If you like crafts, on my blog you can find everything from a home crafts blog, such as food and even crafts for children, recycling or the crafts and decoration blog. Just by saying this phrase “do it yourself”. This is the final objective, that you do not have to buy the product, but that you can do it yourself, with your own hands and with the materials you have on hand. In fact, your hands are the best tools you have to carry them out.
Si te gustan las manualidades, en mi blog podrás encontrar desde un blog de manualidades para el hogar, como de comida y hasta manualidades para niños, de reciclaje o el blog de manualidades y decoración. Con solo el hecho de decir esta frase “hazlo tú mismo”. Este es el objetivo final, que tu no tengas que comprar el producto, sino que puedas hacerlo tú mismo, con tus propias manos y con los materiales que tengas a mano. De hecho, tus manos son las mejores herramientas que tienes para llevarlas a cabo.
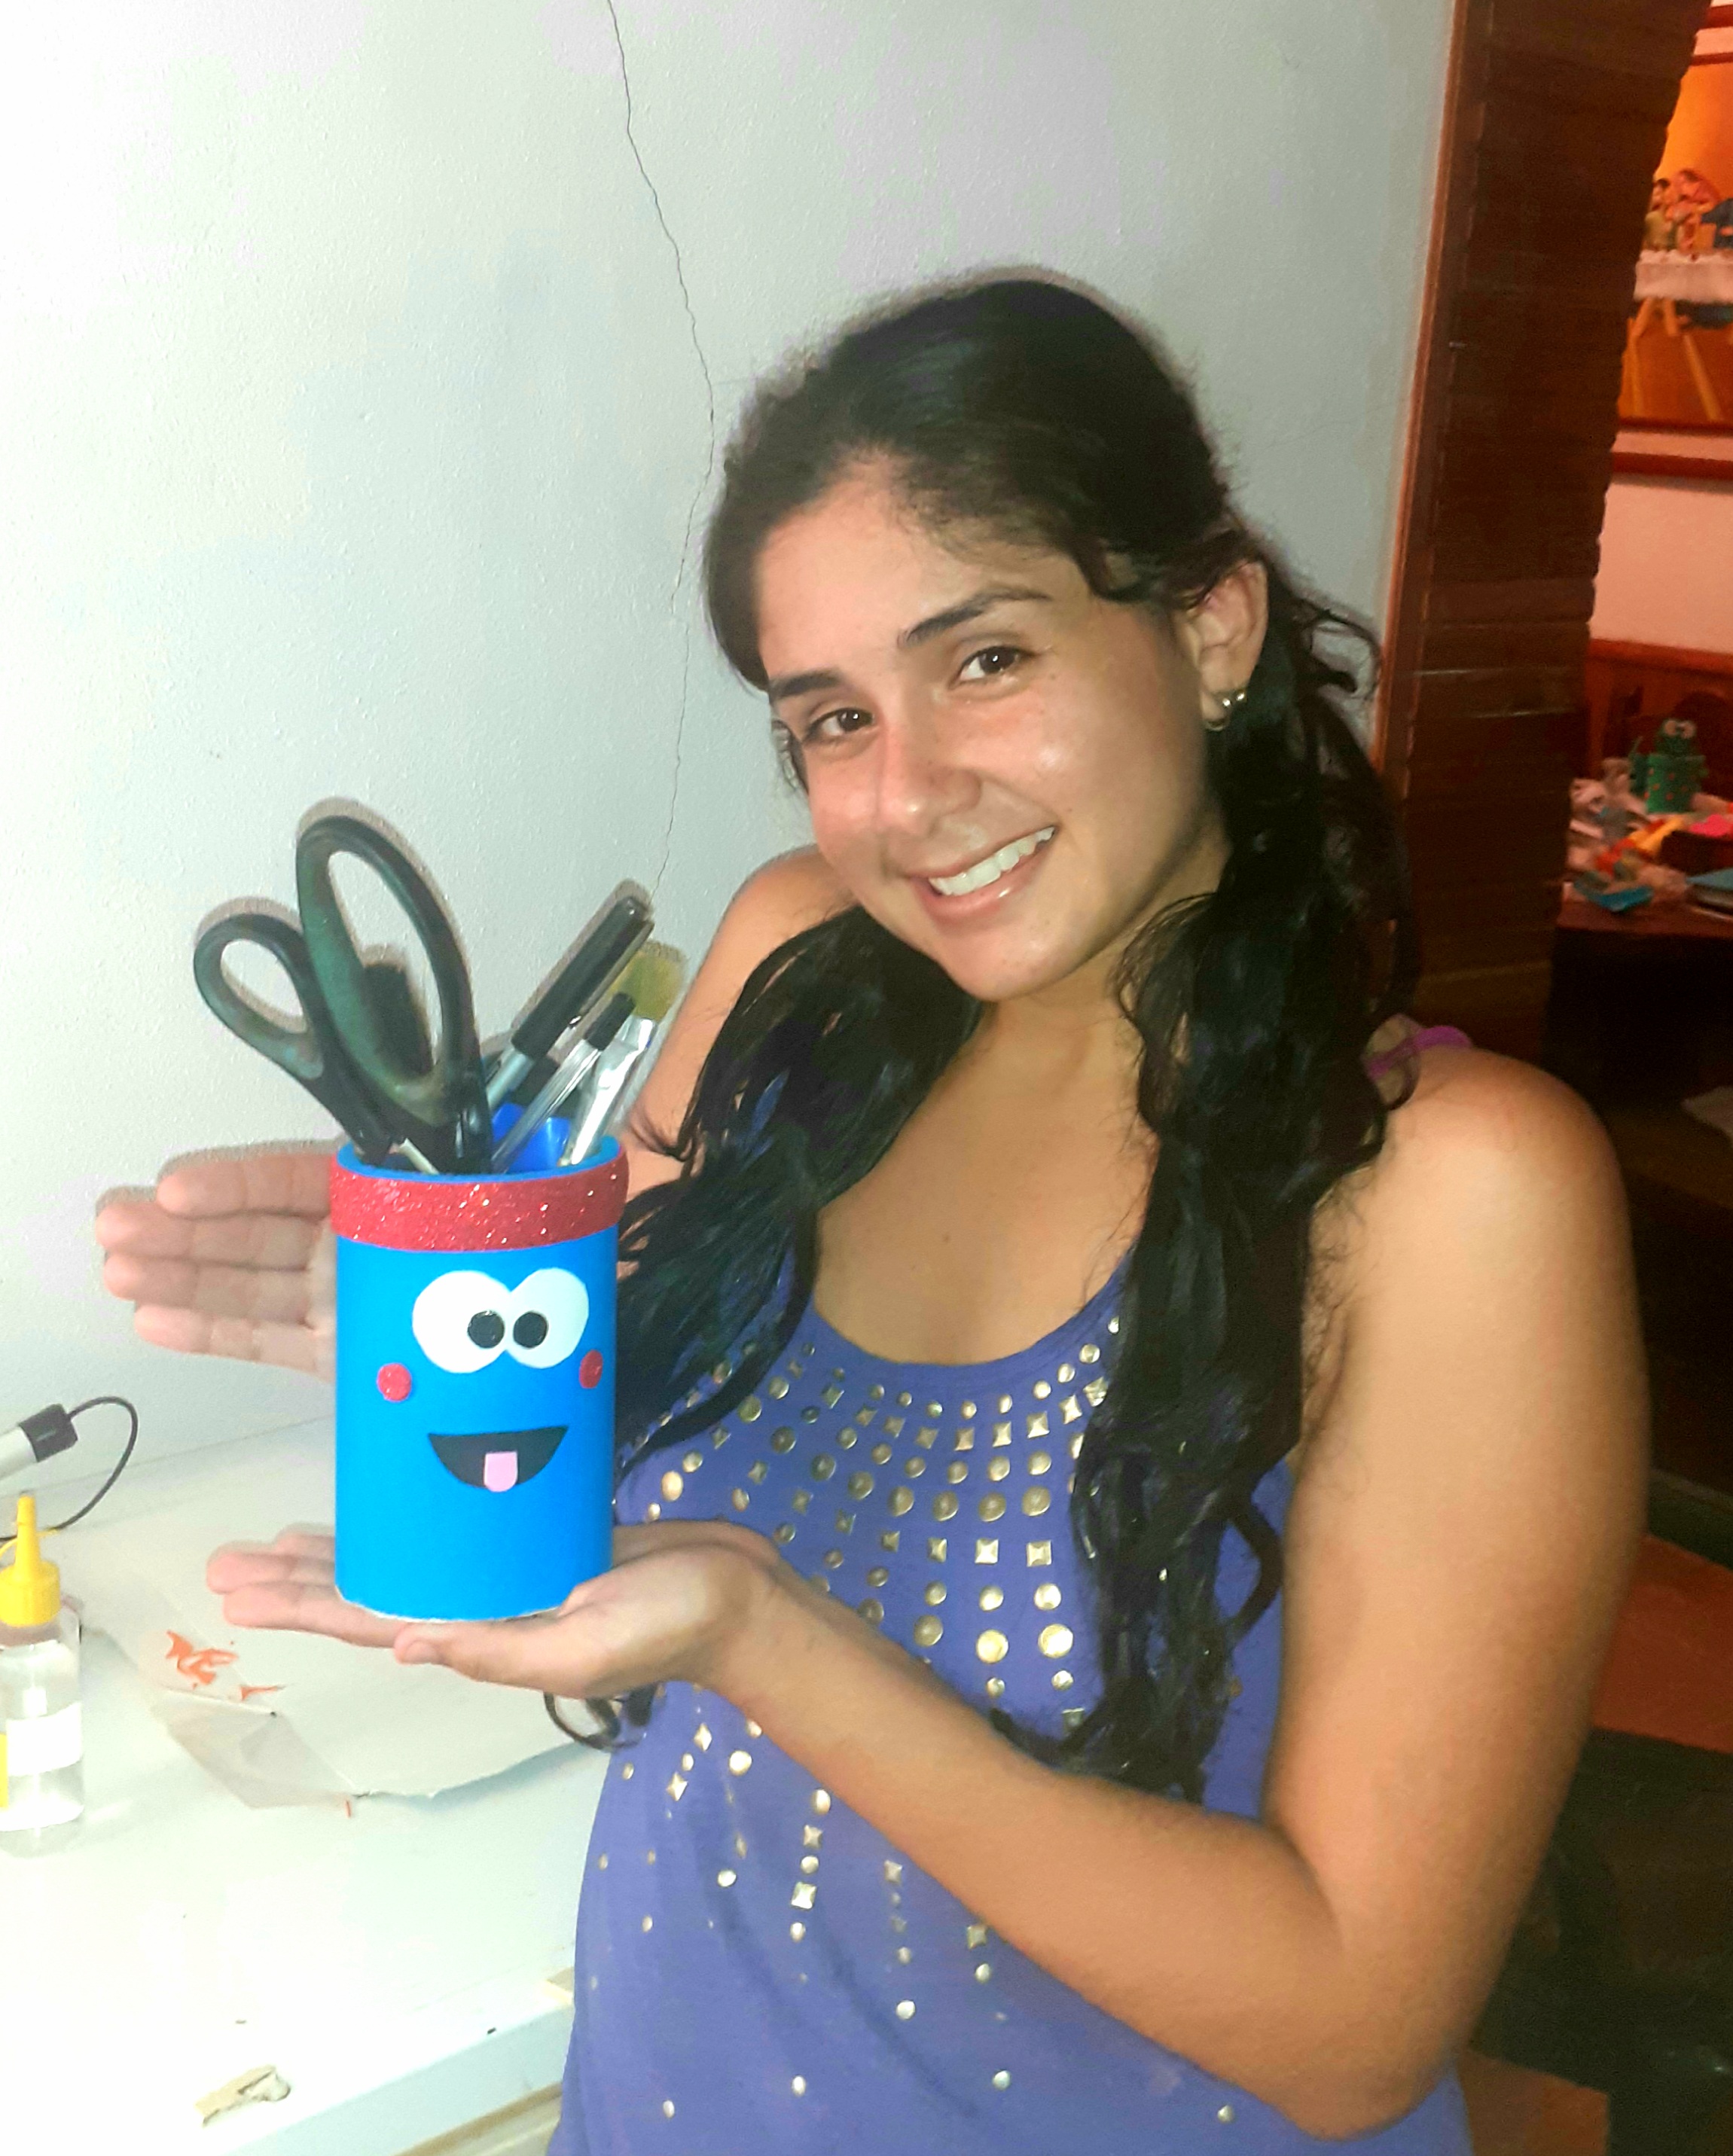
My friends from the hive blog community, below I will show you how to make a pencil holder or doll pens for children with materials that we have in the house
Mis amigos de la comunidad de hive blog, a continuación les mostraré como realizar un portalapices o lapiceras de muñeco para niños con materiales que tenemos en la casa.
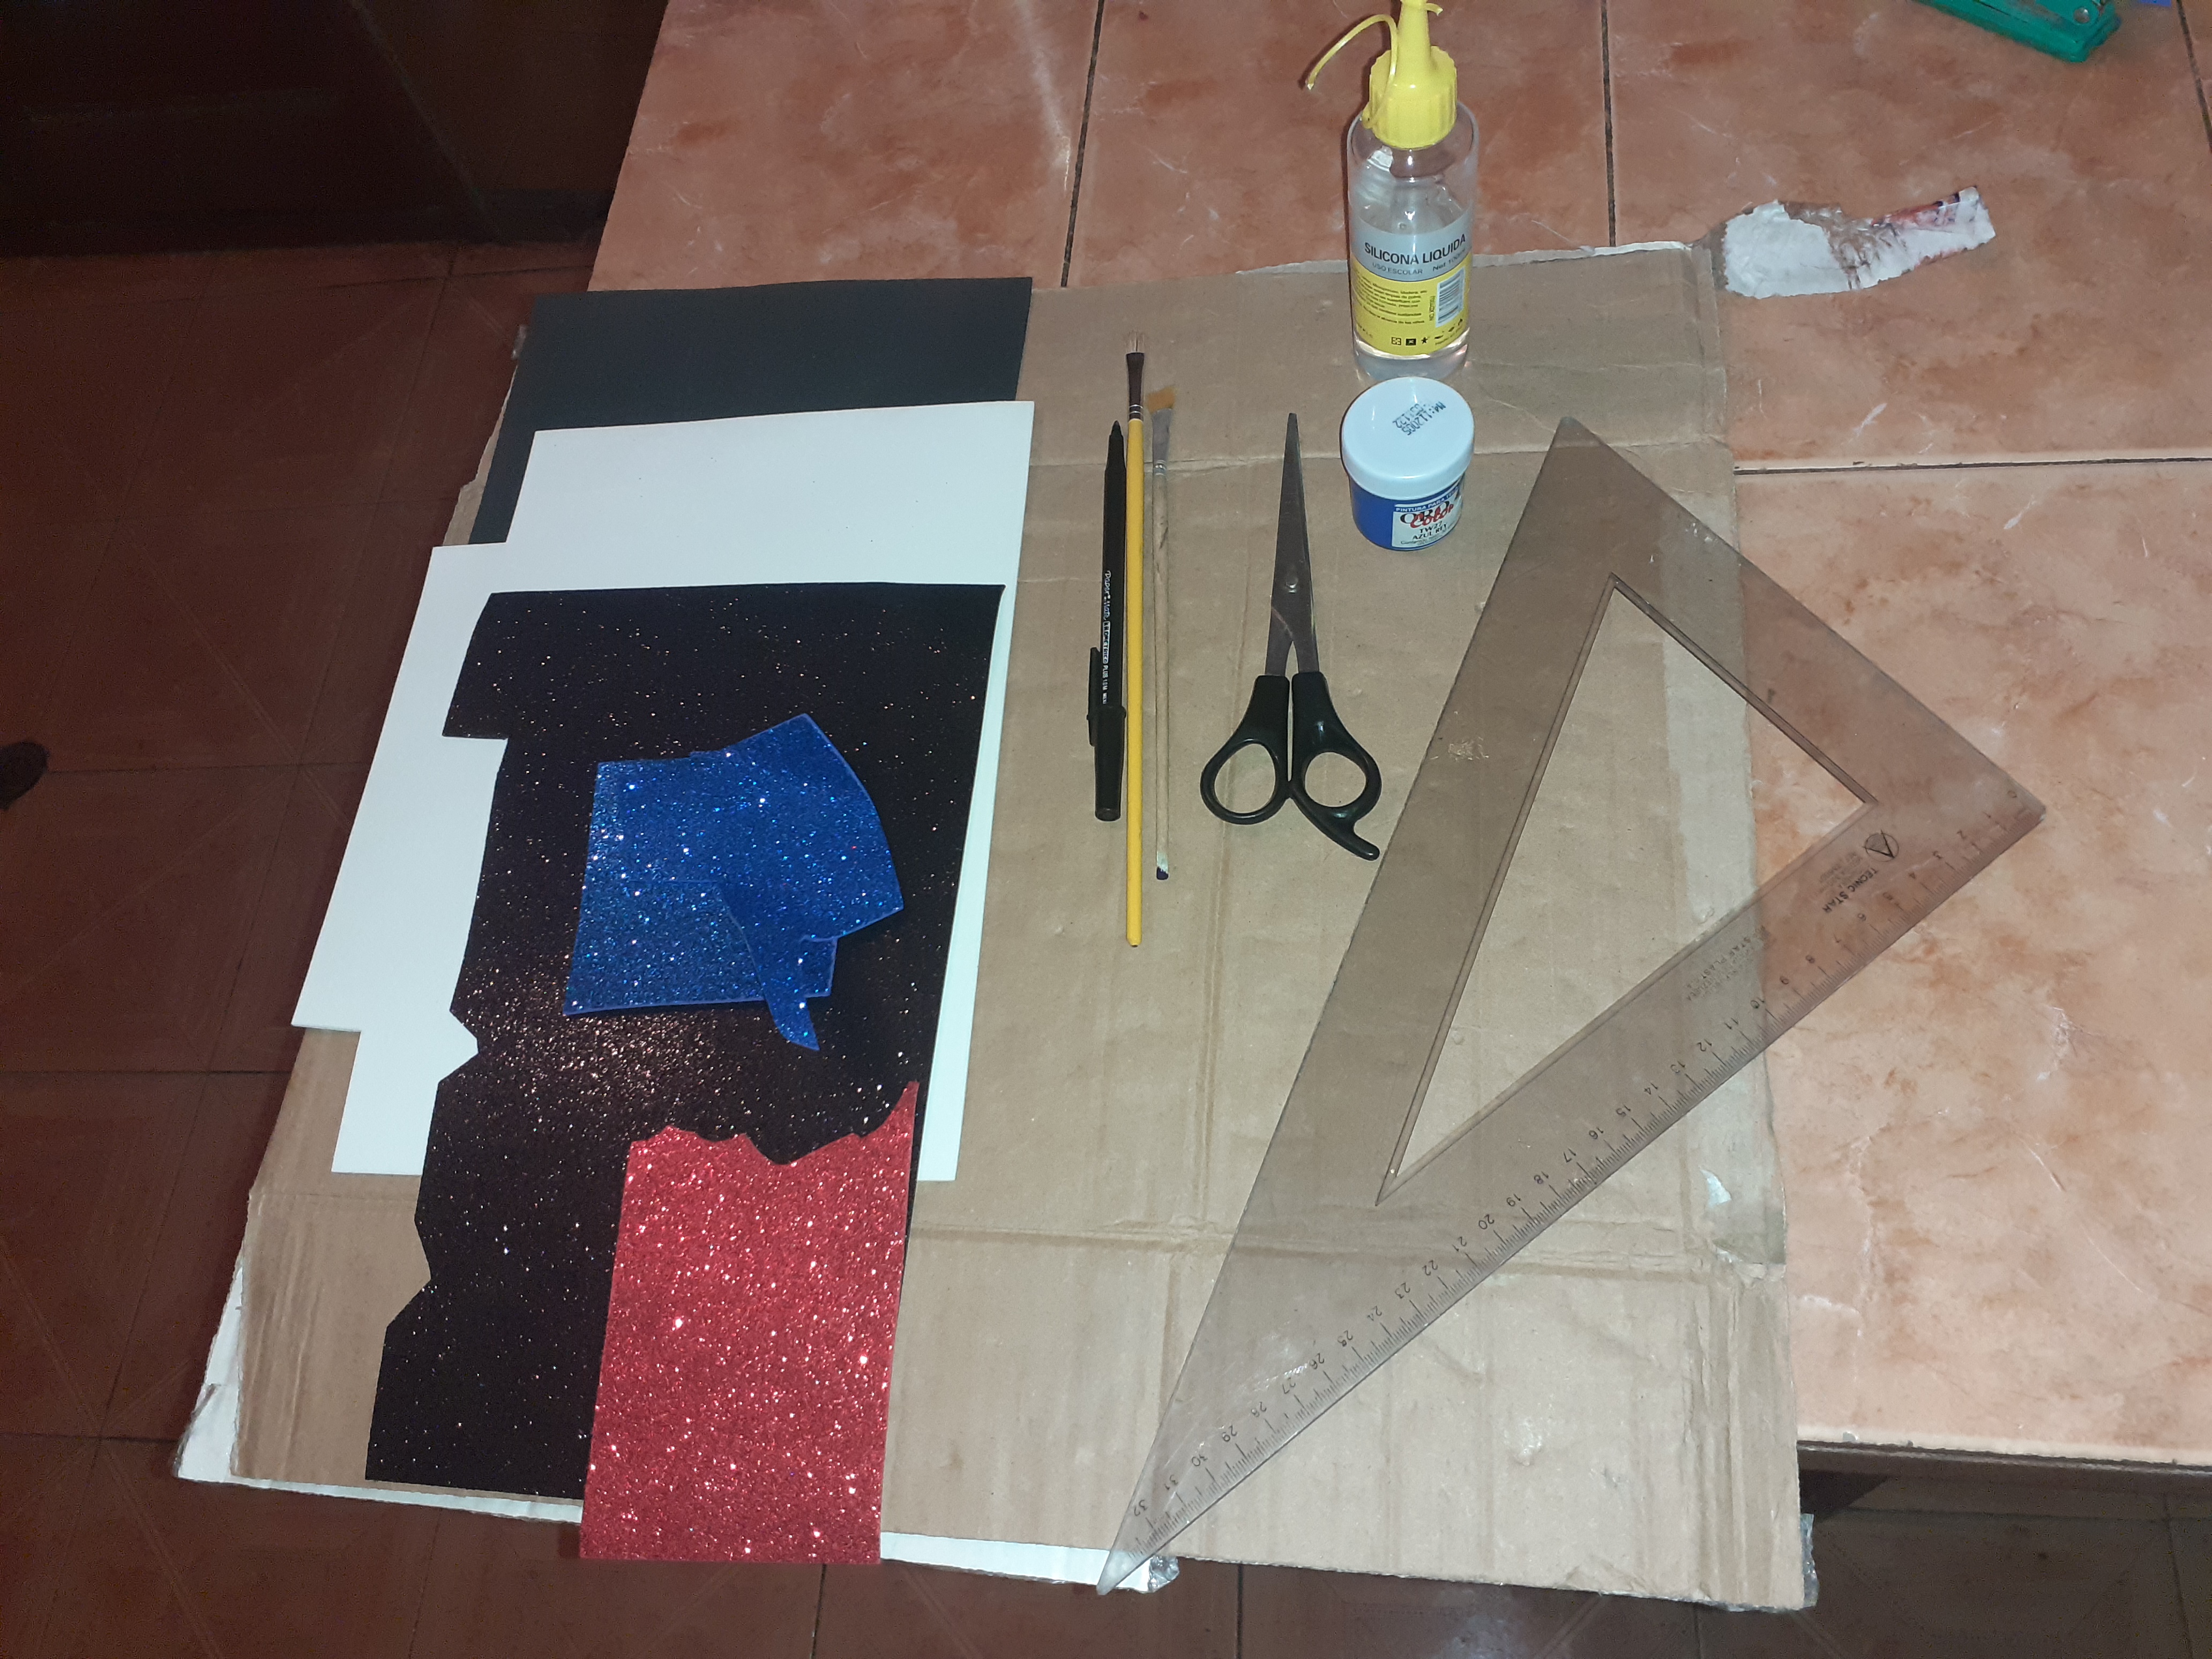
Materiales Materials
◇Tijera ◇ Scissors
◇Cartón ◇ Cardboard
◇ foami ◇ foami
◇ Regla ◇ Ruler
◇ silicon ◇silicon
◇pintura al frio ◇ cold painting
◇pincel ◇ brush
◇Lapicero ◇Pen
Step 1
We will use the box and the ruler to trace the line with a pencil. It depends on the size you want the pencil holder.
Paso 1
Utilizaremos la caja y la regla para trazar la raya con un lapicero, Depende del tamaño que quieran. Tambien hacemos una circunferencia o un redondo en el cartón para que sea la tapa de abajo del portalapiz
)
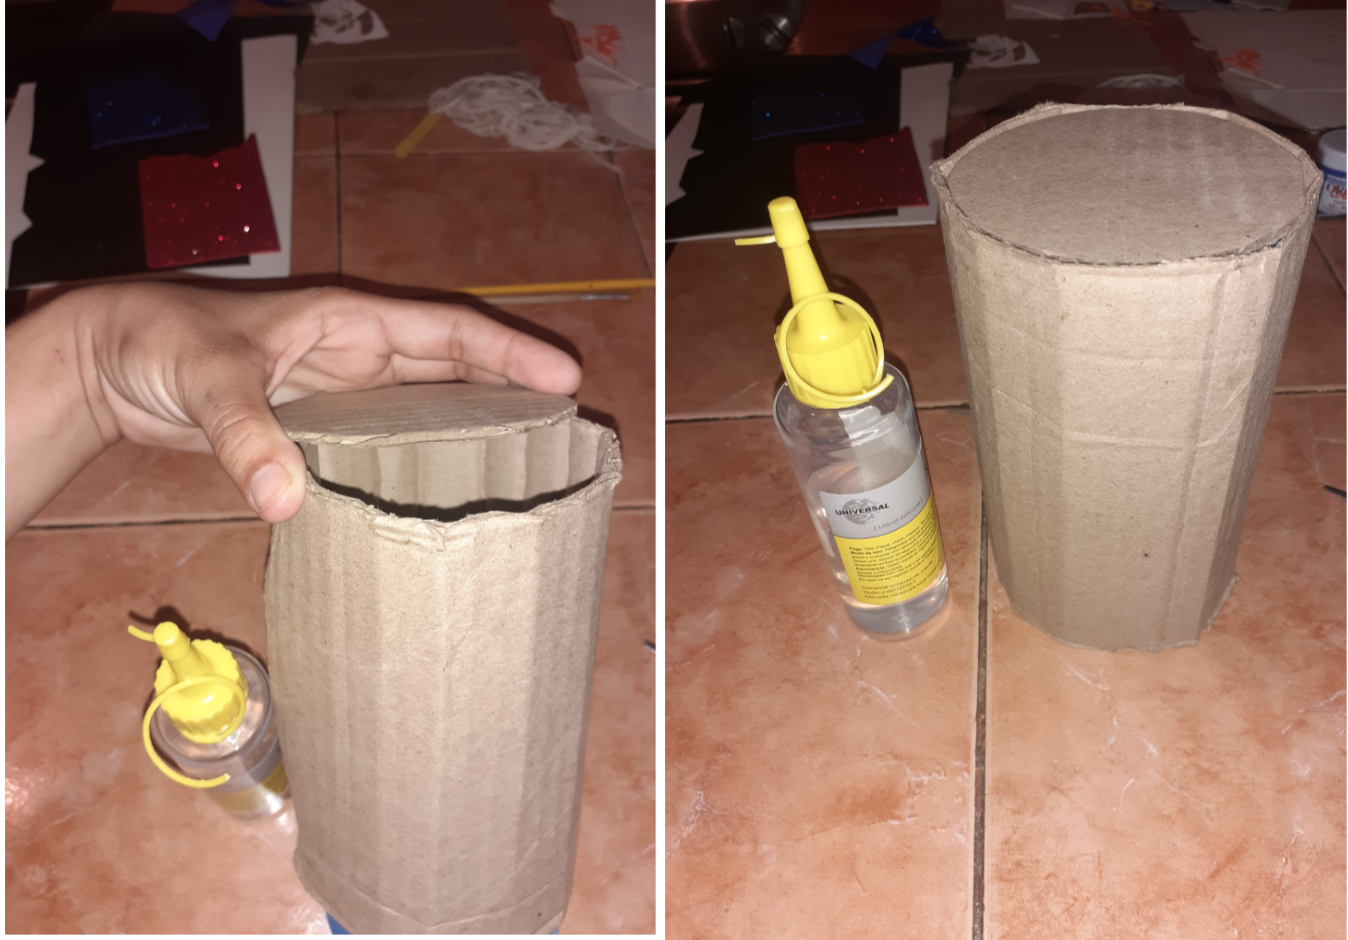
Step 2
With the rectangle that we take out of the cardboard box, it is rolled up and at the end it is glued with cold silicone, later; We glue the round that we cut from the bottom. It would look like a cylinder
Paso 2
Con el rectángulo q sacamos de la caja de cartón se va enrollando y al final se pega con silicon al frio, luego; pegamos el redondo q recortamos por la parte de abajo. Quedaría como un cilindro.
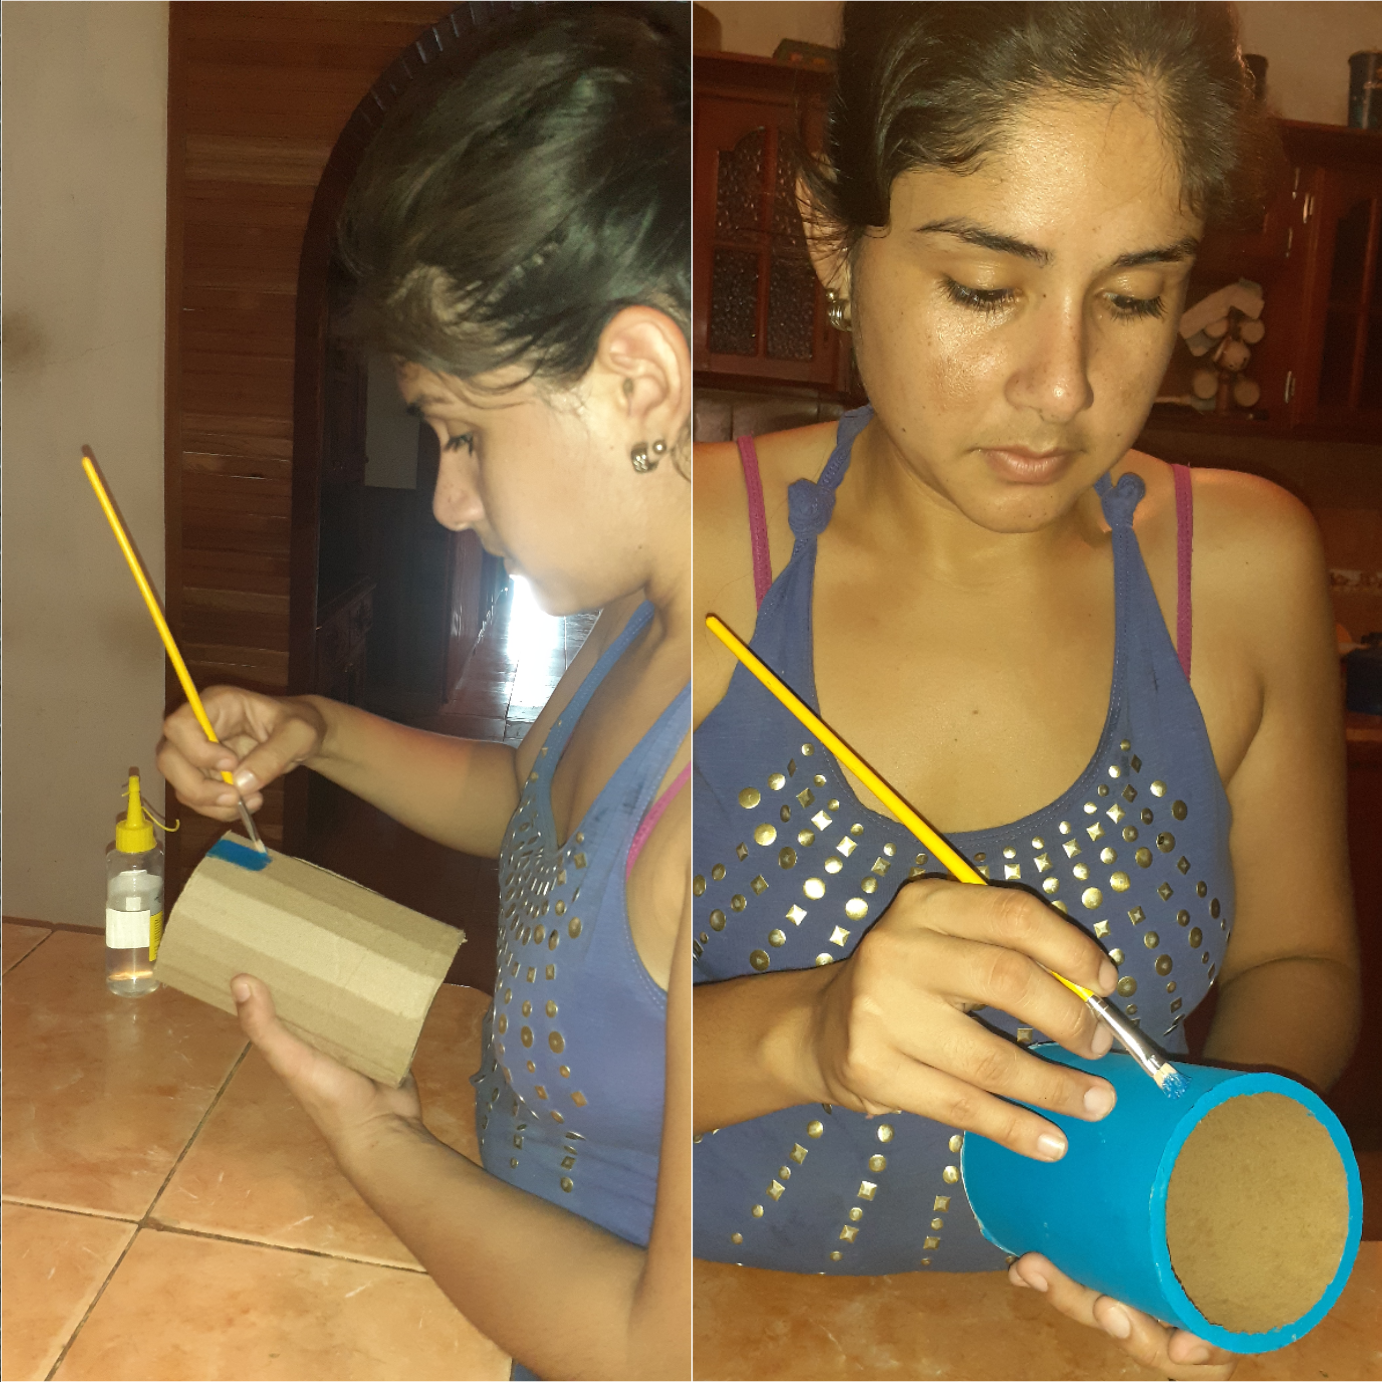
Step 3
Later; we started to paint
Paso 3
Posteriormente; comenzamos a pintar...
Step 4
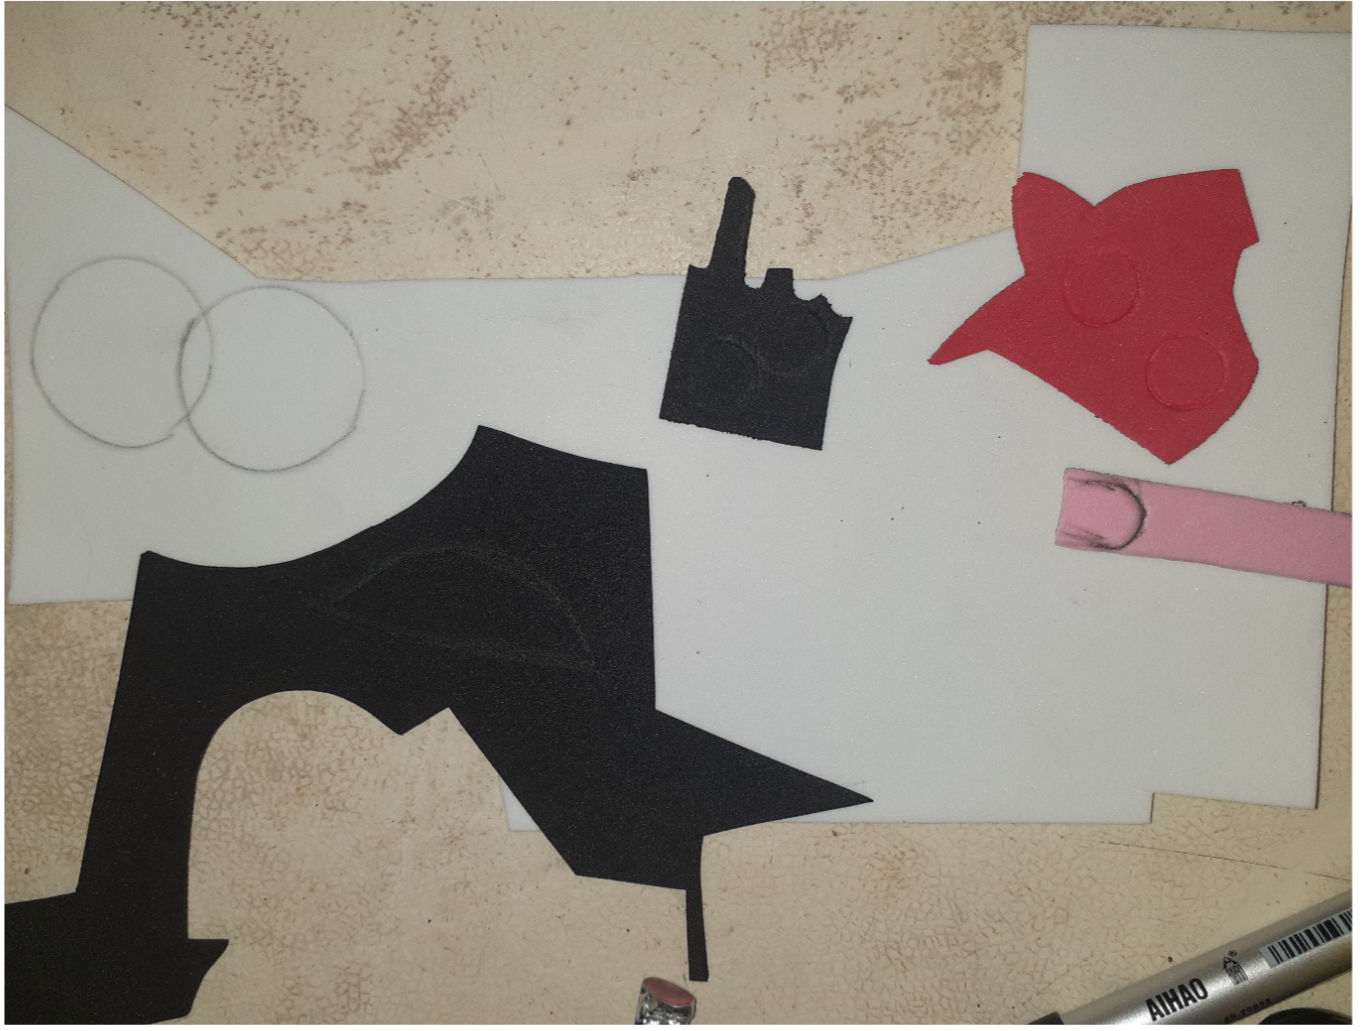
Then, we begin to cut out the foami the face of the doll of your choice
Paso 4
Después, comenzamos a recortar el foami la cara del muñeco de su preferencia.
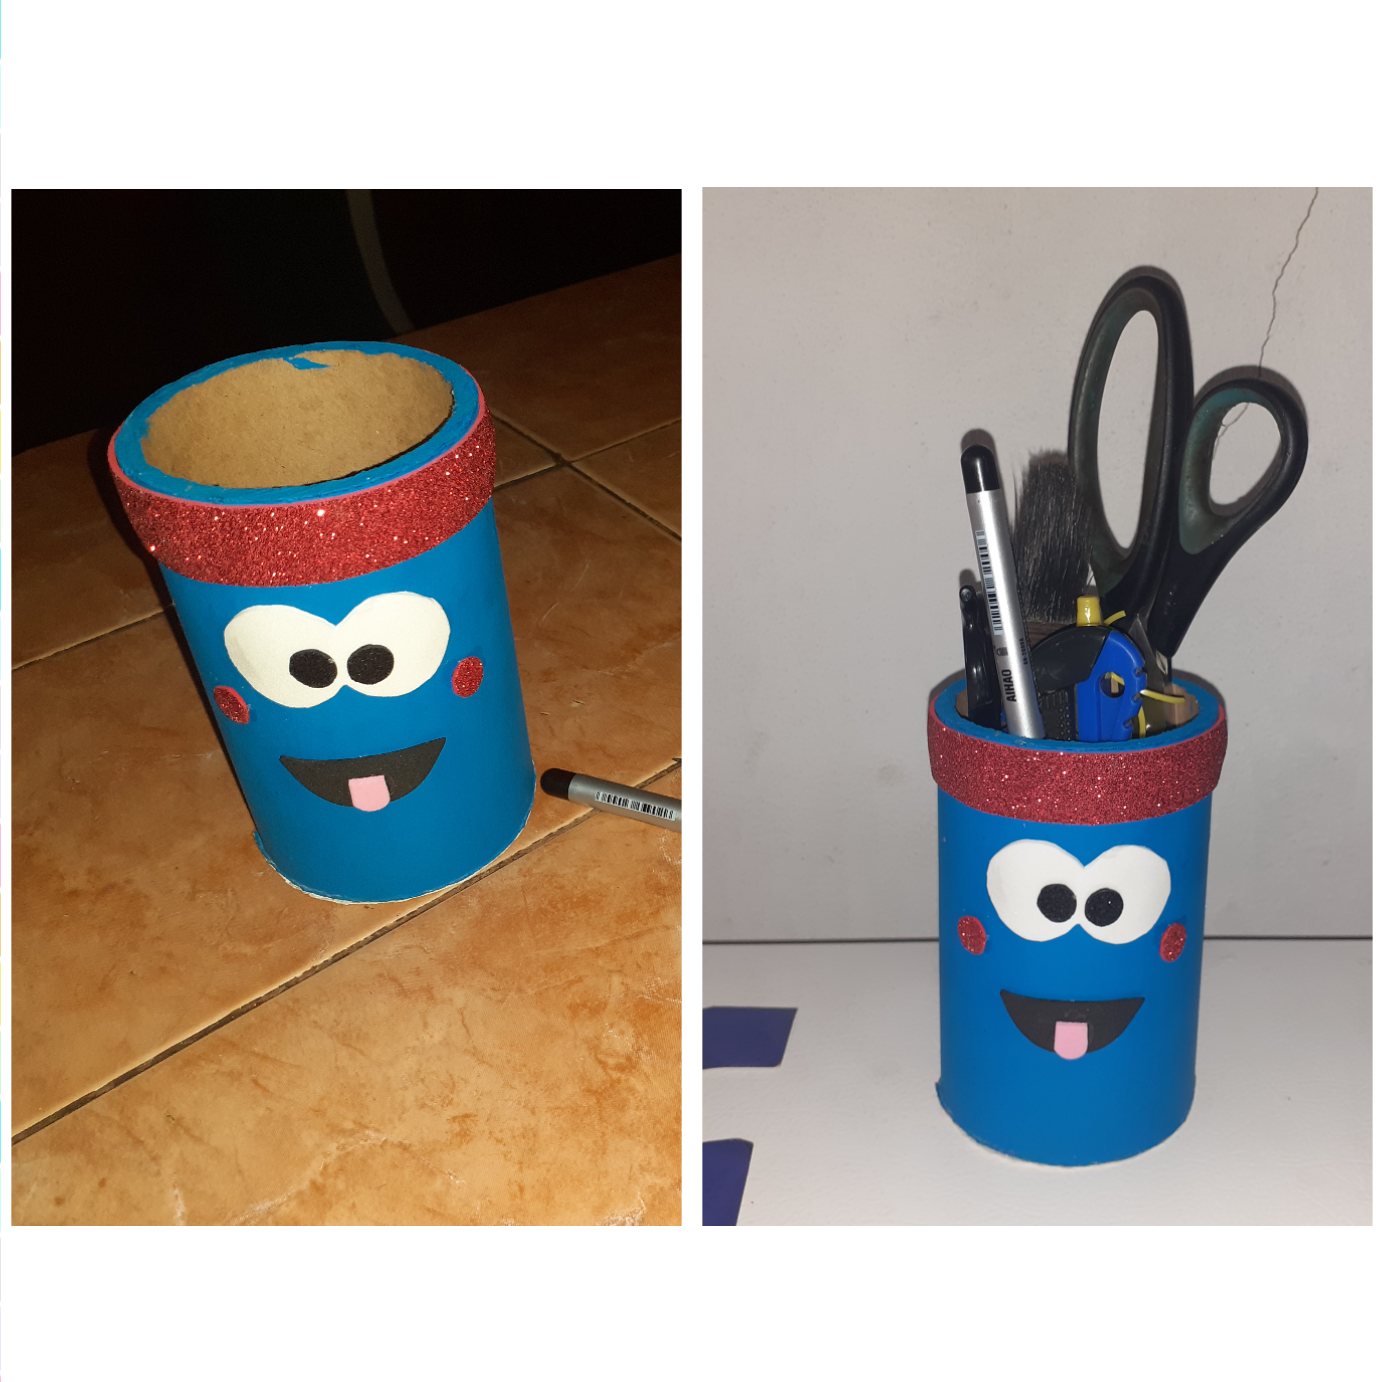
Step 5
To finish; This pencil holder for a child, we began to glue the face of the doll. And we would have our amazing pencil holder.
Paso 5
Para culminar; este portalapices para niño, comenzamos a pegar la cara del muñeco. Y nos quedaría nuestro asombroso portalapiz.
Excelente amiga ese creativo portalapicero que hoy en día es de gran utilidad y con materiales fáciles de conseguir. Te felicito, Yo al igual que tu me gusta también las manualidades. Espero ver otra publicación tuya y así nos apoyamos y compartamos muchas ideas creativas. Saludos.
si amiga, mil gracias... una manera mas ordenada de tener nuestros materiales que utilizamos a diario.