
| Red bracelet with gold and silver plated pellets. | Brazalete rojo con balines dorados y plateados. |
|---|---|
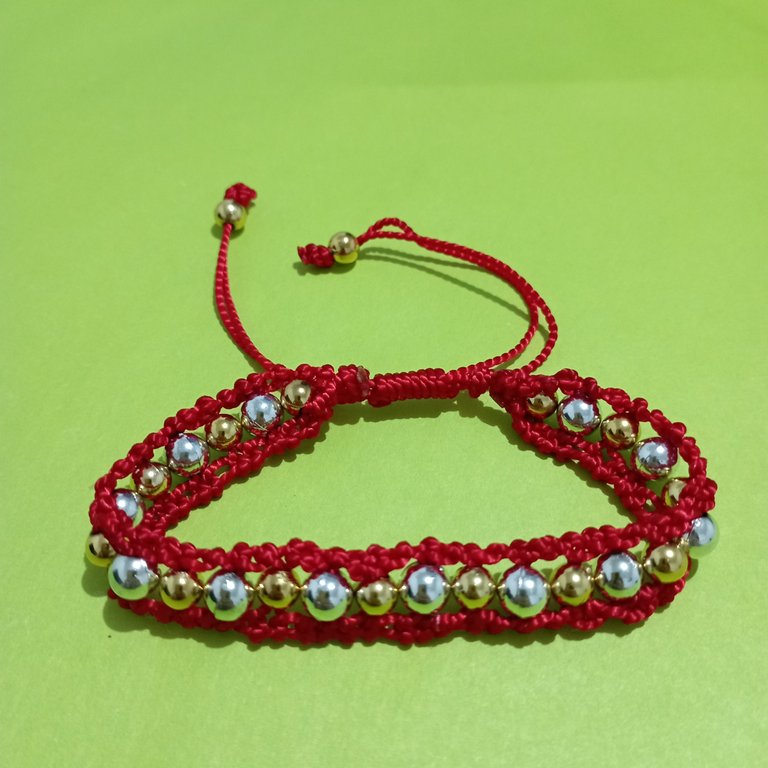
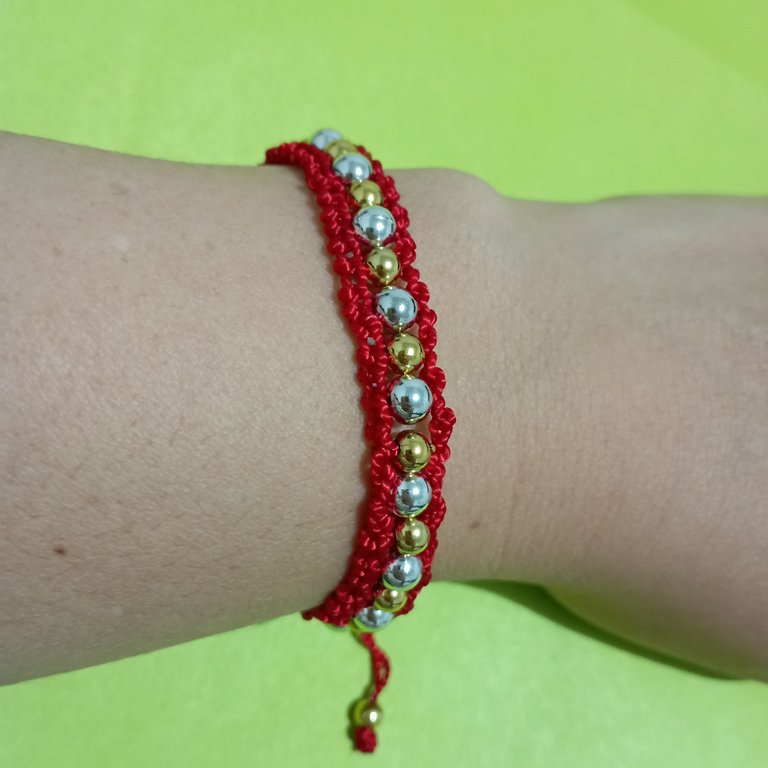
| <div class="text-justify"Greetings friends. What a pleasure to be with you again. Before I start with the details of how to make this bracelet, I want to thank the space given by #jewelry to share our creations. Thanks to the motivation and inspiration we receive daily from our friends in the community. Every comment and support is a great contribution for us, it is a small treasure that encourages us to continue creating with passion and enthusiasm. My blessings to all of you. Now, I want to share with you this last bracelet I made. I chose a red thread that has a beautiful shine, but for the design perhaps it was not the best because it has to be rolled up and the weave loses a little shape. Even so, it turned out quite showy. Later on I would like to try this same design with another type of yarn to see how the results are. For now, here are the details of the process: | Saludos amigos. Que gusto estar nuevamente con ustedes. Antes de empezar con los detalles de cómo elaborar ésta pulsera, deseo agradecer el espacio concedido por #jewelry para poder compartir nuestras creaciones. Gracias a la motivación e inspiración que recibimos a diario de nuestros amigos de la comunidad. Cada comentario y apoyo es un gran aporte para nosotros, es un pequeño tesoro que nos impulsa a seguir creando con mucha pasión y entusiasmo. Mis bendiciones para todos. Ahora bien, les quiero compartir esta última pulsera que realice. Elegí un hilo rojo que tiene un hermoso brillo, pero para el diseño quizás no era el mejor ya que tiene a enrollarse y el entramado pierde un poco la forma. Aún así quedó bastante vistosa. Más adelante quisiera probar este mismo diseño con otro tipo de hilo para ver qué tal los resultados. Por ahora les dejo los detalles del proceso: |
The materials used are:
1.5 meters of red thread for the sides.
2 meters of red thread for the tie.
15 3mm gold balls.
13 silver 5mm balls.
Los materiales usados son:
1,5 metros de hilo rojo para laterales.
2 metros de hilo rojo para el amarre.
15 balines dorados de 3mm.
13 balines plateados de 5mm.
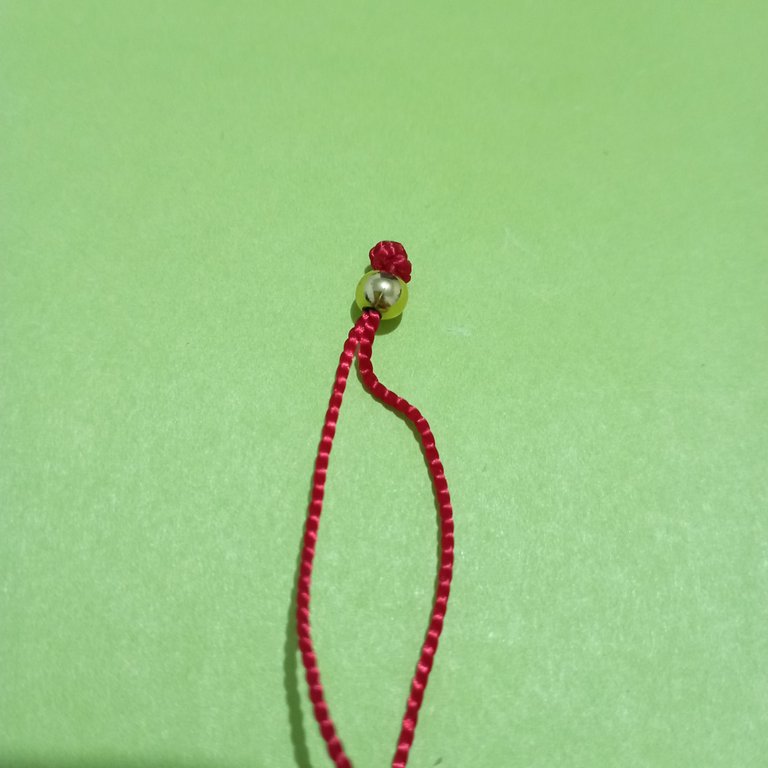
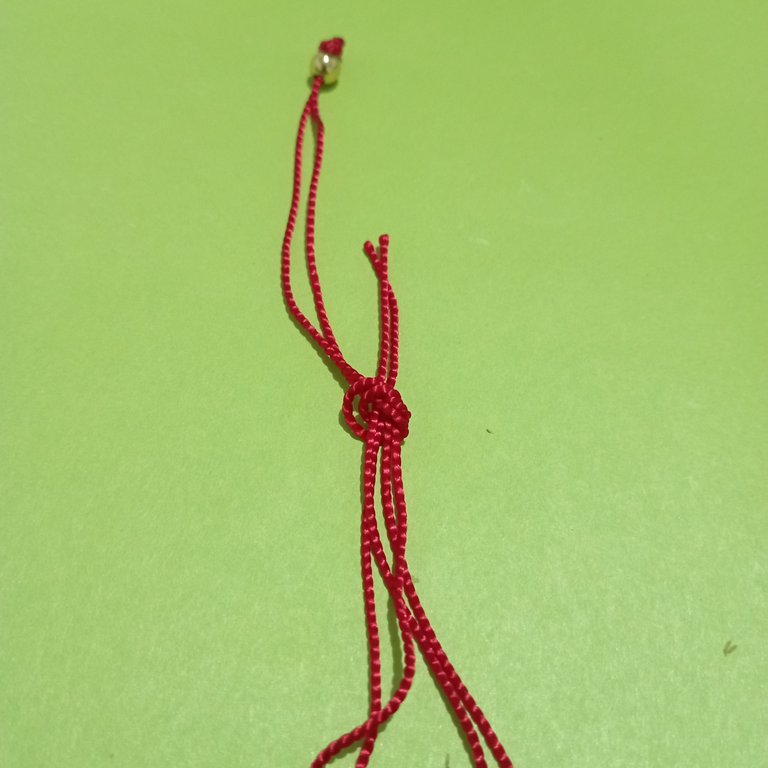
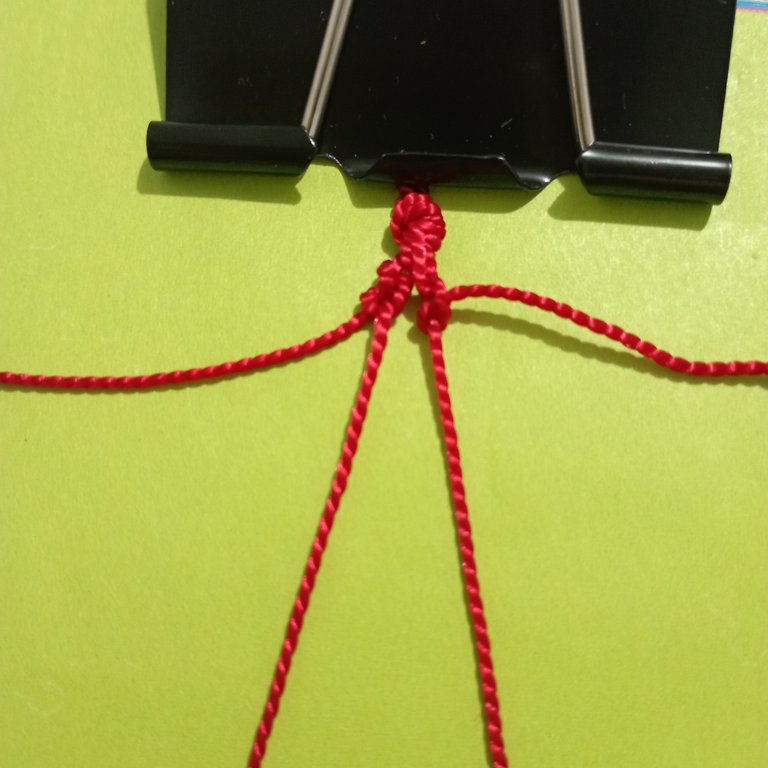
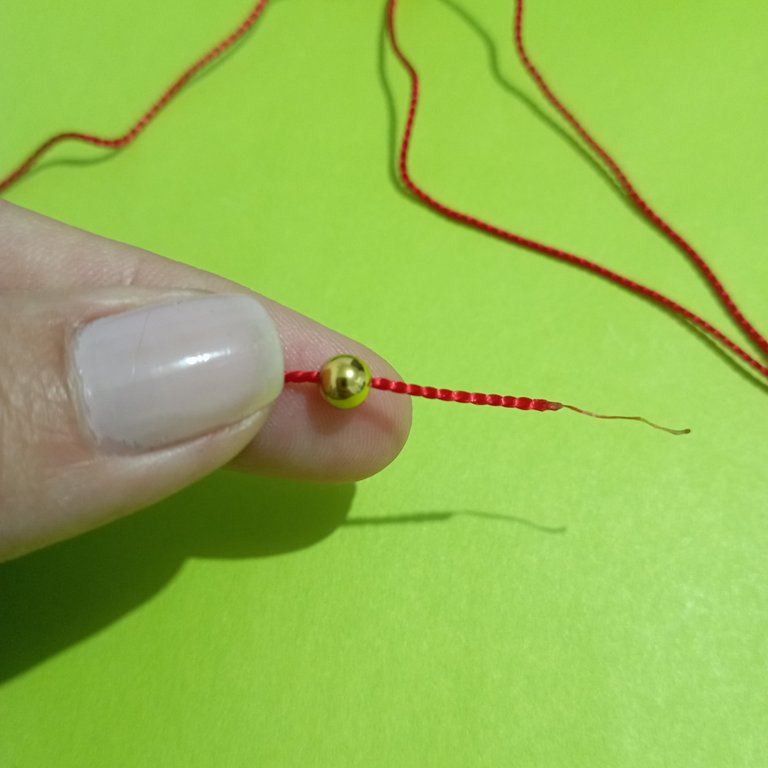
We start by measuring a 1.5 meter thread and cut it in half. These will be the support threads that go to the sides of the bracelet. We will not work with central thread. Now we burn the in-betweens to have a thin strand to pass the balls through. We pass a golden ball that will be the end of one of the ends and at 7 centimeters approximately of this knot we make another simple knot but without tightening it, we take the thread of two meters, we place the half and we pass it through the simple knot that we have maintained without tightening it, we tighten very well and we will have 4 strands of thread to work. | Comenzamos midiendo un hilo de 1,5 metros y lo cortamos a la mitad. Estos serán los hilos de soporte que van a los lados del brazalete. No trabajaremos con hilo central. Ahora quemamos los entremos para tener una hebra delgada para pasar los balones. Pasamos un balín dorado que será el remate de uno de los extremos y a 7 centímetros aproximadamente de este nudo realizamos otro nudo simple pero sin apretarlo, tomamos el hilo de dos metros, ubicamos la mitad y lo pasamos por el nudo simple que hemos mantenido sin apretar, apretamos muy bien y tendremos 4 hebras de hilo para trabajar. |


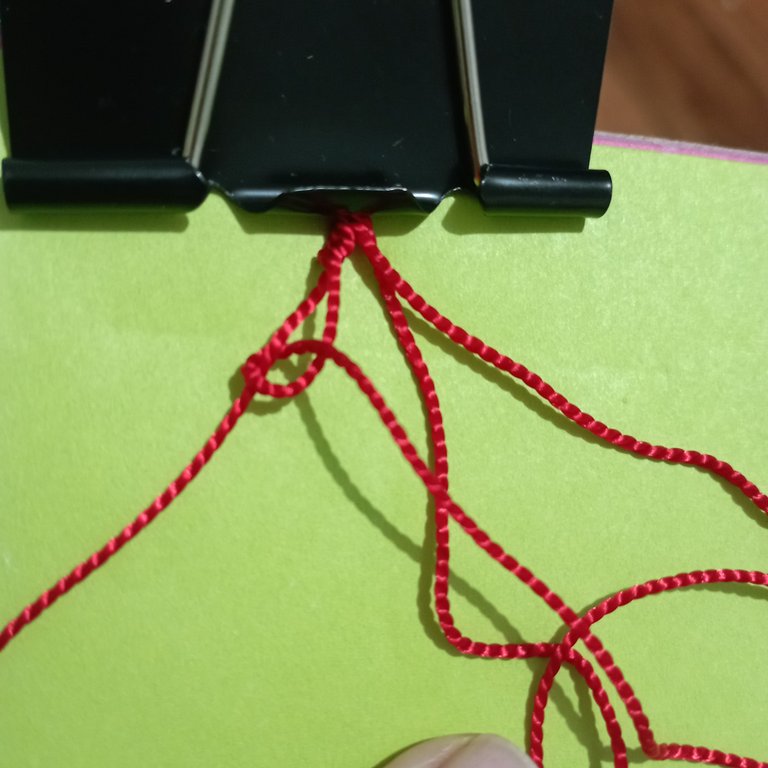
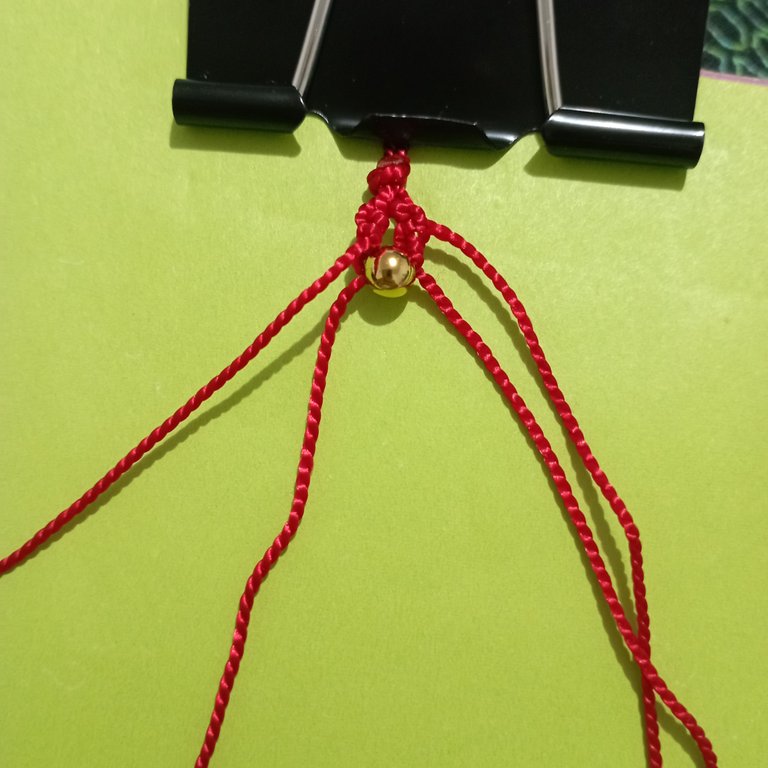
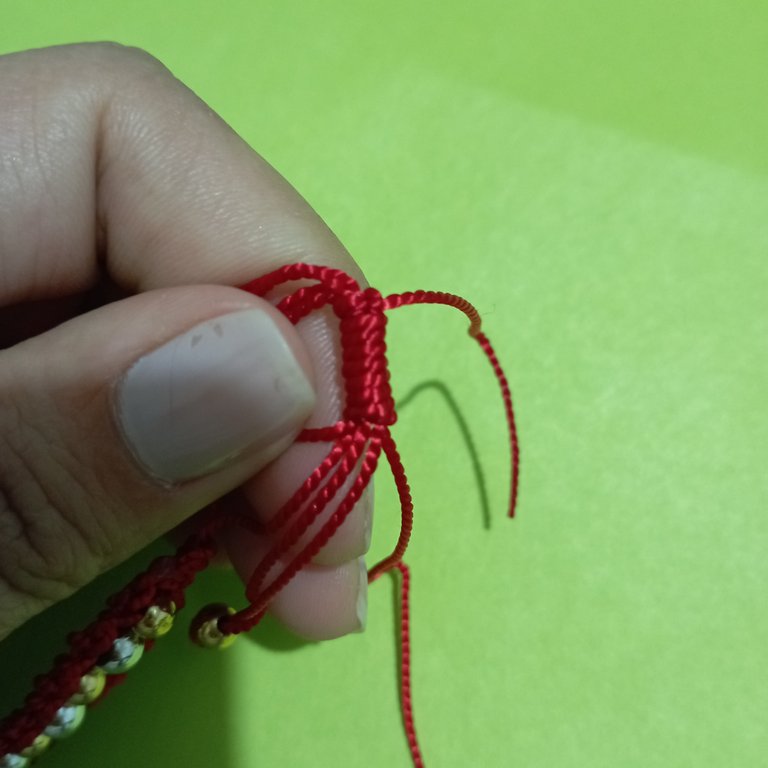
We place the shorter threads at the ends, and the tie threads in the center. We are going to work with torchon knots and with a tie thread on the left we make two torchon knots on the support thread on the left. The torchon knot consists of making a loop around one of the end threads and repeating another loop to tighten it. We do the same with the right side, we take the tie knot and make two loops from the inside to the outside over the end thread on the right. | Los hilos más cortos los ubicamos a los extremos, y los hilos de amarre al centro. Vamos a trabajar con nudos torchon y con un hilo de amarre de la izquierda realizamos dos nudos torchon sobre el hilo de soporte de la izquierda. El nudo torchon consiste en realizar una lazada alrededor de uno de los hilos de los extremos y repetir otra lazada para que se ajuste. Hacemos lo mismo con el lado derecho, tomamos el nudo de amarre y hacemos dos lazadas de adentro hacia afuera sobre el hilo extremo de la derecha. |
We always keep the tying threads towards the center and the support threads towards the sides. We pass a golden ball through one end of the tying thread and the other thread is passed through the same ball but in the opposite direction. That is to say, if we pass one thread from left to right through the center of the ball, we pass the other thread from right to left. We tie two torchon knots on each side over the outer threads and now we pass a silver ball, followed by two torchon knots on each side. The process is repetitive, alternating the colors of the balls and between each ball two knots on each side. | Mantenemos siempre los hilos de amarre hacia el centro y los hilos de soporte hacia los costados. Pasamos un balín dorado un extremo de hilo de amarre y el otro hilo lo pasamos por el mismo balín pero en sentido contrario. Es decir, si hemos pasado un hilo de izquierda a derecha por el centro del balín, el otro hilo lo pasamos de derecha a izquierda. Realizamos dos nudos torchon de cada lado sobre los hilos externos y ahora pasamos un balín plateado, seguido de dos nudos torchon de cada lado. El proceso es repetitivo, intercalando los colores de los balones y entre cada balín dos nudos de cada lado. |


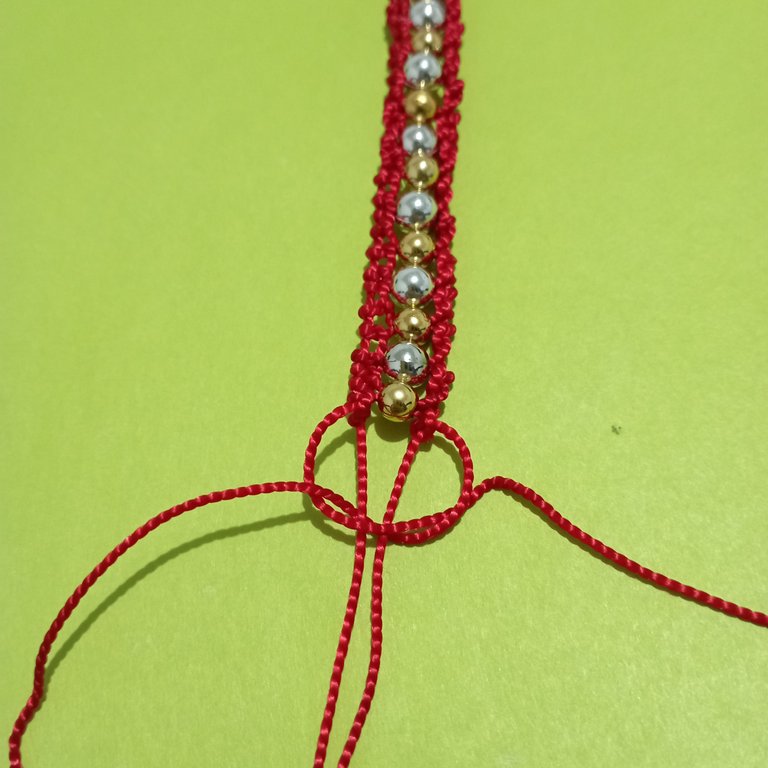

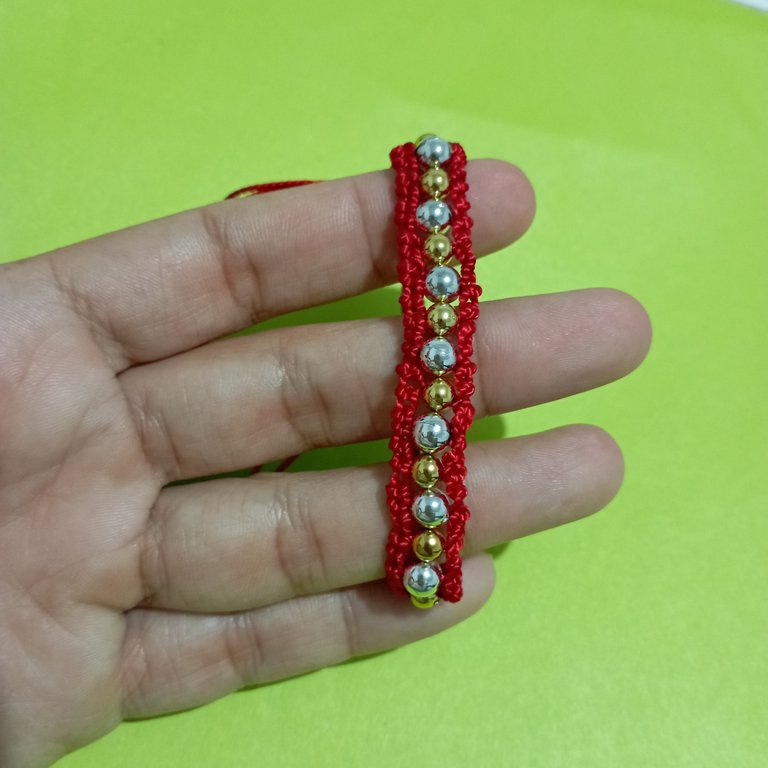
This way we reach the end of the bracelet, depending on the size we are making. We tie a flat knot to finish, cut the ends and seal with the lighter. To close I made a Franciscan knot, actually I only use two closing knots, the other one is the flat one. But I like the Franciscan knot better, this means it's time to learn other styles. I will bring them to you here. Well dear friends this is all. I hope you like it. Bye Bye | Así llegamos al final del brazalete, todo depende del tamaño que estemos realizando. Realizamos un nudo plano para rematar, cortamos los extremos y sellamos con el encendedor. Para cerrar realicé un nudo franciscano, en realidad solo manejo dos nudos de cierre, el otro es el plano. Pero me gusta más el franciscano, esto significa que es hora de aprender otros estilos. Ya se los traeré por acá. Bien queridos amigos esto es todo. Espero les guste. Chao Chao. |
Imágenes editadas en: itshot
Fotos tomadas con Redmi 10
Images edited in: itshot
Photos taken with Redmi 10

Muy bonita esta pulsera , la combinación se ve muy bonita , saludos amiga @artsugar
Muchas gracias. ☺️
Que bueno que te guste.
Abrazos
Gracias por el apoyo.
Exitos.
Un espectáculo de Pulsera me encantó como la realizaste y el paso a paso, te ha quedado increíble, me gusta el color y el resultado felicidades
Agradezco en gran manera su comentario. No me sentía muy segura porque el hilo se me entorchaba y no se notaba el entramado como me hubiese gustado. Me alegra mucho que le gustara. Es muy valioso para mí.
Saludos.☺️
Whoa, this is too pretty. I also love your design 🤩
Thank you for your comment. I'm very glad you like it
Regards.
🤗🤗
Nice guidance to make a beautiful bracelet in a low cost 💗
Appreciable 💞
Thank You.
🤗🤗🤗
Está hermoso el brazalete, me encanta la combinación de los colores 👍
Gracias querida amiga.
Tu comentario es de gran valor para mí.
Abrazos.