Un saludo cargado de mucho cariño para todos mis amigos de #jewelry, esperando se encuentren con mucha salud, para que cada día podamos compartir nuestras creaciones.
Siempre es un placer para mí ver todo lo que se comparte en las diferentes comunidades que nos ofrece esta hermosa plataforma. Y muy particularmente en esta comunidad de artesanos donde son muchas las creaciones realizadas con mucho amor y las cuales muestran con mucho orgullo.
It is always a pleasure for me to see everything that is shared in the different communities that this beautiful platform offers us. And very particularly in this community of artisans where there are many creations made with a lot of love and which they show with great pride.
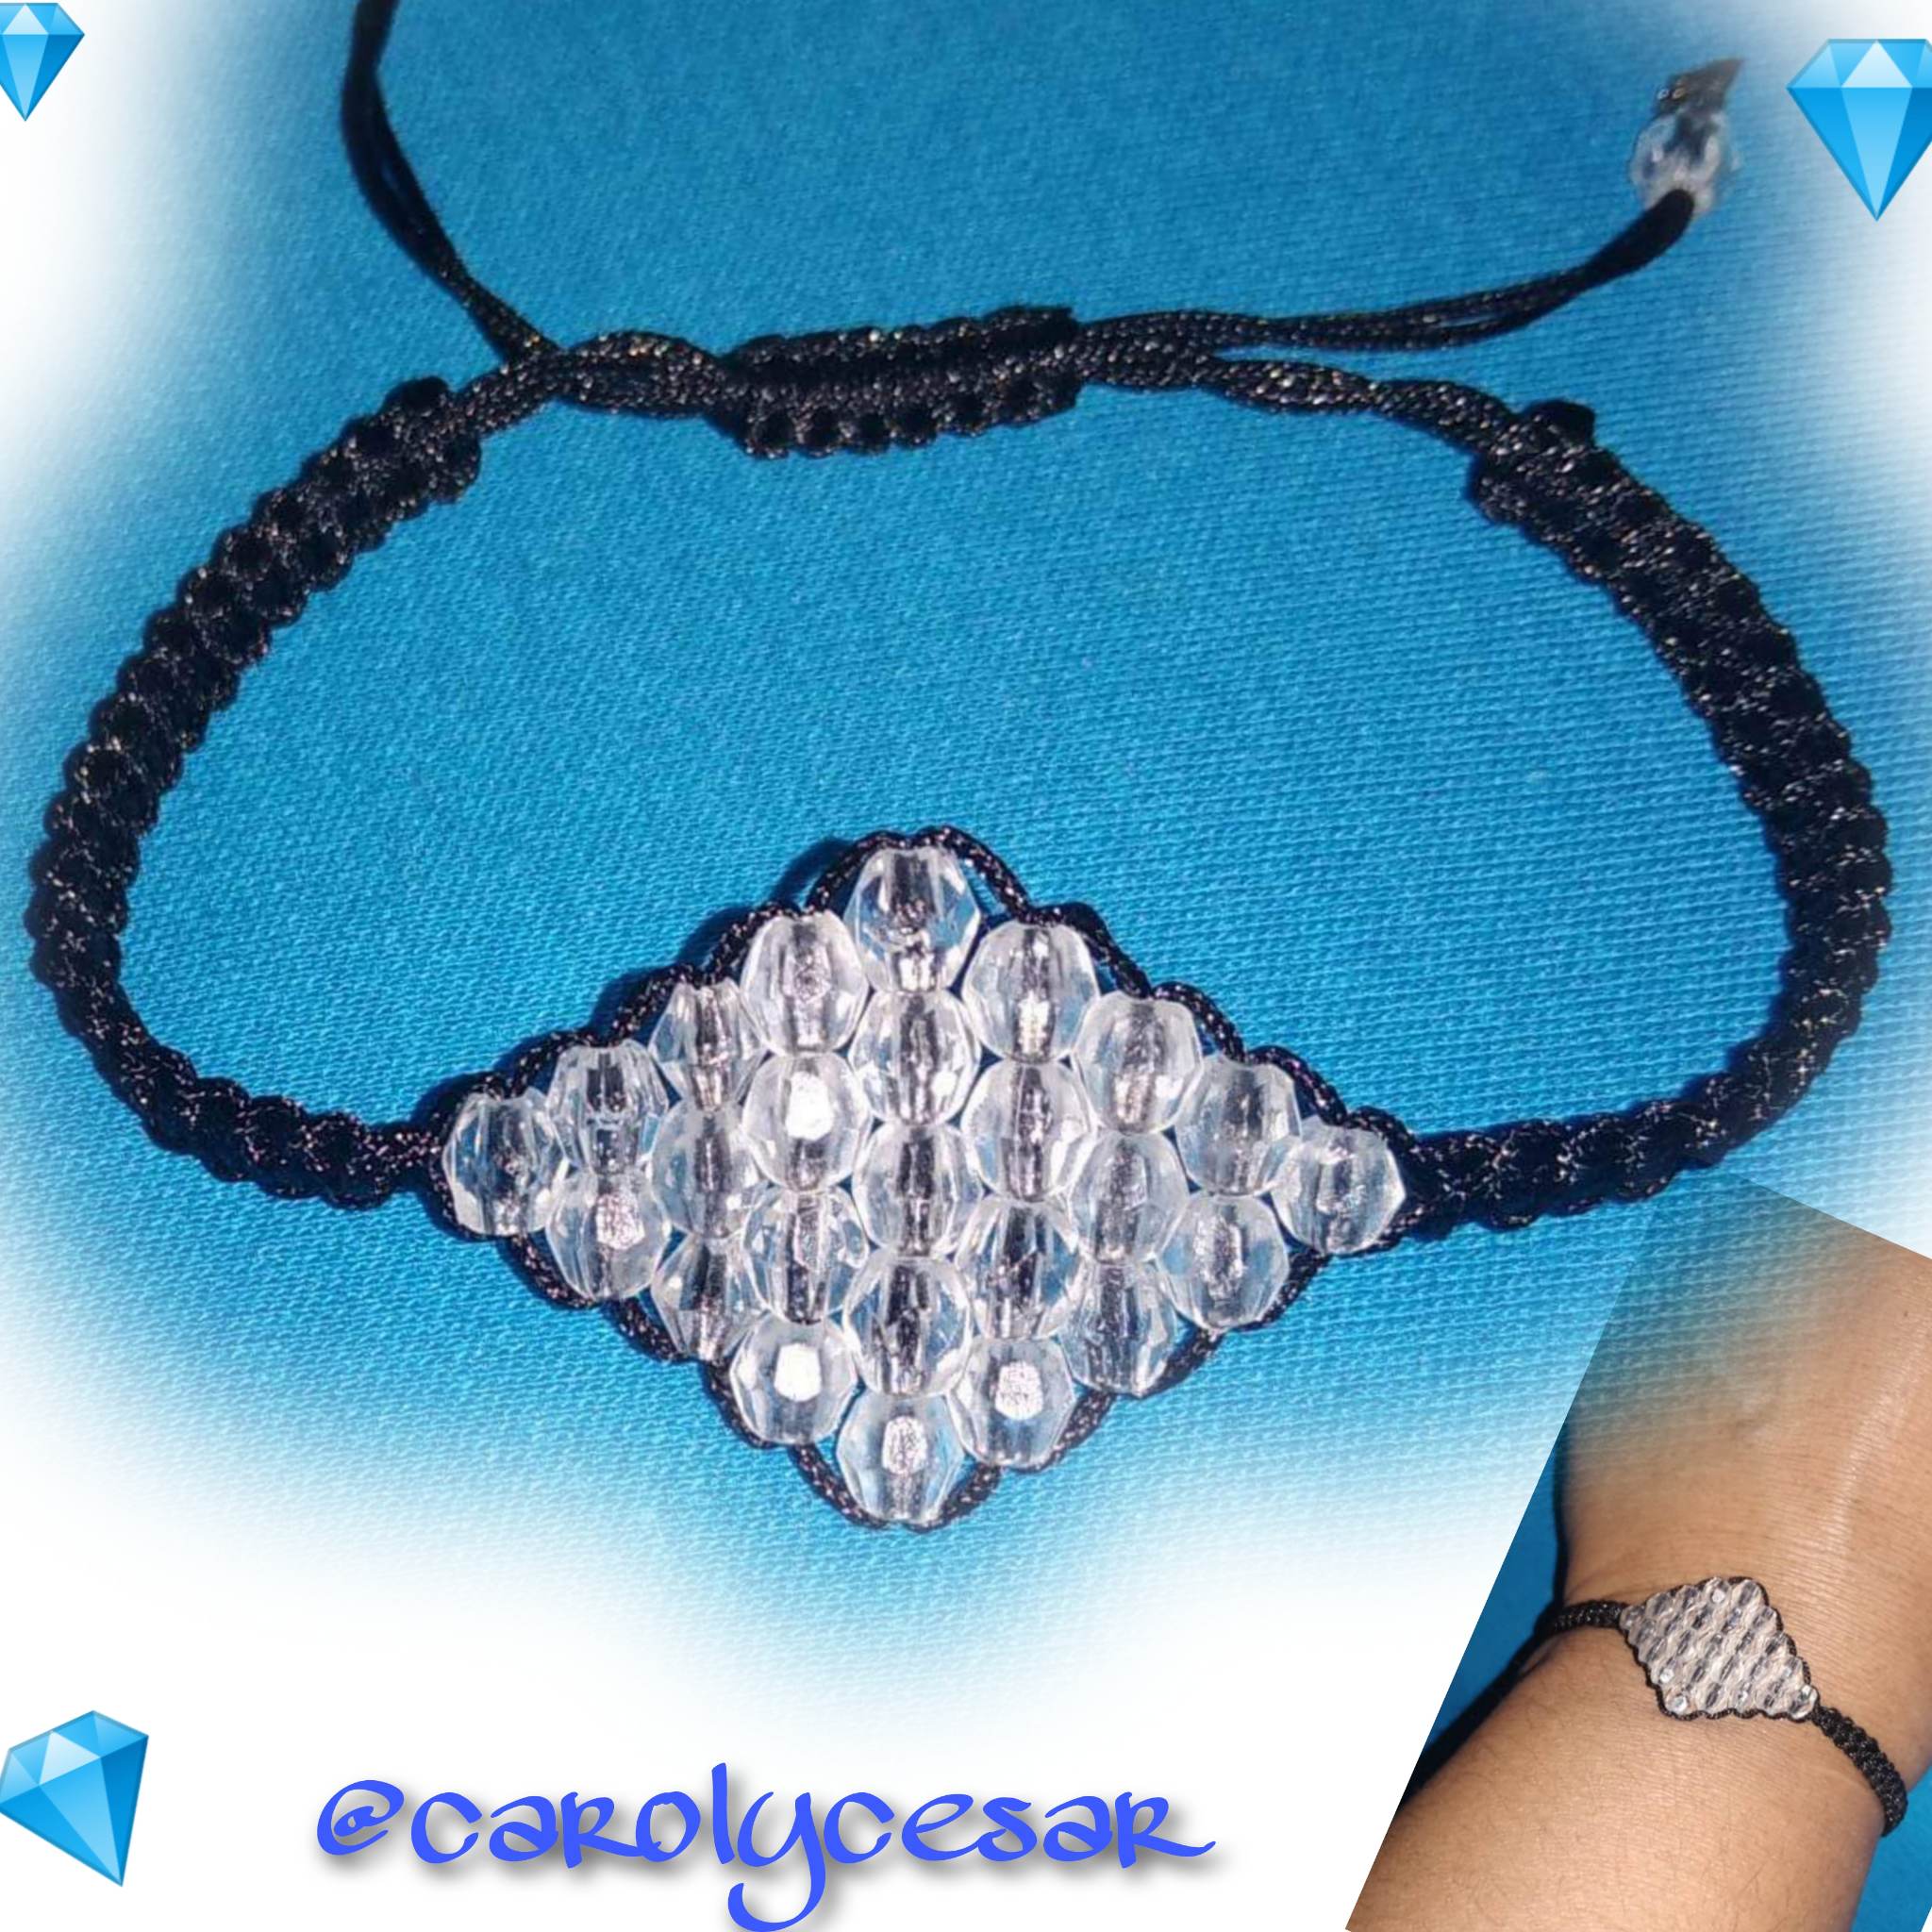
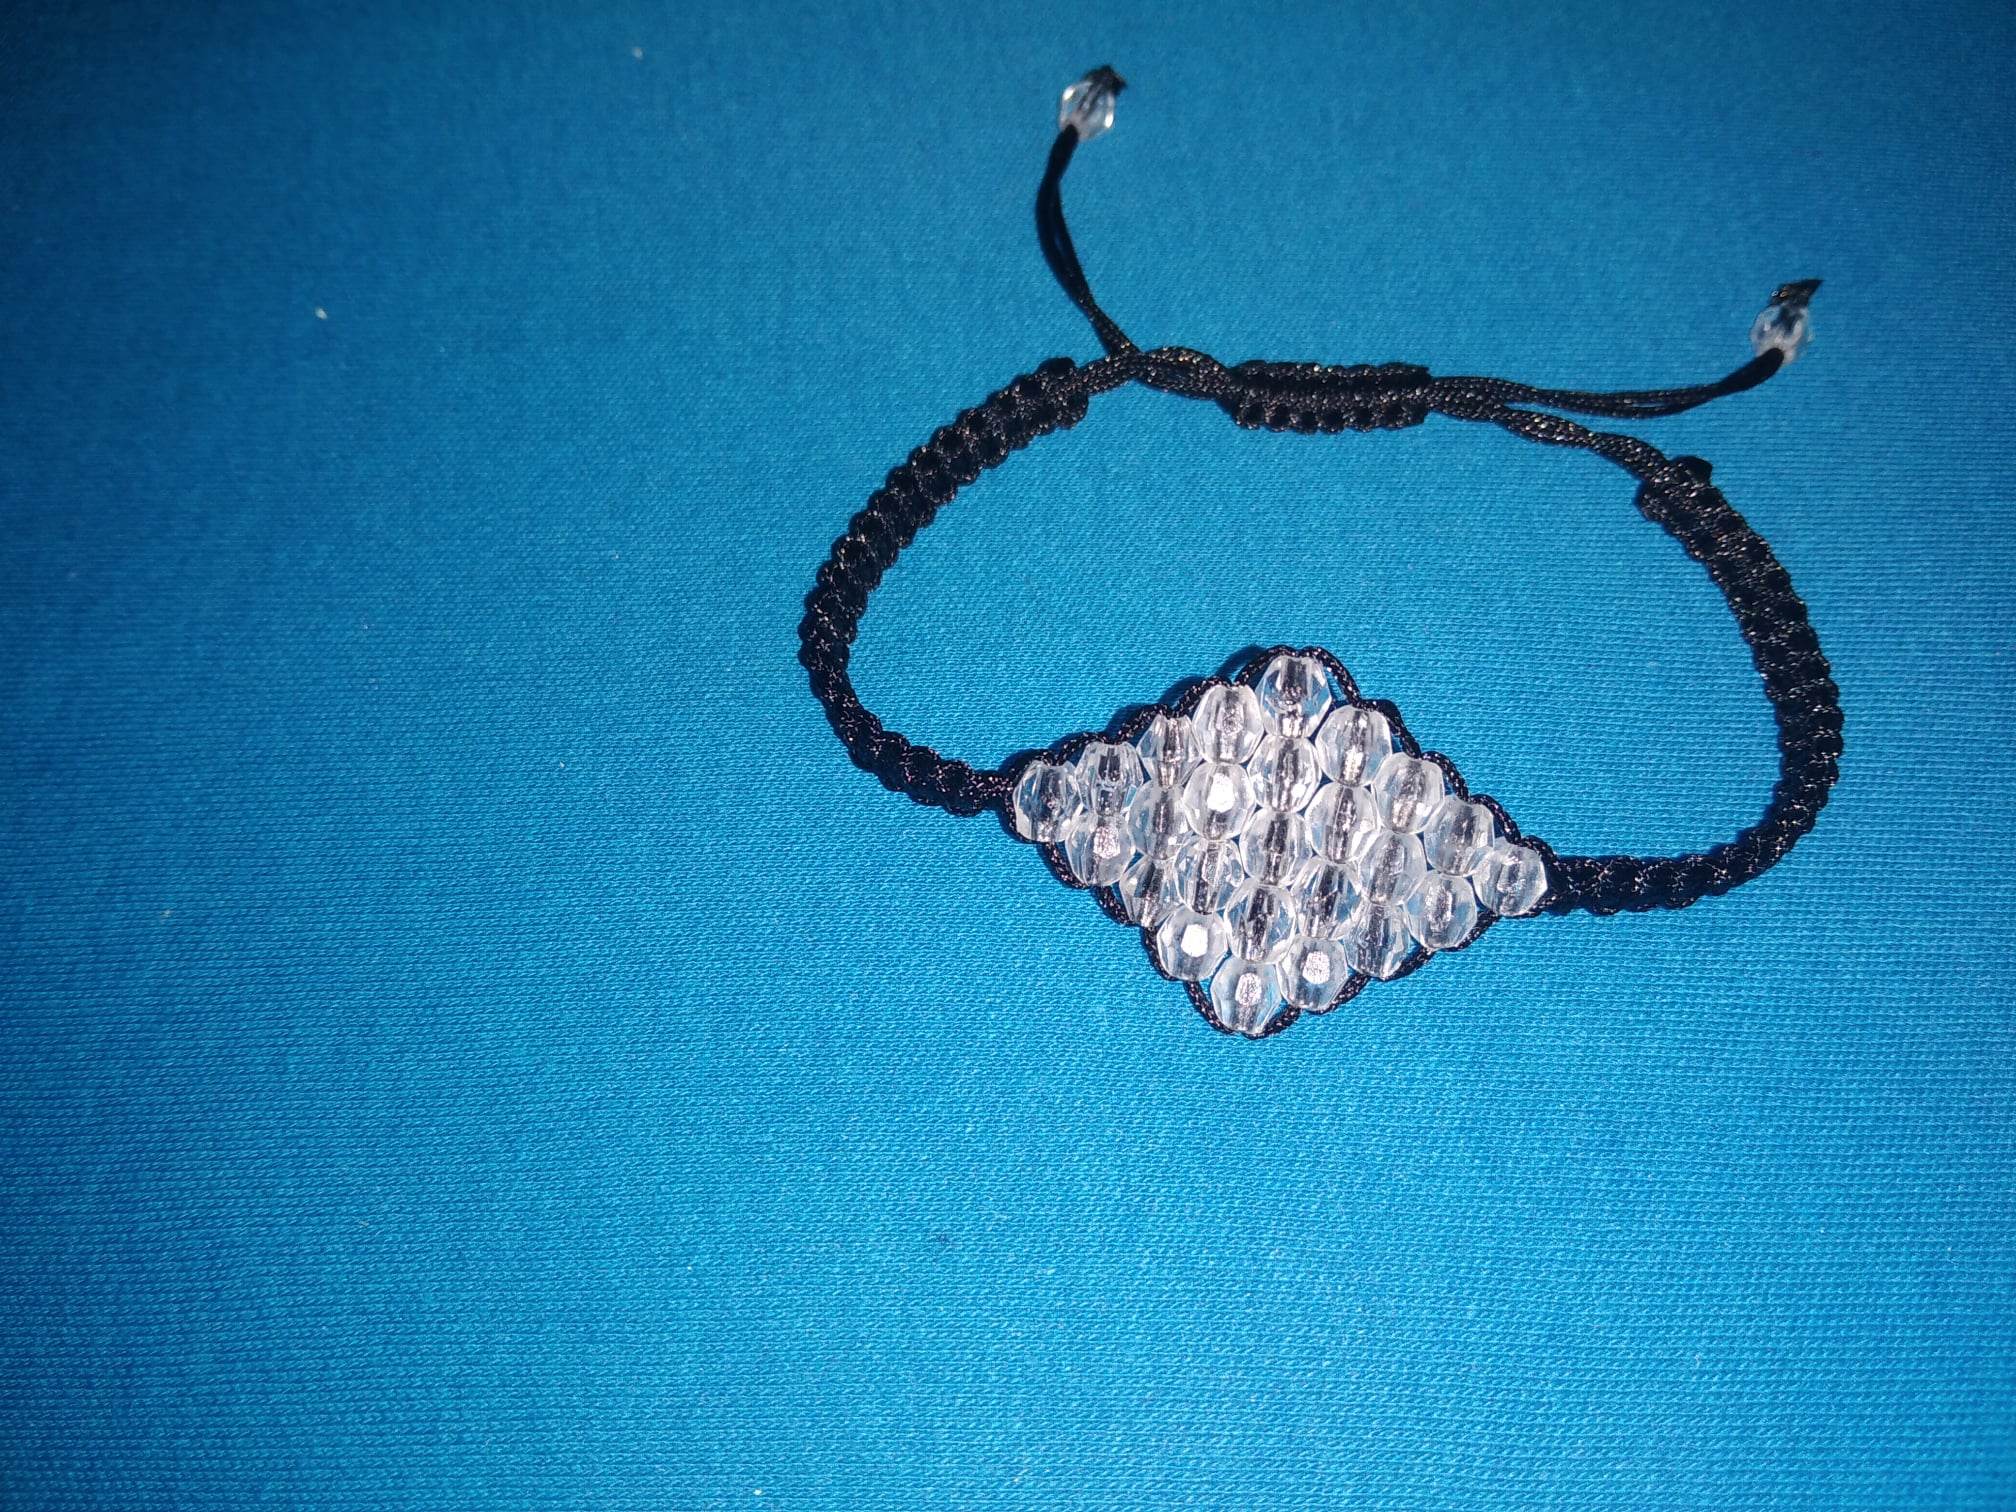
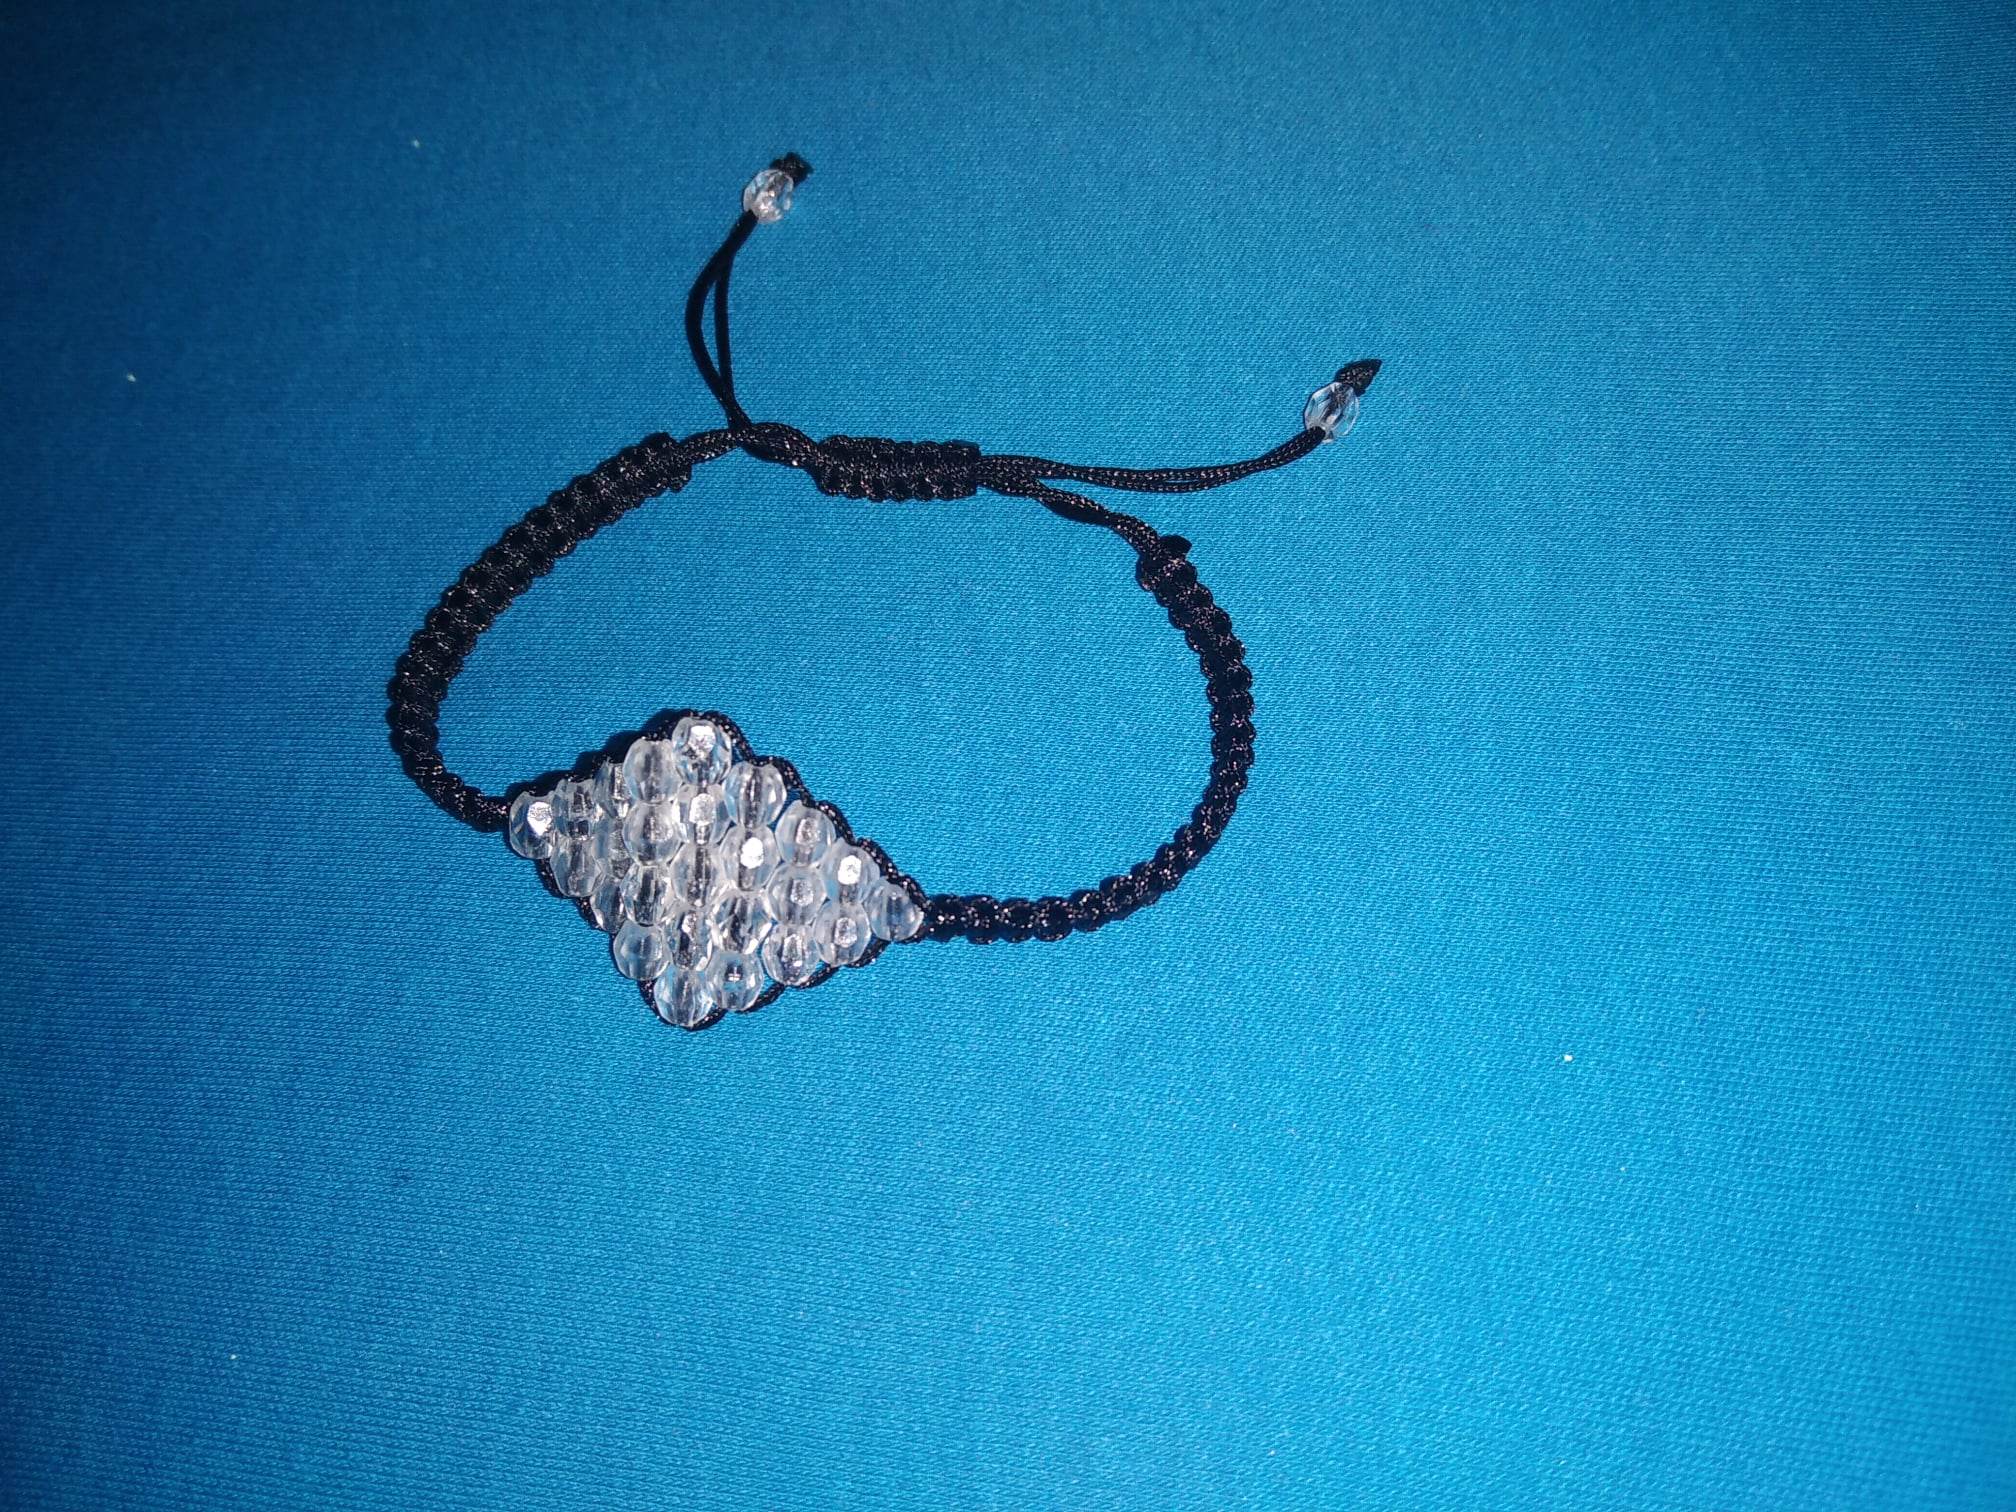
En esta oportunidad les quiero compartir esta linda pulsera que realice , haciendo en el centro de la misma un figura de rombo con unas piedras blancas de bisutería. Usando como base hilo chino de color negro.
This time I want to share this beautiful bracelet that I made, making a rhombus figure in the center of it with some white jewelery stones. Using black Chinese thread as a base.
De las figuras geométricas, esta es mi preferida. Incluso siempre la he usado en la realización de otras manualidades. Me gusta porque se comienza con una pieza y se va aumentado para luego empezar a disminuir hasta llegar a una.
Of the geometric figures, this is my favorite. I have even always used it in the realization of other crafts. I like it because it starts with one piece and increases and then begins to decrease until it reaches one.
Además de me hizo recordar mis primeros voladores que ayudaba hacer a mis sobrinitos, todos eran en forma de esta figura de rombo. Y me encantaba ponerle una cola larga.
In addition to making me remember my first flyers that I helped my little nephews make, they were all in the shape of this rhombus figure. And I loved putting a long tail on it.
Es muy grato recordar momentos felices cuando estás haciendo algo que te gusta, por lo que de seguro tendrás buenos resultados. Y en muchos casos te sentirás motivada a seguir creando lindas cosas para tus seres queridos .
It is very pleasant to remember happy moments when you are doing something you like, so you will surely have good results. And in many cases you will feel motivated to continue creating beautiful things for your loved ones.
Esta pulserita la podemos hacer si la quieres más delicadas con piedras más pequeñas , o si la quieres que resalte mas, pues se puede hacer con piedras más grandes y brillantes…pero de seguro se era muy bonita.
We can make this little bracelet if you want it more delicate with smaller stones, or if you want it to stand out more, it can be done with larger and brighter stones... but surely it was very pretty.
Para hacerla utilice los siguientes materiales:
- Hilo chino de color metro. Un metro para la base de la pulsera y dos pedacitos de 45 cm con los cuales tejí a cada lado haciendo nudos planos.
- 27 piedras de bisutería blancas.
- Yesquero.
- Tijeras.
To make it use the following materials:
- Chinese thread of meter color. One meter for the base of the bracelet and two 45 cm pieces with which I weaved on each side making flat knots.
- 27 white jewelery stones.
- tinderbox.
- Scissors.

Procedimientos:
Procedures:
- Paso # 1.
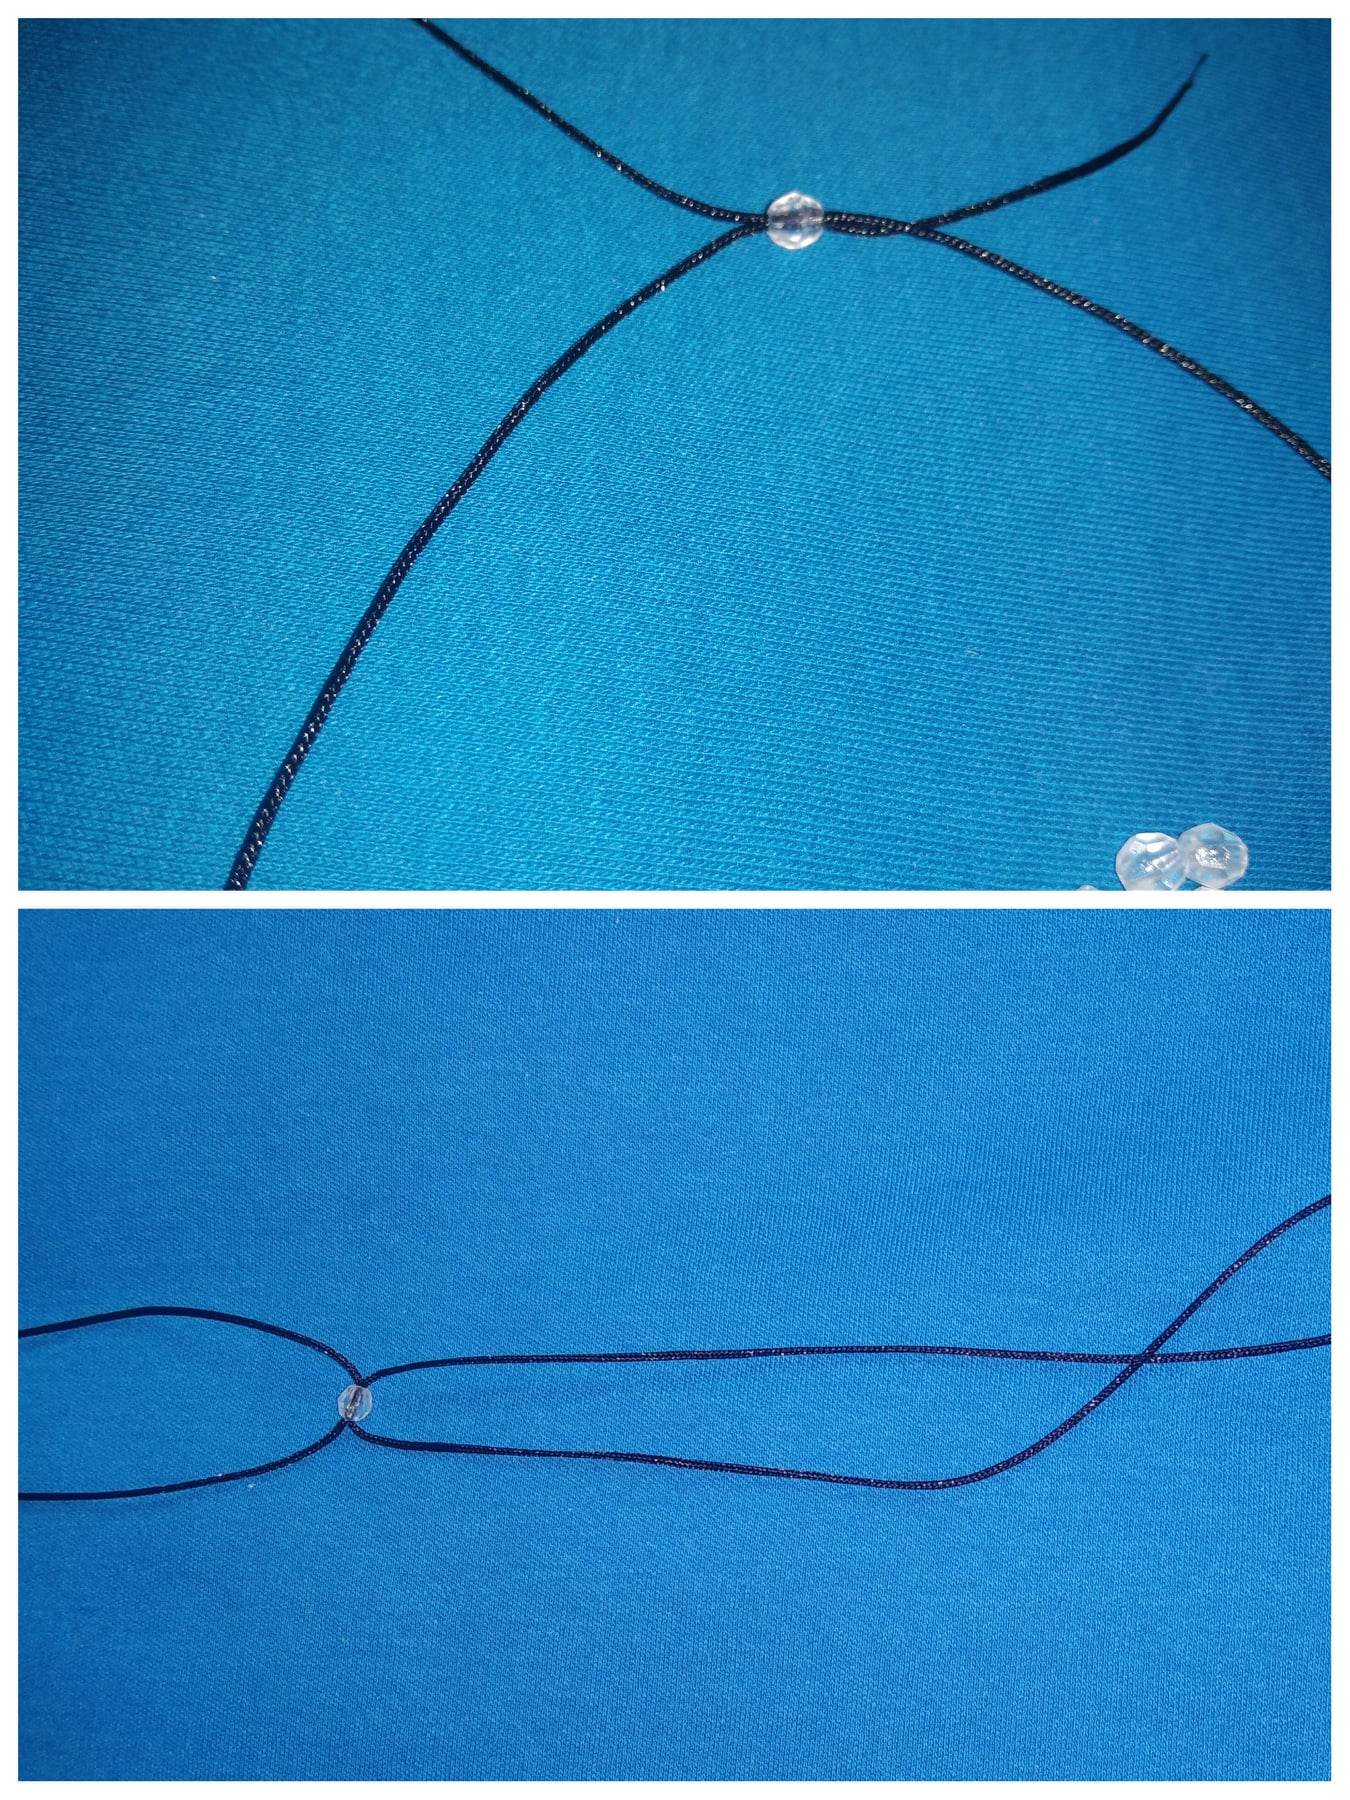
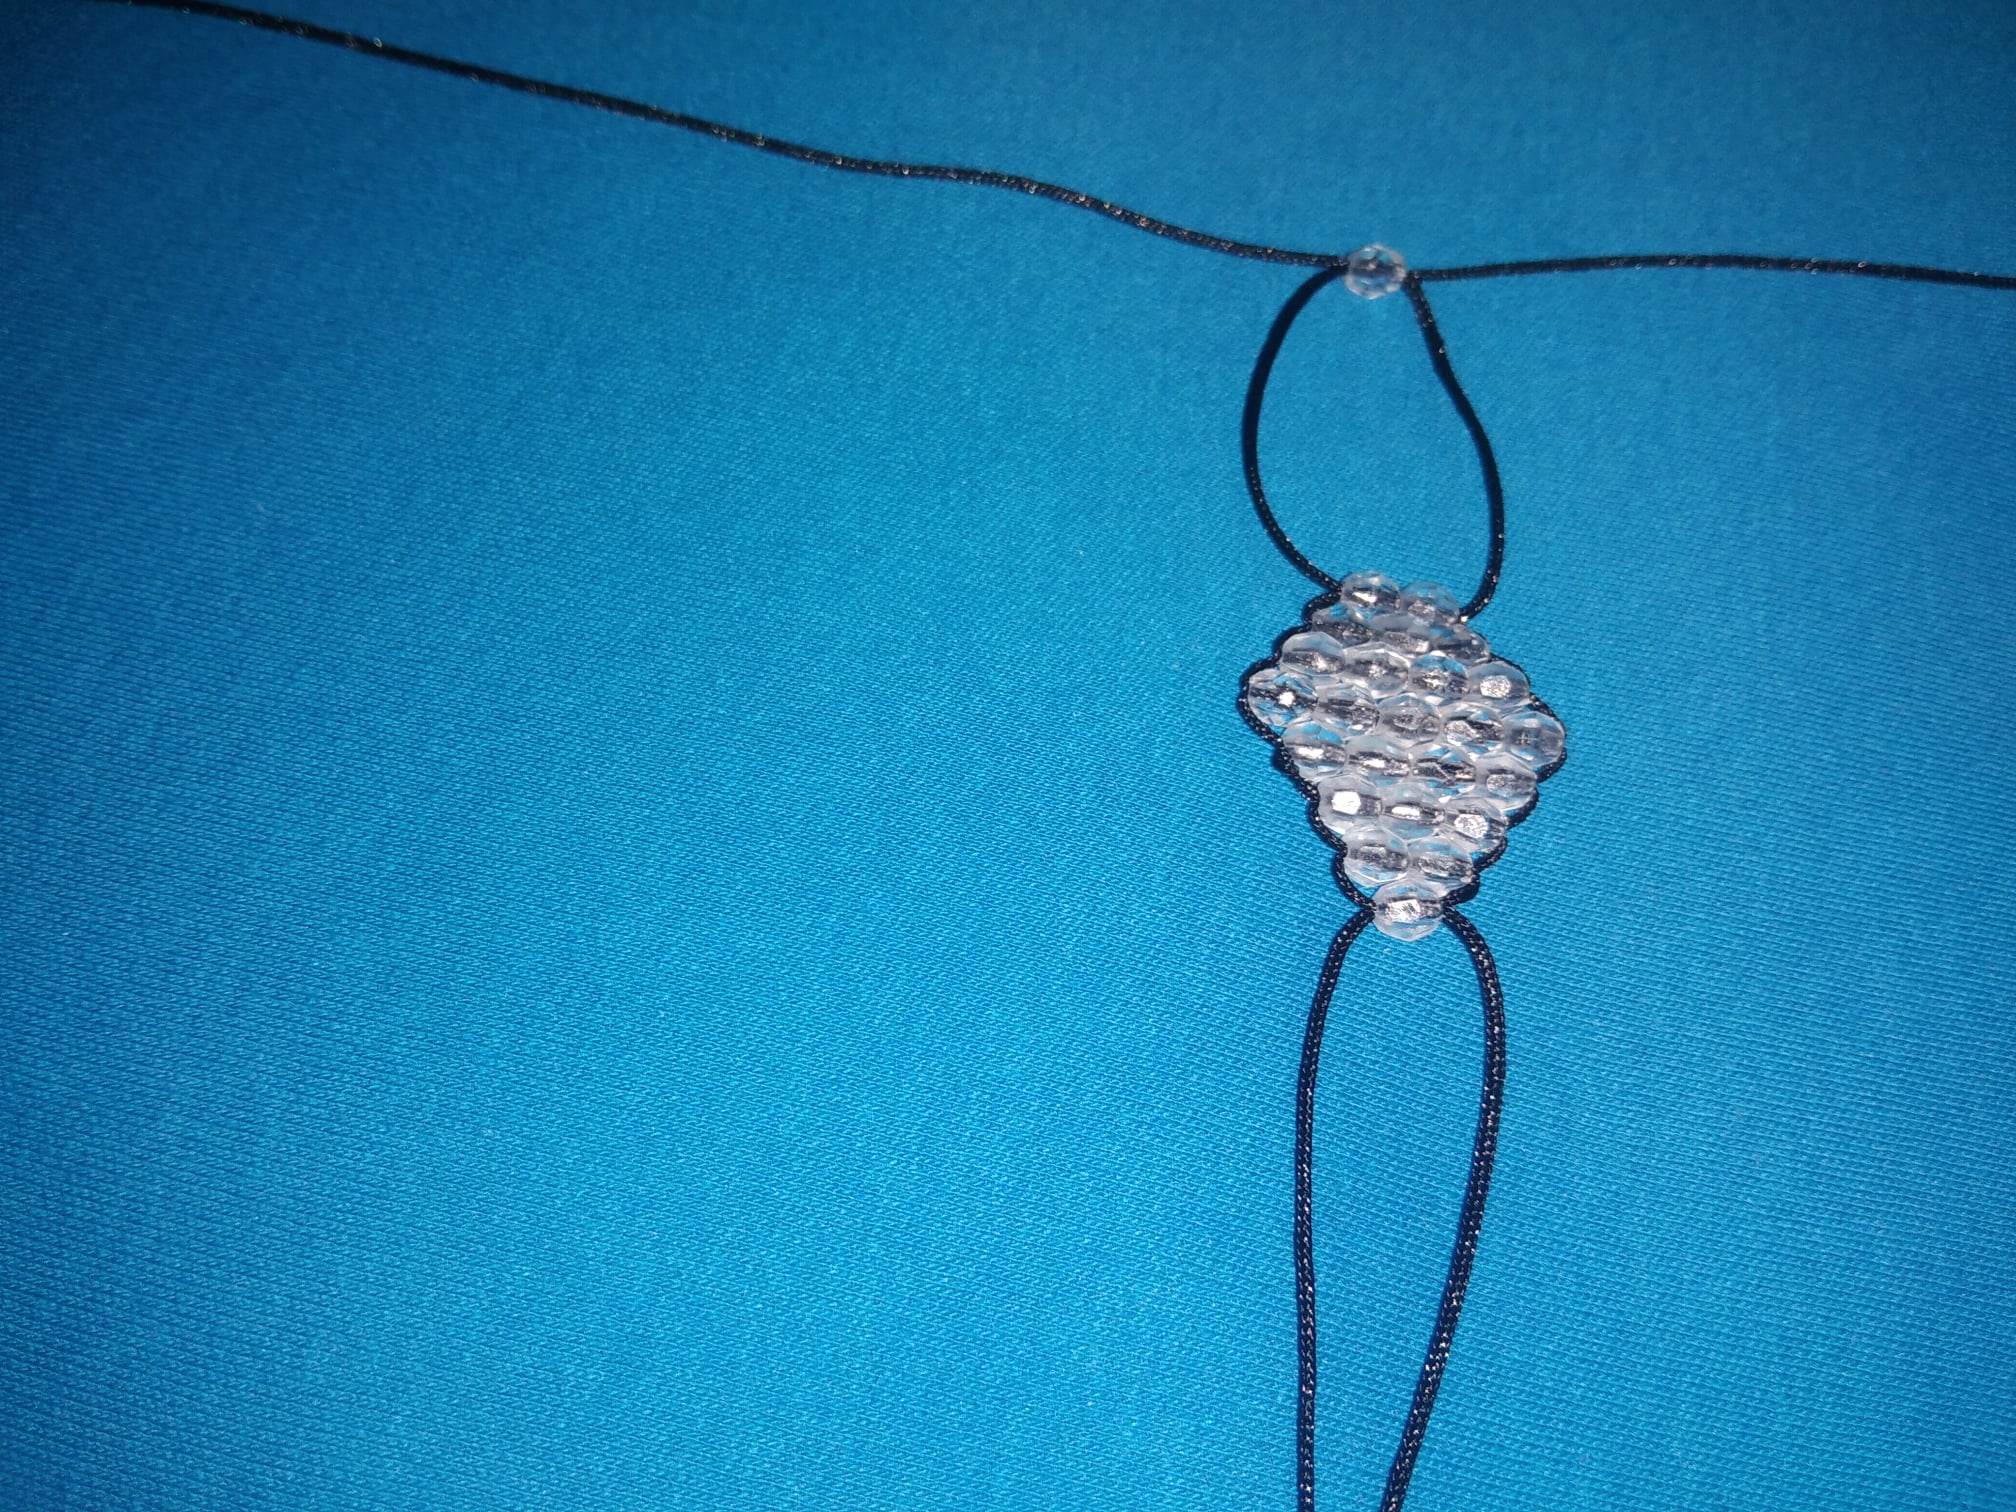
Tome el metro de hilo y luego de haber quemado con el yesquero las puntas para afilarlas bien y así pudieran pasar las piedras. Ya que debía pasar ambas puntas del hilo por cada una de las piedras a utilizar.
Paso la primera piedra cruzando los hilos por el orificio y la llego hasta más allá de la mitad del hilo base, calculando que me quedara a lo que sería la mitad de la medida de la muñeca.
- Step 1.
Take the meter of thread and after having burned the ends with the tinderbox to sharpen them well so that the stones could pass through. Since he had to pass both ends of the thread through each of the stones to be used.
I pass the first stone across the threads through the hole and I bring it to beyond the middle of the base thread, calculating that I would stay at what would be half the measurement of the wrist.
- Paso #2.
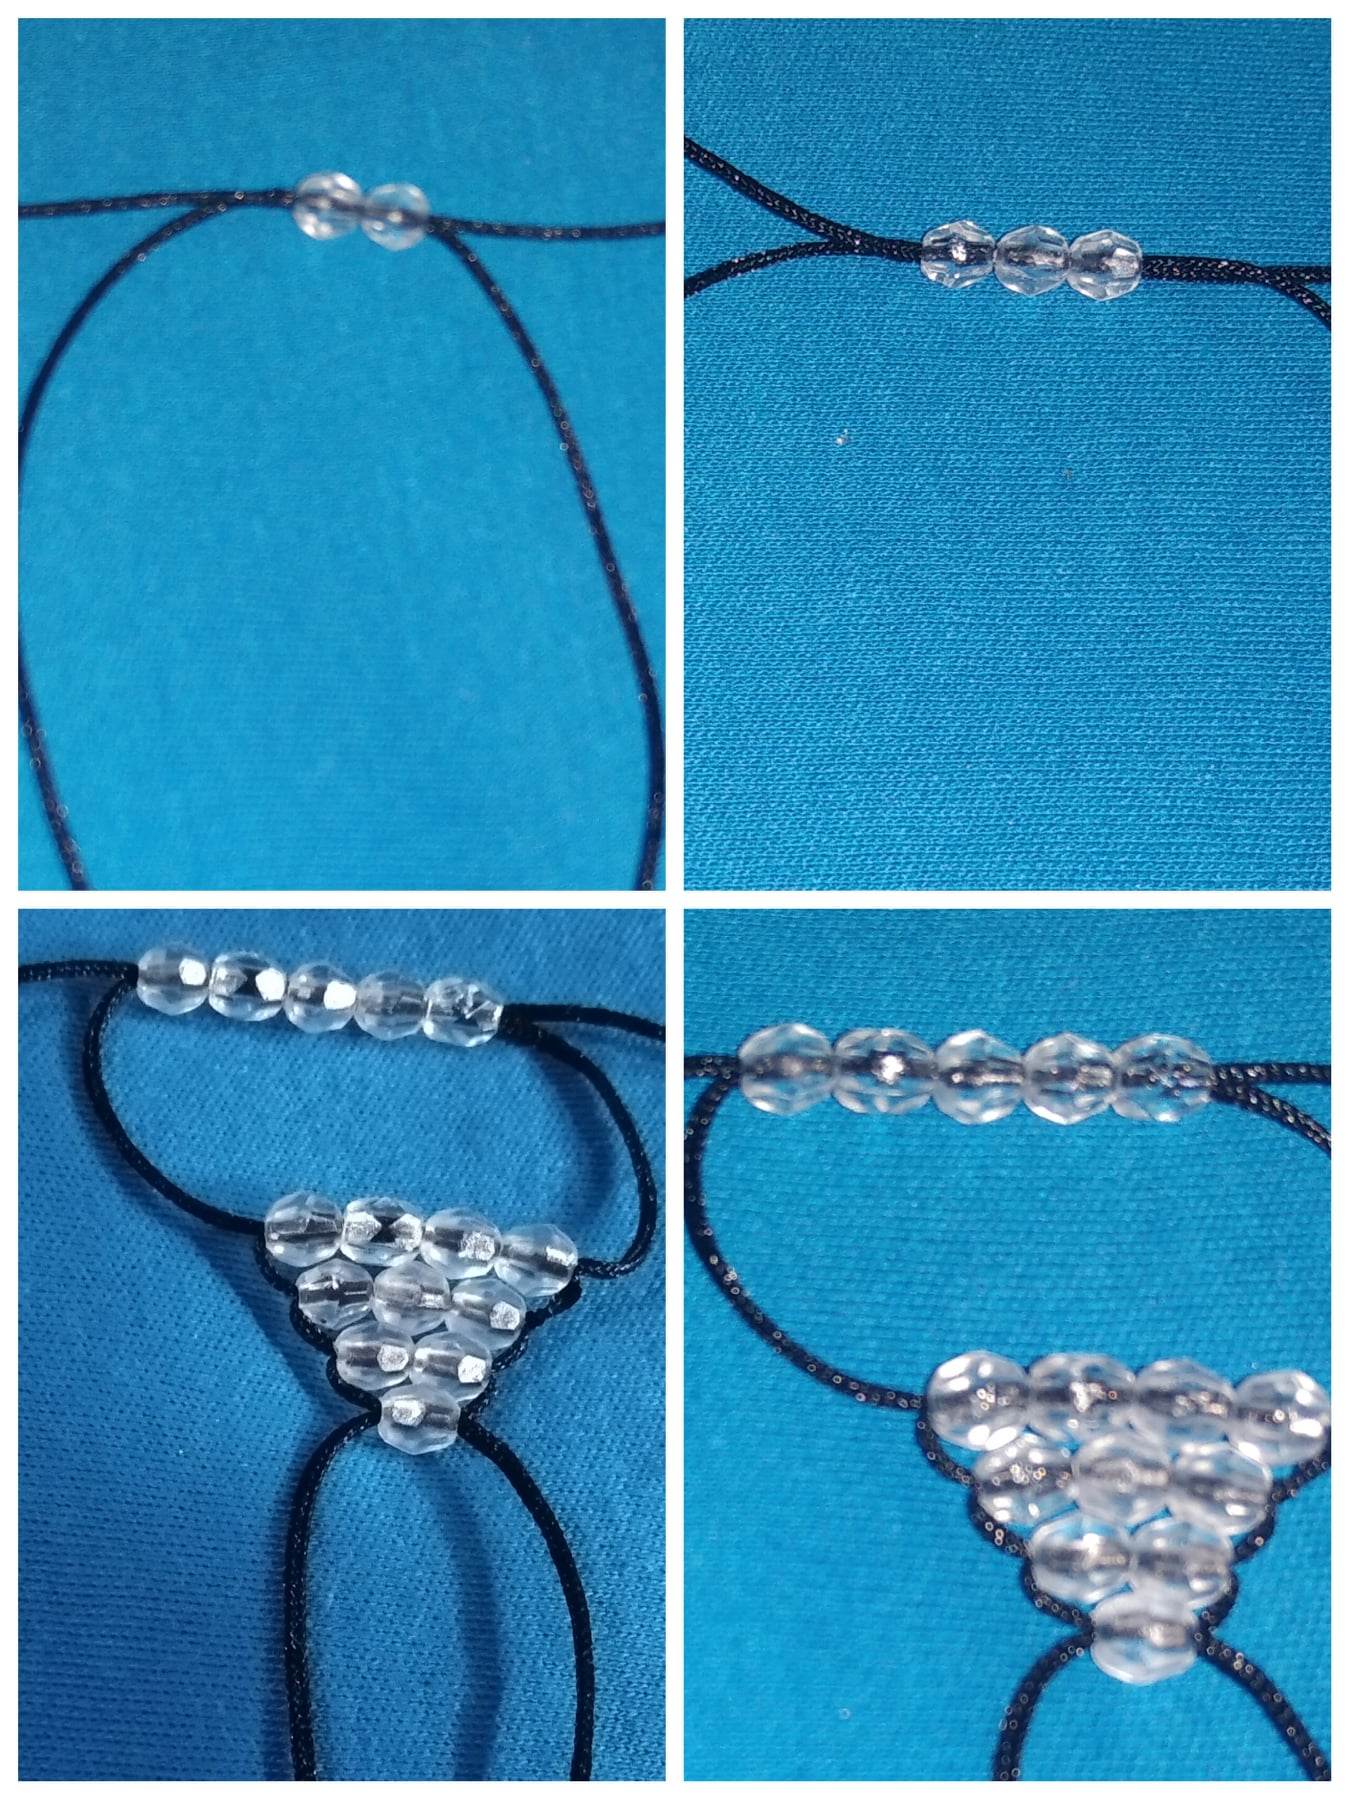
Luego en este paso coloco dos piedras. No importa por cuál de las dos puntas los coloque porque hay que cruzar los hilos por cada piedra.
Una vez listo los llevo hasta la primera piedra, y así hasta que llego a cinco piedras.
- Step 2.
Then in this step I place two stones. It does not matter which of the two ends you place them on because you have to cross the threads for each stone.
Once ready, I take them to the first stone, and so on until I reach five stones.
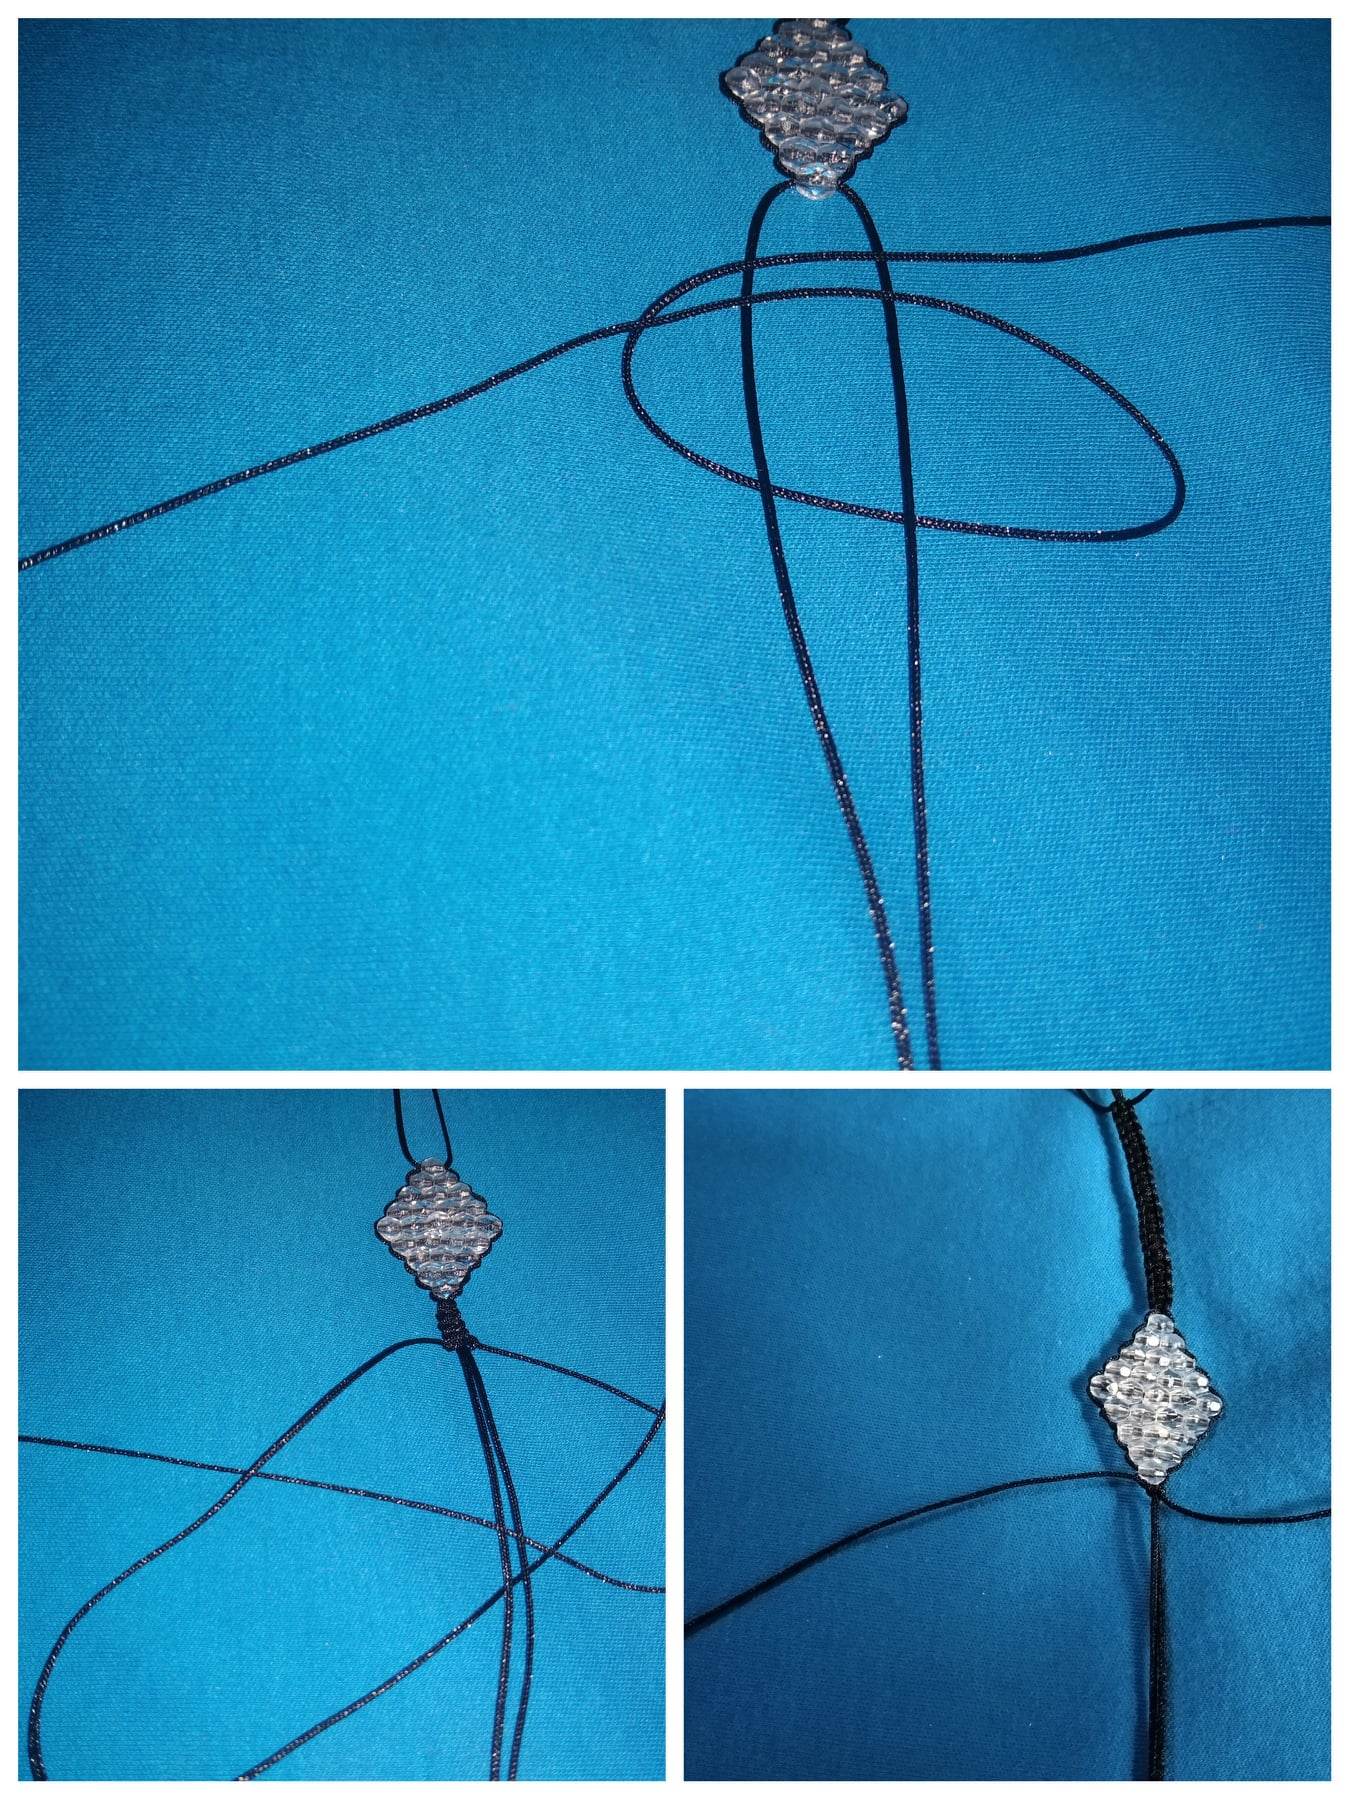
- Paso #3.
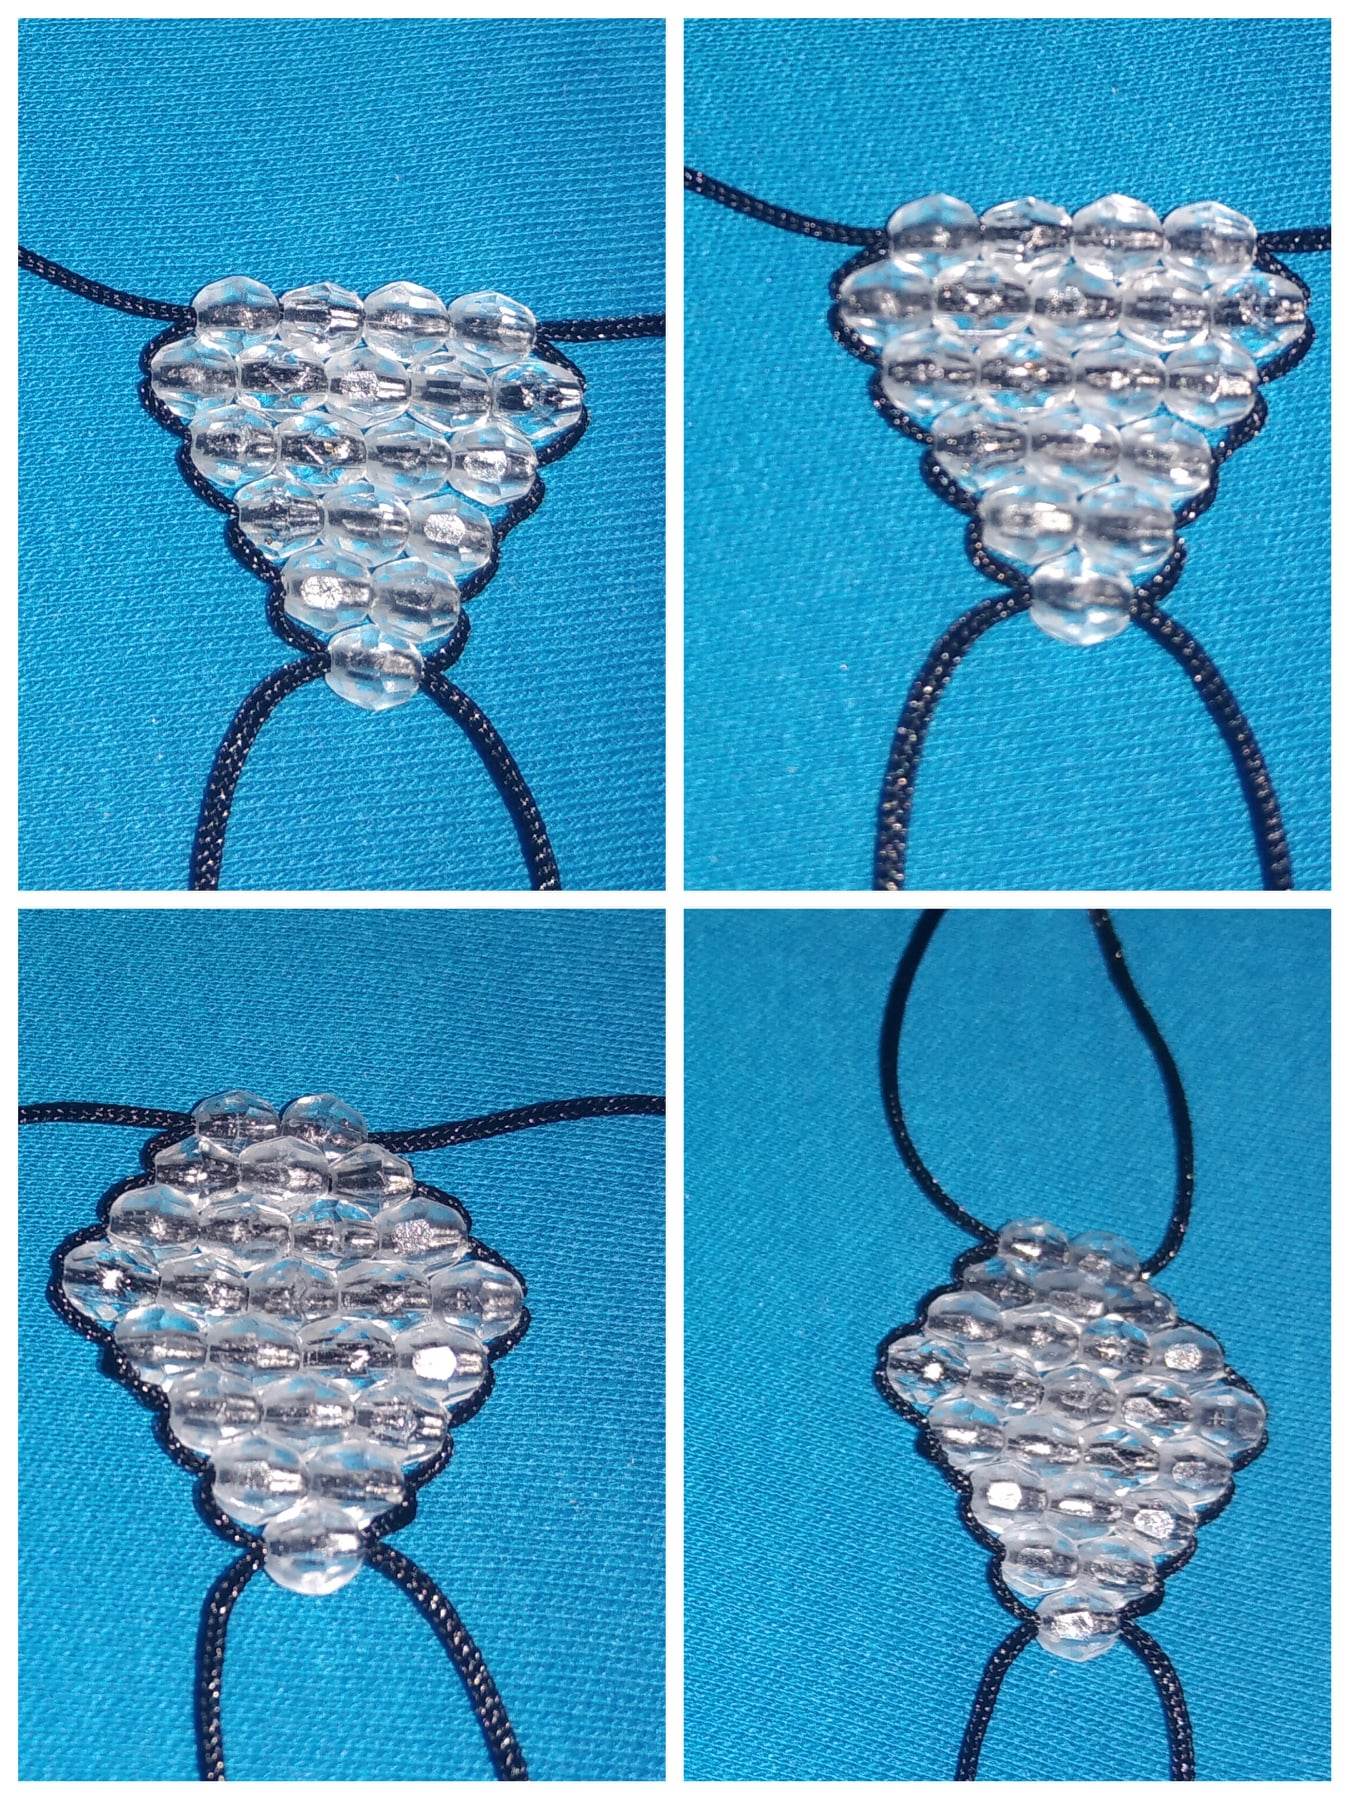
Después de haber hecho todas las vueltas de aumento hasta llegar a las cinco…es aquí donde se empieza hacer las disminuciones, es decir, se colocan cuatro piedras se cruzan los hilos por cada orificio y se llevan hasta donde están las cinco piedras.
Así hasta llegar a una. Formándose de esta manera esta linda figura de rombo, y en este caso pareciera un rombo de diamantes…falsos, pero brillan.
- Step 3.
After having done all the rows to increase until you reach five... this is where you begin to decrease, that is, four stones are placed, the threads are crossed through each hole and they are taken to where the five stones are.
So until you get to one. Thus forming this beautiful rhombus figure, and in this case it looks like a rhombus of diamonds…fake, but they shine.
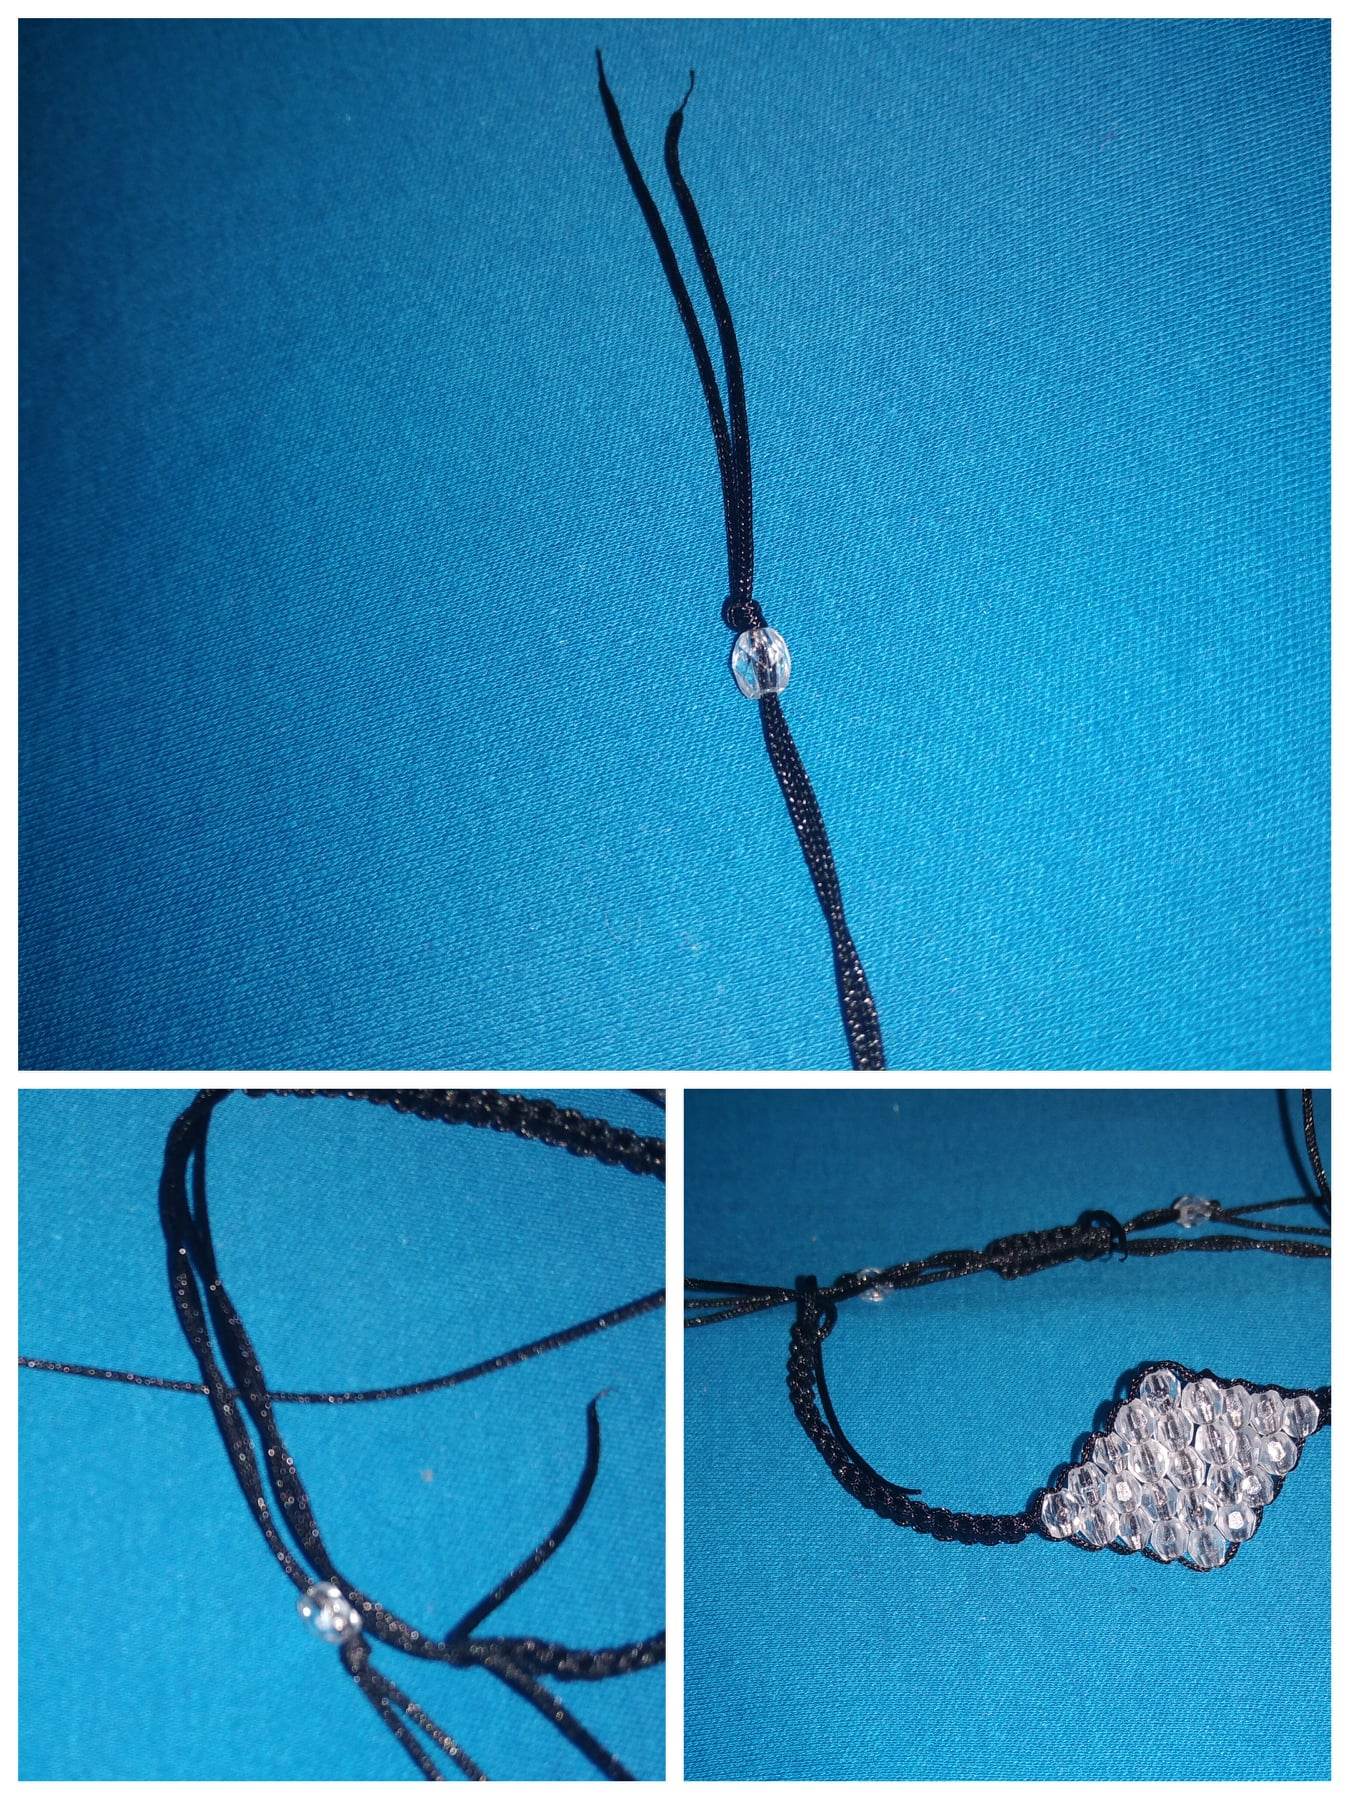
- Paso #4.
Una vez listo el rombo a cada lado tejo con nudos planos con los 45 cm de hilo en ambos extremos del rombo. Luego coloco en ambos extremos una piedra blanca, les hago un nudo simple.
Cruzo ambos extremos y con un pedacito de hilo tejo en el centro varios nudos planos…estos para hacer el cierre de la pulsera.
Corto y quemo los hilos sobrantes y ya terminamos.
- Step 4.
Once the rhombus is ready on each side, I knit with flat knots with the 45 cm of thread at both ends of the rhombus. Then I place a white stone at both ends, I make a simple knot.
I cross both ends and with a little piece of thread weave several flat knots in the center… these to close the bracelet.
I cut and burn the excess threads and we are done.
así de esta manera y en pocos pasos podemos hacer este diseño en pulsera, espero haya sido de su agrado…nos vemos pronto y que Dios nos bendiga.
like this and in a few steps we can make this design on a bracelet, I hope you liked it... see you soon and God bless us.
El contenido y las fotos son mías, tomadas con mi teléfono inteligente Redmi 8a. y editadasen Picsart
El contenido y las fotos son mías, tomadas con mi teléfono inteligente Redmi 8a. y editadasen Picsart

Muy bonito y elegante! 😍
Gracias 😌
Super linda. Me encanta el diseño. Los cristales están muy bonitos.
Exitos para ti.
Abrazos
Hola, muchas gracias. Abrazos y bendiciones.
Nos encanta mucho el diseños de Pulsera que nos haz realizado hoy, que bonito ver como unes los cristales en el medio para darle forma y lo mejor que luce genial, felicidades 👏
Muchísimas gracias 😚 feliz de haya Sido de su agrado. Saludos y bendiciones.
Gracias 😌
@carolycesar15 me encanta como brillan las cuentas del centro y el diseño está muy bien elaborado, espero sigamos disfrutando de tus diseños, saludos 😊.
Gracias 😊 me alegro que te haya gustado. Saludos.
Gracias 😊 me alegro que te haya gustado. Saludos.