Hello everyone... 🐱🐾💕
Hello to my dear Hivers, and to the beloved #Jewelry community, as always very pleased and excited to be here, showing you my work made with love and especially for you.
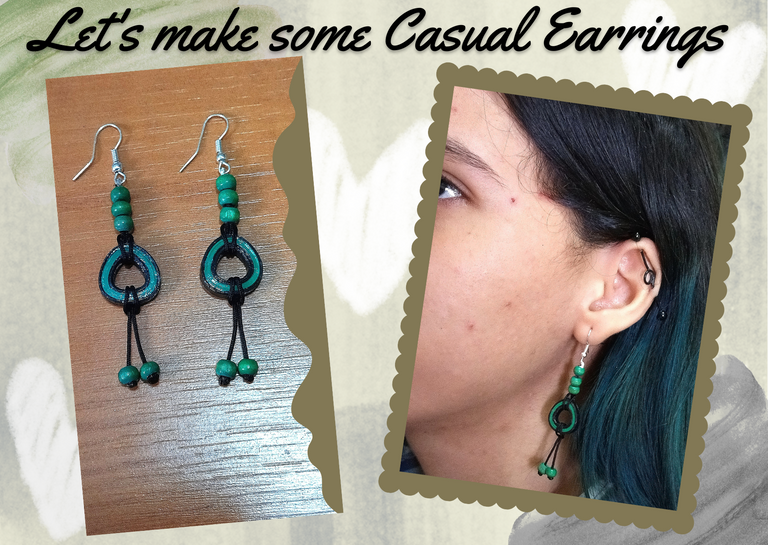
For today I bring you a simple tutorial, to make some casual earrings in the quilling technique, with a combination of details with other materials.
Thinking about what new idea to generate for you, I take out a pen from my wallet and seeing its triangular shape from there this idea was born, (yes as you read it from a pen hahahahahahaha), I hope the combination that came out of my imagination is to your liking, and that you enjoy this simple step by step.
Let's get started: 😃

- Black and dark green 3mm wide quilling ribbons.
- Ruler.
- Triangular shaped pen.
- White glue.
- Scissors.
- Fine nose pliers.
- Base for hanging tendrils (hooks).
- Short knot cover.
- Fine Chinese thread (black color).
- Green wooden beads.
- Tinder.
- Solvent X.
- Artistic Resin.
- Glass flask.
- Paintbrush.

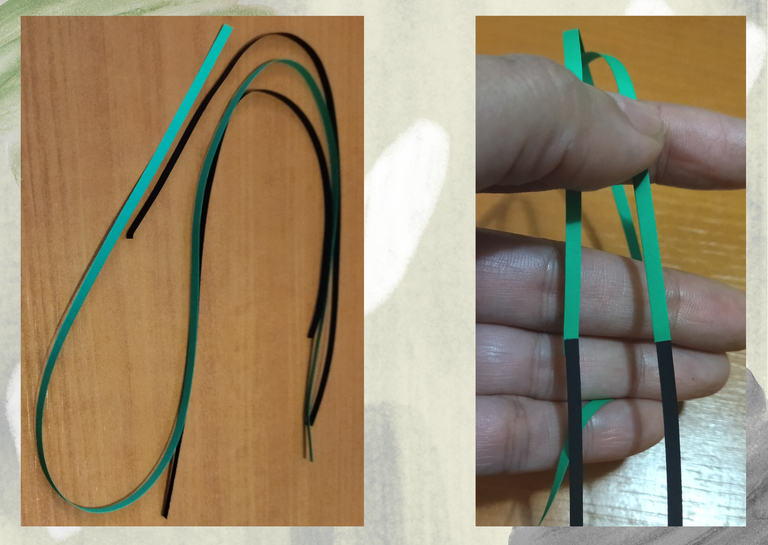
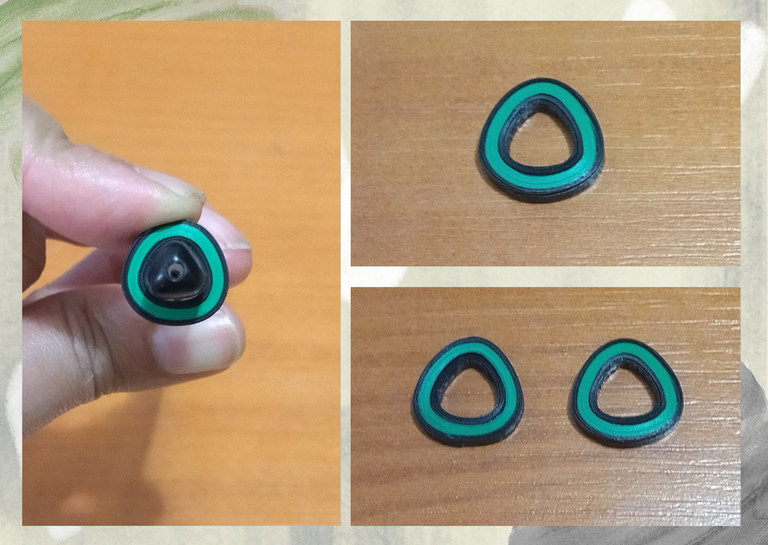
- We start by taking two pieces of black quilling tape 3mm wide x 25cms long, and a piece of dark green tape 3mm wide x 50cms long, these three tapes we are going to join them to form one. We are going to glue joining first a black one, then the green one and finish with the remaining black one.
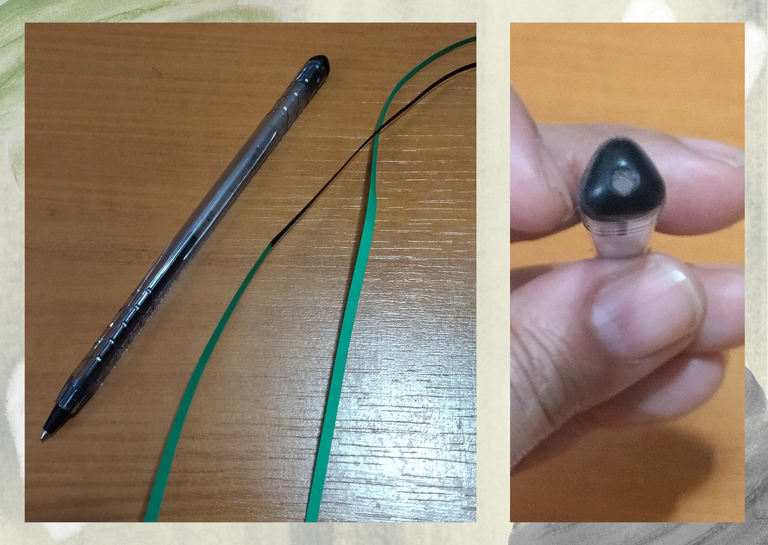
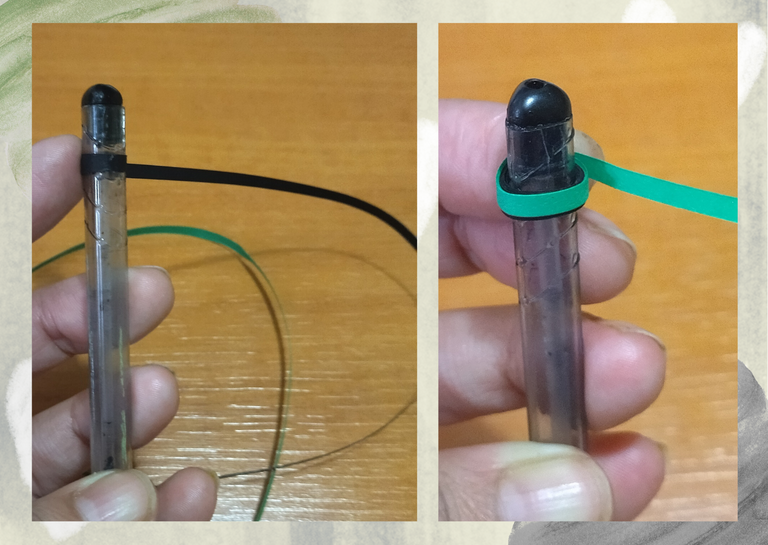
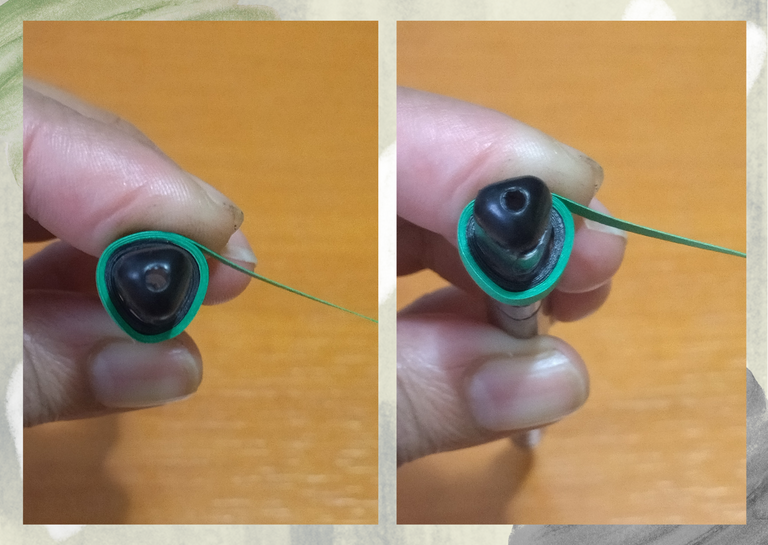
- Now we are going to take the pen (in my case), or any instrument that has a triangular circumference, and proceed to roll our ribbon around it, as we are rolling we must press a little to go molding and that our piece takes the triangular shape that has the pen or instrument that we are using, we must avoid pulling too sharply the tape to avoid breaking it, when we finish rolling, we seal with white glue. We will need two of this piece since we are going to make a pair of tendrils.

Hola a todos... 🐱🐾💕
Hola a mis queridos Hivers, y a la querida comunidad de #Jewelry, como siempre muy complacida y emocionada de encontrarme por acá, mostrándole mi trabajo hecho con mucho amor y especialmente para ustedes.Para hoy les traigo un sencillo tutorial, para realizar unos pendientes casuales en la técnica de quilling, con una combinación de detalles con otros materiales.
Pensando en que nueva idea generar para ustedes, saco un bolígrafo de mi cartera y al ver su forma triangular de allí nació esta idea, (si como lo leen a partir de un bolígrafo jajajajaja), espero la combinación que salió de mi imaginación sea de su agrado, y que disfruten este sencillo paso a paso.
Comencemos:😃

• Cintas de quilling de 3mm de ancho, negras y verdes oscuro.
• Regla.
• Bolígrafo con forma triangular.
• Pega blanca.
• Tijera.
• Alicate punta fina.
• Base para zarcillos colgante (anzuelos).
• Tapa nudos corto.
• Hilo chino fino (Color negro).
• Perlas de madera verdes.
• Yesquero.
• Solvente X.
• Resina Artística.
• Frasco de vidrio.
• Pincel.

• Comenzamos tomando dos trozos de cinta de quilling color negro de 3mm de ancho x 25cms de largo, y un trozo de cinta color verde oscuro de 3mm de ancho x 50cms de largo, estás tres cintas las vamos a unir para formar una sola. Vamos a pegar uniendo primero una negra, luego la verde y finalizamos con la negra restante.
• Vamos a tomar el bolígrafo (en mi caso), o cualquier instrumento que tengan con circunferencia triangular, y procedemos a enrollar nuestra cinta alrededor del mismo, a medida que vamos enrollando debemos presionar un poco para ir moldeando y que nuestra pieza tome la forma triangular que tiene el bolígrafo o instrumento que estamos usando, debemos evitar jalar muy bruscamente la cinta para evitar romperla, al terminar de enrollar, sellamos con pega blanca. De esta pieza necesitaremos dos ya que vamos a realizar un par de zarcillos.
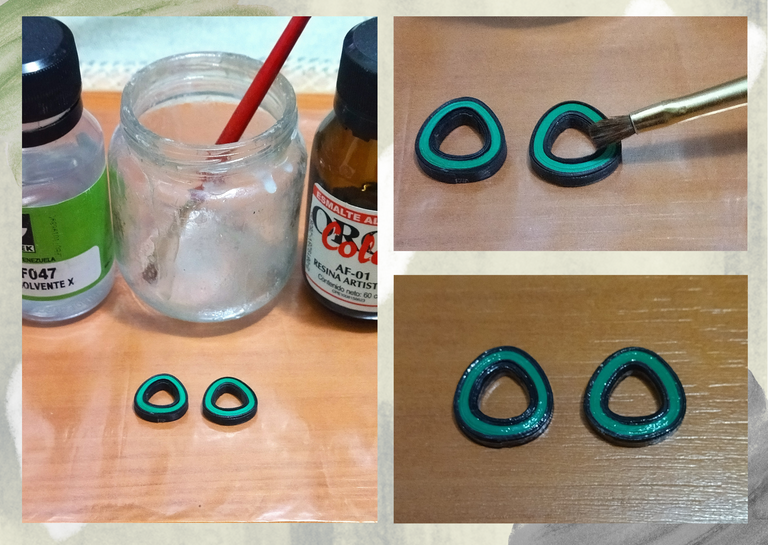
- Once our triangular quilling pieces are ready, we are going to apply the liquid protection (plasticized) at once, we take a glass jar and put one part of artistic resin and another part of solvent X, stir and with a brush we apply it in all its parts, let it dry.
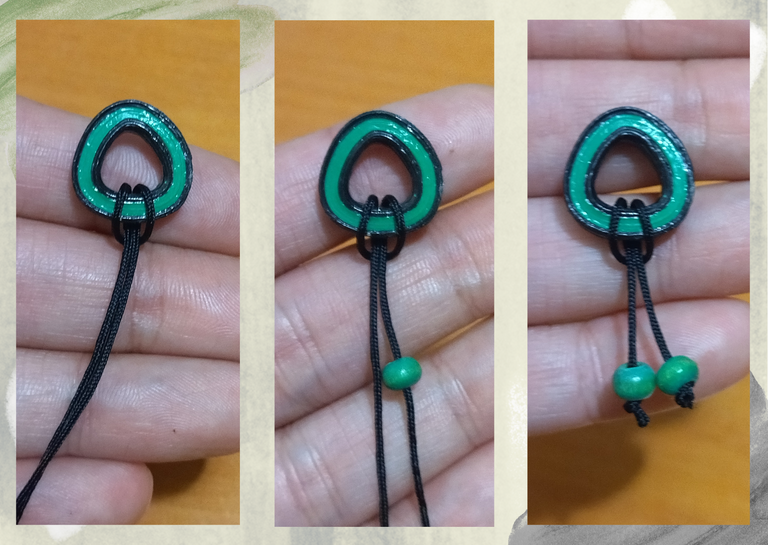
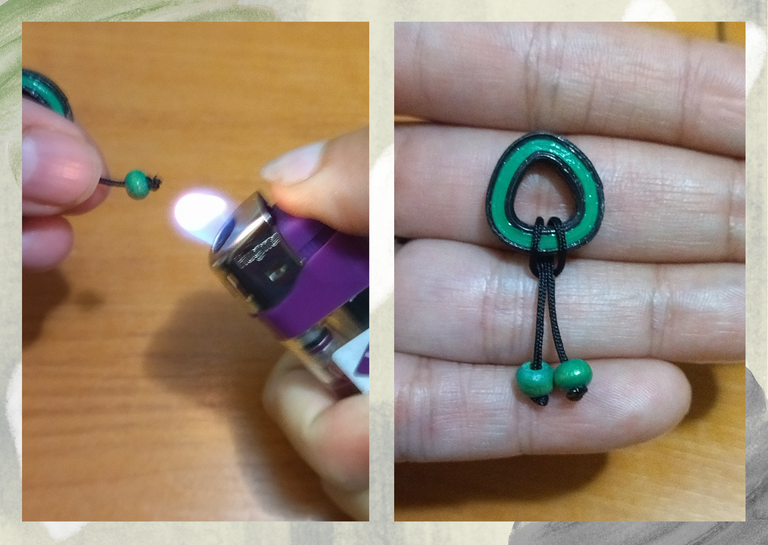
- Once the pieces are dry we are going to decorate, we take a piece of thin black Chinese thread, and we are going to interlace at the bottom of the pieces, we take two medium green wooden beads, (you can place the beads you want according to the combination you decide to make your tendrils), we place a bead in each thread, we make a knot, we cut the excess thread and with a tinder we burn the tip so that the knot we made does not come loose.
• Listas nuestras piezas triangulares de quilling vamos a colocarle su protección líquida (plastificado) de una vez, tomamos un frasco de vidrio colocamos una parte de resina artística y otra de solvente X, revolvemos y con un pincel aplicamos en todas sus partes, dejamos secar.
• Secas las piezas vamos a decorar tomamos un trozo de hilo chino fino negro, y vamos a entrelazar en la parte de abajo de las piezas, tomamos dos perlas de madera verdes medianas, (ustedes pueden colocar las perlas que deseen según la combinación que decidan hacer sus zarcillos), colocamos una perla en cada hilo, hacemos un nudo, cortamos el hilo sobrante y con un yesquero quemamos la punta para que no se suelte el nudo que realizamos.
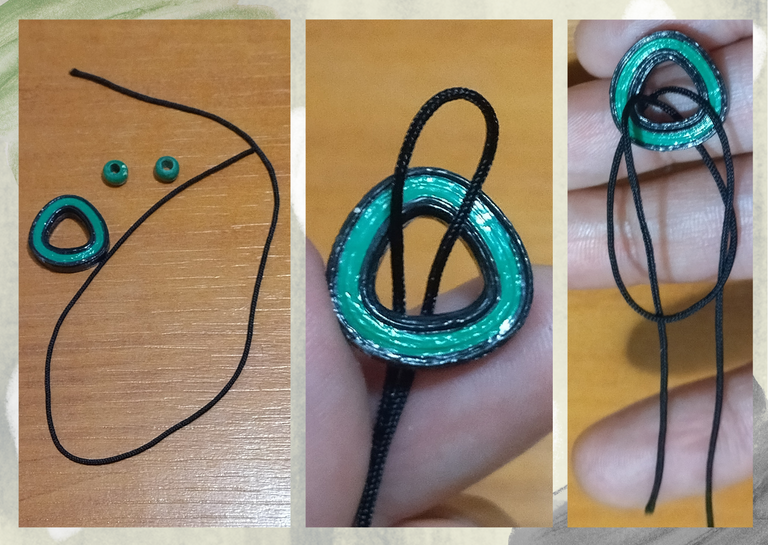
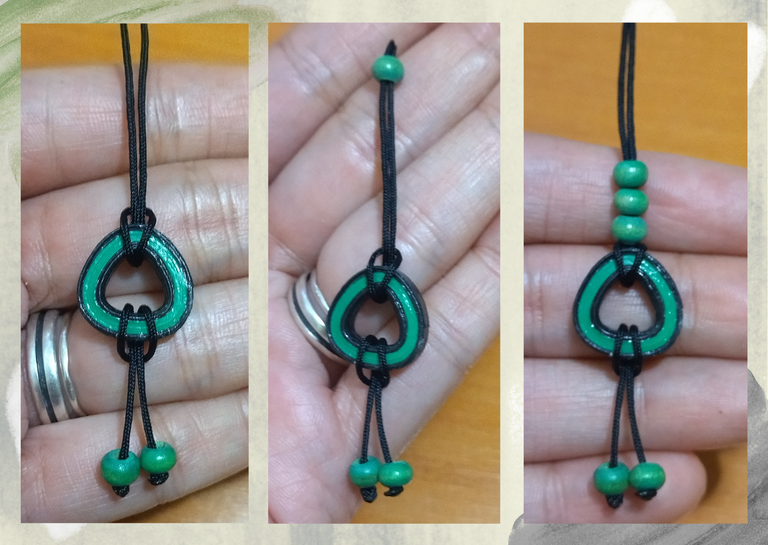
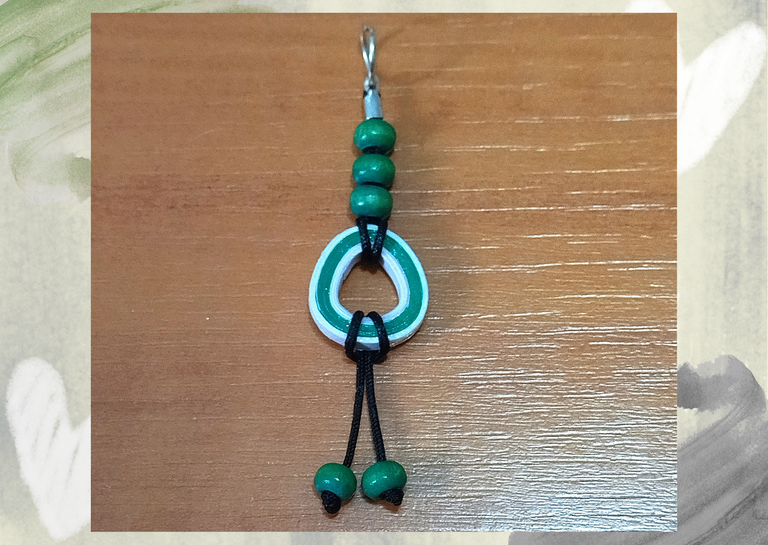
- Let's decorate the top of the piece, we are going to take another piece of thin black Chinese thread and we are going to interlace it as we did in the bottom part, we take three green wooden beads and we put them in the middle of the two threads.
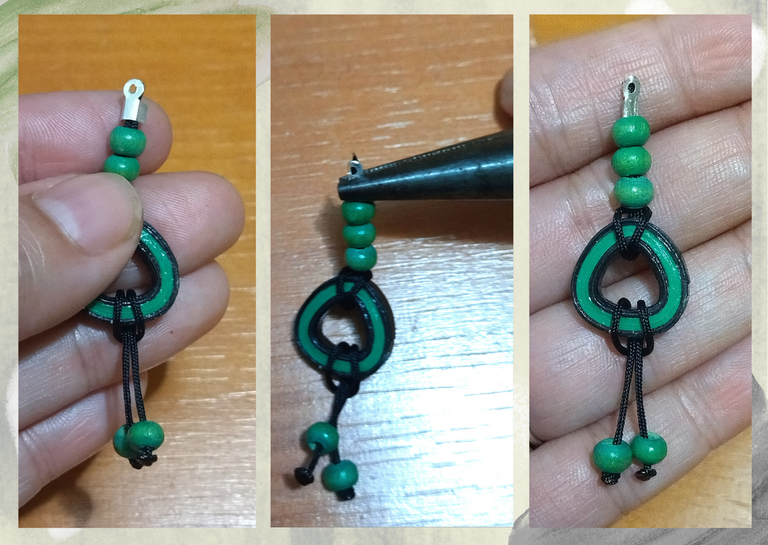
- Now we are going to place a knot cover, try to do it as close as possible to the beads, we place it and with the help of a fine tip pliers we close it, then I raised the first bead to cover the knot cover and make it look as delicate as possible.
- Finally we are going to place the base for hanging tendrils (hook).
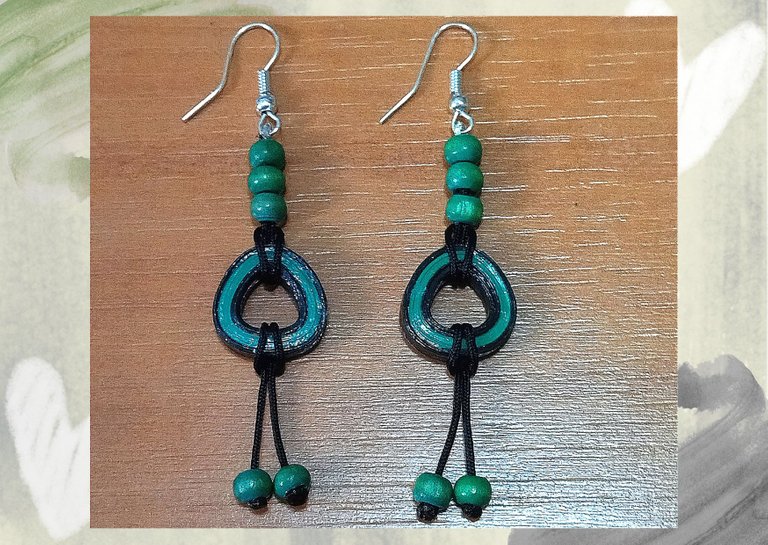
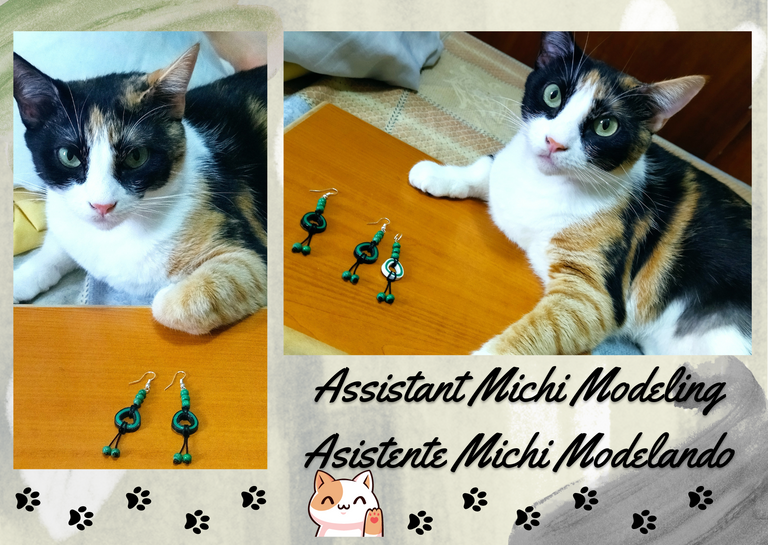
This way we already have some tendrils with a different and casual style, with a combination that I came up with a triangular pendant, decorated with Chinese thread and wooden beads, ready to use.
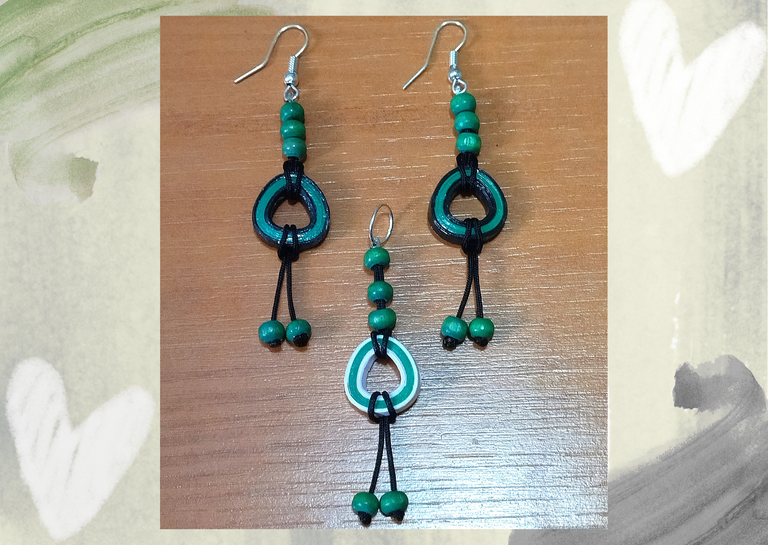
This pendant by its shape can be used for multiple things, it serves you with the intention that I made it today for a pair of earrings, to use it in a necklace by simply placing a ring, as a pendant for cell phone, purses and even to place it as a keychain, or if you make it much bigger it can be your main keychain. I made another one combining it with white to which I put a ring so you can see how it looks like.
• Adornemos la parte de arriba de la pieza, vamos a tomar otro trozo de hilo chino fino negro y vamos a entrelazar tal como lo hicimos en la parte de abajo, tomamos tres perlas de madera verdes y las metemos en el medio de los dos hilos.
• Ahora vamos a colocar un tapa nudos, trate de hacerlo lo más cercano a las perlas, lo colocamos y con la ayuda de un alicate punta fina cerramos, luego subí la primera perla para tapar el tapa nudos y que se vea lo más delicado posible.
• Por último vamos a colocar la base para zarcillos colgante (anzuelo).
De esta manera ya tenemos unos zarcillos con un estilo diferente y casual, con una combinación que se me ocurrió con un dije triangular, decorado con hilo chino y perlas de madera, listos para su uso.
Este dije por su forma lo puedes usar para múltiples cosas, te sirve con la intención que lo hice el día de hoy para un par de zarcillos, para usarlo en un collar simplemente colocándole una argolla, cómo colgante para celular, carteras y hasta para colocarlo como llavero, o si lo haces mucho más grande puede ser tu llavero principal. Realice otro combinando con blanco al cual le coloque una argolla para que vean como luce.


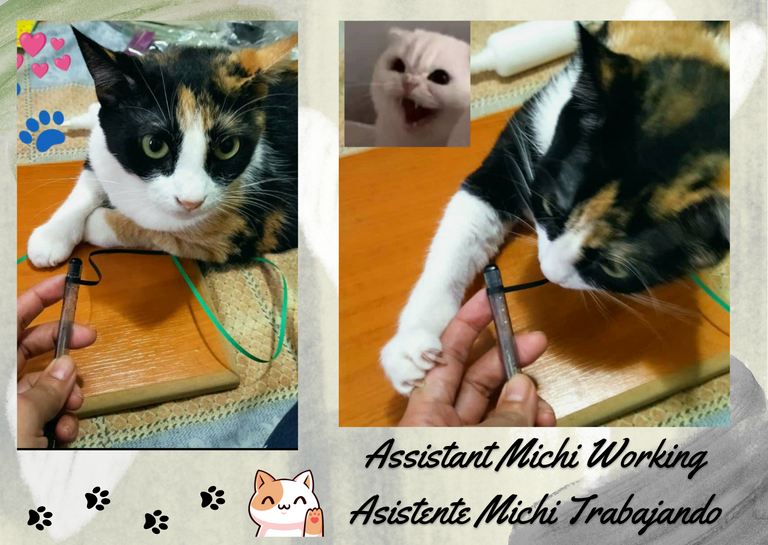
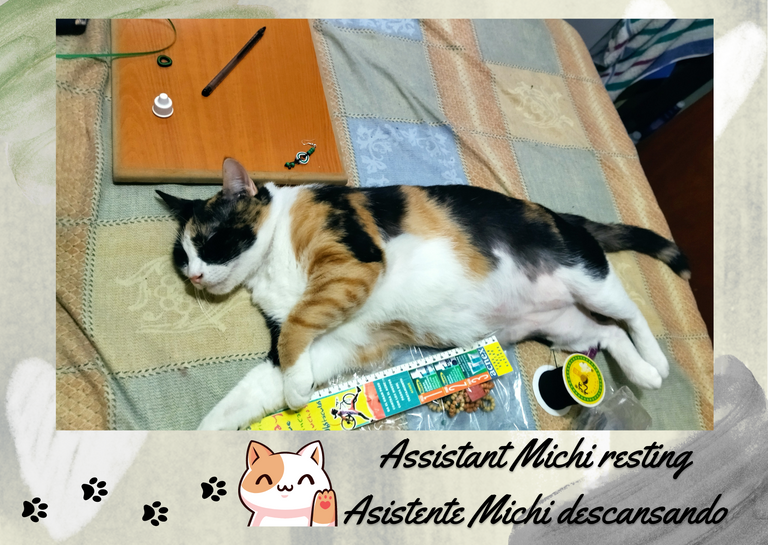
Here are some pictures of my great "Assistant Michi" in various activities hahahahahaha.🐱🐾
Por acá les dejo algunas fotos de mi gran “Asistente Michi” en diversas actividades jajajajaja.🐱🐾
What did you think, did you like it?
I hope you did, I hope you liked my explanation, procedure and photos, I made them with love for you.
"Let out that muse that inspires you, and let your imagination fly".
Thank you all, see you next time. 🐾🐱💕
¿Que les pareció, les gustó?
Espero que sí, que les haya gustado mi explicación, procedimiento y fotos, los hice con mucho cariño por y para ustedes.
"Deja salir esa musa que te inspira, y deja volar tu imaginación".
Gracias a todos, nos vemos en la próxima. 🐾🐱💕
Todas las fotos usadas en este post son de mi autoría y han sido sacadas en mi celular personal un Redmi 9T y editadas Canva Banner y separador hecho por mí en Canva Traducido con la ayuda de DeepL

The rewards earned on this comment will go directly to the people( @dayadam ) sharing the post on Twitter as long as they are registered with @poshtoken. Sign up at https://hiveposh.com.
Thanks @poshtoken ✨
Te quedaron preciosos amiga. Buen trabajo ☺️👍🏼. La combinación de colores es perfecta. Gracias por compartir.
🎆🎇🎉🎊🌧️💐✨🌾🌱🌹🌙🌿🍃🥀⚡🌺☘️🍀🌈🌷⭐🪴🌵🌸🌟💮🌴🌳💫☀️💮☔🌲🌳🌍🌌🌠☄️🏵️🐝🌻🌼🍄🐞🦋💙☕💜🍍🎆🎇🎉🎊
Gracias amiga bella @chacald.dcymt , Que bueno que te gusto. Gracia por pasar, y siempre con tus hermosos comentarios a mi trabajo. Un gran abrazo para ti. bendiciones y que tengas hermosa noche. ✨
Congratulations @dayadam! You have completed the following achievement on the Hive blockchain and have been rewarded with new badge(s):
Your next target is to reach 2500 replies.
You can view your badges on your board and compare yourself to others in the Ranking
If you no longer want to receive notifications, reply to this comment with the word
STOPCheck out the last post from @hivebuzz:
Support the HiveBuzz project. Vote for our proposal!
Thanks @hivebuzz ✨
You're welcome @dayadam. 🌹
BTW, we need your help!
May we ask you to support our proposal so our team can continue its work?
You can do it on Peakd, ecency,
https://peakd.com/me/proposals/199
Your support would be very helpful.
Thank you!
Querida @dayadam que hermosos zarcillos en quilling, siempre tus hermosos post con tanta dedicación 💕, fíjate que a simple vista al tener las piedras de madera pareciera que la pieza central también lo sea, que gran trabajo.
Ahora lo que podemos ver que para este gran trabajo siempre hay un buen asistente al lado como michi 😄, que bueno que te ayude, apreciamos tu hermoso tu tutorial, sigue creando con amor 👏👏
Holaaa @hive-189504 , muy apreciadas tus palabras, siempre tan linda manera de expresarte hacia mi trabajo. Mil gracias de verdad. Me alegra que te gustara. Para eso estamos para hacer, y mostrar trabajos con mucho amor y motivación, esa es la intensión.
Y con respecto a mi asistente es mi mejor acompañante, y muy colaboradora ella, jajajaja. 🐱🐾
Que siga los éxitos en la comunidad, me alegra ver como han crecido. Saludos.🌈
That's too creative 😊
Thank you very much for your comment. Regards @jane1289 💗
Excelente el diseño y la elaboración de estos Zarcillos, super lindos!! Gracias por compartir ❤️😁
Gracias cariño, me alegra que te gustaran. Saluditos, bonito día @andreaelina 💕
Nice one making ear rings
They are so beautiful 💕
But since they are made with paper, won't they spoil easily like when raining?
I'm so glad you liked them honey thank you.
Regarding your question they are handmade earrings made of paper, of course I put them artistic resin which is a liquid plastic, but in the same way you have to take care of them and prevent them from getting wet, if they are exposed to water for a long time they can be damaged, that's for sure. I specify to my clients that they must take care and not to wet the pieces, although if it only rains, and you have them on, they will not be damaged at the moment. They are for showing off, then taking them off and putting them away. I have pieces made for years and they are still intact.
I hope habe @graciousvic ✨
Oh that's a nice one letting your clients know
Me encanta la ayuda que recibió de su mascota y, al final, ambos hicieron algo grandioso.
Jjajajaja Que lindo. Así es, muy colaboradora mi asistente michi, siempre logramos cosas geniales 🐱🐾. Gracias por pasar, y por tu bonito comentario, también me encanta tu trabajo. Saludos @apunawu
Muy lindos zarcillos y excelente paso a paso
Muchas gracias bella miga @mllg . Me alegra mucho que te gustara. Un gran abrazo. Bonita noche. ✨
Sí, te quedaron lindos.
♥♥♥
Muy genial tu creación, ese color verde me llama mucho la atención.
@tipu curate 2
Upvoted 👌 (Mana: 35/55) Liquid rewards.
Muchísimas gracias amigo @yonnathang, me gratifica mucho tu comentario. Me alegra que te gustara mi trabajo. Entre cintas de muchos colores que tengo, esta combinación me pareció genial, aparte que me gusta mucho el verde. Mil gracias por pasar y por el apoyo. Que tengas bonita noche. ✨
Qué espectaacular manualidad!
Excelente; felicitaciones
Mil gracias por pasar y por tu bonito comentario. Me alegro mucho que te gustara. Que tengas bella noche @emiliorios 💕
Post votado por la Curación de la Comunidad de Mundo Virtual. Recibes algunos Huesos
Te invitamos a que conozcas nuestra Comunidad de Hive