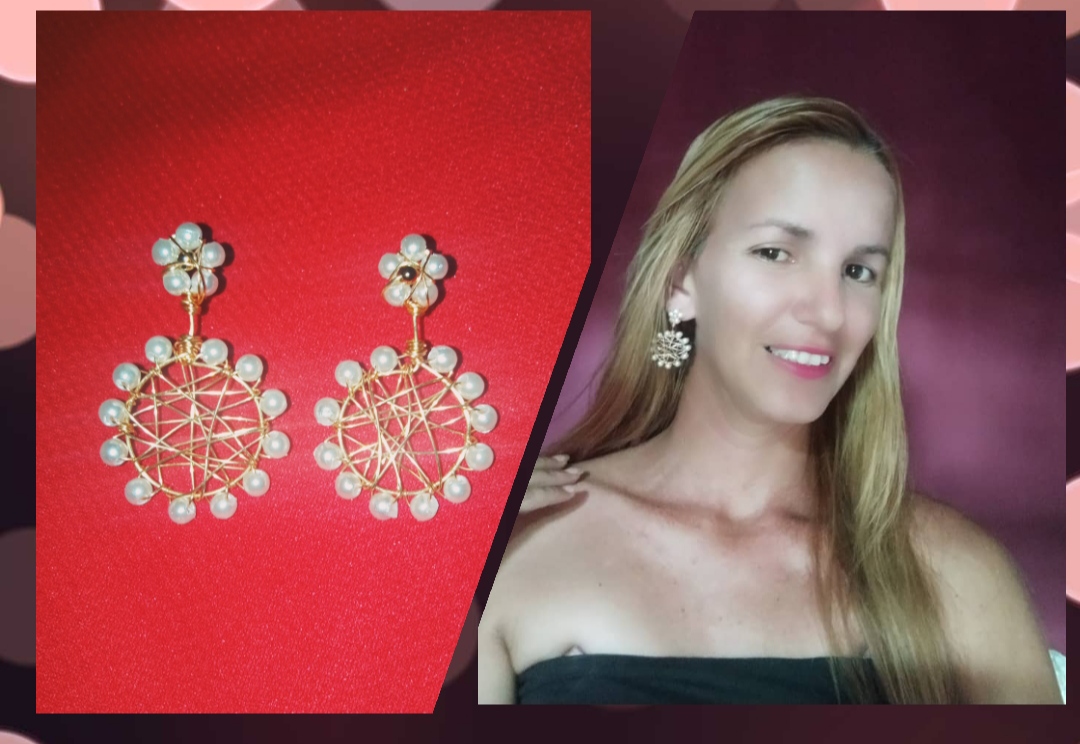
Saludos queridos amigos miembros de esta hermosa y creativa comunidad, es para mí un placer y un gran gusto el poder saludarlos el día de hoy y compartir con ustedes una vez más, el día de hoy les traigo unos hermosos zarcillos elaborados con la técnica de Alambrismo y decorados con her osas piedras perladas. Este diseño está elaborado para combinar con cualquier vestimenta, son unos zarcillos largos, elegantes y delicados, que te harán lucir increíble en cualquier ocasión.
Greetings dear friends, members of this beautiful and creative community, it is a pleasure and a great pleasure for me to be able to greet you today and share with you once again, today I bring you some beautiful earrings made with the Wire technique and decorated with beautiful pearl stones.
This design is made to combine with any outfit, they are long, elegant and delicate earrings that will make you look amazing on any occasion.
Les confieso que a pesar que me encanta el Alambrismo y tengo tiempo realizandolo, en esta comunida he tenido la oportunidad de aprender algunos truquitos y técnicas que me han echo mejorar mucho mis creaciones.
Acá les comparto un muy sencillo tutorial dónde paso a paso podrán observar lo sencillo y fácil que es crear estos bellos acsesorios.
I confess that despite the fact that I love Wire Rope and I have been doing it for some time, in this community I have had the opportunity to learn some tricks and techniques that have made me greatly improve my creations.
Here I share a very simple tutorial where step by step you can see how simple and easy it is to create these beautiful accessories.
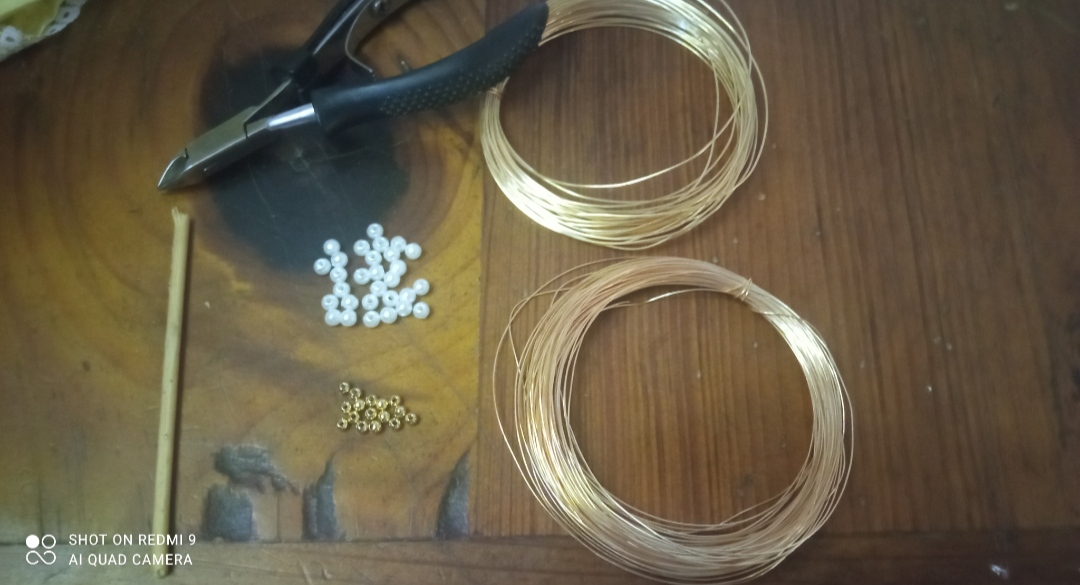
✴️ Que Materiales Necesitas:
- Alambre de bisutería calibre 22.
- Alambre de bisutería calibre 26.
- piedras perladas.
- Pichitas doradas.
- pinza de bisutería.
✴️ What Materials Do You Need:
- 22 gauge jewelry wire.
- 26 gauge jewelry wire.
- pearl stones.
- Golden spikes.
- jewelery clamp.
😊 paso a paso
😊 Step by step
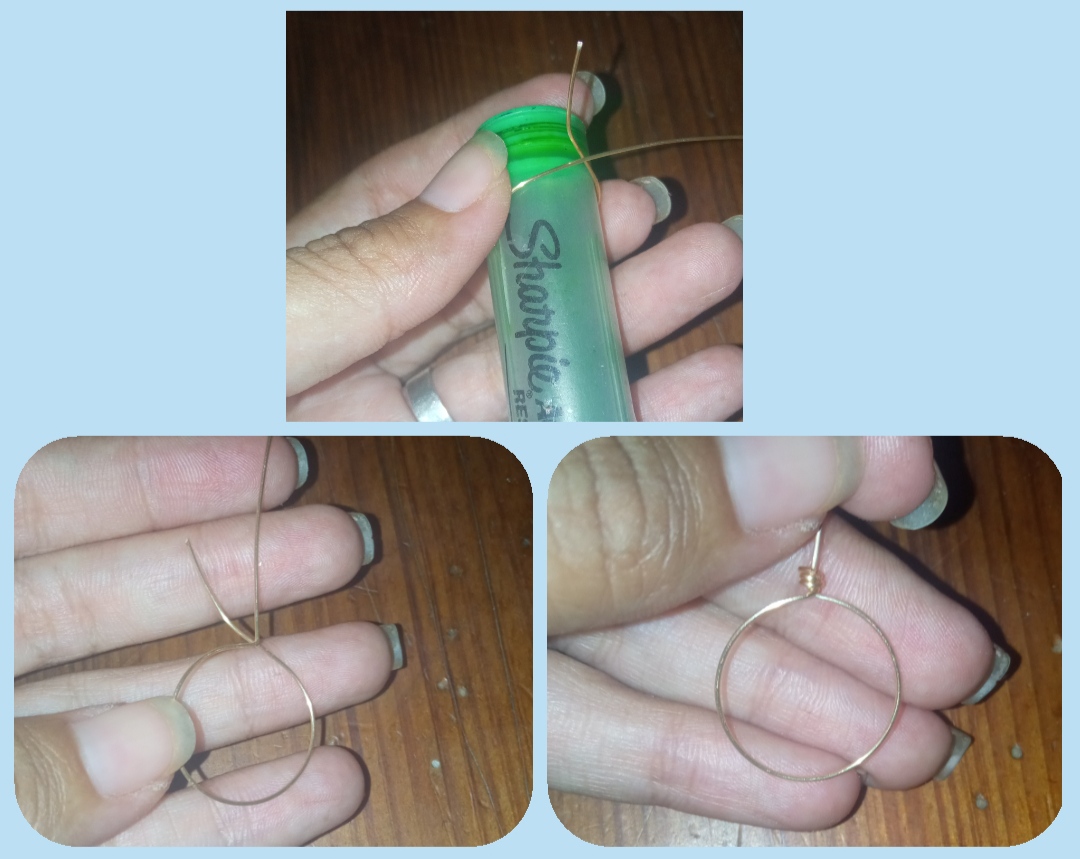
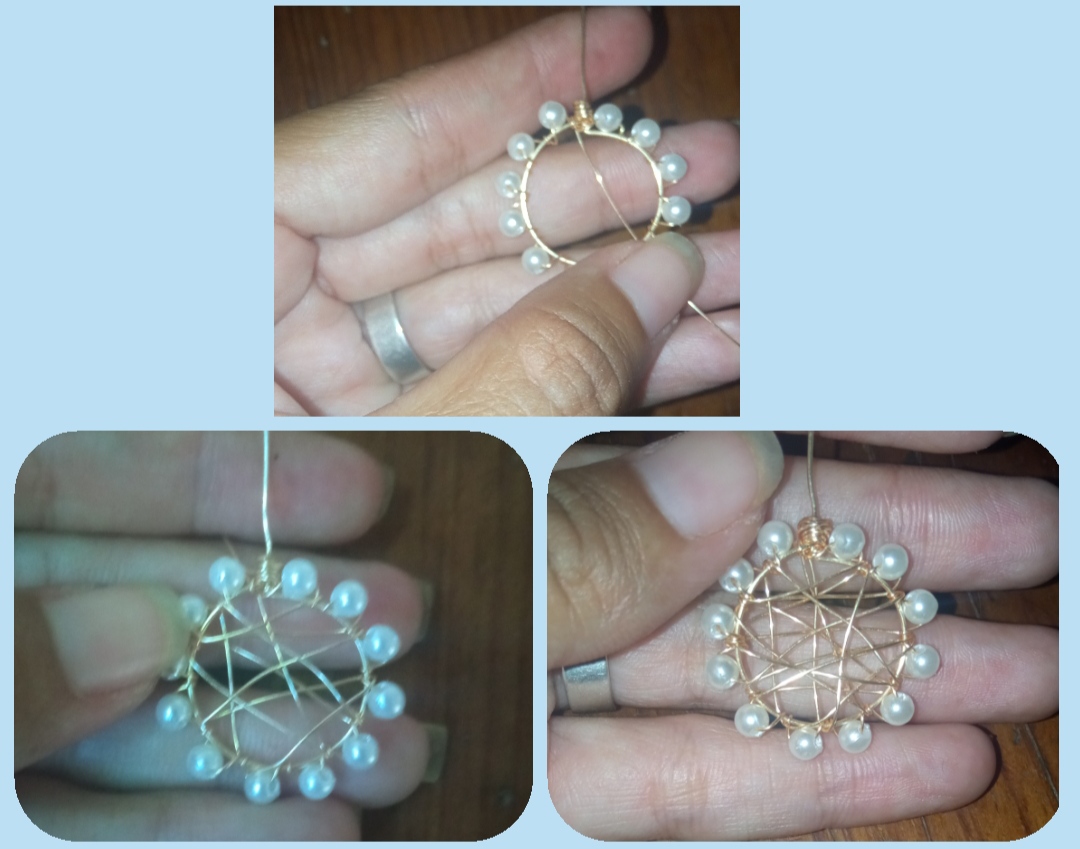
⭐ Paso 1: Para iniciar nuestra creación del día de hoy cortaremos un pedazo de alambre calibre 22 de 10 cm aproximadamente, tomaremos el alambre y con ayuda de un marcador, tubo u objeto circular realizaremos un circulo no muy grande, el cual sostendremos la forma realizando un amarre en la parte superior y cortando el exceso de un lado y dejando el otro largo.
⭐ Step 1: To start our creation for today we will cut a piece of 22 gauge wire of approximately 10 cm, we will take the wire and with the help of a marker, tube or circular object we will make a not very large circle, which we will hold the shape making a tie at the top and cutting the excess on one side and leaving the other long.
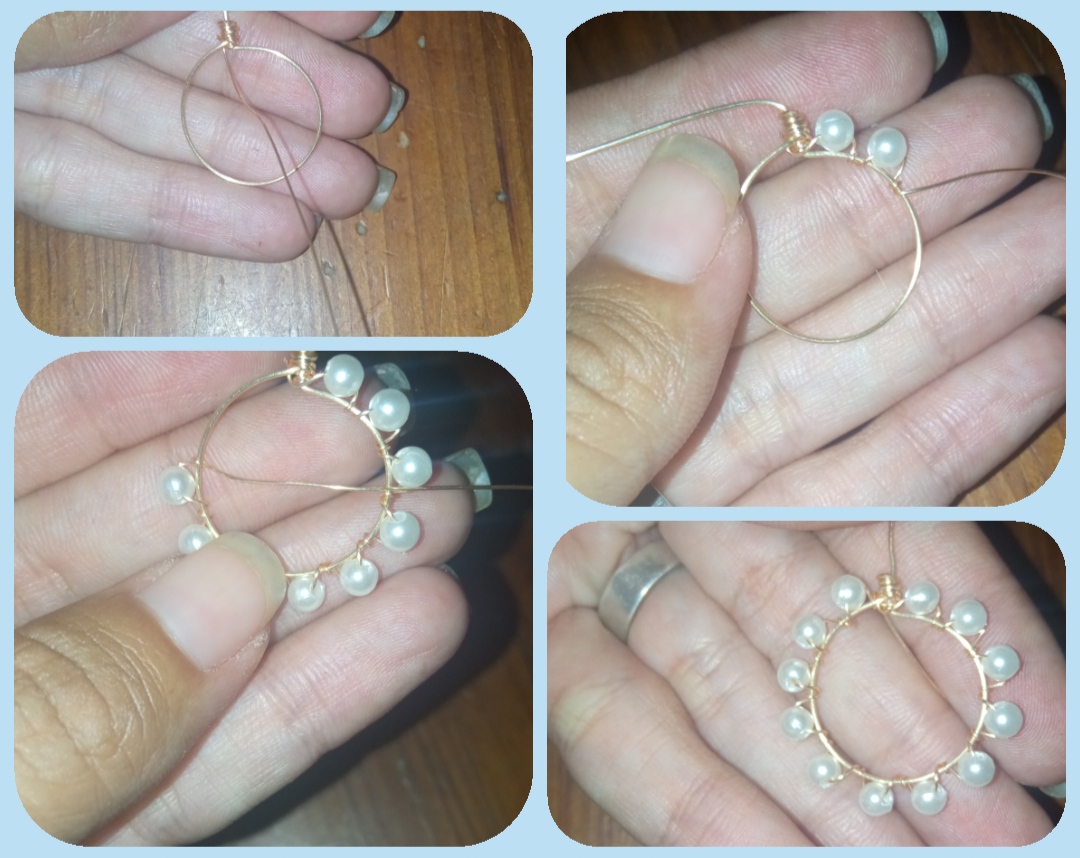
⭐ Paso 2: ahora tomaremos el alambre calibre 26 y cortaremos un pedazo largo de aproximadamente 20 cm y lo enrrollamos en el empate de nuestro círculo, Seguidamente Introducimos una piedra perlada y la llevamos hasta la base y realizamos un amarre de nuestro hilo delgado en el círculo, luego Introducimos otra perlita u volvemos a realizar una vuelta en la base.
Este procedimiento lo seguímos repitiendo hasta cubrir la totalidad de nuestro círculo, al llegar al punto de partida realizamos varias vueltas para evitar se desaga la forma.
⭐ Step 2: now we will take the 26-gauge wire and cut a long piece of approximately 20 cm and wrap it around the tie of our circle, then insert a pearl stone and take it to the base and tie our thin thread on it. circle, then we introduce another pearl and we return to make a turn at the base.
We keep repeating this procedure until we cover the entirety of our circle, when we reach the starting point we make several laps to avoid the shape being unraveled.
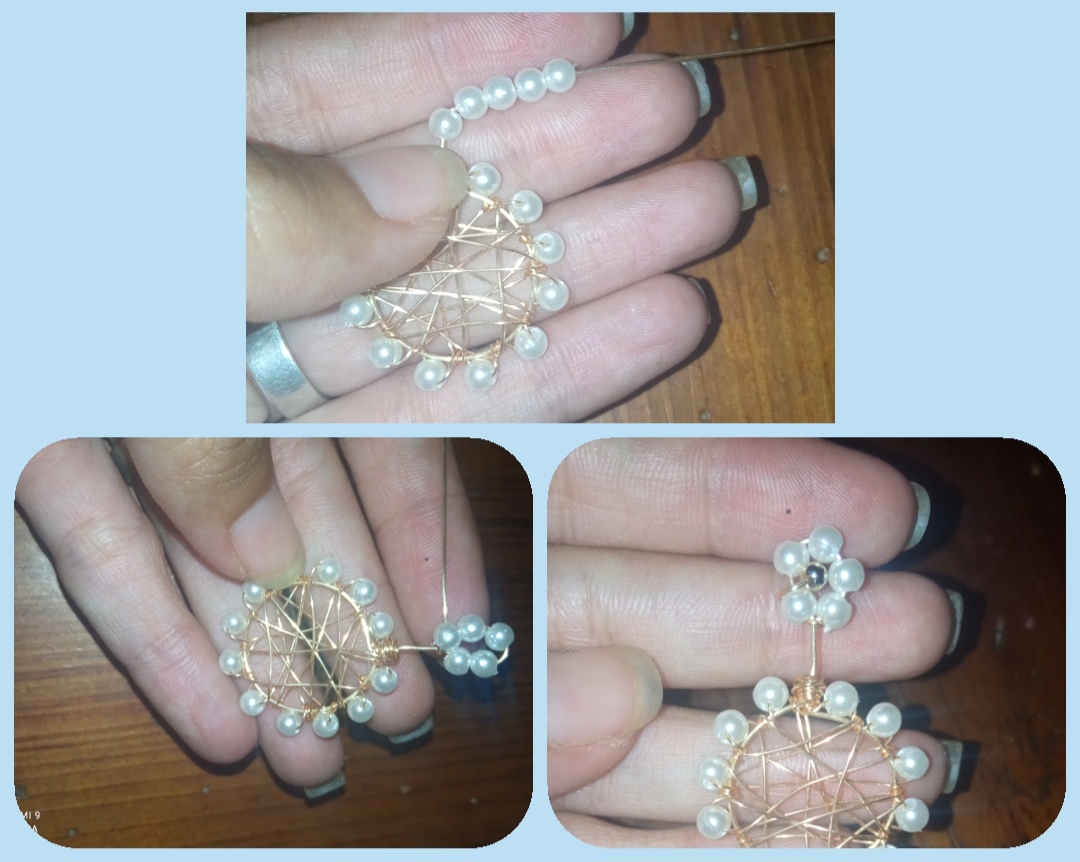
⭐ Paso 3: después con el mismo alambre delgado calibre 26 realizamos un tejido cruzado en la forma circular de un lado a otro yo digo tipo tela de araña.
⭐ Step 3: Then, with the same thin 26-gauge wire, we cross-weave in a circular way from one side to the other, I say spider web type.
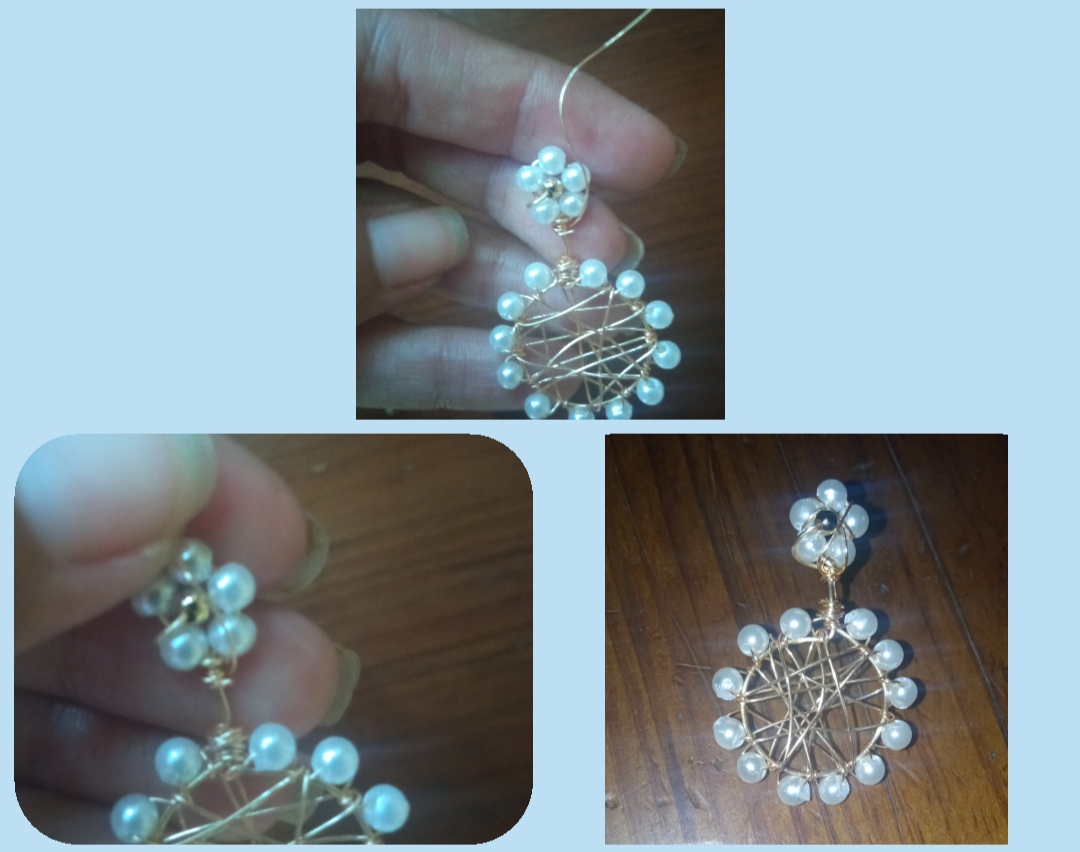
⭐ Paso 4: para continuar trabajaremos con el alambre de la base que nos quedó en la parte superior del círculo, por este Introducimos 5 piedras blancas perladas y moldeamos el alambre hacia abajo realizando un pequeño círculo de piedritas blancas con la que formaremos una flor.
Luego de realizar el círculo Introducimos una piedra dorada que llevaremos al centro de este pequeño círculo y el exceso del alambre lo hacia atrás para que nos curva como clavito o sujetador del zarcillo
⭐ Step 4: to continue we will work with the base wire that was left at the top of the circle, for this we introduce 5 pearly white stones and shape the wire downwards making a small circle of white stones with which we will form a flower.
After making the circle, we introduce a golden stone that we will take to the center of this small circle and the excess of the wire to the back so that it curves us as a nail or earring holder.
⭐ Paso 5: para culminar y darle un toque especial con un pedacito del alambre calibre 26 lo cruzaremos encima de la flor, en las separaciones de los pétalos y listo.
⭐ Step 5: to finish and give it a special touch with a piece of 26 gauge wire we will cross it over the flower, in the separations of the petals and that's it.
⭐ Lindos Zarcillos de Piedras perladas ⭐
⭐ Beautiful Pearl Stone Tendrils ⭐
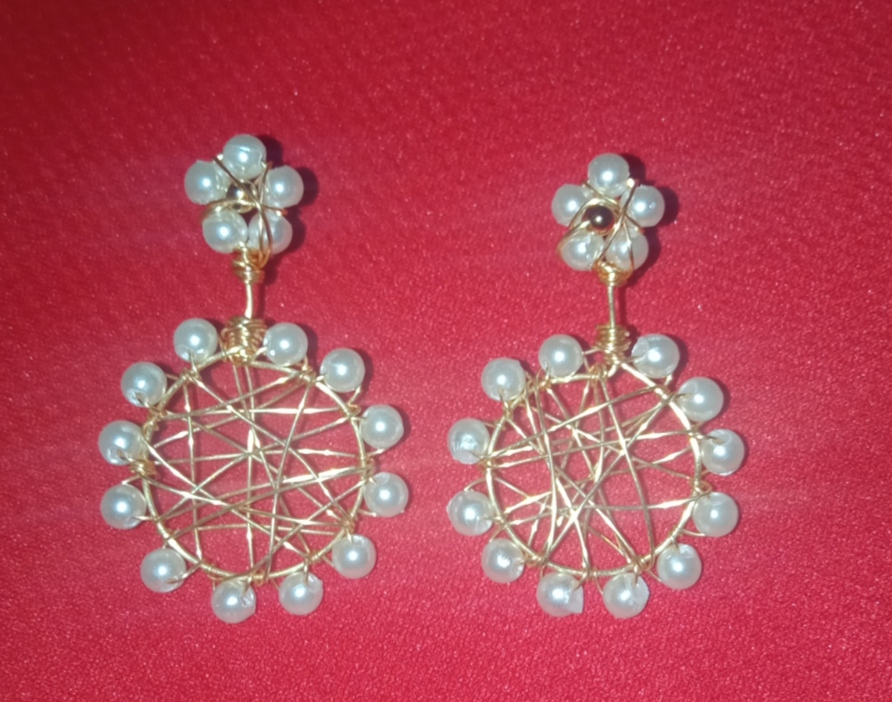
Y así de fácil, rápido y muy sencillo elaboraremos unos hermosos zarcillos largos,bellos y de gran elegancia, ustedes pueden amoldar está idea a su gusto, cambiarles el color de las piedras, o realizarlos más grandes o más pequeños según sea su gusto.
Utilizar dos calibres de alambre de bisutería es lo ideal ya que el de mayor fuerza y grosor nos servirá de base y el más delgado y fácil de moldear será para tejer y sujetar las piedras.
And that easy, fast and very simple we will make beautiful long earrings, beautiful and very elegant, you can mold this idea to your liking, change the color of the stones, or make them larger or smaller according to your taste.
Using two gauges of jewelry wire is ideal since the one with the greatest strength and thickness will serve as the base and the thinnest and easiest to shape will be for weaving and holding the stones.
Queridos Amigos espero que el diseño que les comparto el día de hoy les sea de su total agrado y este sencillo tutorial les sea de utilidad y provecho.
Les agradezco por acompañarme una vez más, y les estaré muy agradecida de su apoyo, comentario y sugerencias.
Saludos y bendiciones para ustedes.
Dear Friends, I hope that the design that I share with you today is to your liking and that this simple tutorial is useful and profitable.
I thank you for joining me once again, and I will be very grateful for your support, comments and suggestions.
Greetings and blessings to you.
las fotos fueron tomadas con mi teléfono Redmi 9, contenido exclusivo para Hive. Y la traducción fue realizada a través de Google.
photos were taken with my Redmi 9 phone, exclusive content for Hive. And the translation was done through Google.
Veo tus tutoriales con la técnica de alambrismo y me emociono 🥰 espero en algún momento incursionar en ella, tus pendientes quedaron muy hermosos las perlas le dan un toque espectacular 💎💎💎 bueno que te digo... soy fan de los accesorios con perlas, un fuerte abrazo y felicitaciones por tu aretes. @emmaris
Gracias amiga, me alegra mucho que sean de tu gusto, Saludos.
Bellos amoga @emmaris esos zarcilllos de perlas te han quedado divinos, me gustaron mucho, muy buena tu tecnica❤️
Gracias amiga.
Hola @emmaris me encantan esos proyectos con la técnica del alambrismo, creo que me voy animar porque quedan hermosos, esos zarcillos se ven muy delicados, me gustaron muchísimo ademas se te ven muy bonitos. Gracias por compartir. saludos
Animate amiga de seguro te realizaras hermosas creaciones.
Me alegra q te hayan gustado.
Hola, feliz noche, que hermosos pendientes muy bonito esta técnica es mi preferida y la verdad esos pendientes se te ven muy bonitos 😍💘😍😍😘😘🤩😉😉😉😉
Me alegra q sean de tu agrado, gracias por su comentario. Saludos.
Te quedaron preciosos amiga @emmaris me encanta la forma que les diste y el pin con las perlas, realmente muy preciosos, que gran trabajo has realizado amiga.
Gracias amiga creo que he aprendido a mejorar la técnica observando los trabajos hermosos que presentan en la comunidad.