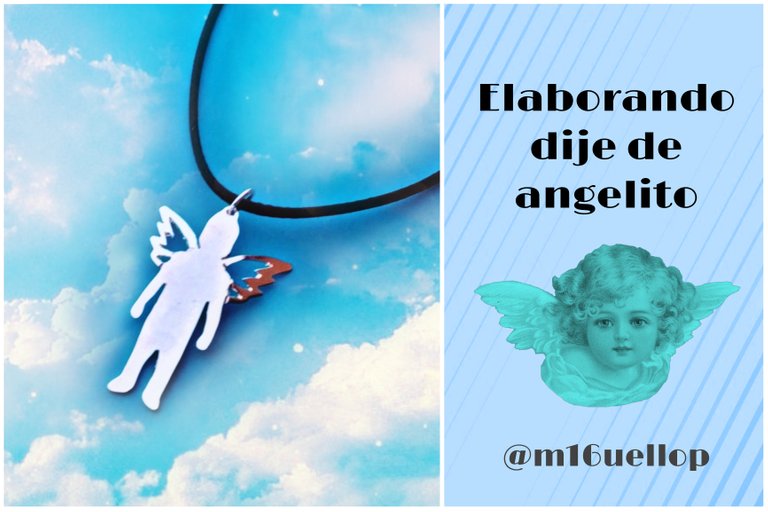
Saludos amigos de la comunidad de Jewelry, hoy quiero compartir parte del proceso de como realice este dije de angelito, que me pidieron y le tome fotos de cada etapa.
Este angelito lo hice la primera vez hace 3 años y no la había vuelto a sacar, hasta que la señora del pedido lo vio en mi Instagram y se enamoró, el problema es que no sabía donde tenía el diseño y me toco redibujar en la computadora con la aplicación Inkscape, que les recomiendo y de la cual ya había hecho un paso a paso para crear una pieza de joyería para calar en lámina (abajo está el enlace).
Estos son los materiales y herramientas usé:
🔹 Impresión o dibujo de la pieza
🔹 Lámina de cobre de 0.5 mm de espesor, es lo que utilice, también se puede utilizar bronce, plata o alpaca; sobre el espesor lo pueden variar de 0.5mm a 1 mm.
🔹 Argolla de cobre. El hilo de aproximado de 0.7 mm de espesor.
🔹 Lijas 3M número de grano 240, 360 y 400.
🔹 Dremel con eje flexible, el Dremel es necesario para abrir los huecos y en mi caso para lijar y pulir.
🔹 Mecha o broca para abrir hueco, yo usé de 0.75 mm.
🔹 Mopa de algodón para pulir.
🔹 Cera para pulir metales, yo empleé una verde que suele venir con el Dremel.
🔹 Arco de segueta para joyería.
🔹 Pelos de segueta número 0/3.
🔹 Pega en barra o pega blanca.
🔹 Portalijas.
🔹 Astillero de madera para joyería o tabla con abertura de v, para poder trabajar con la lámina y el corte con la segueta.
🔹 Pinzas de Joyería redonda y plana.
PASO 1
Impreso el diseño con la figura de 3 cm de alto, la pegué sobre la lámina de bronce de 0,5 mm, con pega de barra; que para mí es la que mejor funciona para adherir el diseño al metal, aunque también si gustas puedes utilizar pega blanca, dejando secar el pegamento unos segundo antes de pegar el diseño en papel.
PASO 2
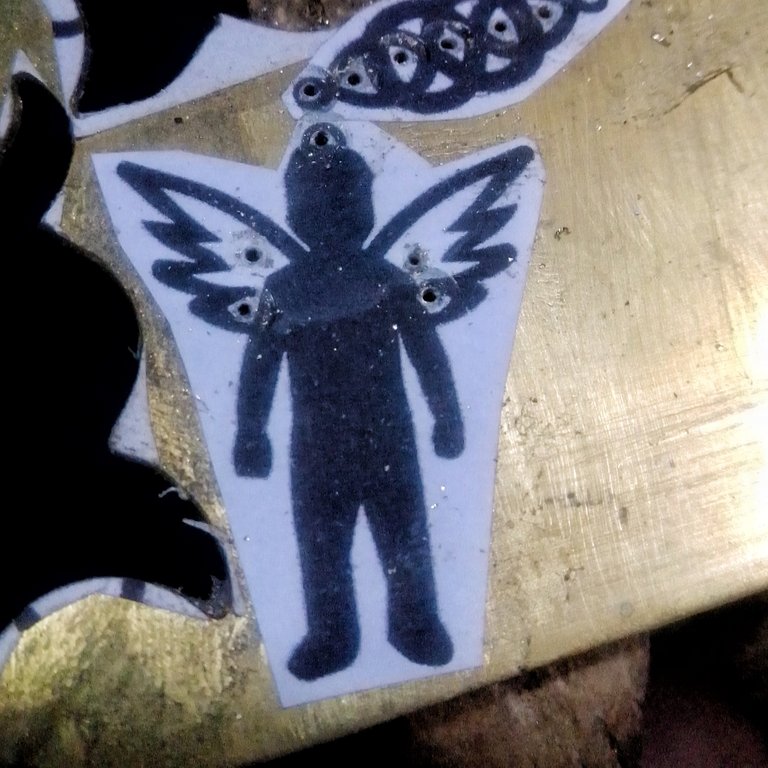
Con la Mecha o broca de abrir huecos de 0.75 mm, se hacen las perforaciones de los espacios internos de la figura que van a ser cortados.
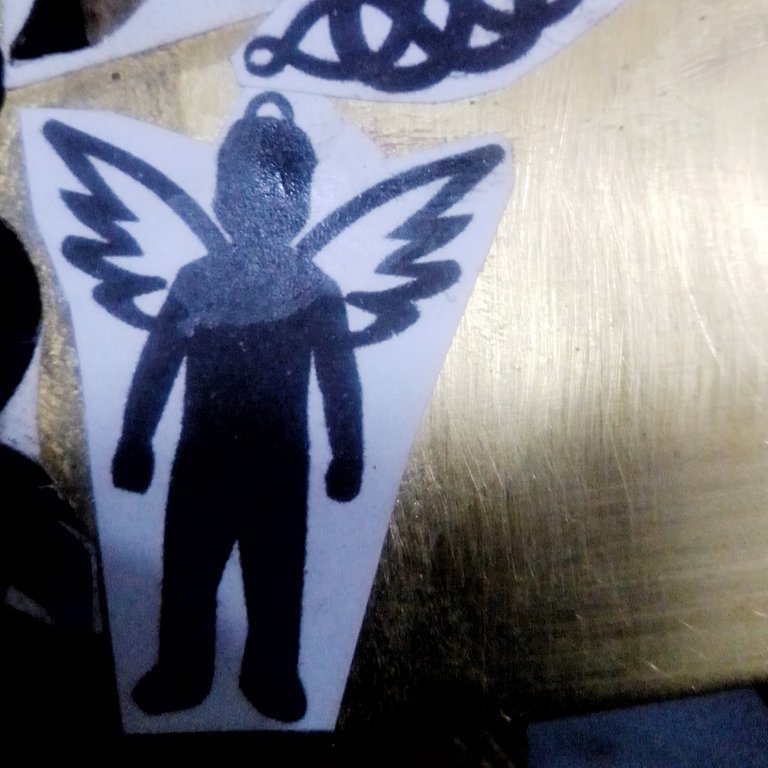
PASO 3

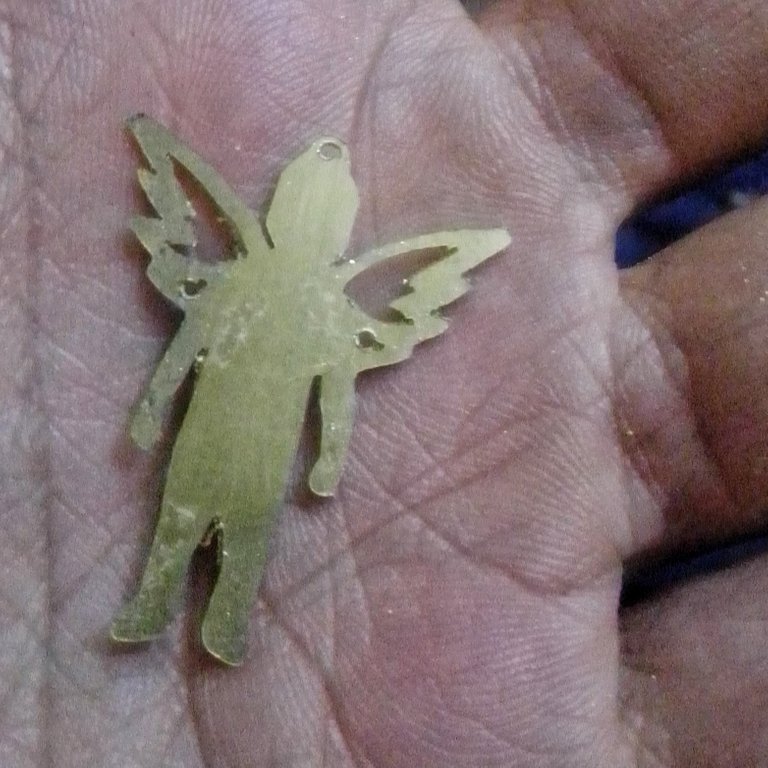
El corte interno fue con el arco de segueta para joyería, en los huecos se insertó la sierra y se hicieron los cortes, quedando como se ve en la imagen de arriba.
PASO 4
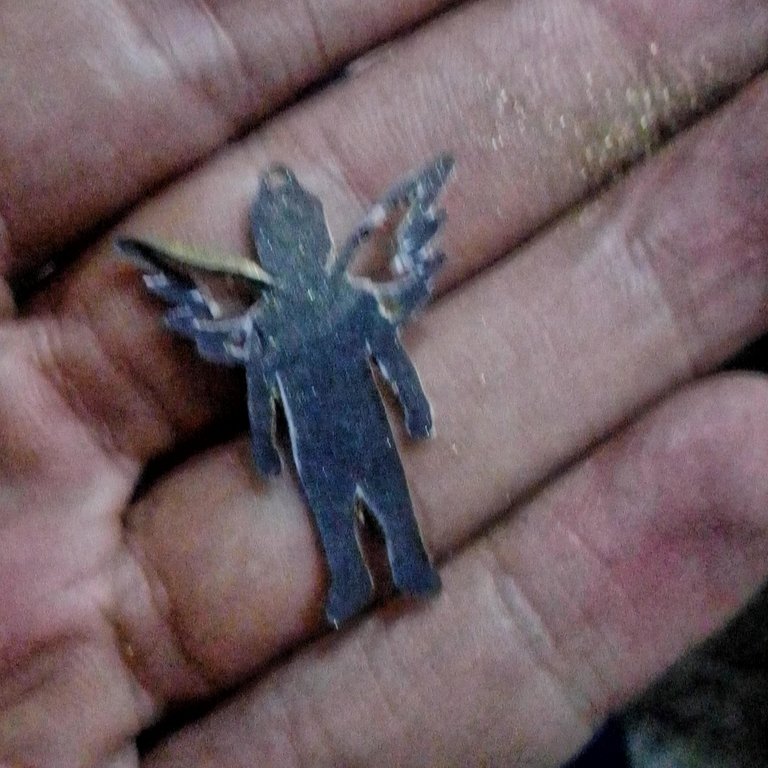
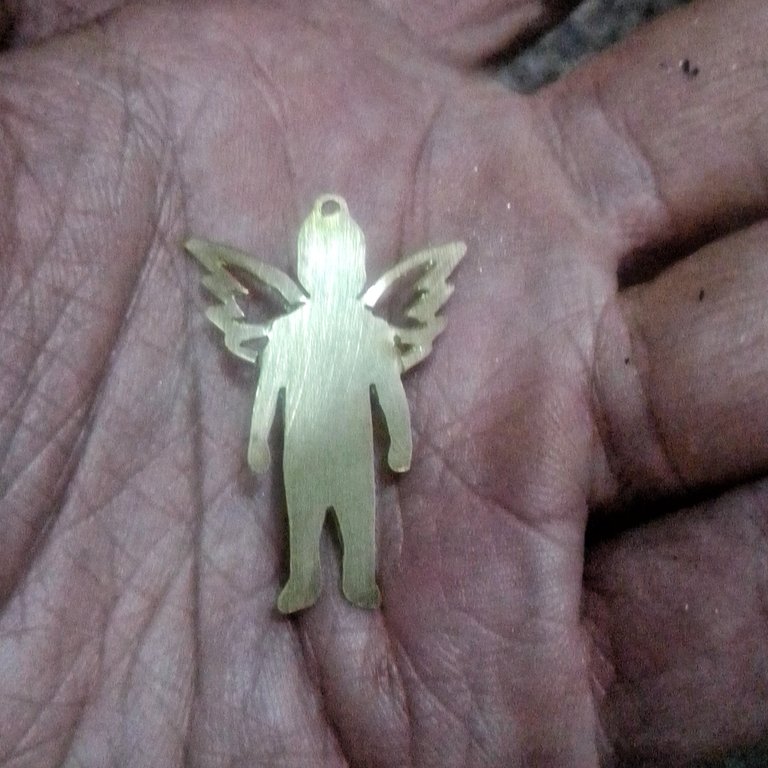
Después de hacer los cortes internos se corta la silueta exterior del ángel, con mucho cuidado.
PASO 5
Para quitar el papel, puedes sumergir la pieza en agua y después cuando se ablande el papel por mojarse quitárselo, así es como yo lo hago. Una vez que no hay papel, con la segueta, se va corrigiendo los detalles internos y externos con la segueta.
PASO 6
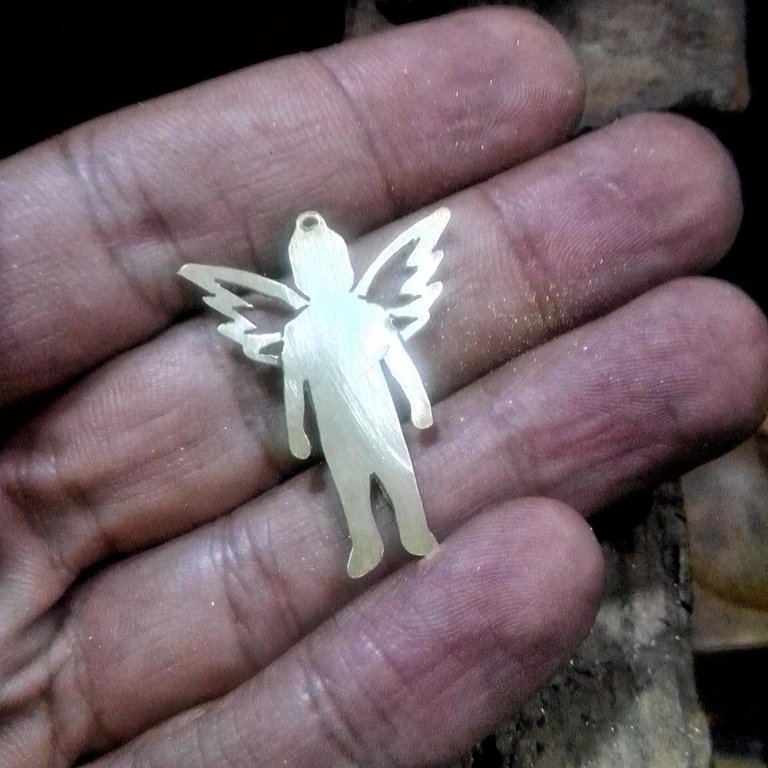
Al estar conforme con la silueta y los detalles internos, se procede a lijar con las lijas 3M de número de grano 240, 360 y 400. Yo con la pinza plana y con ayuda de los dedos doble las alas para darle volumen y así la pieza verse más interesante.
PASO 7
Después con el Dremel o también el motor de banco, se procede a pulir usando la cera para pulir metales, hasta tener un buen brillo, al terminar este proceso conforme, Mande a bañar la pieza en plata.
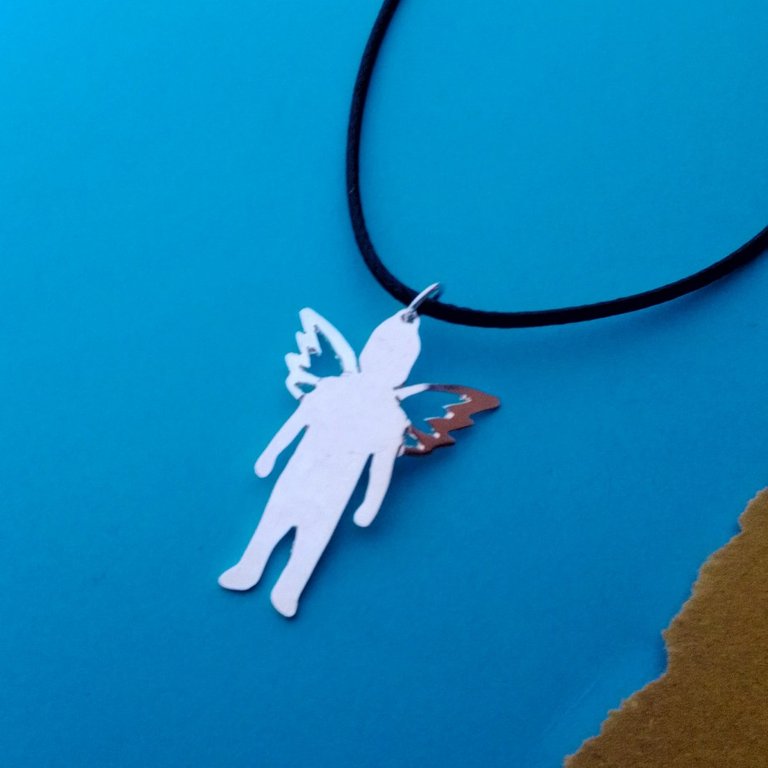
Este es el resultado final de la pieza ya terminada... Espero les haya gustado como quedó...
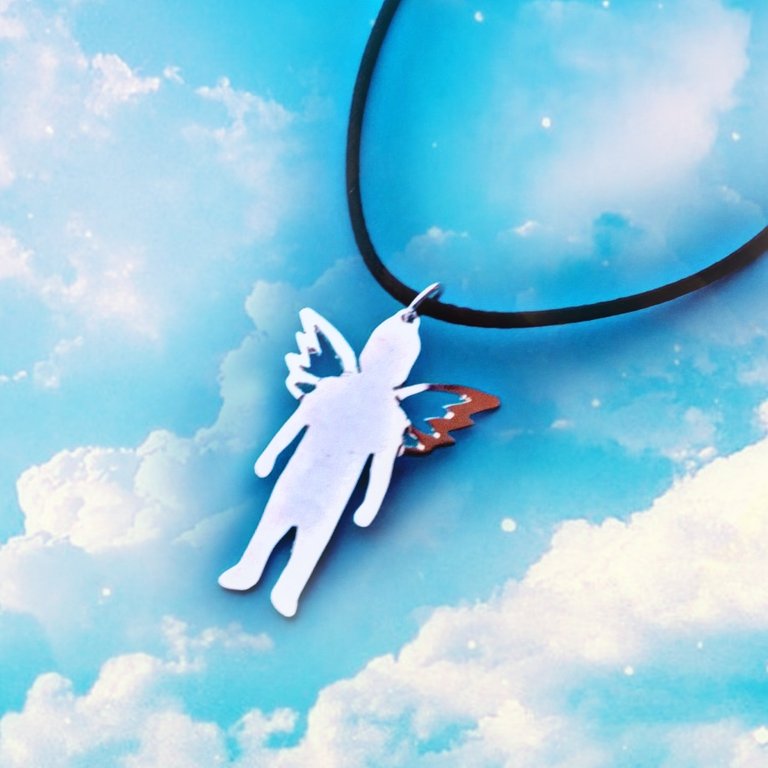
Así edité la foto en Picsart para publicar en mi instagram/m16ueljoyas
Gracias por valorar mi publicación...
ENGLISH
Greetings friends from the Jewelry community, today I want to share part of the process of how I made this little angel pendant, which they asked me for, and I took photos of each stage.
I made this little angel for the first time 3 years ago and I hadn't taken it out again, until the lady who ordered it saw it on my Instagram and fell in love, the problem is that I didn't know where I had the design and I had to redraw it on the computer with the Inkscape application, which I recommend and of which I had already done a step by step to create a piece of jewelry to pierce in sheet (below is the link).
These are the materials and tools I used:
🔹 Printing or drawing of the part
🔹 0.5 mm thick copper sheet, whatever you use, you can also use bronze, silver or nickel silver; About the thickness they can vary from 0.5mm to 1mm.
🔹 Copper ring. The thread of approximately 0.7 mm thick.
🔹 Sandpaper 3 M grain number 240, 360 and 400.
🔹 Dremel with a flexible shaft, the Dremel is necessary to open the holes and in my case to sand and polish.
🔹 Wick or drill to open hole, I used 0.75 mm.
🔹 Cotton mop to polish.
🔹 Wax to polish metals, I used a green one that usually comes with the Dremel.
🔹 Segueta bow for jewelry.
🔹 Hacksaw hairs number 0/3.
🔹 Paste in bar or white paste.
🔹 Lid holder.
🔹 Wooden shipyard for jewelry or table with v opening, to be able to work with the sheet and cut with the hacksaw.
🔹 Round and flat jewelry tweezers.
STEP 1
Printed the design with the 3 cm high figure, I glued it on the 0.5 mm bronze sheet, with stick glue; which for me is the one that works best to adhere the design to the metal, although if you like you can also use white glue, letting the glue dry for a few seconds before sticking the design on paper.
STEP 2
With the 0.75 mm bit or drill to open holes, the holes of the internal spaces of the figure that are going to be cut are made.
STEP 3
The internal cut was made with the hacksaw bow for jewelry, the saw was inserted into the holes and the cuts were made, remaining as seen in the image above.
STEP 4
After making the internal cuts, the outer silhouette of the angel is cut very carefully.
STEP 5
To remove the paper, you can submerge the piece in water and then when the paper softens from getting wet take it off, this is how I do it. Once there is no paper, with the saw, the internal and external details are corrected with the saw.
STEP 6
Being satisfied with the silhouette and the internal details, we proceed to sand with the 3M sandpaper with a grit number of 240, 360 and 400. With the flat pliers and with the help of my fingers I bend the wings to give it volume and thus the piece look more interesting.
STEP 7
Then with the Dremel or also the bench motor, we proceed to polish using the metal polishing wax, until it has a good shine, at the end of this process, order the piece to be bathed in silver.
This is the final result of the finished piece... I hope you liked how it turned out...
So I edited the photo on Picsart to post on my instagram/m16ueljoyas
Thank you for appreciating my publication...
The rewards earned on this comment will go directly to the people( @m16uellop ) sharing the post on Twitter as long as they are registered with @poshtoken. Sign up at https://hiveposh.com.
Bellísimo amigo @m16uellop . Felicidades. Dios bendiga ese don que tienes. Éxitos.
Gracias amiga
¡Qué bello! Me encanta este ángel. El proceso para elaborarlos amerita de precisión en el corte. Lo haces muy bien. 👏
Gracias son años de experiencia
Seguro. Para hacer estos trabajos es necesaria. Lo haces muy bien.
Un hermoso ángel amigo @m16uellop, que bonito y delicado queda con su baño, un collar especial sin duda alguna, gracias por traerlo a la comunidad.
Gracias por allí vienen otras cosas y mejor explicadas
Está demasiado bellísimo, @m16uellop realmente tu trabajo y tú explicación son impecables, realmente hermoso este dije! Gracias por compartirlo con nosotros 🤗
Gracias amiga ☺️
Hola @m16uellop, te ha quedado genial,muy lindo me gustó mucho, Felicidades..
Gracias amiga 😊
Me encantó el dije, la explicación y las fotos, que talento tienes vale. Saludos!
Vale gracias, aunque gran parte es la experiencia tengo más de 15 años en esto