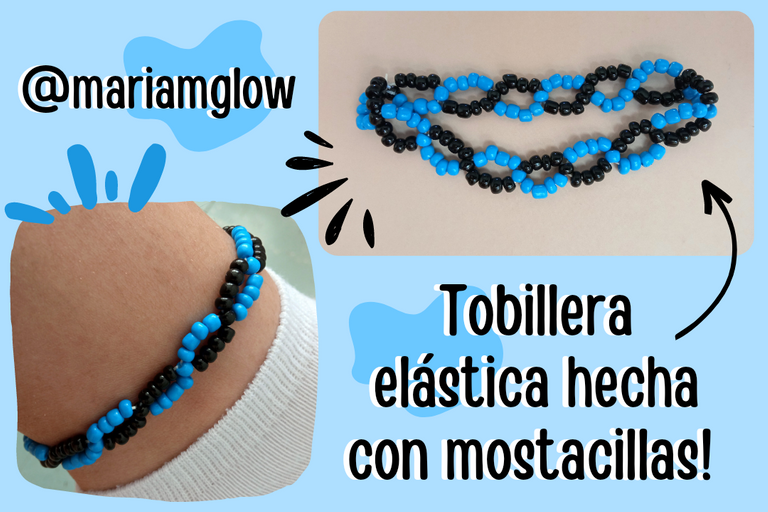
Holaaaaa chicosss!! Espero que estén pasando un lindo miércoles ✨. Yo por acá estoy muy contenta de volver a compartir con ustedes otro paso a paso, esta vez realicé una tobillera, no había hecho una pero vi esta técnica con hilo de nylon elástico y pedrería y me gustó mucho, al principio quería elaborar un collar pero luego se me ocurrió esta idea. Es muy fácil de hacer, al principio lo miras como medio complicado pero después ya se te hace más sencillo. Yo tenía estas mostacillas azules y negras así que decidí combinarlas. Ojalá que les guste mucho este post chicosss. A continuación les indicaré los materiales y cómo la hice:
Helloooooo guysssss!!! I hope you are having a nice Wednesday ✨. I am very happy to share with you another step by step, this time I made an anklet, I had not made one but I saw this technique with elastic nylon thread and rhinestones and I really liked it, at first I wanted to make a necklace but then I came up with this idea. It is very easy to make, at first you look at it as a little complicated but then it becomes easier. I had these blue and black beads so I decided to combine them. I hope you guys like this post a lot. Next I will tell you the materials and how I made it:
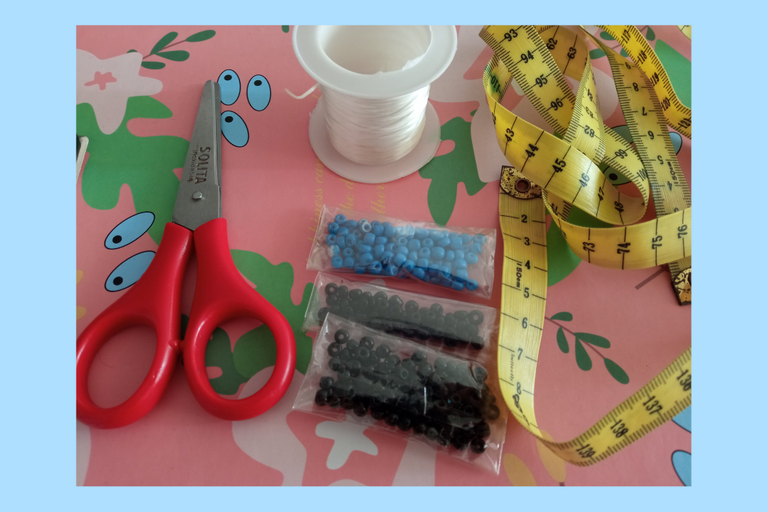
📌 Materiales:
- Hilo de nylon elástico.
- Mostacillas, colores: azul y negro.
- Cinta métrica.
- Tijera.
📌 Materials:
- Elastic nylon thread.
- Beads, colors: blue and black.
- Tape measure.
- Scissors.
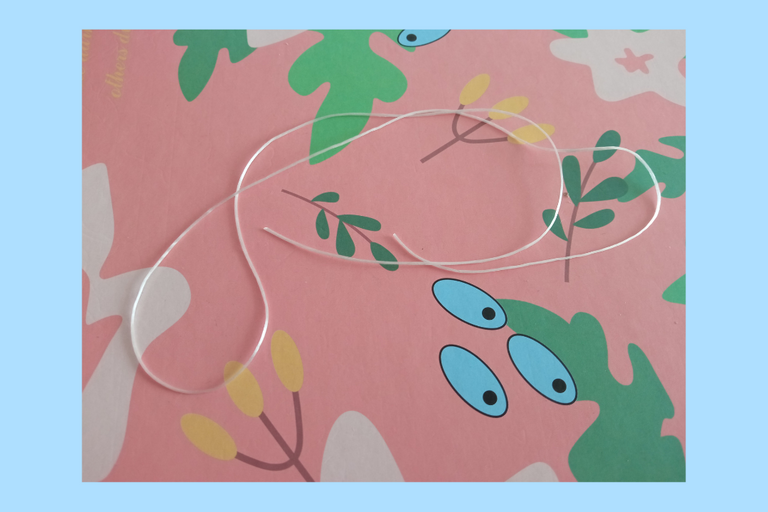
Primero, medimos y cortamos un trozo de hilo de nylon de 90 centímetros aproximadamente.
First, we measure and cut a piece of nylon thread of approximately 90 centimeters.
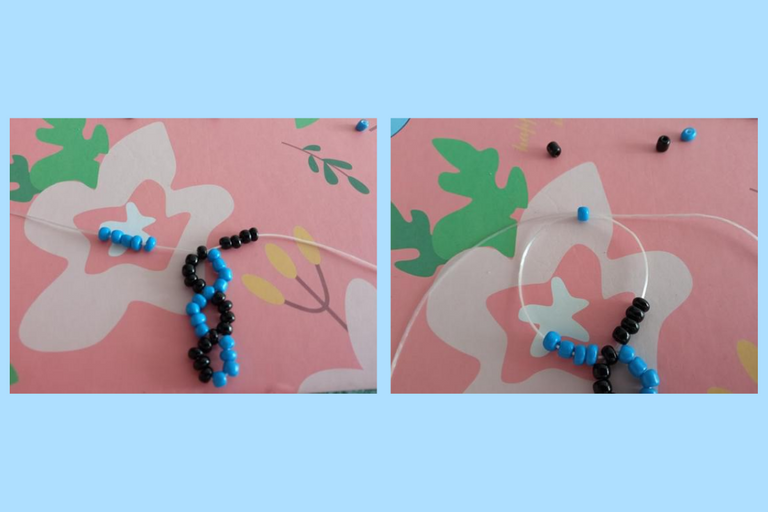
Colocamos cinco mostacillas negras en el lado izquierdo y cuatro mostacillas azules en el lado derecho.
We place five black beads on the left side and four blue beads on the right side.
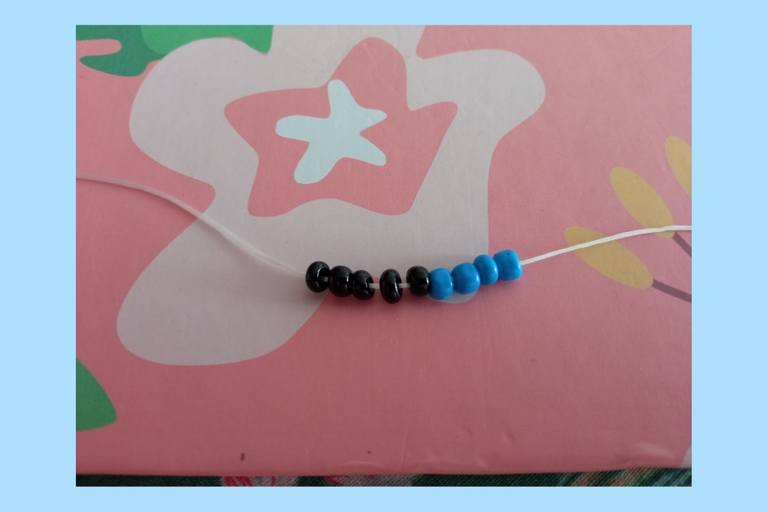
Luego, apartamos la primera mostacilla negra, tomamos el extremo derecho del hilo y lo pasamos por dicha mostacilla.
Then, we put aside the first black bead, take the right end of the thread and pass it through this bead.
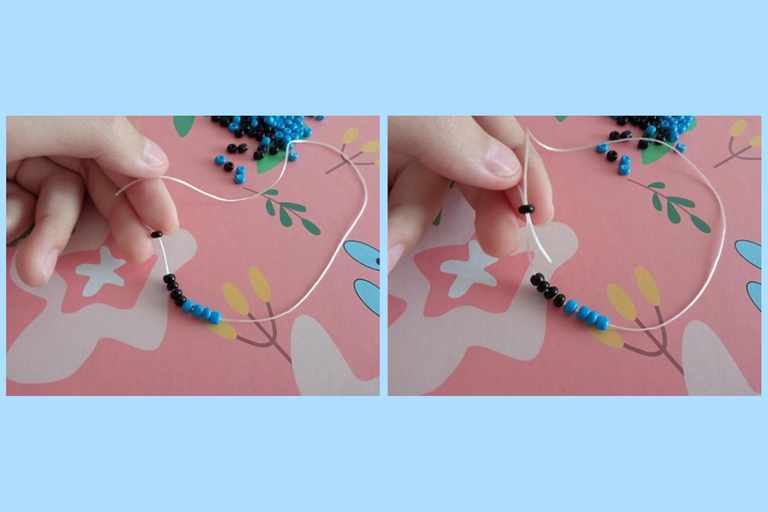
Ajustamos y posicionamos la forma que nos queda en el centro del trozo de hilo.
We adjust and position the remaining shape in the center of the piece of thread.
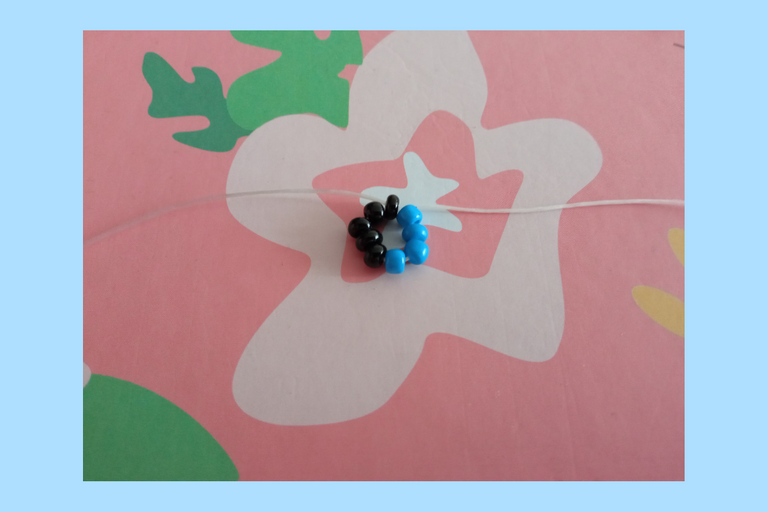
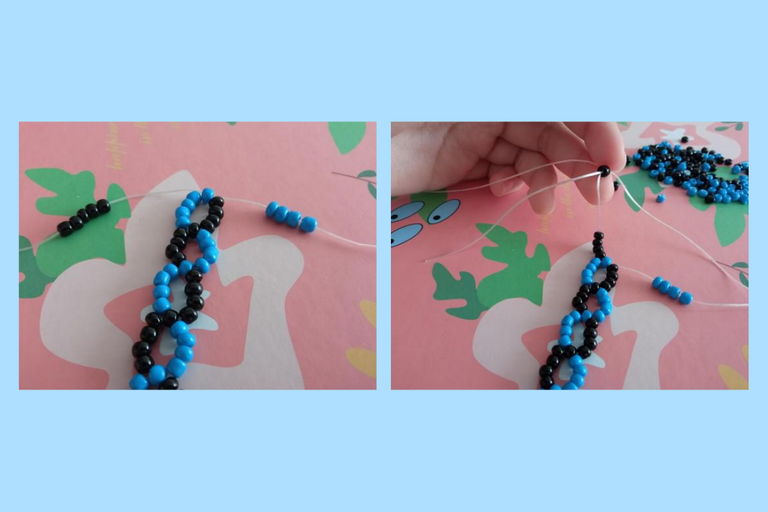
Después, colocamos cinco mostacillas azules en el hilo que va hacia la izquierda y cuatro mostacillas negras en el hilo de la derecha. Tomamos el extremo del hilo derecho, lo pasamos por la primera mostacilla azul y ajustamos.
Then, we place five blue beads on the thread going to the left and four black beads on the thread going to the right. We take the end of the right-hand thread, thread it through the first blue bead and tighten.
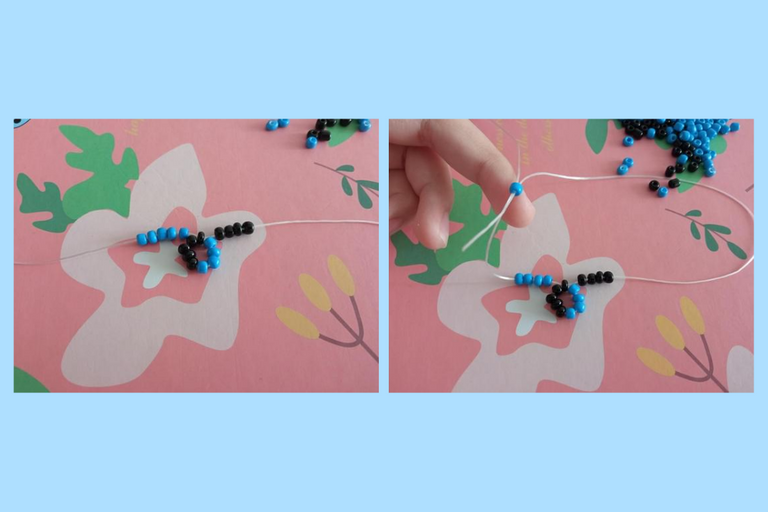
Luego colocamos cinco mostacillas negras en el hilo izquierdo y cuatro mostacillas azules en el hilo derecho, tomamos nuevamente el hilo derecho y lo pasamos por la primera mostacilla negra y ajustamos.
Then we place five black beads on the left thread and four blue beads on the right thread, take the right thread again and pass it through the first black bead and tighten.
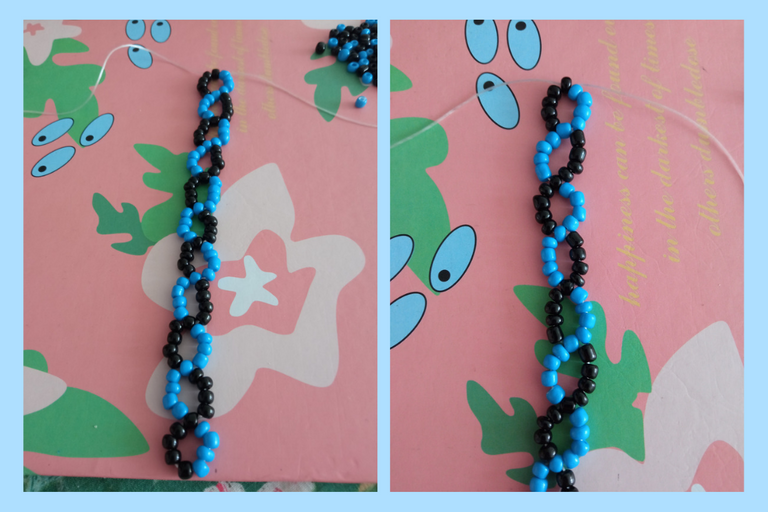
Introducimos cinco mostacillas azules en la parte izquierda y cuatro mostacillas negras en la parte derecha. Tomamos el hilo derecho y lo pasamos por la primera mostacilla azul y procedemos a ajustar.
We introduce five blue beads on the left side and four black beads on the right side. We take the right thread and pass it through the first blue bead and proceed to adjust.
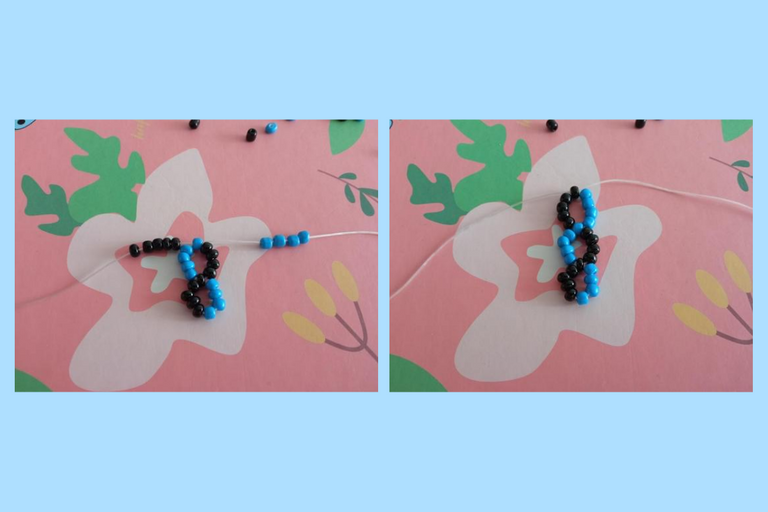
Así sucesivamente, recordando que siempre en el lado izquierdo se colocarán cinco mostacillas y en el lado derecho solo cuatro.
So on and so forth, remembering that we will always place five beads on the left side and only four on the right side.
Vamos insertando mostacillas y realizando los pasos correspondientes hasta obtener el largo de nuestra tobillera, si lo deseas mientras la vas elaborando puedes ir midiéndola alrededor de tu tobillo, así luego te quedará perfecta y a tu medida.
We are inserting beads and performing the corresponding steps to obtain the length of our anklet, if you wish while you are making it you can measure it around your ankle, so then it will be perfect and to your measure.
Por último, juntamos los dos hilos y lo pasamos por el agujero del otro extremo de la tobillera y hacemos varios nudos para que quede bien ajustado.
Finally, we join the two threads and pass it through the hole at the other end of the anklet and tie several knots so that it is well adjusted.
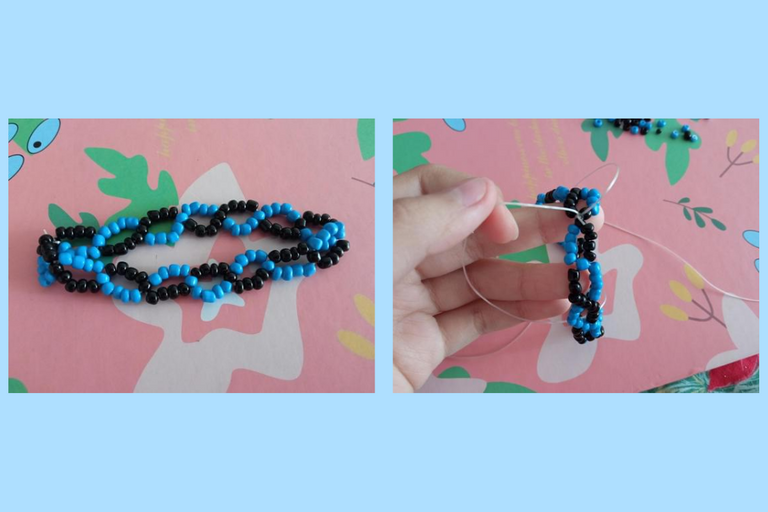
Y este fue el resultado de la tobillera que realicé el día de hoy!!💙 Sinceramente ya quería hacer una, me gustó mucho como quedó, no hay que descartar la posibilidad de hacer una pulsera o una gargantilla usando esta técnica, hasta un anillo podemos elaborar. Podemos utilizar perfectamente el hilo de nylon con menos milímetros, el que uso siempre es de 0.8 milímetros y es elástico. También nos sería de gran utilidad las mostacillas un poco más pequeñas, tengo de ese tipo, muy pronto les estaré compartiendo accesorios usándolas. Bueno chicosss, espero que les haya gustado mucho este post, y ojalá puedan recrear este accesorio en casita. Gracias por leer, hasta una próxima oportunidad!!💙✨
And this was the result of the anklet I made today! 💙 I honestly wanted to make one, I really liked how it turned out, do not rule out the possibility of making a bracelet or a choker using this technique, even a ring can be made. We can perfectly use nylon thread with less millimeters, the one I always use is 0.8 millimeters and is elastic. It would also be very useful the beads a little smaller, I have that kind, very soon I will be sharing accessories using them. Well guys, I hope you liked this post, and hopefully you can recreate this accessory at home. Thanks for reading, see you next time!!! 💙✨

Todas las imágenes son de mi autoría @mariamglow, tomadas con mi teléfono Redmi 9, editadas en Canva, texto traducido en DeepL.
All images authored by me @mariamglow, taken with my Redmi 9 phone, edited in Canva, text translated at DeepL.

The rewards earned on this comment will go directly to the people sharing the post on Twitter as long as they are registered with @poshtoken. Sign up at https://hiveposh.com.
Está tobilleras es muy bonita , me encanta este tipo de accesorios
Graciaas por leer y comentar mi post!! Me alegro que te haya gustado!💙✨
Thank you for sharing this post on HIVE!
Your content got selected by our fellow curator ashikstd & you just received a little thank you upvote from us for your great work! Your post will be featured in one of our recurring compilations which are aiming to offer you a stage to widen your audience within the DIY scene of Hive. Stay creative & HIVE ON!
Please vote for our hive witness <3
Thank you for your support!
Los tonos que usaste combinan muy bien, él azul y el negro se ven bien juntos, la tobillera quedó genial y al ser engomado resulta sencilla de usar y la puedes lucir en la playa o hasta la piscina, gran trabajo amiga @mariamglow
Graciaas por leer y comentar mi post, me alegra mucho que les haya gustado!✨✨
@mariamglow amiga esos colores están espectaculares, hacen muy buena combinación, Gracias por compartir 😊
Gracias a ti por comentar mi post amiga. Me alegra que te haya gustado. Saludoss!!