 🌿🦋🌿🦋🌿🦋🌿🦋🌿🦋🌿🦋

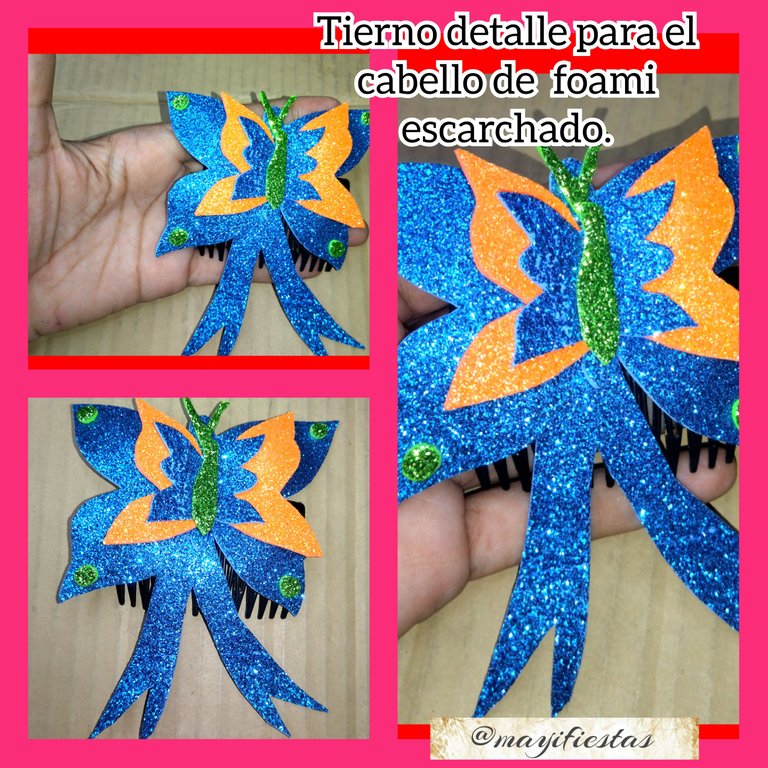
Hola mi gente bonita espero que la estén pasando bien, el día de hoy les traigo este mi primer post en esta comunidad, que se dedica a traernos hermosas creaciones para que sirvan de guía a la mamis, que siempre están en la búsqueda de ideas nuevas e innovadoras para crearles a sus pequeñas bellos detalles para el cabello.
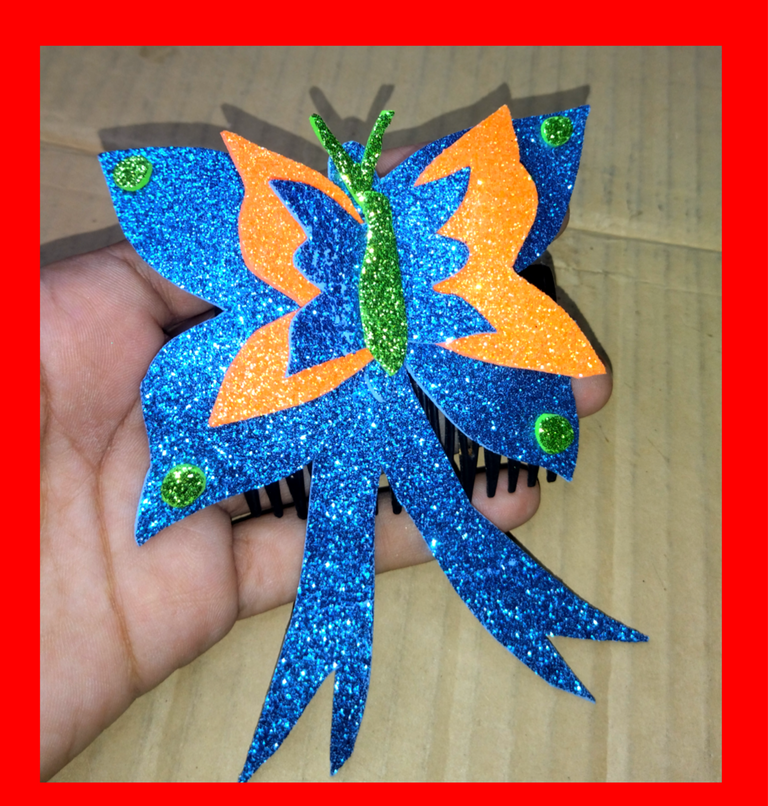
Yo igual quise sumarme a la creación de un lindo detalle en forma de mariposa que elabore en foami escarchado, que puede ser utilizado para el colegio o para un paseo, también se puede elaborar en cualquier combinación de colores.
🌿🦋🌿 MATERIALES 🌿🦋🌿
🌿🦋🌿🦋🌿🦋🌿🦋🌿🦋🌿🦋
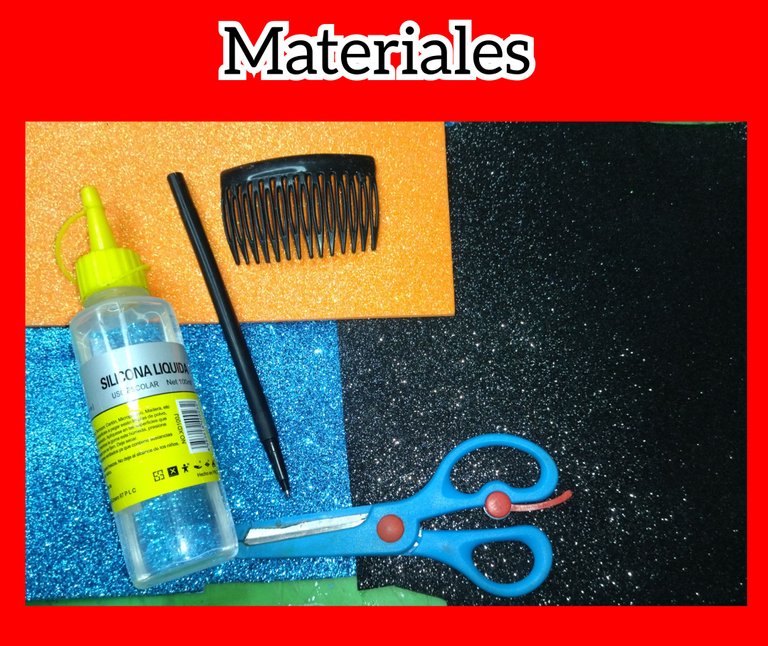
🦋 Foami escarchado naranja.
🌿 Foami escarchado verde.
🦋 Foami escarchado azul.
🌿 Silicón líquido.
🦋 Peineta.
🌿 Tijera.
🦋 Lápiz.
 🌿🦋🌿 PASO A PASO 🌿🦋🌿
🌿🦋🌿🦋🌿🦋🌿🦋🌿🦋🌿🦋
🌿🦋🌿 PASO A PASO 🌿🦋🌿
🌿🦋🌿🦋🌿🦋🌿🦋🌿🦋🌿🦋
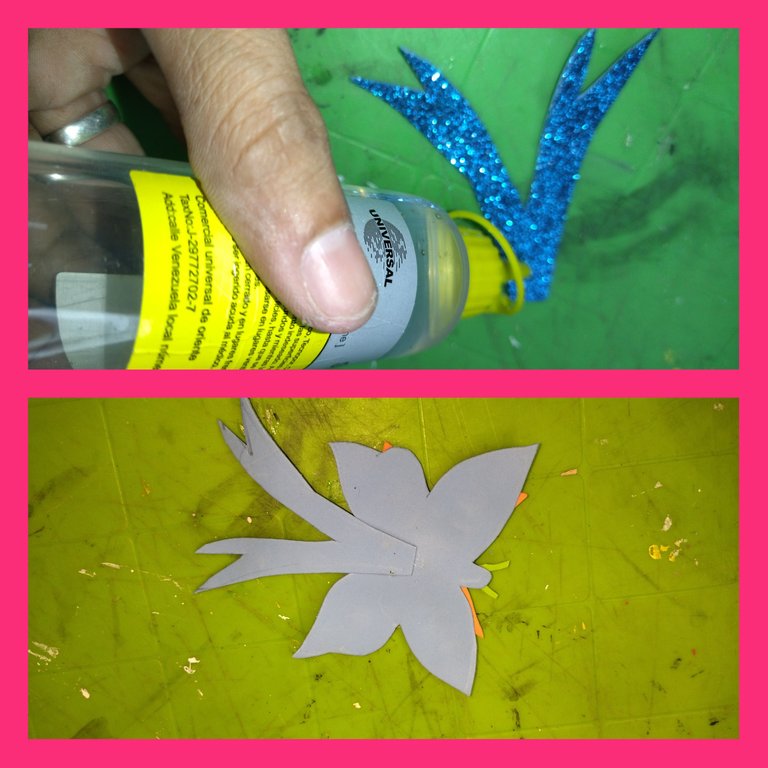
Primero saque el patrón de la mariposa en un papel y recorte, luego con ayuda de el lápiz lo marco en el foami azul y recortó, está será la pieza de base para elaborar mi lazo.
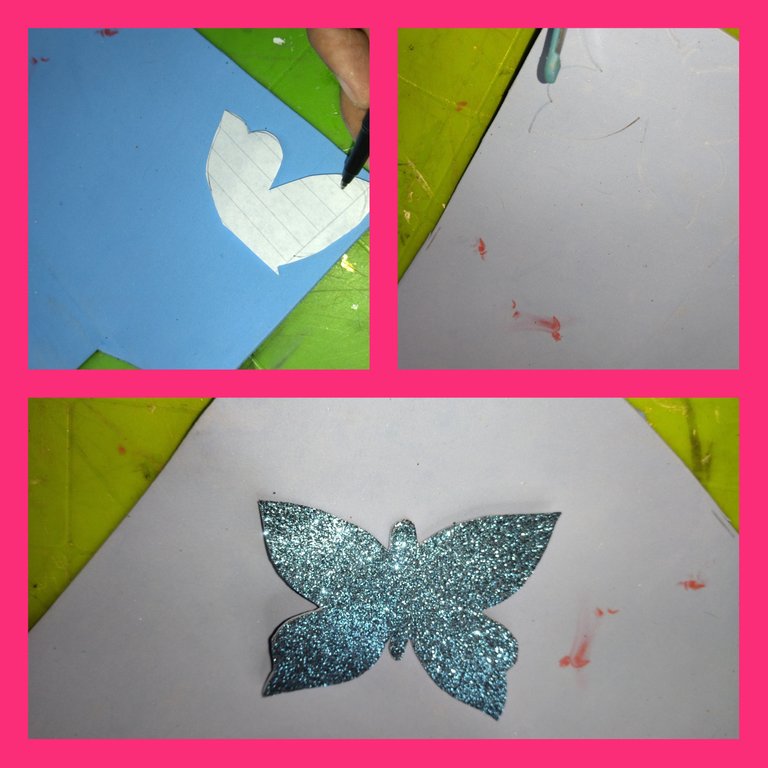
Luego repetí la ópera del paso anterior, solo que está vez la pieza la dibuje y recorte en el foami escarchado naranja pero está será más pequeña que la pieza anterior.
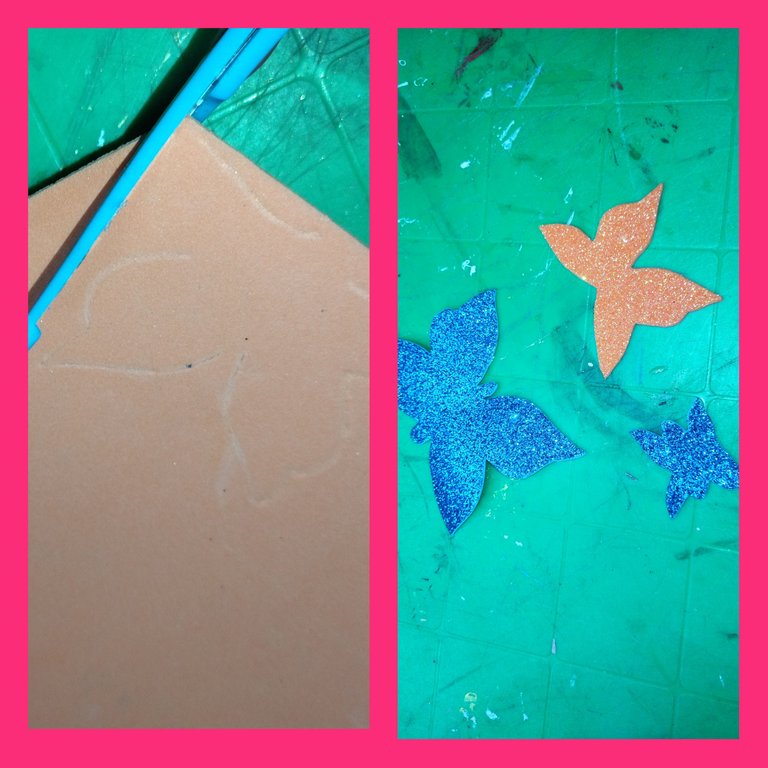
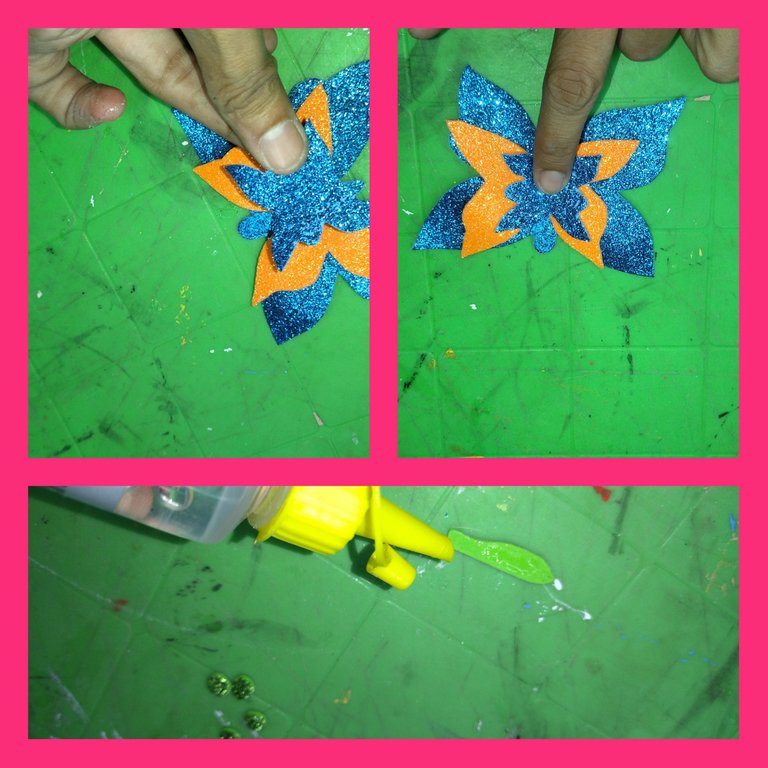
Este paso es bien sencillo, primero nos ayudamos con las manos y vamos dándole forma a la pieza con nuestras manos para que se le vea movimiento, luego aplique el silicón liquido en el centro de la pieza de color azul y le montamos encima la pieza de color naranja.

Recortamos otra pieza del foami azul más pequeña y pegamos encima con un poquito de silicón liquido.
Después con algún retazo de foami verde que nos haya sobrado de un trabajo anterior,marcamos y recortamos lo que viene siendo el cuerpo de la mariposa.
La pieza de color verde, es decir el cuerpo de la mariposa la pegamos encima de de nuestra tercera pieza.
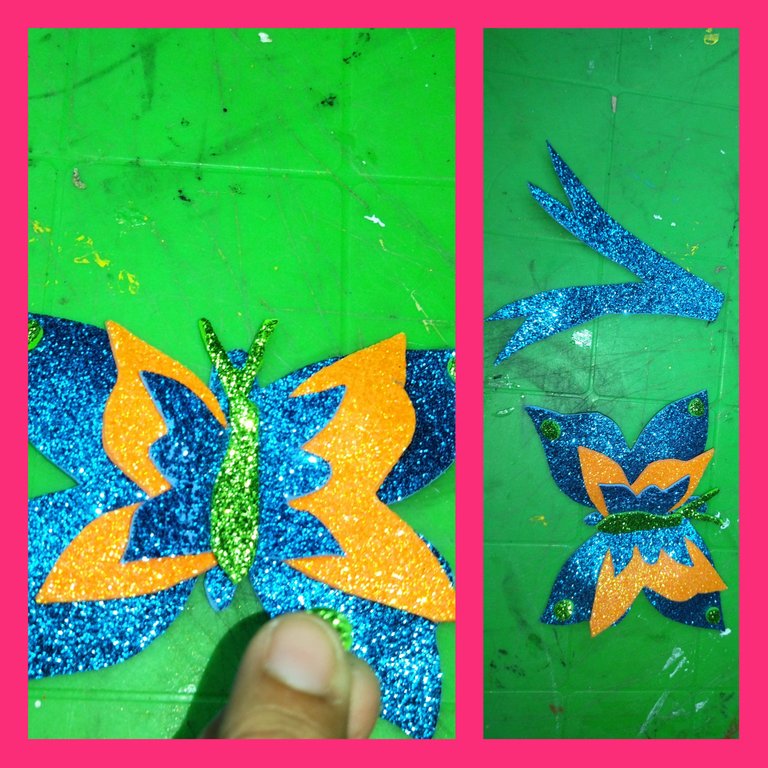
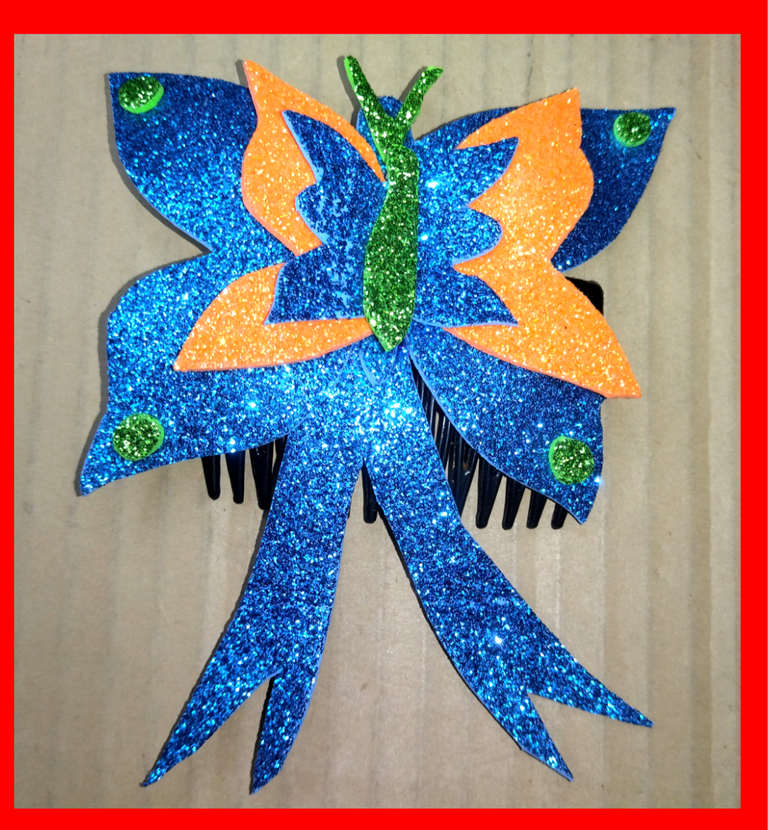
Ahora marcamos y recortamos las patitas del lazo (puede apreciarse mejor en la fotografía) luego aplicamos un poco de silicón liquido y fijamos a nuestra mariposa.
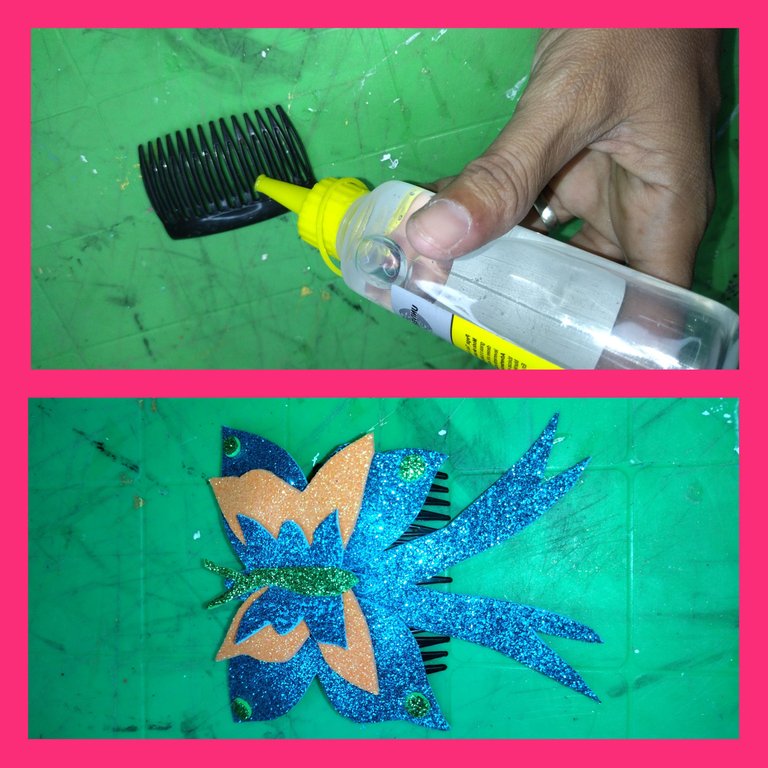
Cómo ya está listo nuestro lazo, solo resta aplicar el silicón liquido en la peineta y le pegamos la mariposa que elaboramos.
Para darle un toque, recorte unos pequeños círculos, cuatro para ser exactos, y los pegue en cada esquina de las alas de la mariposa, dejamos secar bien y listo hemos concluido.
 🌿🦋🌿 RESULTADO FINAL 🌿🦋🌿
🌿🦋🌿🦋🌿🦋🌿🦋🌿🦋🌿🦋
🌿🦋🌿 RESULTADO FINAL 🌿🦋🌿
🌿🦋🌿🦋🌿🦋🌿🦋🌿🦋🌿🦋
 🌿🦋🌿🦋🌿🦋🌿🦋🌿🦋🌿🦋
 🌿🦋🌿🦋🌿🦋🌿🦋🌿🦋🌿🦋
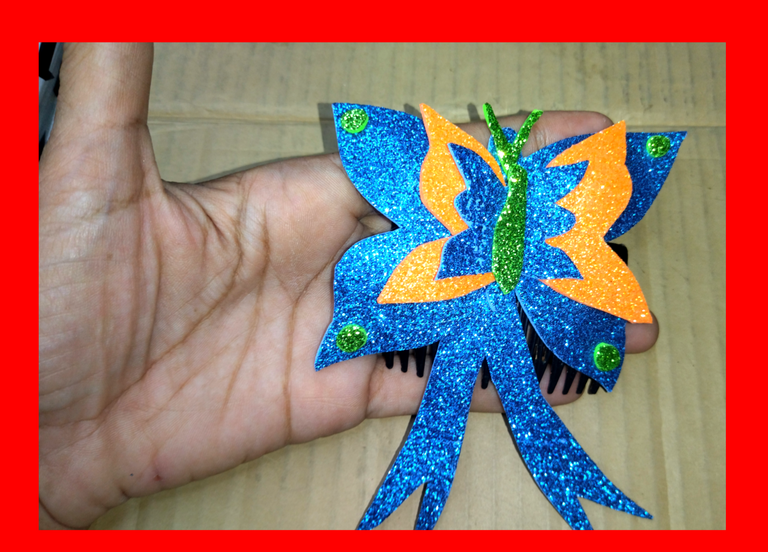
Miren lo lindo que quedó y lo fácil y rápido que es de elaborar, lo mejor de esto es que podemos jugar con los colores, también este trabajo podemos hacerlo en compañía de nuestras pequeñas y de esta manera las incentivamos a iniciarse en el maravilloso mundo de las artes manuales.
🌿🦋🌿 CREDITOS 🌿🦋🌿
🌿🦋🌿🦋🌿🦋🌿🦋🌿🦋🌿🦋
📷 Todas las fotos fueron tomadas con mi teléfono Xiaomi readmi 9T y son de mi propiedad, utilice el traductor Deepl y el programa polish para la edición de las fotografías.
 🌿🦋🌿 ENGLISH 🌿🦋🌿
🌿🦋🌿🦋🌿🦋🌿🦋🌿🦋🌿🦋
🌿🦋🌿 ENGLISH 🌿🦋🌿
🌿🦋🌿🦋🌿🦋🌿🦋🌿🦋🌿🦋
Hello my beautiful people I hope you are having a good time, today I bring you my first post in this community, which is dedicated to bring us beautiful creations to serve as a guide for mommies, who are always looking for new and innovative ideas to create beautiful hair details for their little ones.
I wanted to join in with the creation of a cute butterfly hair detail that I made in frosted foami, which can be used for school or for a walk, and can also be made in any combination of colours.
🌿🦋🌿 MATERIALS 🌿🦋🌿🌿.
🌿🦋🌿🦋🌿🦋🌿🦋🌿🦋🌿🦋
🦋 Orange frosted foami.
🌿 Green frosted foami.
🌿 Green frosted foami.
🦋 Blue frosted foami.
🦋 Blue frosted foami.
🌿 Liquid silicone.
🌿 Blue frosted foami.
🦋 Comb.
🌿 Scissors.
🌿 Scissors.
🦋 Pencil.
🌿🦋🌿 STEP BY STEP 🌿🦋🌿
🌿🦋🌿🦋🌿🦋🌿🦋🌿🦋🌿🦋
First I drew the butterfly pattern on a piece of paper and cut it out, then with the help of the pencil I marked it on the blue foami and cut it out, this will be the base piece to make my ribbon.
Then I repeated the opera from the previous step, only this time I drew and cut out the piece on the orange frosted foami, but it will be smaller than the previous piece.
This step is very simple, first we help ourselves with our hands and we give shape to the piece with our hands so that it shows movement, then we apply the liquid silicone in the centre of the blue piece and we mount the orange piece on top of it.
Cut out another smaller piece of blue foami and stick it on with a little bit of liquid silicone
Then with a piece of green foami that we have left over from a previous job, we mark and cut out the body of the butterfly.
The green piece, i.e. the body of the butterfly, is glued on top of the third piece.
Now we mark and cut out the legs of the loop (you can see it better in the picture) then we apply some liquid silicone and fix it to our butterfly.
As our ribbon is ready, we just need to apply the liquid silicone on the comb and stick the butterfly we made to it.
To give it a touch, I cut out some small circles, four to be exact, and glued them on each corner of the butterfly's wings, let them dry well and that's it, we're done.
🌿🦋🌿 FINAL RESULT 🌿🦋🌿
🌿🦋🌿🦋🌿🦋🌿🦋🌿🦋🌿🦋
🌿🦋🌿🦋🌿🦋🌿🦋🌿🦋🌿🦋
🌿🦋🌿🦋🌿🦋🌿🦋🌿🦋🌿🦋
🌿🦋🌿 CREDITS 🌿🦋🌿
📷 All photos were taken with my Xiaomi readmi 9T phone and are my property, I used Deepl translator and polish software for editing the pictures.
Hola @mayifiestas gracias por compartir un detalle hermoso para hacerlo para mi sobrina 🤗
Saludos gracias a ti por visitar mi blog y apoyar 💞
🤗
The rewards earned on this comment will go directly to the people( @mayifiestas ) sharing the post on Twitter as long as they are registered with @poshtoken. Sign up at https://hiveposh.com.
Gracias por el apoyo 😃
Bienvenida a la comunidad amiga @mayifiestas esperamos que te sientas cómoda y como en casa por aquí, 😉 tu lazo quedo muy lindo, una mariposa radiante y muy llamativa, un lindo tutorial, felicidades 👏
Linda y calurosa bienvenida la cual agradezco, besitos 💋
Thank you for sharing this post on HIVE!
Your content got selected by our fellow curator jasonmunapasee & you just received a little thank you upvote from us for your great work! Your post will be featured in one of our recurring compilations which are aiming to offer you a stage to widen your audience within the DIY scene of Hive. Next time make sure to post / cross-post your creation within the DIYHub community on HIVE and you will receive a higher upvote ;) Stay creative & HIVE ON!
Please vote for our hive witness <3
Muchas gracias por el apoyo agradecida de 💖 es muy importante saber que se valora el trabajo que se hace con amor.
Bienvenida a la comunidad es un placer tenerte entre nosotros, nos encanta esta linda idea de peineta que nos has traído 😉 el foami siempre es un buen aliado a la hora de crear, esta mariposa luce increíble, y el paso a paso muy sencillo de seguir, felicidades 👏 sigue con el buen trabajo.
Muchas gracias por la bienvenida feliz de estar en esta comunidad tan creativa. Besitos 💋
Al ser escarchado hace que resalte mucho este broche para el cabello, hermoso tutorial amiga.
Gracias por el apoyo amiga, por supuesto el brillo es ideal para estás fechas, que bueno que te gustó.
Mil gracias de todo corazón 💓💓