| Esp | Eng |
|---|---|
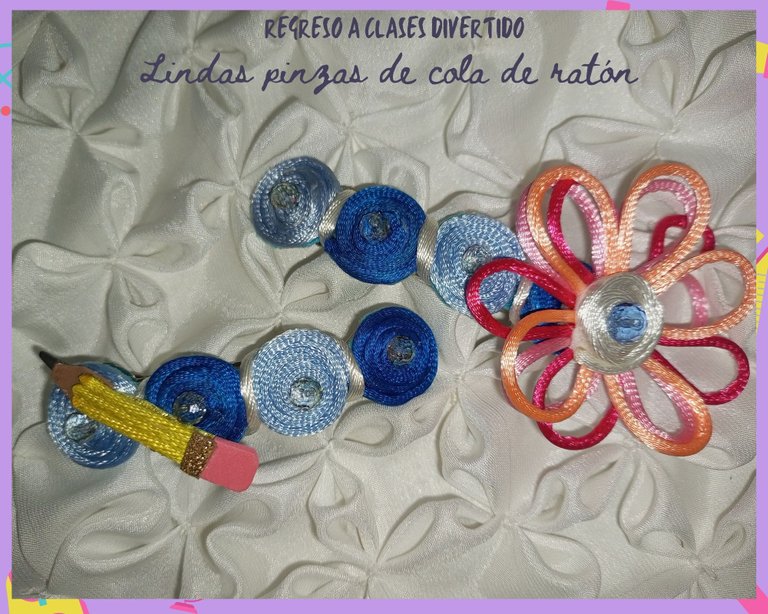
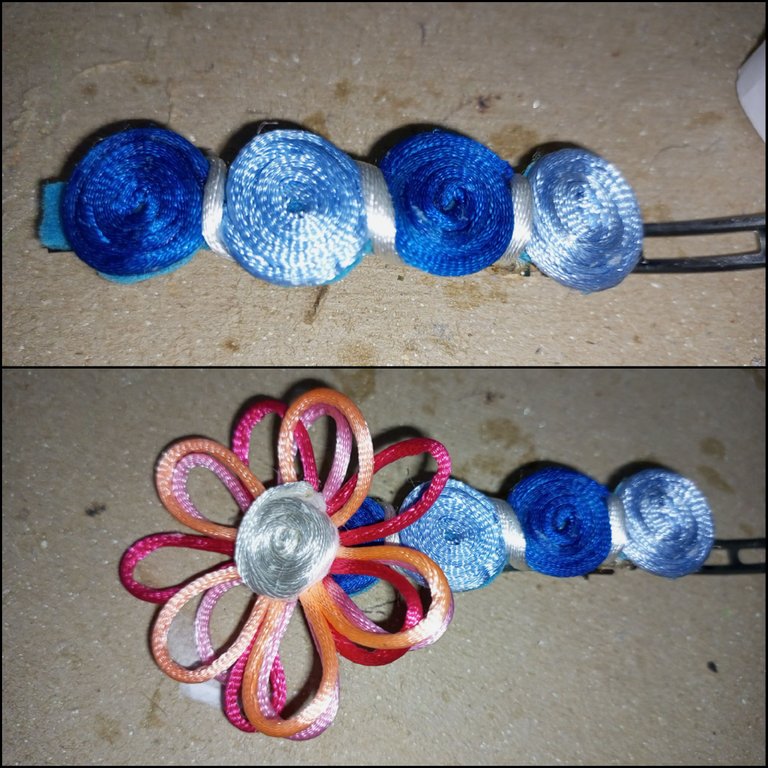
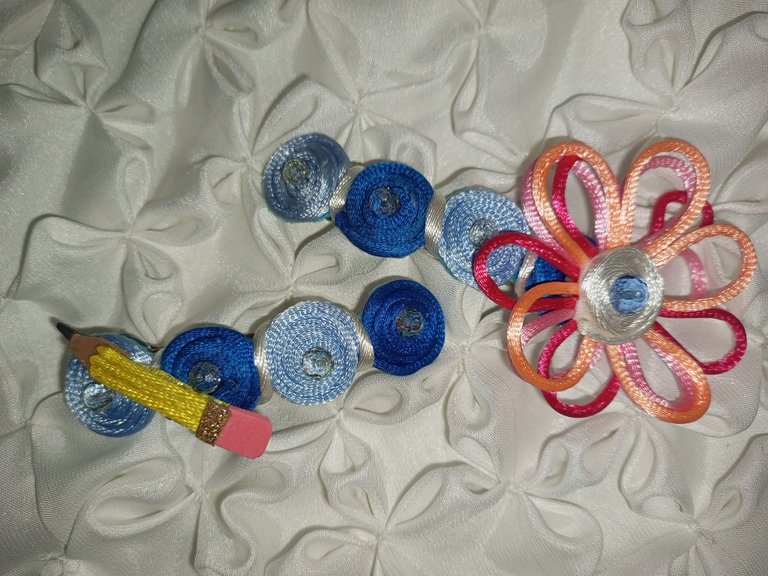
| En el mes de octubre ea el inicio del nuevo año escolar en mi país, después de dos meses y medio de vacaciones, por lo que en casa ya nos estamos preparando para el retorno escolar de loa niños, por lo que ya indicamos las compras de cuadernos, uniforme, zapatos, y por supuesto yo no puedo dejar de lado que mi niña valla hermosa. Por lo que me puse a hacer estas **Lindas y divertidas pinzas de cola de ratón **, pero no las quise hacer de la manera cotidiana que son azules, si no que quise incluir un poco de color. A continuación les comparto mi idea que espero les guste, a continuación la lista de materiales y procedimiento. | In the month of October is the beginning of the new school year in my country, after two and a half months of vacation, so at home we are already preparing for the return to school for the children, so we already indicated the purchases of notebooks, uniform, shoes, and of course I can not leave aside that my girl is beautiful. So I started to make these **Cute and fun mouse tail tweezers **, but I did not want to make them in the everyday way that are blue, but I wanted to include a little color. Below I share with you my idea that I hope you like, here is the list of materials and procedure. |

| Materiales : | Materials: |
|---|---|
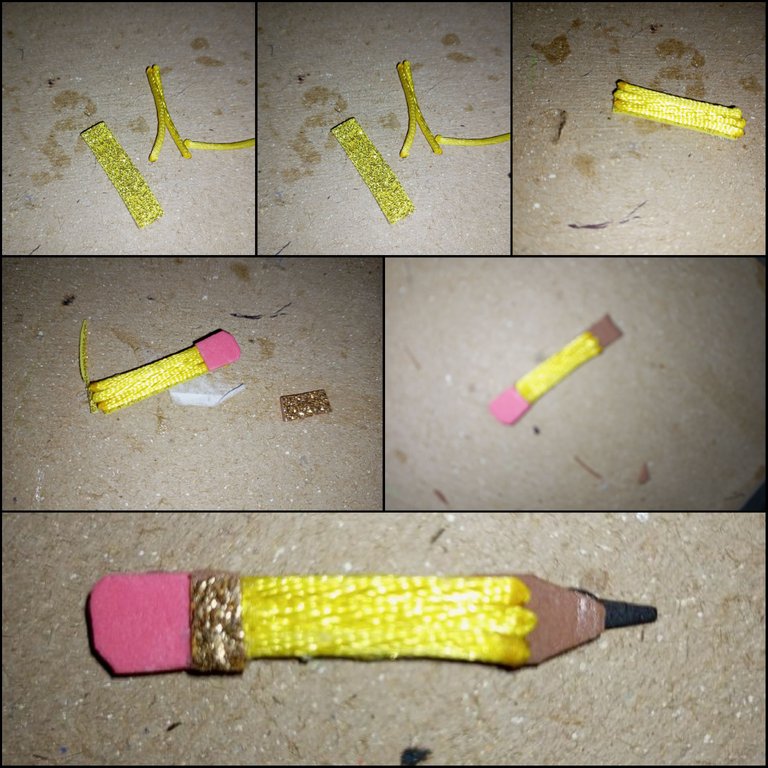
| Cinta de cola de ratón azul marino, azul claro, rosado, fucsia, melón, blanco, amarillo, fieltro: azul y blanco, un poco de foami dorado, rosado, negro y bronce para hacer el lápiz, silicon, tijeras, 8 piedras o cristales, 2 pinzas. | Mouse tail ribbon: navy blue, light blue, pink, fuchsia, melon, white, yellow, felt: blue and white, some gold, pink, black and bronze foami to make the pencil, silicone, scissors, 8 stones or crystals, 2 tweezers. |
| Instrucciones: | Instructions: |
|---|
| Paso 1 | Step 1 |
|---|---|
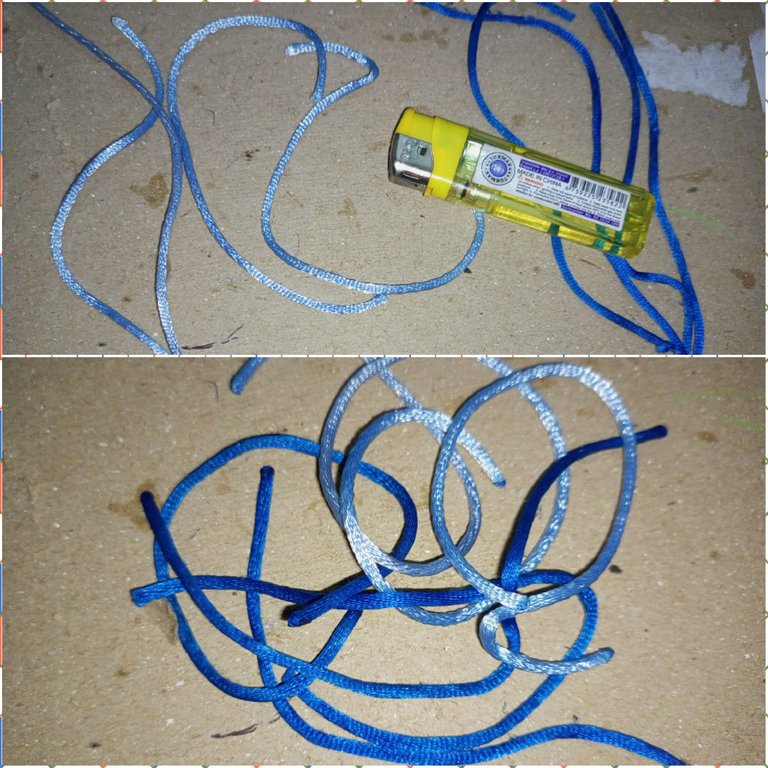
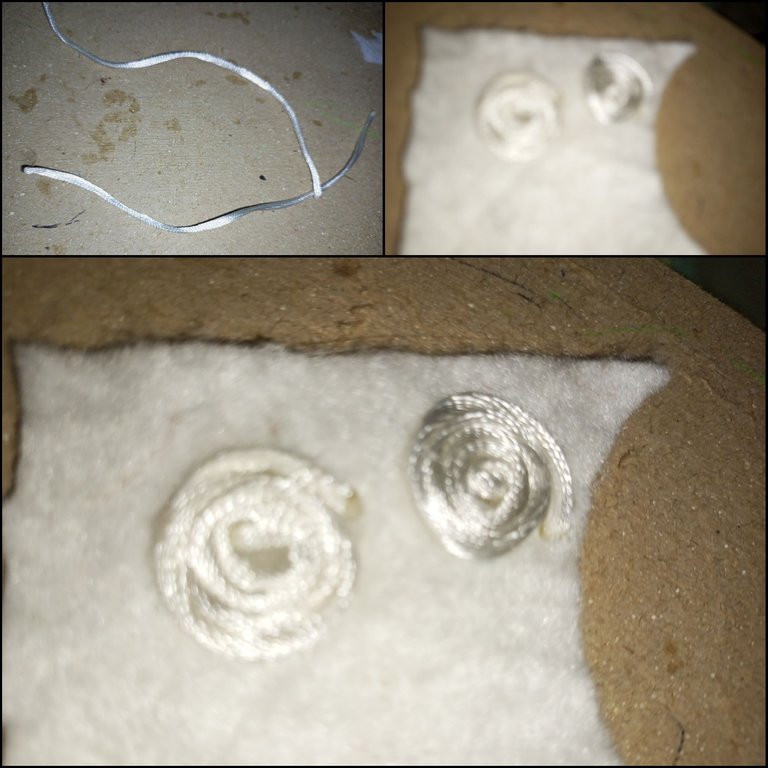
| Corté 8 piezas de cordón de cola de ratón de 18 centímetros de largo, las cuales les quemare las puntas con un yesquero, 4 del color azul marino, y 4 de color azul claro. | I cut 8 pieces of mouse tail string 18 centimeters long, which I will burn the ends with a tinder, 4 of navy blue color, and 4 of light blue color. |
| Paso 2 | Step 2 |
|---|---|
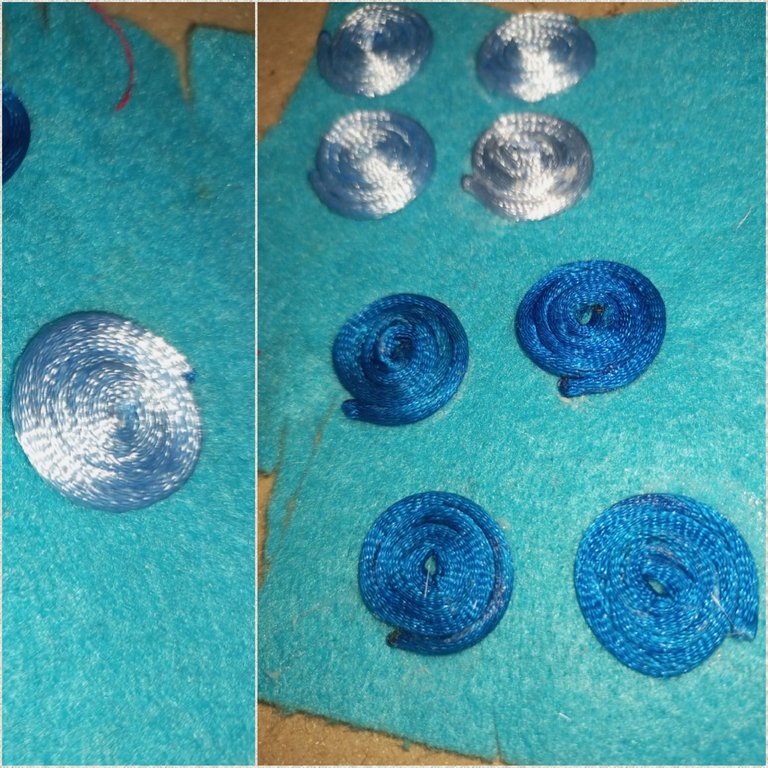
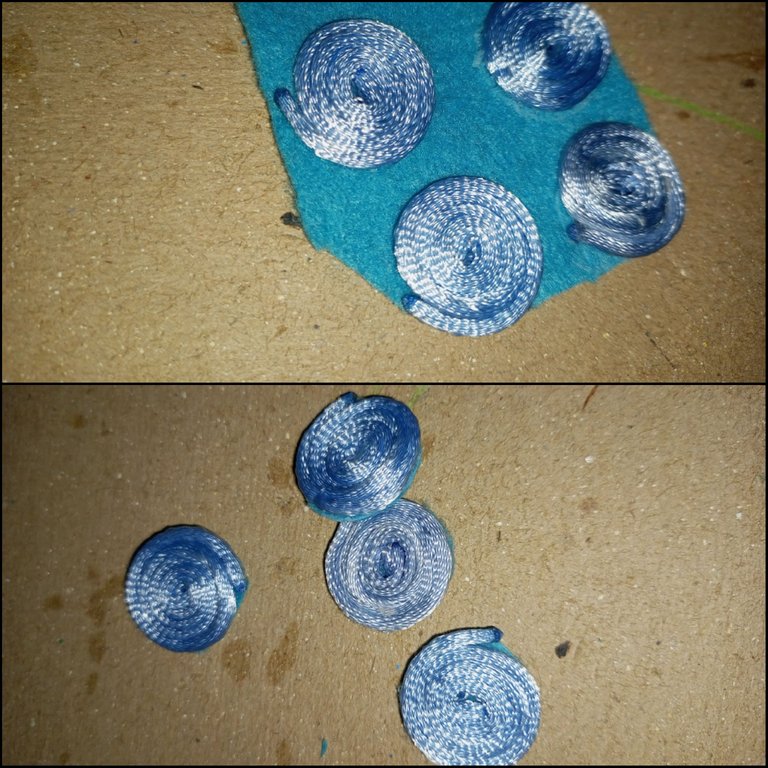
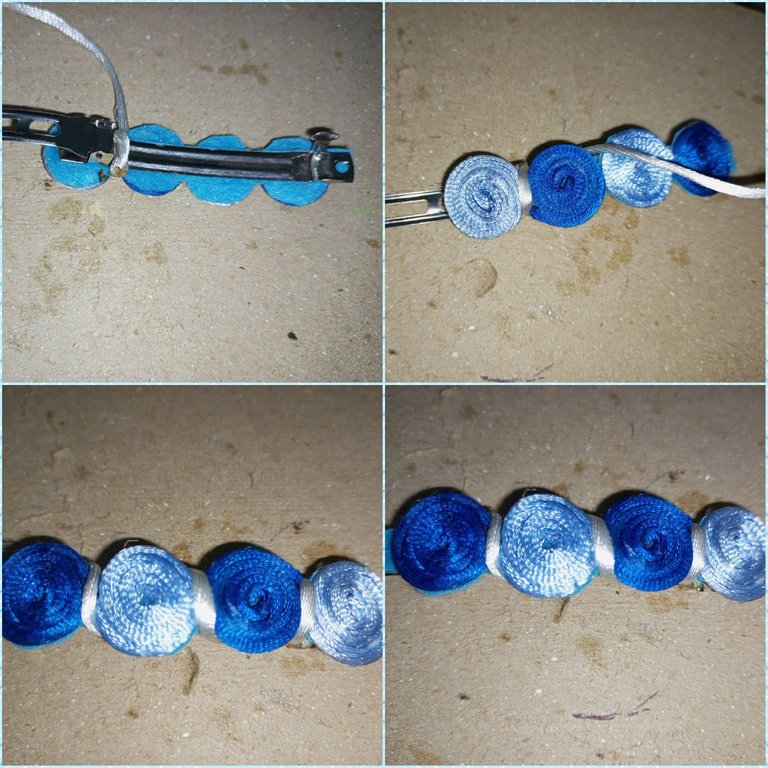
| Forme 4 espirales del color azul marino, los hice con los dedos, y coloque sobre fieltro azul silicon del tamaño del aspiral, luego lo coloque sobre el silicon, cuide que quede bien pegado. | I made 4 navy blue spirals, I did them with my fingers, and placed them on blue silicon felt of the size of the aspiriral, then I placed it on the silicon, making sure that it is well glued. |

| Paso 3 | Step 3 |
|---|---|
| Forme 4 espirales azul claro y también los pegue en el fieltro azul, usando el mismo procedimiento anterior. | Form 4 light blue spirals and also glue them to the blue felt, using the same procedure as above. |
| Paso 4 | Step 4 |
|---|---|
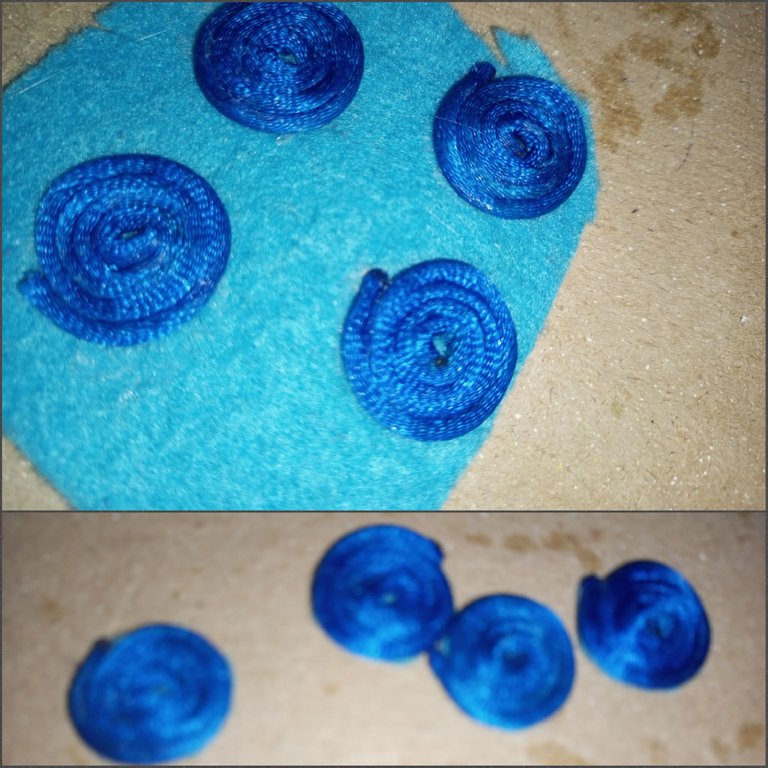
| Una vez seco los espirales con una tijera corte los espirales la ras del fieltro. | Once the spirals are dry, use a scissors to cut the spirals along the felt. |
| Paso 5 | Step 5 |
|---|---|
| Corte los otros espirales azules claro. | Cut the other light blue spirals. |
| Paso 6 | Step 6 |
|---|---|
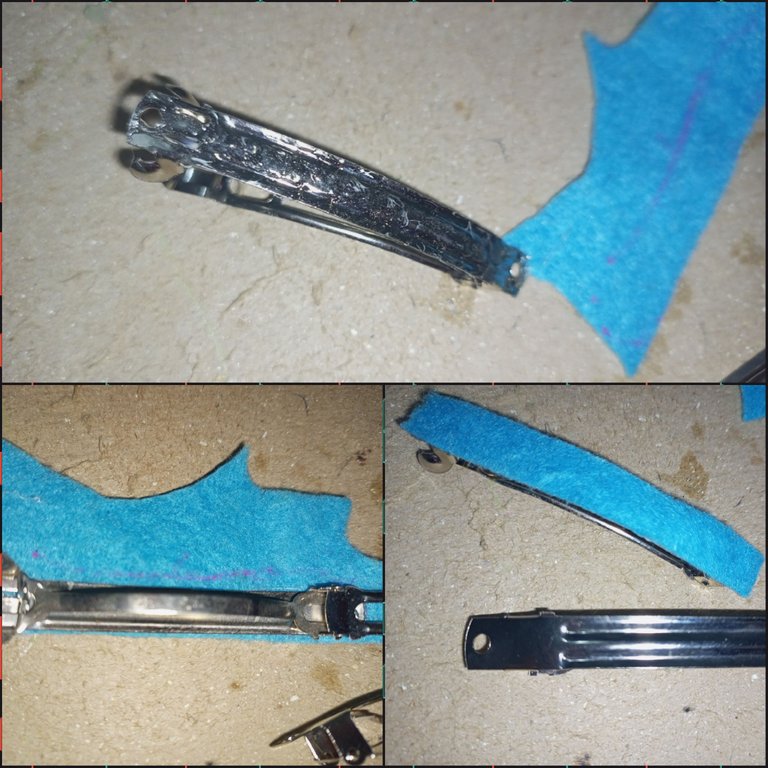
| Forrare las pinzas corte un pedazo del silicon no importa el tamaño, coloque sobre la parte superior de la pinza suficiente silicon y coloque el fieltro cuidando que cubra la pinza, una vez bien pegado, recorte el fieltro cuidando que quede bien cubierta la pinza. | I will line the clamps cut a piece of silicone no matter the size, place on the top of the clamp enough silicone and place the felt taking care to cover the clamp, once well glued, trim the felt taking care that the clamp is well covered. |
| Paso 7 | Step 7 |
|---|---|
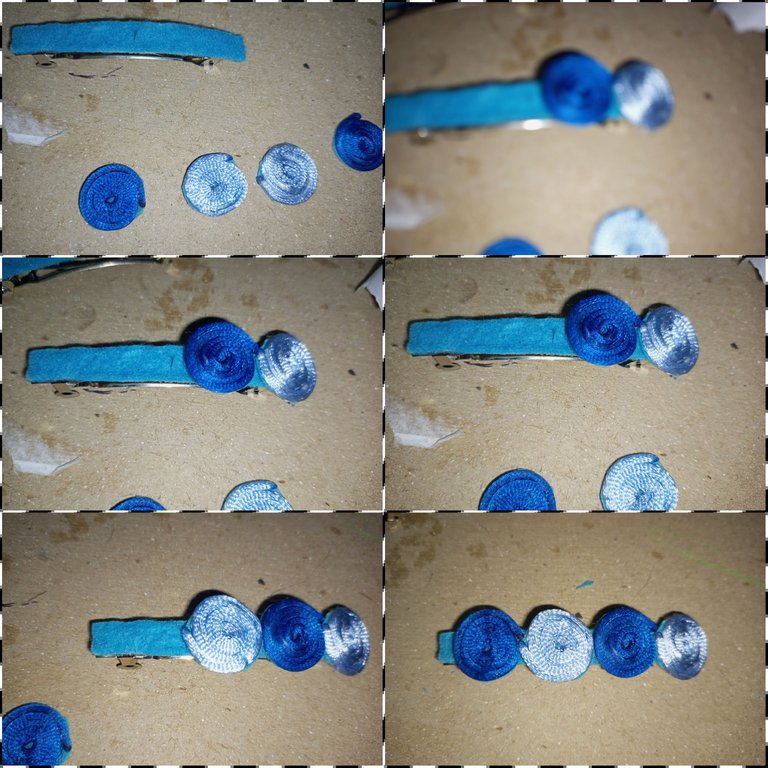
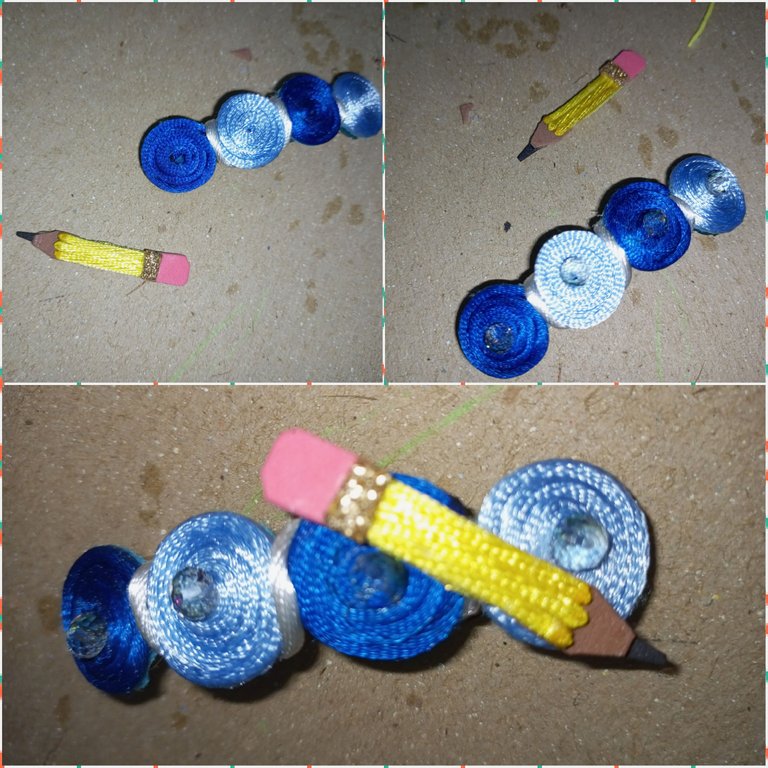
| Pegue sobre la pinza los espirales de manera intercalada los colores, azul oscuro y azul claro, las pegue con silicon 4 por cada pinza. | Glue the spirals on the clamp in an intercalated way, the colors, dark blue and light blue, glue them with silicon 4 for each clamp. |
| Paso 8 | Step 8 |
|---|---|
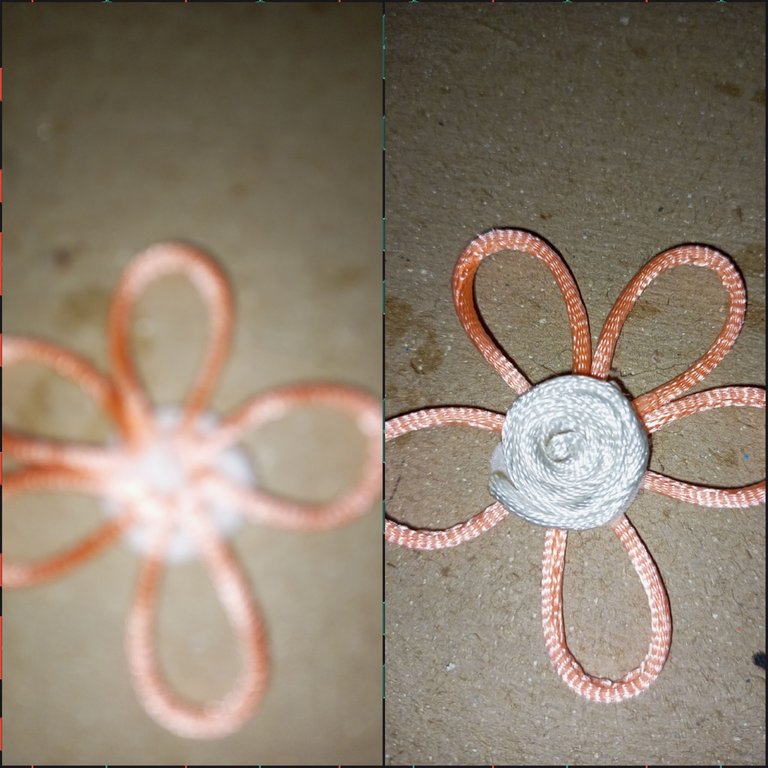
| Comencé a colocar en el contorno de la primera flor la cinta de rabo de ratón pegándole con silicón y cuidando quede bien limpio y prolijo, coloque alrededor de la primera flor formándola. También comencé a pegar la cinta blanca para terminar con la primera flor. | I began to place the mouse tail ribbon around the outline of the first flower, gluing it with silicone and taking care to keep it clean and neat, I placed it around the first flower forming it. I also began to glue the white ribbon to finish with the first flower. |
| Paso 9 | Step 9 |
|---|---|
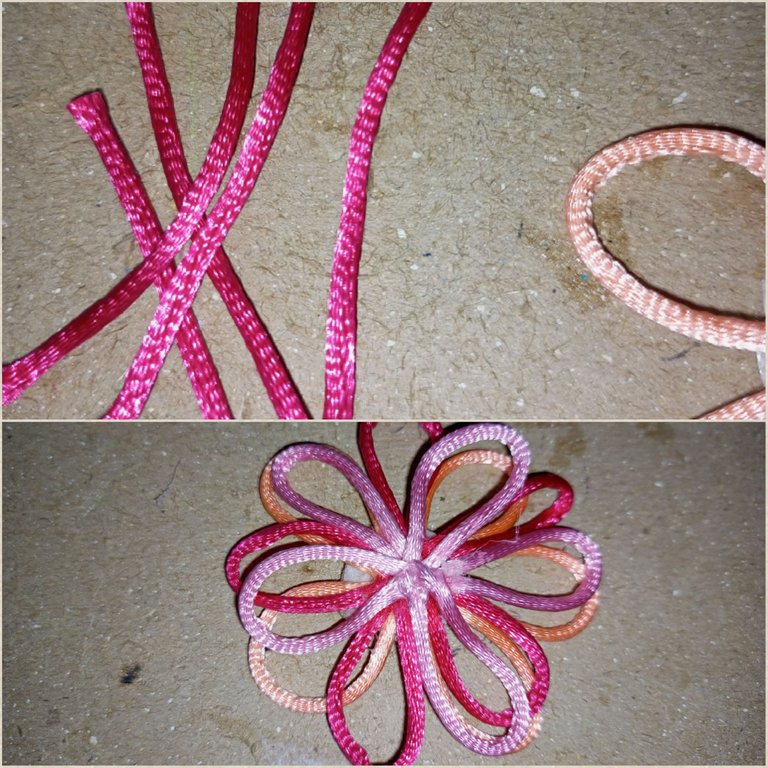
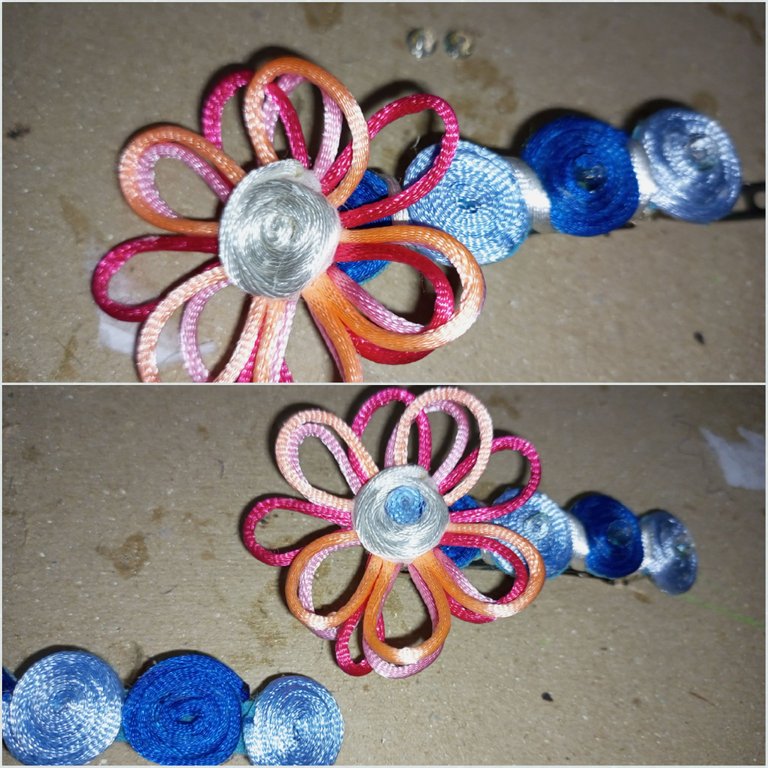
| Comencé a trabajar con la segunda flor, trabaje con las flores de los lados primero para luego trabajar con la del medio y cubrir las terminaciones de las otras flores. | I started working with the second flower, working with the flowers on the sides first and then working with the one in the middle and covering the ends of the other flowers. |
| Paso 10 | Step 10 |
|---|---|
| Una vez aplicada la cinta roja, coloqué en el medio la cinta blanca. | Once the red ribbon was applied, I placed the white ribbon in the middle. |
| Paso 11 | Step 11 |
|---|---|
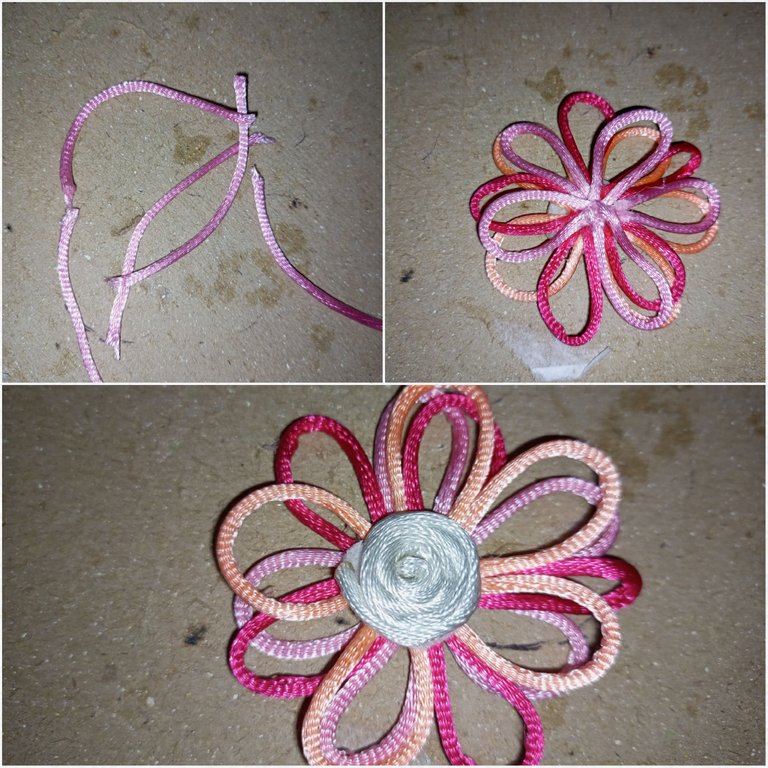
| Pegue la cinta roja de la flor central colocando la cinta sobre las terminaciones de las otras flores. | Glue the red ribbon of the central flower by placing the ribbon over the ends of the other flowers. |
| Paso 12 | Step12 |
|---|---|
| Coloqué la cinta blanca, todo lo pegue con silicón liquido. | I placed the white tape, glued everything with liquid silicone. |
| Paso 13 | Step 13 |
|---|---|
| Coloqué canutillos amarillo para dar un poco más de luz y quede más bonita. | I placed yellow beads to give a little more light and make it prettier. |
| Paso 14 | Step 14 |
|---|---|
| Hice el cordón con nudos corredizos en los extremos para que tenga movilidad el collar y lo podamos usar a la altura que queramos. Lo ajuste quemando un poco porque el cordón es de cuerina. | I made the cord with sliding knots at the ends so that the necklace has mobility and we can wear it at the height we want. I adjusted it by burning it a little bit because the cord is made of leather. |
| Paso 15 | Step 15 |
|---|---|
| Corté pequeños dos pedazos de cinta de rabo de ratón roja para hacer dos azas donde irán ajustado el cordón del collar, la pegue con silicón. | I cut two small pieces of red mouse tail ribbon to make two loops where the necklace cord will be attached, and glued it with silicone. |
| Paso 16 | Step 16 |
|---|---|
| Pegue el fieltro negro para que quede más seguro el collar y también con mejor acabado. | Glue the black felt to make the necklace more secure and also with a better finish. |
| Despedida | Farewell |
|---|---|
| Y éste es mi propuesta de hoy para ustedes Lindo Collar de jeans y cordón de rabo de ratón, Una propuesta sencilla, económica y hermosa. Espero les haya gustado y gracias por visitar mi Post. | And this is my proposal today for you Nice Necklace of jeans and mouse tail cord, A simple, economical and beautiful proposal. I hope you liked it and thank you for visiting my post. |
| Créditos | Credits |
|---|---|
| Traductor: www.DeepL.com/Translator (free version).Las fotos fueron tomadas con mi Celular Tecno Sport 7T. Foto de portada editada con Canva.Banner editado con Canva. . | Translator: www.DeepL.com/Translator (free version).The photos were taken with my Tecno Sport 7T cell phone. Cover photo edited with Canva.Banner edited with Canva. |
Amiga que preciosos están estos ganchitos para el regreso escolar, nos encanta el lápiz ✏️ realmente es hermoso y tan sencillo como lo muestras en tu paso a paso, gran trabajo 😉
Gracias que bueno saber que lea gusto, gracias por valorar y visitar mi Post,
Gracias @rutablockchain por su apoyo a mi trabajo.
Me hiciste recordar mi infancia con estos lindos ganchos muy hermosos y sutiles. @yanethstars
Gracias amiga.
Le quedaron muy hermosas sus pinzas, la felicito, excelente talento y paciencia para hacer este hermoso trabajo, me encantó el detalle del lápiz, muchas bendiciones para usted 🤗
Gracias amiga, que chevere que te gusto,