We're back with another instalment of Woodworking Wednesdays, the section of my blog were I make a summary of a week's work on a project and anything related to my craft. Today, we'll see the progress on a commission that came from a Venezuelan living in California. The odd thing is this guy is from my hometown, Cumaná. So this one is also filled with a lot of nostalgia and sand of our shores (literally).

The commission came after a lot of thought and with only 1 month to make it happen. It gives me plenty of wiggle room since I had been working on a lot of pieces in the workshop. That way, I'm one step ahead of any quick projects that might come. Let's get to it and see how it went. The project is almost done!
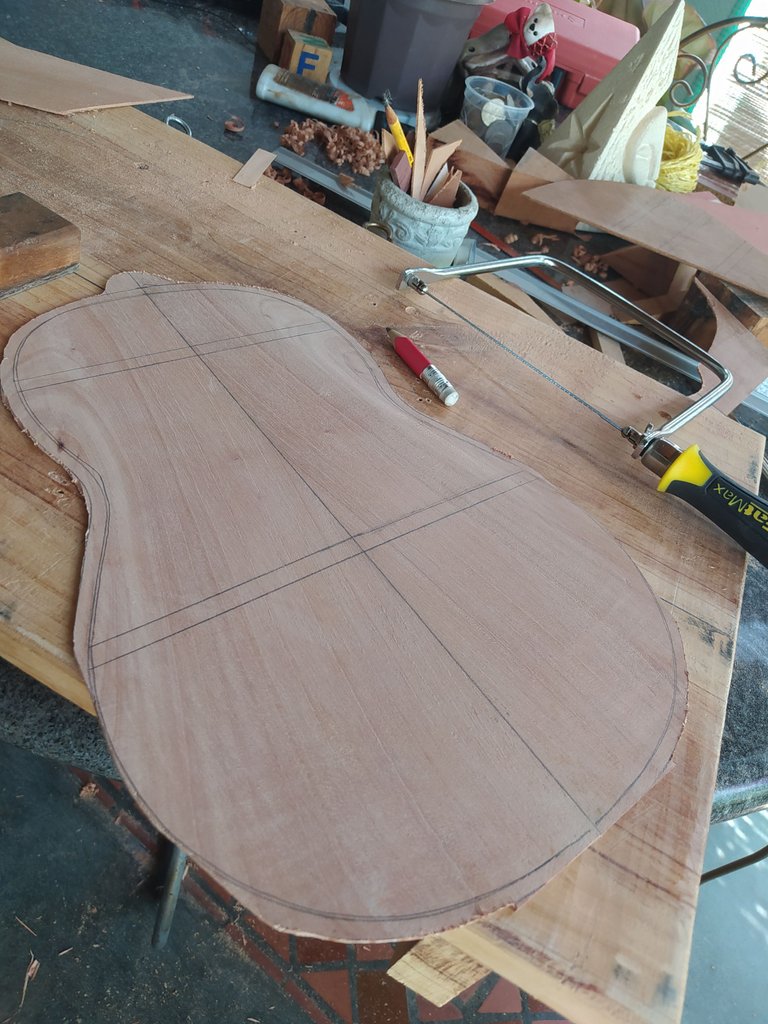
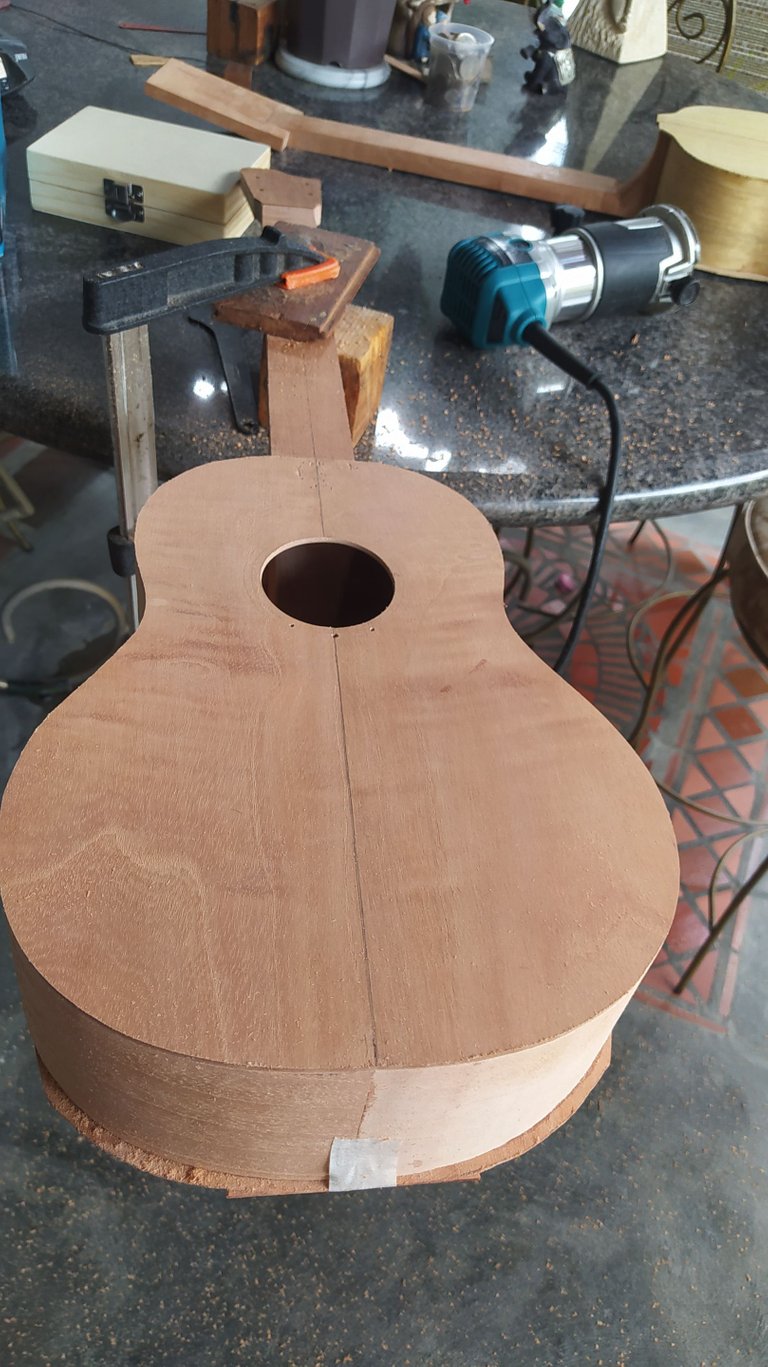
Sound board
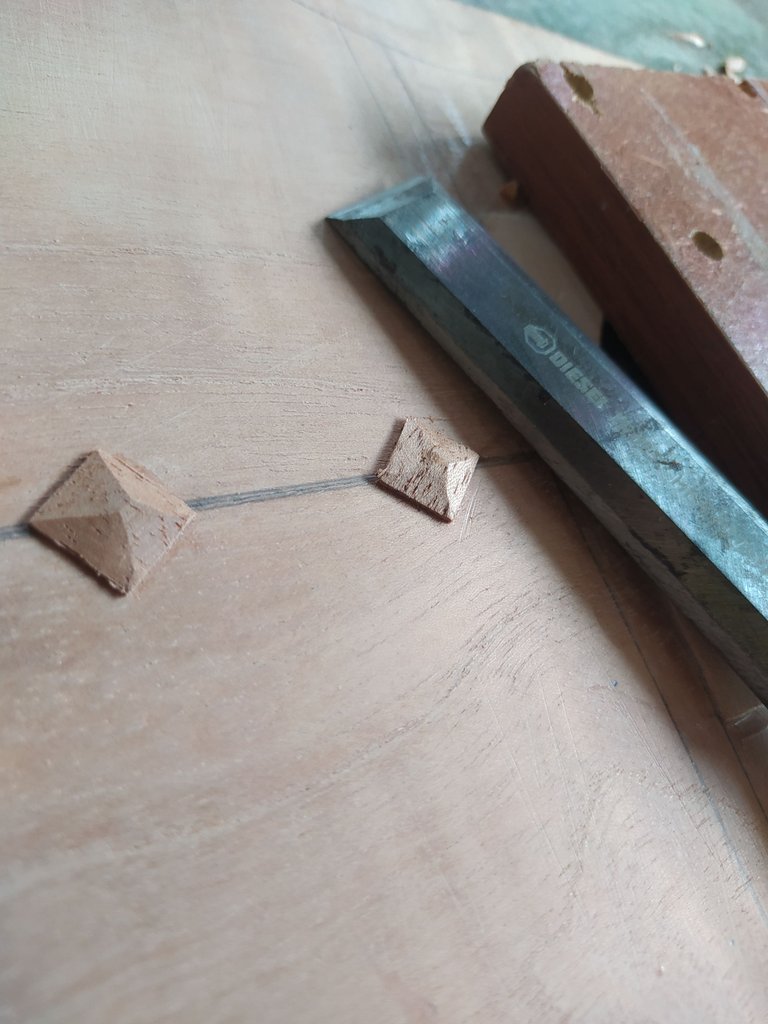
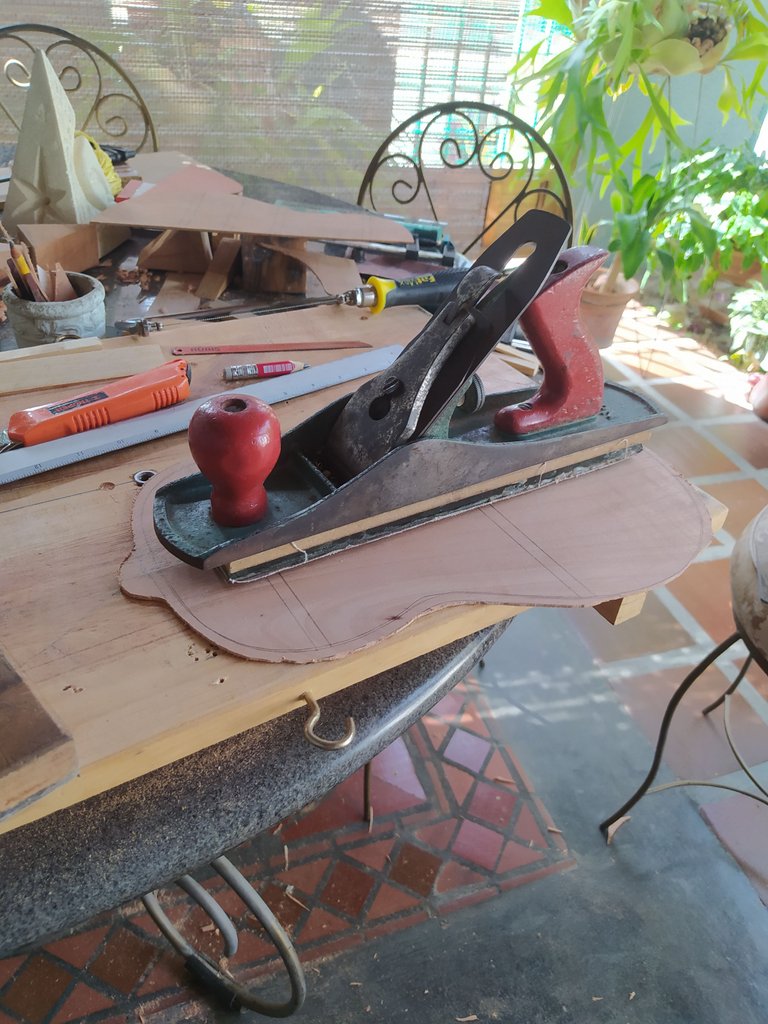
I had a cedar sound board ready for another project. Since that one wasn't urgent, I decided to use it for this one. After some checking, it was ready to get its reinforcements and it some an straightforward deal. Our regional woods don't need struts or anything fancy. Giving them s joint reinforcement and maybe something for the bridge is enough.

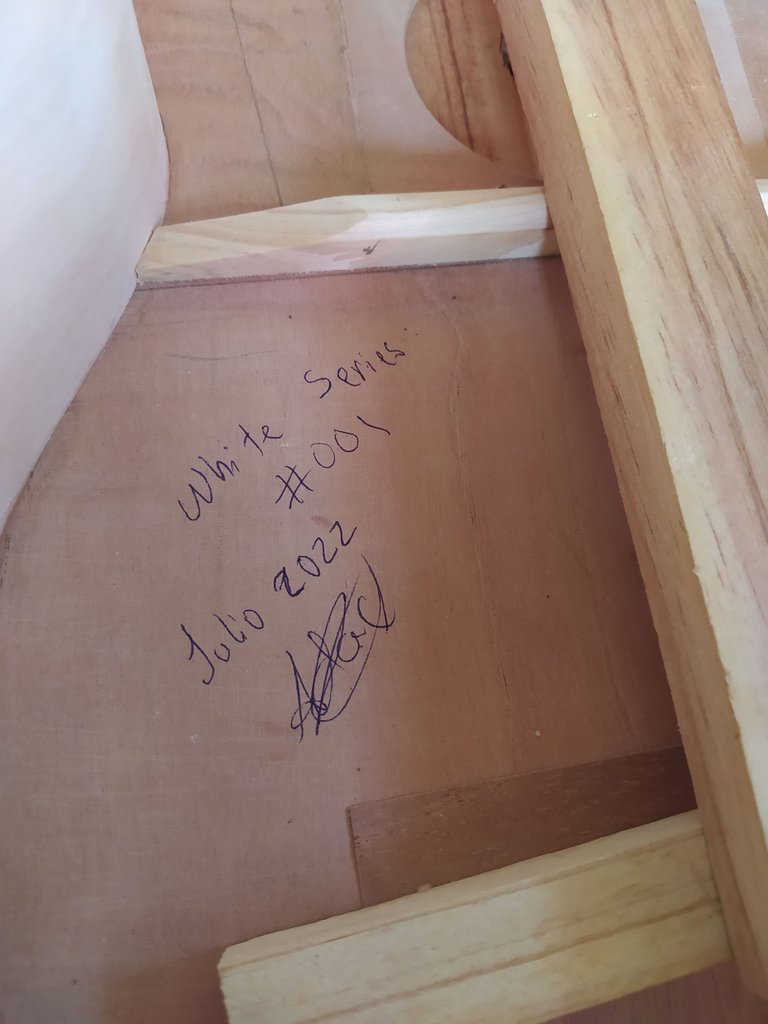
This is a White Series instrument, but that doesn't mean it lacks in beauty. Just take a look at that flamed pattern on this cedar. If you're wondering about the species, this is our regional cedrala odonata. This is a common wood throughout the whole continent. But it's has plenty of variants according to the region. Ours is usually called xCedro Amargo" (bitter cedar) because it has a really strong and bitter taste (don't taste wood, it isn't good for health).
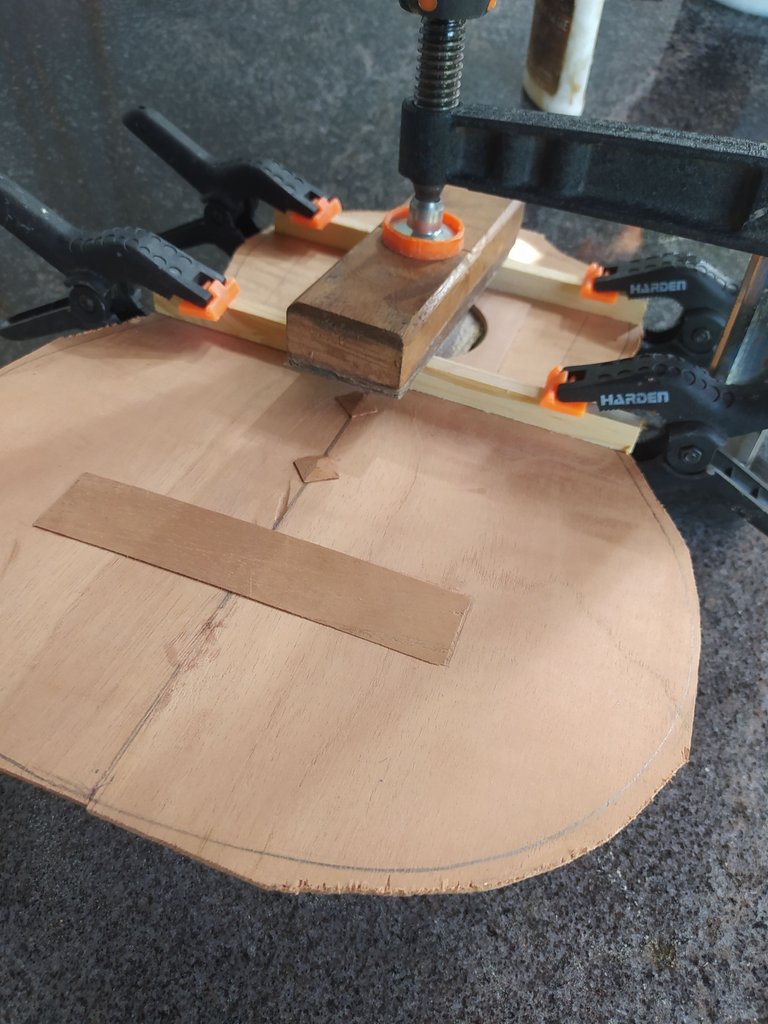
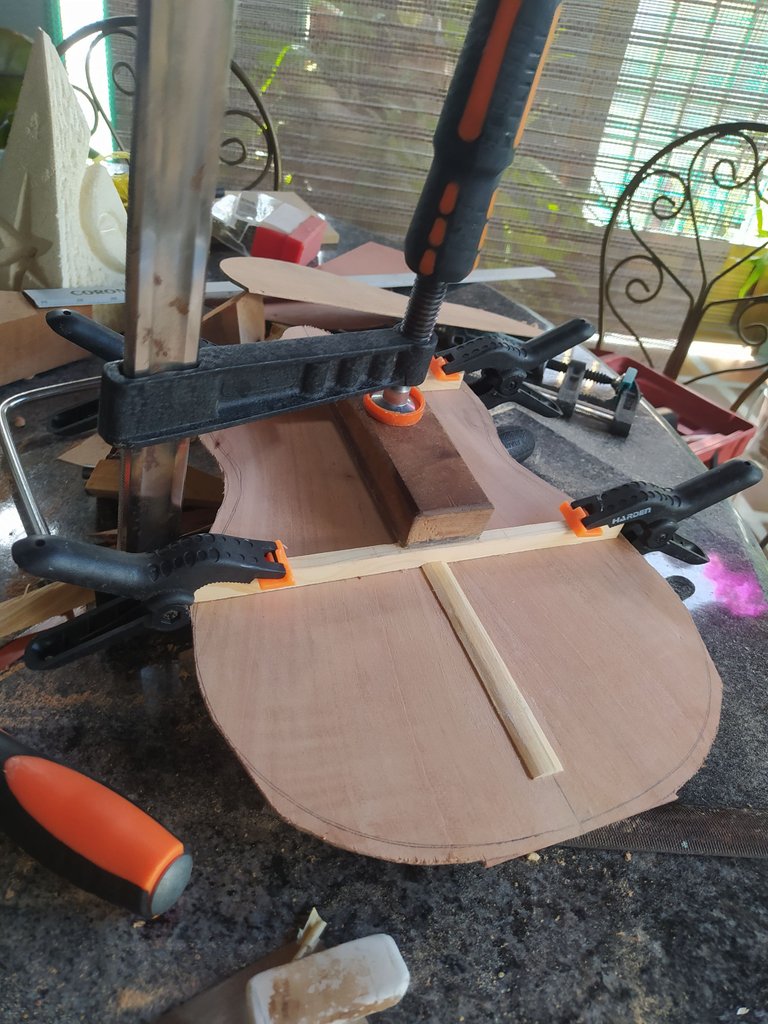
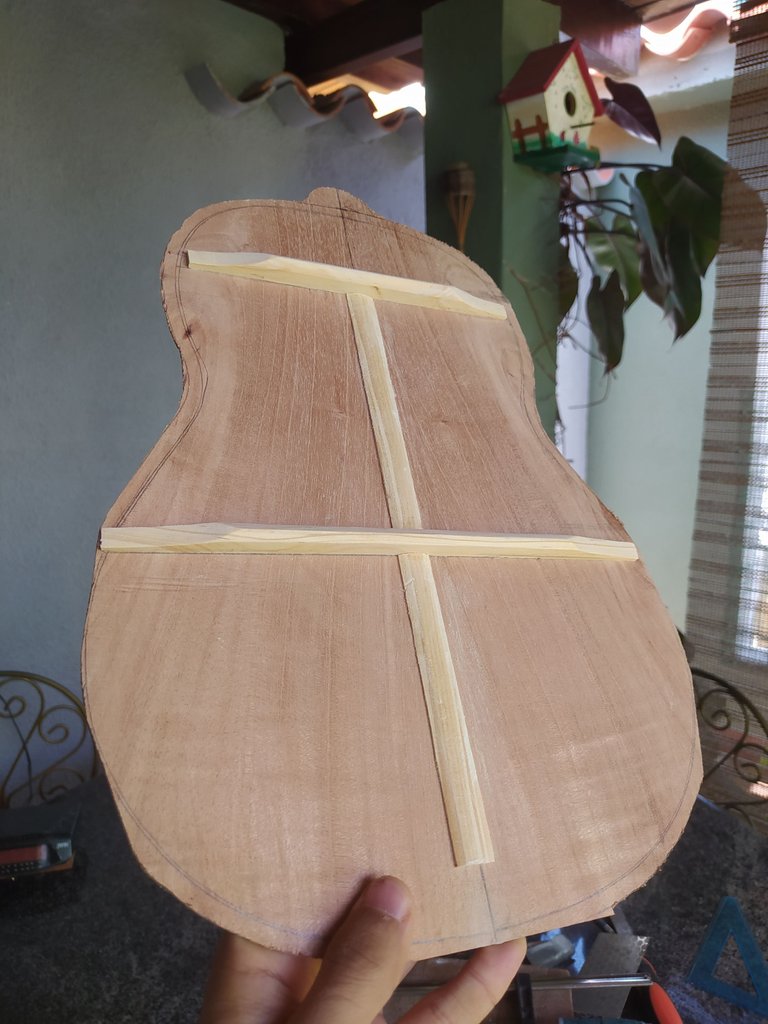
Of course, the sound board isn't complete without its bars to give it strength and limit the vibrating area.
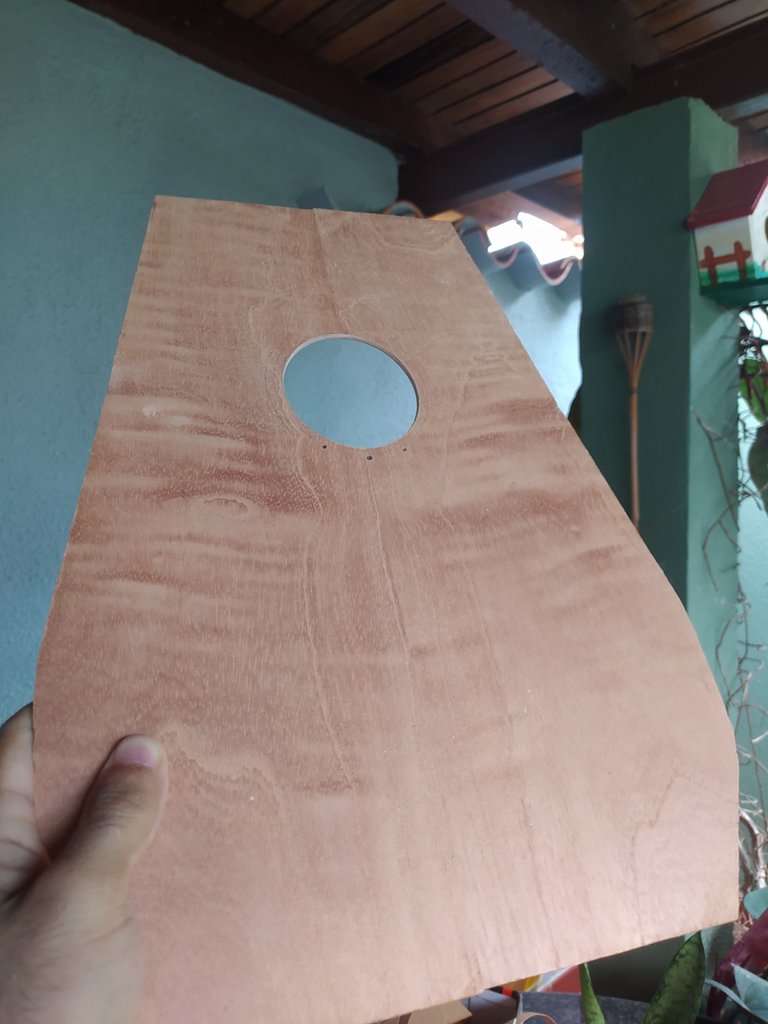
Back
I didn't have the wood for this had to wait until it was cut. There were some pieces at my teacher's workshop and, for my luck, the person who does this social cutting of pieces has started working nearby. So, after a few days, I had the rest of the pieces.
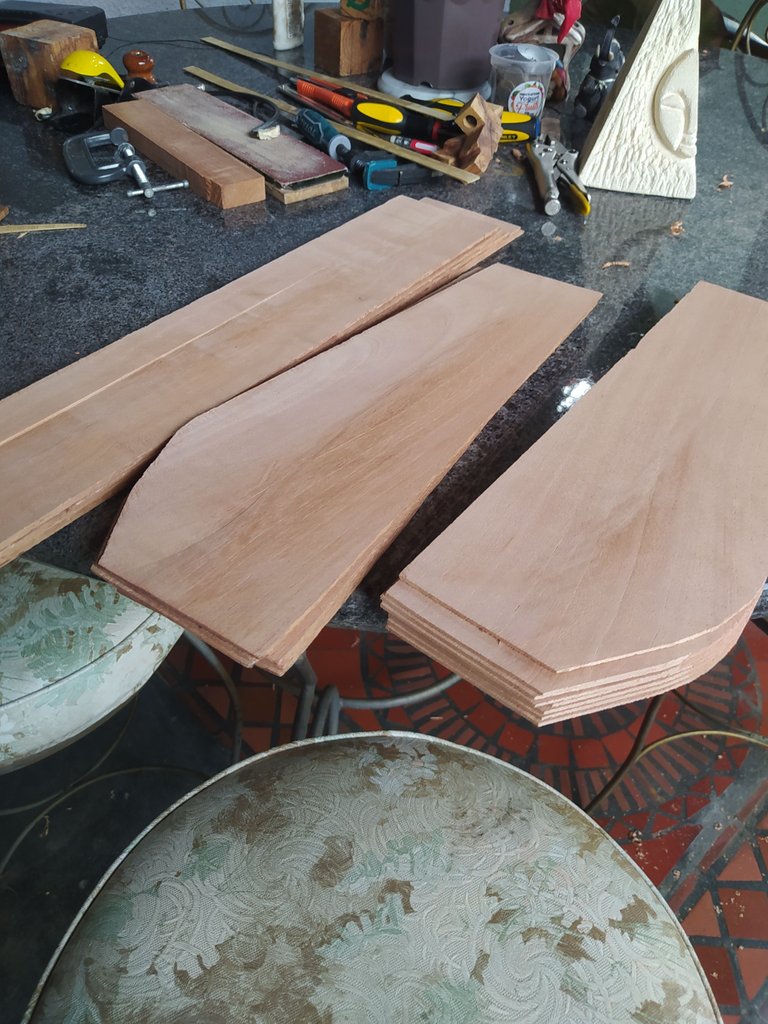
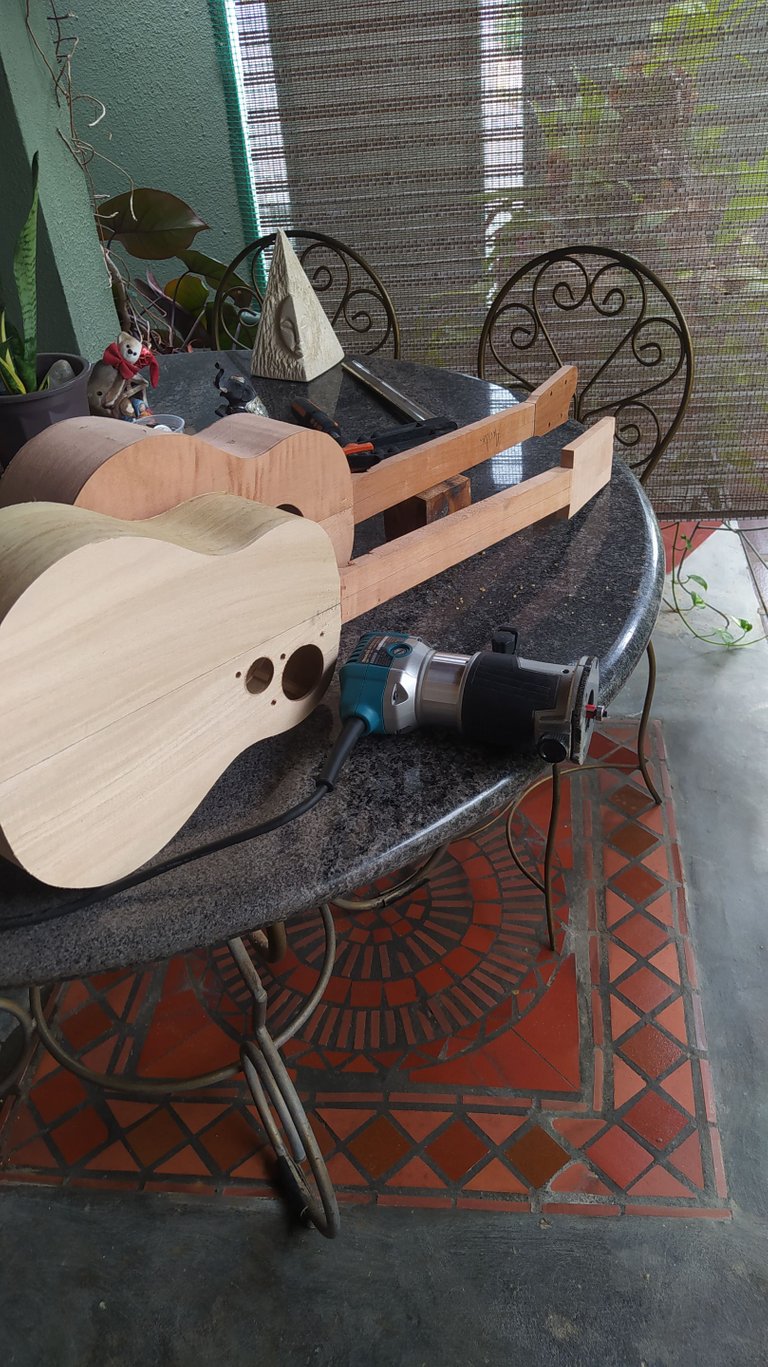
More backs, sides and sound boards prepared to be assembled.
I washed no time in assembling a back for this Venezuelan Cuatro. I decided to leave the back without any detail since the grain of the wood is beautiful by itself. After having the pieces together, I started to scrape and sand it to make it thinner and flat. Then, it was time to start with the reinforcements. First, the joint and the bars. After some trimming, all was set.
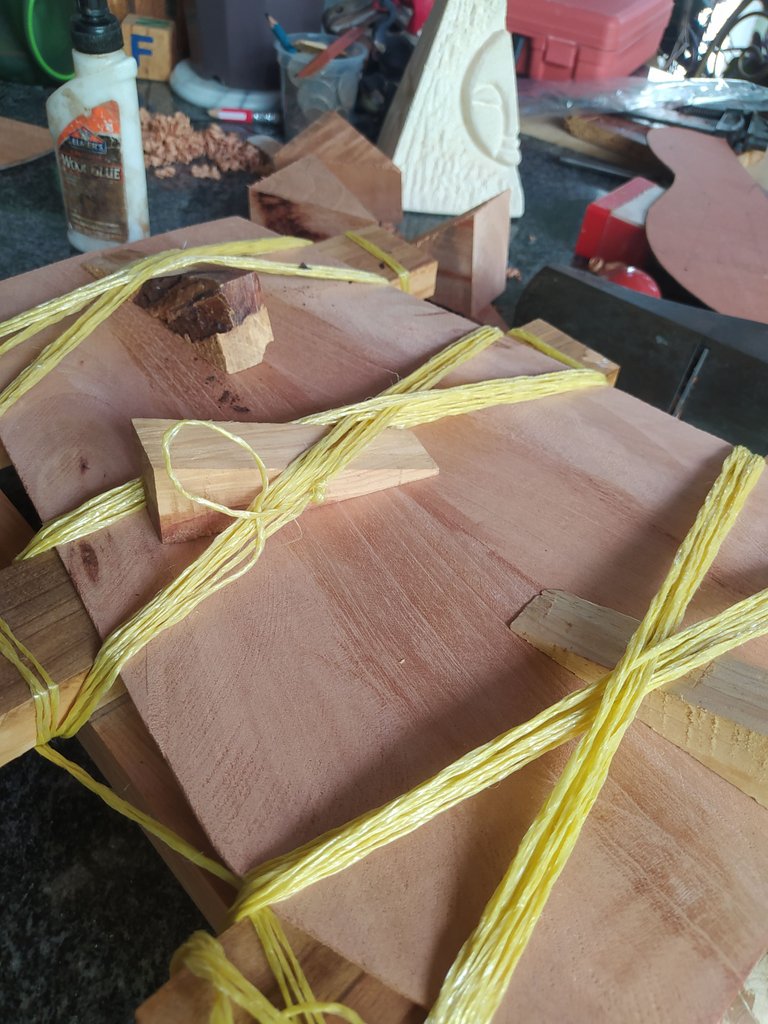
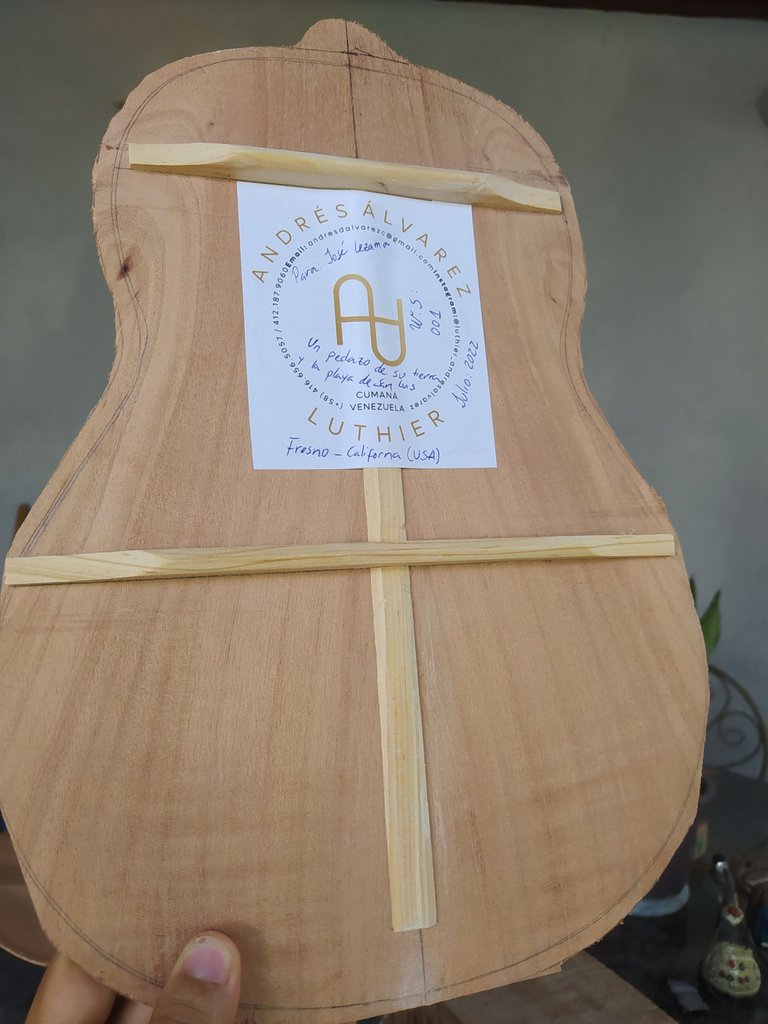
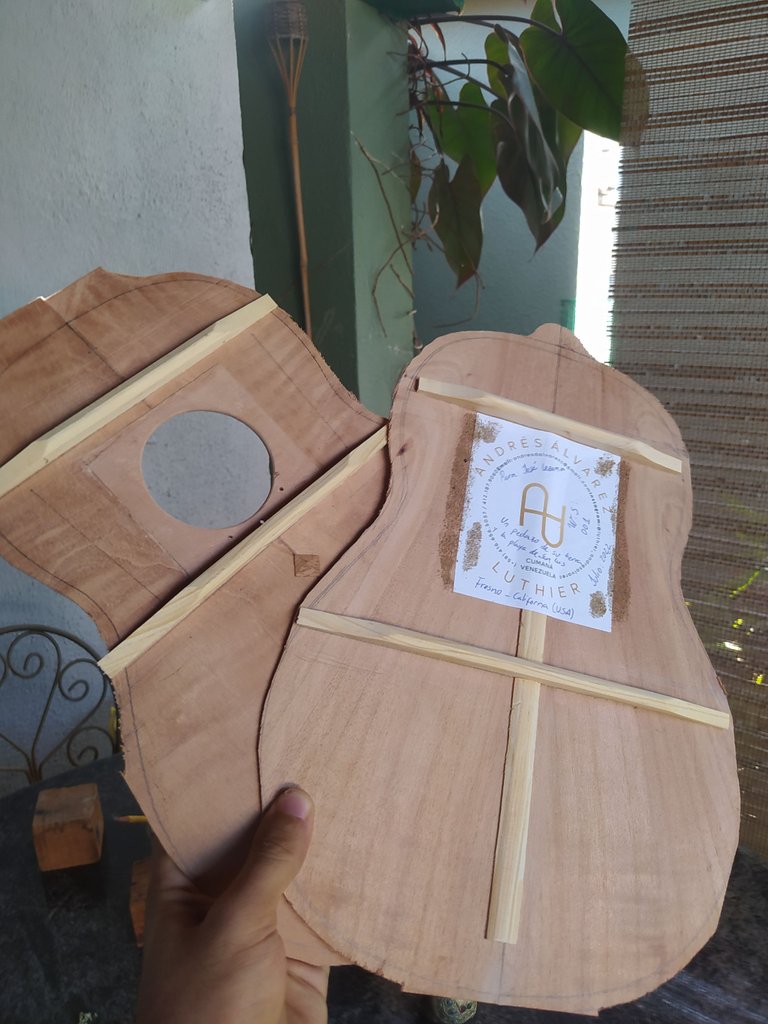
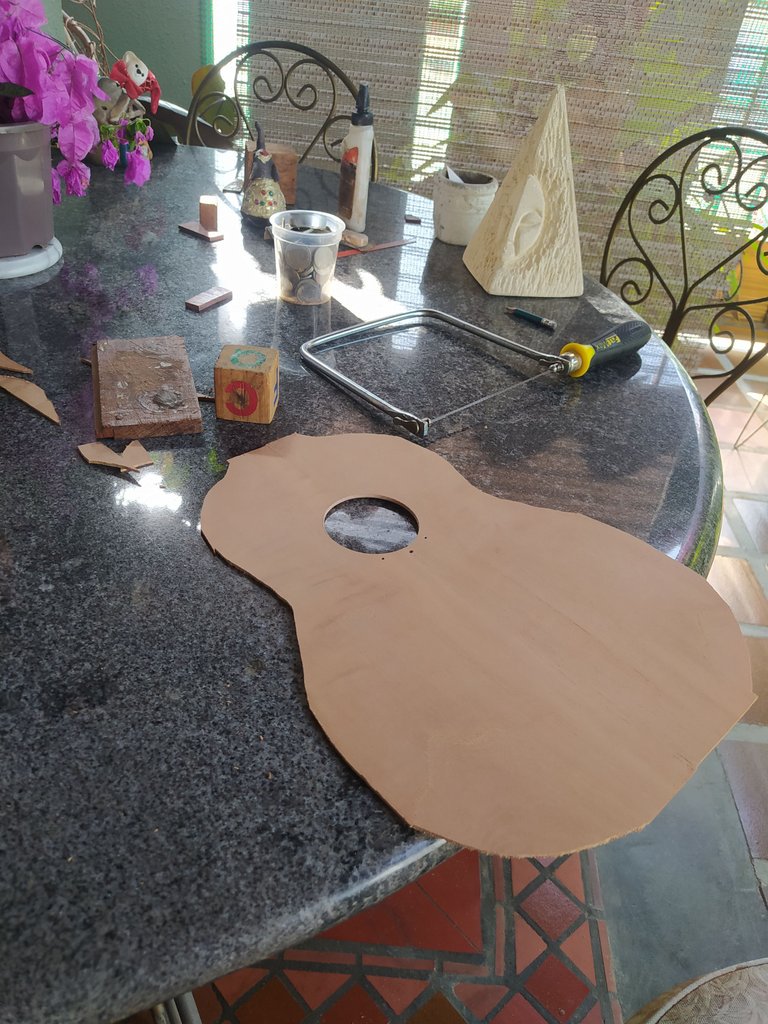
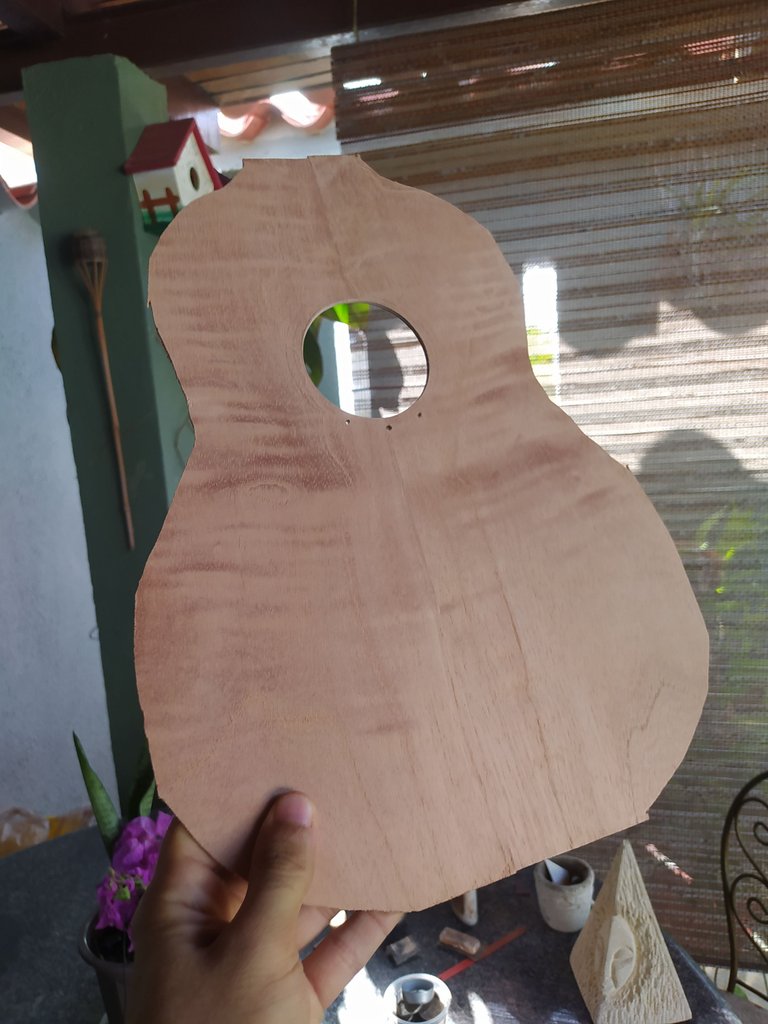
Back and sound board ready
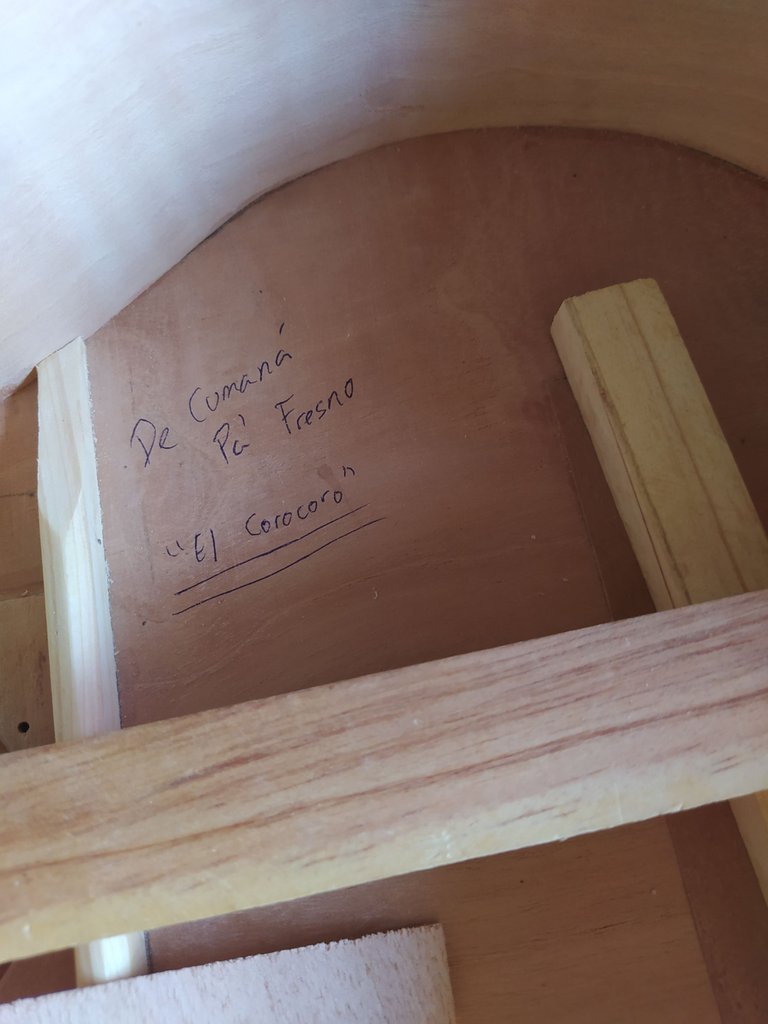
What you see on the borders of the label is sand from one of our beaches. This was a request from the client. And I felt compelled to oblige.
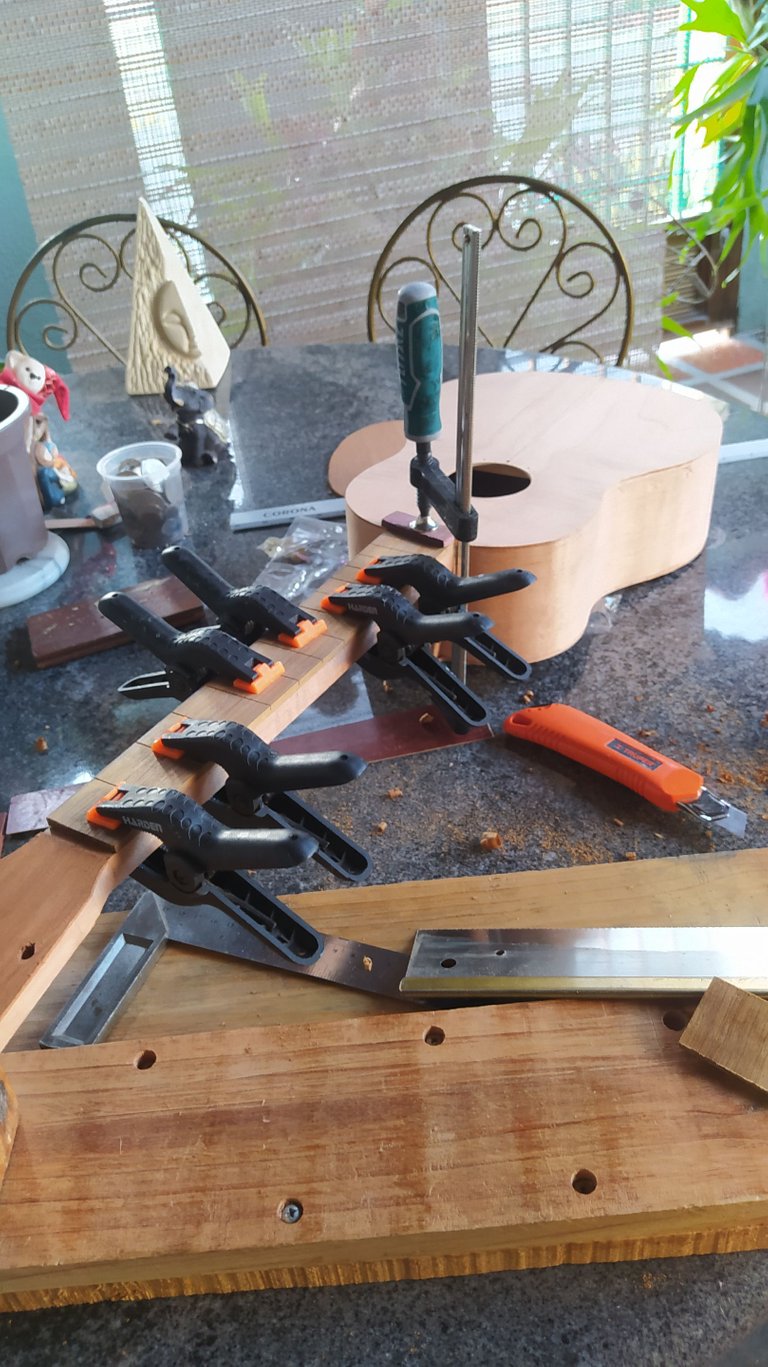
Neck
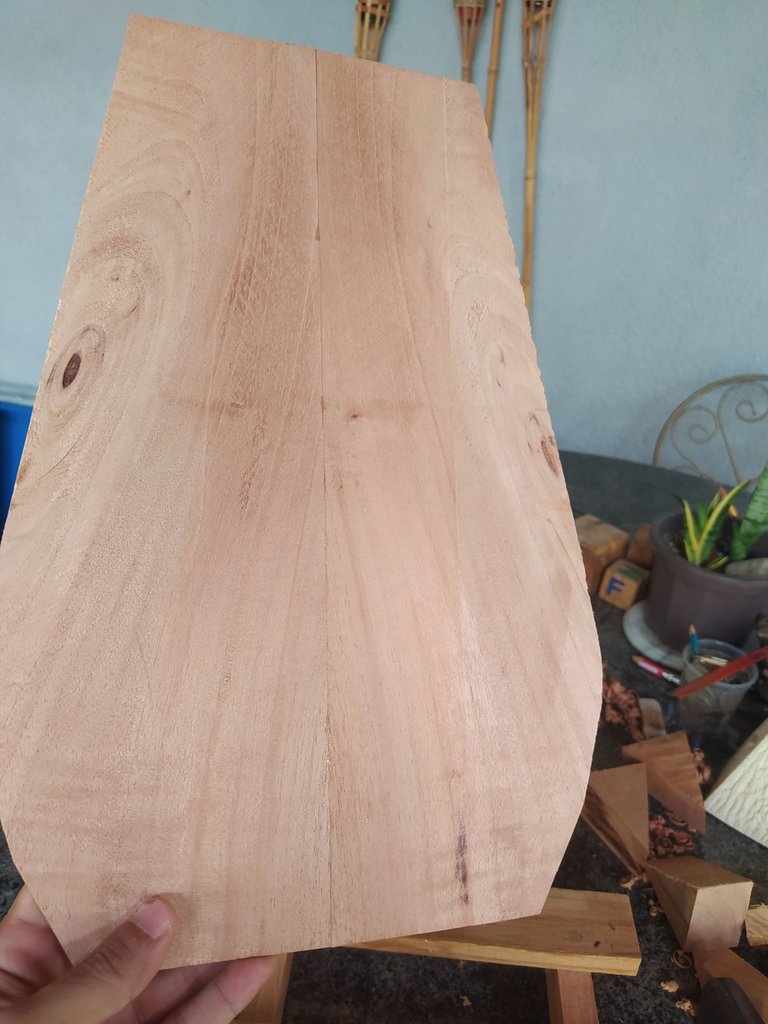
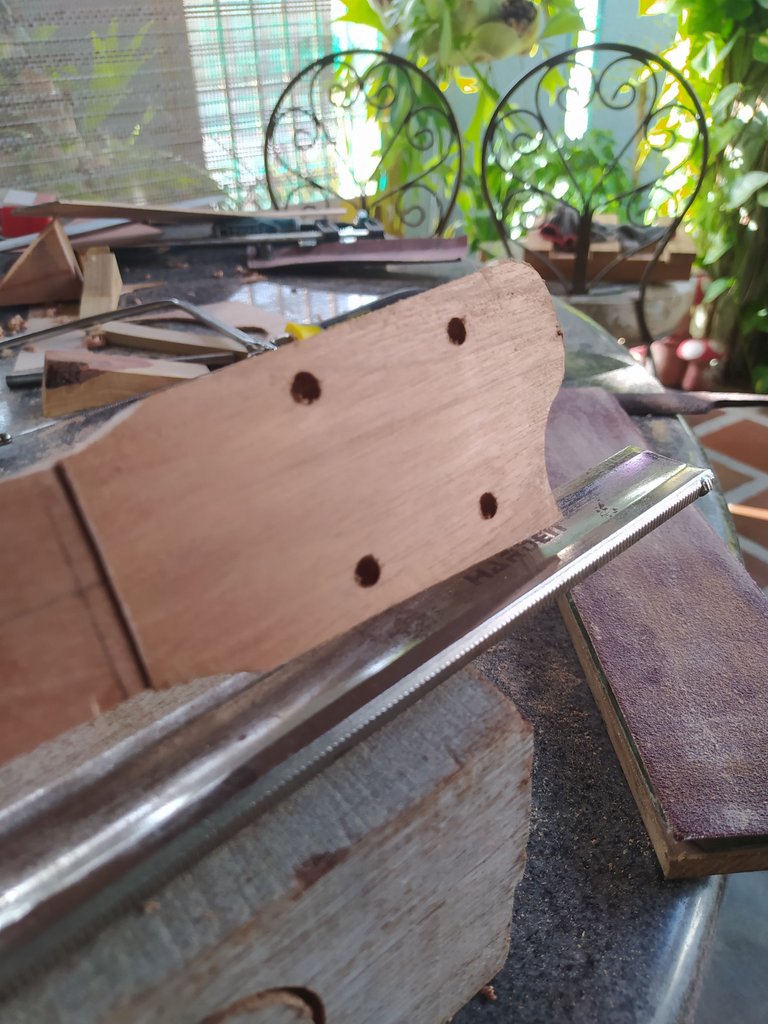
Remember all those neck I had made like a moth ago? Well, they have been paying their due as I have had a lot of free time to get them ready for the projects. On this neck, I was only missing the ornaments for the head stock and the holes for the tuning machines. Needless to say this was a piece of cake.
With these pieces ready, we can start the assembly process.
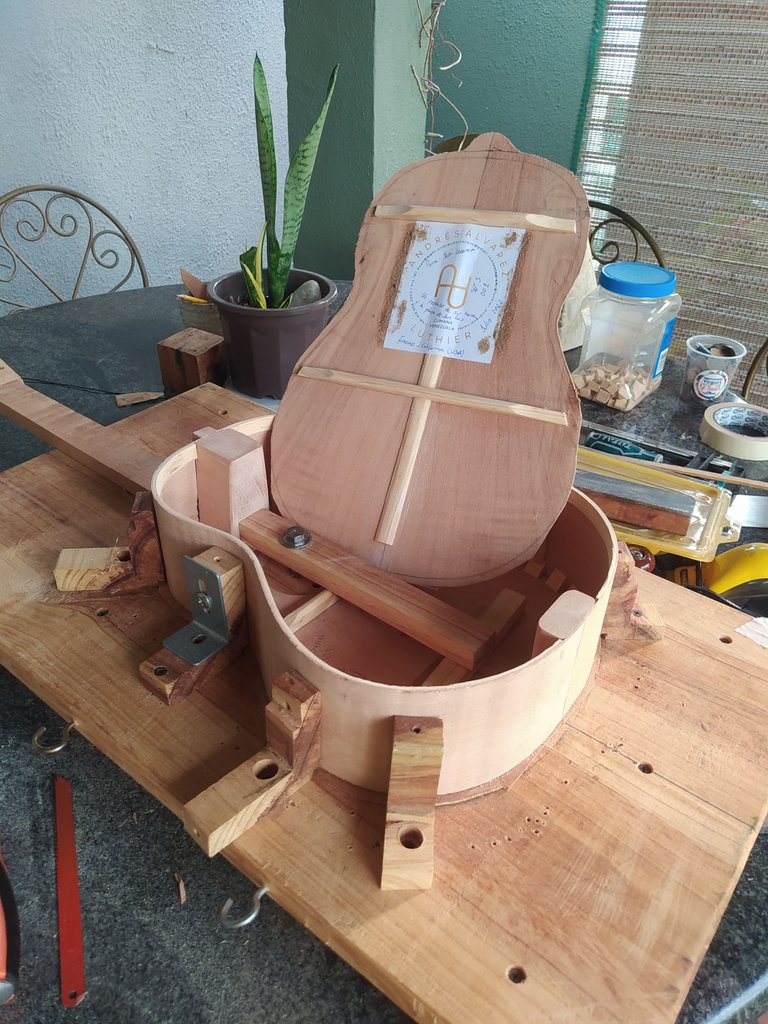
Assembly
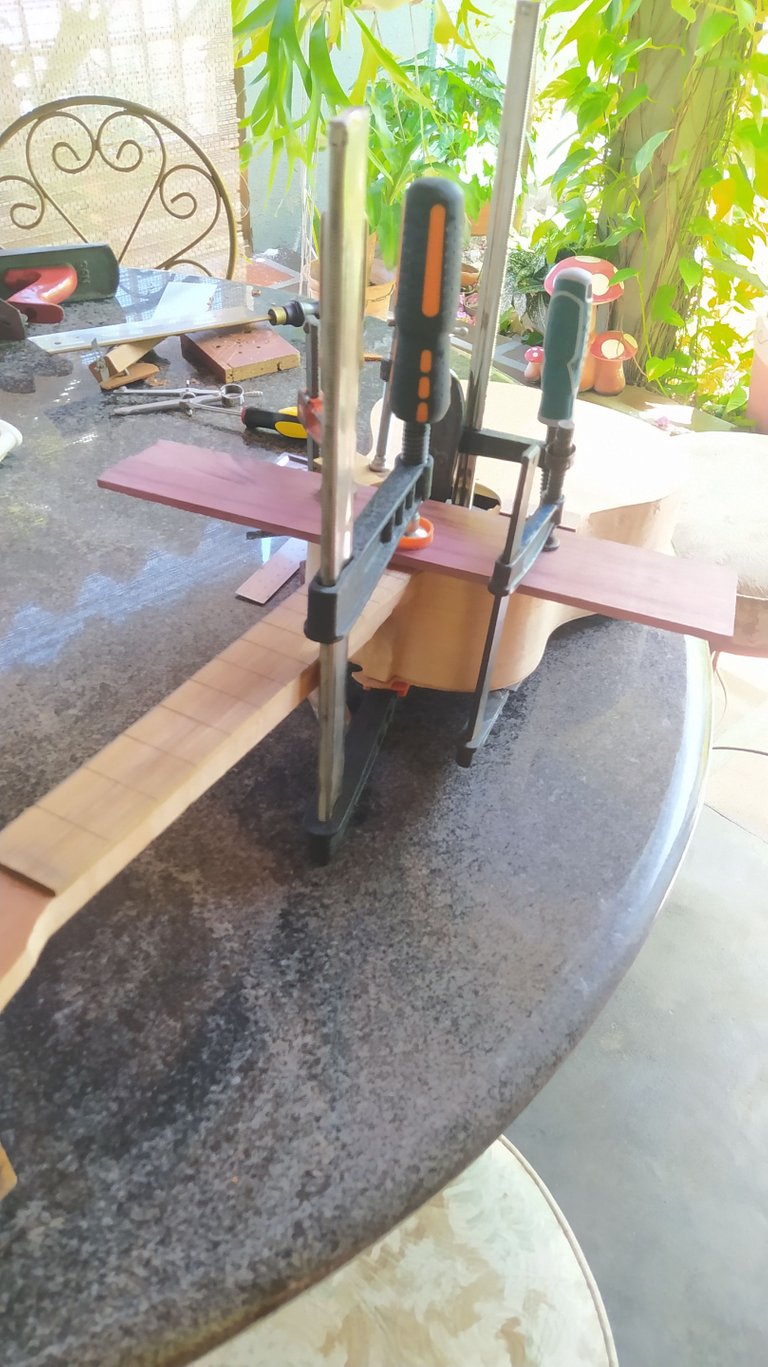
We start with the sound board and neck. We fit then with glue and hold then together for some time. This way the glue will start working and we'll be able to use a stapler to hold the whole thing together. The staples also help us press the sound board against the neck so it can glue properly.

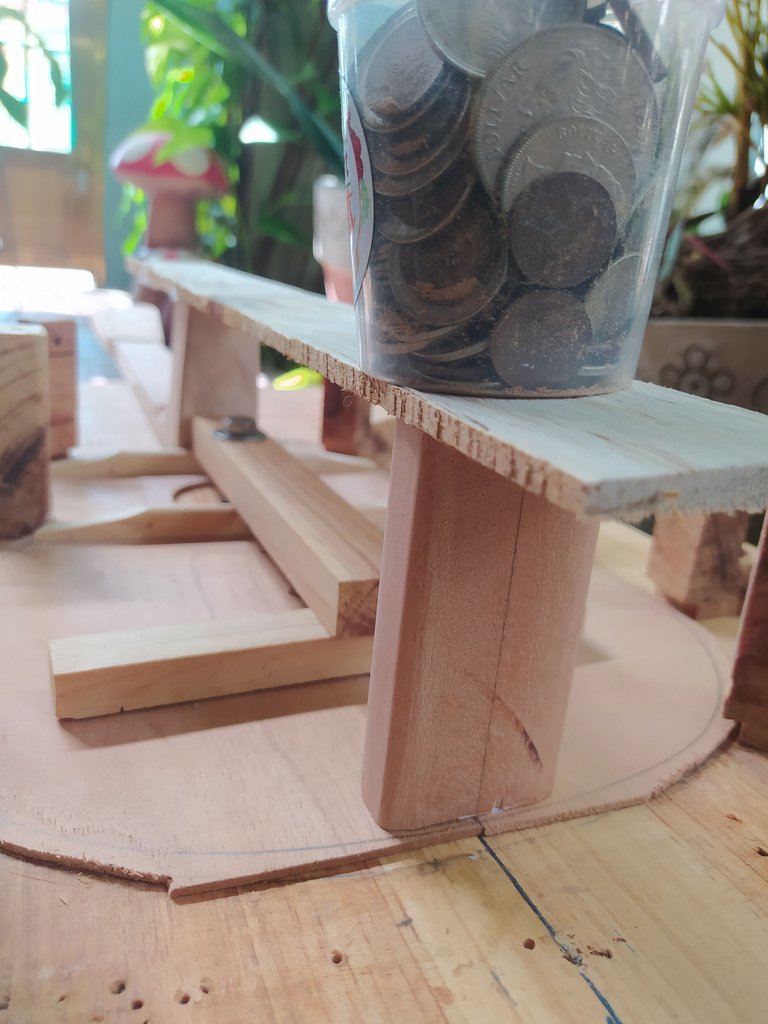
End block
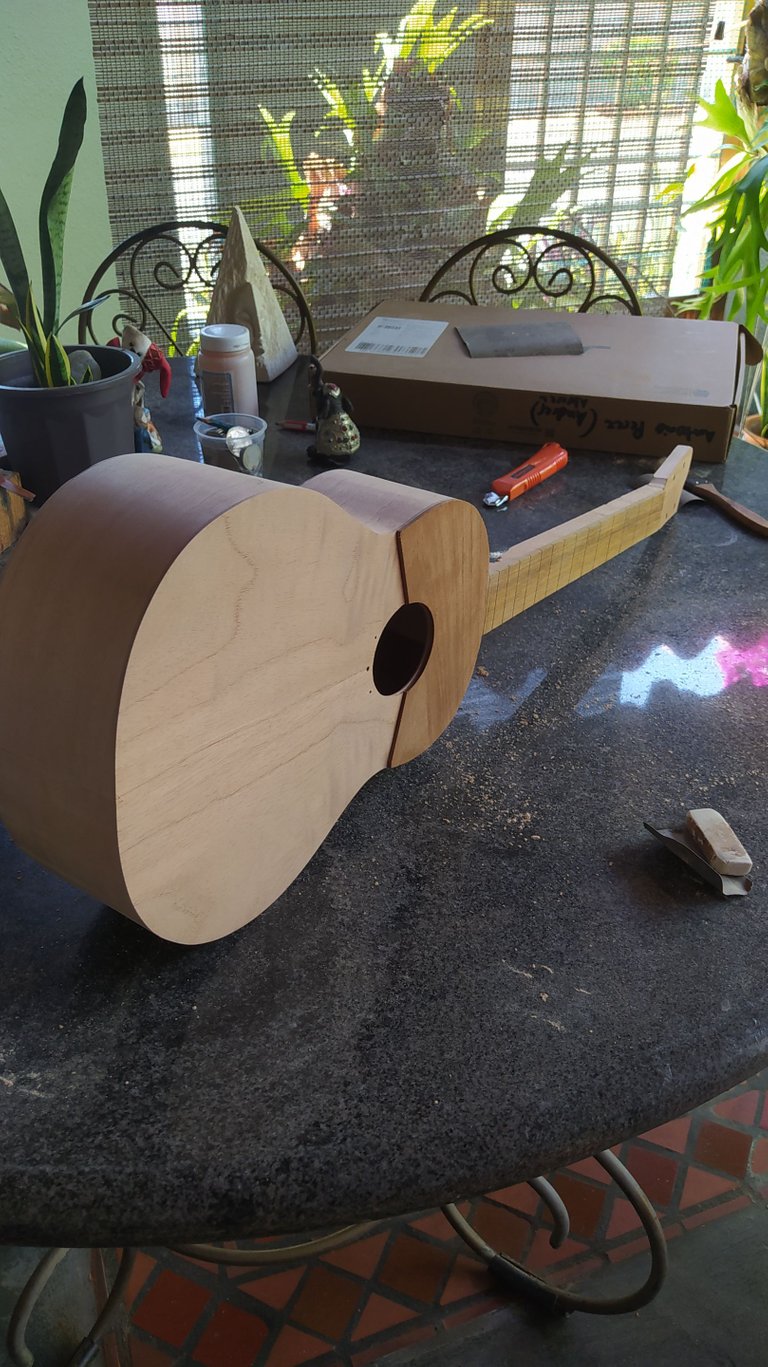
This piece goes opposite to the heel and severs the same function. It holds everything together at the end of the instrument. We use a 9cm block since this instrument will have a flat back and glue it on the far end on the sound board.
Sides
It's now that I realize that I missed a lot of photos. Too much focus on the work made me skip the process of thicknessing the sides and bending them. But it's simple. First, we use our scraper to remove any cut marks and uneven surfaces. Second, we hydrate the wood to make more flexible. Last, we use our bender to heat the wood and give it the shape of the instrument.
Of course, there's some trimming required and other things in the process, but that's woodworking (pardon my bad joke).
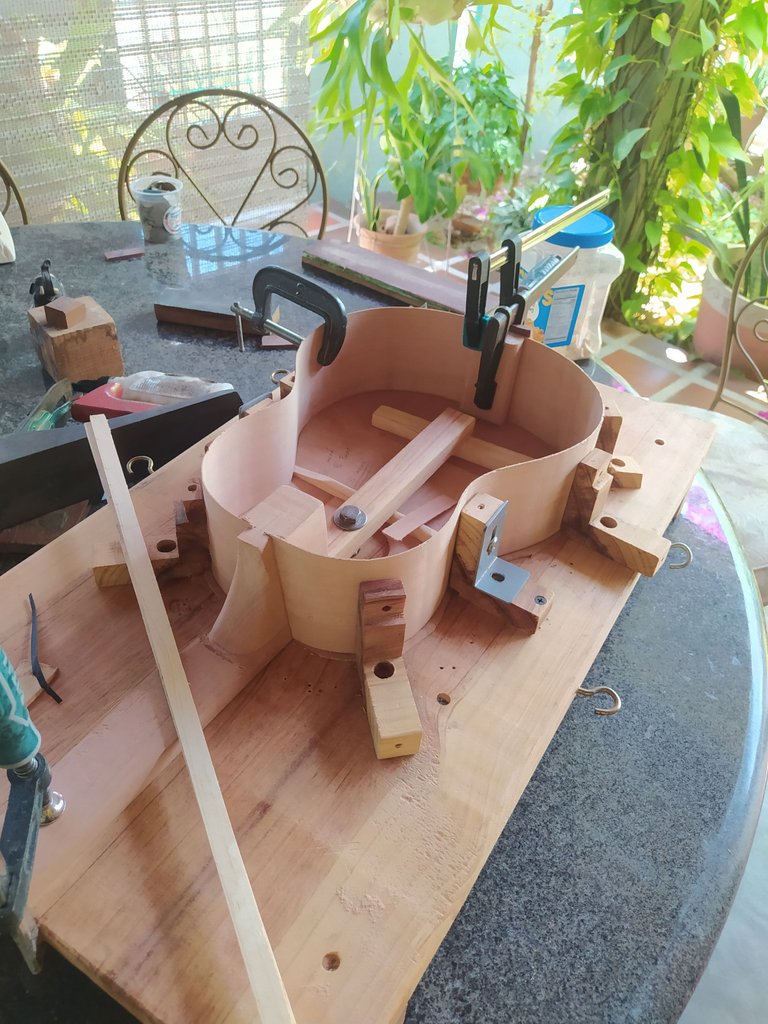
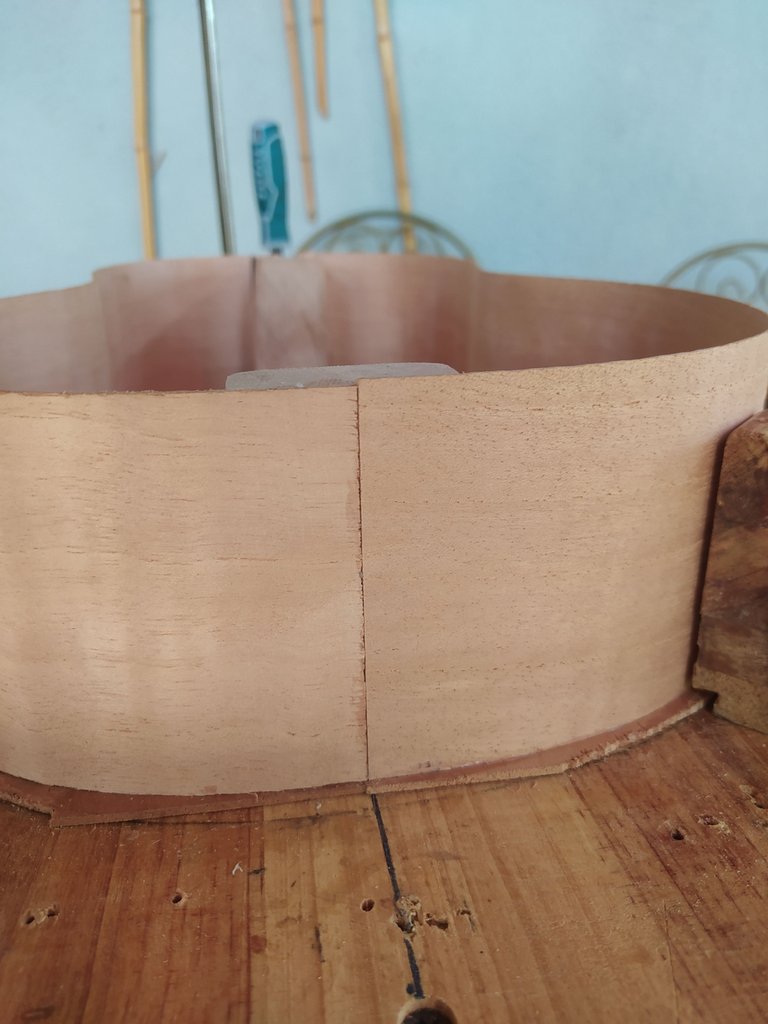
And this is how the sides look after gluing. I also realised I hadn't written any message on this one. That was easily fixed! And we press on with the reinforcements.
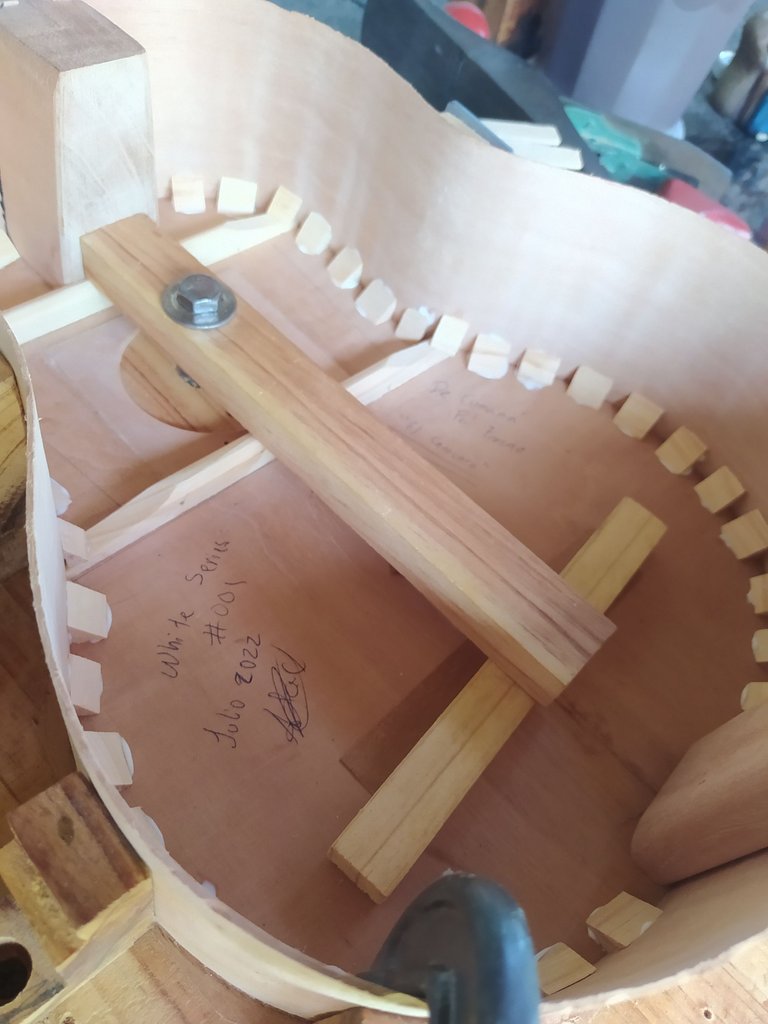
Kerfing and reinforcements
We have some extra pieces inside. First, the wedged called kerfing to secure the sides and glue them to the sound board. We can use as many as we want, but babe to be aware that everything on the sound board adds weight. Weight reduces vibration. Vibration means sound. So spacing the kerfing in important. After these, we have reinforcements for the sides on the place we're they are glued to the back. Last but not least, some vertical reinforcements to strengthen the sides on key points. These last are just for structural integrity.
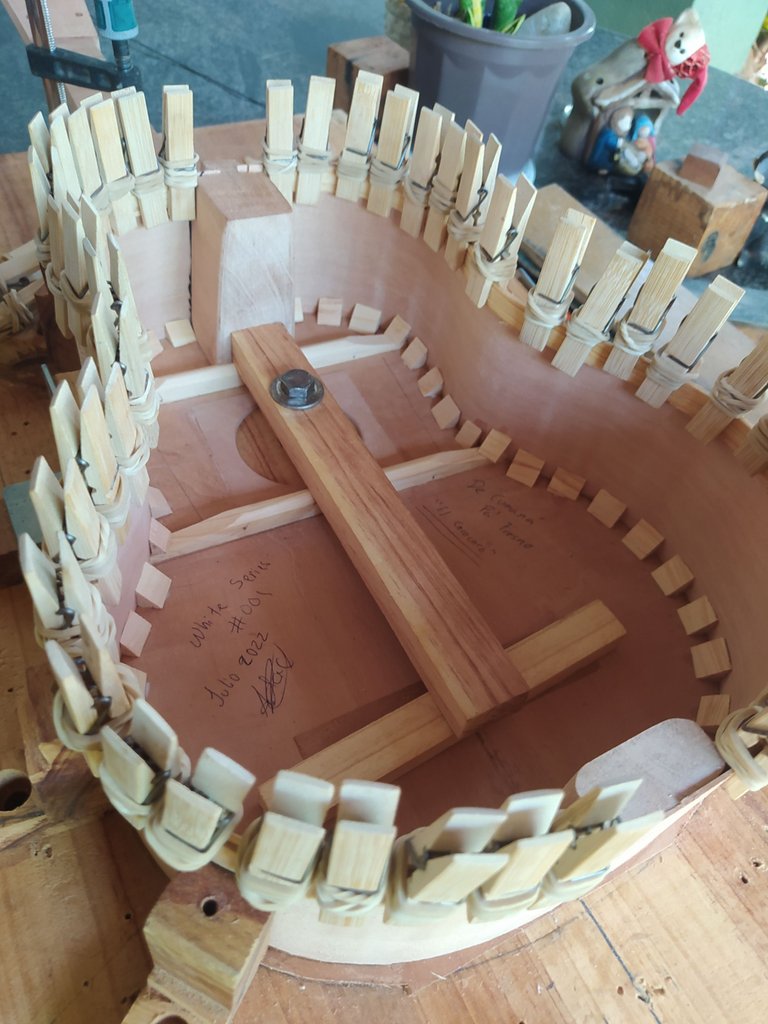
Ready to close
With all the reinforcements in place we can close this one up. There's some trimming and measuring that needs to be done before that. But nothing too difficult. The idea is to have back fit on the instrument as good as possible.
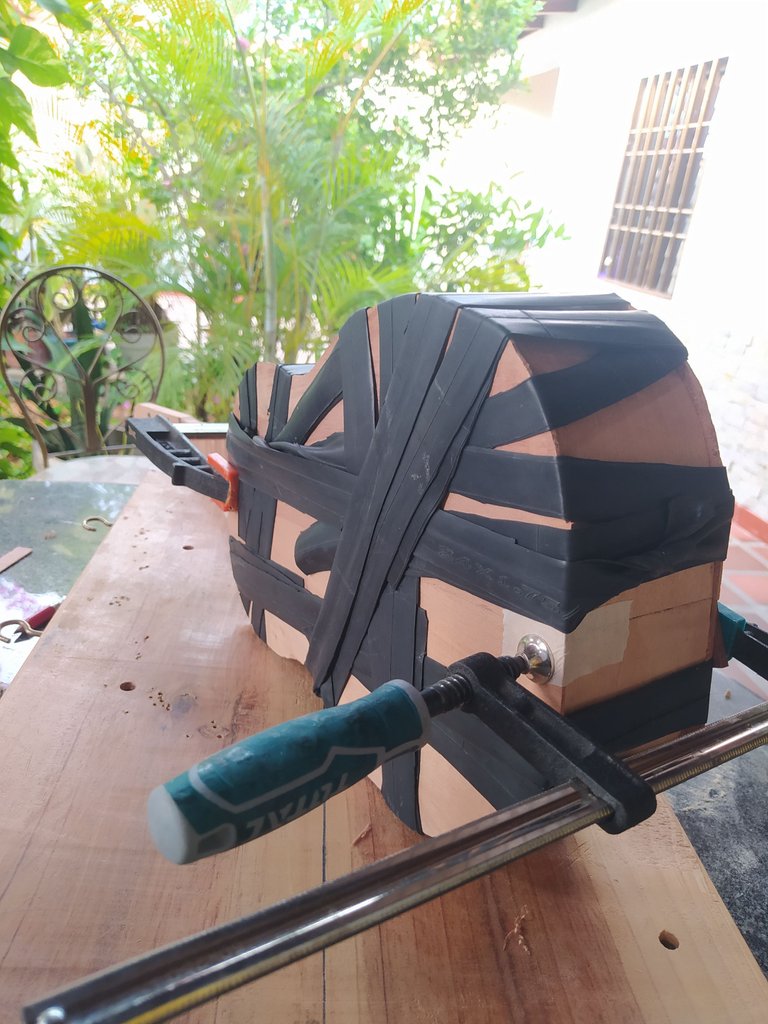
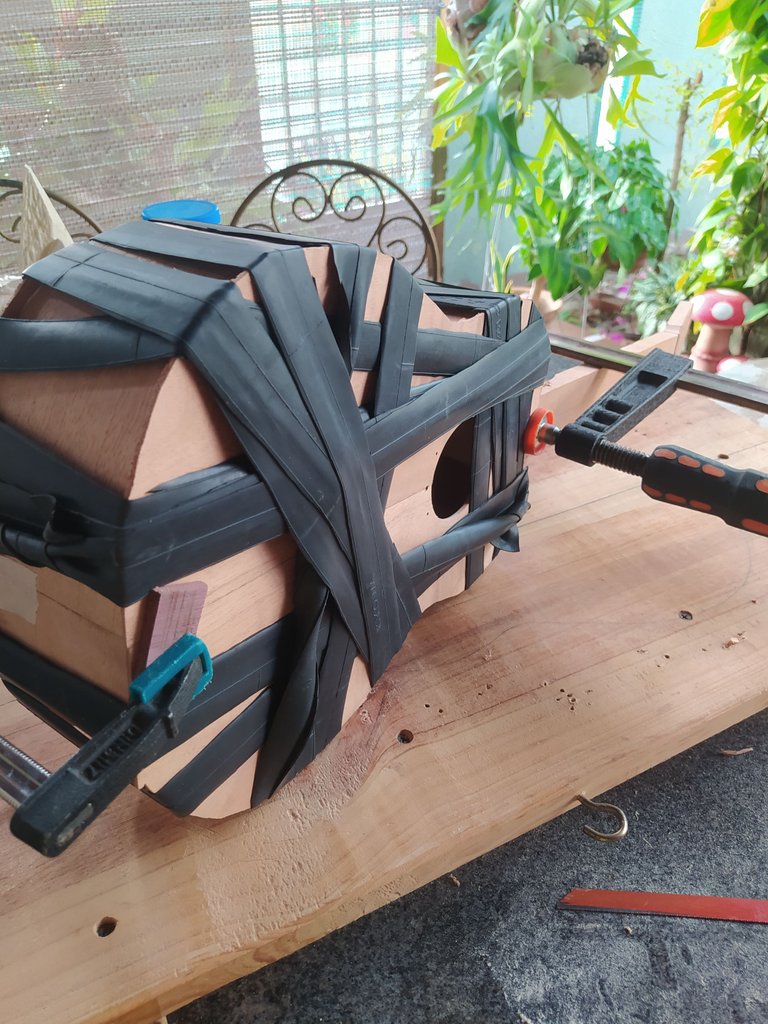
I repeated the process of using this elastics since it works pretty well and it's easy to do.
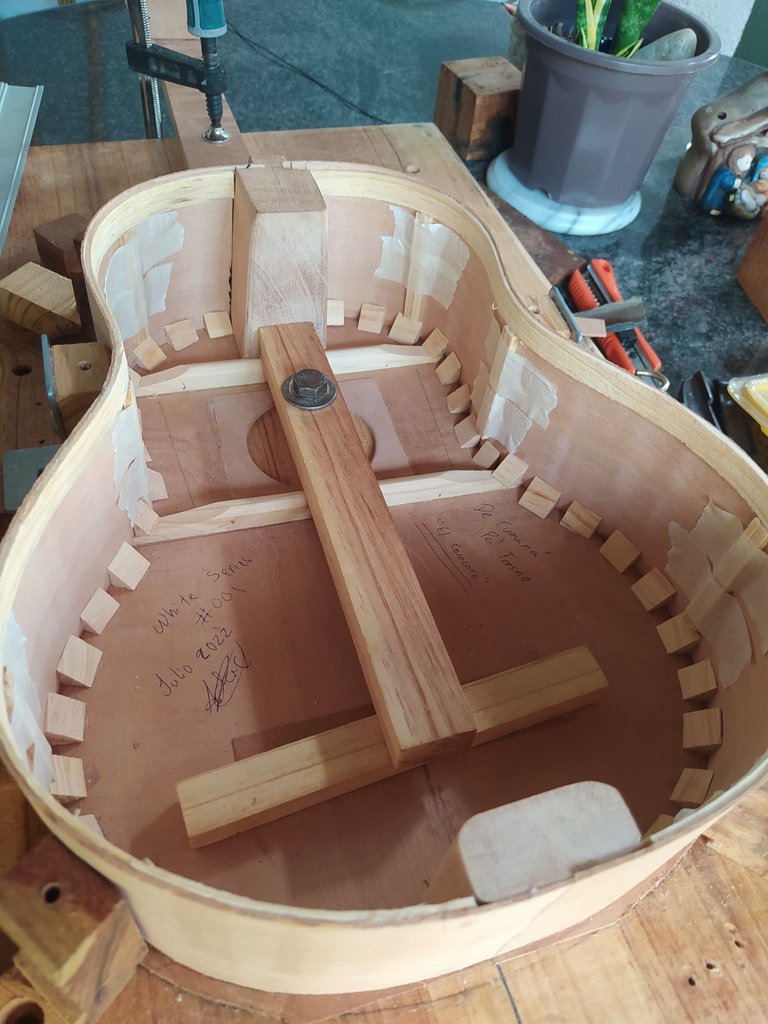
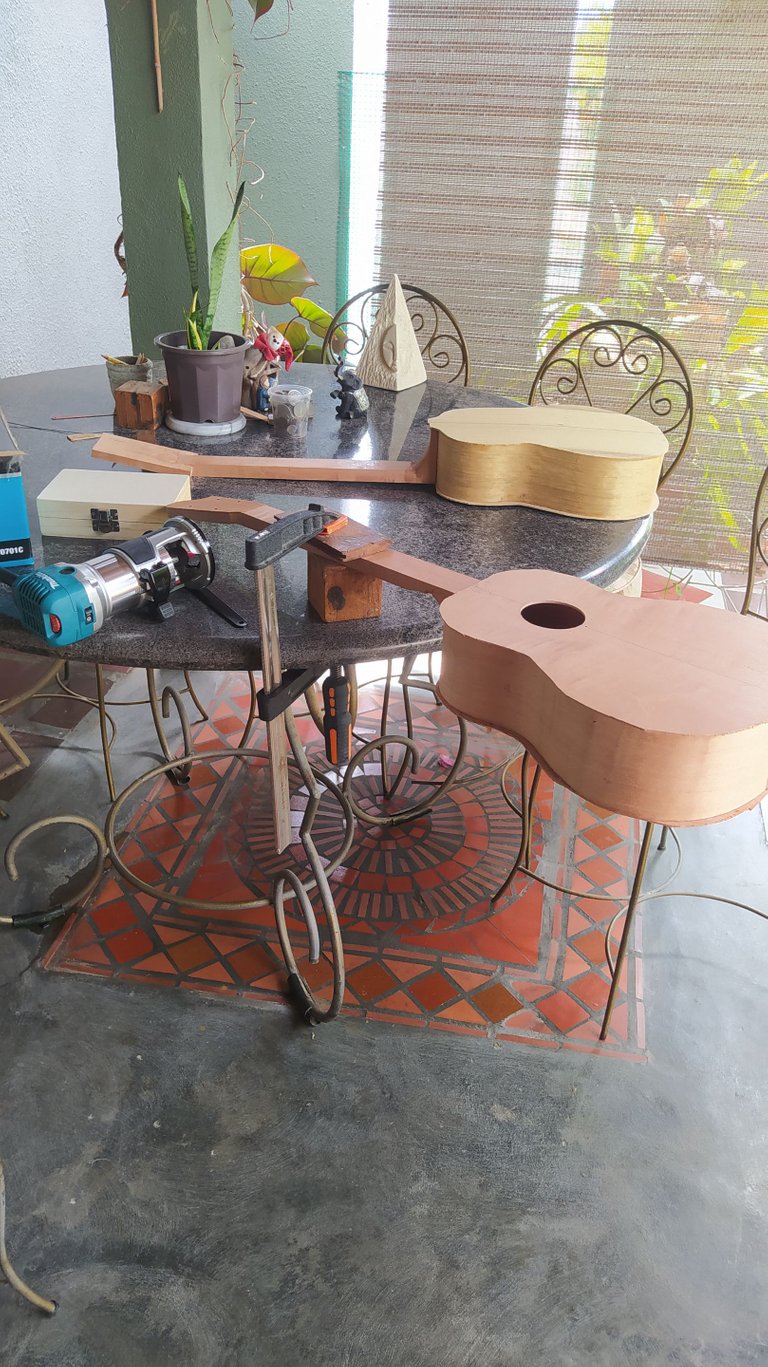
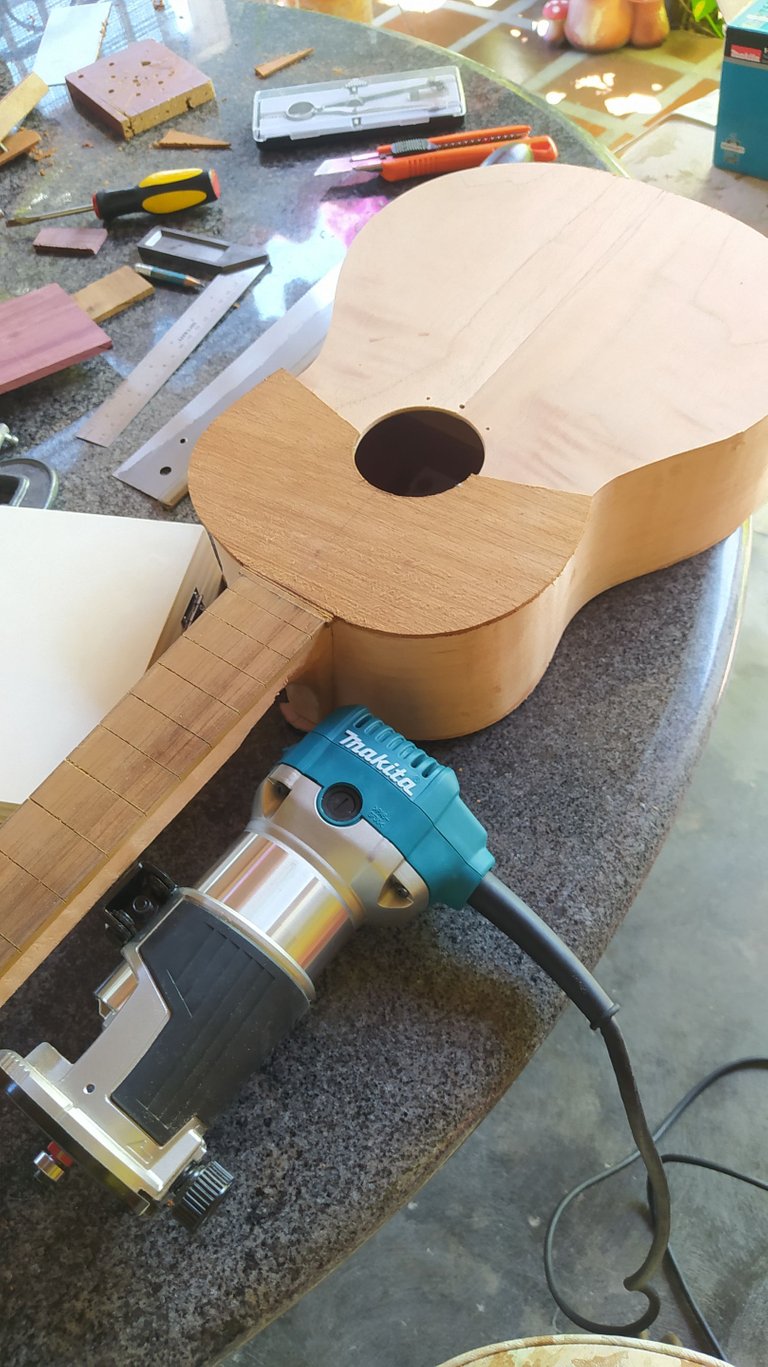
Trimming and accessories
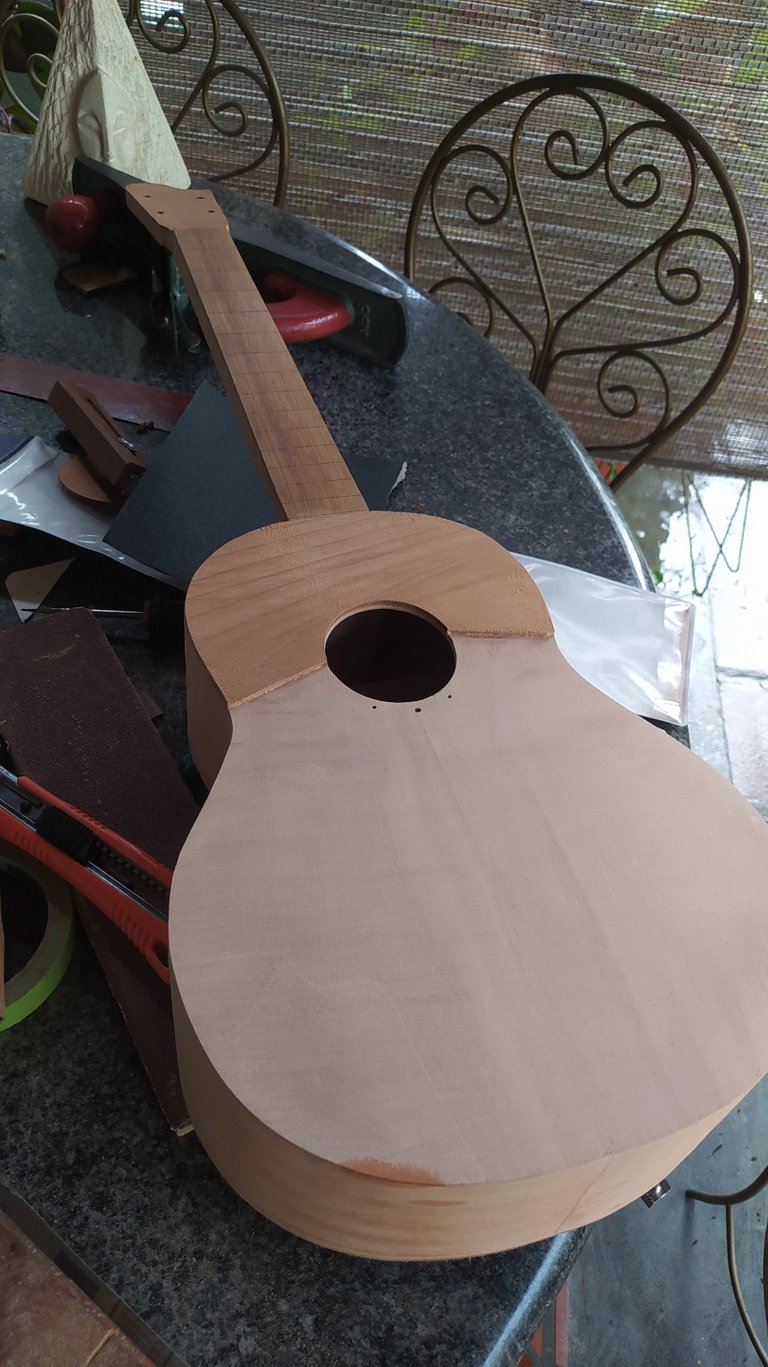
After removing the elastics, we proceed to tirm the instrument with a router. This gives us the final shape of the project. But we are not done. Some other pieces need to be added. The fretboard and the strumming guard are next. Both require precision.
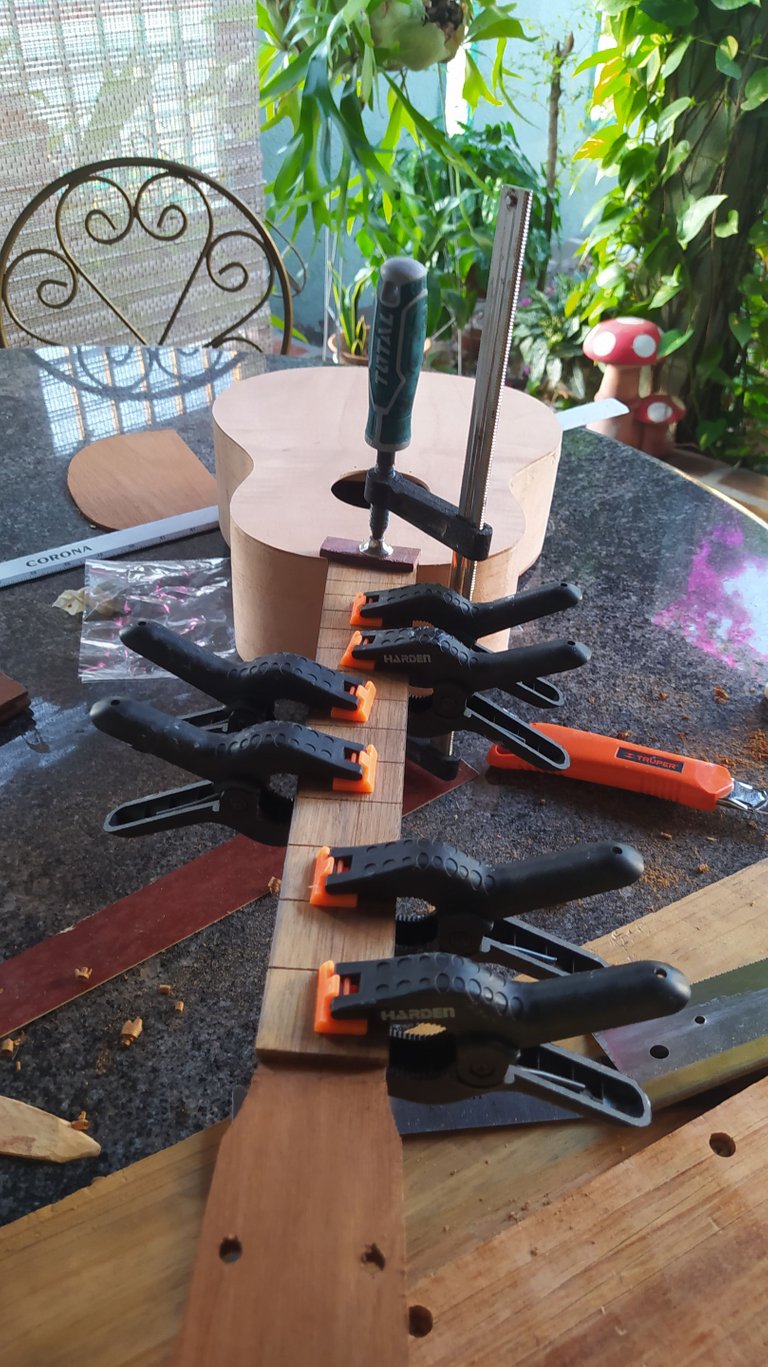
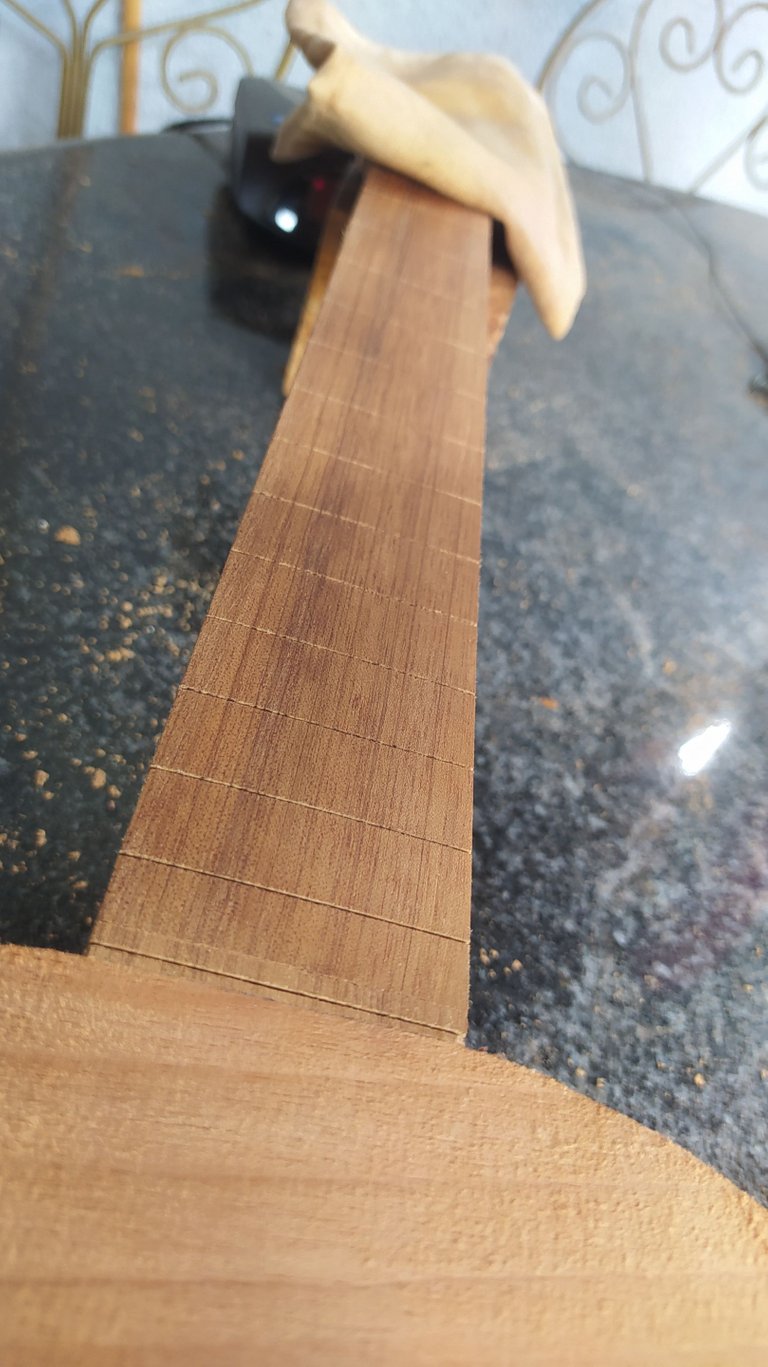
Fretboard
Here we will place the frets. The slots need to be made with care. This will ensure s good tuning of the instrument. However, the hardest part is gluing it aligned to the center line of the whole instrument. So it's important to keep an eye for that. A crooked fretboard needs a crooked setting.
Strumming Guard
A defining feature of the instrument. Since the strumming action is high, the instrument has this piece that goes in top of the sound board. Some instruments use a pick guard. Here we protect the top from the nails with a piece of wood. It can have any particular design but it has to be aligned with the sound hole.
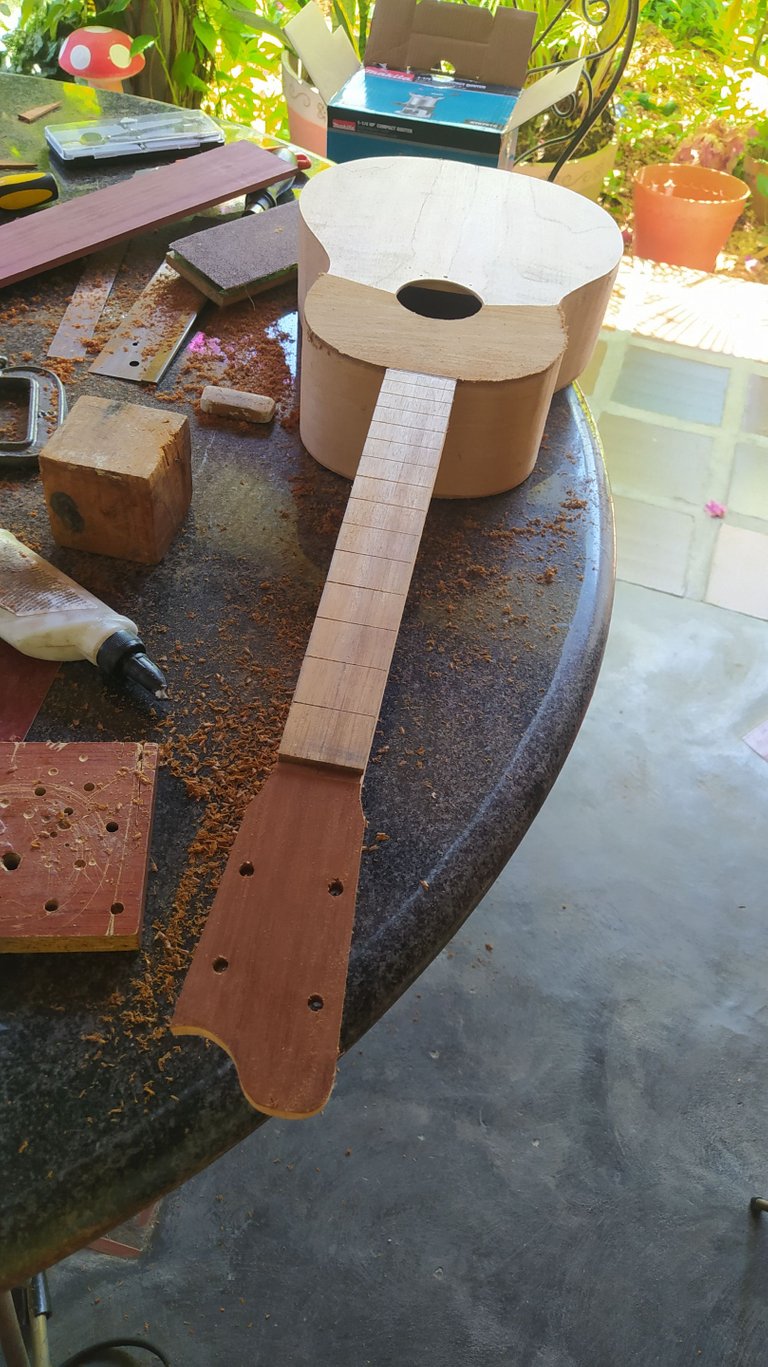
Preparing for the future
Since we don't have any brass frets, we had to buy some and are still waiting for then to arrive. While that happens, we prepare the fretboard. It need to be leveled along with the strumming guard. A lot of sanding does it. Then, we prepare it for a cost of oil. This is done with more sanding until the surface is smooth.
Half sanding
With the fretboard on hold, we took the time to sand the body of the instrument do we can do less sanding in the future. The results show the beauty of the grain and will gives us a smooth finish once the instrument is ready.
On that note, I end this post. I hope you enjoyed the process as much as I do. Be ready for next entry where we might give this project a close and finish a few others that are on hold as well. Until next time!
Follow me on Instagram for enquires and commission.
If you'd like to help the workshop grow, you can make a donation here. You can find me at discord as bertrayo#1763
¿Dónde queda fresno? Bueno qué bien te quedó el corocoro, filósofo. Así que solo fuiste a la playa para buscar el pedido del cliente, chamo aprovecha esas playas, que los que estamos afuera desearíamos ir siquiera a ver el paisaje. xD
Bueno, yo tomé fotos para tener el paisaje y mandarla también. Fresno queda en California, filósofa. Ahí va el Corocoro, le falta poquito para estar completo.
Un corocoro en California 👏👏
¡Una cosa insólita!
Que belleza... Increíble todo el proceso, muy interesante todo tu Post.
Gracias por compartir 🤗🤗😊
Muchas gracias por tus palabras. Me alegra que te haya gustado. ✌🏻✨😌
Congratulations @bertrayo! You have completed the following achievement on the Hive blockchain and have been rewarded with new badge(s):
Your next target is to reach 5000 comments.
You can view your badges on your board and compare yourself to others in the Ranking
If you no longer want to receive notifications, reply to this comment with the word
STOPTo support your work, I also upvoted your post!
Check out the last post from @hivebuzz:
Thank you for sharing this amazing post on HIVE!
Your content got selected by our fellow curator @hafizullah & you just received a little thank you via an upvote from our non-profit curation initiative!
You will be featured in one of our recurring curation compilations and on our pinterest boards! Both are aiming to offer you a stage to widen your audience within and outside of the DIY scene of hive.
Join the official DIYHub community on HIVE and show us more of your amazing work and feel free to connect with us and other DIYers via our discord server: https://discord.gg/mY5uCfQ !
If you want to support our goal to motivate other DIY/art/music/homesteading/... creators just delegate to us and earn 100% of your curation rewards!
Stay creative & hive on!
Thanks a lot!
Definitivamente todo un arte y poder verlo de ésta manera es genial. Cuando se hace lo que se ama los resultados siempre son maravillosos.
En efecto, vale la pena el esfuerzo y mostrar el trabajo. Gracias por tu comentario. 😌😁
@brumest is the best! Thank you and all the team at @qurator
Your content has been voted as a part of Encouragement program. Keep up the good work!
Use Ecency daily to boost your growth on platform!
Support Ecency
Vote for new Proposal
Delegate HP and earn more
Thanks a lot!
Wow, qué hermoso y laborioso trabajo, pero sobre todo muy bien hecho, eres todo un artista sin ninguna duda. Te felicito! Es un trabajo digno de admiración!
Muchas gracias! Además de todas las cosas dichas ahí, lo mejor del trabajo sin duda es disfrutar del proceso! 😌