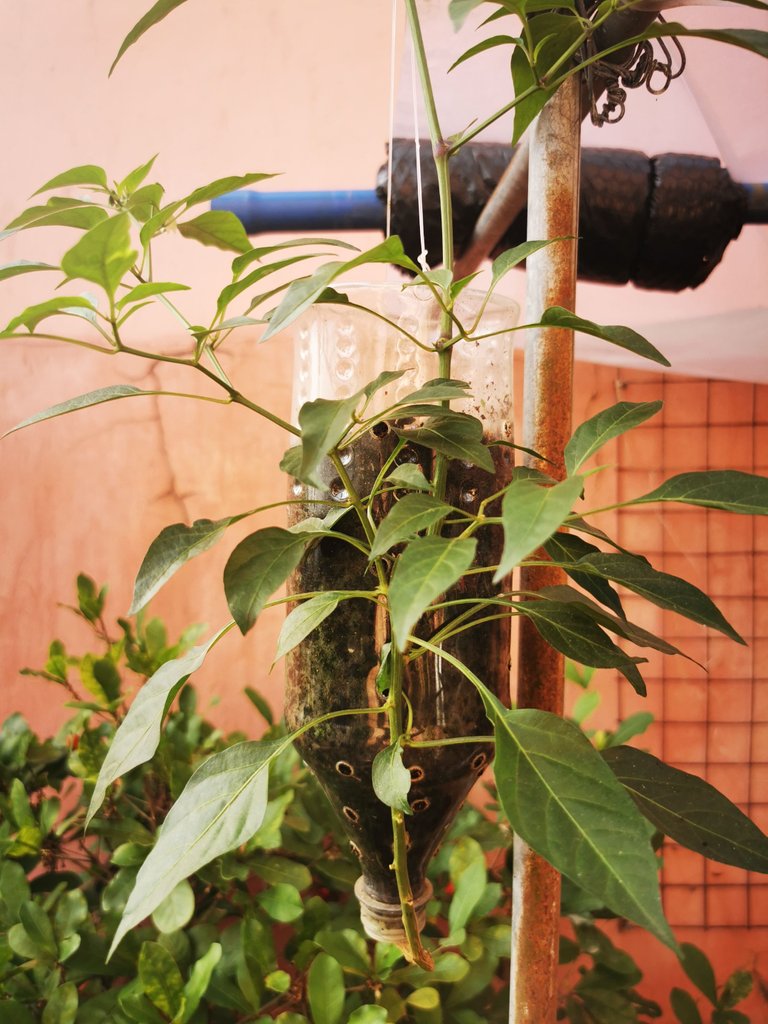
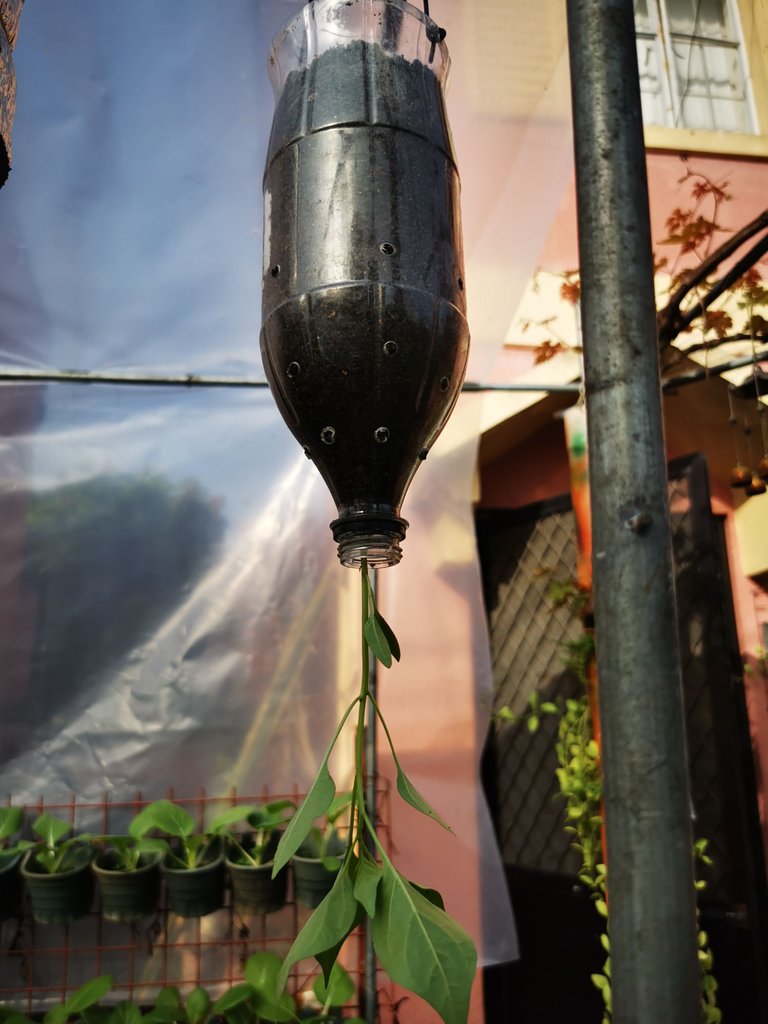
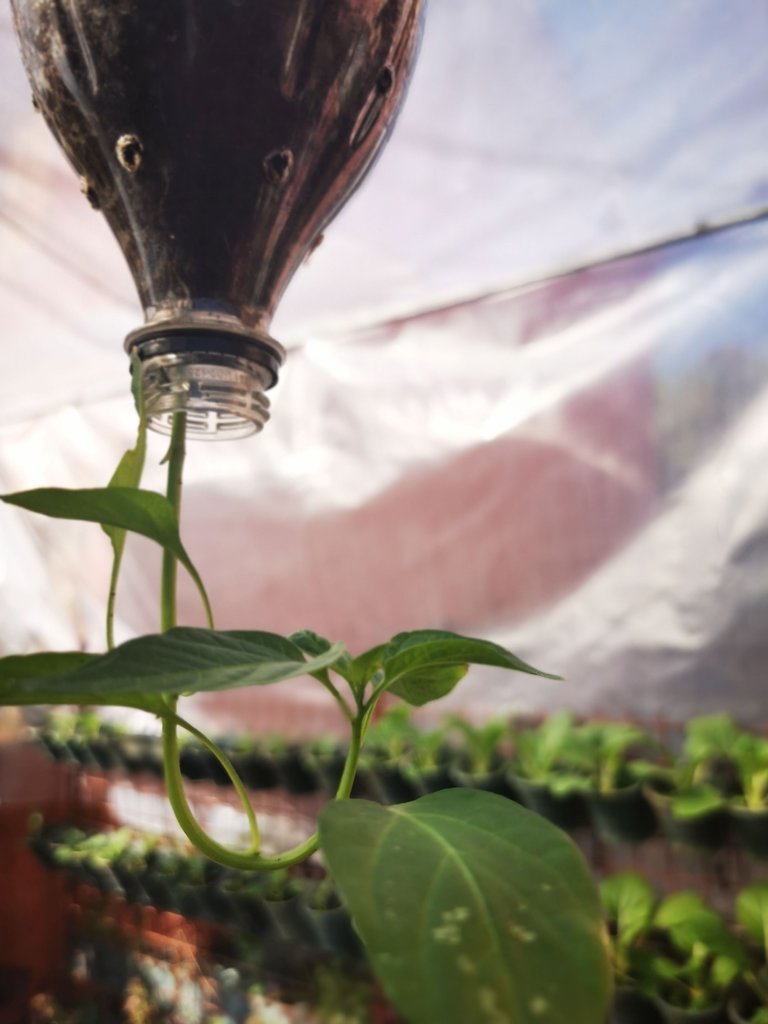
This is one of my chili plant that I planted vertically.
Yes, it is vertically planted.
And I would like to share to you the success of my experiment.
Chili is now so expensive these days. I think yearly, the price increases when Christmas is coming (in the Philippines).
That's why I planted chilis months ago. Some of them had been gifted to my friends and families so they can have their own chilis in times of price increase this Christmas.
So, let me share to you what I've done. Although this is just a simple methods and techniques, I will still show you the way I made it.
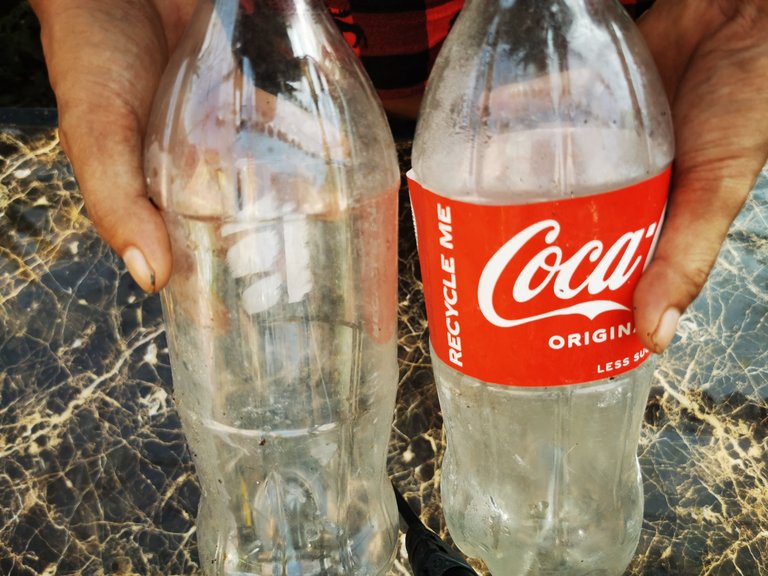
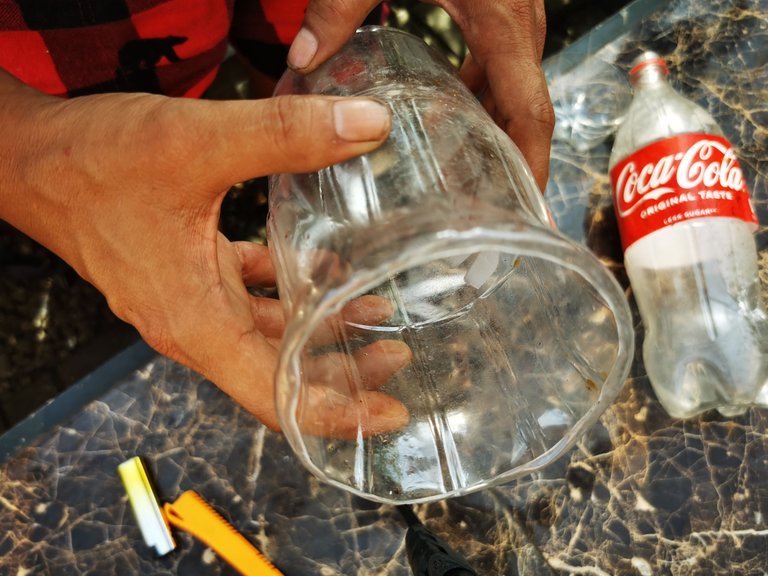
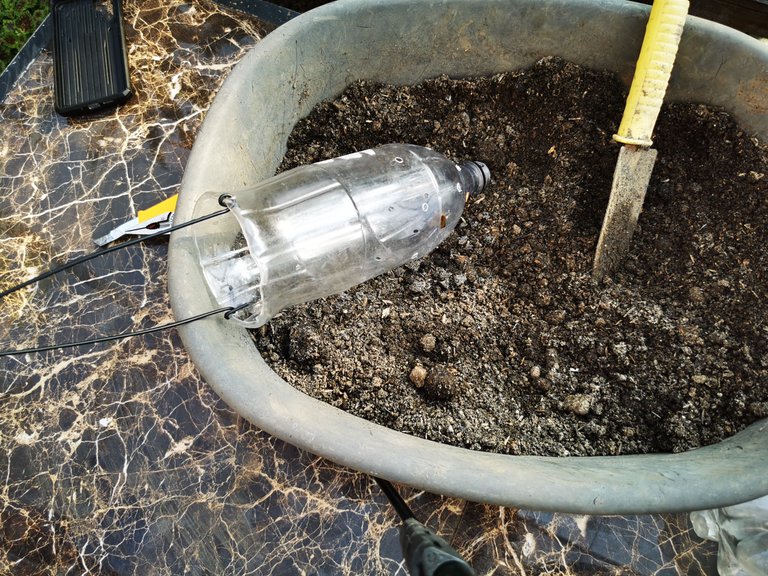
First, we need a soda plastic bottles.
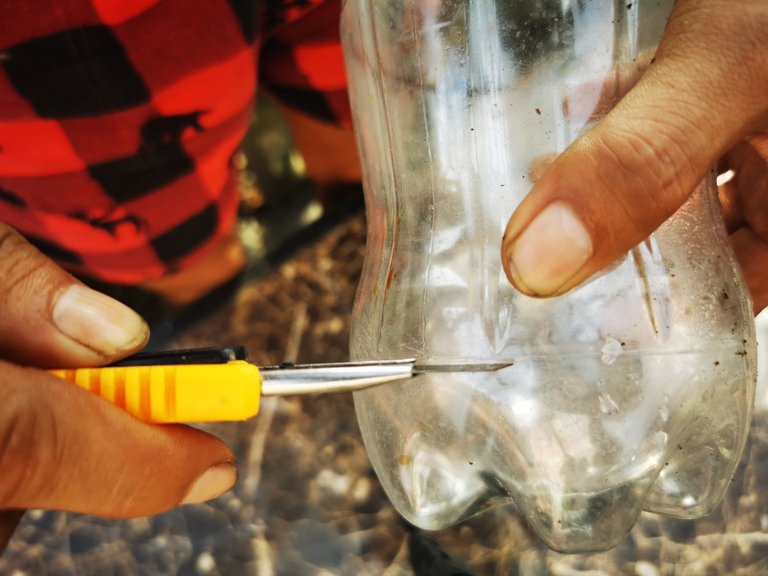
I cut on a bottom side of the bottle to make room for my scissors.

Then I continued to cut using scissors.
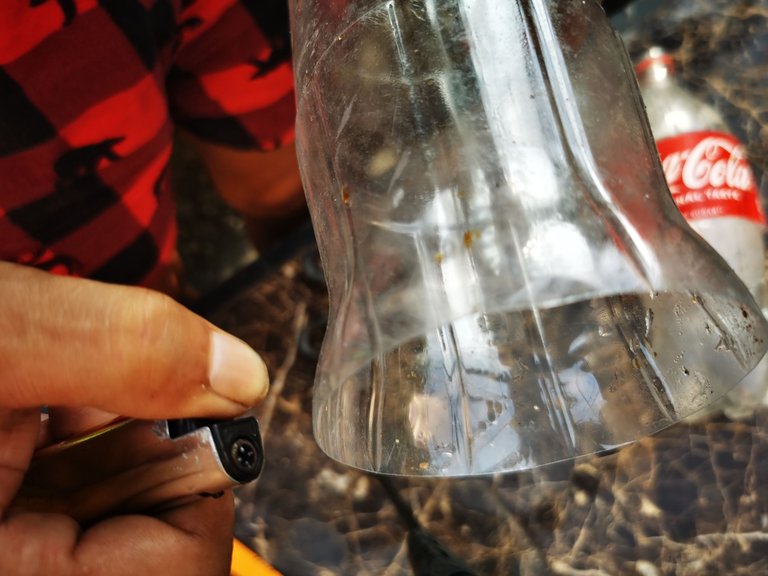
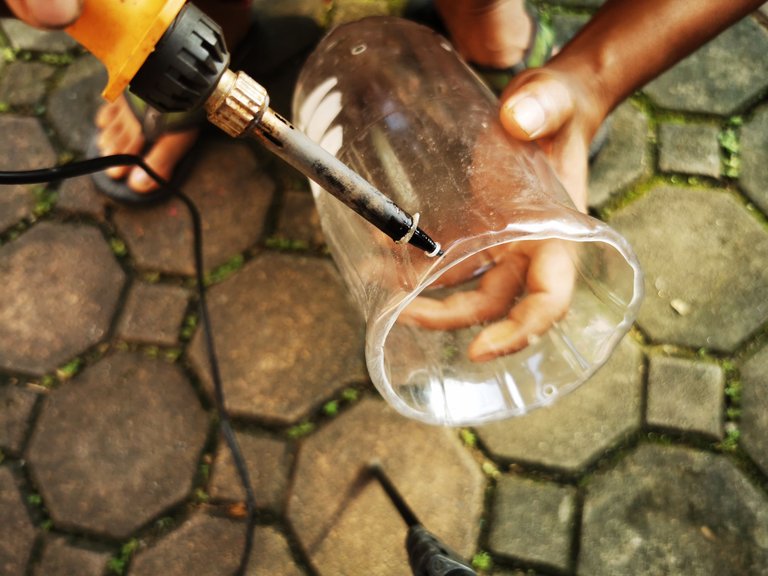
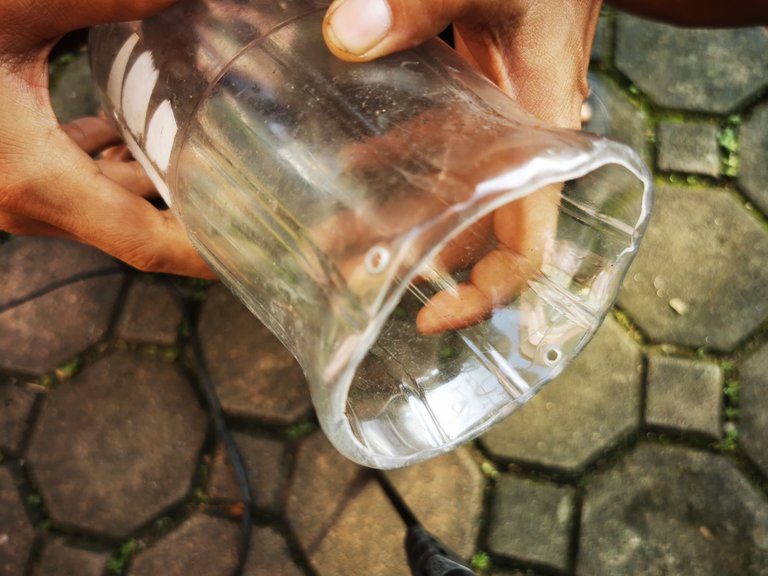
Next thing I did is to apply heat on the edges of the bottle. This make the bottle much smoother and stronger, and prevent an accident skin cut when watering.
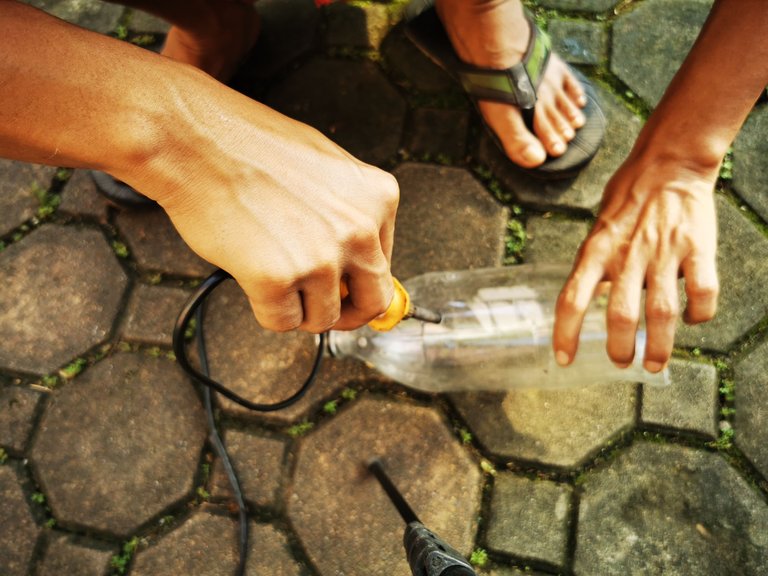
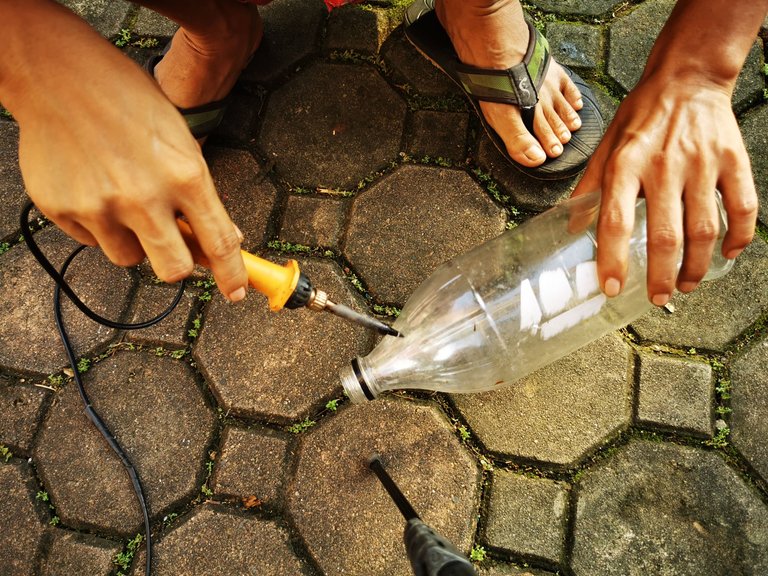
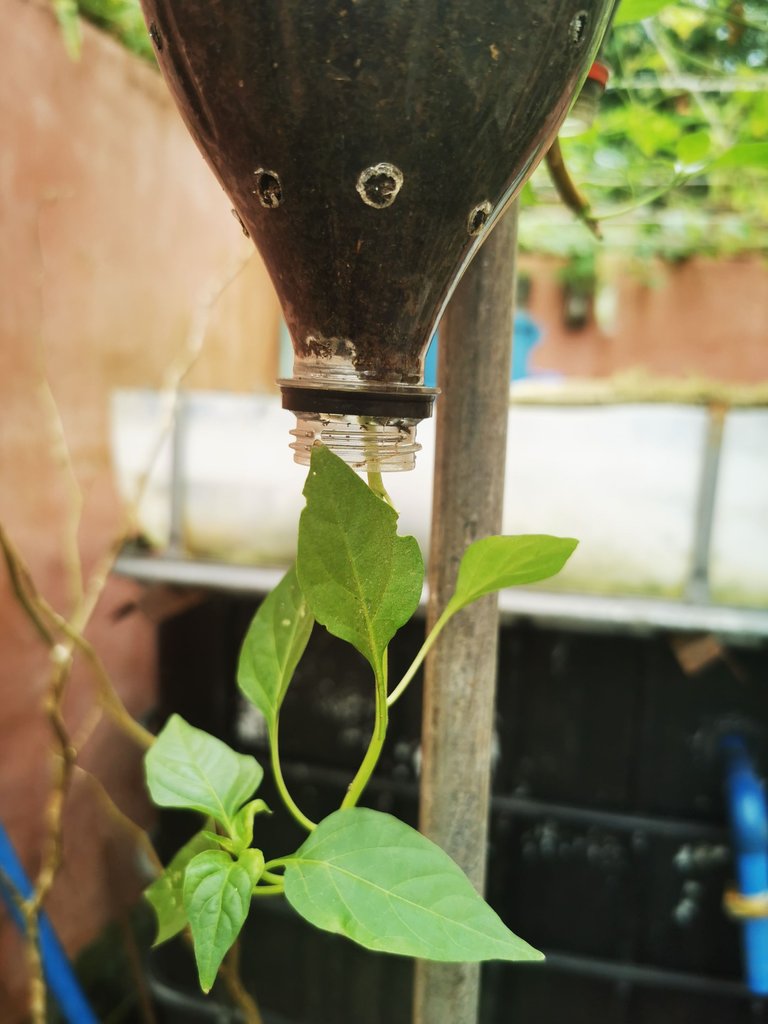
Using a soldering iron, I put holes on the bottle's neck so it will be the additional drain holes for water.
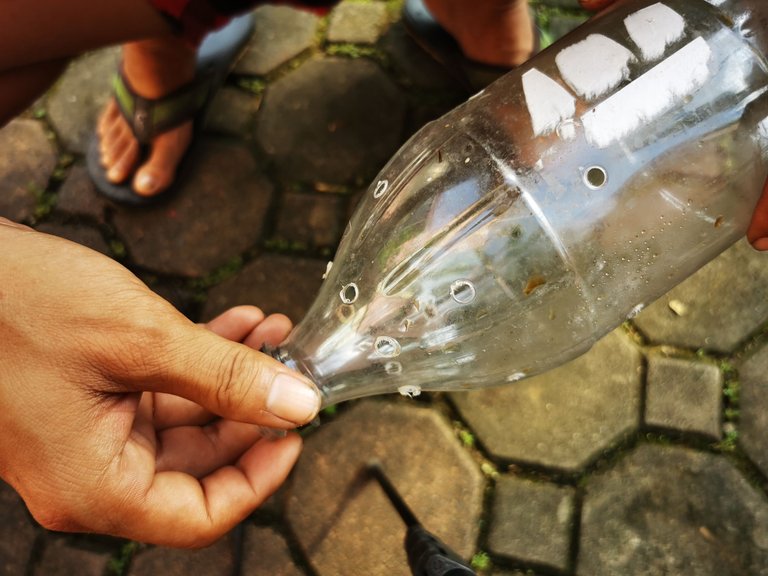
I also put holes on the sides.
This will help oxygen to penetrate the soil and the roots.
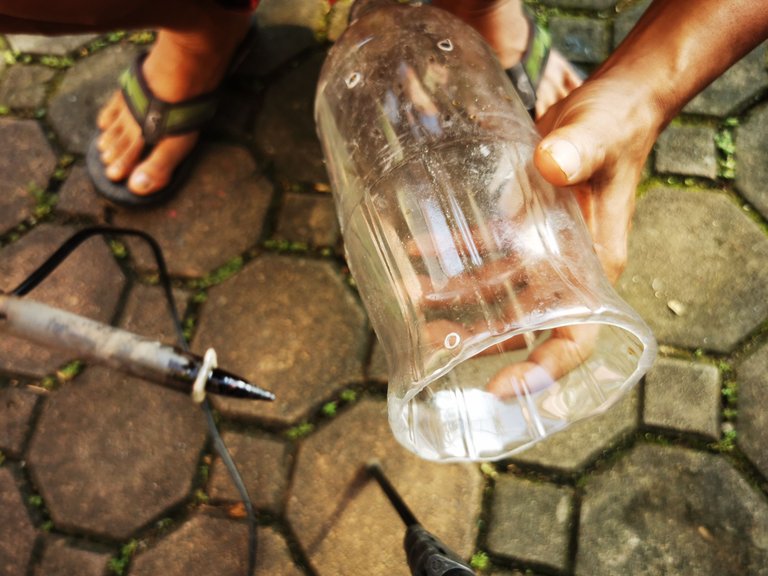
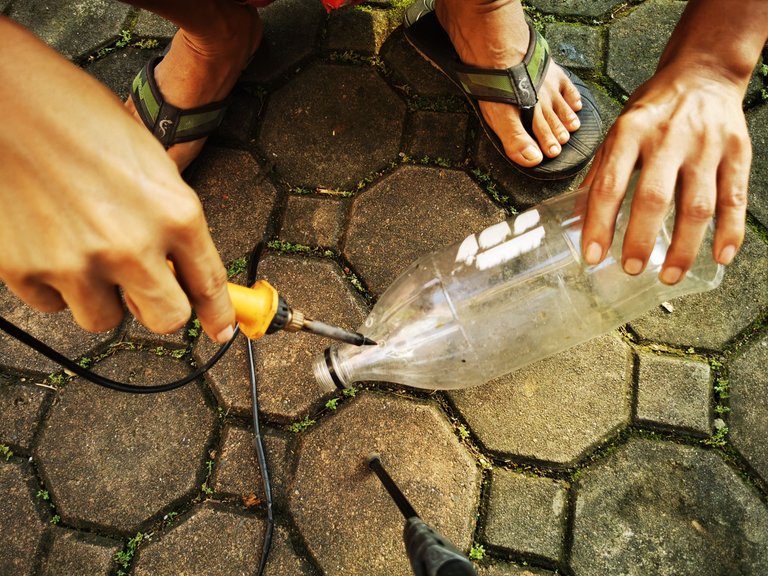
Then additional 2 holes on the bottom part of the bottles. This will be our attachment for strings or wires.
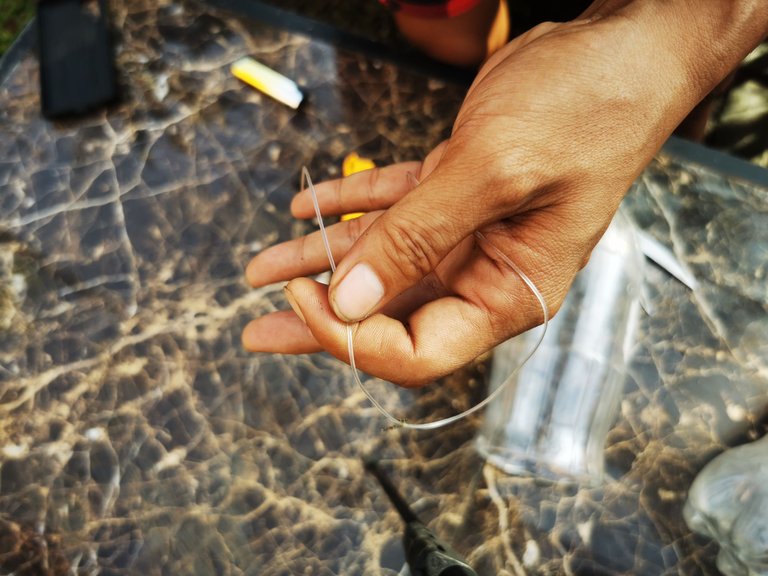
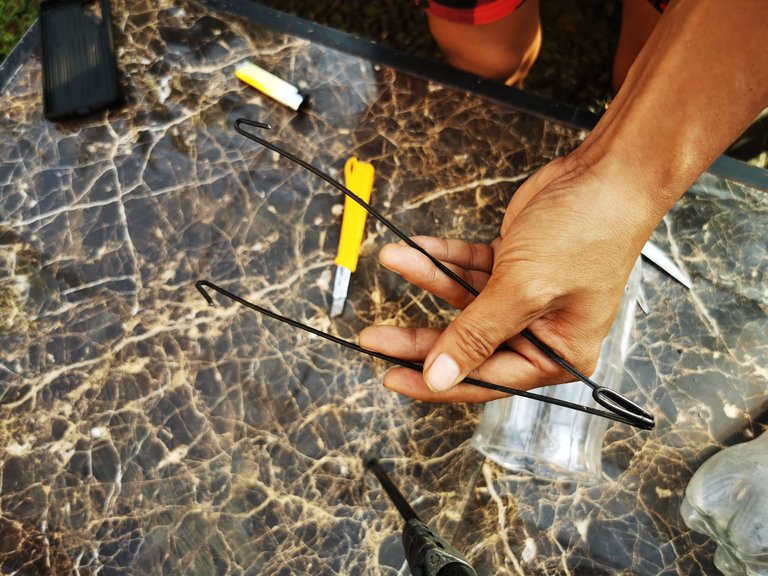
I usually use nylon as string for hanging. But this time I will use coated wire from a fiber internet cable wire.
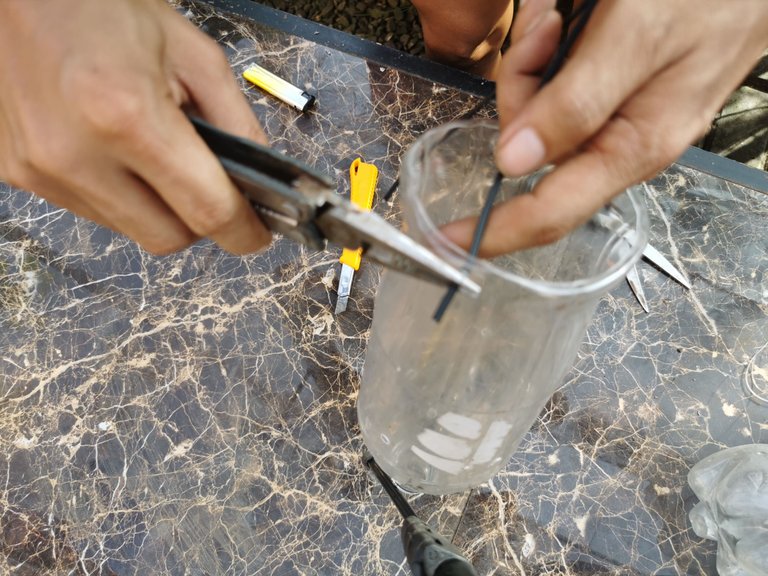
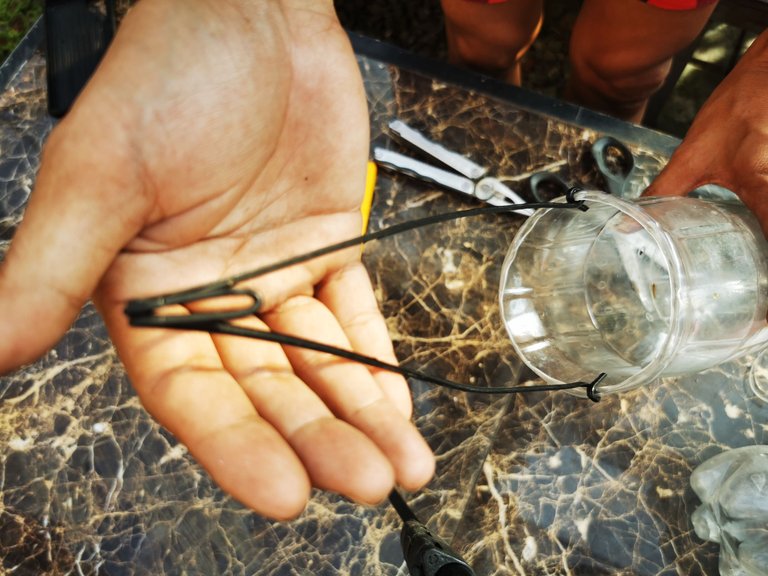
I'm securing the wire to the 2 holes on the bottom so it will not fall when it is already hanging. The bottom of the bottle will be our top after we completed this project.
I prepared a nutrient-rich soil for my plant. I usually mix garden soil, vermicast, carbonized rice hull and eggshells for my soil. The chili plant needs a lot of nutrients to give us abundant harvest.
The carbonized rice hull can make the soil acidic. The soil needs to be acidic so the plant can easily convert nutrient into their food.
They also needs calcium from eggshells to prevent flowers and fruits from falling.
The vermicast gives the plant perfect NPK (Nitrogen, Phosphorus and Potassium).
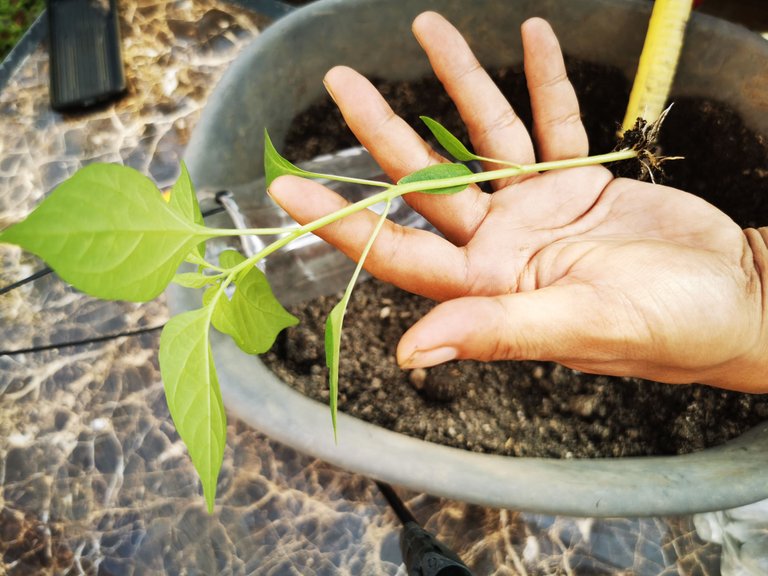
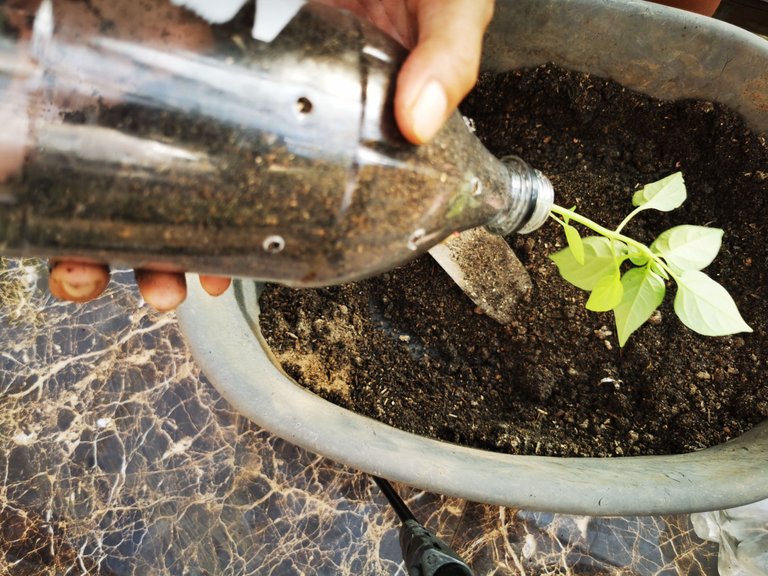
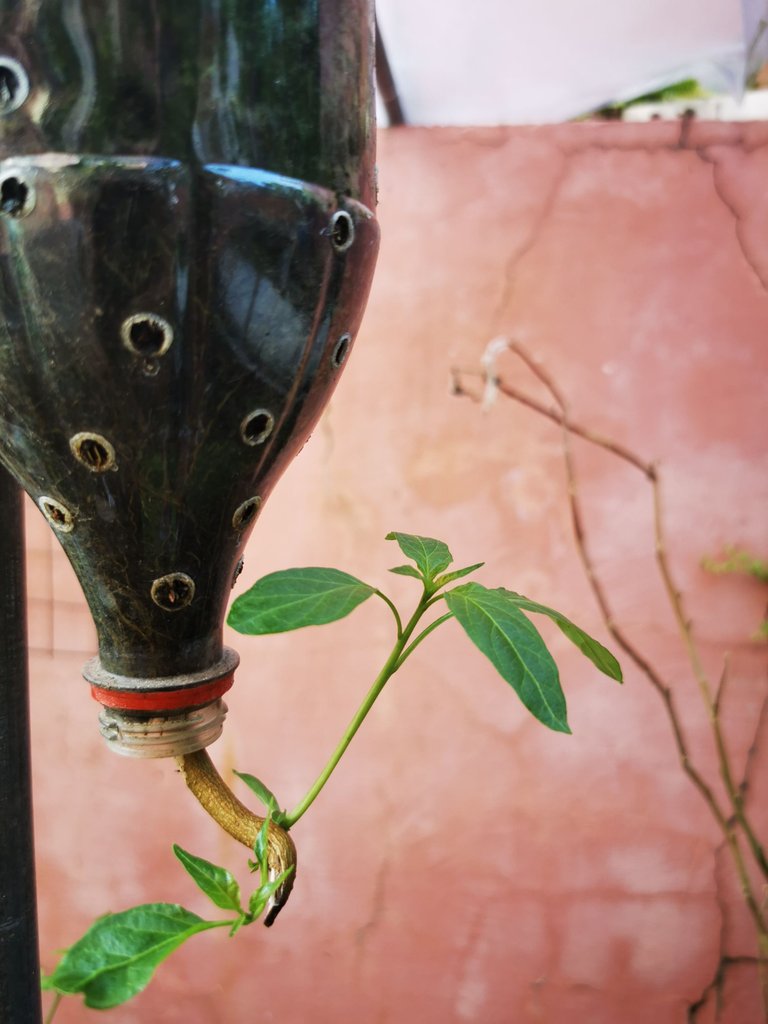
I already prepared seedlings weeks ago. And it is time to transplant them.
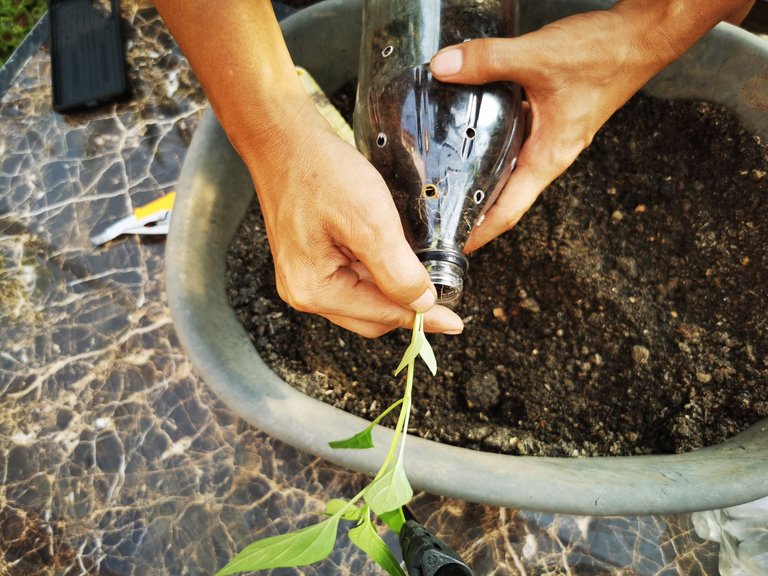
I inserted the roots on the mouth of the bottle. Deep enough for the roots reached the middle.
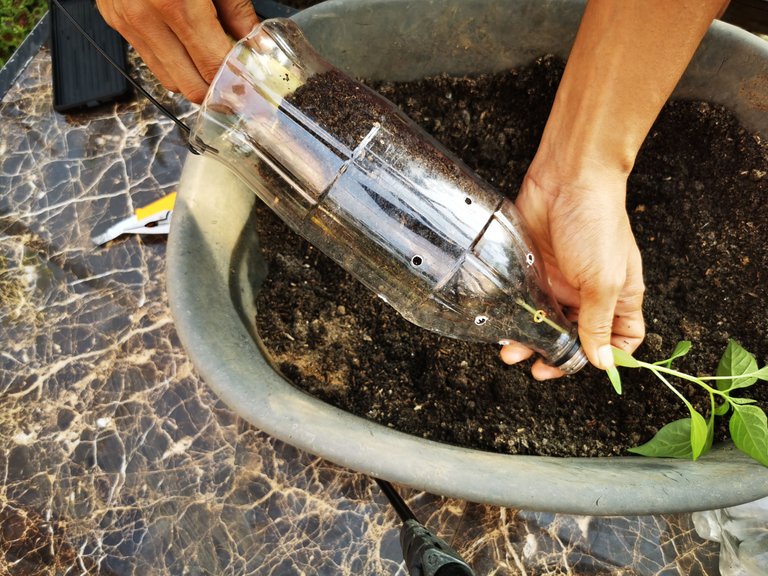
I carefully put soil in the bottle.
I compressed the soil so the soil is not easily drained when watering. It is also way for the plant to be stable.
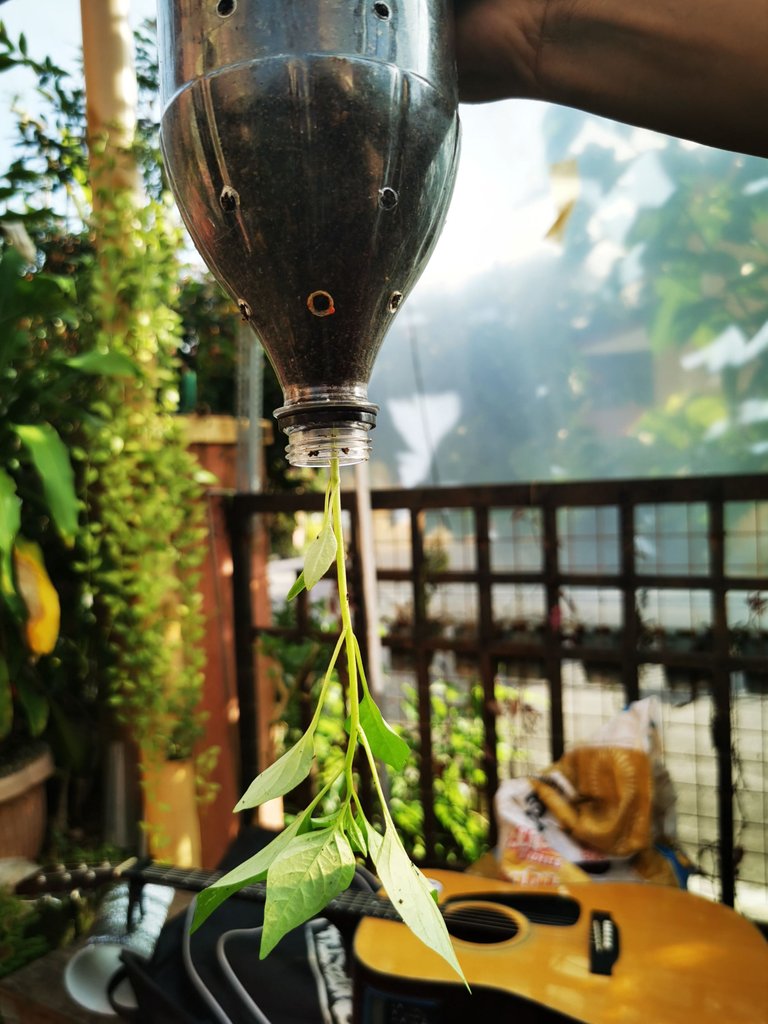
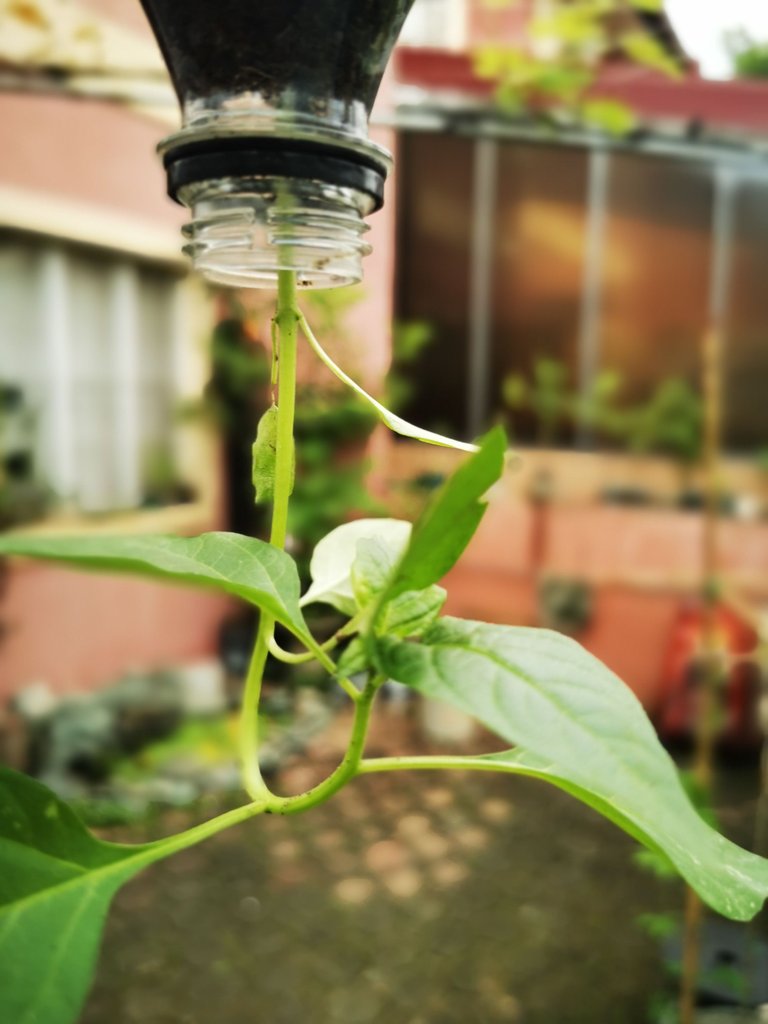
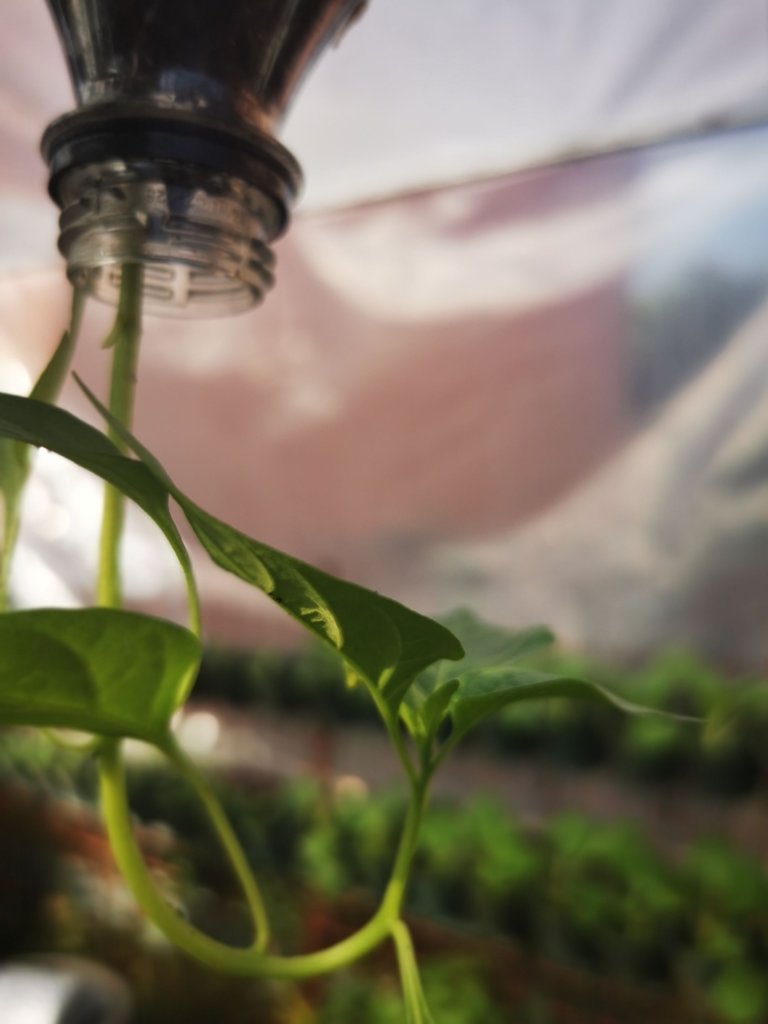
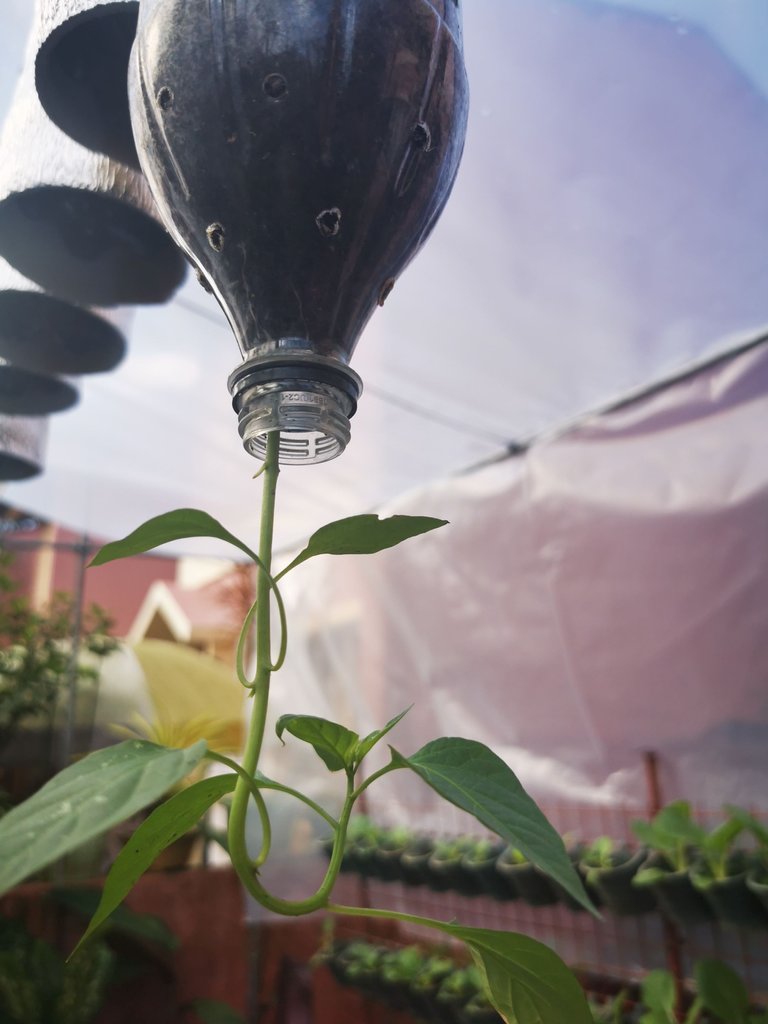
The plant seems to planted upside down. But days will come and it will be standing on their own cause the leaves will seek for the light and eventually will stand correctly.
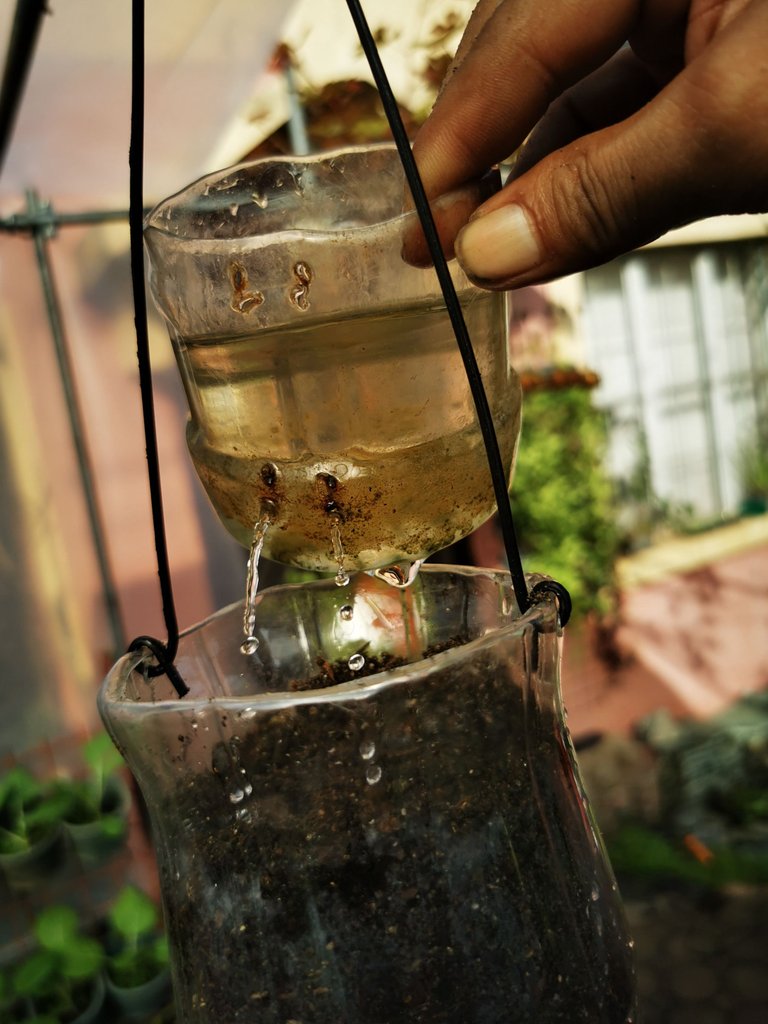
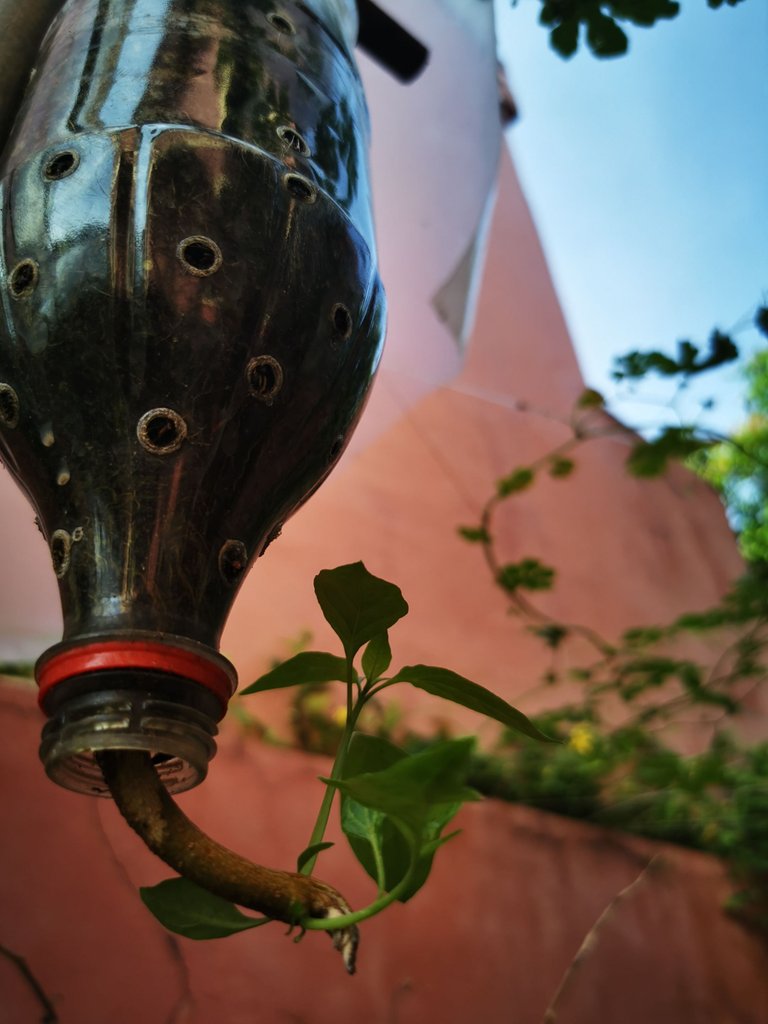
It's time for watering our plant.
Give much water it needs. This will prevent the plant from transplanting shock. And it also need to rest on a shaded area for weeks until it is stable.

Now, I will be waiting for it to stand correctly.

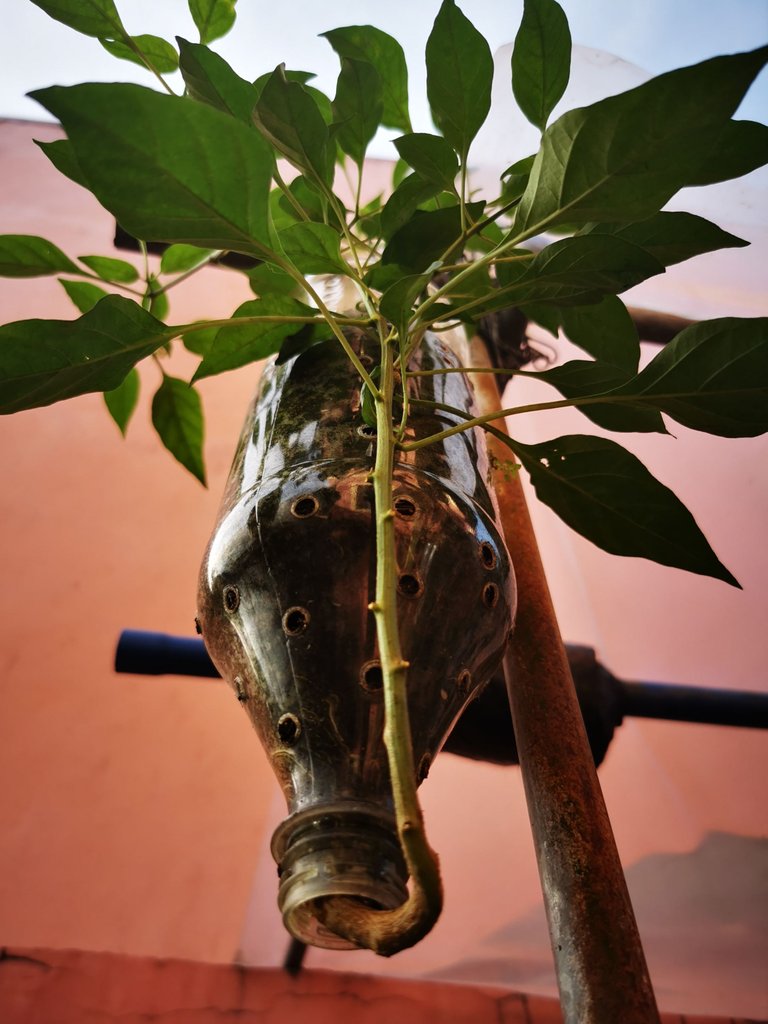
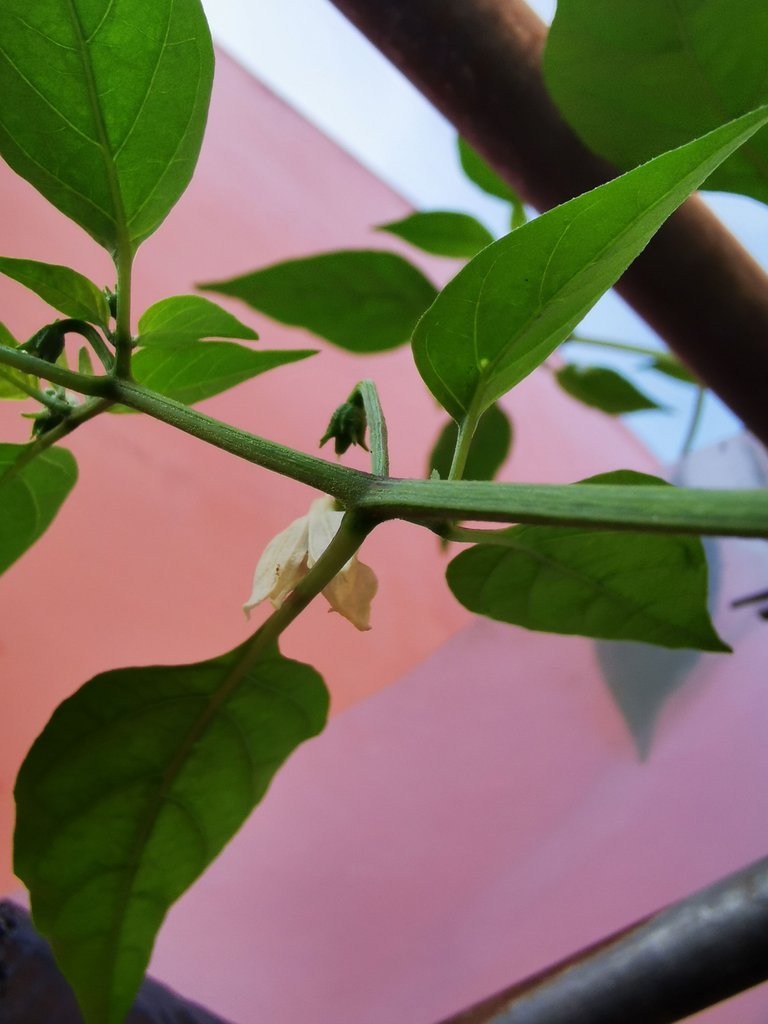
I still have my own inverted chilis.
One of it is on flowering stage.
And other one is in recovery stage. I don't know exactly what happened to this plant. One day, I woke up that the trunk is missing.
Maybe it was accidentally bumped or something broke it down. I don't know. But the good thing is, it is striving to survive. And I'm so thankful with that.

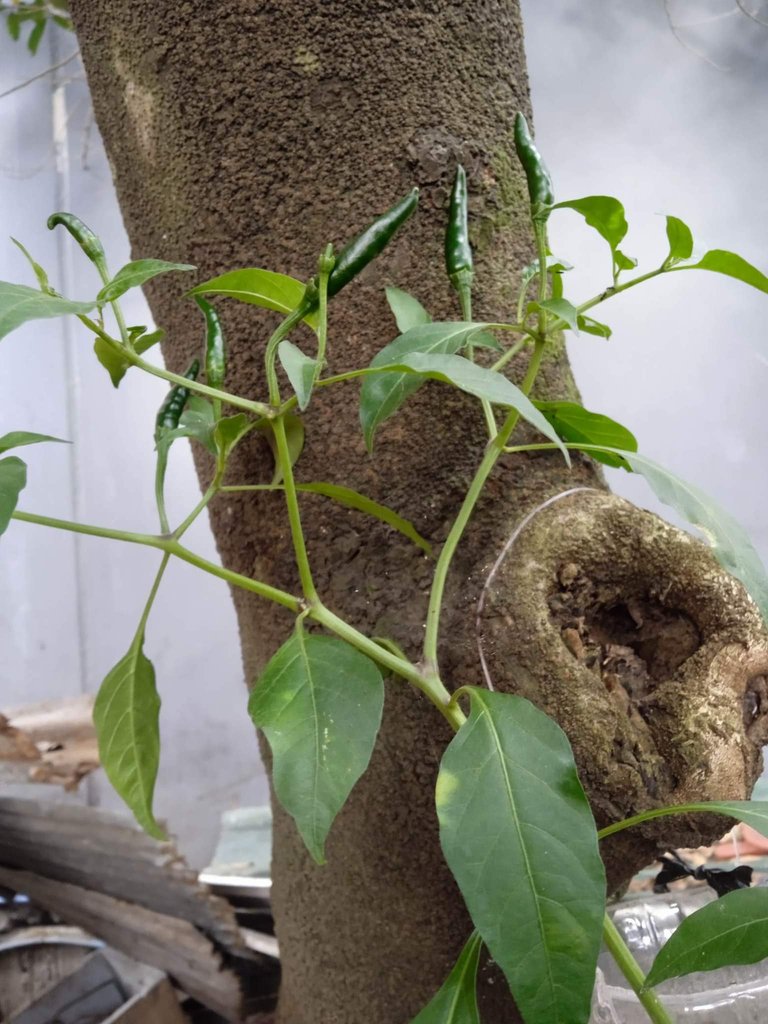
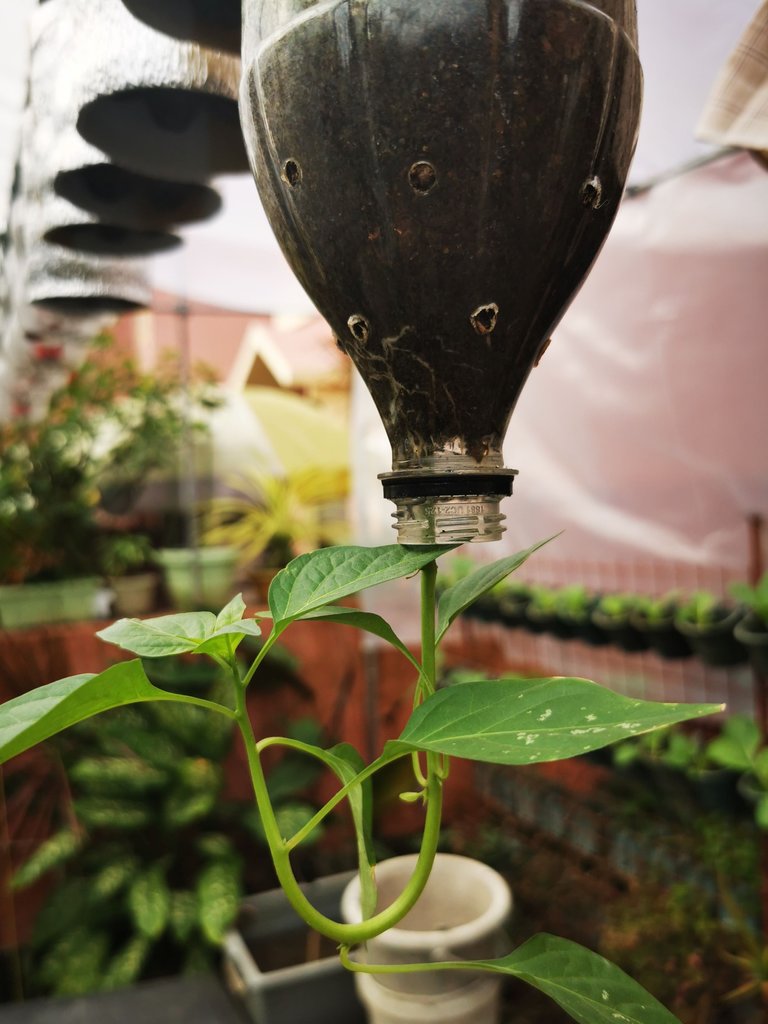
This the chili plant that I gave to my friend @boykampante.
It has already have fruits. Maybe in next days the fruits will be ripe and they will start to benefits on its fruits.
PROs and CONs
Maybe the only CONs that I'm thinking is the nutrient supply. It need to be supplied weekly for a healthy plant cause the soil is only limited. The plant can't find nutrients on its own. You need to feed them of what they needs (fertilizers).
But the PROs are more.
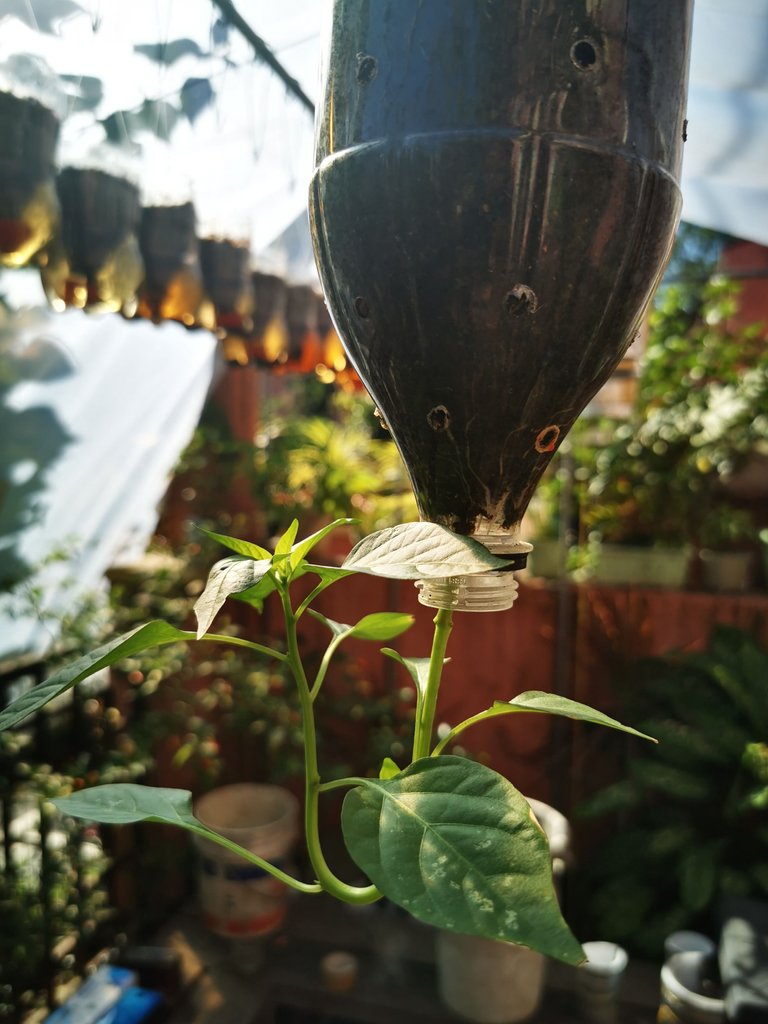
One is the space. The plant only require a small area. We can hang it almost everywhere, from the tube of our clothesline to branches or stems of a tree, or on our gates and fences. Almost everywhere as long as there are spaces for hanging.
Another is if there is a storm or it is too hot, we can took them and put them on a more safe place.
This is also cost efficient. Even when you're buying a commercial garden soil, which is expensive, it is still econimical cause it only consume less soil than when it is in big pots.
This is all I can think of.
If you have something to add on CONs and PROs, please comment below.
I will appreciate your comments and suggestions.
DEVELOPMENT
DAY 1 (12-13-2022): Still upside down
DAY 2 (12-14-2022): Slightly turning up
DAY 3 (12-15-2022): It seems there's no change. It's raining and I had to put it under the uv plastic.
DAY 4 (12-16-2022): Still trying to turning up.
DAY 5 (12-17-2022): Still no major progress.
DAY 6 (12-18-2022): It seems that it is not in a hurry to turn up.
DAY 8 (12-20-2022): Progress.
(Sorry, I was busy yesterday. I forgot to update)
DAY 10 (12-22-2022): Progress - it looks like it is already stable.
(I will update this post daily until it is already stable)
And that's it. I hope you also try it. And if you have questions, comments and suggestions, please do.
I will answer it surely and happily.
See you on my next post.
Happy Gardening!
Ui ang ganda ng idea na ito! I never imagined that this can be done that way! @jhero22 look oh ayos ito especially nowadays na naparaming beses tayo na binabagyo.
Aside from sili, what other plants can you suggest doing the said technique @deythedevil?
This was my plan before but I don't have any pole or whatsoever where I can hang them po. hihi Kaya ganun nalang plus there's a lot of shades na here sa bahay so need isakto yung halaman sa naarawan.
Ate jen did this one on her eggplants po. Namunga na din sa kaniya.
I saw someone did it with tomatoes and eggplants. But the idea is not limited. We can also try it on other plants. I am planning to do this on eggplants. I'm still waiting for my seedlings to be ready for transplanting. Happy gardening kabayan. Salamat po sa pag comment.
Thank you for sharing this post in the DIYHUB Community!
Your content got selected by our fellow curator elizacheng & you just received a little thank you upvote from us for your great work! Your post will be featured in one of our recurring compilations which are aiming to offer you a stage to widen your audience within the DIY scene of Hive. Stay creative & HIVE ON!
Please vote for our hive witness <3
Thank you so much @diyhub for the curation and reblogging.
I only learned planting tomato invertedly, now I know pwede rin pala sa chili.,
Galing!
Yes. Try it po. Mas mejo less ang stress sa sili. Ung dati kong kamatis laging namamatay. Haha.
Pero try ko ulit ung kamatis ngayong meron nako greenhouse. Hehehe.
Good luck po.
Nice idea!
Thank you so much!
You can use the polymer water retaining crystals. That will really help.
And the transplant shock? B vitamins in the water.
Thank you so much for your informative suggestions.
Of course the skill of this is cool.
Phenomenal job and great photography. Yes you can do this without large expensive things. It's not complicated.
Great job! On growing the plants and the innovations!
Also a drip system is always an option you can set it for a timer as well.
But I love the hand fed simple system and care.
Congratulations @deythedevil! You have completed the following achievement on the Hive blockchain And have been rewarded with New badge(s)
Your next target is to reach 800 upvotes.
You can view your badges on your board and compare yourself to others in the Ranking
If you no longer want to receive notifications, reply to this comment with the word
STOPTo support your work, I also upvoted your post!
Check out the last post from @hivebuzz:
Support the HiveBuzz project. Vote for our proposal!
What a wonderful idea to make small pots to store your plants, they are very beautiful and strong, I am sure they will love them and be more beautiful than before.
Thank you so much. I love to see you too making this kind of project in your garden. Have a nice day.
And thank you so much for reblogging my post.
Great idea to do it with our plants
I hope you can do it on your garden.
This is very helpful and economical.
Plus, it's environmental.
Thank you for your comment.
Have a nice day