Saludos queridos amigos miembros de esta bella comunidad, el día de hoy quiero realizar mi primera publicación para todos ustedes, y como parte de mi presentación ante la comunidad quiero compartir un muy sencillo tutorial dónde les quiero compartir la elaboración paso a paso de unos hermosos y muy sencillos zarcillos.
Para los que no me conocen de alguna otra comunidad puedo decirles que amo crear y enseñar a otros a crear con muy pocos materiales.
Me he dedicado últimamente a la elaboración de acsesorios y joyería para nuestro uso, me encanta la técnica del Alambrismo y la realización de diseños a base de reciclaje
En esta ocasión les quiero compartir un procedimiento muy sencillo para la elaboración de unos lindos Zarcillos en pedrería y alambre, los invito a elaborarlos en casa.
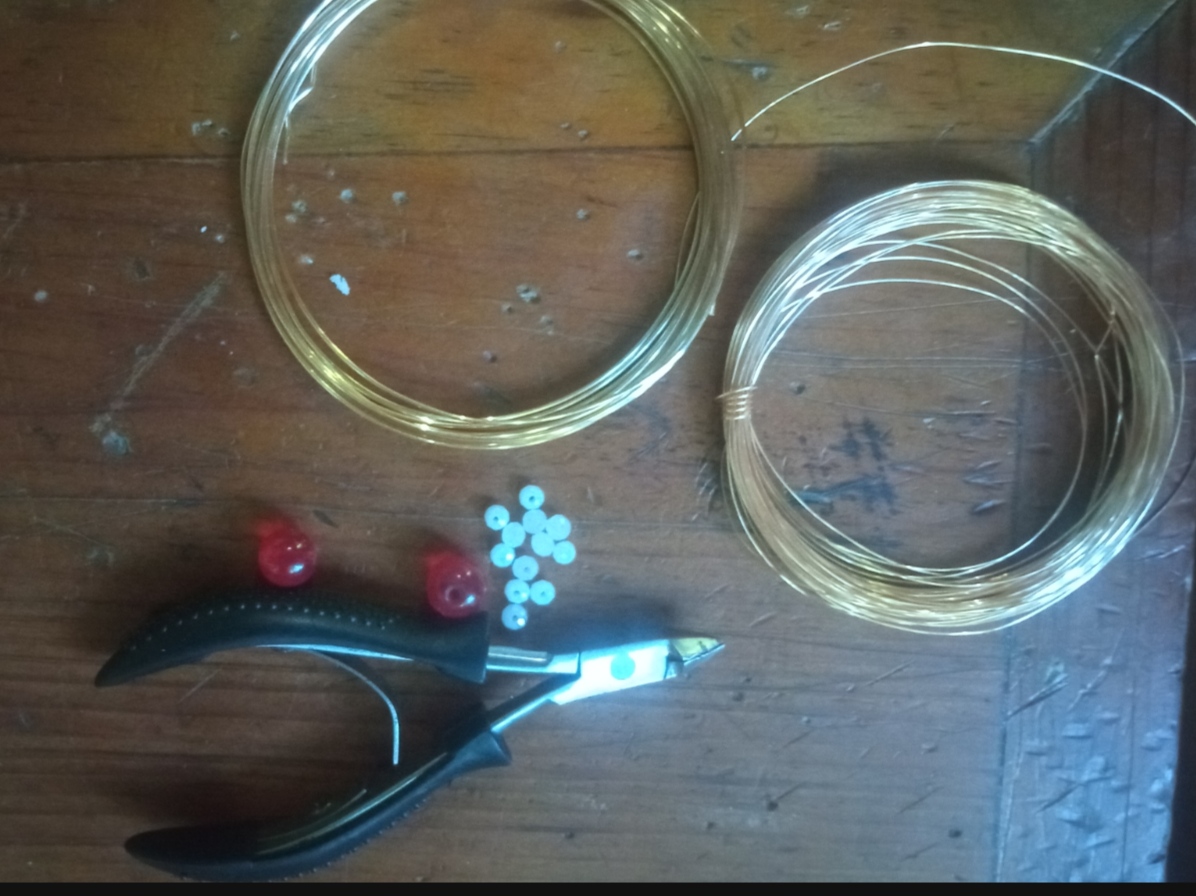
✴️ What Materials do you need:
- 22 gauge jewelry wire
- 26 gauge jewelry wire.
- Bright red rhinestones.
- White glitter rhinestones.
- jewelry clip.
✴️ Que Materiales necesitas:
- Alambre de bisutería calibre 22
- Alambre de bisutería calibre 26.
- Pedrería color Rojo brillante.
- Pedrería Brillantinas color blanco.
- pinza de bisutería.
😊 Step by step
😊 paso a paso
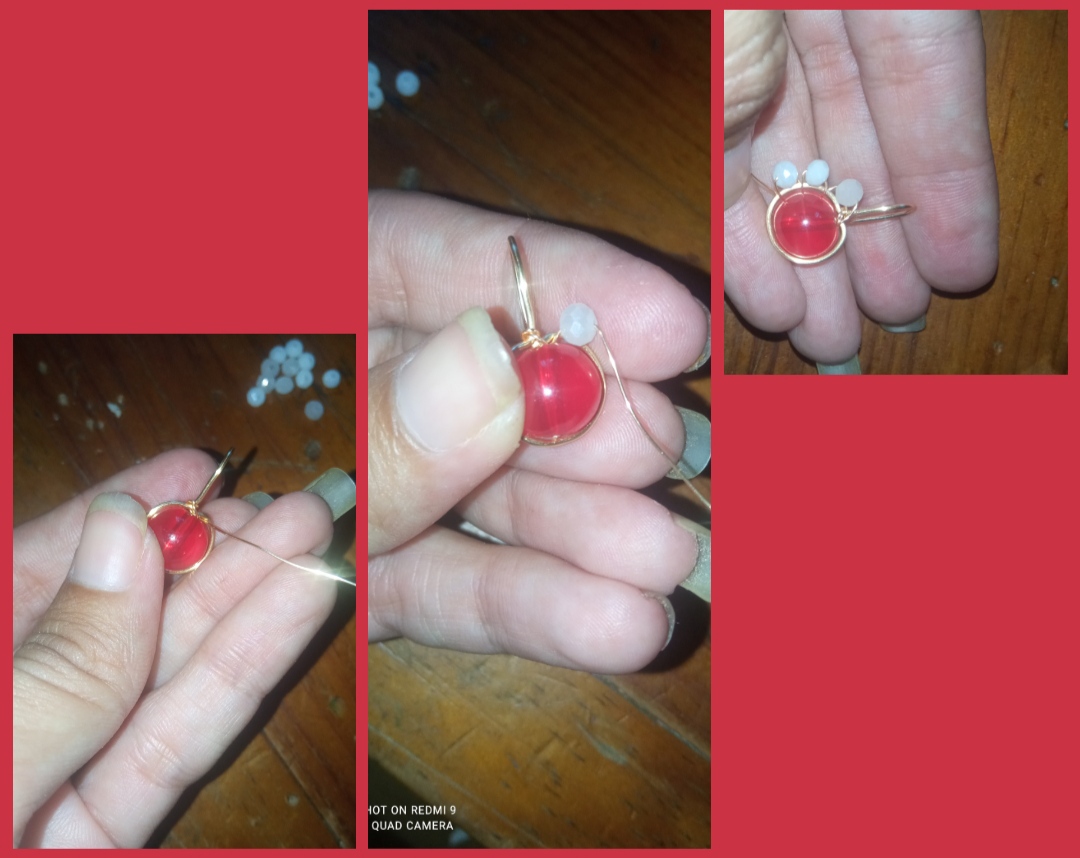
⭐ Step 1: First, we take the 22-gauge jewelry wire, which is of a suitable thickness to make the base of our tendril, and we cut an 8cm piece.
Through this we introduce the bright red rhinestones, leaving a small wire tip below the rhinestones and proceed to wrap the rhinestones with the wire, making a circular turn, molding the wire in the shape of the stone.
⭐ Paso 1: Primeramente tomamos el alambre de bisutería calibre 22 que es de un grosor adecuado para realizar la base de nuestro zarcillo y cortamos un pedazo de 8cm.
Por este Introducimos la pedrería brillante color rojo dejando una pequeña punta de alambre por debajo de la pedrería y procedemos a envolver la pedrería con el alambre realizando una vuelta circular moldeando el alambre con la forma de la piedra.
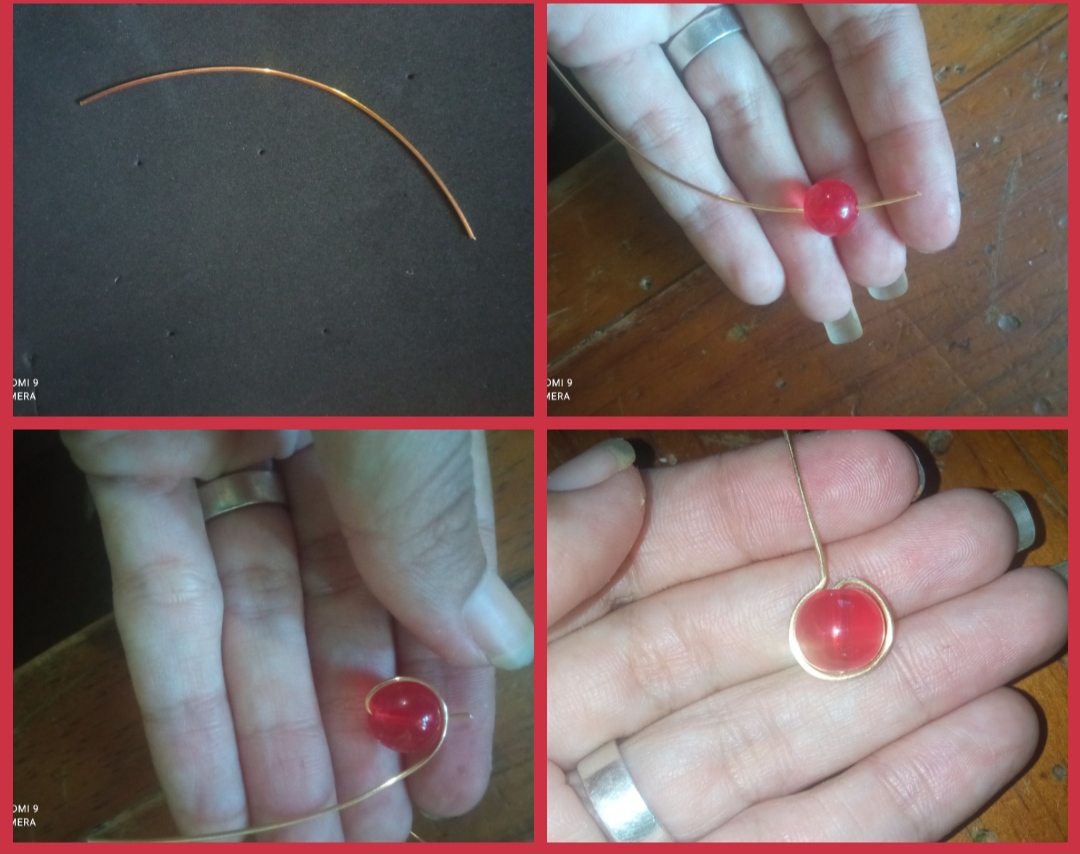
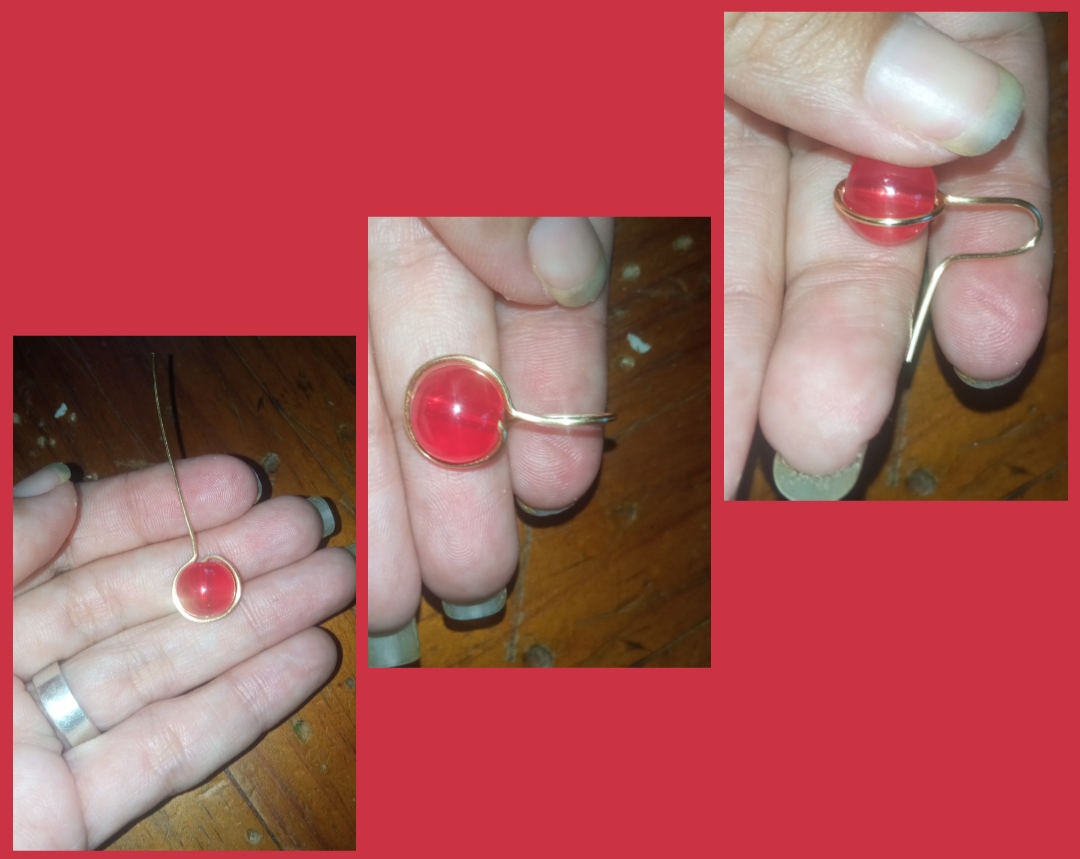
⭐ Step 2: by going all the way around the stone and bringing our wire to the starting point, we bend the wire just where it joins the other piece of wire and place it upwards.
We will shape this wire with the jewelry pliers to make the hook of our tendril with it as follows.
Without forgetting to cut the excess and the pint that remains below the rhinestones.
⭐ Paso 2: al realizar toda la vuelta a la piedra y llevar nuestro alambre hasta el punto de partida doblamos el alambre justo donde se une con el otro pedazo de alambre y lo colocamos hacia arriba.
Este alambre lo moldearemos con la pinza de bisutería para con el mismo realizar el anzuelo de nuestro zarcillo de la siguiente manera.
Sin olvidar cortar el exceso y la pinta que nos queda por debajo de la pedrería.
⭐ Step 3: then we will take a fairly long piece of 26 gauge beading wire and wind it around the upper side of our earring, through this we will introduce a small white rhinestone and make two turns on the base wire again, then a second rhinestone and we wind the wire around the base again to hold the shape.
We will elaborate this procedure for 3 more times, in total there must be 5 white stones that will surround one side of our tendril
⭐ Paso 3: luego tomaremos un pedazo bastante largo de alambre de bisutería calibre 26 y lo enrrollamos en la parte lateral superior de nuestro zarcillo, por este Introducimos una pequeña pedrería blanca y volvemos a realizar dos vueltas en el alambre base, luego una segunda pedrería y enrrollamos nuevamente el alambre en la base para ir sosteniendo la forma.
Este procedimiento lo elaboraremos por 3 veces más, en total deben ser 5 piedritas blancas que rodearán un lado de nuestro zarcillo.
⭐ Step 4: finally we make a loop with the fine wire, 26 gauge on the opposite side which will not have rhinestones and that's it.
⭐ Paso 4: por último realizamos un vueltas con el alambre fino, calibre 26 por el lado opuesto el cual no llevará pedrería y listo.
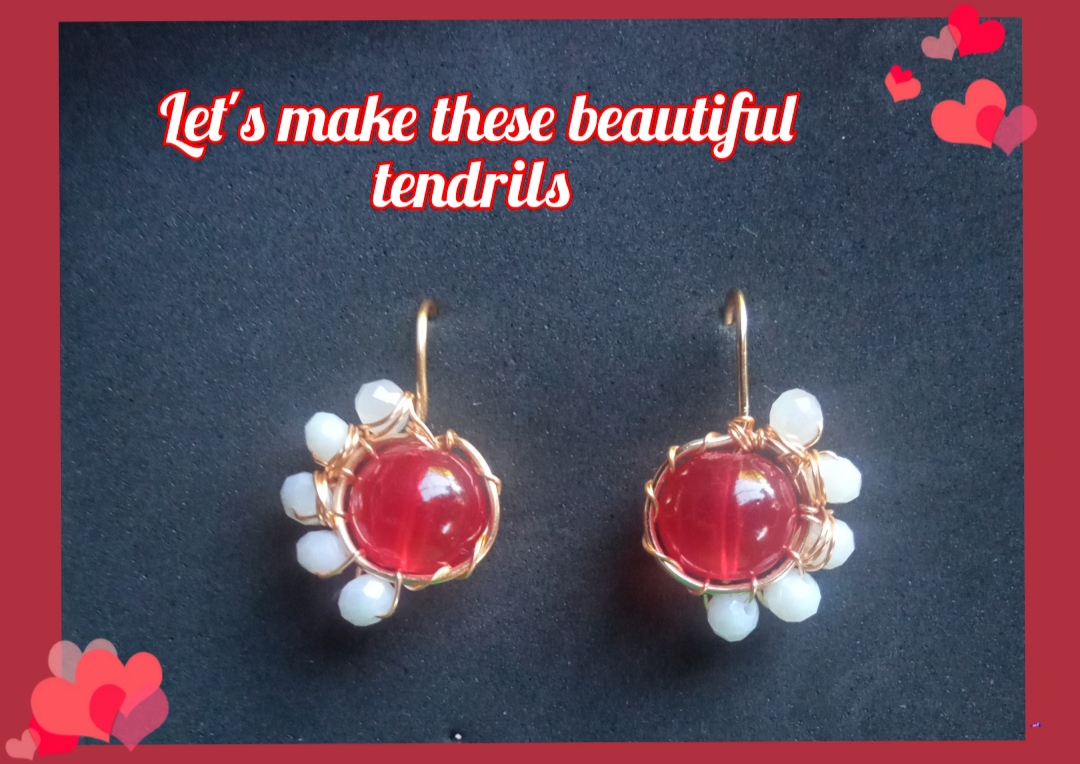
⭐ Let's make these beautiful tendrils
⭐ Realicemos estos hermosos Zarcillos

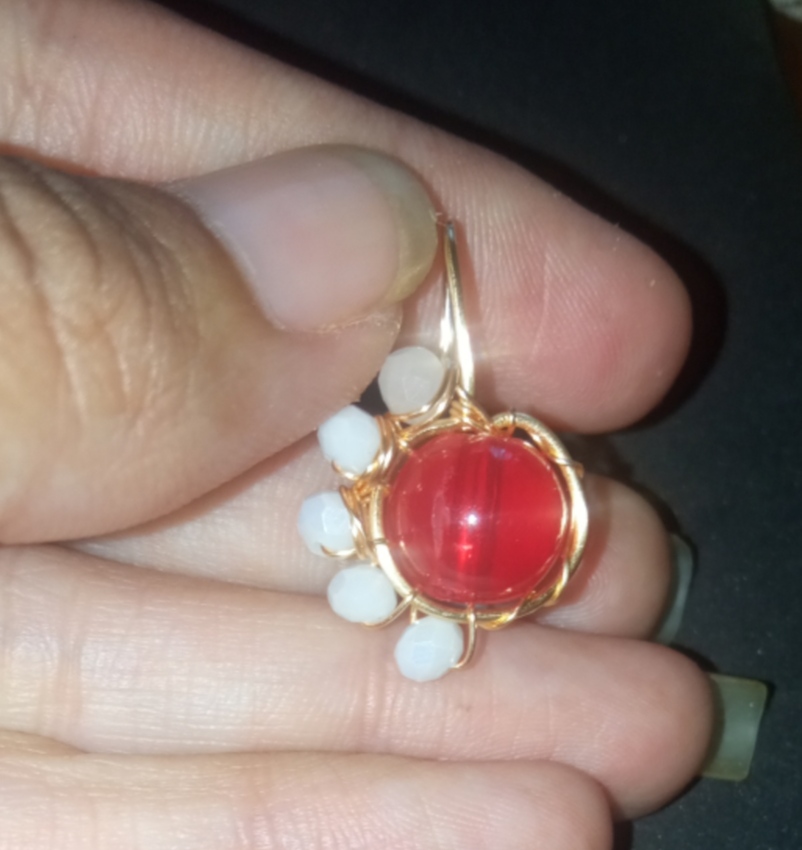
And that easy and very simple we will obtain this beautiful result, some beautiful tendrils ideal to wear on any occasion or make a beautiful detail made by ourselves.
You can play and combine the colors to your tastes and preference.
Y así de fácil y muy sencillo obtendremos este hermoso resultado unos bellos zarcillos ideales para lucir en cuálquier ocasión o realizar un hermoso detalle elaborado por nosotros mismos.
Puedes jugar y combinar los colores a tus gustos y preferencia.
Dear Friends, this has been my first creation for this beautiful community, I hope you all like it, I say goodbye thanking you for your visit and your support.
Greetings and blessings to you.
Queridos Amigos este a Sido mi primera creación para esta bella comunidad, espero sea del agrado de todos ustedes, Me despido agradeciendoles por su visita y su apoyo.
Saludos y bendiciones para ustedes.
photos were taken with my Redmi 9 phone, exclusive content for Hive. And the translation was done through Google.
las fotos fueron tomadas con mi teléfono Redmi 9, contenido exclusivo para Hive. Y la traducción fue realizada a través de Google.
Me encantó este modelo de aretes. Son ideales para realizar rápido en casa. También me gusta realizar manualidades con poco material, hay que sacar provecho de lo que se tiene.
Me alegra que sean de tu agrado. ☺️
Thank you for sharing this post in the DIYHUB Community!
Your content got selected by our fellow curator tibfox & you just received a little thank you upvote from us for your great work! Your post will be featured in one of our recurring compilations which are aiming to offer you a stage to widen your audience within the DIY scene of Hive. Stay creative & HIVE ON!
Please vote for our hive witness <3
Gracias por su apoyo.
Hermoso trabajo. Me encantó
🎆🎇🎉🎊🌧️💐✨🌾🌱🌹🌙🌿🍃🥀⚡🌺☘️🍀🌈🌷⭐🪴🌵🌸🌟💮🌴🌳💫☀️💮☔🌲🌳🌍🌌🌠☄️🏵️🐝🌻🌼🍄🐞🦋💙☕💜🍍🎆🎇🎉🎊🎆🎇🎉🎊🌧️💐✨🌾🌱🌹🌙🌿🍃🥀⚡🌺☘️🍀🌈🌷⭐🪴🌵🌸🌟💮🌴🌳💫☀️💮☔🌲🌳🌍🌌🌠☄️🏵️🐝🌻🌼🍄🐞🦋💙☕💜🍍🎆🎇🎉🎊
Gracias ☺️