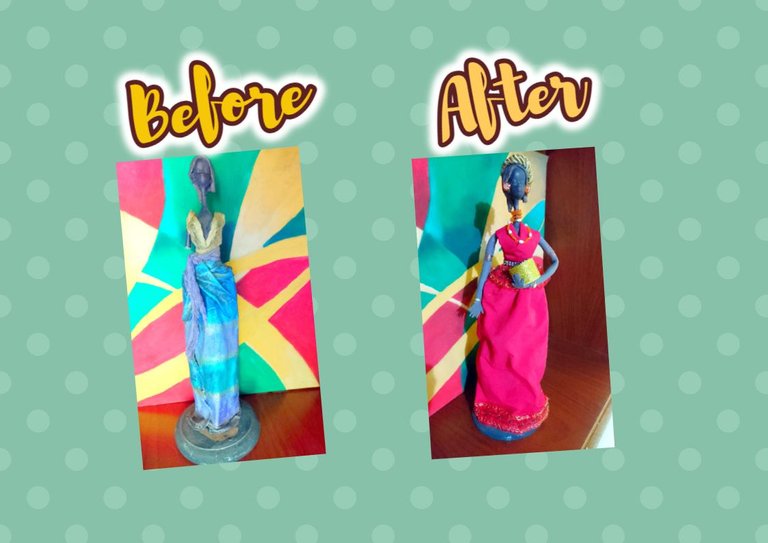
Good evening dear community, hoping you are having a good time. First I am going to tell you an anecdote, so that you can understand what this post is about. Several years ago, a friend who works with flexible dough made a special doll for me. What happened was that as my nephew grew the tumbo, his arms broke off and the base of the skirt where it was attached became it took off, from there I decided to keep it, but today I looked for it and decided to rebuild its arms, and clothing, which was already very discolored. This kind of doll is from African blacks, they are beautiful, I have seen that they make some paintings and create spectacular dolls with bottles, clay, for sale.
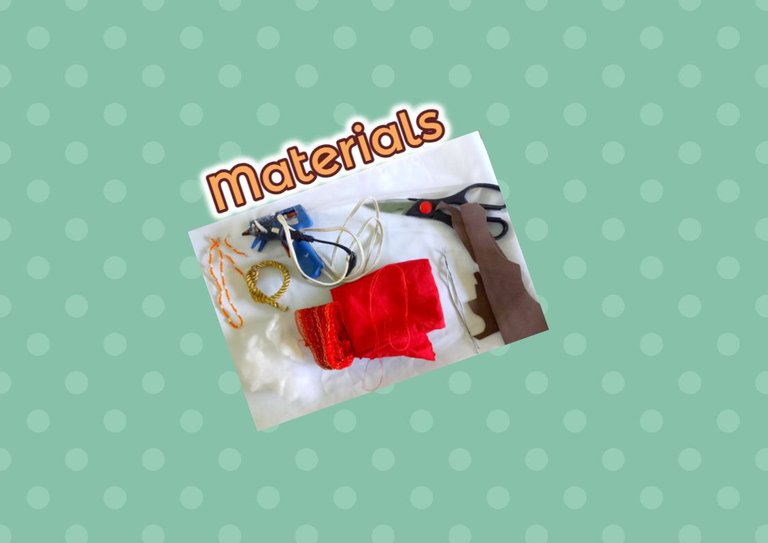
Materials:
Red cloth.
Lace.
Golden cord.
Needle, red thread.
Necklace, bracelet, tendrils.
Pieces of brown Eva rubber.
Wire.
Wadding.
Scissors.
Silicone gun and bar.
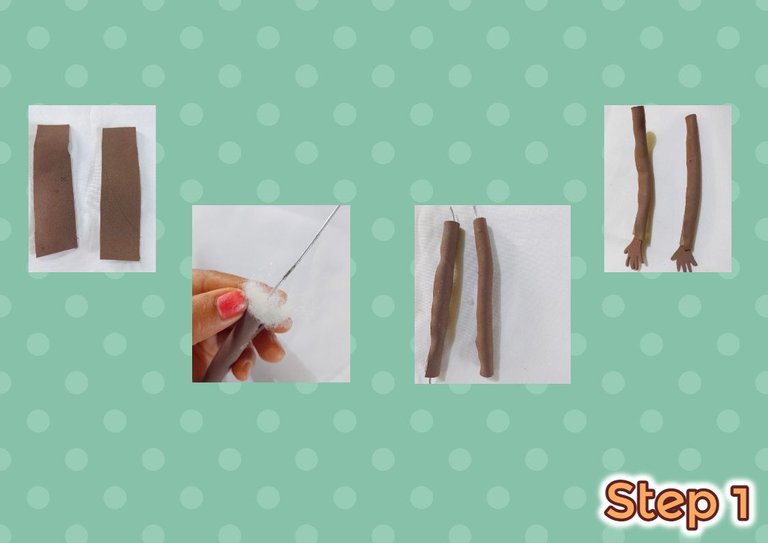
Step 1:
Cut 2 rectangles of brown Eva rubber, to make the arms. Once cut, glue, forming a tube, through there I will introduce the wadding, then carefully the wire, as I have leftover wire, I just prick it. With the remaining Eva Rubber, cut the hands and glue them to each arm.
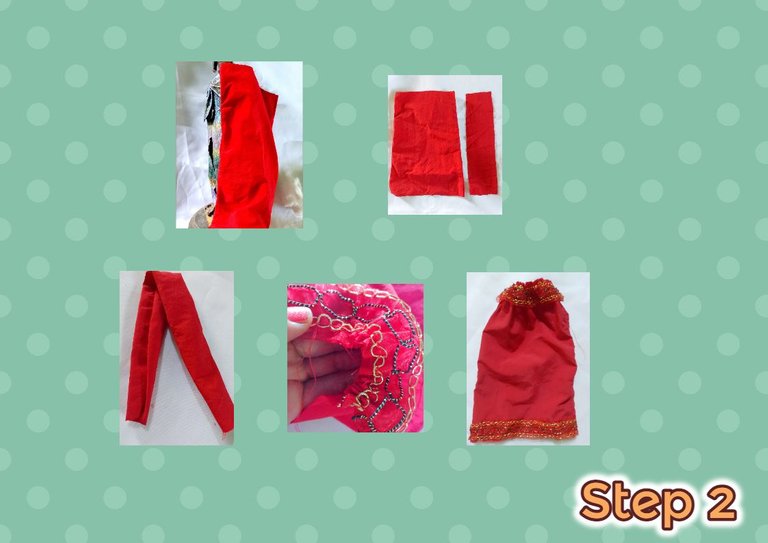
Step 2:
I measured the fabric from the hip, down and cut. With the fabric that had been cut, a rectangle. I proceeded to sew the rectangle to form a strip, then I placed the lace on the fabric, to sew in a ruffled way, together in the part of the waist, thus leaving a long thread, so that when it was inserted into the doll it would enter easily, and to finish I sewed the lace on the bottom of the skirt smoothly, leaving it this way.
Step 3:
To start, I first glued to the base and the skirt that I brought, which moved a lot, and I needed to stabilize it. From there I took off the blouse she was wearing, which was made of chiffon. I proceeded to glue her arms, then with the red strip I made her a crossover blouse at the front and glued it at the back, to finish I placed the skirt, to finish gathering with the thread that I had left and I sewed.

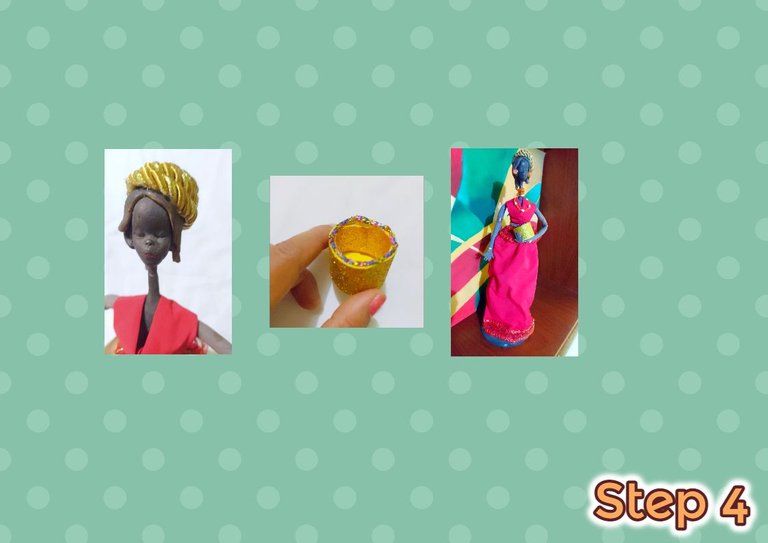
Step 4:
Already completed part of her clothing, I began to place her accessories: her turban in her hair, I quickly made a shiny basket, then I finished placing bracelets, necklace and tendrils. This is the end of the doll, I made the basket, since they generally use baskets, jugs, among others. Well, in this way I hope you have been able to take into account all the steps, especially the making of the arms, in case at some point you have a doll or doll, and your arms break, you can take into account manufacturing yourselves. the arms themselves. Or if you have to put the arms of that same material, you can do it too. Greetings, happy night.
Collage making program: Fotojet Link
Translated from google translator Link
Photo editing program: PhotoFiltre 7
I say goodbye until another opportunity.
Thanks for your support.
Copyright @imargasa. All rights reserved.
Thank you for sharing this post in the DIYHUB Community!
Your content got selected by our fellow curator desro & you just received a little thank you upvote from us for your great work! Your post will be featured in one of our recurring compilations which are aiming to offer you a stage to widen your audience within the DIY scene of Hive. Stay creative & HIVE ON!
Please vote for our hive witness <3
!discovery 27
This post was shared and voted inside the discord by the curators team of discovery-it
Join our community! hive-193212
Discovery-it is also a Witness, vote for us here
Delegate to us for passive income. Check our 80% fee-back Program