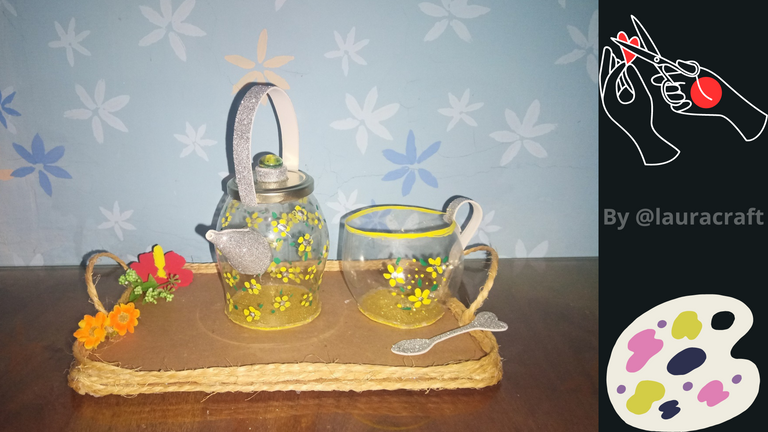

Reciban todos un cordial saludos con mucho cariño, deseándoles un bendecido y productivo comienzo de semana, hoy hago mi primera participación en el concurso @diyhub del mes cuya iniciativa del concurso es de una tetera.
Mi iniciativa para esta participación es un set de tetera hecho con materiales reutilizables, a continuación comienzo con los materiales que utilice para lograrlo.
Las fotografías que verán a continuación, fueron tomadas con mi teléfono modelo Alcatel_5044R.

I wish you all a blessed and productive start of the week, today I make my first participation in the @diyhub contest of the month whose initiative of the contest is a teapot.
My initiative for this participation is a teapot set made with reusable materials below I start with the materials I used to achieve it.
The pictures you will see below, were taken with my Alcatel_5044R model phone.

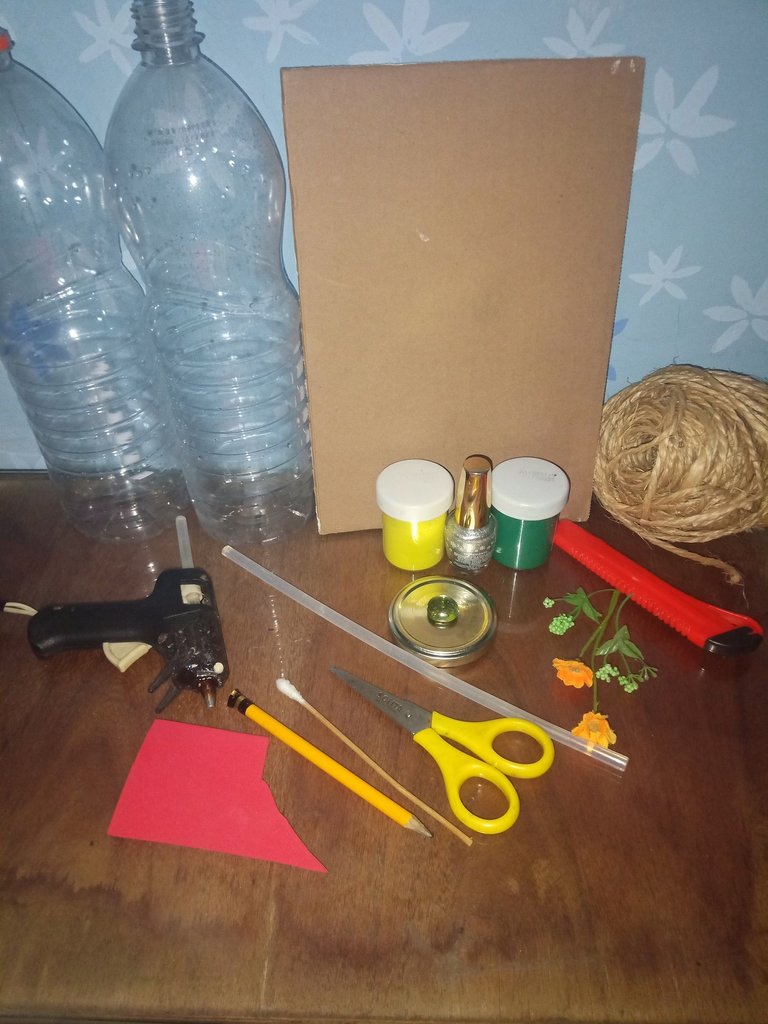
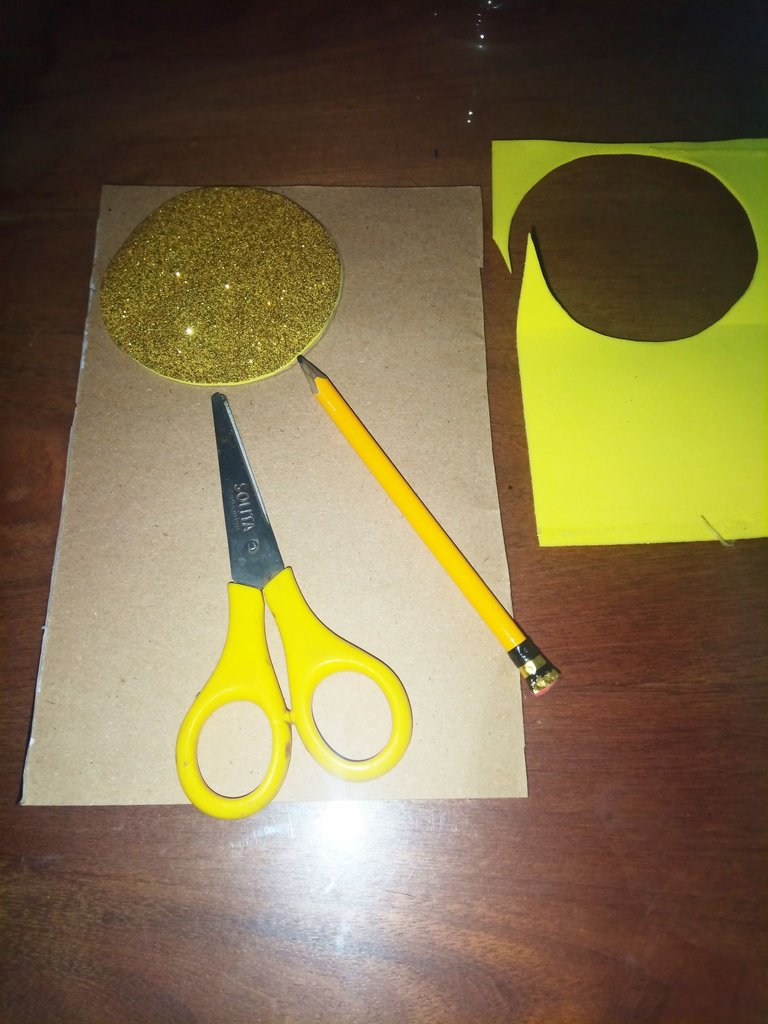
- 2 envases de plástico
- 1 cartón rectangular
- Cuerda de mecate
- Pinturas al frío verde y amarillo
- Pintura para unas de escarchado plateado
- Tijera
- 1 barra de silicona
- 1 retazo de foami
- Flores artificiales
- 1 tapa de metal dorada
- Tapiz
- Cotonete
- Cúter
- gema
- Retazos de foami escarchado.
- Cartón delgado.
- 2 plastic containers
- 1 rectangular cardboard
- Rope string
- Green and yellow cold paints
- Paint for silver frosting
- Scissors
- 1 silicone stick
- 1 piece of foami
- Artificial flowers
- 1 golden metal lid
- Tapestry
- Cotonete
- Cutter
- gem
- Pieces of frosted foami.
- Thin cardboard.
 |  |
|---|
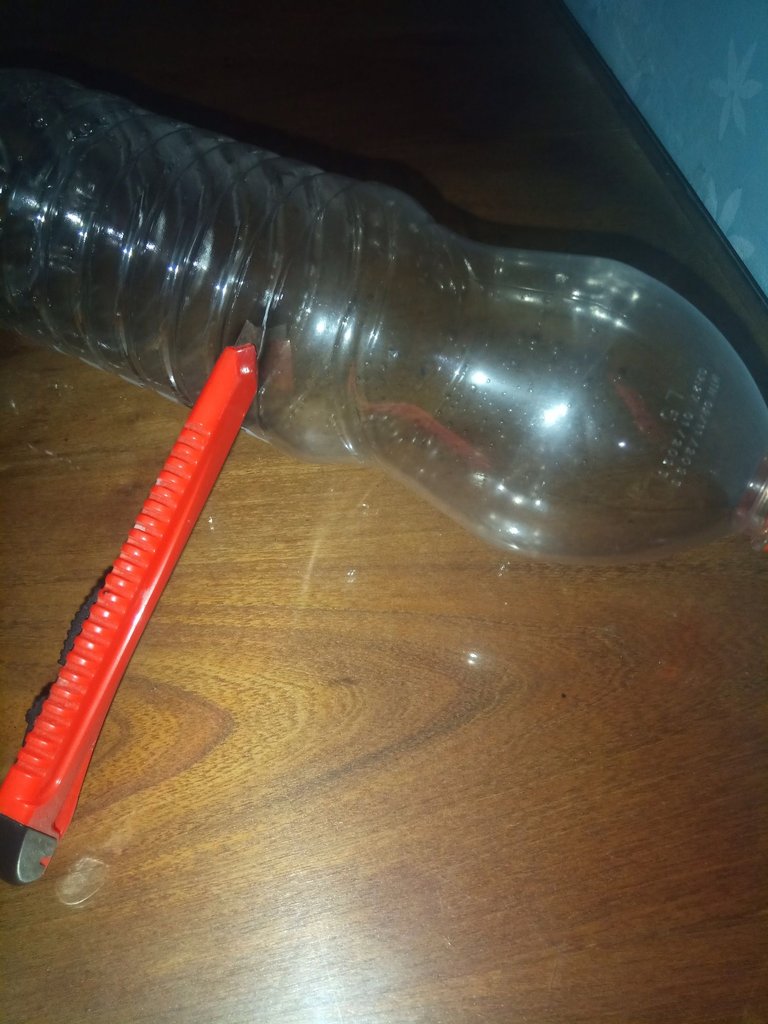
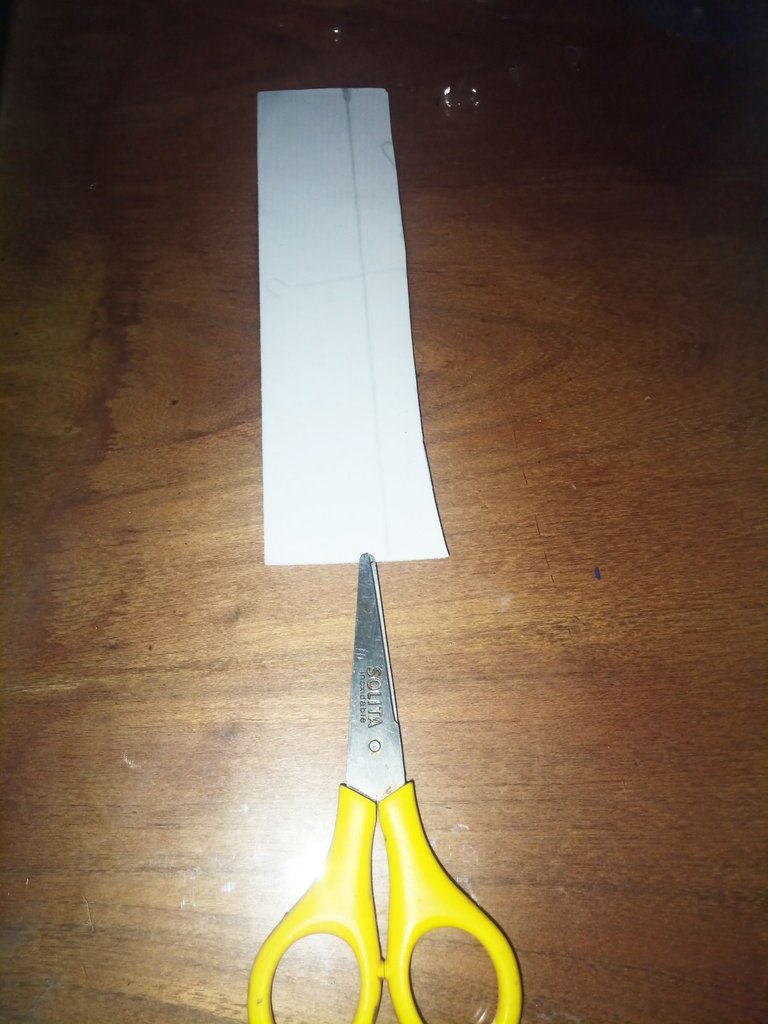
Lo primero que hice fue tomar el envase plástico y con el uso del cuter abrí un orificio por la parte más débil del envase, luego con la tijera corte hasta el alto deseado, en este caso retire toda la parte corrugada dejando solo la parte lisa.
Luego corte la parte de la rosca de la botella a unos 4 cm hacia abajo en círculo y así queda la base para la tetera.
The first thing I did was to take the plastic container and with the use of the cutter I opened a hole in the weakest part of the container, then with the scissors cut to the desired height, in this case remove all the corrugated part leaving only the smooth part.
Then cut the threaded part of the bottle about 4 cm down in a circle and so is the base for the teapot.
 |  |
|---|
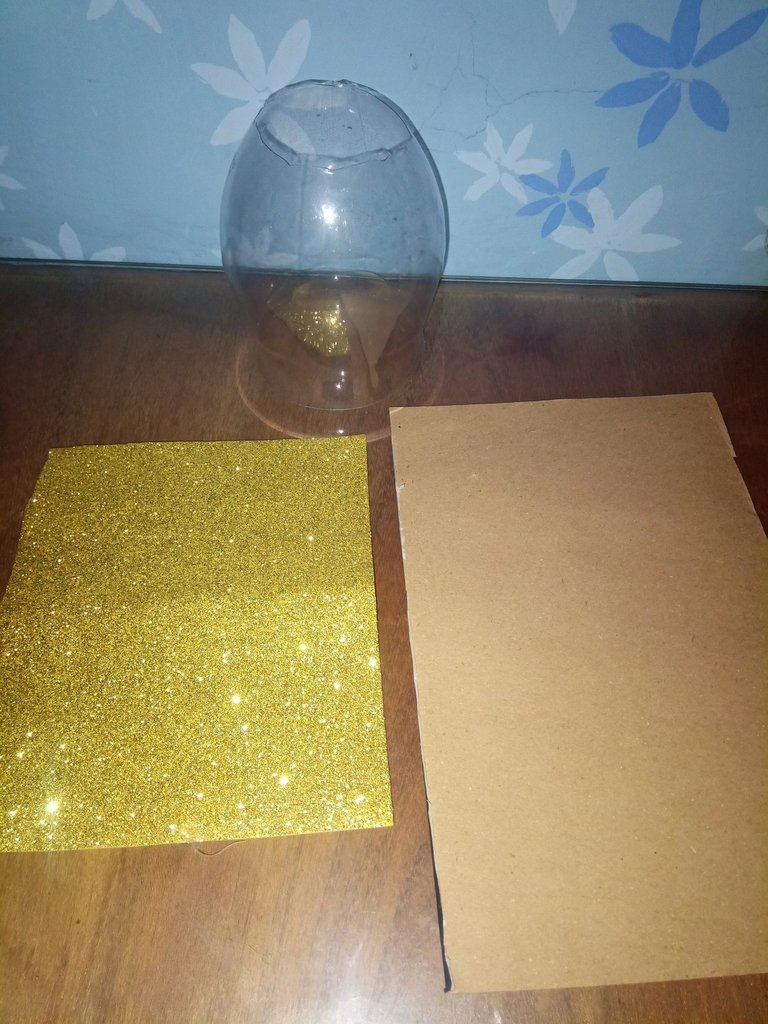
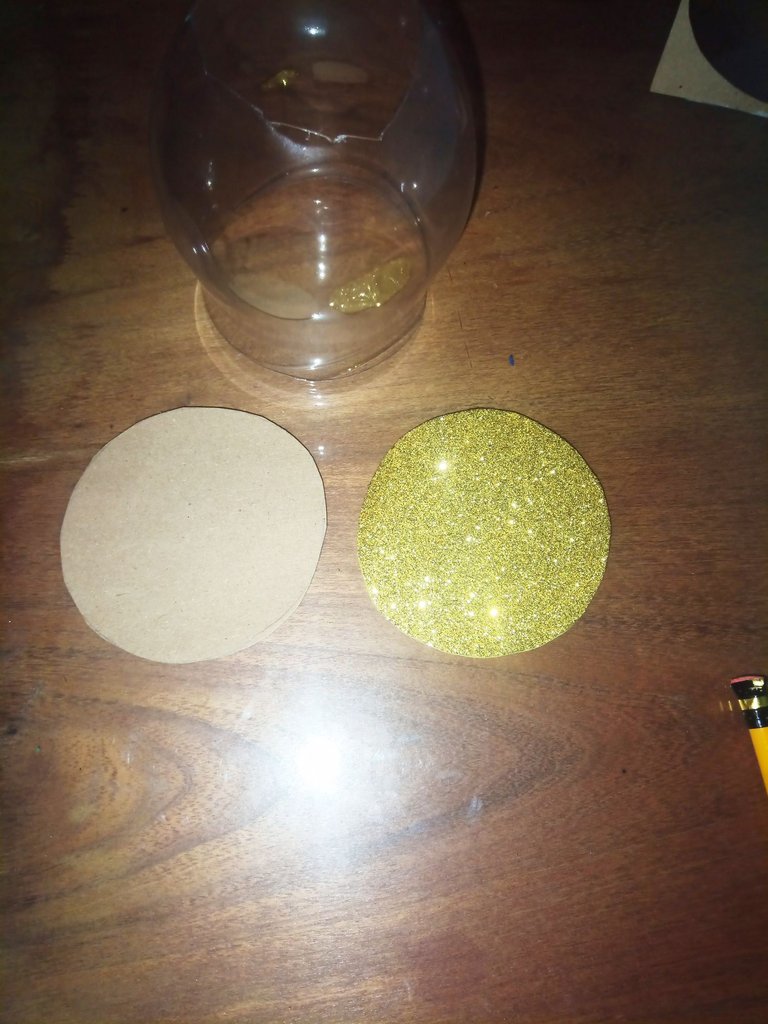
En este paso comencé a realizar la pieza para tapar la parte de abajo de la tetera, coloque el envase plástico sobre el foami escarchado y remarque con un lápiz del lado revés del foami para evitar manchas.
Luego recorte este círculo con la tijera y este lo utilice sobre un trozo de cartón delgado, haciendo el mismo procedimiento para darle más firmeza a esta parte, y evitar que se doble al momento de pagarlo al fondo de la tetera.
In this step I began to make the piece to cover the bottom of the teapot, place the plastic container on the frosted foami and mark with a pencil on the reverse side of the foami to avoid stains.
Then cut out this circle with the scissors and use it on a piece of thin cardboard, doing the same procedure to give more firmness to this part, and prevent it from bending at the time of paying it to the bottom of the teapot.
 |  - - |
|---|
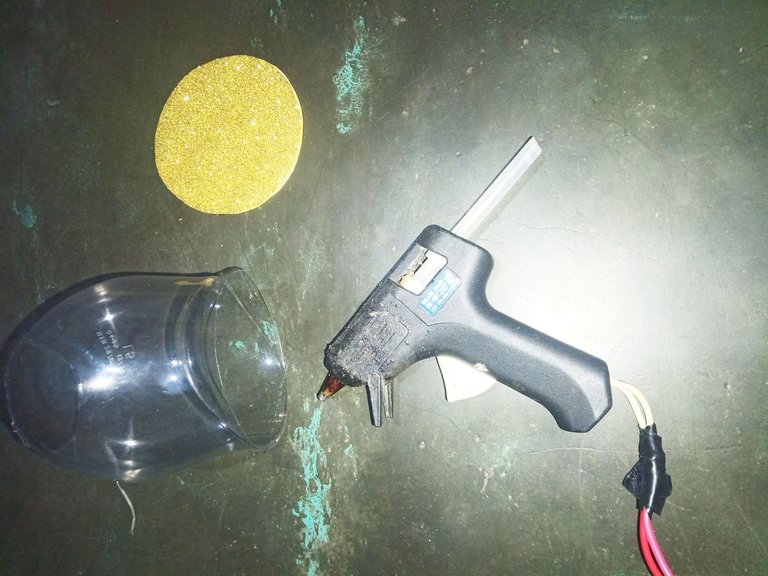
Uní las dos circunferencias con silicona, luego coloque silicona por todo el borde de la pieza de plástico de forma rápida, y pegue la pieza de foami con el escarchado hacia dentro.
Esto hay que hacerlo rápido para evitar que se deforme el plástico, ya que lo más recomendable para hacer este tipo de trabajos es realizarlo con silicona al frío, en mi caso ya sé dominar este trabajo con silicona caliente, cuando no cuento con silicona al frío.
I joined the two circumferences with silicone, then I put silicone all around the edge of the plastic piece quickly, and glued the foami piece with the frosting inside.
This has to be done quickly to avoid deforming the plastic, since the most advisable to do this type of work is to do it with cold silicone, in my case I already know how to master this work with hot silicone, when I do not have cold silicone.
 |  |
|---|---|
 |  |
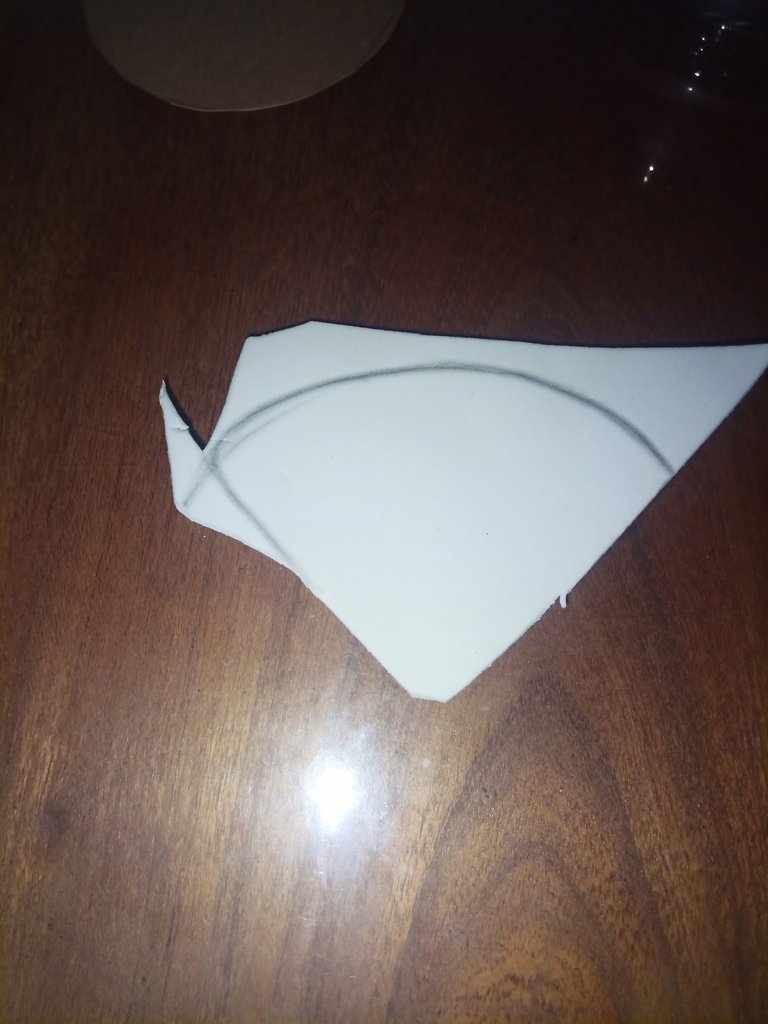
En este paso se puede notar como cubrí el fondo de lo que será la tetera, luego de esto comencé hacer lo que será el pico vertedor de la tetera con un retazo de foami escarchado, aquí dibuje una figura en forma de abanico.
Para luego recortarlo con la tijera y con silicona caliente pegarlo por los lados como haciendo un cono.
Por otra parte, recorte una cinta de foami escarchado de 2 cm de ancho por 19 de largo para el asa o mango de agarre, los reserve para pegarlos en otro paso.
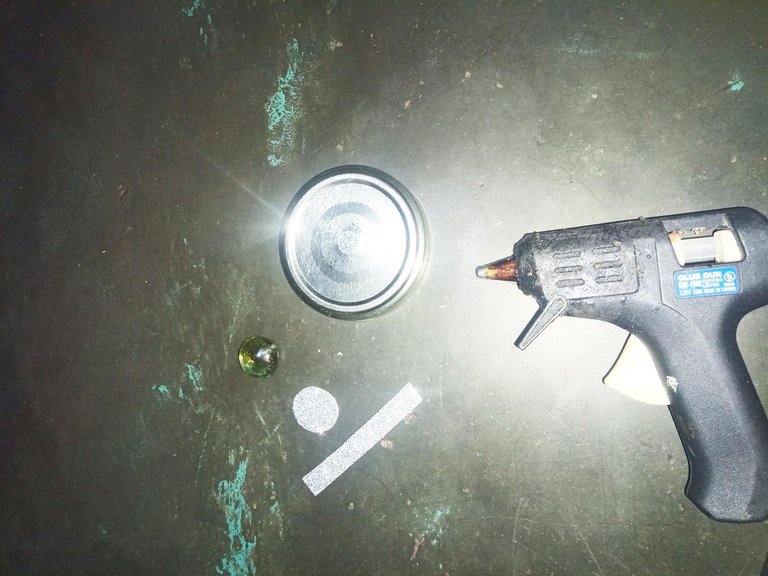
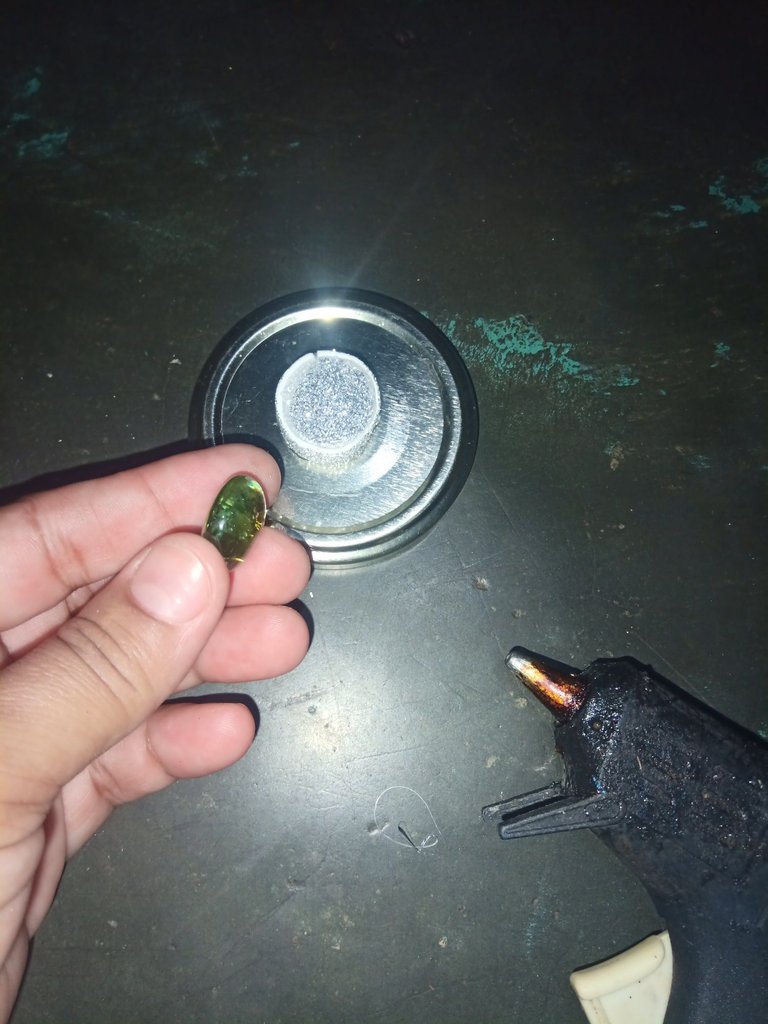
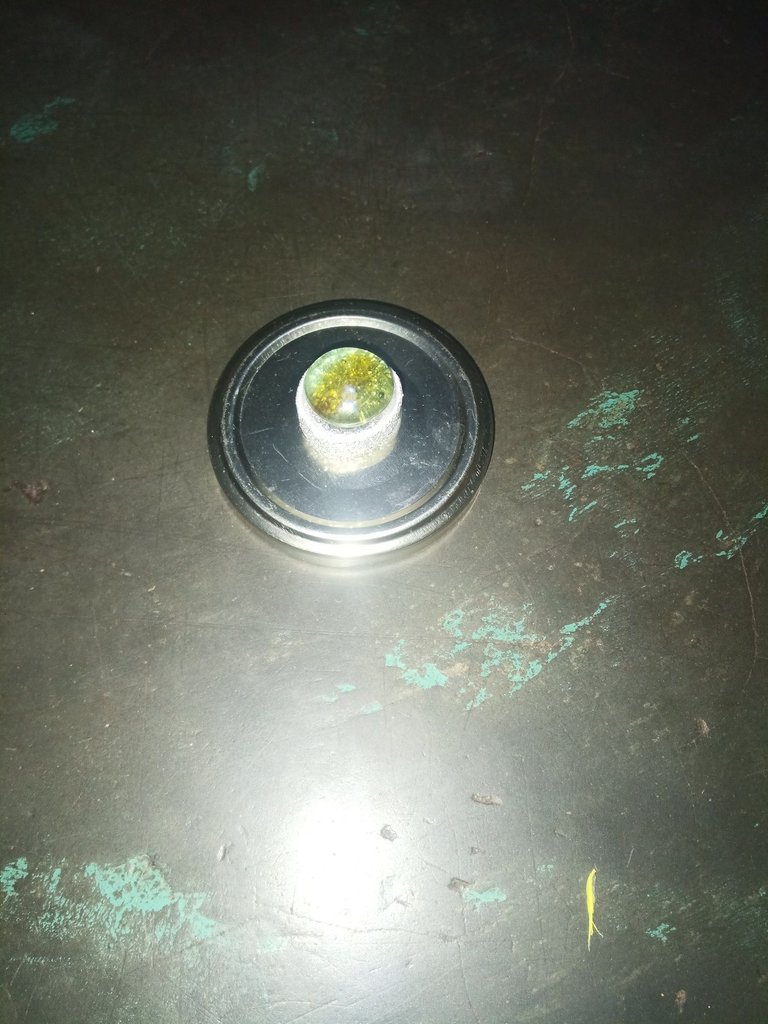
Seguido comencé a decorar la tapa de la tetera, para esto necesité recortar un círculo de foami escarchado y una tira que irá pegada a este círculo para darle altura y sobre esta ira una gema decorativa.
In this step you can see how I covered the bottom of what will be the teapot, then I started making what will be the pouring spout of the teapot with a piece of frosted foami, here I drew a fan-shaped figure.
Then I cut it out with the scissors and with hot silicone I glued it on the sides like a cone.
On the other hand, I cut a 2 cm wide by 19 cm long frosted foami ribbon for the handle or grip handle, I reserved them to glue them in another step.
Then I began to decorate the lid of the teapot, for this I needed to cut a circle of frosted foami and a strip that will be glued to this circle to give it height and on this will go a decorative gem.
 |  |
|---|---|
 |  |
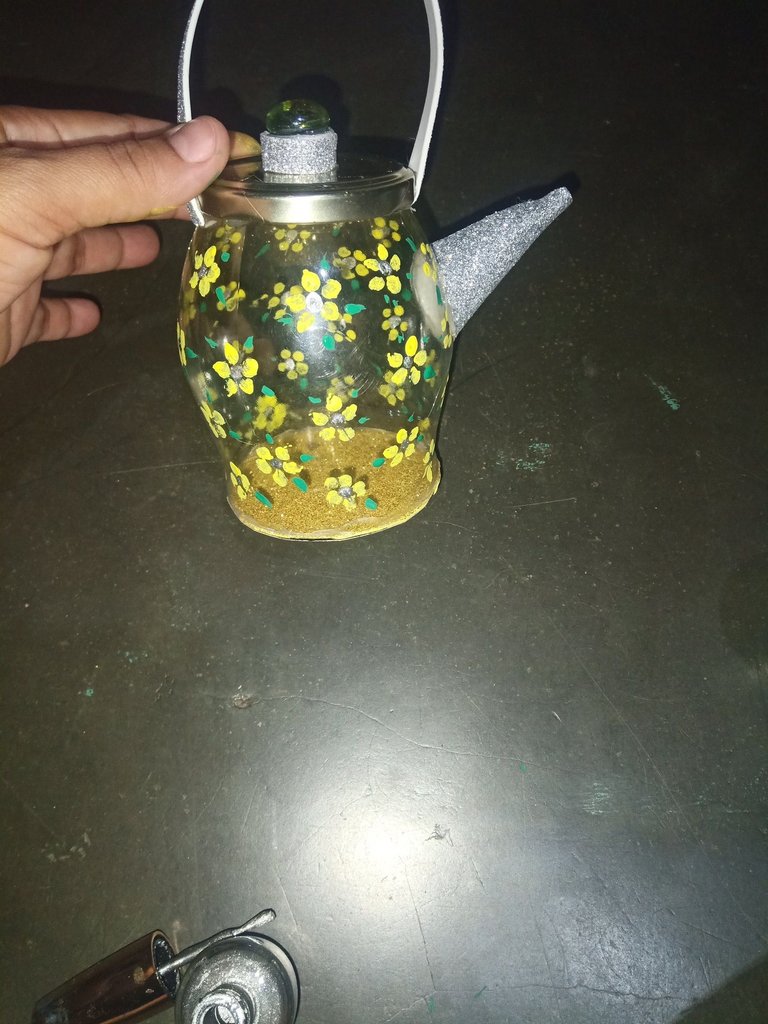
Luego de decorar la tapa, procedí a pegarla, coloque silicona en la parte interna de la tapa para fijarla bien sobre la base de la tetera, luego en uno de los lados coloque el pico vertedor, también pegue el asa que va frente al pico vertedor y ya vemos como está quedando la tetera.
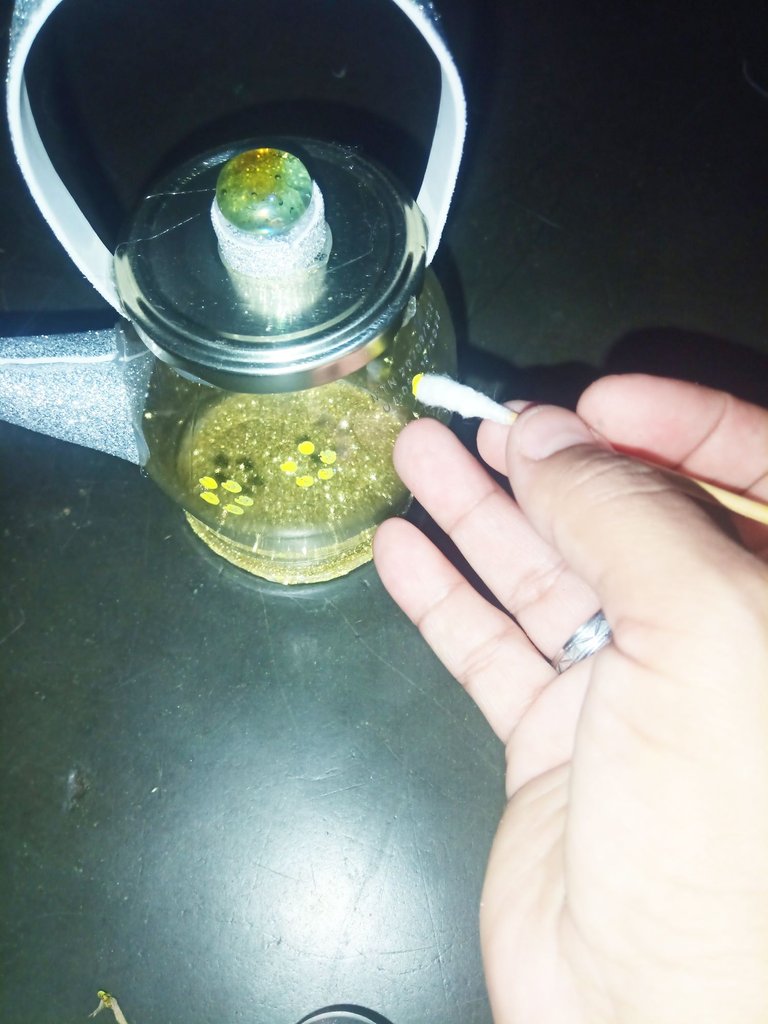
Luego con el cotonete y la pintura al frió de color amarillo, hice puntos para hacer unas flores decorativas, y realizaré hojas con la pintura al frió verde y colocaré los centros de las flores con pintura para uñas de escarcha plateada.
After decorating the lid, I proceeded to glue it, I put silicone on the inside of the lid to fix it well on the base of the teapot, then on one of the sides I put the pouring spout, I also glued the handle that goes in front of the pouring spout and we can see how the teapot is getting.
Then with the cotonete and the yellow cold paint, I made dots to make some decorative flowers, and I will make leaves with the green cold paint and I will place the centers of the flowers with silver frost nail polish.
 |  |
|---|---|
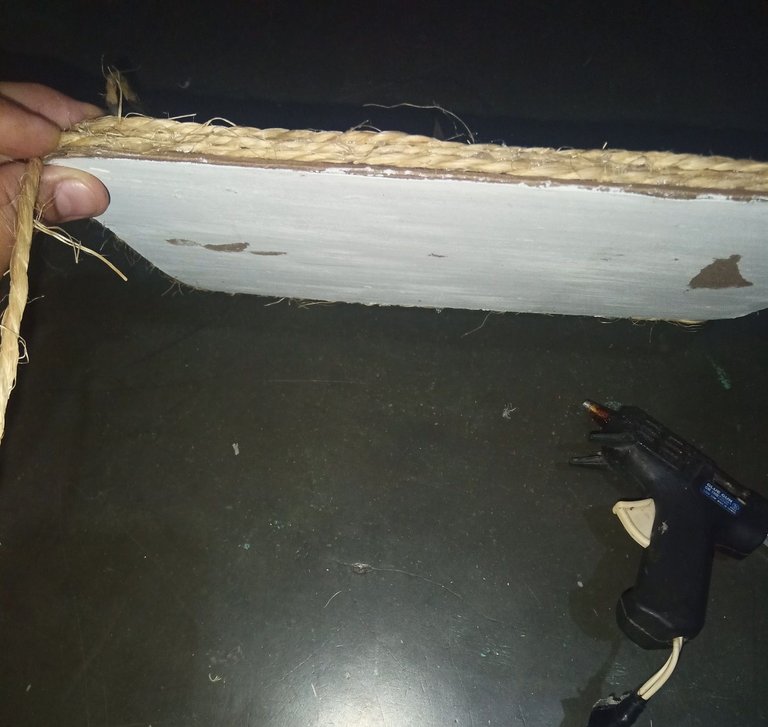 | 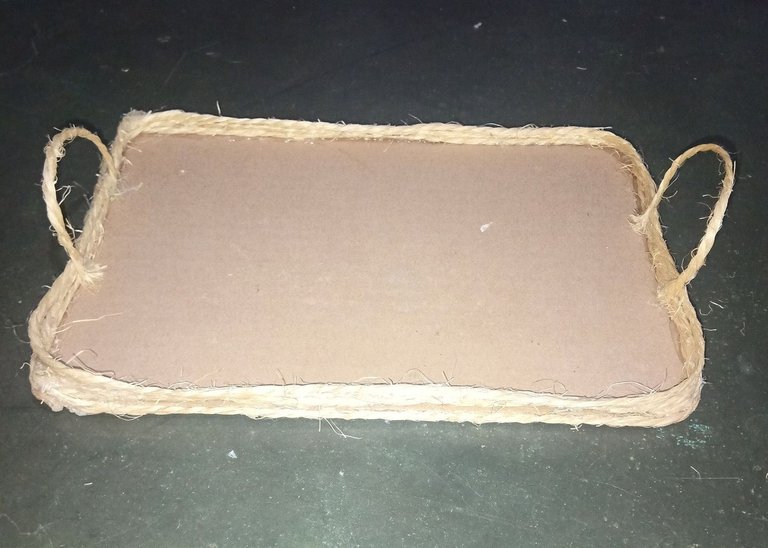 |
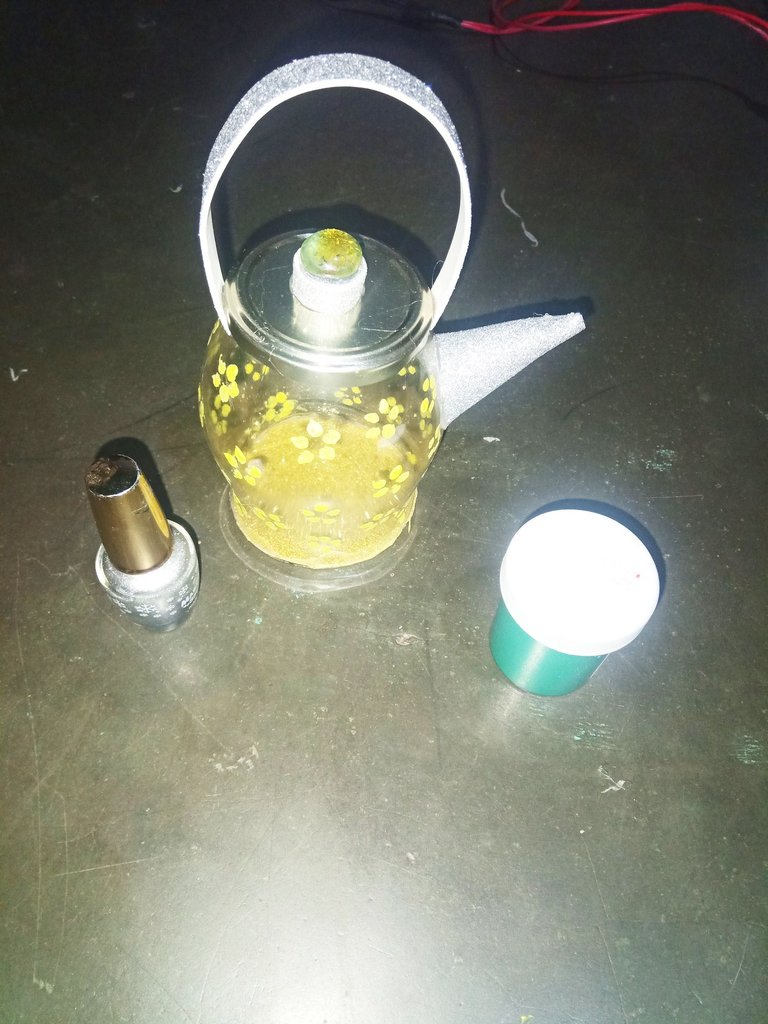
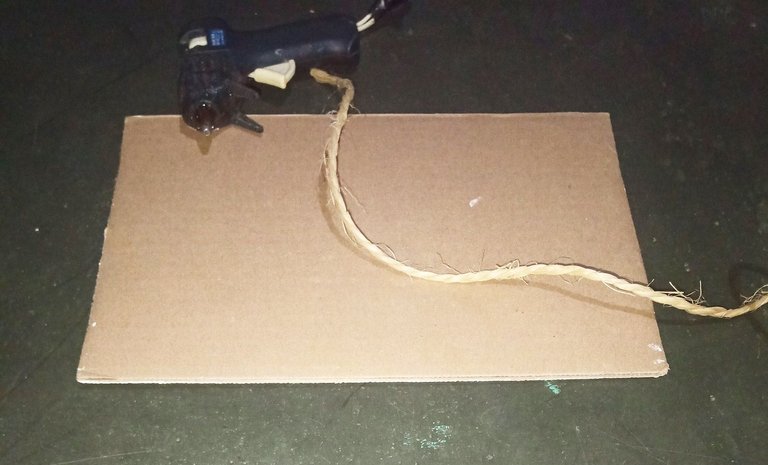
Así es como queda la tetera lista con las decoraciones florales, después con el cartón rectangular realizaré una bandeja para servir el té, coloque cordón de meca tillo por todo el rectángulo haciendo 5 vueltas pegadas con silicona caliente.
Por los lados de la bandeja coloqué unas asas, esta bandeja está lista para hacerle unas decoraciones.
This is how the teapot is ready with the floral decorations, then with the rectangular cardboard I will make a tray to serve the tea, I put some mecatillo cord all over the rectangle making 5 turns paid with hot silicon.
On the sides of the tray place some handles so this tray is ready to make some decorations.
 |  |
|---|---|
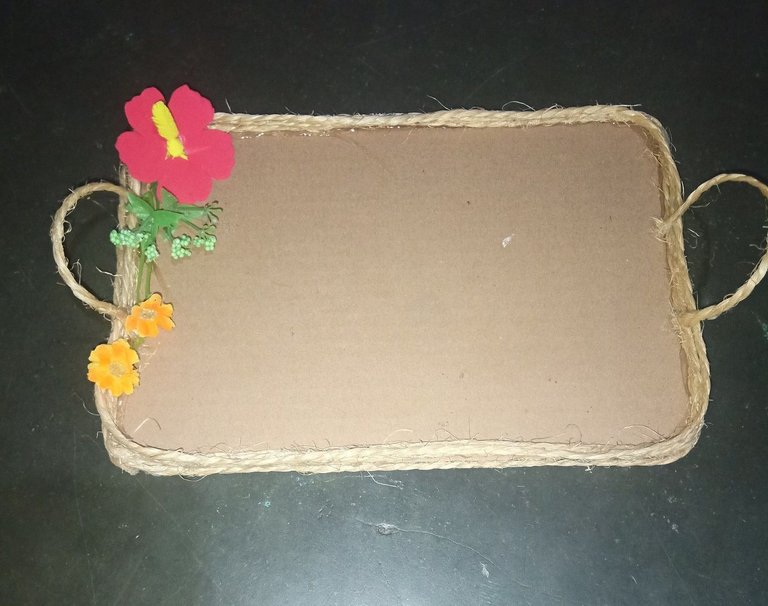 | 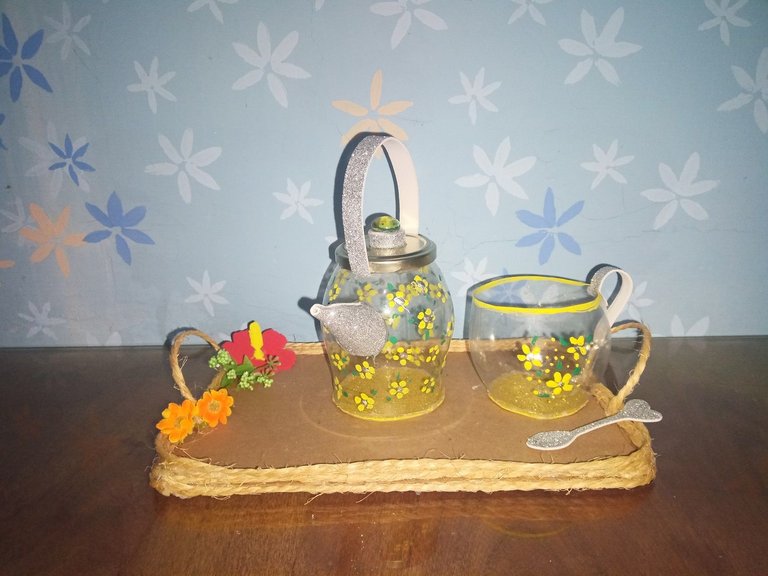 |
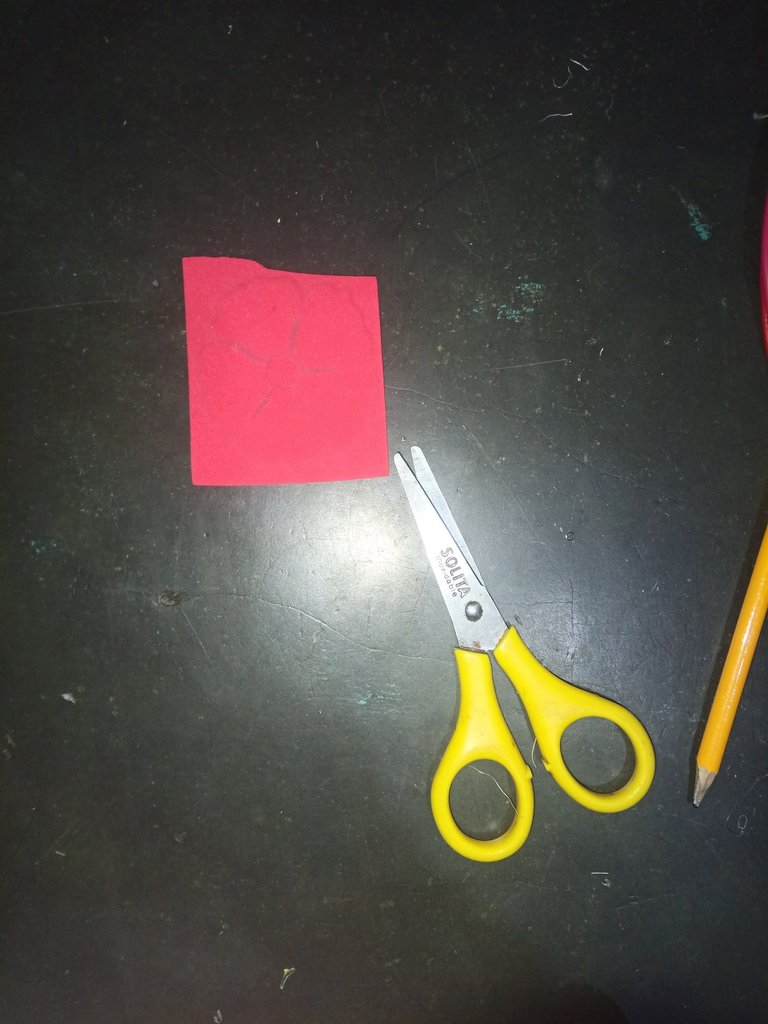
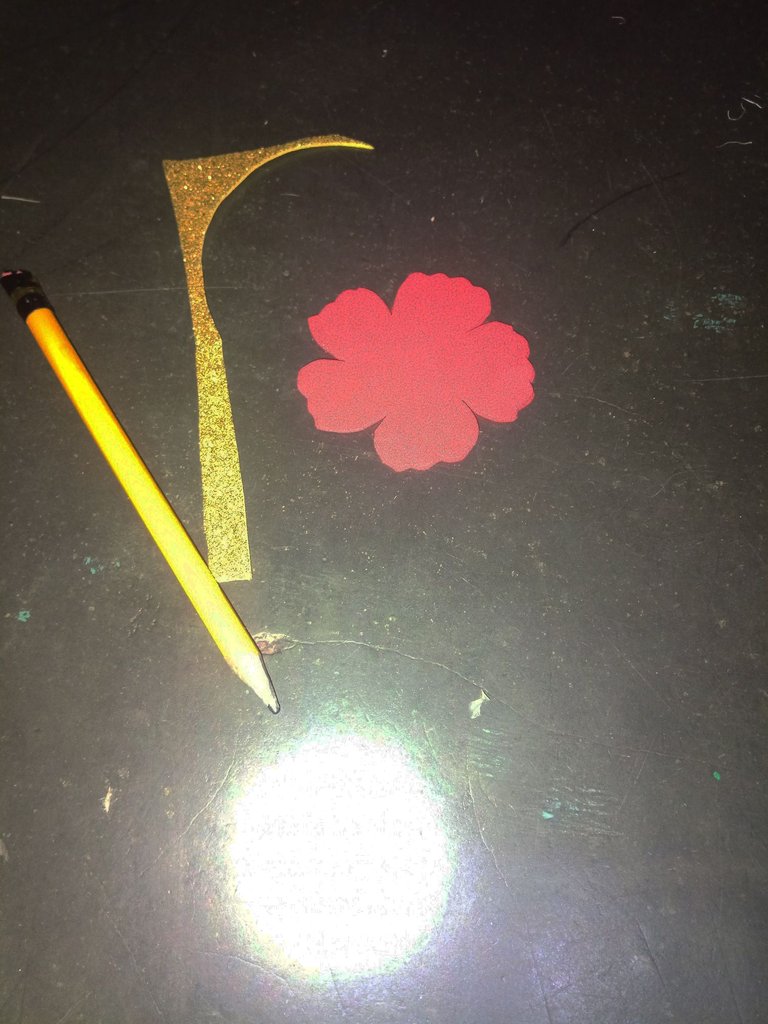
Comienzo con la decoración de la bandeja, sobre un trozo de foami dibuje una flor de cayena, la recorte y la pegue en un extremo de la bandeja, también pegue el resto de las flores que reserve para esta decoración.
En este proceso también hice una taza con el mismo procedimiento inicial de la tetera, y con un retazo de foami escarchado hice una cuchara decorativa para este hermoso juego de tetera.
Así culmino mi publicación, espero sea de su agrado, estaré muy agradecida por visitarme, espero vernos en otras publicaciones.
I start with the decoration of the tray, on a piece of foami I drew a cayenne flower, cut it out and glued it at one end of the tray, I also glued the rest of the flowers that I reserved for this decoration.
In this process I also made a cup with the same initial procedure of the teapot, and with a piece of frosted foami I made a decorative spoon for this beautiful teapot set.
This is the end of my publication, I hope you like it, I will be very grateful for visiting me, I hope to see you in other publications.
social networks / redes sociales
![]()
![]()
Traductor Deepl
Translated Deepl
Ediciones Canva
Editions Canva


The rewards earned on this comment will go directly to the people( @yessi08 ) sharing the post on Twitter as long as they are registered with @poshtoken. Sign up at https://hiveposh.com.
Thank you for this amazing contest entry! The cup and pot look very realisitc and I bet it is a great toy to play with for kids 🙂 Very creative with the use of multiple materials and the decoration is beautiful!
Hola @lauracraft, has hecho un gran trabajo reciclando las botellas, una gran idea para decorar y reducir costos.
@samuell12 como estas? la verdad me gusta reciclar, porque es de mucha utilidad, se aprovechan muy bien los materiales, y se crean grandes cosas, hay infinidad de accesorios decorativos que ni imaginamos que son hechos con reciclaje.
Que bello juego de té 🥰 me encantó el diseño esta hermoso para las niñas jugar, es fácil y lo mejor que lo podemos hacer con materiales de reciclaje, la felicito amiga, gracias por compartir , saludos 🤗
@marlynmont saludos!! gracias!! es un honor para mi saber que te haya gustado el juego de te, esta tetera creo que a las niñas les encantaría para jugar es muy lindo.
Llevo tiempo buscando ideas para reciclar botellas plásticas y de vidrio, reconozco que esta idea me parece bastante buena. No se me había ocurrido.
Le deseo mucha suerte en el concurso.