Welcome DIY repair enthusiasts, motor heads, and cheapskates! As promised in my last auto repair post, this time around we'll be doing an exhaust repair. I was originally going to to do a few short posts about some common repairs, but as a reward for sticking with me (despite a nearly month long posting drought), I'm going to start right off with a full system replacement, from the end of the exhaust manifold all the way to the muffler tip.
If you've ever gotten a quote from a muffler shop for a complete exhaust system replacement, you know that it's the kind of number that can initiate a fight-or-flight response. The cheapest one I've ever heard of was $1200, and that was back in '92. I think the quote that was given to the previous owner of this vehicle was around $2800, which was close the cost of the car. I know people that have paid over $4000, for muffler repair. If you have a lot of disposable income, that's fine. Mechanic's kids need jet skis too. If you don't have that kind of extra money, but still need to quiet down your old rust bucket, then you've come to the right place.
I would like to say right up front that while exhaust repair isn't technically challenging, it can be very physically demanding, and is not for the faint of heart. Unless (and even if) you have a lift, the working conditions are likely to be very uncomfortable, and during removal old dirt and rust are going to be falling in your face most of the time. For a complete system repair like this, getting the old stuff off will always be the hardest part. The second hardest part will be getting the right pieces.
First of all, getting the right exhaust parts can be a difficult task, and will often require you to know a little more about your vehicle than you would need for ordering brakes or wipers. Usually, you'll just need to know the 'trim' package of your vehicle, which is the 2 or 3 letters (DX, LX, ST, STS, GXP...) that follow your vehicle's model. If you don't know your trim package, the easy way to find out is by using a VIN decoder tool, like this one offered by AutoZone. VIN stands for Vehicle Identification Number, and is a unique number on every vehicle that will tell you what engine size, color, and trim package (along with some other options) your vehicle left the factory with, IF you can decode it. The AutoZone one does not give very detailed information, but it will give you enough to order parts.
The second pro tip I want to hand out is a method for saving a literal TON (several tons, in quarters) of cash when ordering parts, ESPECIALLY exhaust parts. Basically, I shop my exhaust parts around in a specific sequence. First, I check the chain store sites (Autozone, Advance Auto Parts, NAPA) to see which OEM fitted parts will be readily available. They also have pictures of the exhaust assembly for most vehicles, so you can find out all the parts you need to look for, even though these stores won't carry all of them, and you probably won't want to pay their prices for any of them. Next, I go the online stores, RockAuto.com and CarParts.com. This is where you will likely find ALL the parts you need, and get an idea of what reasonable prices will look like. There are often entire systems available as a package deal, but I've found that I can usually save about $100 by buying pieces individually. The last thing I do is check eBay for my parts, and this is where I usually end up ordering them. eBay will have the same low prices as the online stores, but the shipping will be free (and usually a lot faster).
Occasionally you will need an exhaust part that you can't find for sale new, or at least, not at a price you're willing to pay. In this case, you'll have to search for a good used one. There are junkyards, and even online junkyards, all over the world, and they can vary pretty wildly in how much they want for something. If you don't like the price from one place, it never hurts to check the next one.
OEM exhaust parts will have a very specific fit, with not a whole lot of room for 'making things work'. Because of this, it's always a good idea to do a visual inspection of the parts on the car, and the new parts you're going to install, to see if they look like a match. For most cars, you're going to want to get the car off the ground a bit to be able to get a good look at it. I can barely even get my head under the $500 Honda if it isn't on ramps, so that's where I start off. I recently picked up these plastic ramps because the price was right, and they looked quite a bit sturdier than other ones I've looked at. It turned out to be true, the first thing I did was drive right off the ends of them, then reverse back up onto them, and they held up just fine. 🤣
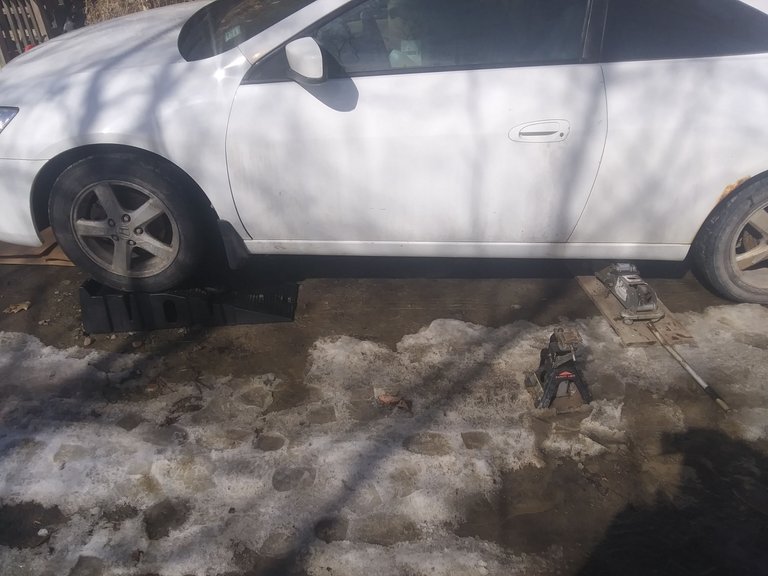
Once the vehicle is on the ramps, I figure out where I want my jack, block the wheel on the opposite side, and jack up the rear of the car. When placing the jack, you want to consider whether or not it will be in the way while you're trying to remove the old system and install the new. I normally would prefer to set the vehicle on a jack stand, which is sturdier and has a smaller footprint, but this jack has a locking pin to keep it from dropping if it loses pressure, and over the last 20 years I've really come to trust it. I'll also keep the rear wheels on for this repair. Removing them would give me more room and light, but with them on, if the car falls while I'm under it, it's much less likely to be lethal.
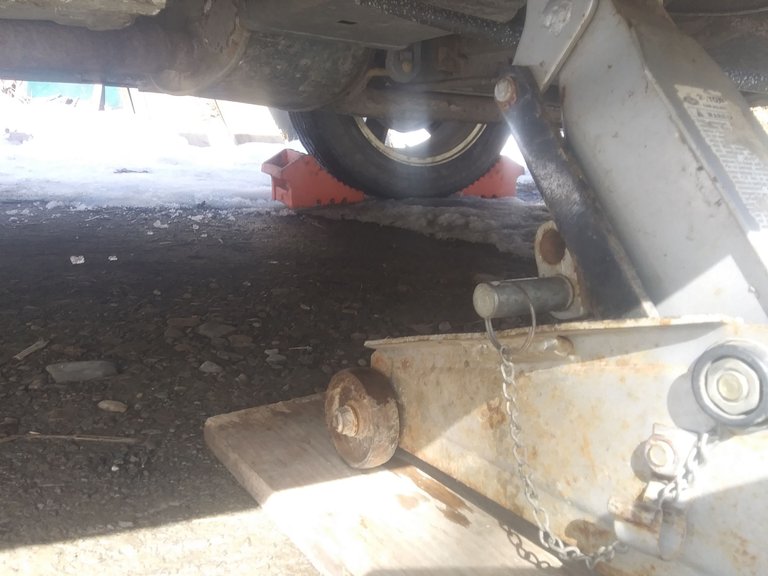
Between the ramps, jack, and clever use of a few inches of ice accumulation, I now have enough room to move around under the vehicle, and it even lets in enough light to take some pictures. I've never really checked to see what kind of resolution these pictures keep in the upload process, but if they're as good as the originals, I left an easter egg for any stalkers out there trying to get my plate number :D
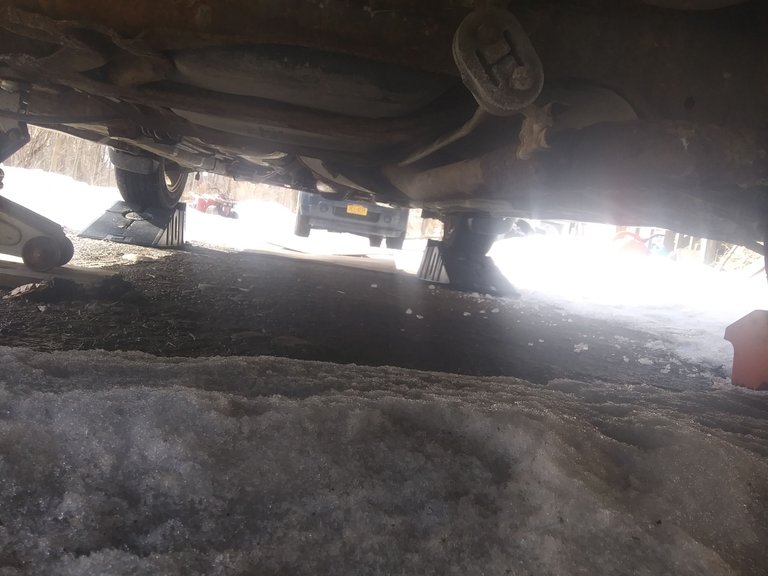
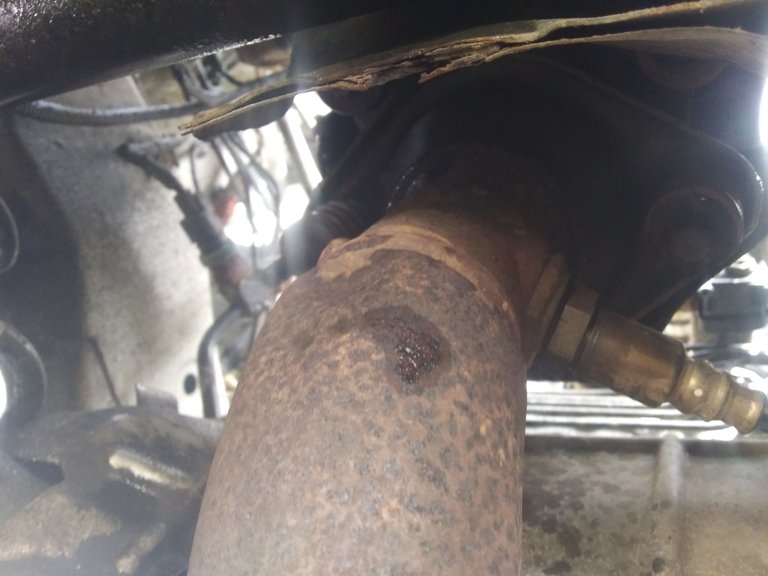
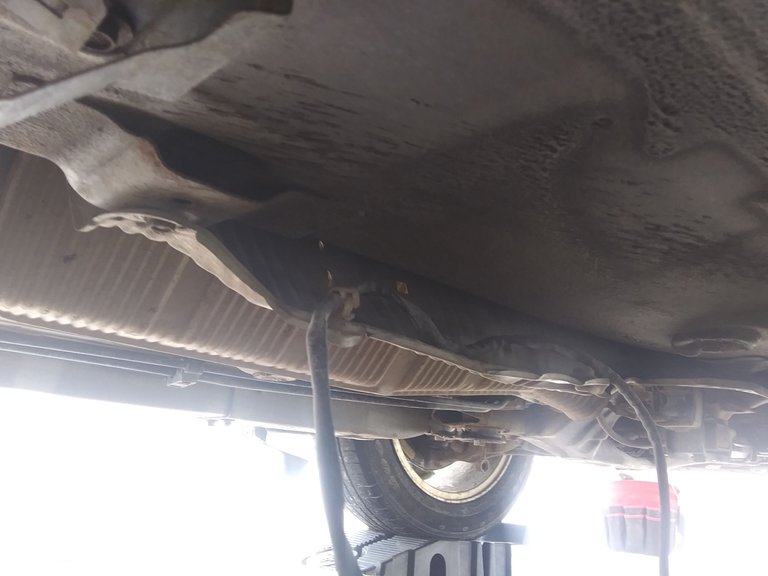
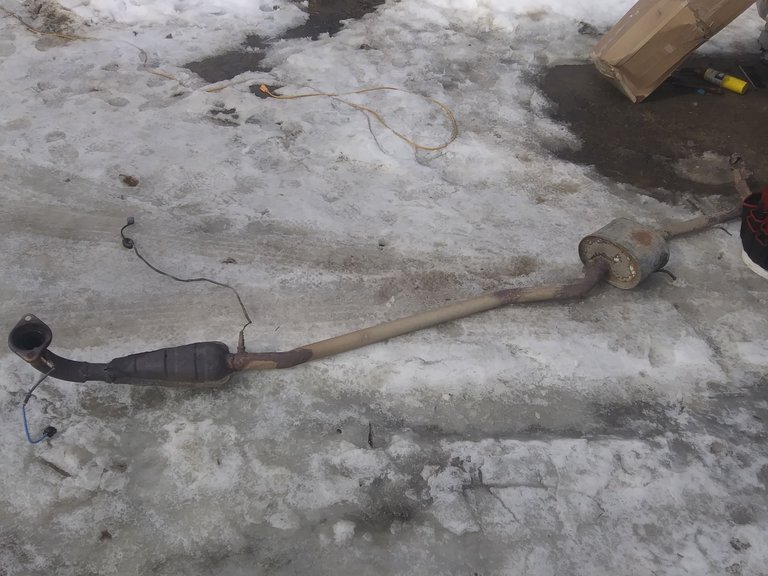
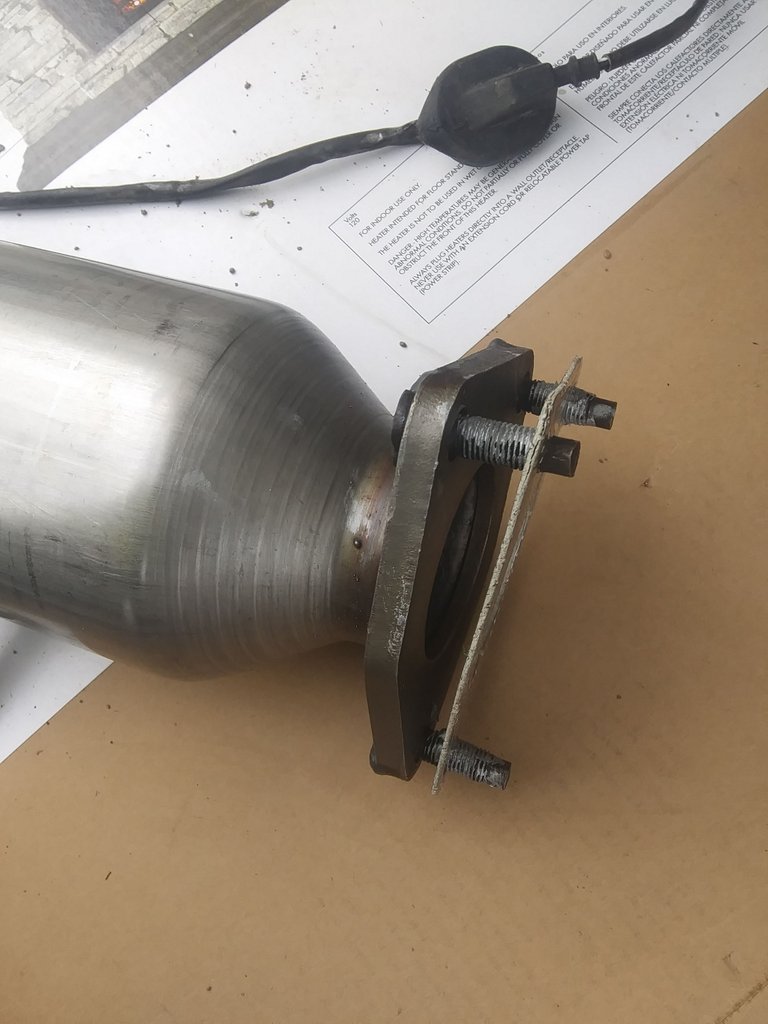
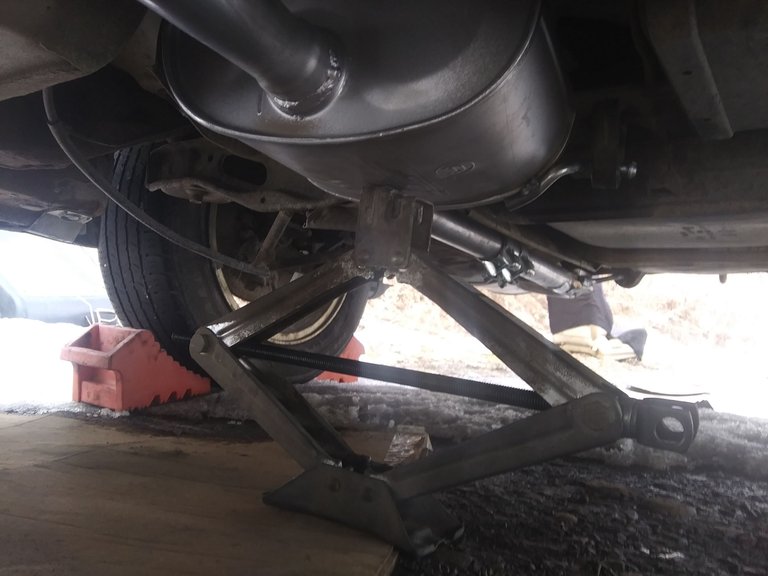
Now that I have room to start the actual work, it's time to assess how difficult it will be to remove the old exhaust. The picture below shows the flange that attaches to the exhaust manifold. On the right hand side is the upstream (bank0) oxygen sensor. Normally you would replace these with the exhaust, but in this case, I know that the ones on this vehicle are pretty new, and this one is actually very expensive, over $120 to replace, so I'm being careful to save them both. The bolts (technically one nut and one bolt) on the flange are ones that did not come with any of my repair pieces, so I will need to save them. These manifold bolts can be difficult to find for vehicles, so it's always a good idea to save them when you can. Other than that, this entire exhaust has been welded together over the years, and my hope is that I have the vehicle up high enough that I can drop the entire exhaust and just pull it out from under the car. The only thing holding it on are this flange, one hanger, and the wires on the O2 sensors.
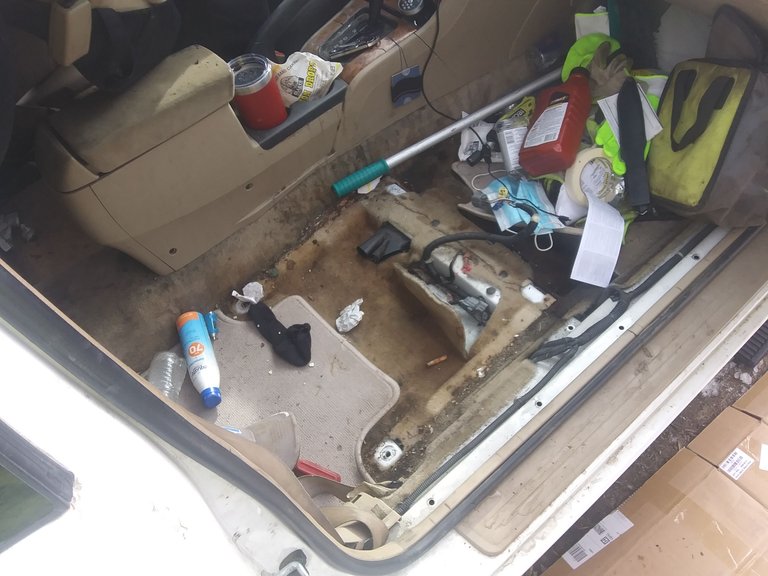
The downstream O2 sensor on this vehicle comes through the floorboards under the passenger seat. You can get at it without removing the seat, but I'm getting too old to work in cramped spaces when I don't have to. Don't judge me for the mess, this is both my work beater AND the loaner car that family teens borrow when I'm working on the damage they've done to their own vehicles.
To remove the sensor, this rubber boot just pulls out, and then you can poke the boot and connector down through the hole. The connector for the upstream sensor was an easy disconnect under the hood, though it would have been easier if I had disconnected that one BEFORE I jacked up the car.
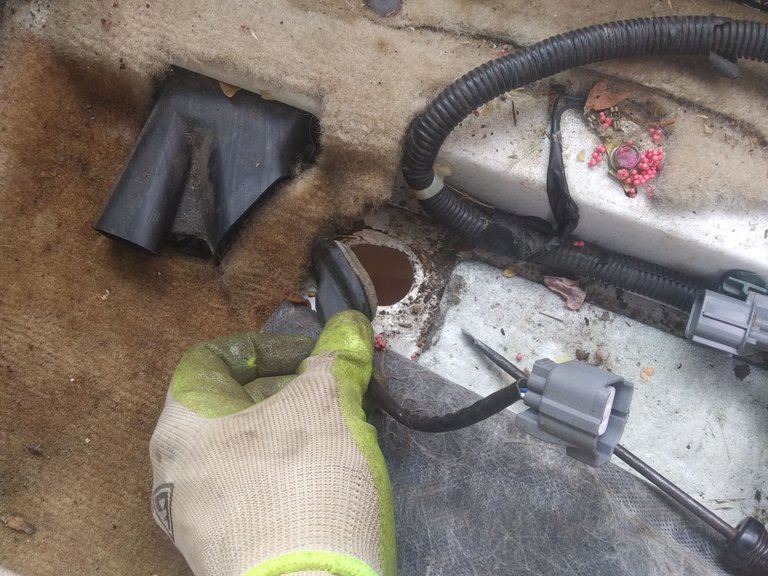
The wire for the downstream sensor is held in place under a heat shield with a couple plastic clips. These prevent the wire from dragging and getting damaged, so I take care not to damage them during removal.
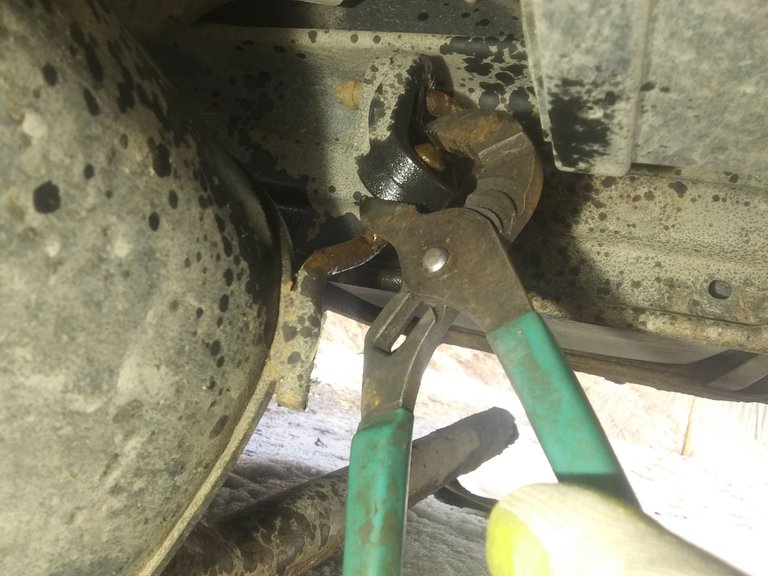
With the O2 sensors and manifold bolts removed, there is just the one exhaust hanger holding things in place. These can be difficult to remove by hand, but a little lubricant and a large set of pliers used like you see here will pop them right out. Just set one end of the plier jaws on the end of the metal post, set the other end against the rubber, and squeeze. As soon as the barbed end of the post gets poked inside the rubber, it will come out easily. The ends of the old exhaust posts are still stuck in the rubber hangers, so I have to get them out before installing the new parts.
Everything did pull out easy enough once it was unhooked, so this removal went very smoothly. Normally there is more grinding and cursing involved. I was lucky to be able to remove this with the O2 sensors still installed, they can be very difficult to get at when the exhaust system is in place. I'll make sure to install these into the new parts before installing the new parts on the car.
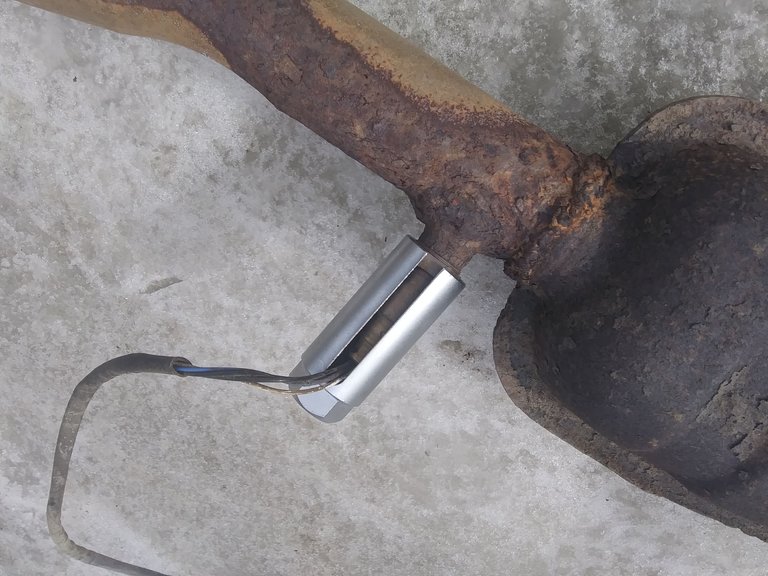
They make special sockets for installing and removing O2 sensors that have cutouts in them to allow clearance for the wires, and I highly recommend getting them if you do this work a lot. Cheap open end wrenches will not usually do the job, and the connectors on many sensors won't fit through the box end of a wrench. Even if you're not re-using the old ones, you'll want to keep them. They contain platinum, and are usually worth at least a few dollars apiece at the scrap yards. Your old catalytic converter will also have a high scrap value, platinum is the catalyst they use.
With everything out in the open, I like to do a final check of everything before I start putting new parts on the car. The differences in exhaust parts between similar models can be very subtle, and it's very frustrating to get everything almost together, just to have two parts miss each other by an inch or two. As you can see, the 'J' pipe that comes off the manifold is quite a bit different from the system that had been cobbled on to the car over the years, but the holes line up, and the mounting post is in the right place.

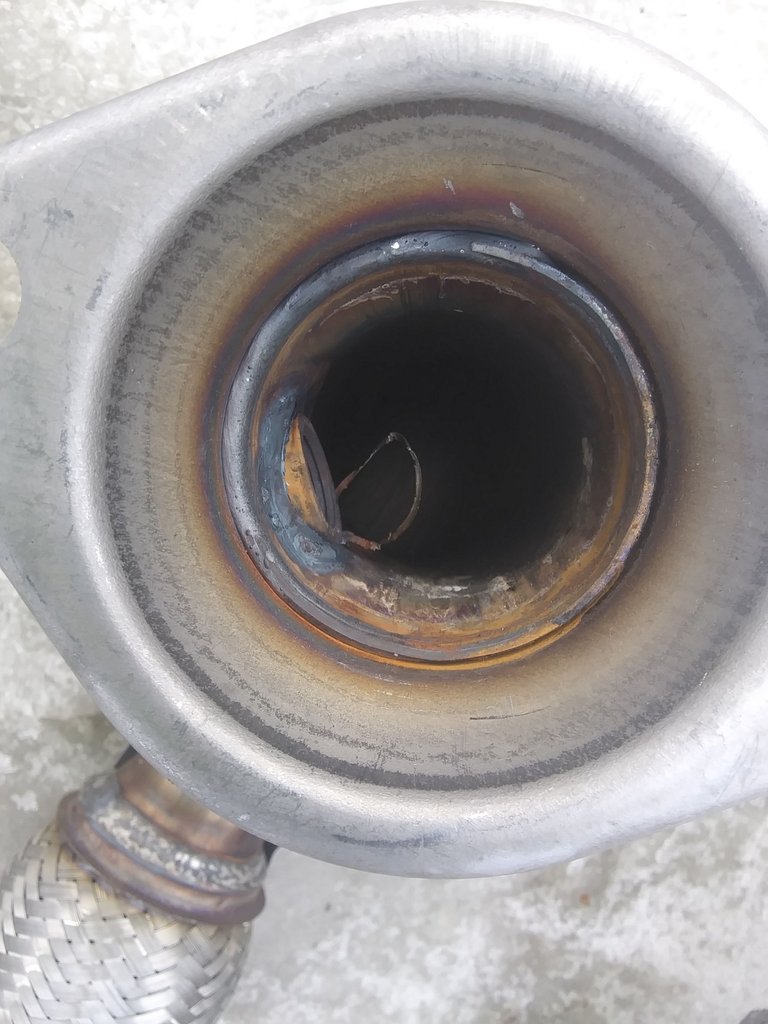
There was some excess welding wire on the inside, where the socket for the upstream O2 sensor was welded in. I checked all the welds for anything that looked like it might need some touch-up, but everything looks fairly solid, if a bit sloppy. This would be extremely unlikely to ever affect performance in any way, but if I remove it, then there is 0 chance of it becoming a problem later.
Checking the catalytic converter, things are still looking strange but okay. The O2 sensor sockets are in the right places, which is a very important detail. It looks like there could be some clearance issues where the new part is much fatter in the area of the sensor, but looking underneath the car, it seems like it will be fine.
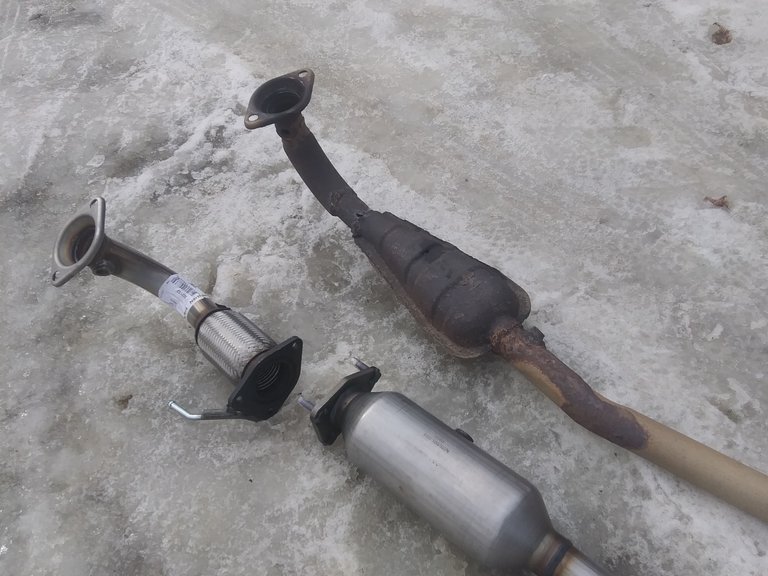
Moving on to the middle pipe and resonator, some of the lengths and angles are looking suspicious. Too much length is an easy problem to fix, especially on the middle pipe, but if the angles are off too much things will not fit in place.
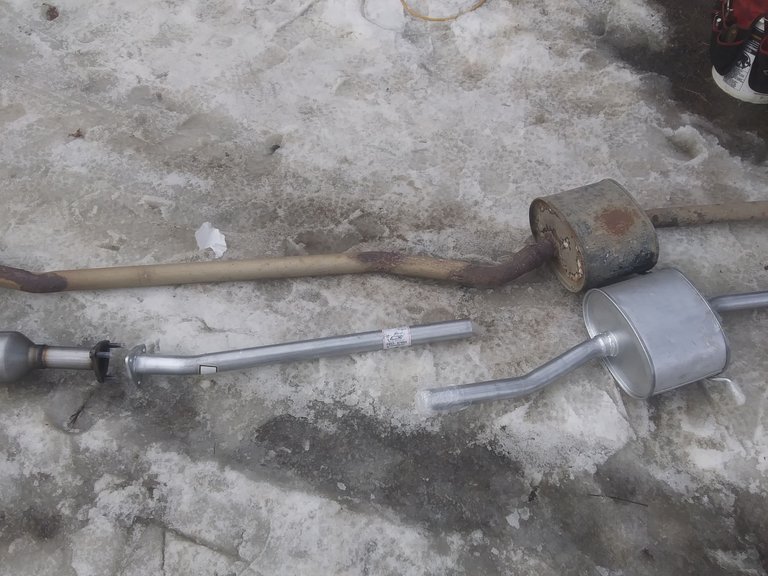
There wasn't enough left of the old muffler to really compare that, so I just check what I can and see if the hanger posts are in the right place. This all looks spot on, so after double checking that I have all the nuts, bolts, gaskets, and sleeves I need, I set about figuring what order to install things in. Generally, the easiest way to hang up all the parts that can be hung, then fit in the pieces without hangers and bolt everything together.
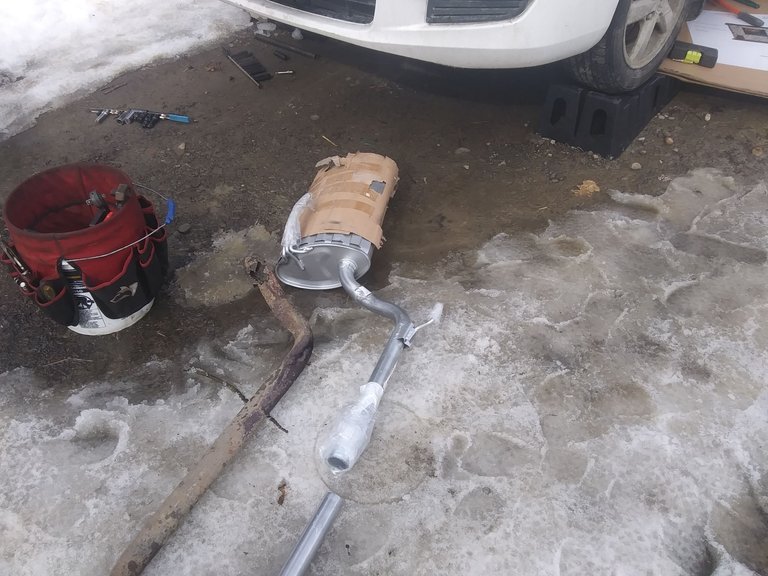
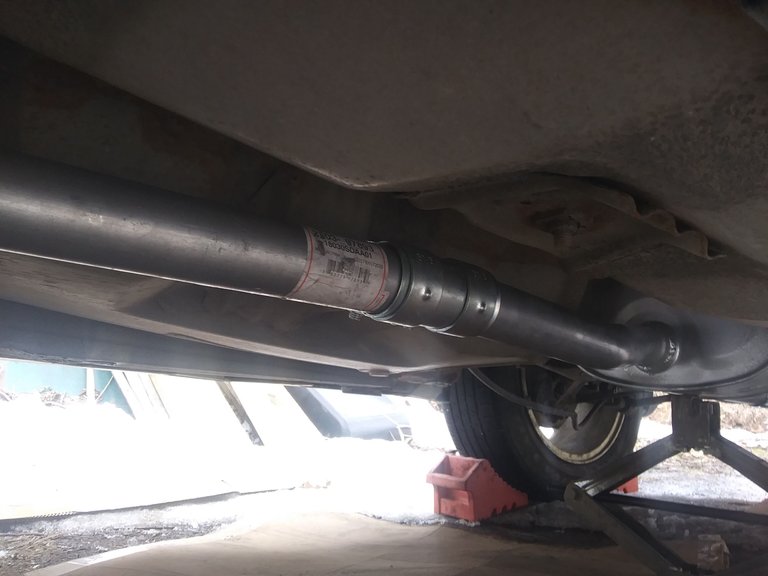
Every piece on this had a hanger post EXCEPT the middle post. This also came with 'compression sleeve' connectors for joining the pipes that don't have flanges, so this installation will be as easy as the removal. First I fit the muffler and resonator onto their hangers, and connect them together with a compression sleeve. At this time, I'm not tightening the sleeves, just sliding them into place so they hold the two parts loosely together. The hanger posts will usually slide easily into the rubber hangers with just a little lubricant. I like to put aluminum anti-seize compound on them to aid installation and prevent future corrosion.
Before installing the J pipe to the manifold, the old manifold gasket needs to be removed. This is usually an unpleasant task, and you want to be careful not to damage the manifold. The picture below shows the manifold after all the old gasket has been cleaned off.
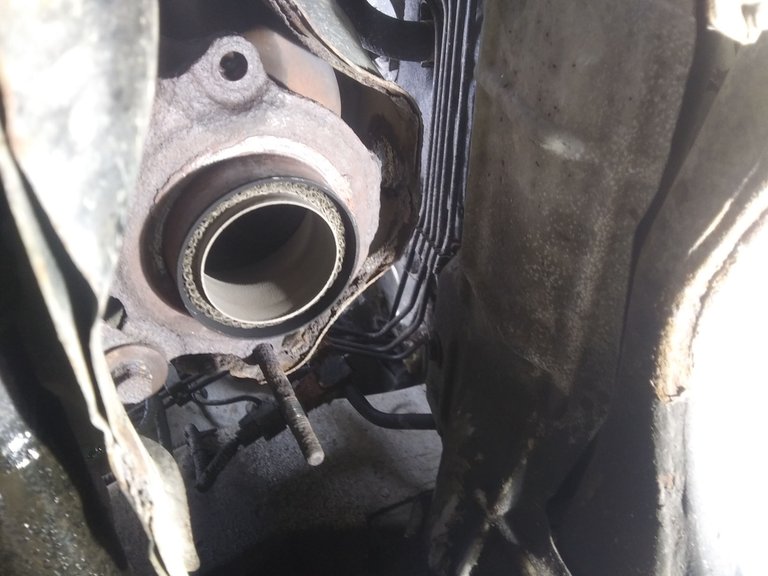
Below is a picture of the old gasket, and the new gasket, which is apparently a 2 piece system. I'm not sure that they sent exactly the right part, but it came with the J pipe, which is a perfect fit, and it will work, so I'm going with it. As you can see, the old one was pretty beat up, and this is actually where most of the noise was coming from. If you vehicle become very loud all of a sudden, it will usually be a gasket like this that needs to be replaced. The old one would fit tightly onto the manifold end and stay in place, but the new ones have to be held in place on the J pipe as you fasten it to the manifold.

The only other gaskets I have to worry about are a couple flat ones on some new flanges at either end of the catalytic converter. These fit snugly over the flange bolts and stay right in place, so no need to worry about keeping them lined up.
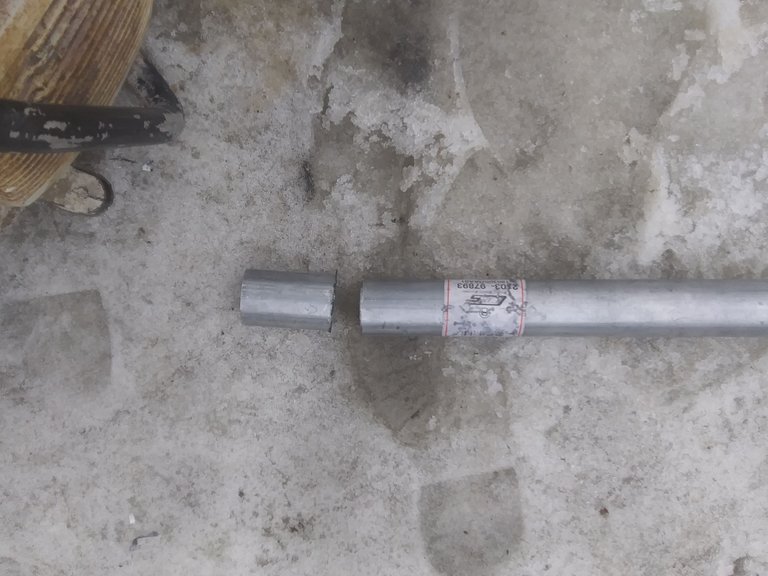
The middle pipe is indeed a few inches long, likely left that way for shops who have tools for putting a 'bell' end on one of the pipes, so instead of using a sleeve connector, one pipe can be slid inside the other. I don't have that tool yet, so I'm just going to mark the excess and cut it off. The compression sleeve is about 6" long, so my cut doesn't have to be exact, just pretty close, and a little too short is better than a little too long. The J pipe and catalytic converter are held pretty much in place by the manifold bolts and their hangers, but the resonator and muffler are still hanging pretty low, so I use a scissor jack to push them up where they belong while I mark the middle pipe. Raising this jack by hand will help make sure you don't damage the resonator.
My trusty cutoff saw did this in a couple seconds, but you can cut this stuff pretty easily with a hacksaw or reciprocating saw. Be careful with the cut end, and clean it with a metal file before installing.
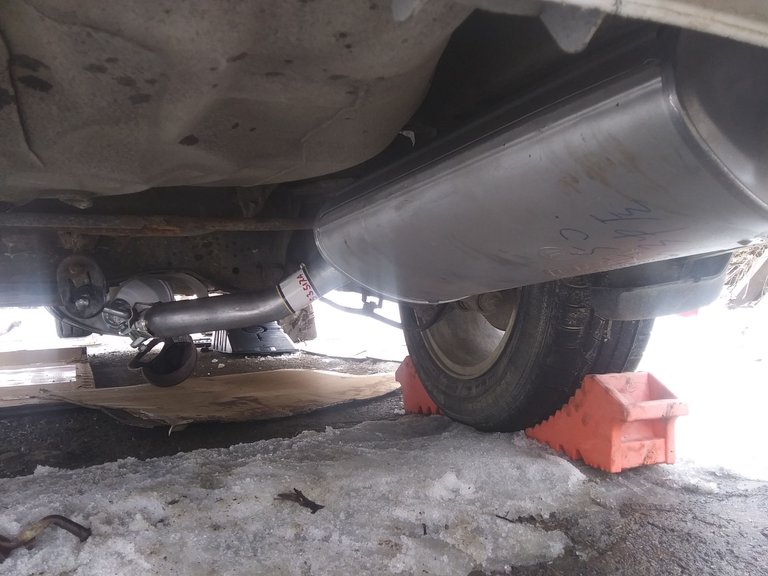
I tighten all the bolts on the flanges first, and the compression sleeves last. Make sure everything is pushed up where it belongs when you tighten the compression sleeves, if things are left hanging too low, you'll be doing this repair all over again all too soon! Once everything is tightened up and your O2 sensors are plugged back in, you're ready to ride in style! I recommend giving it a test start BEFORE getting the car off the jack and down from the ramps. Sometimes you may need to tighten things up a bit more around the manifold, or the sleeves. Exhausts with bell fittings will usually be clamped together with U bolts, and these will also need a little extra tightening on occasion.
The total cost of my parts for this project, including the ramps and the O2 sensor socket, was under $400, and it took me about 6 hours to complete. Not only did I save around $2000 by doing this repair myself, now that it's done, I can get about $1500 for my $500 car, if I decide to sell it. There were a couple other minor fixes to get the value up to that, but those will be in another post. This one is more than long enough for now!
I hope you learned something, or at least enjoyed this a little bit. For more DIY project, tips, and dry humor, give me a follow. I don't always post in a real timely fashion, but there will always be another post! Until the next one, stay safe out there, and don't be afraid to try doing it on your own!