✨🌼¡Hola amigos amantes de la creatividad! Espero que esten pasado un muy buen comienzo de semana.🌼✨
Después de pensarlo por unas semanas y quizás casi desistir, me convencí de participar porque es un tema que me encanta y era el momento perfecto para hacer un hermoso colgante de margaritas, además de pasarme por primera vez en esta hermosa comunidad que tanto me ha apoyado en mis creaciones desde que comencé en hive. Para este colgante utilicé pocos materiales y la mayoría los podemos tener en casa, como por ejemplo; cartón, tela, estambre, etc. Al principio en mi mente tenía una idea totalmente diferente de lo que sería el resultado final, pero esa es la belleza de la creatividad y la imaginación que podemos tener, ya que al imaginarlo, no es algo que vemos en una foto, pues se puede cambiar o quizás olvidar lo que tienes en mente desde un principio, ahí es cuando comenzamos a utilizar nuestra imaginación y creamos.
🔸Sin más que añadir, a continuación los dejo con el paso a paso:
✨🌼¡Hello friends who love creativity! I hope you had a very good start to the week.🌼✨
It's my first time sharing in this beautiful community and nothing better than participating in the contest for the month of January with my favorite theme: 🌼FLORES🌼. If you are interested in learning a little more about the guidelines to participate in the January contest in the #DIYHUB community, here is the link.
After thinking about it in my head for a few weeks and maybe almost giving up, I was convinced to participate, because it is a topic that I love and it was the perfect moment to make a beautiful daisy pendant, besides spending my first time in this beautiful community that He has supported me so much in my creations since I started in hiver. For this pendant I used few materials and we can have most of them at home, such as; cardboard, cloth, yarn, etc. At first in my mind I had a totally different idea of what the final result would be, but that is the beauty of creativity and imagination that we can have, since when imagining it, it is not something that we see in a photo, because it can be change or perhaps forget what you have in mind from the beginning, that's when we start to use your imagination and create.
🔸Without more to add, then I leave you with the step by step:
♥️ESPERO QUE TE GUSTE,
¡Empecemos!
♥️I HOPE YOU LIKE IT,
Let's start!

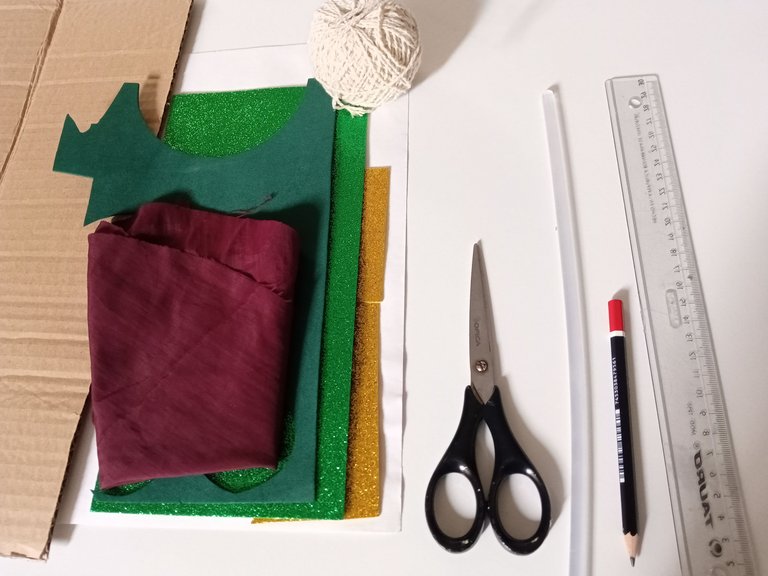
🌸 MATERIALES | 🌸 MATERIALS
- Cartulina blanca.
- Cartón grueso.
- Retazo de tela.
(Color de preferencia). - Foami escarchado dorado.
- Foami escarchado verde.
- Estambre blanco y verde.
- Silicona caliente.
- Tijeras.
- Papel.
- Lápiz.
- Regla.
- White card.
- Thick cardboard.
- Fabric.
(Preference color). - Foami frosted gold.
- Green Foami.
- White and green yarn.
- Hot silicone.
- Pair of scissors.
- Paper.
- Pencil.
- Rule.
🌼 PROCEDIMIENTO | 🌼 PROCESS
- PASO 1:
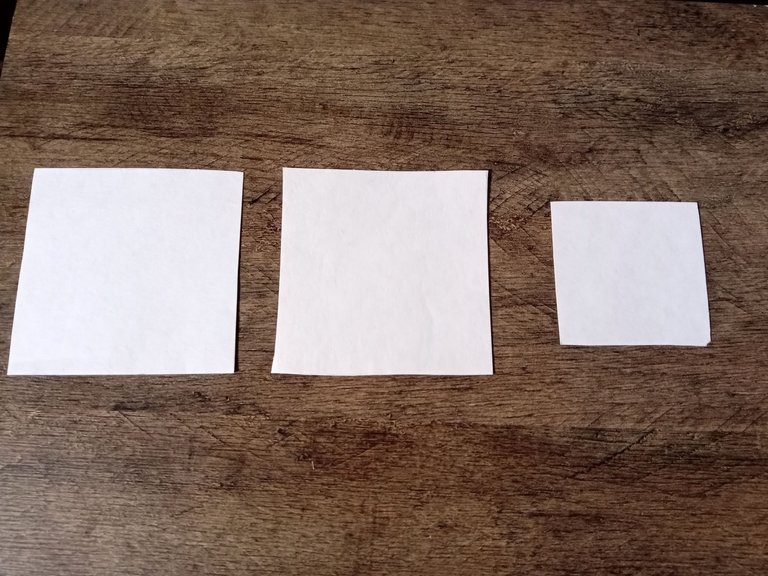
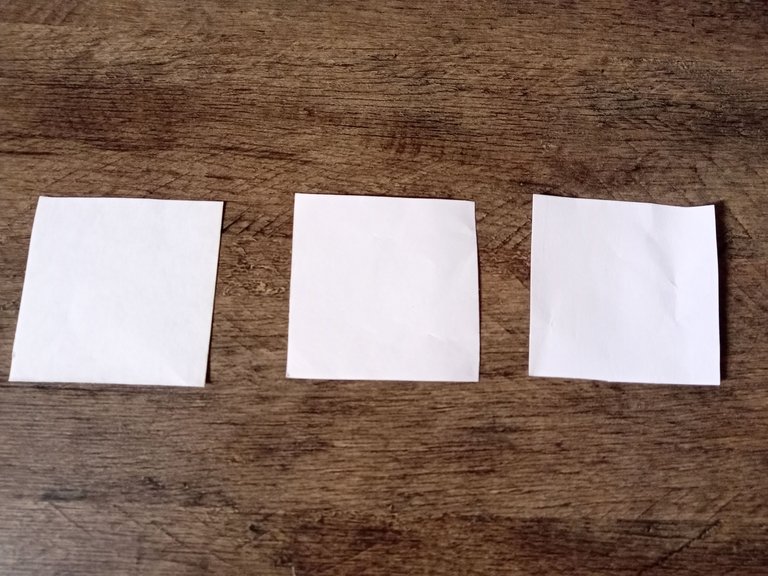
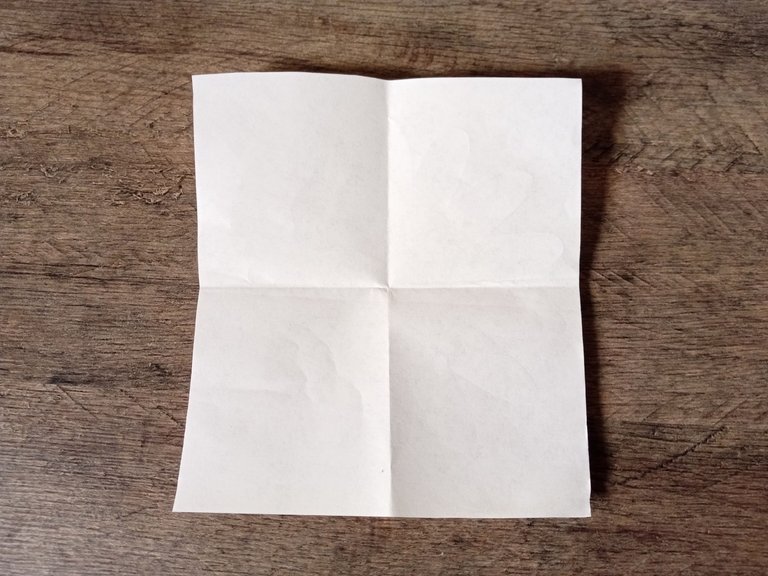
Lo primero que debemos hacer es cortar cuadrados en cartulina blanca con estas medidas para hacer 3 flores de diferentes tamaños. Traza y corta 2 piezas de 11,5 cm x 11,5 cm. 4 piezas de 8,5 cm x 8,5 cm y 5 piezas de 6 cm x 6 cm.
- STEP 1:
The first thing we must do is cut squares in white cardboard with these measurements to make 3 flowers of different sizes. Trace and cut 2 pieces of 11.5 cm x 11.5 cm. 4 pieces of 8.5 cm x 8.5 cm and 5 pieces of 6 cm x 6 cm.

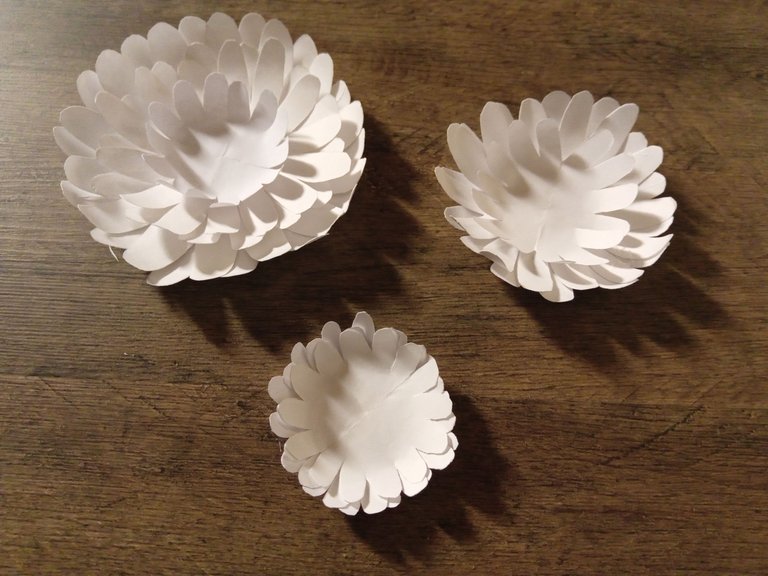
- PASO 2:
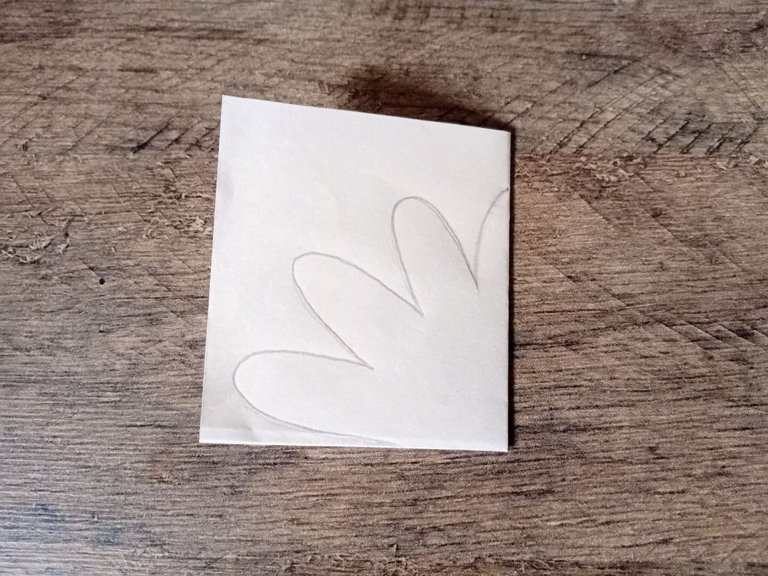
Una vez que tengamos las piezas con sus diferentes tamaños, dibujar el patrón de la flor correspondiente a su tamaño, para ello; Tomar Uno de los cuadrados doblar en 4 Pares y dibujar 3 Pétalos y ½ en uno de los cuadrados, recortar y tendremos la forma de la flor. Repite el mismo proceso en cada uno de los cuadrados de diferentes tamaños.
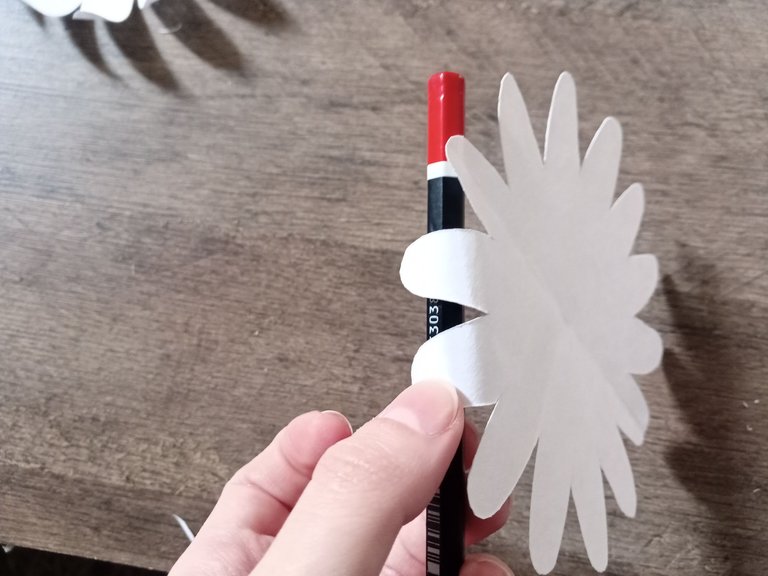
Para darle más forma a la flor, toma un lápiz y riza un poco los pétalos, haz esta técnica con todas las flores.
- STEP 2:
Once we have the pieces with their different sizes, draw the flower pattern corresponding to its size, for it; Take one of the squares bend in 4 pairs and draw 3 petals and ½ in one of the squares, cut and we will have the shape of the flower. Repeat the same process in each of the squares of different sizes.
To give more way to the flower, take a pencil and curl the petals a bit, do this technique with all the flowers.
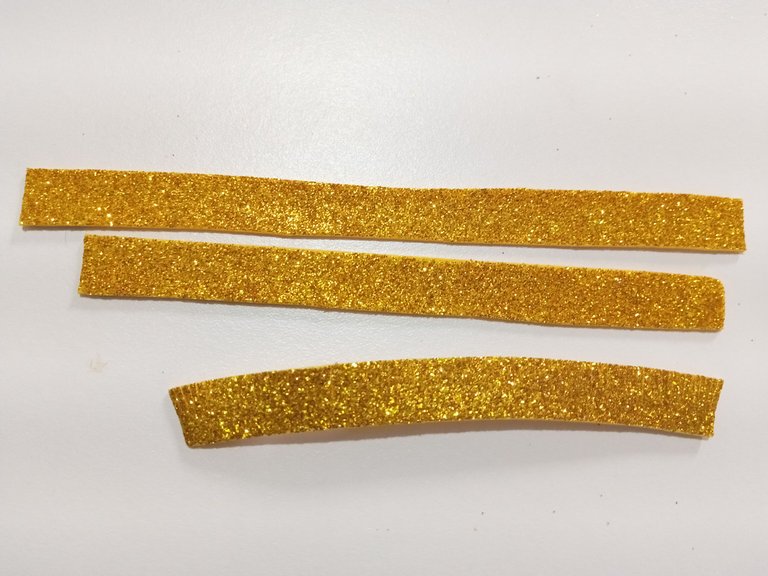
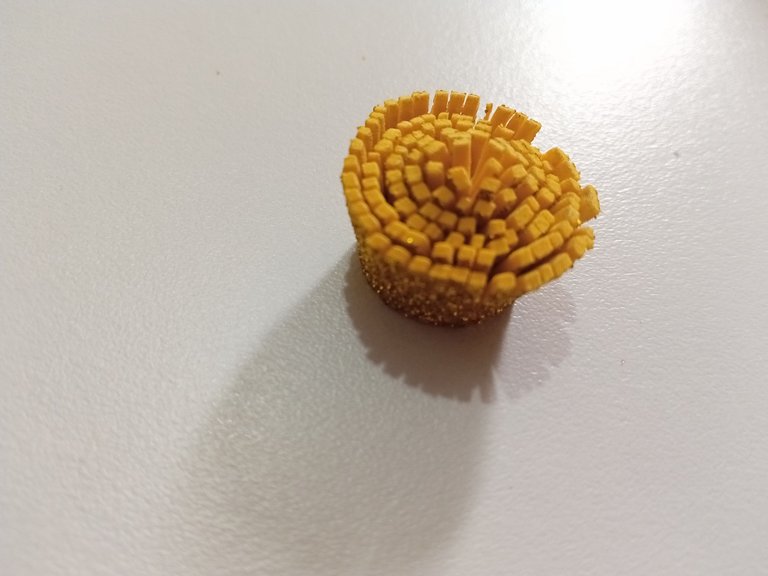
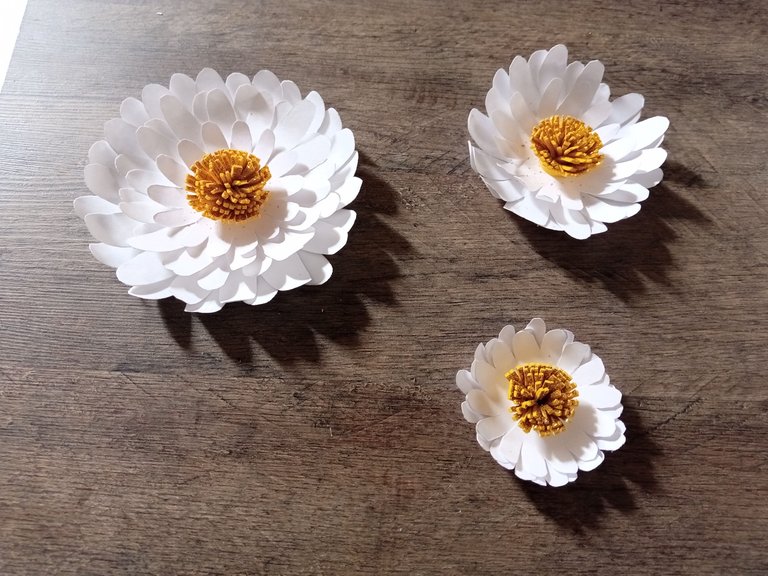
- PASO 3:
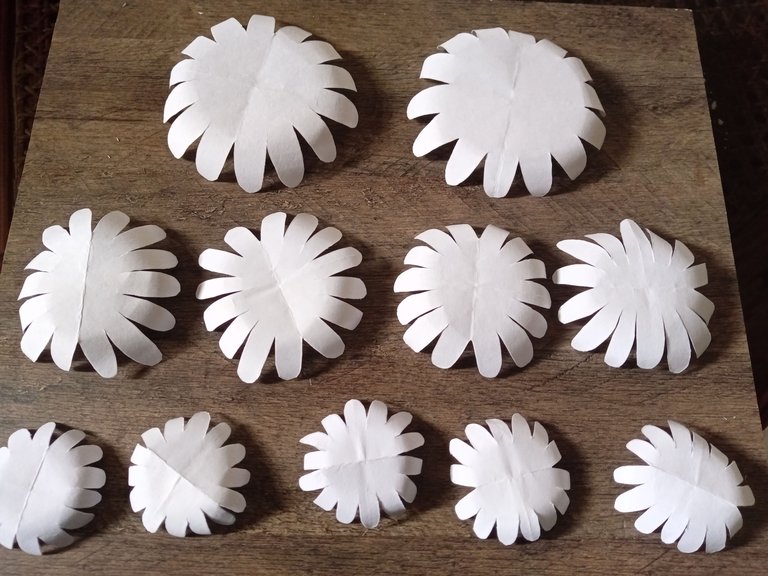
Ahora si podemos empezar a formar las 3 flores. Para la flor grande: pega 2 piezas grandes, 2 piezas medianas y una pequeña. Para la flor mediana: 2 piezas medianas y 1 pequeña. Para la flor pequeña: 3 piezas pequeñas. Luego, corte 3 tiras de 1 cm de foami escarchado dorado de 16 cm, 14 cm y 12 cm. Con una tijera, haz cortes por toda la tira, uno al lado del otro, sin llegar al final, enrolla, cierra con un poco de pegamento y pega en el centro de cada flor correspondiente al tamaño de cada una.
- STEP 3:
Now if we can start to form the 3 flowers. For the large flower: glue 2 large pieces, 2 medium pieces and a small one. For the medium flower: 2 medium pieces and 1 small. For the small flower: 3 small pieces. Next, cut 3 1 cm strips of gold frosted foam 16 cm, 14 cm and 12 cm. With scissors, make cuts all over the strip, one next to the other, without reaching the end, roll up, close with a little glue and paste in the center of each flower corresponding to the size of each one.
- PASO 4:
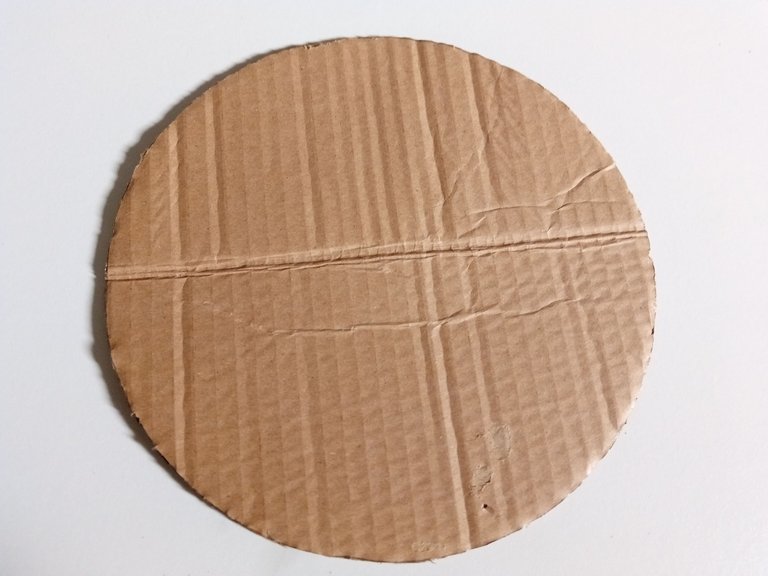
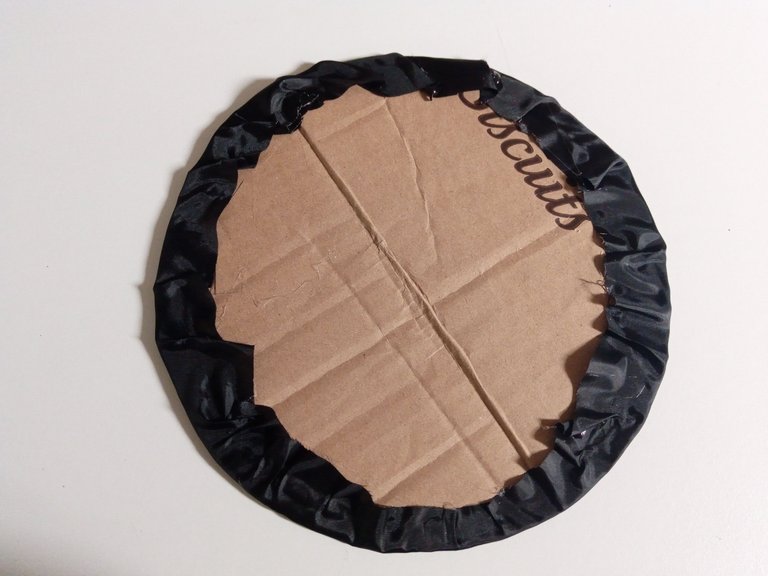
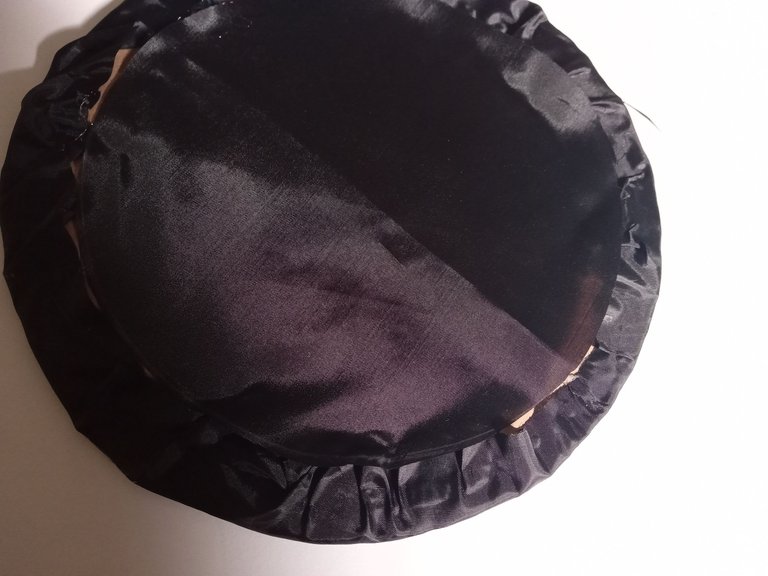
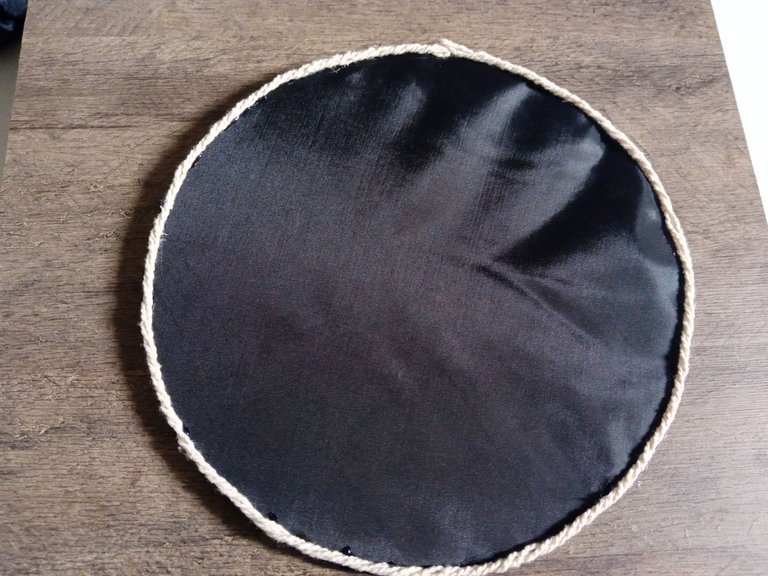
Una vez listas las flores podemos empezar con la base. En cartón cortaremos un círculo de 23 cm x 23 cm, puedes ayudarte de un plato o cualquier objeto circular. Luego, forrar con un trozo de tela unos 2 cm más grande que la cartulina y para que quede más prolijo cubrimos la parte de atrás con otro trozo de tela que cubra lo que queremos tapar.
- STEP 4:
Once the flowers are ready we can start with the base. In cardboard we will cut a circle of 23cm x 23cm, you can help yourself with a plate or any circular object. Then, we cover with a piece of cloth about 2 cm larger than the cardboard and to make it neater we cover the back with another piece of cloth that covers what we want to cover.
- PASO 5:
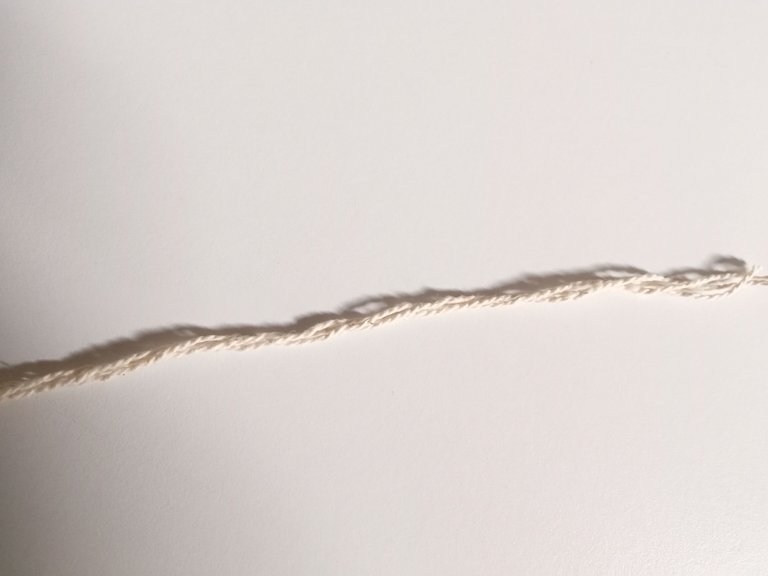
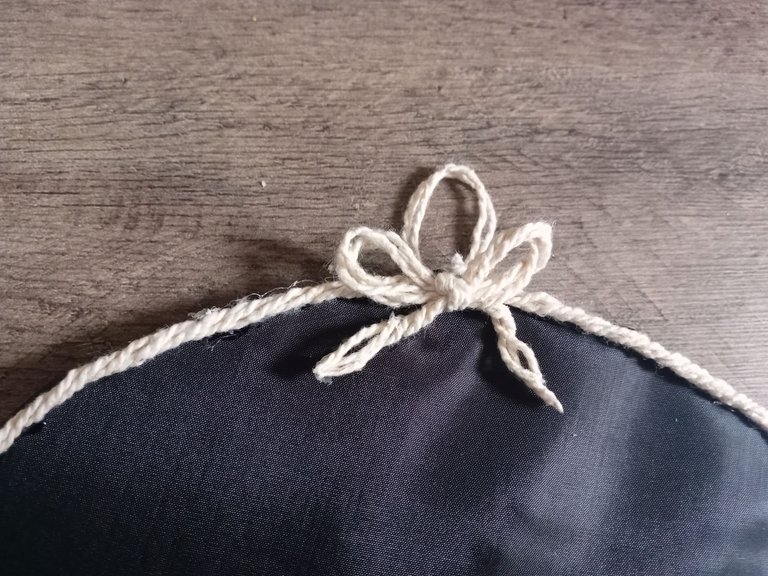
Luego, toma 3 tiras de estambre más largas que la circunferencia de nuestra base, enróllalas y pégalas por todo el borde de la base. Luego doblé un estambre de 20 cm en dos partes y lo pegué en la parte superior trasera, para poder colgarlo. También hice un lacito y lo pegué en la parte de arriba.
- STEP 5:
Next, take 3 strips of yarn longer than the circumference of our base, roll them up and glue them around the entire edge of the base. Then I folded a whole 20 cm thread in two parts and glued it to the top back, so I could hang it. I also made a little bow and glued it to the top.
- PASO 6:
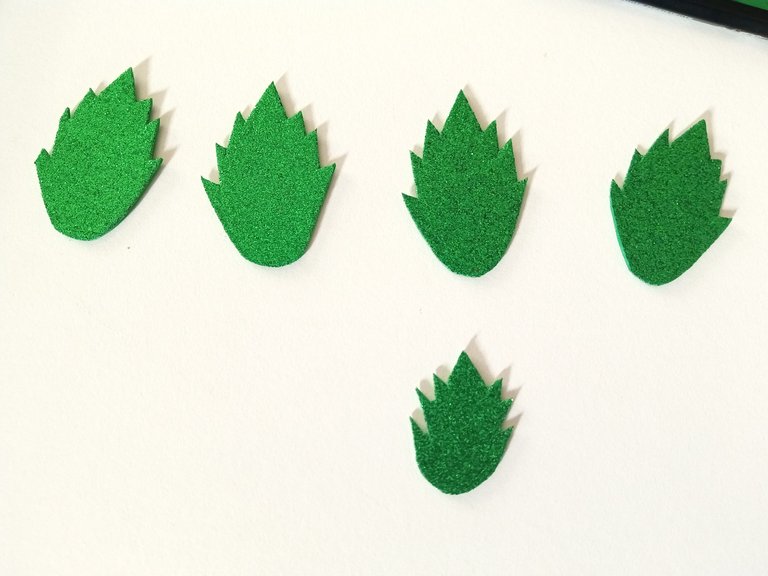
Para terminar, pegar 3 tiras de hilo verde a la base simulando el tallo de las flores. Pegar en el orden deseado y luego pegar las flores. Por otro lado, con foami escarchado verde; dibuja y corta hojas para finalmente pegarlas en el orden deseado.
- STEP 6:
To finish, glue 3 strips of green thread to the base simulating the stem of the flowers. Glue in the desired order, and then glue the flowers. On the other hand, with green frosty foami; draw and cut sheets to finally stick them in the desired order.

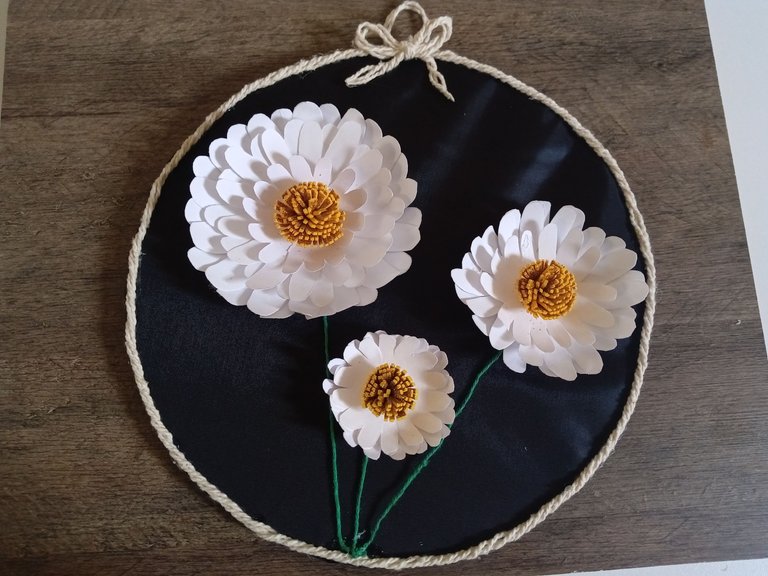

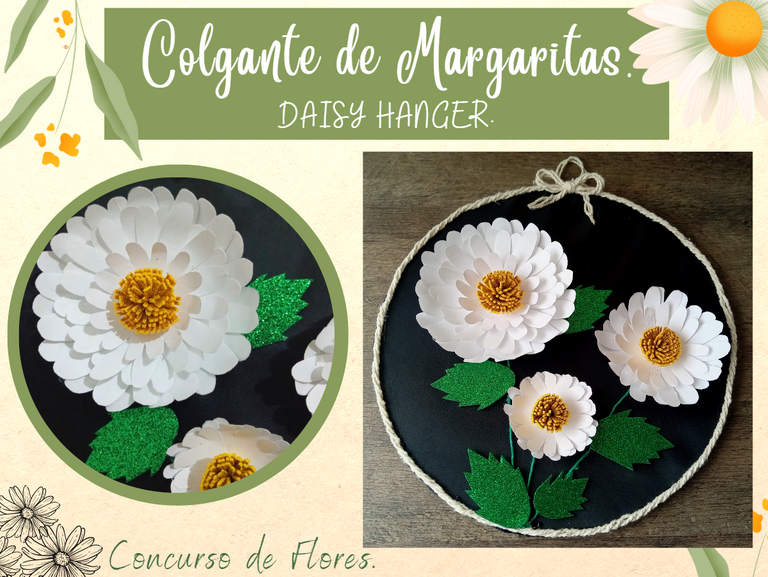
✨🌼¡Y listo!🌼✨ Así hice este hermoso adorno de margaritas, sinceramente me parece muy fácil de hacer y en su mayoría son materiales que tenemos en casa o que se pueden conseguir muy fácilmente. Y bueno chicos, esta fue mi participación para el concurso del mes en la comunidad #DIYHUB, espero que les haya gustado y una vez más agradeceré a la comunidad por el maravilloso apoyo que he recibido de ustedes desde mis inicios en Hive.
❤️Hasta la próxima publicación.
✨🌼¡And ready!🌼✨ This is how I made this beautiful daisy ornament, honestly it seems very easy to make and they are mostly materials that we have at home or that can be obtained very easily. And well guys, this was my entry for the contest of the month in the #DIYHUB community, I hope you liked it and once again I will thank the community for the wonderful support I have received from you since my beginnings in Hive.
❤️Until the next post.
✨RESULTADO: | ✨RESULT:


Todas las fotografías son de mi propiedad.
Separador y Fotos editadas en Canva
All photographs are my property.
Photos edited in Canva
Thank you for sharing this post in the DIYHUB Community!
Your content got selected by our fellow curator ashikstd & you just received a little thank you upvote from us for your great work! Your post will be featured in one of our recurring compilations which are aiming to offer you a stage to widen your audience within the DIY scene of Hive. Stay creative & HIVE ON!
Please vote for our hive witness <3
Thank you very much for selecting my post. ✨Grateful for the support you have given me since my beginnings.✨❤️🌼
You've crafted such an impressive output. Your flower is just so lovely to look at. Congratulations. ☺️
Thank you very much for your comment. I'm glad you like it. I really enjoyed the creation process. Regards.✨🌼
You're welcome. ☺️
Congratulations, your post has been upvoted by @dsc-r2cornell, which is the curating account for @R2cornell's Discord Community.
Muchas gracias por el apoyo amigos @dsc-r2cornell ✨❤️
~~~ embed:1620073834119573511 twitter metadata:MTQ5MDc5MjczNjE2OTExMTU2Mnx8aHR0cHM6Ly90d2l0dGVyLmNvbS8xNDkwNzkyNzM2MTY5MTExNTYyL3N0YXR1cy8xNjIwMDczODM0MTE5NTczNTExfA== ~~~
~~~ embed:1620220313937281024 twitter metadata:MTI4NTU5NTk0Mjk5ODIyNDg5N3x8aHR0cHM6Ly90d2l0dGVyLmNvbS8xMjg1NTk1OTQyOTk4MjI0ODk3L3N0YXR1cy8xNjIwMjIwMzEzOTM3MjgxMDI0fA== ~~~
The rewards earned on this comment will go directly to the people( @mariajcastro28, @valenpba, @samuell12, @sugarelys ) sharing the post on Twitter as long as they are registered with @poshtoken. Sign up at https://hiveposh.com.
Te quedaron bellísimas esas flores amiga 😍😍😍 El colgante está hermoso, me encantó la idea, me gusta mucho para decorar algun espacio, estoy segura de que quedaría mejor que un cuadro o algo así, creo que le daria un toque muy bonito a la sala o el pasillo ♥️ Gracias por compartir este tutorial bella 💮
Muchas gracias Mary, agradezco mucho tu bonito comentario. ✨ Aunque siento que le faltaron detalles, pero igualmente me siento satisfecha con el resultado final. ❤️
Estoy de acuerdo Mary . Lo hice pensando en la pared de un pasillo o la puerta de un cuarto.
Gracias a ti por el apoyo amiga! 🌼✨
Unas flores con un toque muy sutil y delicado..
Amee estas margaritas 💗
Adornarian perfecto cualquier espacio.. Gracias por compartir este tutorial mi Valen..
Mi Aliz!! ✨
Muchas gracias por tu comentario amiga , me alegra que te haya gustado. Aunque a mí no me convencía mucho , al final me terminó gustando. ❤️
Muchas gracias por pasarte bella!
Te dije que eran hermosas amiga.. ¡HERMOSASSS!
Amiga, quedó bellisimo!! Me encanta el fondo negro sobre el cual las colocaste porque les dio un toque increíble, realza muchísimo el trabajo.
Te felicito, porque quedó precioso!
Muchas gracias amiga! Estoy de acuerdo contigo, estuve horas buscando esa tela negra, ya que como dices; es un color que hace resaltar aún más las margaritas.🌼
Me alegra mucho que te haya gustado. ✨❤️
Wuaoo amiga que creativa eres! Me encantaron y realmente parece fácil, aunque no sé si al hacer algo así me quede tan lindo como a tí. Gracias por compartir!
Muchas gracias por tus lindas palabras amiga! Es un poco tardado pero si te lo propones es hasta relajante 🤭 estoy segura de que te quedarían mucho más bellas, es cuestión de dejar salir nuestra creatividad.
Saludos amiga!✨🌼
Qué detalle tan bonito, me encanta. Definitivamente hay que ser muy cuidadoso y detallista para que quede asi de lindo. Gracias por compartir
Muchas gracias por tu lindo comentario amiga! Así es , me tomé mi tiempo, aunque no lo parezca puede ser un poco tardado.
Muchas gracias a ti por pasarte .✨🌼
Que hermoso detalle hiciste, a mí también me gustan las flores y estas se ven bellísimas. Esta perfecto para adornar una sala o el cuarto, estoy segura que le daría vida al espacio.
Gracias por compartir el tutorial!💛
Es que las flores son hermosas , son las protagonistas. ✨🌼 Totalmente amiga, queda perfecto en la sala o en la puerta de una habitación.
Muchas gracias por pasarte y tú lindo comentario.✨🌼
Valeeeeen, eso te quedó hermoso, eres muy creativa, este tipo de cosas es algo que colocaría perfectamente en mi sala, parece mucho más elaborado y realmente lo haces ver muy fácil.
Gracias por compartir @valenpba 😊
Vallllll 🤭 Dejando esos bonitos comentarios cualquiera se motiva amiga ❤️ Agradezco mucho tus palabras cuando te gusta algo de lo que escribo. ✨🌼 Así es, se ve muy bonito en una pared o puerta de habitación.
Saludos bella!
I loved your flowers, they have a very well cared details and that makes a wonder of the whole composition. I congratulate you not only for the manual part but also for the creative part, you have a great aesthetic.
Thank you very much friend, I am glad that my creation has been to your liking.
Your words are very nice, they sincerely motivate me to continue with my creations. Regards.✨🌼
What a beautiful job, I really congratulate you. A neat, delicate work. Beautiful.
Best of luck in the contest.
Best of luck @valenpba 🌺✨
Que trabajo tan hermoso de verdad te felicito. Un trabajo prolijo, delicado. Bellisimo.
La mejor de la suerte en el concurso.
Éxitos @valenpba 🌺✨
!DIY
Muchas gracias amiga , me alegra que tal haya gustado.
Eso es lo que intento en mis creaciones un resultado bastante prolijo.
Muchas gracias por tan lindas palabras.✨🌼
Te quedo demasiado hermoso mi Val, cada detalle luce demasiado delicado y lindo 💖
Muchas gracias mi Vane, me alegra que te fijes en los pequeños detalles y te guste el resultado. ✨🌼
Hola linda, me gustaron muchos estás margaritas...Lo mejor es que el paso a paso no es complicado, fácil lo podemos recrear. Gracias por compartir.
Saludos💕
Hola linda! 💖 Así es amiga, puede ser un poco tardado pero es realmente sencillo de elaborar y relajante.
Gracias a ti por pasarte. Saludos ✨🌼
Se requiere de paciencia para hacer todos esos detallitos con las flores. Esta es una entrada muy bonita para el concurso, las fotos de portada llaman mucho la atención y fueron muy bien tomadas. Le deseo éxitos!
Así es, se requiere de paciencia y bueno, al final ayuda mucho a desestresar un poco. Simplemente es poner concentración en lo que vas a elaborar para obtener un bonito resultado.
Muchas gracias por tus bonitas palabras amigo. ✨🌼
That was a nice craft!
Thank you very much for your words. I'm glad it was to your liking. ✨🌼
Yay! 🤗
Your content has been boosted with Ecency Points, by @valenpba.
Use Ecency daily to boost your growth on platform!
Support Ecency
Vote for new Proposal
Delegate HP and earn more
Que hermoso trabajo amiga! Te quedó precioso. Me gusta que el fondo sea negro porque queda muy bien. Hace que resalten los otros colores.
Muchas gracias amiga, me alegra que te guste el resultado. 🌼 Así es , el fondo ayuda mucho que el centro de atención sean las flores. ✨🌼
Hola bienvenida quedé encantada con tu trabajo es muy hermoso y delicado
❤️👏👏👏👏😚😚♥️🌹♥️👏☺️😊🤗🤗🤗🤗😊😊☺️❤️👏♥️😍😍😍🤗😊❤️
Hola amiga! Muchas gracias por el recibimiento. Me alegra saber que te gusta mi creación. 🤭
Gracias por el lindo comentario, saludos. ✨🌼
Creativity at it's finest! :)