Hola querida comunidad de Hive y Graphic Design, tengo días ya sin publicar pero es porque el trabajo me tiene hasta el cuello, aun así el cosquilleo en las manos por publicar y diseñar nunca termina, el día de hoy quiero compartir con ustedes otro montaje que tenia guardado por ahí, como siempre explicare el paso tras la edición y los recursos que utilice para la misma.
Hello dear community of Hive and Graphic Design, I have days without publishing but it is because the work has me up to my neck, even so the tingling in my hands to publish and design never ends, today I want to share with you another montage that I had saved around, as always I will explain the step after the edition and the resources I used for it.
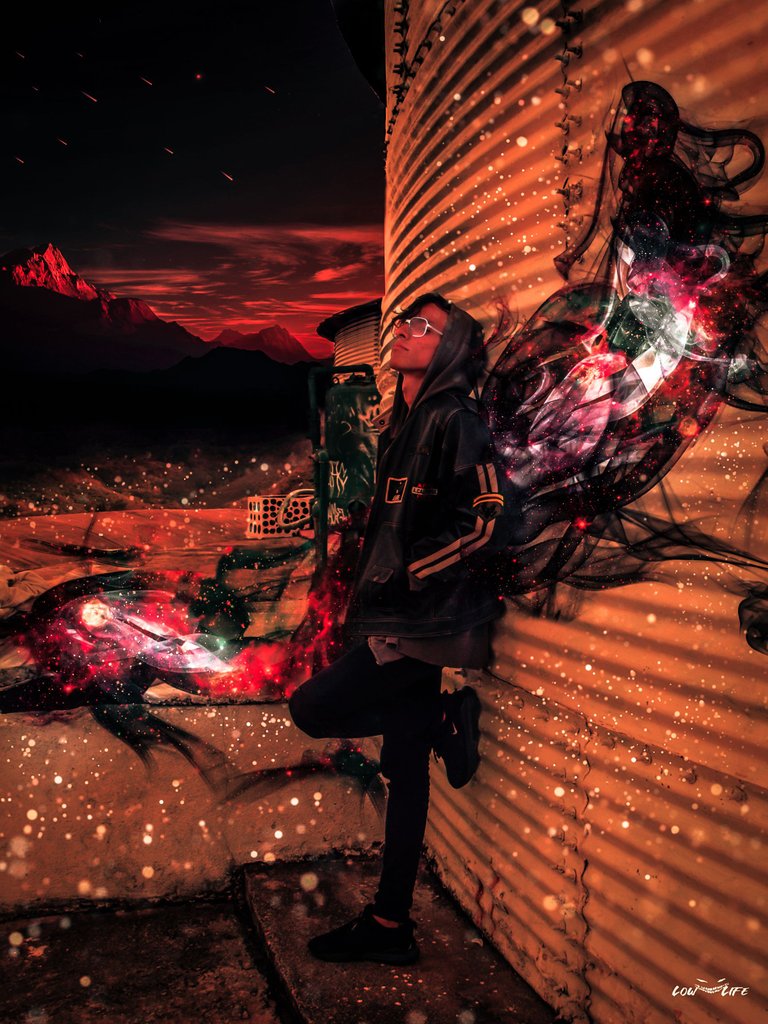
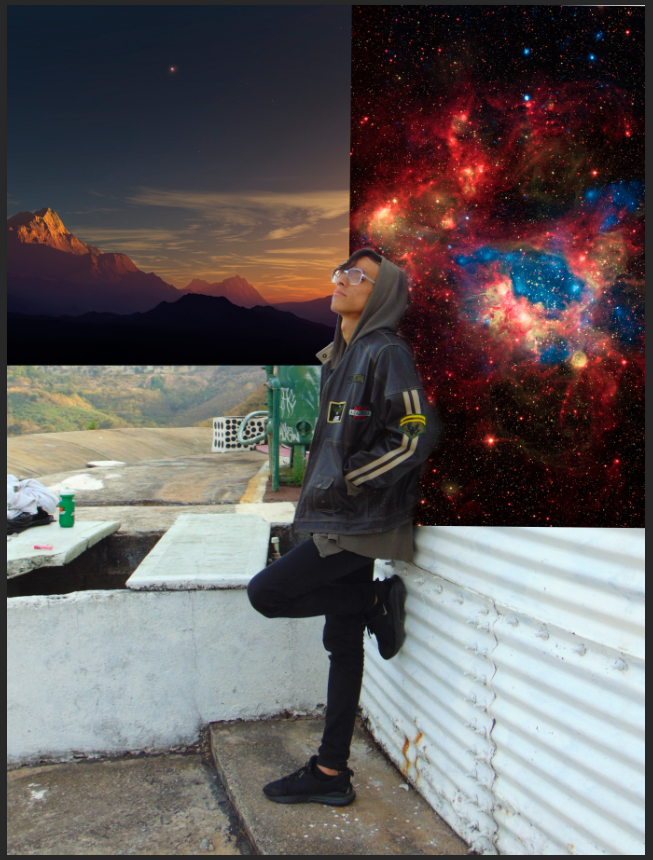
Este montaje fue un poco random aunque tiene un cierto estilo ghoul espacial, personalmente quería hacer unas alas al rededor que quedaran a la par pero vi decidí dejarla de esa manera mas por gusto personal que por otra cosa.
This assembly was a bit random although it has a certain space ghoul style, personally I wanted to make some wings around it to match but I decided to leave it that way more for personal taste than anything else.

Resources Used ~ Recursos Utilizados.

Pinceles de humo ~ Smoke Brushes
click on the images to go to their sources. ~ Clic en las imágenes para ir a sus fuentes.

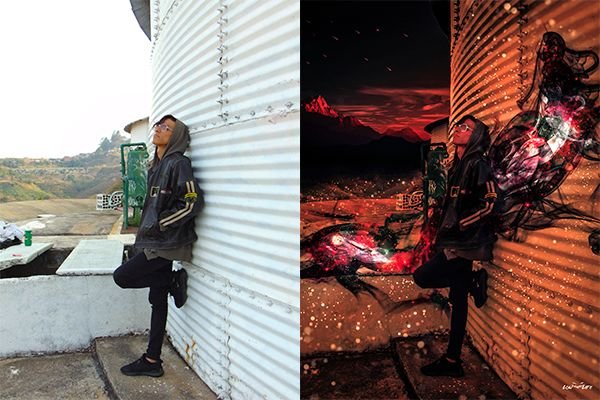
The first thing I did was to open the photo I planned to edit and make two cuts of it, the first one was of the environment of mountains in the background and the sky, the second one of the subject I had planned to make a fading effect in smoke, but I opted more for the wings. Once I created the two cuts in two new layers, I added a layer mask in each one to work on them later.

Lo primero que hice fue abrir la fotografía que planeaba editar y realizar dos recortes de esta, el primero fue del entorno de montañas en el fondo y el cielo, el segundo del sujeto tenia planeado hacer un efecto de desvanecimiento en humo, pero opte mas por las alas. Una vez creado los dos recortes en dos capas nuevas, agregue una mascara de capa en cada una para trabajarlas después.

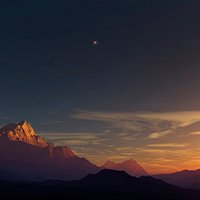
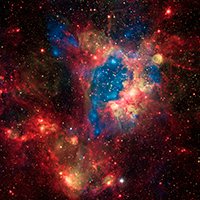
For the second step I added the first two resources, the background with the mountain sunset and the galaxy that later would be the ghoul wings, I transformed its size and position with Ctrl + T to then work on the masks of the cutouts.
Para el segundo paso añadí los dos primeros recursos, el fondo con el atardecer montañoso y la galaxia que posteriormente seria las alas ghoul, transforme su tamaño y posición con Ctrl + T para después trabajar sobre las mascaras de los recortes.
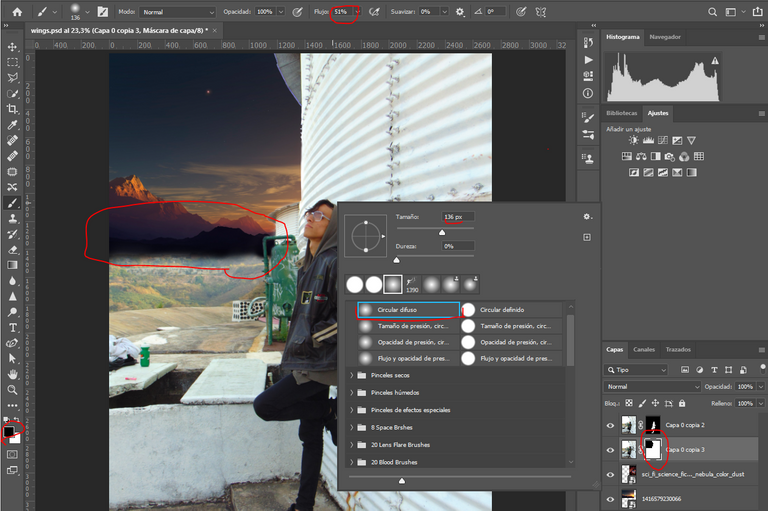
In the third step I proceeded to merge the background of the photograph with the new one of mountains, for this I placed the two clipped layers above the two new ones, then in the layer mask of the first clipping, with a diffuse brush with a diameter between 100px - 300px and a flow of 30% - 60%, I merged the background of the image with the background of the photograph.
En el tercer paso procedí a fusionar el fondo de la fotografía con el nuevo de montañas, para esto me situé las dos capas recortadas por encima de las dos nuevas, luego en la mascara de capa del primer recorte, con un pincel difuso con un diámetro entre 100px - 300px y un flujo de 30% - 60%, fusione el fondo de la imagen con el de la fotografía.
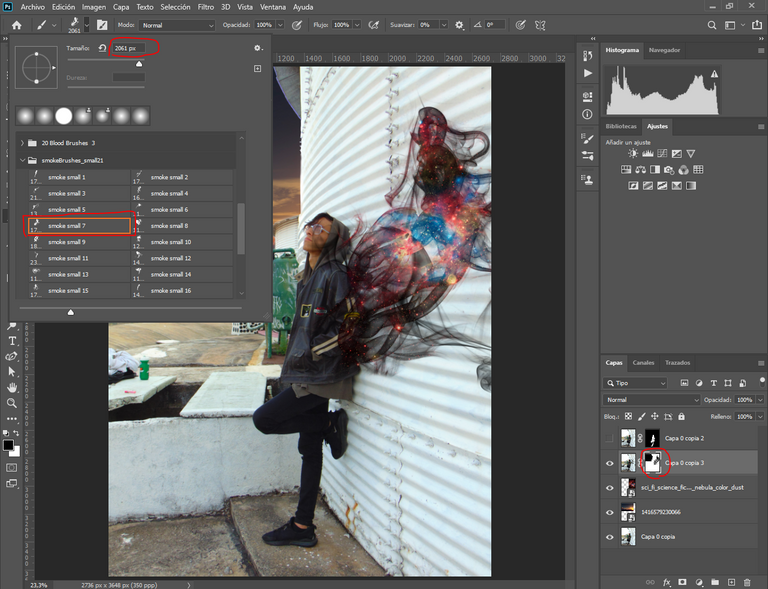
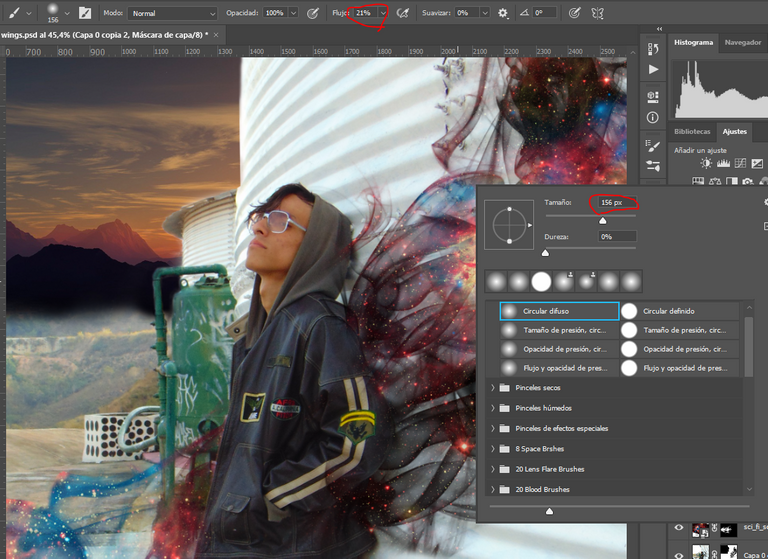
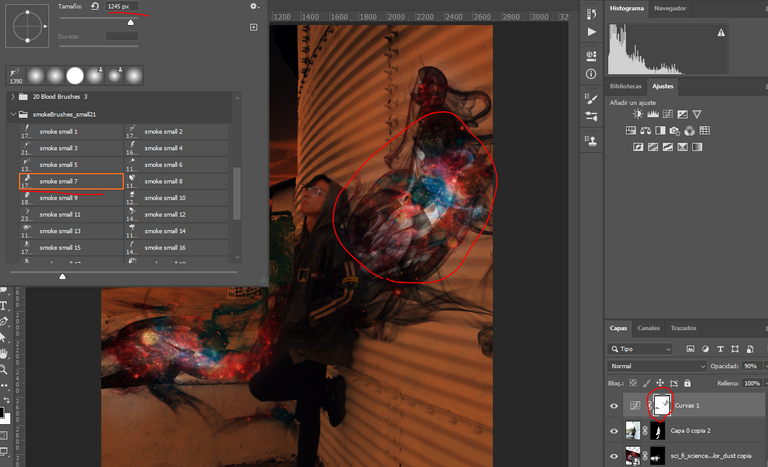
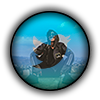
Then in the fourth step, I added the wings with the smoke brush, for this I continued working on the layer mask but I placed the second resource below the place where I was going to pass the stroke of the brush, then I chose the brush number 7 and decreased its diameter to a considerable size, then with the black color in front I clicked twice on the mask, behind the jacket so that it looked like this.
Luego en el cuarto paso, pase a agregar las alas con el pincel de humo, para esto seguí trabajando sobre la mascara de capa pero ubique el segundo recurso debajo del lugar donde iba a pasar el trazo del pincel, luego escogí el pincel numero 7 y disminuí su diámetro a un tamaño considerable, luego con el color negro de frente hice dos clic sobre la mascara, detrás de la chaqueta para que quedara de la siguiente manera.
Then I did exactly the same but duplicated the second resource with Ctrl + J and placed it under the second cutout and added a layer mask to repeat the same thing.
Después hice exactamente lo mismo pero duplique el segundo recurso con Ctrl + J lo ubique debajo del segundo recorte y le agregue una mascara de capa para repetir lo mismo.
Then I gave visual to the second cutout that would be the subject, and in the mask of the cutout with a blurred black brush and a 20% flow I eliminated parts of the smoke that covered part of the body and I gave the effect that it emanates from my back.
Luego di visual al segundo recorte que seria el del sujeto, y en la mascara del recorte con un pincel negro difuminado y un flujo al 20% elimine partes del humo que tapaban parte del cuerpo y le di efecto de que emana de mi espalda.
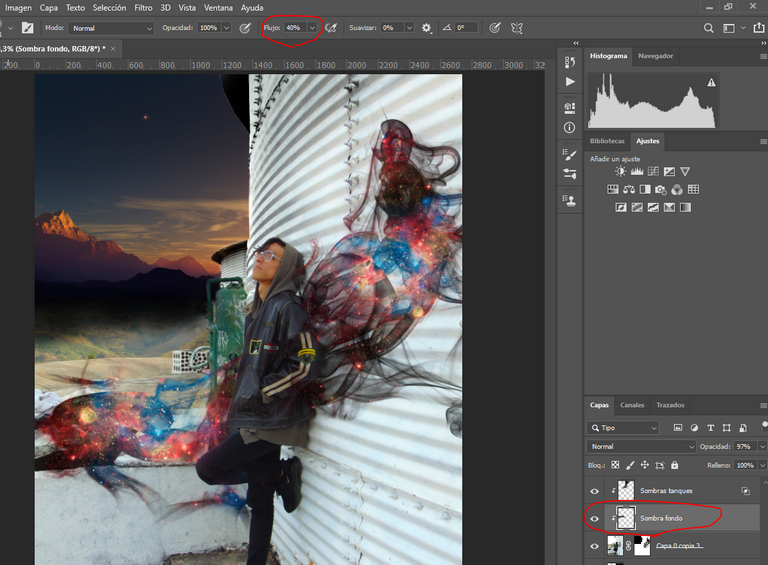
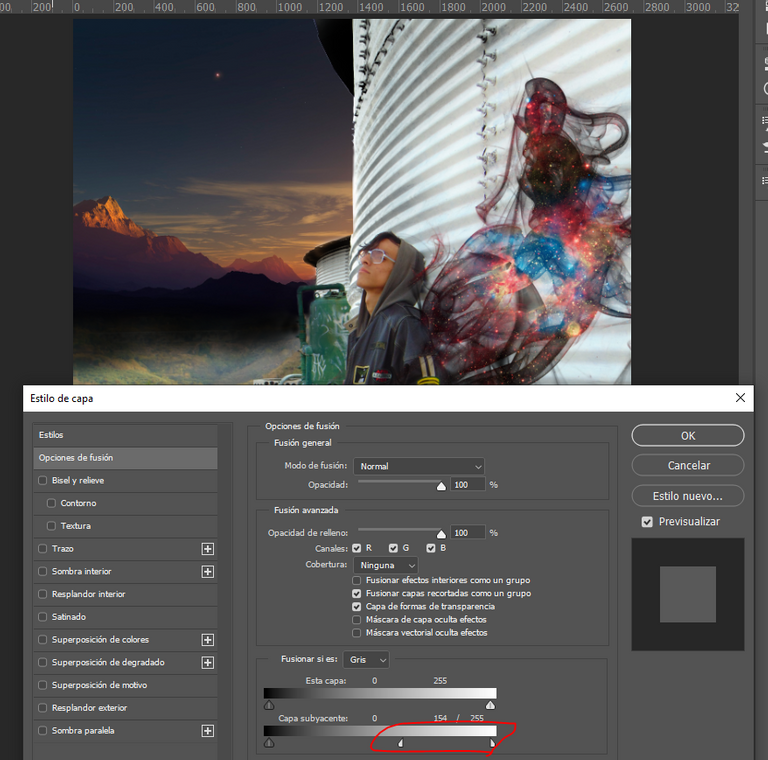
For the fifth step, I added some shadows to the background and the tanks behind me, for this I created two new layers in white and with the blurred black brush and a flow of 40% in the first layer I gave a little more shadow to the mountainous background, then in the tanks I did the same but with the next layer, I changed the flow to 100% and in the blending options of the layer, I lowered the underlying grayscale with Alt + Click moving the little dove to the left so that it looked like this.
Para el quinto paso, añadí unas sombras al fondo y a los tanques detrás de mi, para esto cree dos capas nuevas en blanco y con el pincel negro difuminado y un flujo del 40% en la primera capa di un poco mas de sombra al fondo montañoso, luego en los tanques hice lo mismo pero con el la siguiente capa, cambie el flujo al 100% y en las opciones de fusión de la capa, baje la escala de grises subyacentes con Alt + Clic moviendo la palomita hacia la izquierda para que quedara de la siguiente manera.
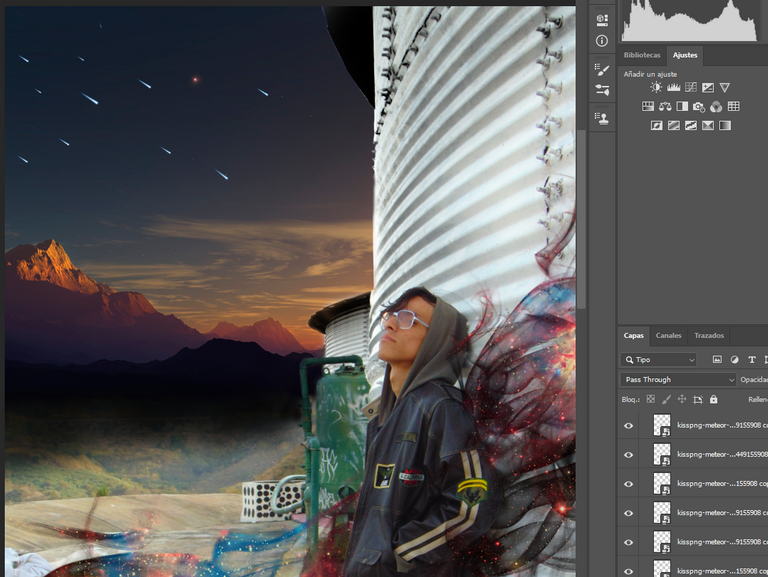
Then i added a meteor shower in the sky, for this I added the last resource and made several duplicates with Ctrl + J and modified their size with Ctrl + T, after positioning them I grouped them in a group.
Después agregue una lluvia de meteoritos en el cielo, para esto agregue el ultimo recurso y hice varios duplicados con Ctrl + J y modifique su tamaño con Ctrl + T, después de posicionarlos los agrupe en un grupo.
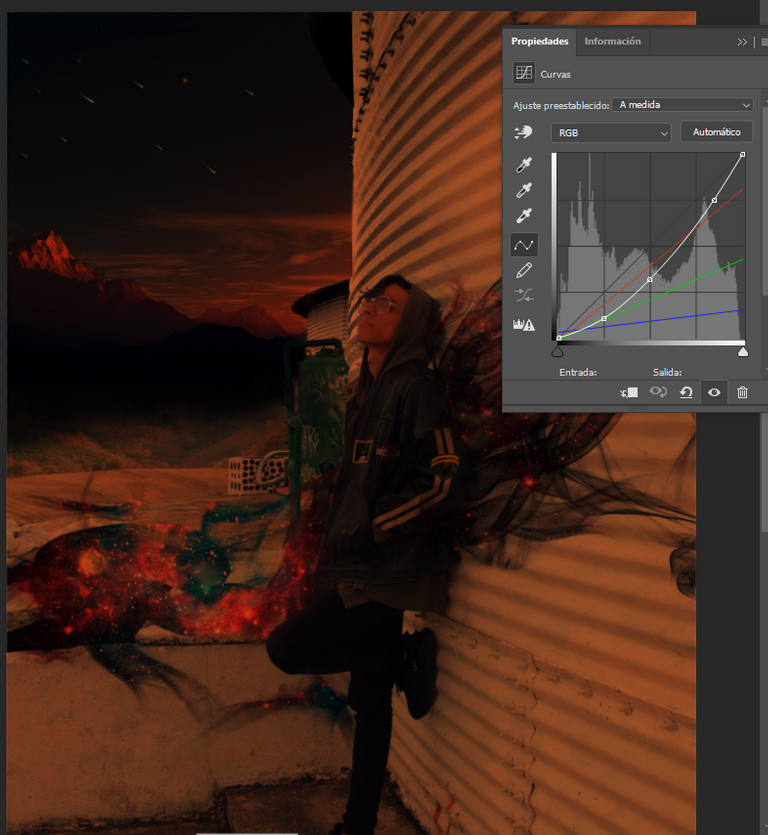
Then change the color of the environment with a curves layer, adjust the color of the highlights with Alt + right click on the button that says Automatic and select the option Search for dark and light colors then I put the following color in for the highlights, the rest I left it as it is.
Luego cambie el color del ambiente con una capa de curvas, ajuste el color de las iluminaciones con Alt + clic derecho sobre el botón que dice Automático y seleccione la opción de Buscar colores oscuros y claros luego puse el siguiente color en para las iluminaciones, el resto lo deje tal como esta.

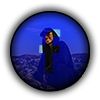
Then lower the shadows a bit and in the entrance line to give a glow or white light effect inside the "wings".
Luego baje un poco la sombras y en la linea de entrada para después darle un efecto de brillo o luz blanca dentro de las "alas".
To create this effect I placed myself on top of the mask of the curves layer and with the same brush number 7 black and a smaller diameter, I made two clicks inside it to make it look like this.
Para crear este efecto me situé encima de la mascara de la capa de curvas y con el mismo pincel numero 7 negro y un diámetro mas pequeño, hice dos clics dentro de la ellas para que quedara de esta manera.
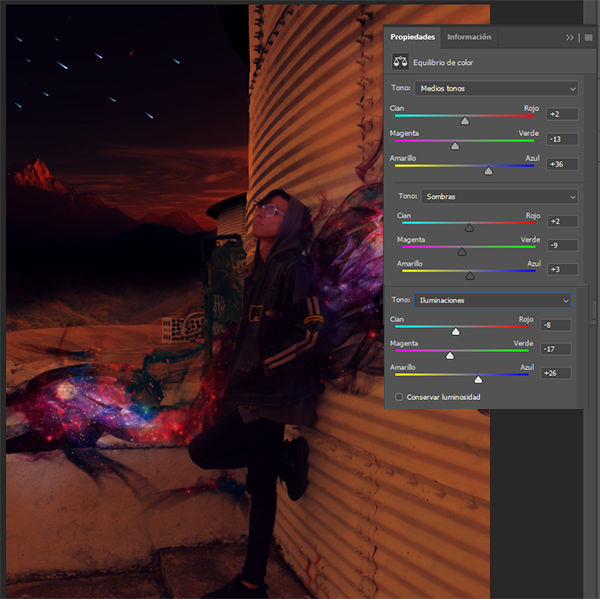
For the sixth step, I wanted to change the tonality of the environment a bit so it wouldn't be so warm, so I added a new color balance layer on top of the others and adjusted the tones, shadows and highlights as follows.
Para el sexto paso, quise cambiar un poco la tonalidad del entorno para que no fuera tan cálido, así que agregue una nueva capa de equilibrio de color sobre las demás y ajuste los tonos, sombras y iluminaciones de la siguiente manera.
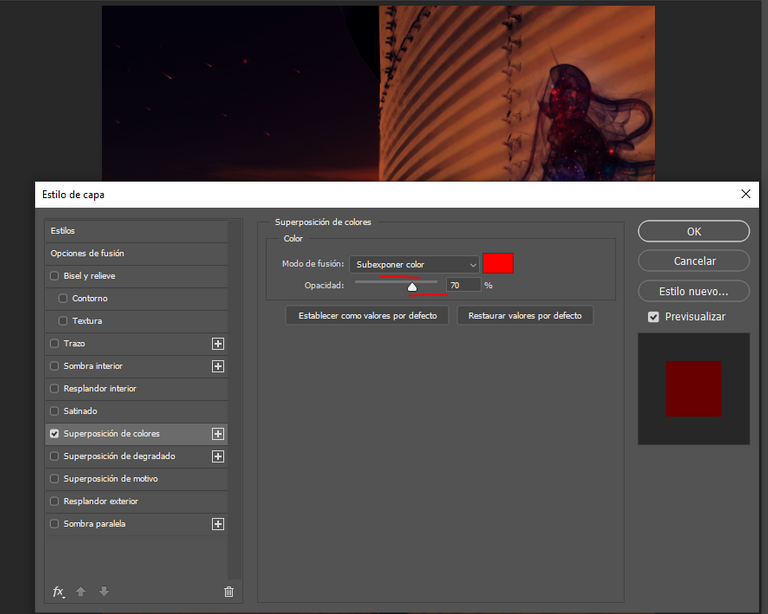
I then realized that the meteor shower was emanating a different color to the environment, I didn't want them to be glass or ice so I went to the group that made up the shower and went into the blending settings, selected the Color Overlay tab and chose the brightest red color and finally changed the blending mode of this setting to Overexpose Color and lowered the opacity of this effect to 70%.
Luego me di cuenta que la lluvia de meteoritos emanaba un color distinto al ambiente, no quería que fueran de cristal o hielo así que me dirigí al grupo que conformaban la lluvia y entre en las configuraciones de fusión, seleccione la pestaña de Superposición de Colores y escogí el color rojo mas brillante por ultimo cambie el modo de fusión de este ajuste a Sobreexponer Color y baje la opacidad de este efecto a un 70%.
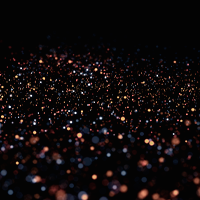
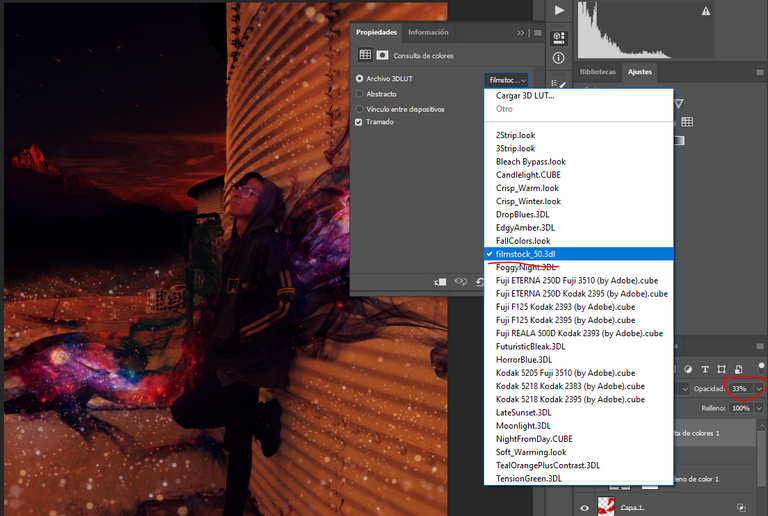
For the seventh and last step in photoshop I added the last resource which are the particles around me, for this I duplicated the resource layer four times changed the blending mode of these to Frame, lowered its opacity to 33% and with a layer mask, the dark brush and in the positioned in the following places with Ctrl + T, I gave the effect that these particles floated and emanated from around the wings.
Para el séptimo y ultimo paso en Photoshop agregue el ultimo recurso que son las partículas a mi alrededor, para esto duplique la capa del recurso cuatro veces cambie el modo de fusión de estas a Trama, baje su opacidad a un 33% y con una mascara de capa, el pincel oscuro y en la posicionadas en los siguientes lugares con Ctrl + T, di el efecto que estas partículas flotaban y emanaban de alrededor de las alas.
Finally I added a 3Dlut filmstock color query and lowered the opacity of this to 33% to look like this.
Por ultimo agregue una consulta de colores 3Dlut filmstock y baje la opacidad de este a un 33% para que quedara de la siguiente manera.
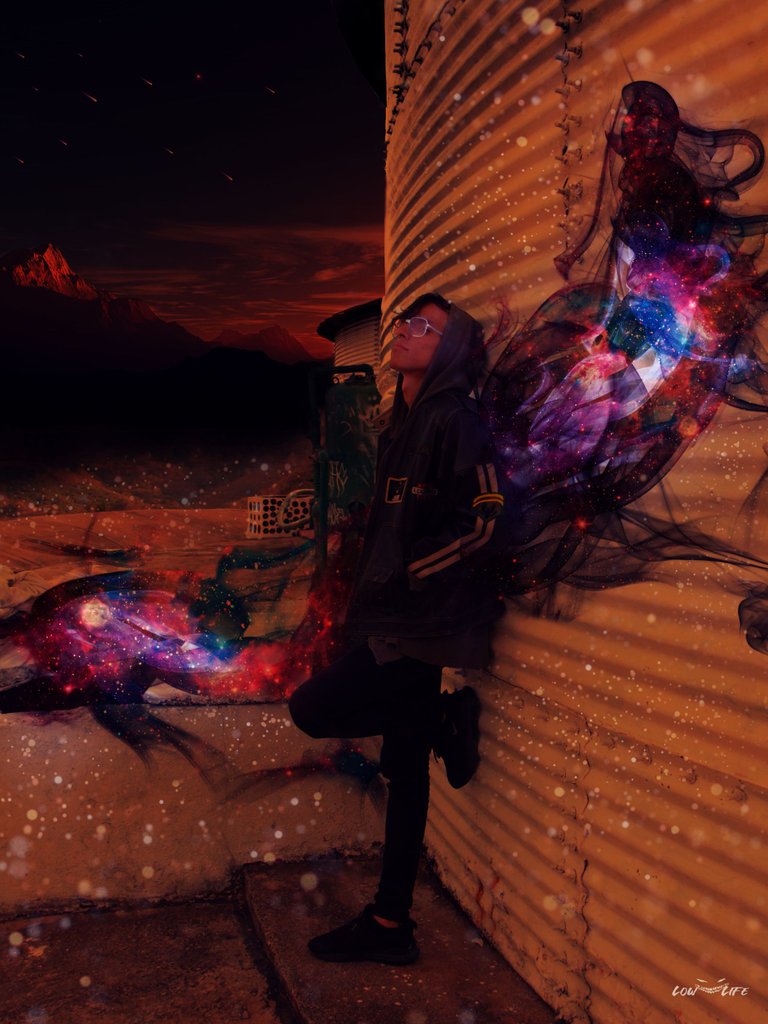
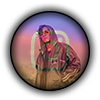
To finalize the assembly I exported the project to lightroom, once there I increased a little the contrast, the lights, shadows and whites of the image, I increased its prescience to the maximum to give more sharpness to the details, I increased to the maximum the radius of these same and I decreased a little the noise, I increased in great quantity the lights of the tone curves and a little the shadows and the lights of this same, to finish I added an effect of darkness in the edges and I played with the tones, colors and illuminations for the following way to obtain this result.
Para finalizar el montaje exporte al lightroom el proyecto, una vez ahí aumente un poco el contraste, las luces sombras y blancos de la imagen, aumente su presciencia al máximo para darle mas nitidez a los detalles, aumente al máximo el radio de estos mismos y disminuí un poco el ruido, aumente en gran cantidad las luces de la curvas de tonos y un poco las sombras y los claros de esta misma, para finalizar agregue un efecto de oscuridad en los bordes y jugué con los tonos, colores e iluminaciones para de la siguiente manera para obtener este resultado.

Y bueno queridos amigos esta a sido todo el trasfondo del montaje, espero les haya gustado y perdonen mi inactividad, con la situación que afrontamos se me dificulta un poco mantenerme activo por aquí sin en cambio daré mi mejor esfuerzo, como siempre cualquier consejo o ayuda es bien recibida y agradecía de mi parte, espero que tengan una excelente semana y hasta la próxima!
And well dear friends this has been all the background of the montage, I hope you liked it and forgive my inactivity, with the situation we face is difficult for me to stay active here but instead I will give my best effort, as always any advice or help is welcome and appreciated on my part, I hope you have a great week and see you next week!

Photographs @angelsbravo ~ Fotografia @angelsbravo
Another excellent design. Keep bringing the 🔥🔥🔥
Bro of all, your support is more significant for me really thank you very much !! I will keep improving and designing for this community to grow even more !! 😁😁💪🏻
I believe in you to do that.
Este post ha sido propuesto para ser votado por el equipo de curación de Cervantes.
Agradecido con la propuesta un saludo!!
Congratulations @lowlifevzla08! You have completed the following achievement on the Hive blockchain and have been rewarded with new badge(s) :
Your next target is to reach 8000 upvotes.
You can view your badges on your board and compare yourself to others in the Ranking
If you no longer want to receive notifications, reply to this comment with the word
STOPCheck out the last post from @hivebuzz:
Support the HiveBuzz project. Vote for our proposal!
Thank you very much!!
You're welcome @lowlifevzla08 😉👍
Support us back and vote for our witness.
You will get one more badge and bigger upvotes from us when we notify you.
Your content has been voted as a part of Encouragement program. Keep up the good work!
Use Ecency daily to boost your growth on platform!
Support Ecency
Vote for Proposal
Delegate HP and earn more
Thank you very much for your support!! 😁😁😁
¡Felicidades! Esta publicación obtuvo upvote y fue compartido por @la-colmena, un proyecto de Curación Manual para la comunidad hispana de Hive que cuenta con el respaldo de @curie.
Si te gusta el trabajo que hacemos, te invitamos a darle tu voto a este comentario y a votar como testigo por Curie.
Si quieres saber más sobre nuestro proyecto, acompáñanos en Discord: La Colmena.
Agradecido con su apoyo!! 😊😊