The Witch and the Monk
Old, ruined buildings have always had a great attraction for me, especially when they are large, imposing sacred buildings like the monastery ruins in the first picture. Unfortunately, there are only a few such places in and around Berlin. There are monastery ruins in Berlin Mitte, but they are not accessible at night and the city lights make them much too bright for light paintings. Other exciting buildings, such as the Chorin Monastery, are also not accessible at night.
Alte, verfallene Gebäude üben schon immer eine große Anziehungskraft auf mich aus, ganz besonders wenn es große imposante Sakralbauten sind wie die Klosterruine im ersten Bild. Leider gibt es in und um Berlin nur wenige solcher Orte. Es gibt zwar in Berlin Mitte die Klosterruine, allerdings ist diese nachts nicht zu gänglich, außerdem ist das dort durch die Lichter der Stadt viel zu hell für Light Paintings. In andere spannende Gebäude, wie das Kloster Chorin, kommt man nachts ebenfalls nicht rein.
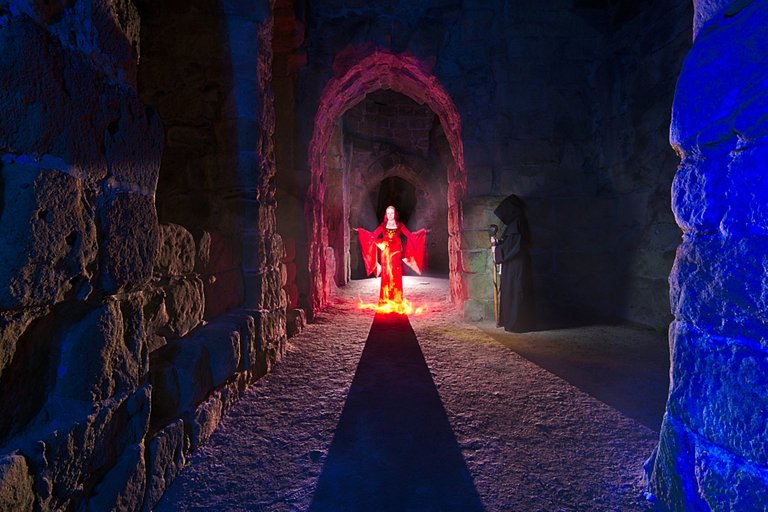
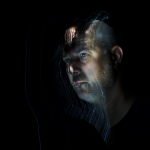
📷 Nikon D750 - Laowa 12/2,8 - f8 - ISO 100 - 426 seconds - Models: Marlene & Erik
The picture doesn't look that elaborate at first glance, does it? But the exposure time gives an idea of the effort involved, I think. First I used DIY Light Scanner to illuminate the two models. I do that first with most pictures. If the model fidgets, closes her eyes or something similar, I stop the shot immediately and start again. Of course, some things can go wrong in the remaining steps, but that's mostly up to me.
In the next step, I painted the fire into the picture with a fire aclyl blade. Then I blew a little mist into the ruin and put the light behind Marlene. Then I lit the archway with the red Convoy S2+ and the scene from the front with the blue Convoy S2+. You don't see blue light very often in light paintings. Blue light is difficult to implement. It burns out very quickly and takes away depth and sharpness from the picture. It takes some practice to achieve good results with blue light. However, one should not overdo it. Large blue areas in the picture usually don't look so good, in my opinion.
Das Bild sieht auf den ersten Blick gar nicht so aufwändig aus, oder? Die Belichtungszeit lässt den Aufwand aber erahnen, denke ich. Zuerst habe ich mit DIY Light Scanner die beiden Model eingeleuchtet. Das mache ich bei den meisten Bildern zuerst. Wenn das Model beim Einleuchten rumzappelt, die Augen geschlossen hat oder Ähnliches breche ich die Aufnahme sofort ab und beginne von vorn. Bei den restlichen Schritten kann natürlich auch einiges schiefgehen, aber das hängt dann meist allein von mir ab.
Im nächsten Schritt habe ich dann mit einem Feuer Aclyl Blade das Feuer ins Bild gemalt. Dann habe ich ein wenig Nebel in die Ruine geblasen und das Licht hinter Marlene gesetzt. Im Anschluss habe ich den Torbogen mit der roten Convoy S2+ und die Szene von vorne mit der blauen Convoy S2+ beleuchtet. Blaues Licht sieht man nicht sehr häufig in Light Paintings. Blaues Licht ist schwierig umszusetzen. Es brennt sehr schnell aus und nimmt dem Bild Tiefe und Schärfe. Es erfordert einiges an Übung um mit blauem Licht gute Ergebnisse zu erzielen. Allerdings sollte man nicht übertreiben. Große blaue Bereiche im Bild sehen meist nicht so gut aus, wie ich finde.

The Electrified Monk
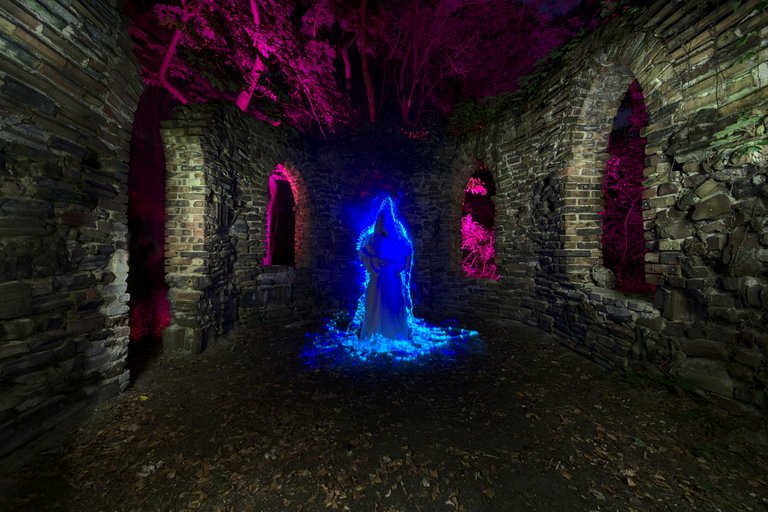
📷 Nikon D750 - Laowa 12/2,8 - f8 - ISO 50 - 355 seconds - Model: @gunnarheilmann
I discovered the ruins of the small chapel in the middle of the forest some time ago. I don't know if it was actually a chapel or if it was built as a ruin in the forest. But anyway, it's a cool light painting location.
I first illuminated Gunnar with the light scanners and then painted the light traces around him with blue glass fibres. Then I lit the ruin with the Fenix FD65. In the last step I attached a purple colour filter to the head of the FD65 and lit the forest. That wasn't so easy, it's all pretty overgrown.
Die Ruine der kleinen Kapelle habe ich vor einiger Zeit mitten im Wald entdeckt. Ich weiß nicht, ob das tatsächlich mal eine Kapelle war oder das als Ruine in den Wald gebaut wurde. Aber egal, eine coole Light Painting Location ist das auf jeden Fall.
Ich habe zuerst Gunnar mit den Light Scanner beleuchtet und dann mit blauen Glasfasern um ihn herum die Lichtspuren gemalt. Dann habe ich die Ruine mit der Fenix FD65 beleuchtet. Im letzten Schritt habe ich einen lila Farbfilter am Kopf der FD65 befestigt und habe den Wald beleuchtet. Das war nicht so einfach, das ist alles ziemlich zugewuchert.
The Gate to...
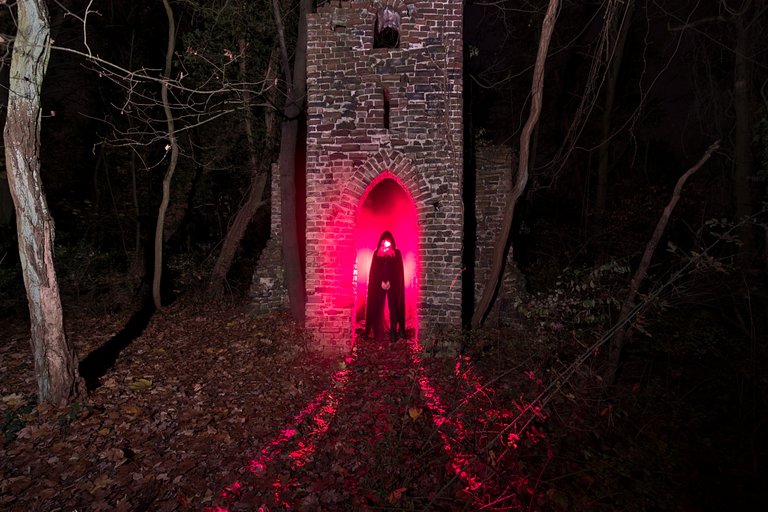
📷 Nikon D750 - Laowa 12/2,8 - f8 - ISO 50 - 117 seconds - Model: Jennifer
Here you can see the ruin from the front. Jennifer stood in the entrance, then I illuminated it red with the Light Scanner. Then I lit the ruin from the front with the Emisar D18. I then blew mist from inside behind Jennifer and shone the LEP torch with a red colour filter towards the camera.
Hier seht die Ruine von vorne. Jennifer hat sich in den Eingang gestellt, dann habe ich sie mit dem Light Scanner rot beleuchtet. Dann habe ich die Ruine von vorne mit der Emisar D18 von vorne beleuchtet. Ich habe dann von innen Nebel hinter Jennifer geblasen und mit der LEP Taschenlampe mit rotem Farbfilter in Richtung Kamera geleuchtet.
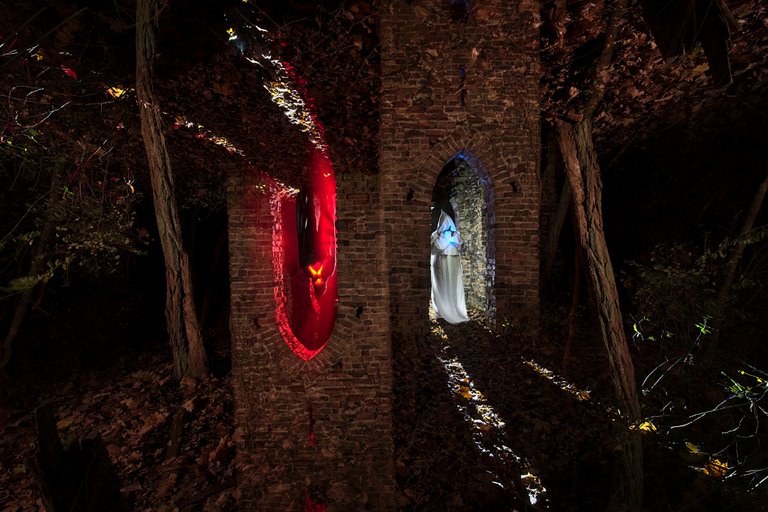
For the second version, I rotated the camera 180° around the optical axis during the exposure. All pictures were taken in a single exposure and were not processed on the computer. Jennifer had changed her frock for the second part of the picture. Otherwise the procedure was the same as in the picture above.
Für die zweite Version habe ich die Kamera während der Belichtung um 180° um die optische Achse gedreht. Alle Bilder sind in jeweils einer einzigen Belichtung entstanden und wurden nicht am Computer bearbeitet. Jennifer hatte für den zweiten Bildteil die Kutte gewechselt. Ansonsten war die Vorgehensweise wie im Bild darüber.
WHAT IS LIGHT PAINTING?
Light painting is a unique form of art. The darkness is illuminate by the artist with diverse light sources and light traces are paint into the picture with various light tools. Various techniques are use, such as camera rotation or other movements of the camera during the exposure. The creative possibilities are almost unlimited. All the pictures were taken during one single exposure. Apart from denoising, sharpening, cutting and possibly adjusting the white balance, the pictures are not processed on the computer.
LICHTKUNSTFOTO
If you like my art visit www.lichtkunstfoto.de for more Light Art Photography and informations about Light Painting. Join me on Flickr Twitter
For more great Light Art Photography, Light Painting and inspiration check these light painters: @marlasinger666 @fadetoblack @fastchrisuk @dawnoner @oddballgraphics @martbarras @stepko @rod.evans.visual @yo-hoho @maxpateau @gunnarheilmann @neilru75 @maximepateau @ryuslightworks @lightstabeu

WE ARE LIGHT PAINTERS
To help and support the LightPainters community here on Hive I would appreciate your delegation of HivePower. Any amount is appreciated. It does not require much to get started, we are happy for any gesture. @lightpainters
How to delegate?
Delegate 50HivePower, [50HP]
Delegate 250HivePower, [250HP]
Delegate 500HivePower, [500HP]
Delegate 1000HivePower, [1000HP]
All the Hive Power will help to upvote the artist's contribution as part of the LightPainters community.
Schön gemacht. Aber deine Models Hexen zu nennen ist nicht sehr nett 😂
Danke. Hexe ist doch nicht schlimm. Da steht ja nicht "alte Hexe" oder so. 🤣😂
The electrified monk one is a real beauty. Top set and what a beautiful location. Bravo.
Cheers mate 😊
WOW what an amazing series and so interesting to read all the work involved in creating these
Thanks
most welcome
Very cool serie, great inspiration and nice in the making 💪👍
Thanks 😊
Ich liebe es auch, die alten Dinge zu photographieren.
Na dann fahren wir bald mal wieder dort hin.
Fantastic set of shots mate, great write up too. 😎
Cheers mate 😊
This is amazing
Thanks
The rewards earned on this comment will go directly to the person sharing the post on Twitter as long as they are registered with @poshtoken. Sign up at https://hiveposh.com.
Congratulations @lichtkunstfoto! You have completed the following achievement on the Hive blockchain and have been rewarded with new badge(s):
You can view your badges on your board and compare yourself to others in the Ranking
If you no longer want to receive notifications, reply to this comment with the word
STOPCheck out the last post from @hivebuzz:
Support the HiveBuzz project. Vote for our proposal!