This is an amalgamation of work-in-progress notes over several days shoehorned into a single post.
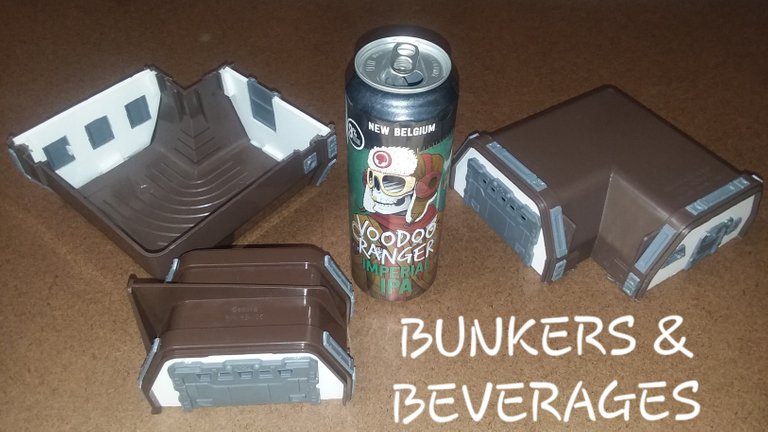
Working on a tabletop war game terrain project and a New Belgium Voodoo Ranger Imperial IPA. Care to tag along?
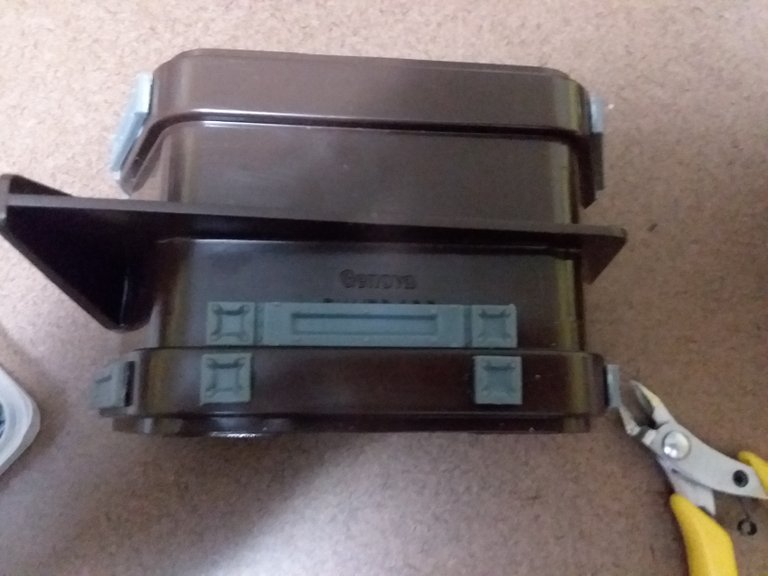
First up, the bunkers. I made these with some plastic rain gutter (eaves trough) connectors, foamcore boards, and the Maelstrom's Edge Terrain Sprue. This is still a work in progress. I plan to add some roof hatches from that kit, and maybe some extra detail from the Mantic Games Deadzone Terrain sprue, plus I need to hide the manufacturer's text somehow. I would add a link to the Mantic stuff, but it doesn't seem to be available as a standalone item. I may have gotten mine in a Crazy Box assortment. The hardware store also said the gutter line is discontinued, so good luck finding these "Genova" pieces.
Both Mantic and Spiral Arm Studios make some great hobby products for people who want miniatures on a budget and some creativity-inspiring terrain kits. Aesthetics are a personal matter, but either company also offers both unique game rules and distinct armies for sci-fi gaming if you want an alternative to Games Workshop offerings.
As for these bunkers, I had to start with some modification. These pieces were a perfect starting point because they had separate rubber gaskets that fit into recesses on the plastic. Discard the rubber pieces, and there's a ready-made location for walls. The shape also has that sci-fi pre-fab look already. I just had to saw off some tabs that I don't need, since I don't have to add the gutter sections.
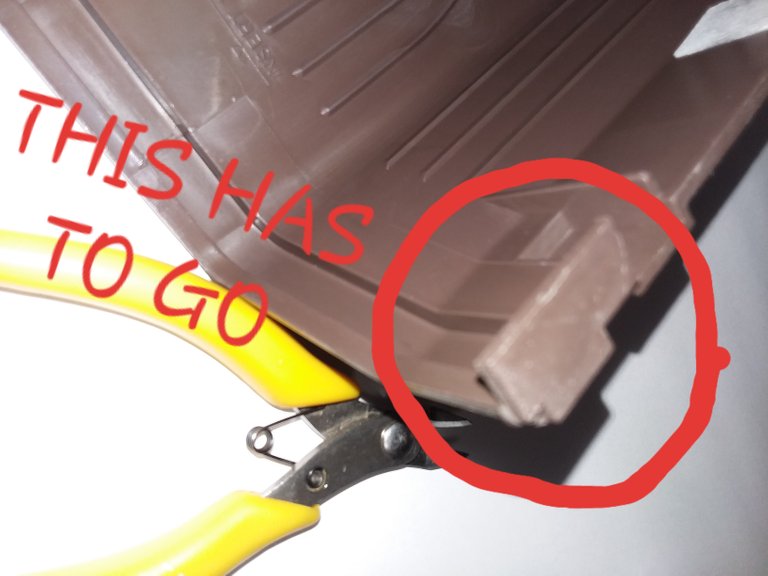
The flush cutters didn't cut it, literally. I had to use a razor saw instead. Yes, there was a sacrifice of Blood for the Blood God in the process. This is tough plastic, but it gave way unexpectedly on the first bit I cut. Such is life in the war game hobby. Once I had a feel for the material, it went better.
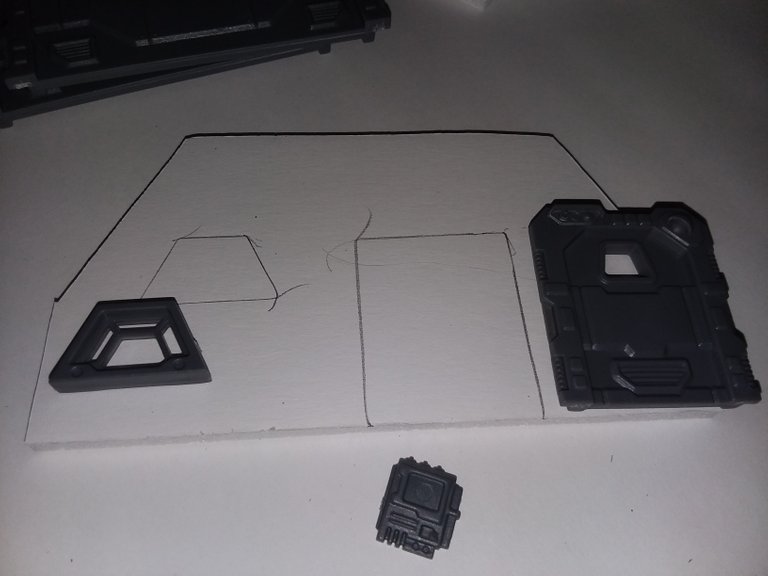
Next up: cutting the foam core. I just traced and used a utility knife to cut along the lines. I wasn't going for precision architectural modeling here. I eyeballed where I wanted the pieces, and made my parts fit. Good news: no blood was shed this time. These are much more dangerously sharp blades, and I was much more careful.
Styrene foam is nasty stuff. It dulls blades like nobody's business, but it reacts poorly to many chemicals. I used white glue to stick it in place, and to coat the exposed foam surfaces so it won't suffer as much when I eventually spray paint it. PVA glue is not the best adhesive, but I gambled that it would fit the bill in this particular case, especially since I also mechanically wedged everything in place.
I am not sure yet how I want to handle basing and the interior. I could add these to a board base, or leave them as-is. I could use some black styrene sheets to cover the openings, or leave them as-is. I also have some tinted plastic binder dividers I could try to convert into windows, and include an LED tealight inside each bunker for dynamic lighting effects. Choices, choices...
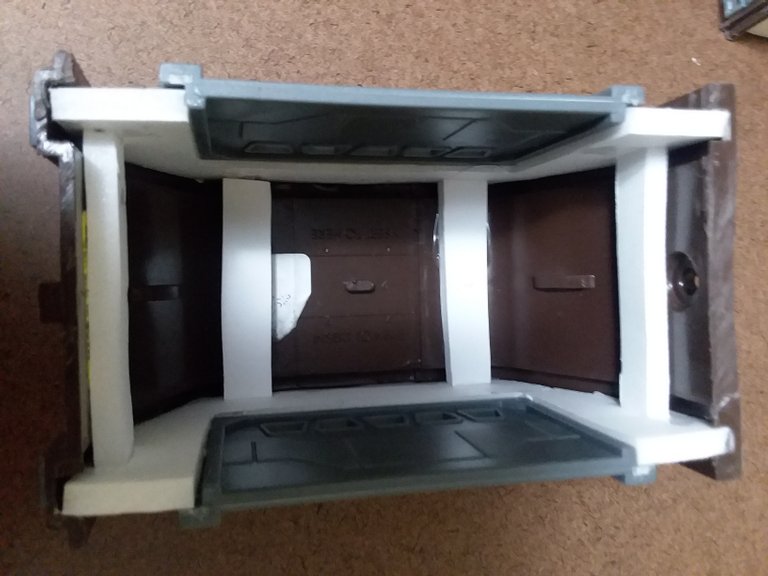
I used a few different methods to brace the end panels in place, and they all worked. The simplest for the L-shaped corner miter sections was to wedge in some scraps to fill the old gasket space and force everything into position toward the exterior. For the short butt joint piece, I used my calipers to measure and score some bigger scraps to cut some braces to span the space in between the sides.
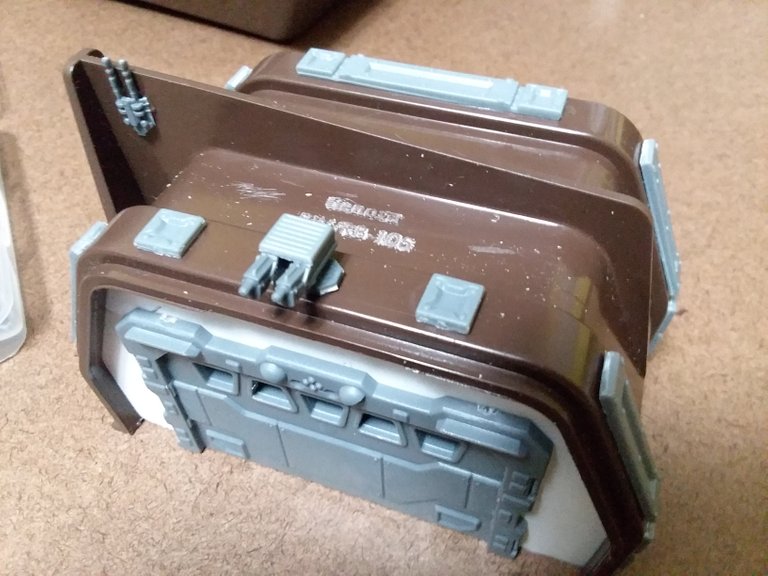
Let's see what I can do to finish up this section. The terrain sprue includes these strips of textured panels that can be used as-is or trimmed to length. On one side, I want a symmetrical panel over the center of the toor, but on then other, I want some smaller segments from previous trimming plus some leftover bitz from the Maelsteom's Edge drones cut into a turrets like an armed checkpoint gate. The ME kits all come with a nice set of spare bitz, so I recommend the entire Battle for Zycanthus starter kit since it has the terrain kits and some bots and troops and aliens for two starter armies. It's a good deal for sure.
I used one piece cut to length to eyeball the positioning of the square pieces before gluing them. This isn't a precision project, so I am cheating a lot compared to what I would do in a proper architectural model.
And last for now is my attempt to build a turret. I trimmed the legs from a spider drone, added some gun bits, threw on a vent square from that strip, and here we go.
As for the beverage I am drinking while summarizing this process, I am of two minds. On one hand, it is an IPA that goes a bit too heavy on the piney hops, but on the other hand, I don't exactly hate it. It ain't a session lager, that's for sure. It's also quite strong at 9% ABV. This can is 19.5 oz. (558mL) and that is plenty for me. But I can sip and build at leisure. Don't worry, no beer was consumed during the cutting stage of this project. Booze and blades don't mix.
What will it look like when it's all finished? Hard to say, but I like where it is going, and this Maelstrom's Edge bitz kit is sweeeeeet. The beer is bitter, but that's not necessarily a bad thing. On we go! Cheers! Remember, drink responsibly, and handle sharp objects with caution.
Voodoo Ranger is one of my favs.
Not sure if I have enough beer staked but gonna give this a try. (I may have to stake it on HE)
!BEER
If that don't work, I'll be back!
I've had a couple from that line, but the Imperial IPA is just a skosh too high in the IBU department for my liking.
Those parts are expensive. (the rain gutter)
But, probably cheap when compared to anything from Citadel.
Adding all the bits does make it look proper.
I made such with a plywood mockup, and then made a silicone mold and cast plaster.
And then gave them to all my friends.
I paid well under $20 total for those three, and then outlay was worth the head start in design. Wood isn't exactly cheap either these days, and I don't have the proper shop.
I still plan to add a styrofoam wall on one side of the checkpoint gate piece, and if I build it on a base, there are some nice fence posts in the ME kit that just need some styrene rod rails and screen mesh for a destroyed perimeter look.
Voodoo Ranger is an amazing beer
They're cute XD
Never would have thought about using gutter pieces, they do have the right kind of look for a bunker :)
The Maelstrom's Edge site has a lot of hobby posts and suggestions. One used a trench drain cut to bunker sizes, but I couldn't find a comparable product at a decent price here, so instead, I browsed for alternatives I could use.
Sorry, you don't have enough staked BEER in your account. You need 24 BEER in your virtual fridge to give some of your BEER to others. To view or trade BEER go to hive-engine.com