¡Saludos a todos, hoy veremos el diseño de las cartas coleccionables del proyecto!
Greetings to all, today we will see the design of the collectible cards of the project.!
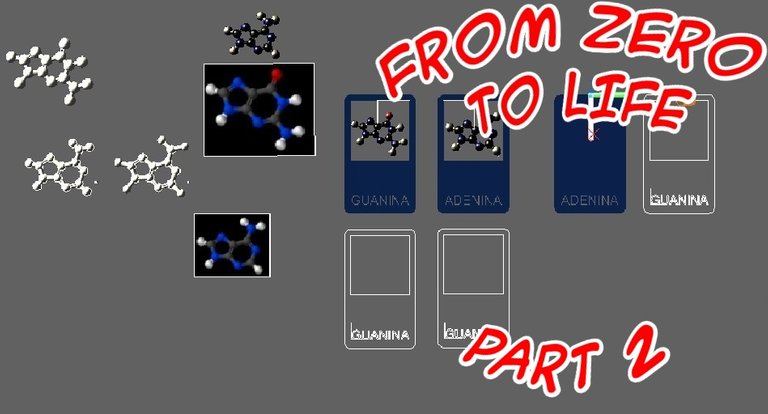
El día de hoy veremos el diseño de nuestros NFTs, lo más básico que podríamos crear como NFT sería un archivo de imagen, entonces eso utilizaremos para nuestras cartas. Estas imágenes podrían ser de cualquier tipo, lo más básico y sencillo que podríamos hacer, es buscar un cuaderno o libreta y dibujar a mano nuestro prototipo de carta, una vez dibujado podemos tomarle una fotografía y ya tendríamos nuestra primera carta, la cual podríamos recortarla un poco en Paint y quedaría de la siguiente forma.
Today we will see the design of our NFTs, the most basic thing that we could create as NFT would be an image file, then that we will use for our cards. These images could be of any type, the most basic and simple thing that we could do, is to look for a notebook or notebook and to draw by hand our prototype of letter, once drawn we can take a photograph and we would already have our first letter, which we could cut it a little in Paint and it would be as follows.
Translated with www.DeepL.com/Translator (free version)

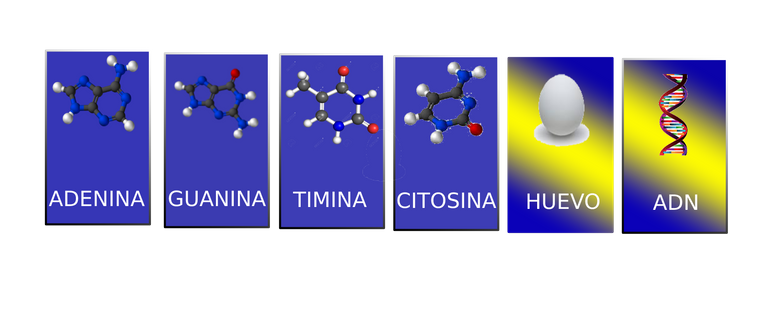
La imagen anterior demuestra lo malo que soy para dibujar, pero si alguien tiene un poco más de talento podría generar una carta aceptable. Otra forma sencilla de generar una carta aceptable puede ser a través de Photoshop y programas de edición similares, pero esos programas son de paga y la idea es tener una inversión de 0 centavos, para tener un trabajo un poco más profesional podemos utilizar la siguiente página web, Photopea, la cual nos permite editar imágenes con la mayoría de las herramientas que posee Photoshop y de manera totalmente gratuita. Utilizando esta página podrás crear cartas con una apariencia más profesional, y si no tienes mucho talento para el dibujo, puedes simplemente buscar imágenes en internet sin derecho de uso, editarlas y generar tus propias imágenes. La imagen que se muestra a continuación, son los ejemplos de las cartas comunes y poco comunes del proyecto, azules y azules con amarillo respectivamente.
The image above shows how bad I am at drawing, but if someone has a little more talent they could generate an acceptable letter. Another simple way to generate an acceptable letter can be through Photoshop and similar editing programs, but those programs are paid and the idea is to have an investment of 0 cents, to have a little more professional work we can use the following website, Photopea, which allows us to edit images with most of the tools that Photoshop has and totally free. Using this site you can create more professional looking letters, and if you don't have much talent for drawing, you can simply search the internet for royalty-free images, edit them and generate your own images. The image below are the examples of the common and uncommon cards of the project, blue and blue with yellow respectively.
Translated with www.DeepL.com/Translator (free version)
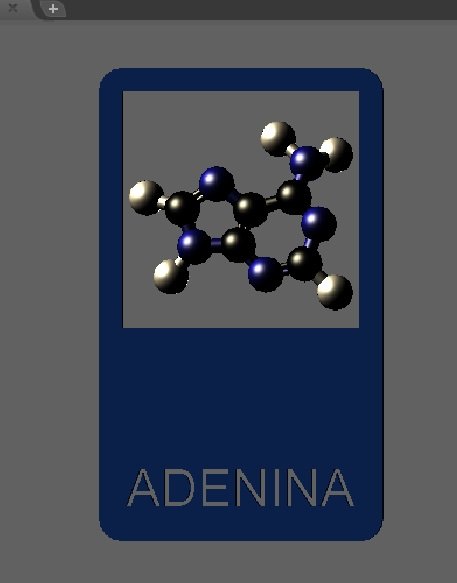
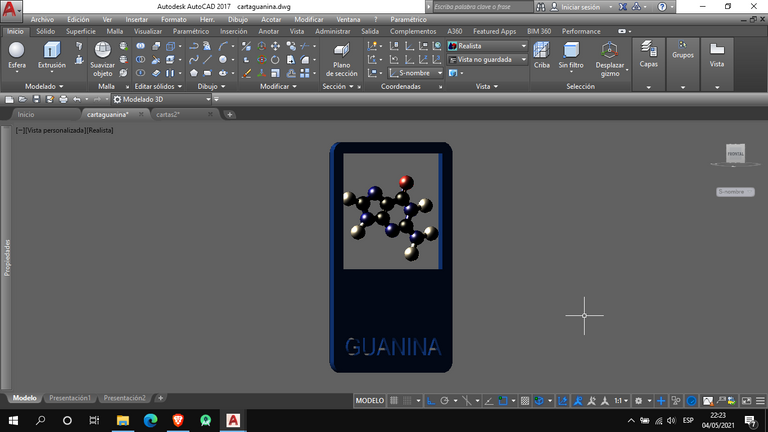
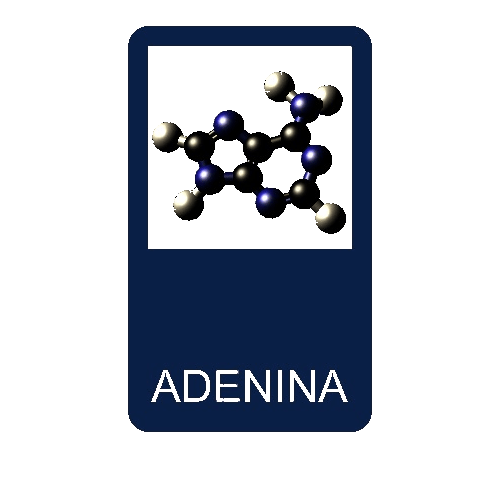
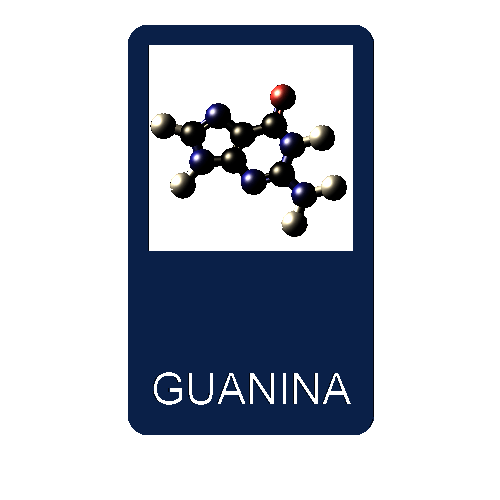
Creo que las cartas mostradas anteriormente son aceptables para convertirse en NFTs y para un primer proyecto está bien, pero pensé en darlo un poco más de estilo a mi primer NFT, por que no darle una apariencia 3D y además que giré en su propio eje. Para poder lograr esto la imagen tendría que ser un gif, pero para mí fue más fácil pensarlo que hacerlo, así que lo hice de la única manera que se me ocurrió en el instante, lo primero que hice fue usar el programa AutoCAD que tenia instalado en mi computador de mis tiempos en la universidad, con ese programa logre hacer un a imagen 3D de la carta Adenina, la que se muestra a continuación.
I think the cards shown above are acceptable to become NFTs and for a first project is fine, but I thought to give it a little more style to my first NFT, why not give it a 3D appearance and also that I rotated on its own axis. To achieve this the image would have to be a gif, but for me it was easier to think it than to do it, so I did it the only way I could think of at the moment, the first thing I did was to use the AutoCAD program that I had installed on my computer from my college days, with that program I managed to make a 3D image of the Adenina chart, which is shown below.
Translated with www.DeepL.com/Translator (free version)
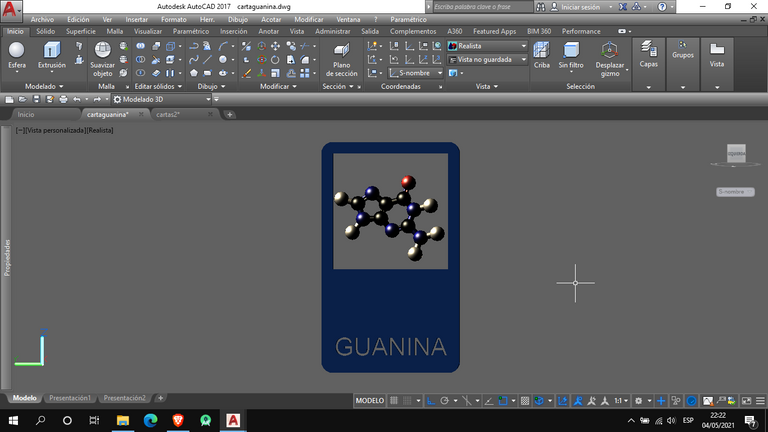
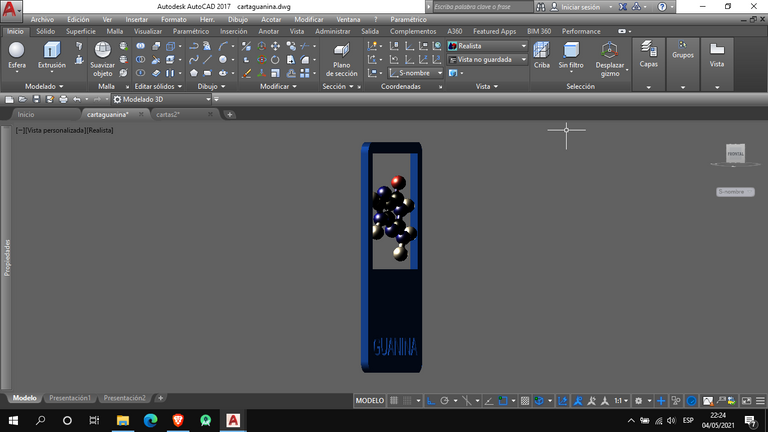
Si alguien quiere hacer su carta 3d de la misma forma que yo, y no tienen AutoCAD, pueden utilizar la pagina de Tinkercad, en esta página podrán crear diseños 3D de manera gratuita y sencilla. Teniendo la carta 3D, ahora solo falta el movimiento, hay una forma fácil de hacerlo, la cual es gratuita y fácil, solo tienes que exportar tu carta como un archivo stl y abrirlo con Paint 3D, el cual viene con el sistema operativo Windows, esta herramienta te permite guardar el archivo como video y también como gif, además de tener incluido varios movimientos para los objetos 3D, entre ellos el giro en su propio eje. Tuve dos inconvenientes con esta herramienta, el primero fue que la imagen stl tienes que asignarle colores en Paint 3D nuevamente, esto es por que al exportar el archivo como stl, solo se guarda la forma y no los colores ni materiales que le asignaste al objeto 3d, por otra parte el gif que crea es de baja resolución y viene con fondo incluido, lo que no me gusto mucho en mi opinión, además de que si usaba por mas de 5 minutos el programa se me cerraba solo (creo que eso se debe a mi computador). Luego de pensar por bastante tiempo una mejor manera de crear un gif de mi carta 3D, se me ocurrió tomar pantallazos de mi carta 3D y girarla 36 grados en su eje, luego sacar otro pantallazo y girar nuevamente 36 grados, esto hasta que la carta gire 360 grados, esto nos dará 10 imágenes, como las que se muestran a continuación.
If someone wants to make their 3d chart in the same way as me, and they don't have AutoCAD, they can use the Tinkercad page, in this page they will be able to create 3D designs for free and easy. Having the 3D chart, now only the movement is missing, there is an easy way to do it, which is free and easy, you just have to export your chart as a stl file and open it with Paint 3D, which comes with the Windows operating system, this tool allows you to save the file as a video and also as gif, besides having included several movements for 3D objects, including the rotation on its own axis. I had two drawbacks with this tool, the first one was that the stl image you have to assign colors in Paint 3D again, this is because when exporting the file as stl, only the shape is saved and not the colors or materials that you assigned to the 3d object, on the other hand the gif that creates is low resolution and comes with background included, which I did not like much in my opinion, plus if I used for more than 5 minutes the program closed by itself (I think that's because of my computer). After thinking for a long time about a better way to create a gif of my 3D chart, it occurred to me to take screenshots of my 3D chart and rotate it 36 degrees on its axis, then take another screenshot and rotate it again 36 degrees, this until the chart rotates 360 degrees, this will give us 10 images, like the ones shown below.
Translated with www.DeepL.com/Translator (free version)
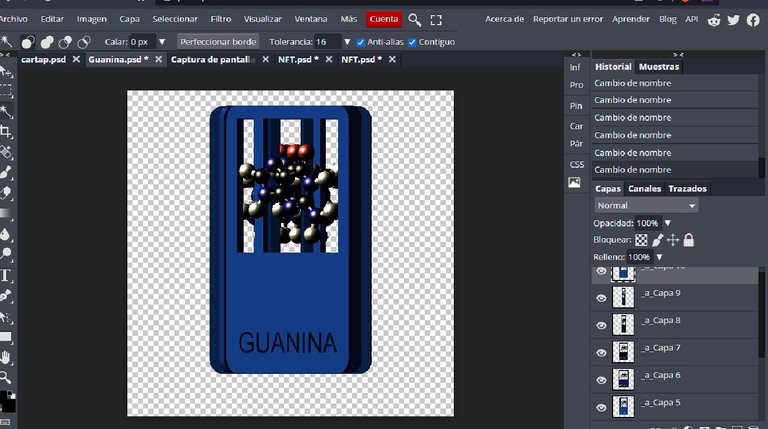
Estas imágenes podemos llevarlas y editarlas en Photopea, superponerlas una tras otra, siendo cada imagen una capa diferente, al nombre de cada capa debemos anteponerle _a_, esto es para poder exportar el archivo como gif.
These images can be taken and edited in Photopea, superimposing them one after another, each image being a different layer, the name of each layer must be prefixed with _a_, this is to be able to export the file as a gif.
Translated with www.DeepL.com/Translator (free version)
El resultado final será un gif un tanto tosco, puesto que, son solo 10 cuadro, para aumentar un poco mas la calidad de nuestro gif podemos aumentar al doble o al triple nuestras imágenes, y con eso lograr un efecto más fluido. Estos serían lo último de este día, mañana subiré como crear un NFT en la red de Wax, con algunos videos explicativos que me sirvieron bastante en Youtube.
The final result will be a somewhat coarse gif, since they are only 10 frames, to increase a little more the quality of our gif we can double or triple our images, and with that achieve a more fluid effect. These would be the last of this day, tomorrow I will upload how to create a NFT on the Wax network, with some explanatory videos that helped me a lot on Youtube.
Translated with www.DeepL.com/Translator (free version)
Estos serían todo por hoy, saludos cordiales y ojalá les sirva un poco mi experiencia de cómo realizar este proyecto.
These would be all for today, best regards and hopefully my experience on how to do this project will help you a little.
Translated with www.DeepL.com/Translator (free version)