.jfif)
When Warm Means Cold - Huh?
Yesterday, I made a post about one of the basics for artistic composition The Rule of Thirds and today, I will try to explain Color Temperature, which is a little bit more advanced - And complicated! When you say "Color Temperature" in regards to photography, it is important to understand that you are NOT talking about actual heat, but the FEEL of the lighting.
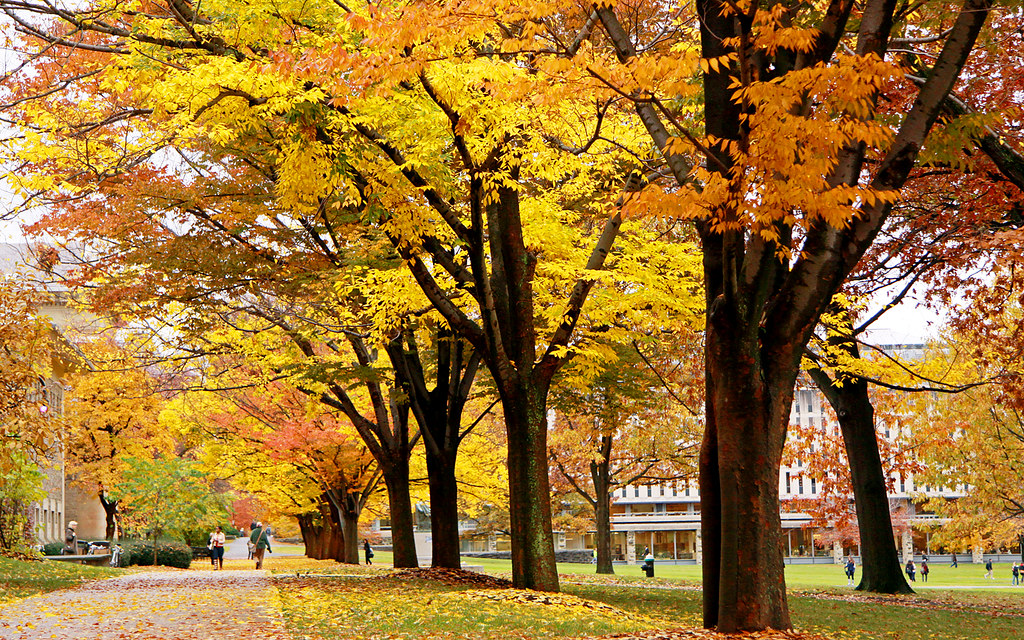
A "warm" color photograph example...
I Am Confused!
When I say the FEEL of the lighting, what I am referring to is the temperature at which a black body — an object that fully absorbs all frequencies of light — would emit radiation of the same color as any given object. Sounds complicated, huh? Really, it is not, and what is happening in photography is the color temperature is OPPOSITE of the actual temperature of the object. If you look at the image above, you will notice that a yellow flame is actually colder than the bluish flame on the Kelvin scale, but regarding photography, the yellow flame is said to be WARMER than the blue flame. Again, this is speaking about the FEEL the lighting gives to the photographs, not the actual heat range of the lighting.
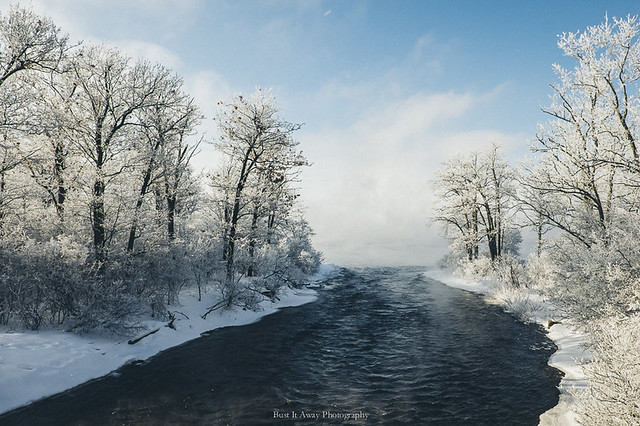
A "cold" color photograph lighting example...
White Balance
Color temperature is related to white balance in that most cameras have settings that go from TUNGSTEN, or the blue end of the spectrum, to DAYLIGHT, which is the yellow end of the spectrum. Of course, most modern digital cameras also have an AWB feature, or "Auto White Balance" which will automatically detect the color balance and adjust accordingly. You can use AWB, but sooner or later, you will want to have more control over this and will likely want to use the manual settings. This is where it is important to know the color temperature of the lighting in your scene, or shoot.
Matching Temperatures
When it comes time to edit your photos, you will be able to adjust the color temperature accordingly easily in your edit software, but if you used the wrong lighting, or mixed lighting, you will soon find yourself running into problems. If, for example you used "Tungsten" lighting, and you want to have a WARMER feel to your photos, you will find you are able to easily adjust things. If, however, you used mixed lighting sources, for example, tungsten light for a back light, and daylight light for the key light, or main lighting source, you will find you have trouble getting the photo to look just right. Sometimes, you may want this feel for your photos, but if you are not expecting it, it can cause problems. If you are shooting outside and use blue, or tungsten light for filler or key lighting, you will find out your photos appear to be "washed out."
Trail and Error
As with a lot of aspects of photography, trying out new things and getting an idea of how they work will be key to your success, however, you will want to experiment BEFORE you go on an actual paid shoot. The last thing you want to do is shoot a thousand dollar wedding job, only to figure out later you used the wrong lighting! Take some time and experiment on some photos so you can get an idea of the different lighting techniques and how they look after edits. Trust me, you will be glad you did!
As Always, Thank You For Reading!
Photo Credit 1
Photo Credit 2
Photo Credit 3
The rewards earned on this comment will go directly to the person sharing the post on Twitter as long as they are registered with @poshtoken. Sign up at https://hiveposh.com.
Your content has been voted as a part of Encouragement program. Keep up the good work!
Use Ecency daily to boost your growth on platform!
Support Ecency
Vote for new Proposal
Delegate HP and earn more