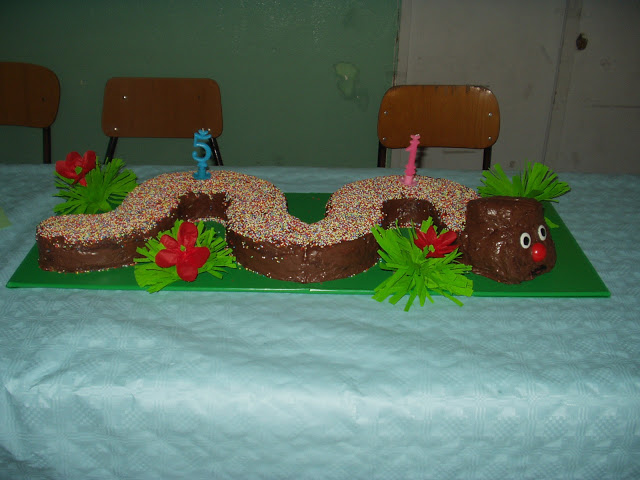
Una verdadera delicia para los niños este exquisito pastel en forma de oruga.
Si eres imaginativo y te encanta preparar dulces, puedes crear un pastel delicioso y colorido para tus hijos.
Excelente pastel, apreciado por jóvenes y adultos, para fiestas de cumpleaños y eventos especiales.
A delight for children this exquisite ** caterpillar cake. **
If you are imaginative and love to prepare sweets, you can create a delicious and colorful cake for your children.
Excellent cake, appreciated by young and old, for birthday parties and special events.
Aquí está la receta:

para 20-24 personas.
18 huevos
600 g de azúcar
450 g de harina
una pizca de sal
500 ml de crema fresca
2 onzas de mompariglia de color
2 onzas de azúcar glas
algunas cucharadas de azúcar
1 paquete grande de nutella
2 botones blancos lisos
1 botón rojo liso
1 marcador permanente negro
un caramelo rojo largo
for 20-24 people.
18 eggs
600 g of sugar
450 g flour
a pinch of salt
500 ml of fresh cream
2 ounces colored mompariglia
2 ounces icing sugar
a few tablespoons of sugar
1 large pack of nutella
2 plain white buttons
1 smooth red button
1 black permanent marker
a long red candy

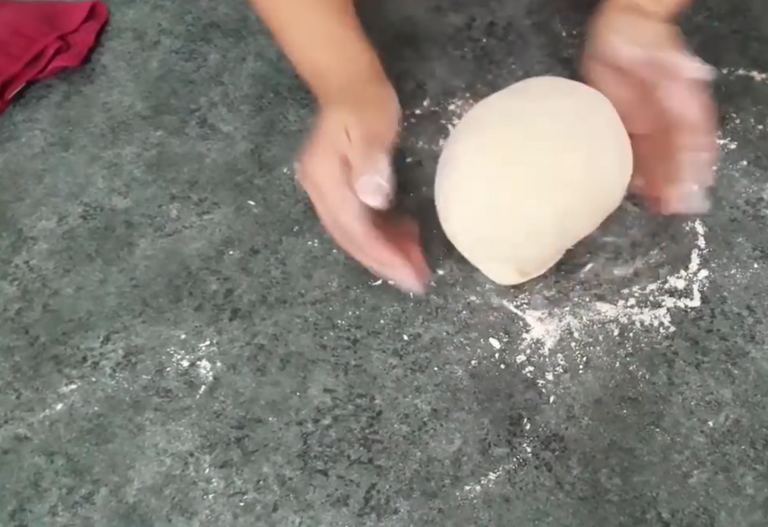
30' para la preparación del bizcocho.
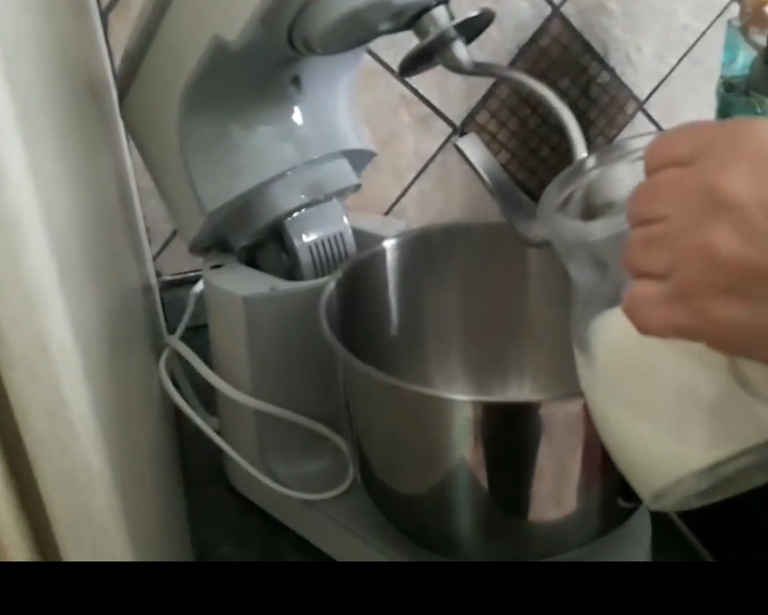
- Separar las claras de las yemas y póngalas en un tazón grande con 300 g de azúcar.
- Batir el azúcar y las yemas de huevo con la ayuda del batidor eléctrico durante unos 5 minutos, hasta obtener una mezcla suave y espumosa.
- Batir las claras con una pizca de sal hasta que estén firmes y agregarlas a las yemas, revolviendo suavemente de abajo hacia arriba para no desmontarlas.
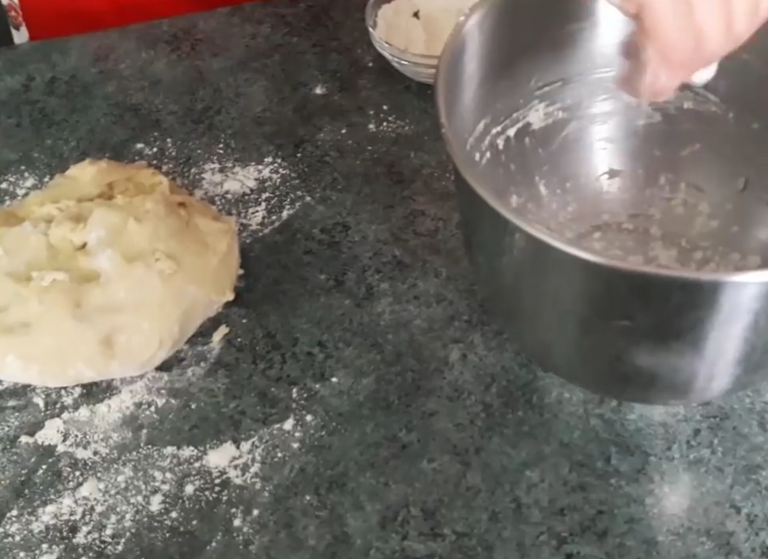
- Agregar 225 g de harina a la crema pasándola a través de un tamiz (poco a poco) para evitar la formación de grumos y vuelva a girar suavemente desde abajo hacia arriba.
- Verter la mezcla en un molde con bisagras con la base de la rosquilla (la que tiene el orificio en el medio), ya engrasada y enharinada.
 |  |  |
|---|---|---|
 |  |  |
 |  |  |
30' for the preparation of the cake.
- Separate the whites from the yolks and put them in a large bowl with 300 g of sugar.
- Beat the sugar and the egg yolks with the help of the electric mixer for about 5 minutes, until you get a smooth and foamy mixture.
- Beat the whites with a pinch of salt until they are firm and add them to the yolks, stirring gently from the bottom up so as not to disassemble them.
- Add 225 g of flour to the cream by passing it through a sieve (little by little) to avoid lumps and gently rotate again from the bottom up.
- Pour the mixture into a hinged mold with the base of the donut (the one with the hole in the middle), already greased and floured.
50 ' para la cocción del bizcocho.
- Hornear en un horno precalentado a 180 ° C durante aproximadamente 40-50 minutos, dependiendo de la altura y el ancho del molde.
- Recomiendo revisar la cocción después de 40 minutos con un palillo de dientes, ponerlo en el centro debe salir seco y limpio.
- Sacar el pastel del horno junto con la rejilla del horno, que colocará en la estufa (apagada) para que el aire pase debajo del molde, enfriándolo sin formar condensación en el interior.
- Una vez frío, apagar y repetir todas las operaciones para hacer un segundo pastel idéntico.
50 'for baking the cake.
- Bake in a preheated oven at 180 ° C for approximately 40-50 minutes, depending on the height and width of the pan.
- I recommend checking the cooking after 40 minutes with a toothpick, putting it in the center should come out dry and clean.
- Take the cake out of the oven along with the oven rack, which will be placed on the stove (turned off) so that the air passes under the mold, cooling it without forming condensation inside.
- Once cold, turn off and repeat all operations to make a second identical cake.
Preparación y decoración de la oruga.
Batir la crema junto con el azúcar glas y reservar.
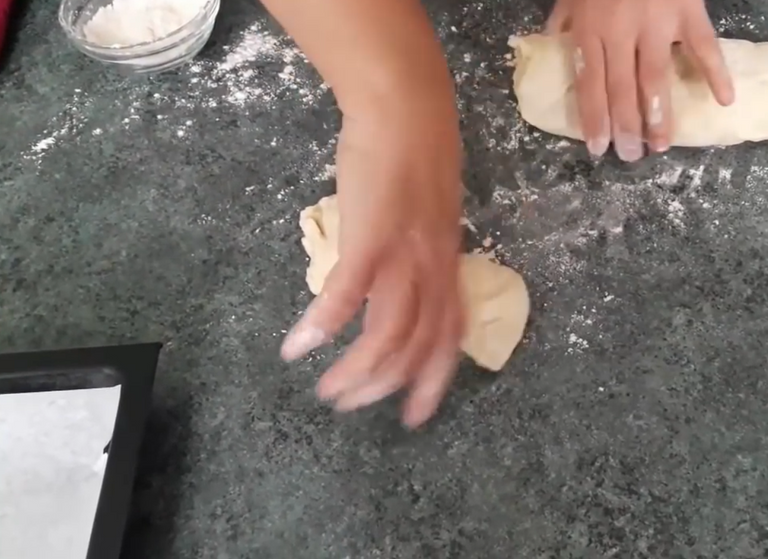
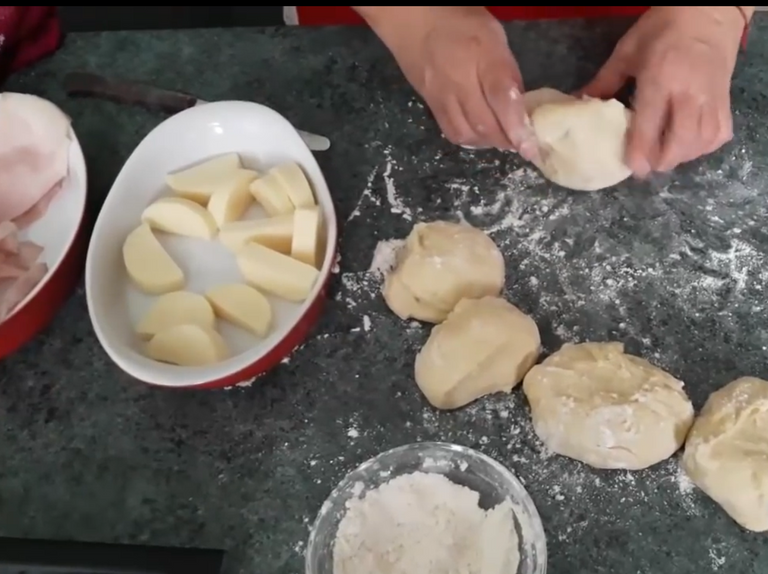
Obtenido los dos bizcochos de rosquilla, cortará cada uno en 4/4, es decir, en 4 piezas idénticas. Obtendrá así 8 piezas idénticas.
Dividir cada pieza horizontalmente en 3 rebanadas.
Ciertamente no encontrarás una bandeja lo suficientemente grande.
Lo construí con madera contrachapada que luego cubrí con papel de celofán de color (esas hojas de papel de regalo brillante o transparentes que usan los floristas).
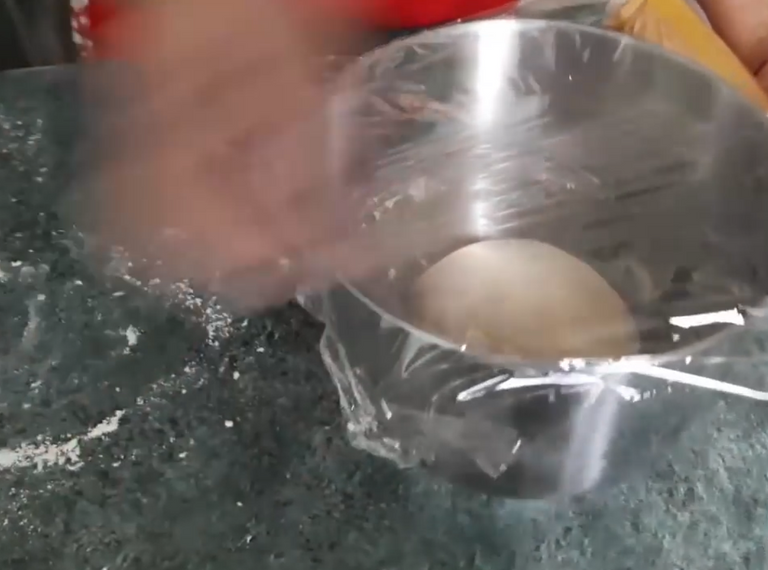
Tomar un tazón grande donde colocará agua en la que derretirá unas cucharadas de azúcar.
Pruébalo, lo hago para no darte una cantidad precisa.
Debe ser dulce pero no demasiado dulce.Una vez que haya encontrado la bandeja, comience a organizar los trozos de pastel uno a la vez, humedezca cada capa con agua fresca con un cepillo y rellene con crema batida.
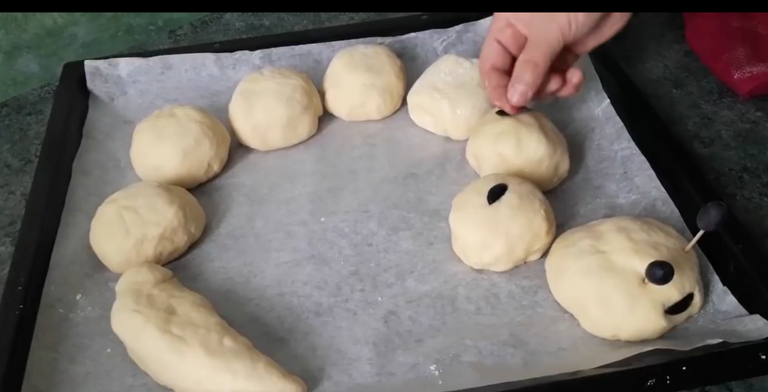
Acomodarlos para formar las curvas de la oruga, pero manteniendo la última pieza para componer la cabeza.
Ahora no recuerdo cómo lo corté porque lo hice hace 2 años, pero aún así lo hice con la última pieza que queda.
Creo que al mirar la foto todavía podrás modelarla de manera similar o incluso mejor que yo.
Cuando la oruga tome forma, tome la nutella y comience con un cuchillo redondo y puntiagudo para extenderlo sobre el pastel.
Si tienes dificultades para extenderlo, caliéntelo unos segundos en el microondas para que sea menos denso.
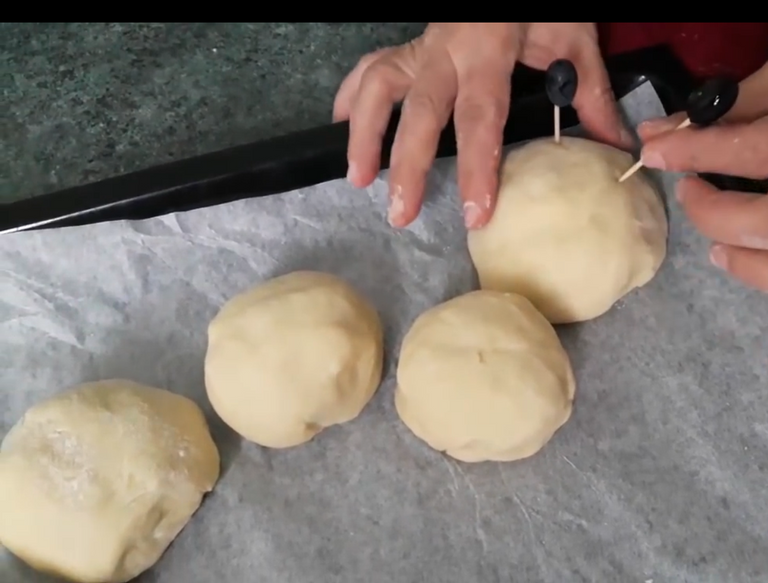
Hice la nariz con la mitad de un huevo de plástico más amable.
Ahora, desafortunadamente, los hacen diferentes, pero un botón rojo suave también puede estar bien.
Para los ojos utilicé dos grandes botones blancos lisos (los que tienen el agujero detrás para coserlos) e hice las pupilas con el marcador permanente.
Para la boca usé un regaliz rojo.
Solo tienes que extender la mompariglia de color en la parte posterior.
También puedes agregar antene hecho de regaliz. Se me ocurrió tarde.
Si deseas embellecer la bandeja, haga pasto y flores con papel crepé.
El éxito está asegurado!
Preparation and decoration of the worm.
- Beat the cream together with the icing sugar and reserve.
- Obtained the two donut cakes, each one will be cut in 4/4, that is, in 4 identical pieces. You will thus obtain 8 identical pieces.
- Divide each piece horizontally into 3 slices.
- You certainly won't find a tray big enough.
- I built it with plywood which I then covered with colored cellophane paper (those glossy or clear sheets of wrapping paper that florists use).
- Take a large bowl where you will put water in which you will melt a few tablespoons of sugar.
- Try it, I do it not to give you a precise amount.
- It must be sweet but not too sweet.
- Once you have found the tray, start arranging the pieces of cake one at a time, moisten each layer with fresh water with a brush and fill with whipped cream.
- Arrange them to form the curves of the track, but keeping the last piece to compose the head.
- Now I don't remember how I cut it because I did it 2 years ago, but I still did it with the last piece left.
- I think by looking at the photo you can still model it similarly or even better than me.
- When the caterpillar takes shape, take the nutella and start with a round, pointed knife to spread it over the cake.
- If you have difficulty extending it, heat it for a few seconds in the microwave so that it is less dense.
- I made my nose with half a kinder plastic egg.
- Now unfortunately they make them different, but a soft red button may also be fine.
- For the eyes I used two large smooth white buttons (the ones with the hole behind to sew them on) and made the pupils with the permanent marker.
- For the mouth I used a red licorice.
- You just have to spread the colored mompariglia on the back.
- You can also add antenna made of licorice. It occurred to me late.
- If you want to beautify the tray, make grass and flowers with crepe paper.
- Success is assured!
Las imágenes que no hacen referencia a una fuente específica son propias.
Los banners han sido descargados gratuitamente del sitio pngtree y luego modificados por la autora con el programa Paint.NET
Las recetas originales y tradicionales de la cocina italiana han sido publicadas en mi blog Il Mondo dei Dolci
Images that do not refer to a specific source are their own.
The banners have been downloaded for free from the site pngtree and then modified by the author with the Paint.NET program
The original and traditional recipes of Italian cuisine have been published on my blog Il Mondo dei Dolci
Congratulations @belen0949! You have completed the following achievement on the Hive blockchain and have been rewarded with new badge(s) :
You can view your badges on your board And compare to others on the Ranking
If you no longer want to receive notifications, reply to this comment with the word
STOPTo support your work, I also upvoted your post!
Do not miss the last post from @hivebuzz:
Support the HiveBuzz project. Vote for our proposal!
Thanks for the support received @hivebuz!
You're welcome @belen0949👍🙂
Excelente postre @belen0949! Fantástico para los niños.
Excelente receta muy bien descripta con las fotos @belen0949!