

Hola a todos los amigos que me visitan, les doy la bienvenida a este mi espacio preferido.
Los materiales que necesitas son:
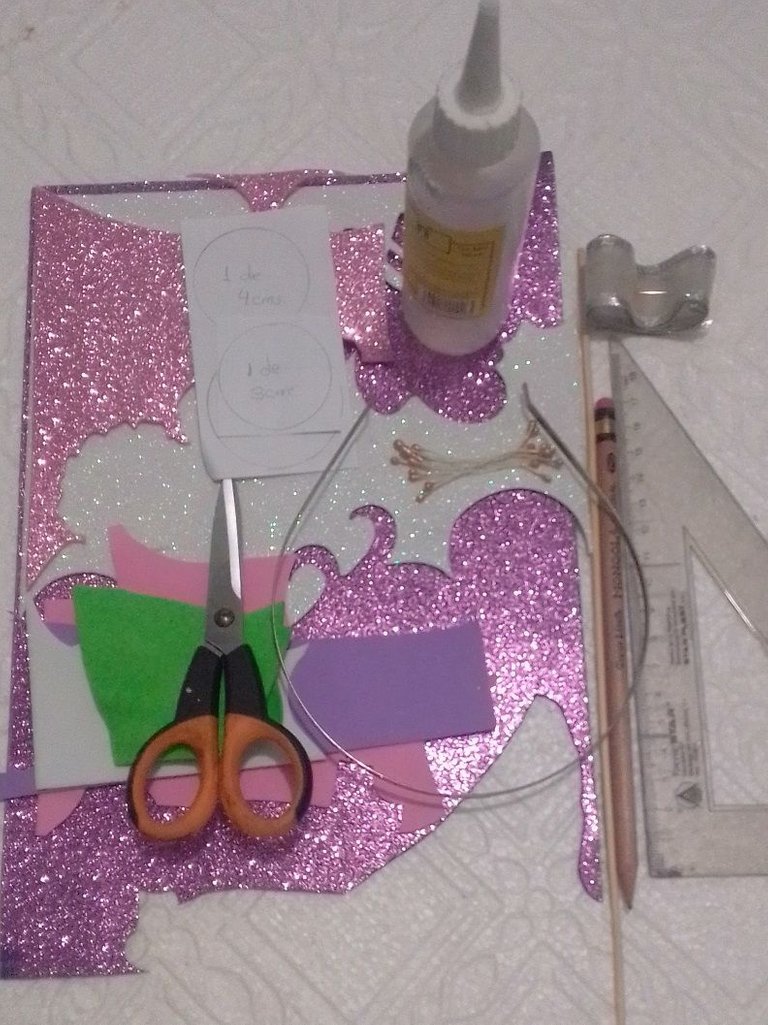
| Cintillo usado | Foamy escarchado y mate |
|---|---|
| Cinta de tela | Silicón de pistola |
| Tijera | Palito de madera |
| Lápiz | Regla |
| Pistilos | Papel reciclado |
| Plancha eléctrica |
Comienzo con el procedimiento:
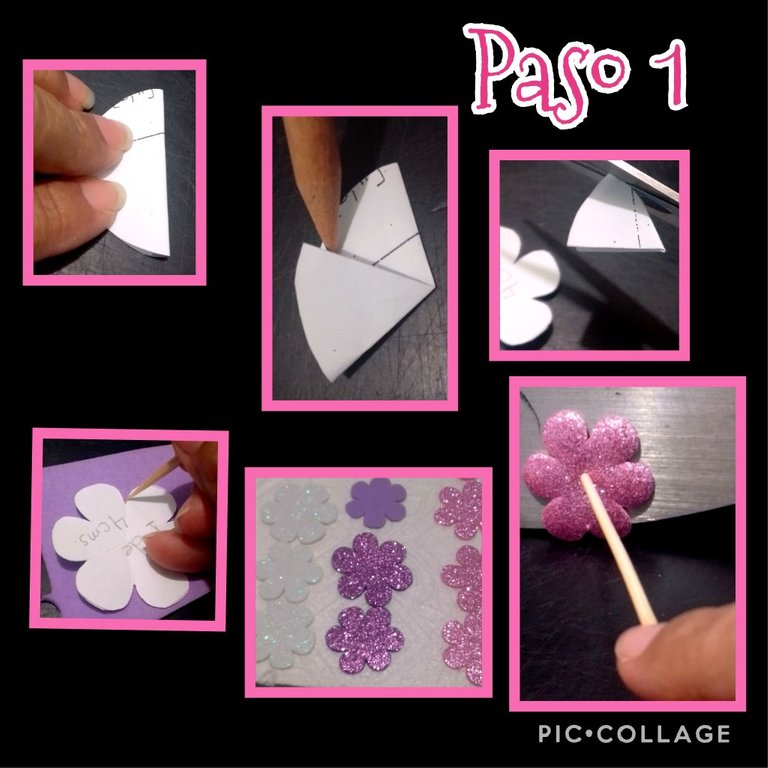
- Marca y recorta círculos de 4, 3 y 2,5cms.
- Dobla por la mitad y esa mitad la divides en 3 partes (ver foto).
- Y recorta las esquinas redondeando para sacar los pétalos y luego marca sobre el foamy con un palito de madera.
-Recorta en foamy 3 flores de cada color o del color de tu preferencia. - Calienta la plancha y coloca la flor, sujetando con un palito hasta que tome forma.

- Perfora el centro de la flor, introduce 2 pistilos y cierra el la flor pegando los pétalos con silicón, luego pega la segunda flor y pega estos pétalos a la primera flor.

- Pega la tercera flor pero con los pétalos hacia abajo.
- Repite el mismo procedimiento para el resto de las flores.

- Aplica silicón en uno de los extremos del cintillo, pega la cinta y comienza a forrarlo, al cubrirlo todo, vuelve a aplicar silicón y pega un trocito de cinta rosada para rematar en las puntas.
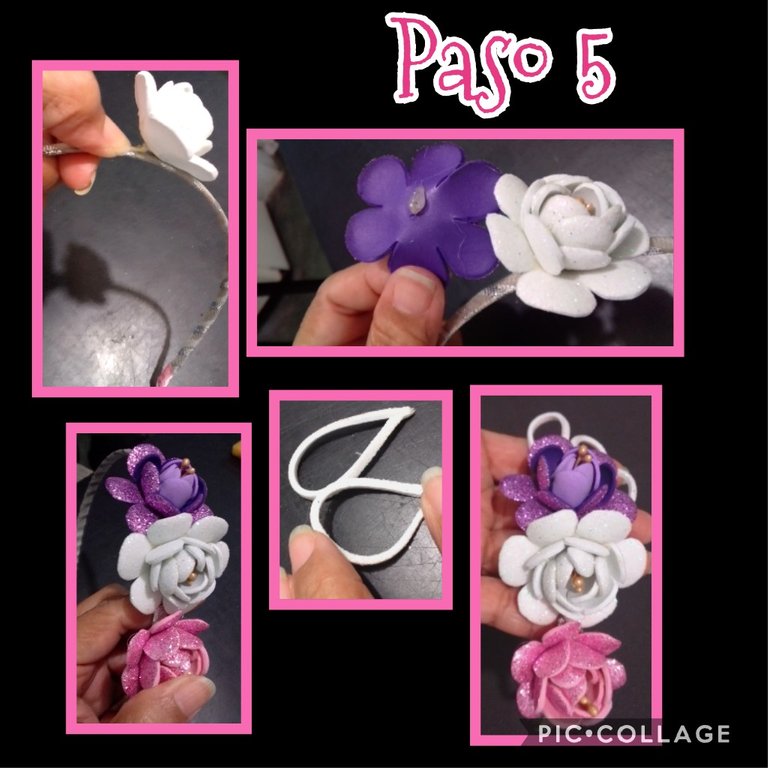
- Ahora pega las flores al cintillo colocando a tu gusto.
- Si quieres puedes recortar 3 tiras en foamy o pueden ser en cinta y pega en los extremos formando como una gota y pega para decorar.
Así quedó listo este fácil y lindo cintillo.
Esta publicación està editada con etiquetas HTML, traducido con DeepL, y las fotos capturadas con mi Blu G5, editadas con Pic collage.
Ahora me despido esperando te haya gustado mi paso a paso y deseando te motives a realizar uno...igual las flores las puedes utilizar para decorar, cajas, cuadros en fin hacer cualquier manualidad con ellas.
Si te gustó deja tu comentario, gracias por tu visita!
*** English ***
Hello to all my friends who visit me, I welcome you to this my favorite space.
The materials you need are:
| Foamy frosted and matte | Foamy frosted and matte |
|---|---|
| Cloth tape | Silicone glue gun |
| Scissors | Wooden stick |
| Pencil | Ruler |
| Wooden stick | Pistilos |
| Recycled paper | Electric iron |
Start with the procedure:
- Mark and cut out circles of 4, 3 and 2.5 cm.
- Fold in half and divide that half into 3 parts (see photo).
- And cut the corners rounding to get the petals and then mark on the foamy with a wooden stick.
-Cut 3 flowers of each color or the color of your choice out of the foamy. - Heat the iron and place the flower, holding it with a stick until it takes shape.
- Pierce the center of the flower, insert 2 pistils and close the flower by gluing the petals with silicone, then glue the second flower and glue these petals to the first flower.
- Glue the third flower but with the petals facing down.
- Repeat the same procedure for the rest of the flowers.
- Apply silicone to one end of the headband, glue the ribbon and begin to line it. When it is all covered, apply silicone again and glue a small piece of pink ribbon to finish off the ends.
- Now glue the flowers to the headband, placing them as you like.
- If you want you can cut 3 strips of foamy or can be in ribbon and glue at the ends forming a drop and glue to decorate.
This is how this easy and cute headband is ready.
This publication is edited with HTML tags, translated with DeepL, and the photos captured with my Blu G5, edited with Pic collage.
Now I say goodbye hoping you liked my step by step and wishing you get motivated to make one...you can use the flowers to decorate, boxes, pictures in order to make any craft with them.
If you liked it leave your comment
Thanks for your visit!