
Hola amigos 🤍
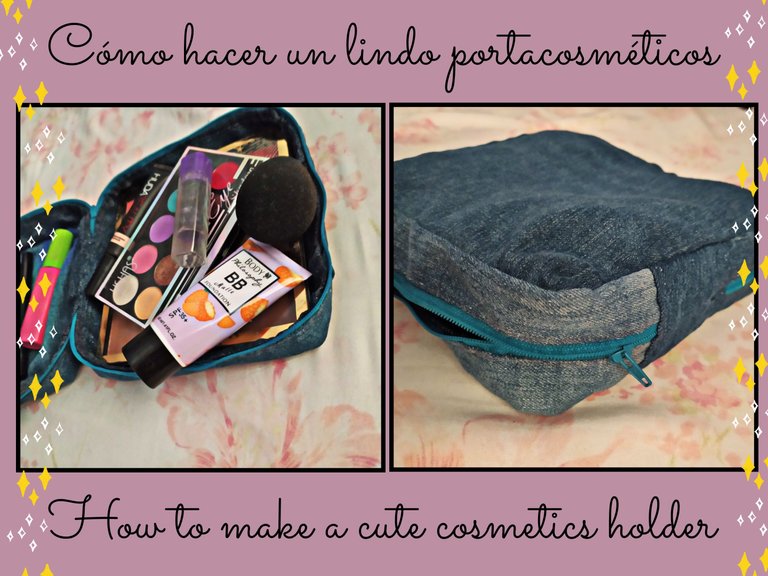
Feliz a domingo a todos, hoy quiero compartir con ustedes la elaboración de este lindo portacosméticos hecho con tela reciclada de un jeans viejo.
Los materiales que utilicé fueron:✂️
- Tela de jeans
- Cierre de 55 cm
- Tijeras
- Hilo y aguja de coser
- Alfileres
- Cartón y lápiz
Hello friends 🤍
Happy to Sunday everyone, today I want to share with you the elaboration of this cute cosmetic holder made with recycled fabric from an old jeans.
The materials I used were:✂️.
- Jeans fabric
- 55 cm zipper
- Scissors
- Sewing thread and needle
- Pins
- Cardboard and pencil
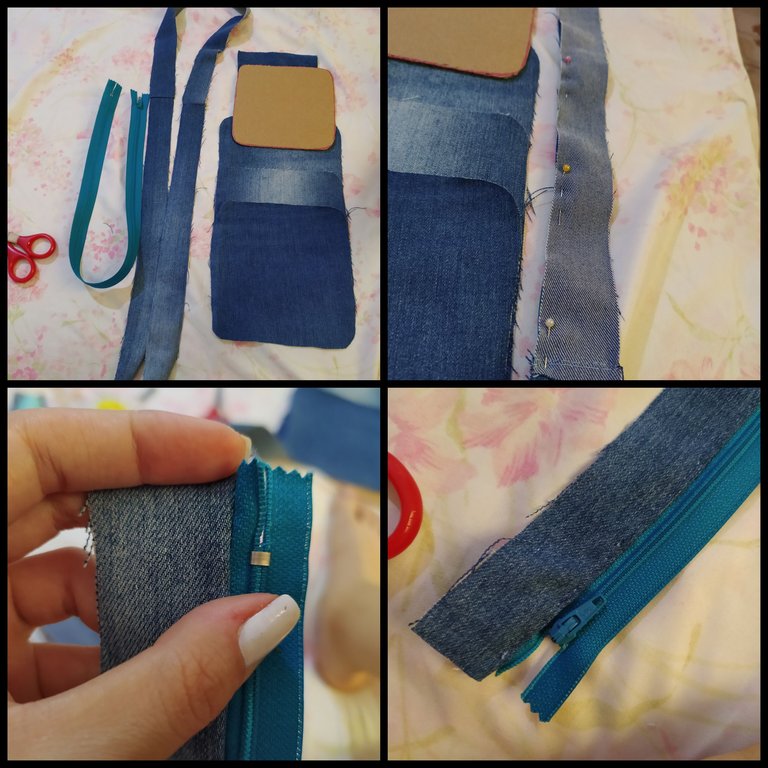
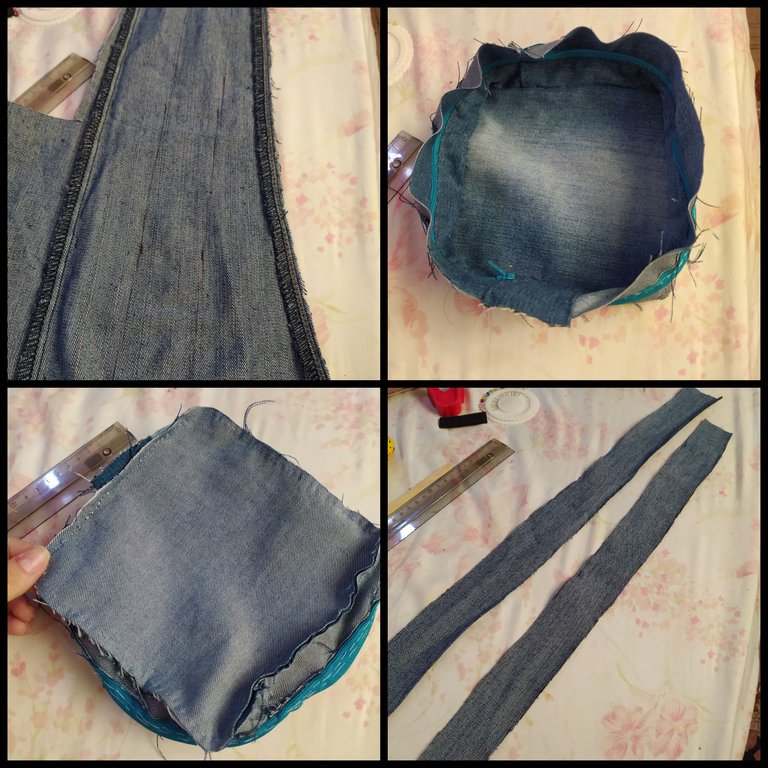
El primer paso es recortar en un papel o cartón el tamaño del rectángulo que quieran para su organizador y usarlo de patrón para sacar 4 piezas iguales en tela de jeans.
Mis medidas fueron 15 cm x 15 cm
También recortaremos 1 tira de tela del largo de la circunferencia de los cuadrados que serían 60 cm, la cual recortaremos a la mitad y le coseremos el cierre.
The first step is to cut out on a piece of paper or cardboard the size of the rectangle you want for your organizer and use it as a pattern to make 4 equal pieces out of denim.
My measurements were 15 cm x 15 cm
We will also cut out 1 strip of fabric the length of the circumference of the squares which would be 60 cm, which we will cut in half and sew the zipper.
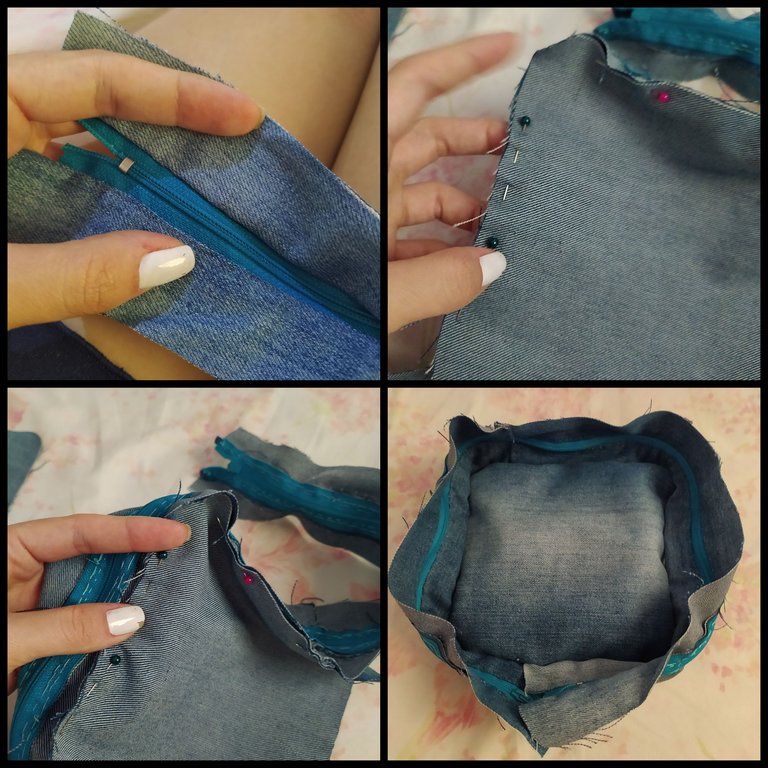
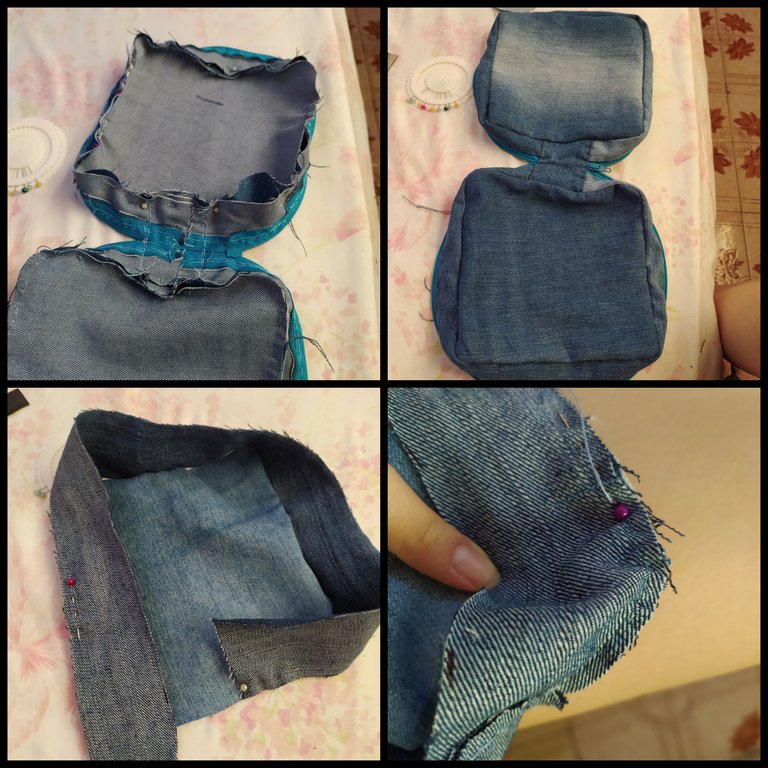
Luego de coser el cierre a la tira de tela, vamos a adaptarlo por todo el alrededor de uno de los cuadrados con alfileres.
After sewing the zipper to the fabric strip, we will adapt it all around one of the squares with pins.
Cosemos muy bien, y en la unión de los dos extremos del cierre coseremos un cuadro de tela que será la separación de una cara del organizador con la otra.
We sew very well, and at the junction of the two ends of the zipper we will sew a square of fabric that will be the separation of one side of the organizer with the other.
Repetimos el proceso de adaptar los alfileres y coser con otro cuadro de tela en el otro lado del cierre.
Y ahora recortaremos 2 tiras más de tela para hacer el forro que va por dentro.
Repeat the process of adapting the pins and sewing with another square of fabric on the other side of the zipper.
And now we will cut 2 more strips of fabric to make the lining that goes inside.
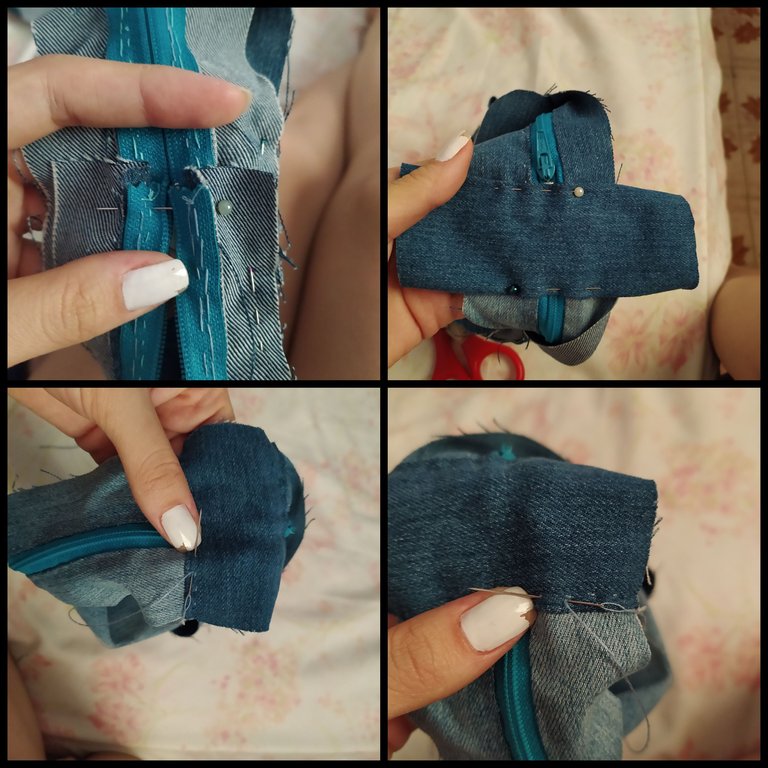
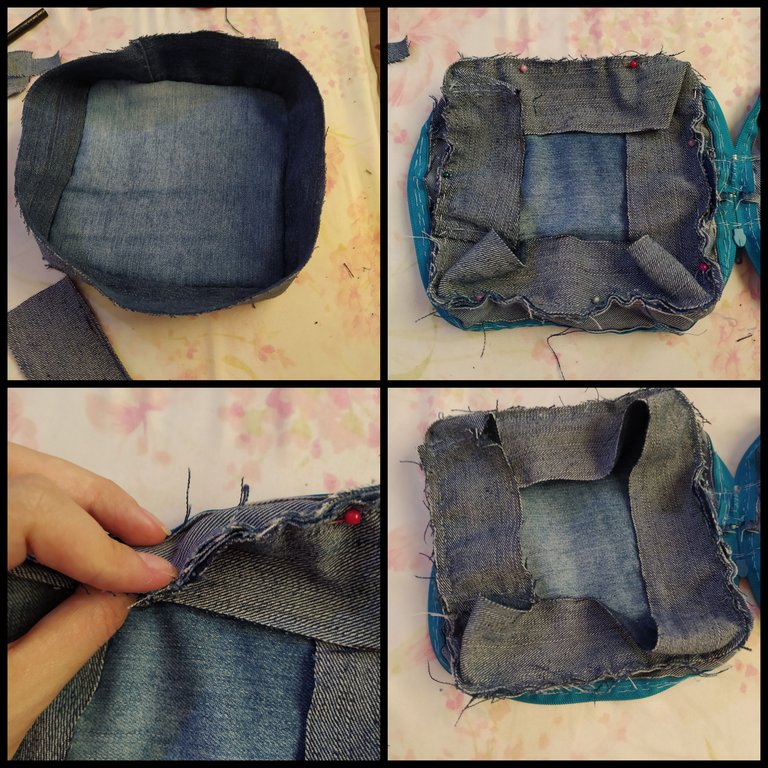
Para hacer el forro, repetimos el proceso anterior pero con la tira sin cierres y haremos dos caras, con los dos cuadros sobrantes y las dos tiras que habíamos recortado.
Y empezamos a coser por todo el alrededor revés con revés como se muestra en la foto.
To make the lining, we repeat the previous process but with the strip without fasteners and we will make two sides, with the two leftover squares and the two strips we had cut out.
And we start sewing all around back to back as shown in the photo.
Doblamos la tira hacia dentro del cierre tapando las costuras visibles y empezamos a dar puntadas muy pequeñas para que no se noten a simple vista.
Fold the strip inside the zipper covering the visible seams and start stitching very small stitches so that they are not visible to the naked eye.
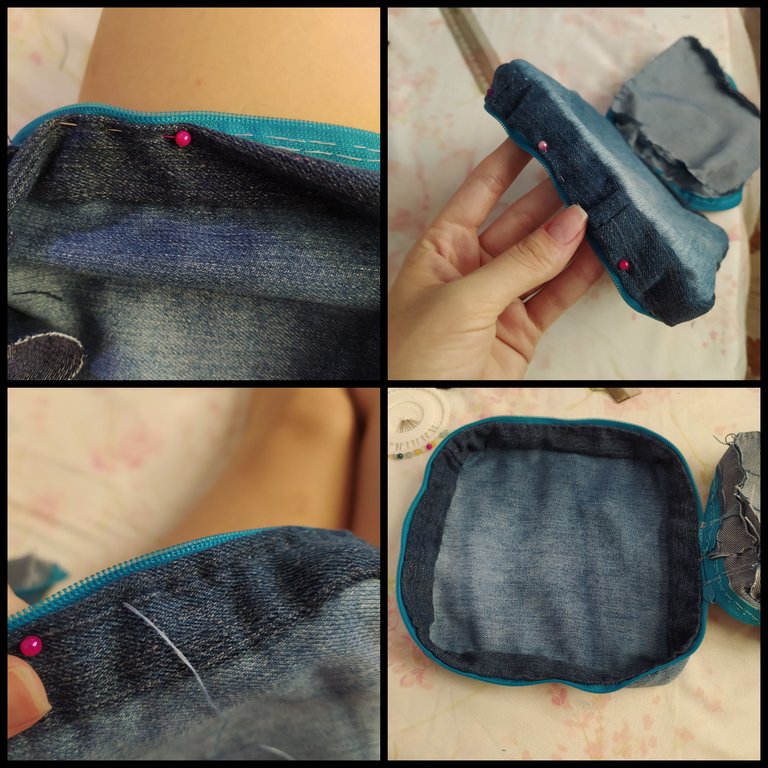
Finalmente, repetimos el proceso del otro lado con el otro forro que habíamos elaborado y listo💫
Finally, we repeat the process on the other side with the other lining we had made and that's it💫.
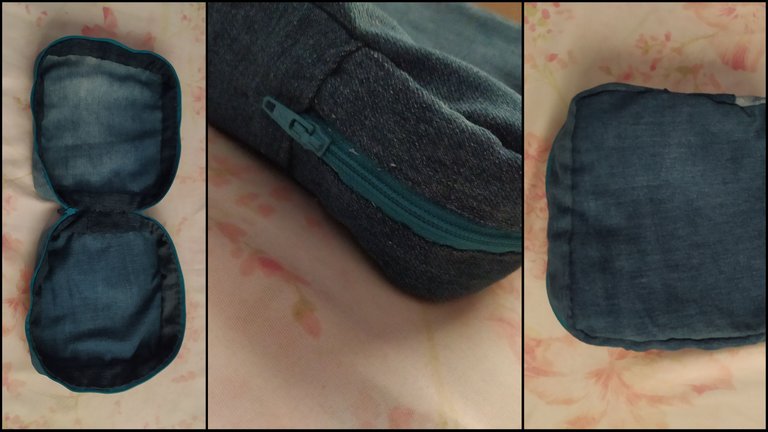
Este fue el resultado.
Espero les guste y se animen a elaborar uno para sus maquillajes🤍💄
Hasta la próxima!✂️
This was the result.
I hope you like it and I encourage you to make one for your makeup🤍💄.
See you next time!✂️.
✂️🤍✂️🤍✂️🤍✂️🤍✂️🤍✂️🤍
Traducido con DeepL
Fotos editadas con PicsArt App
Fotografías tomadas con mi Redmi Note 8
Translated with DeepL
Photos edited with PicsArt App
Photographs taken with my Redmi Note 8
The rewards earned on this comment will go directly to the person sharing the post on Twitter as long as they are registered with @poshtoken. Sign up at https://hiveposh.com.
Congratulations @emybaby! You received a personal badge!
You can view your badges on your board and compare yourself to others in the Ranking
Check out the last post from @hivebuzz: