
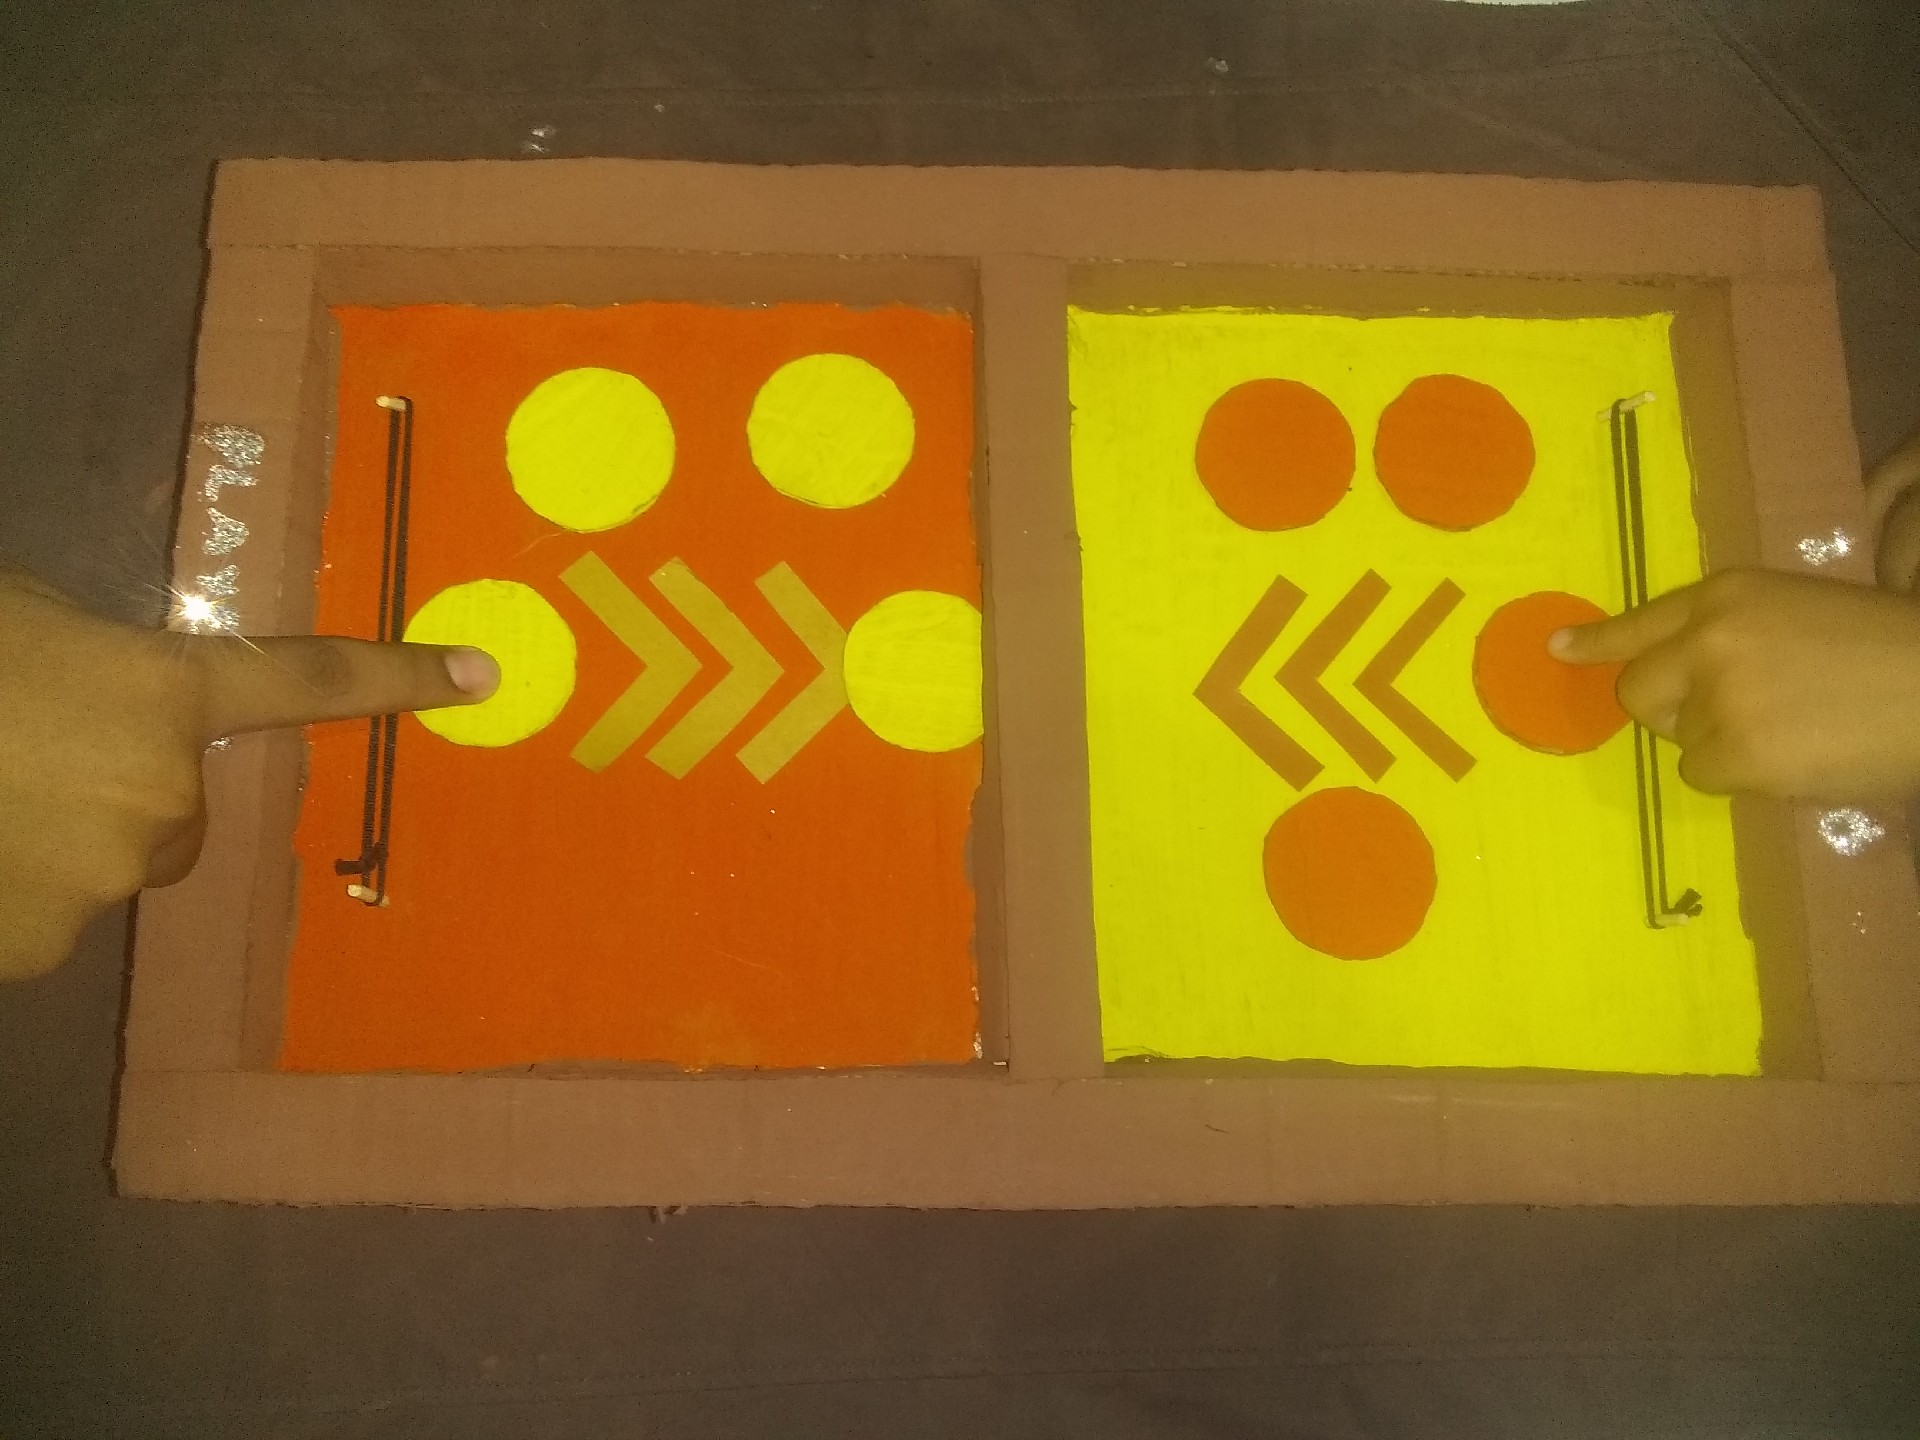
Hello everyone, I hope you have an excellent day and I'm here again after two months away I had to leave urgently to another state and I'm back home. Today I bring you one of my creative activities that I like to do with much affection for you a step by step pucket board game made with cardboard for two players is very fun and easy to play is to compete with the other player passing the circles through the holes in the center is very entertaining. It can also be played by the children of the house. Here are the materials for its elaboration.
Hola a todos, espero y tenga un excelente día nuevamente estoy poraqui después de dos meses ausente tuve que salir de urgencia a otro estado ya estoy en mi hogar. El día de hoy les traigo una de mis actividades creativas que me gusta hacer con mucho cariño para ustedes un paso a paso de un juego de mesa pucket realizado con cartón para dos jugadores es muy divertido y fácil de jugar se trata de competir con el otro jugador pasando los círculos por el agujeros del centro es muy entretenido. También pueden jugar los niños de la casa. A continuación estos son los materiales de su elaboración.
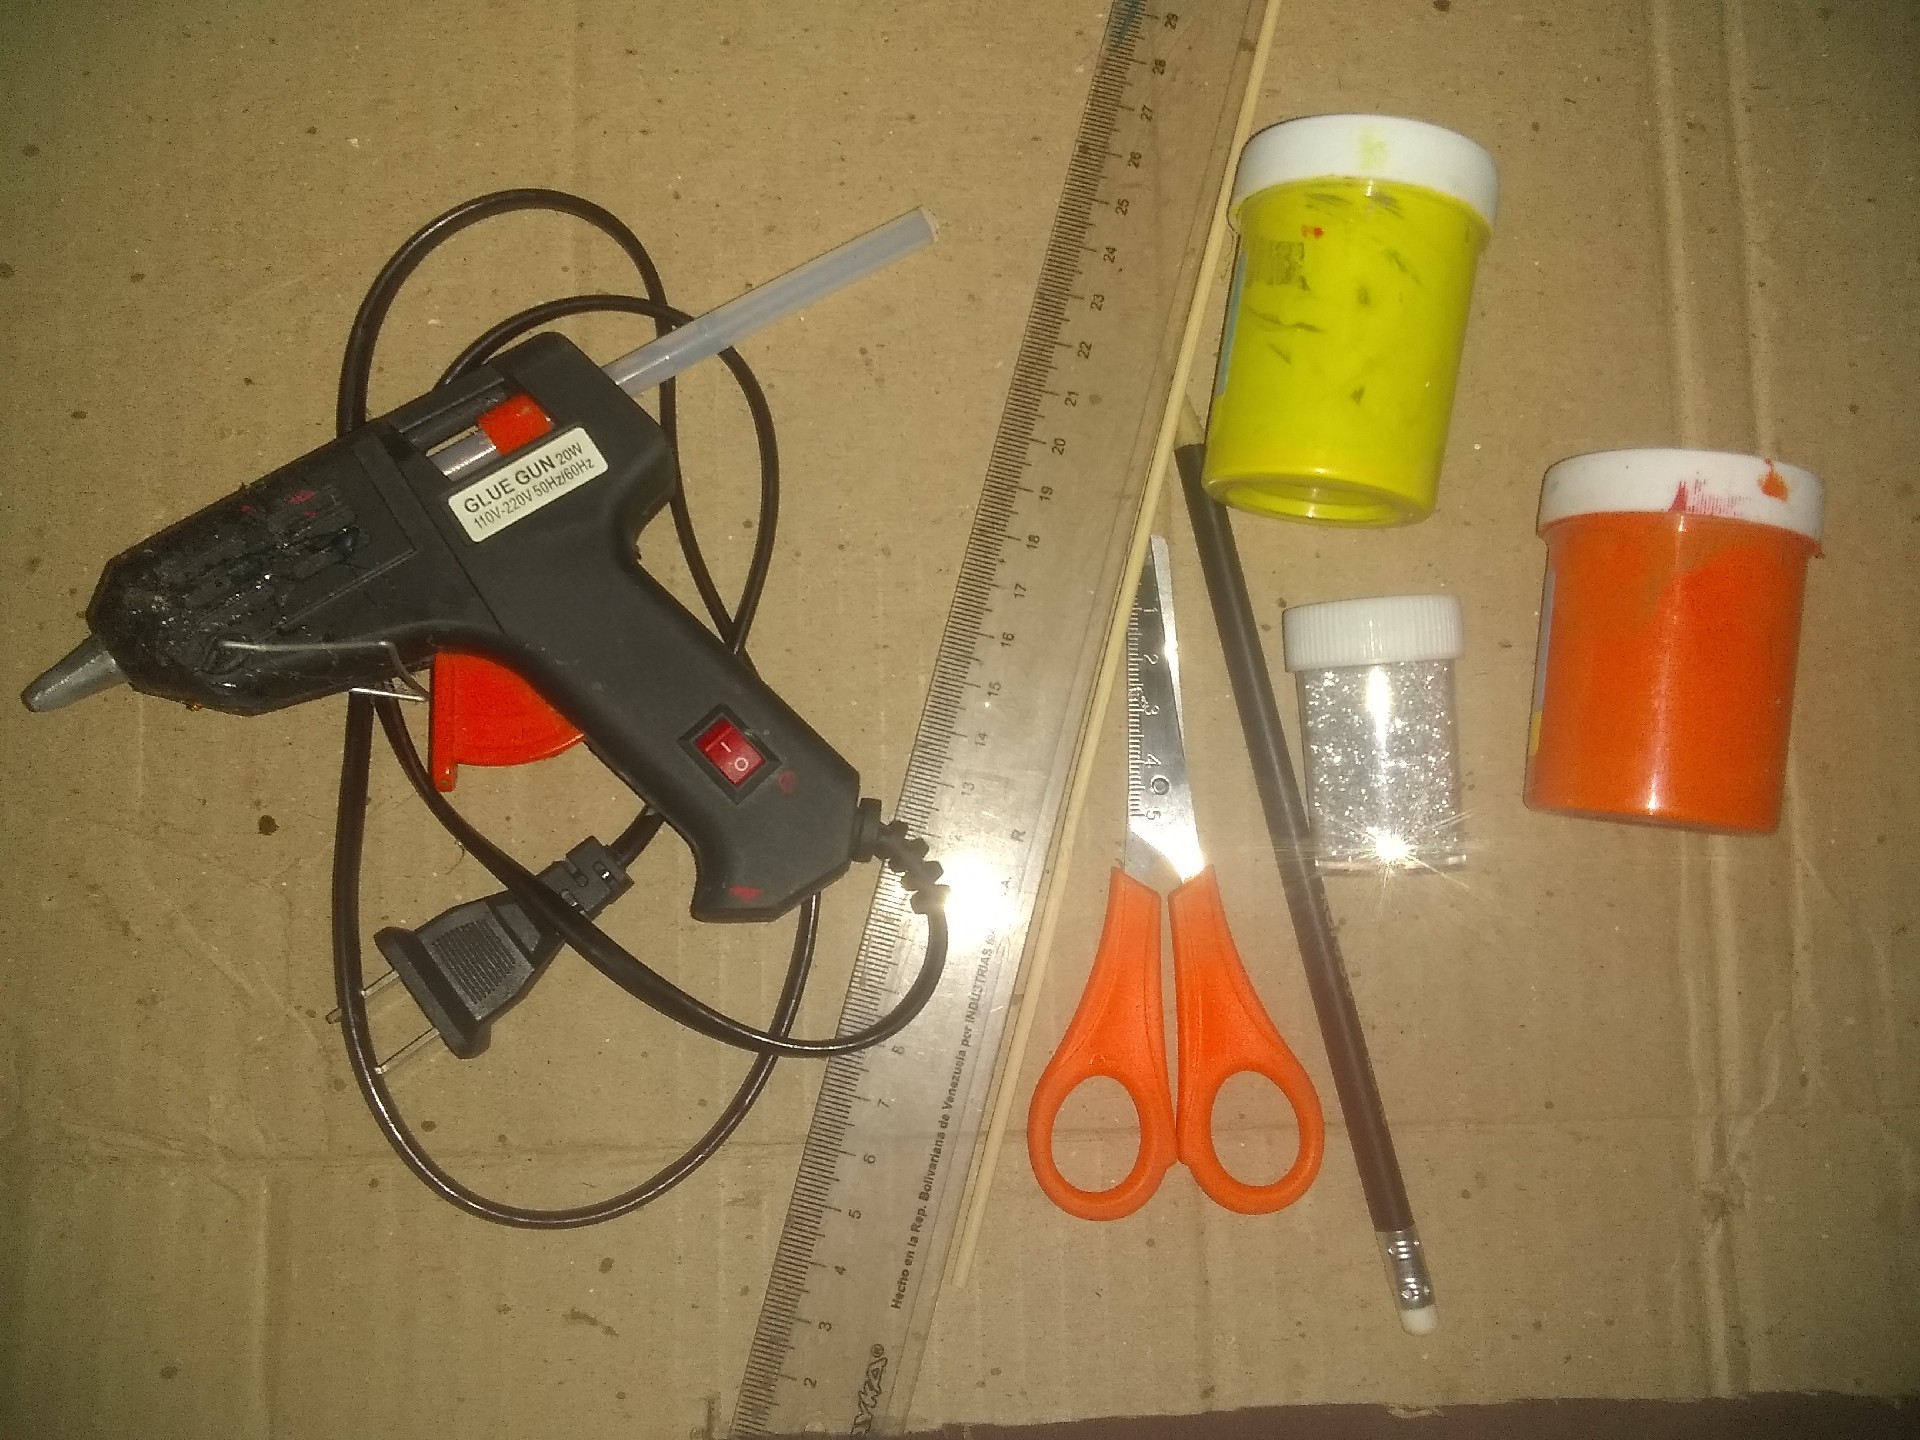
Materials.
Materiales.
- Cardboard
- 3 acrylic paint
- Brushes
- Pencil
- Scissors
- Silicone gun
- Ruler
- Shine paper
- Toothpick
- Elastic band
- Glitter or glitter.
- Cartón
- 3 pintura acrílica
- Pinceles
- Lápiz
- Tijera
- Pistola de silicón
- Regla
- Papel lustrillo
- Palillo
- Liga elástica
- Brillo o Purpurina.
Step by step.
Paso a paso.
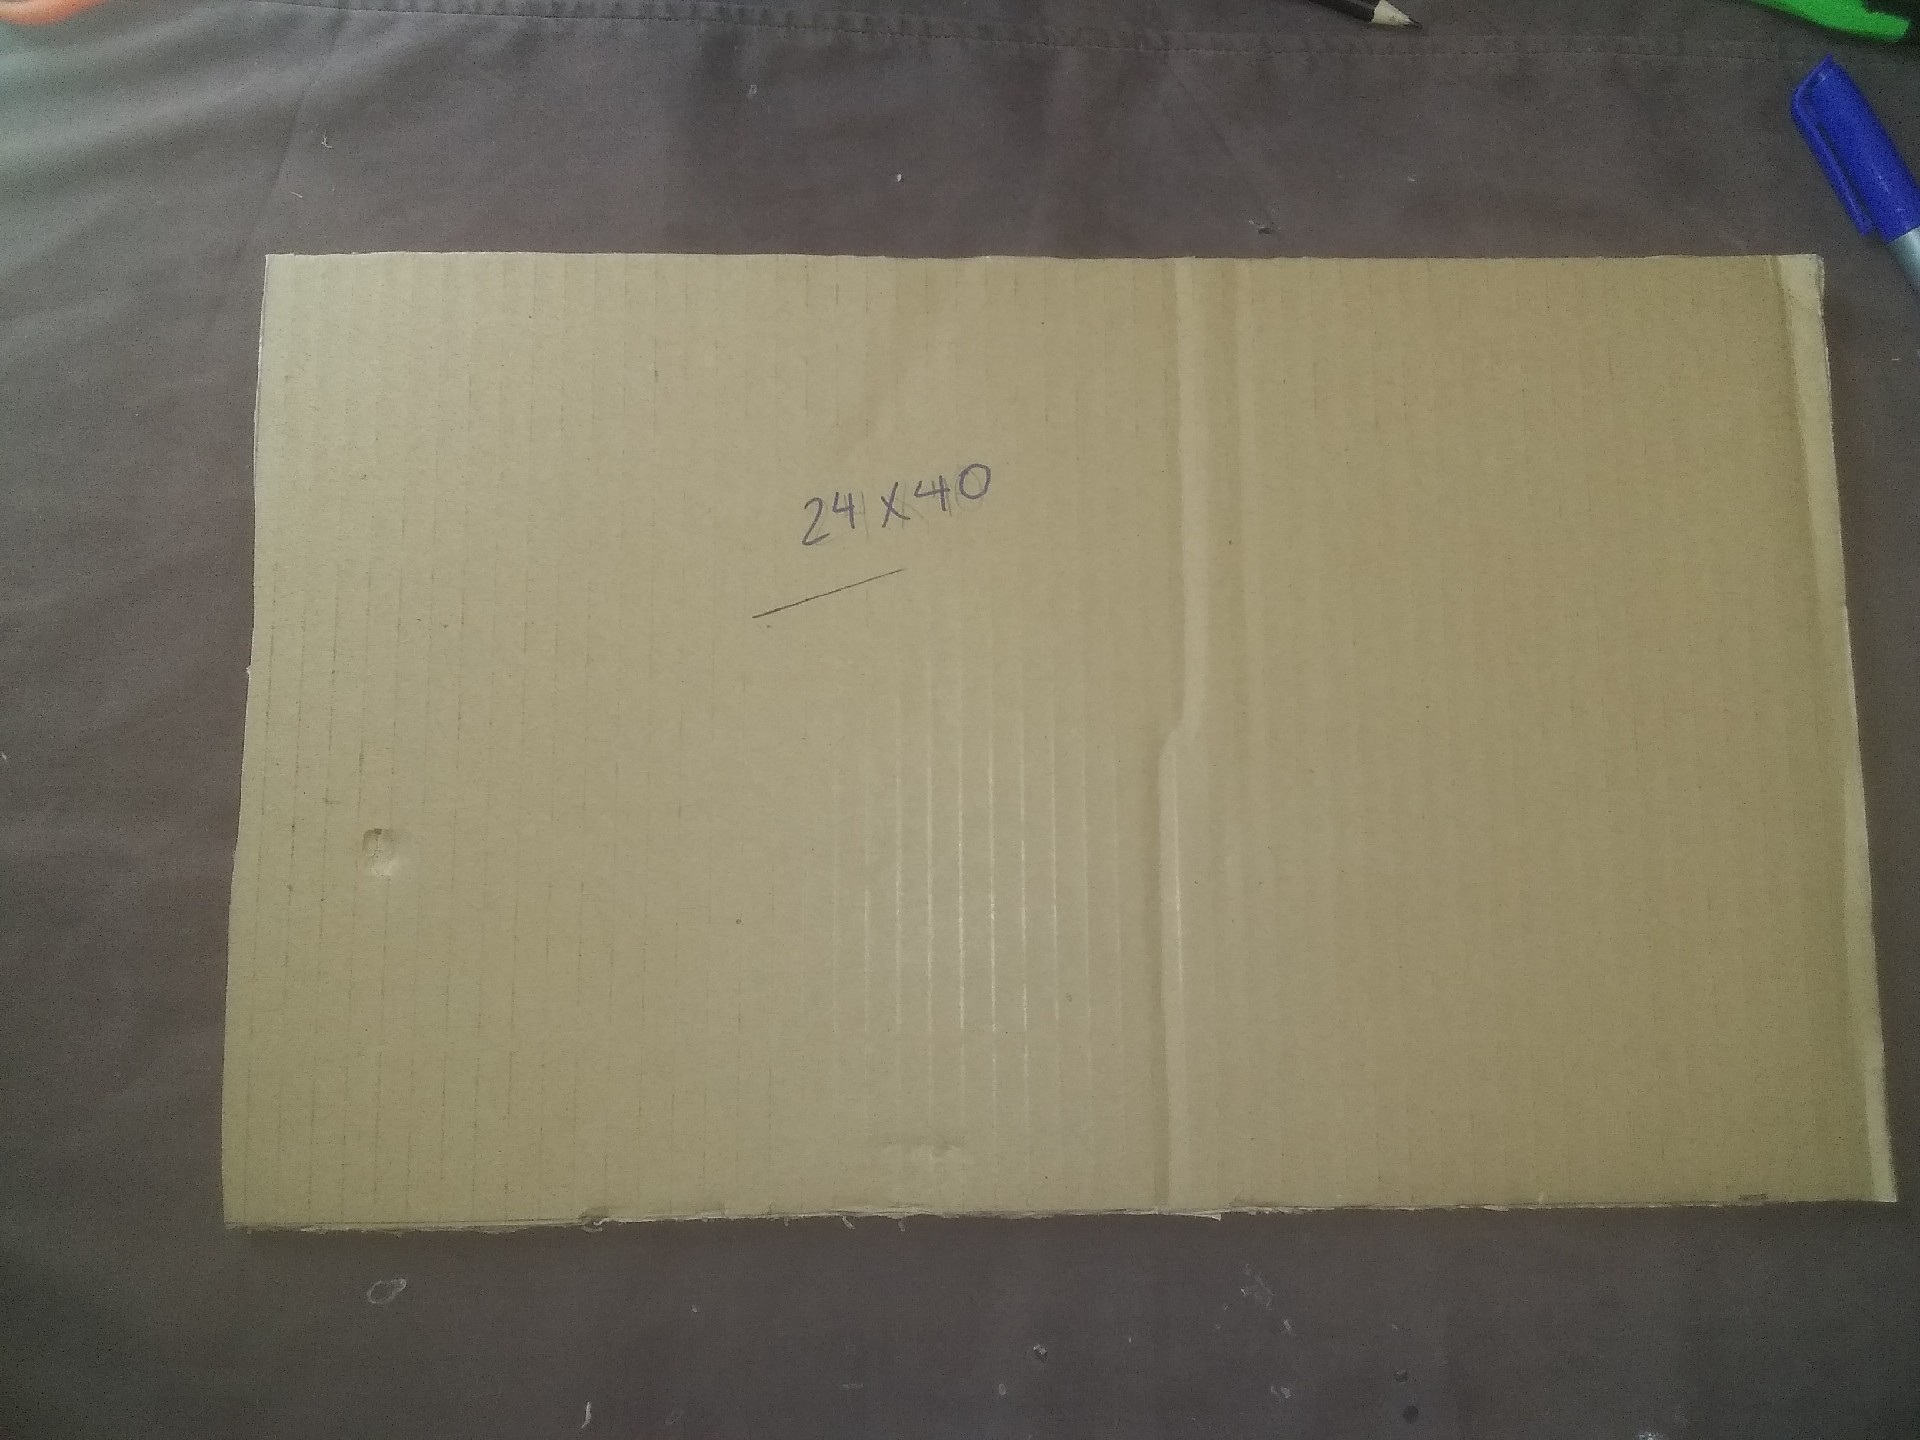
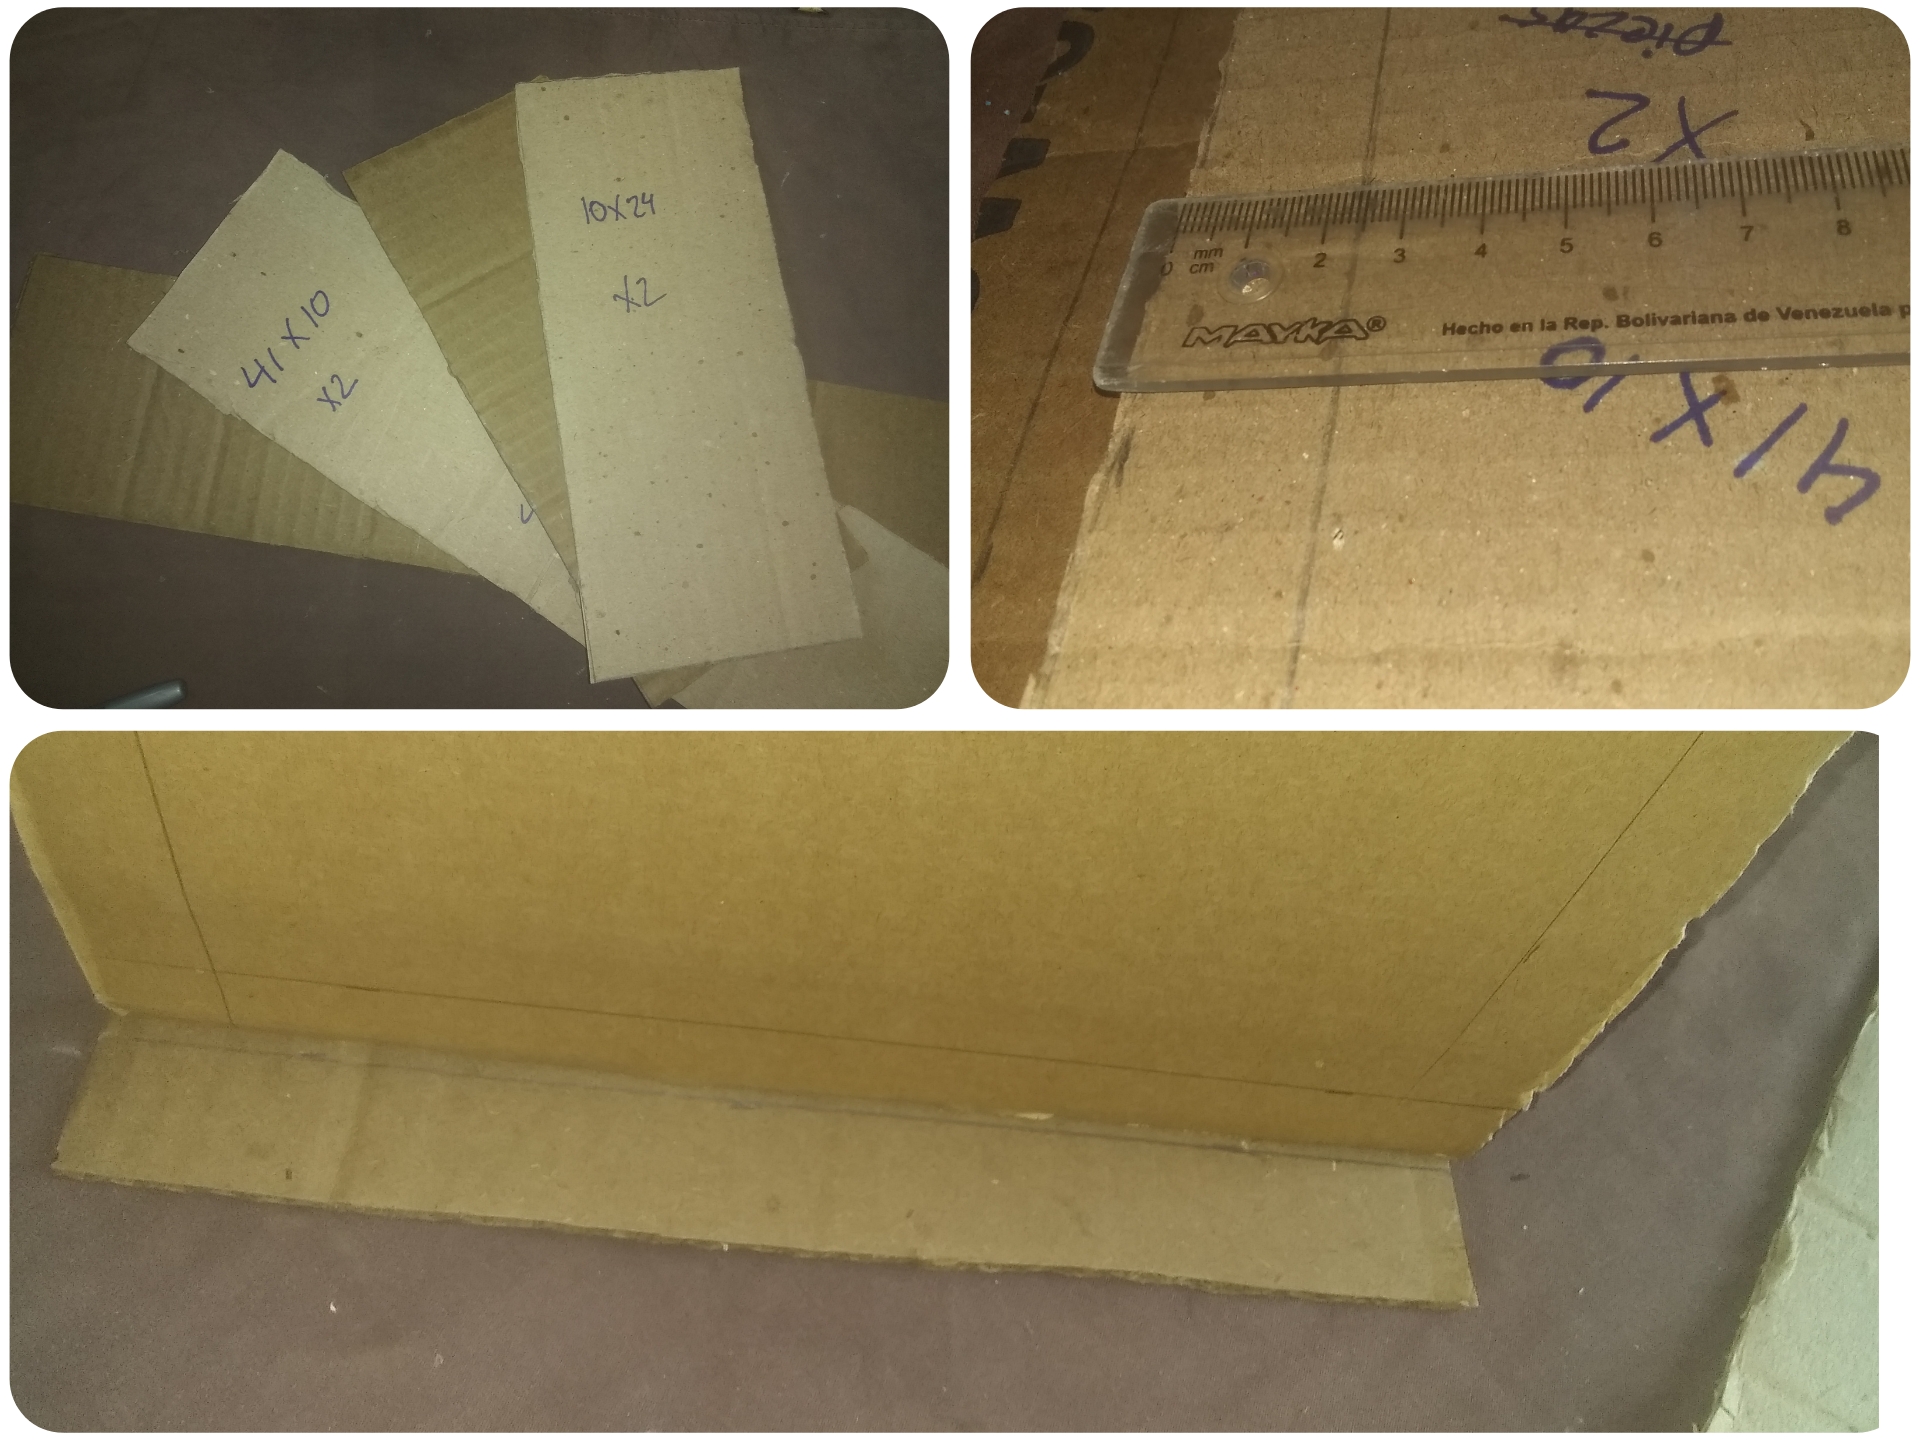
✓To make the pucket table set cut a piece of cardboard with the help of the ruler of 24x40 cm, or any size of your preference for the sides we will make a cardboard cut two of 10x24cm, and two of 10x41 cm, attention leave each cardboard 2.5 cm, glue with hot silicone the base and sides. Leaving a space of 2.5 cm at the top.
✓ Para hacer el juego de mesa pucket corta un trozo de cartón con la ayuda de la regla de 24x40 cm, o de cualquier tamaño de su preferencia para los laterales haremos unos corte de cartón dos de 10x24cm, y dos de 10x41 cm, atención deja a cada cartón 2,5 cm, pegamos con silicón caliente la base y los laterales. Quedando en la parte superior un espacio de 2.5 cm.

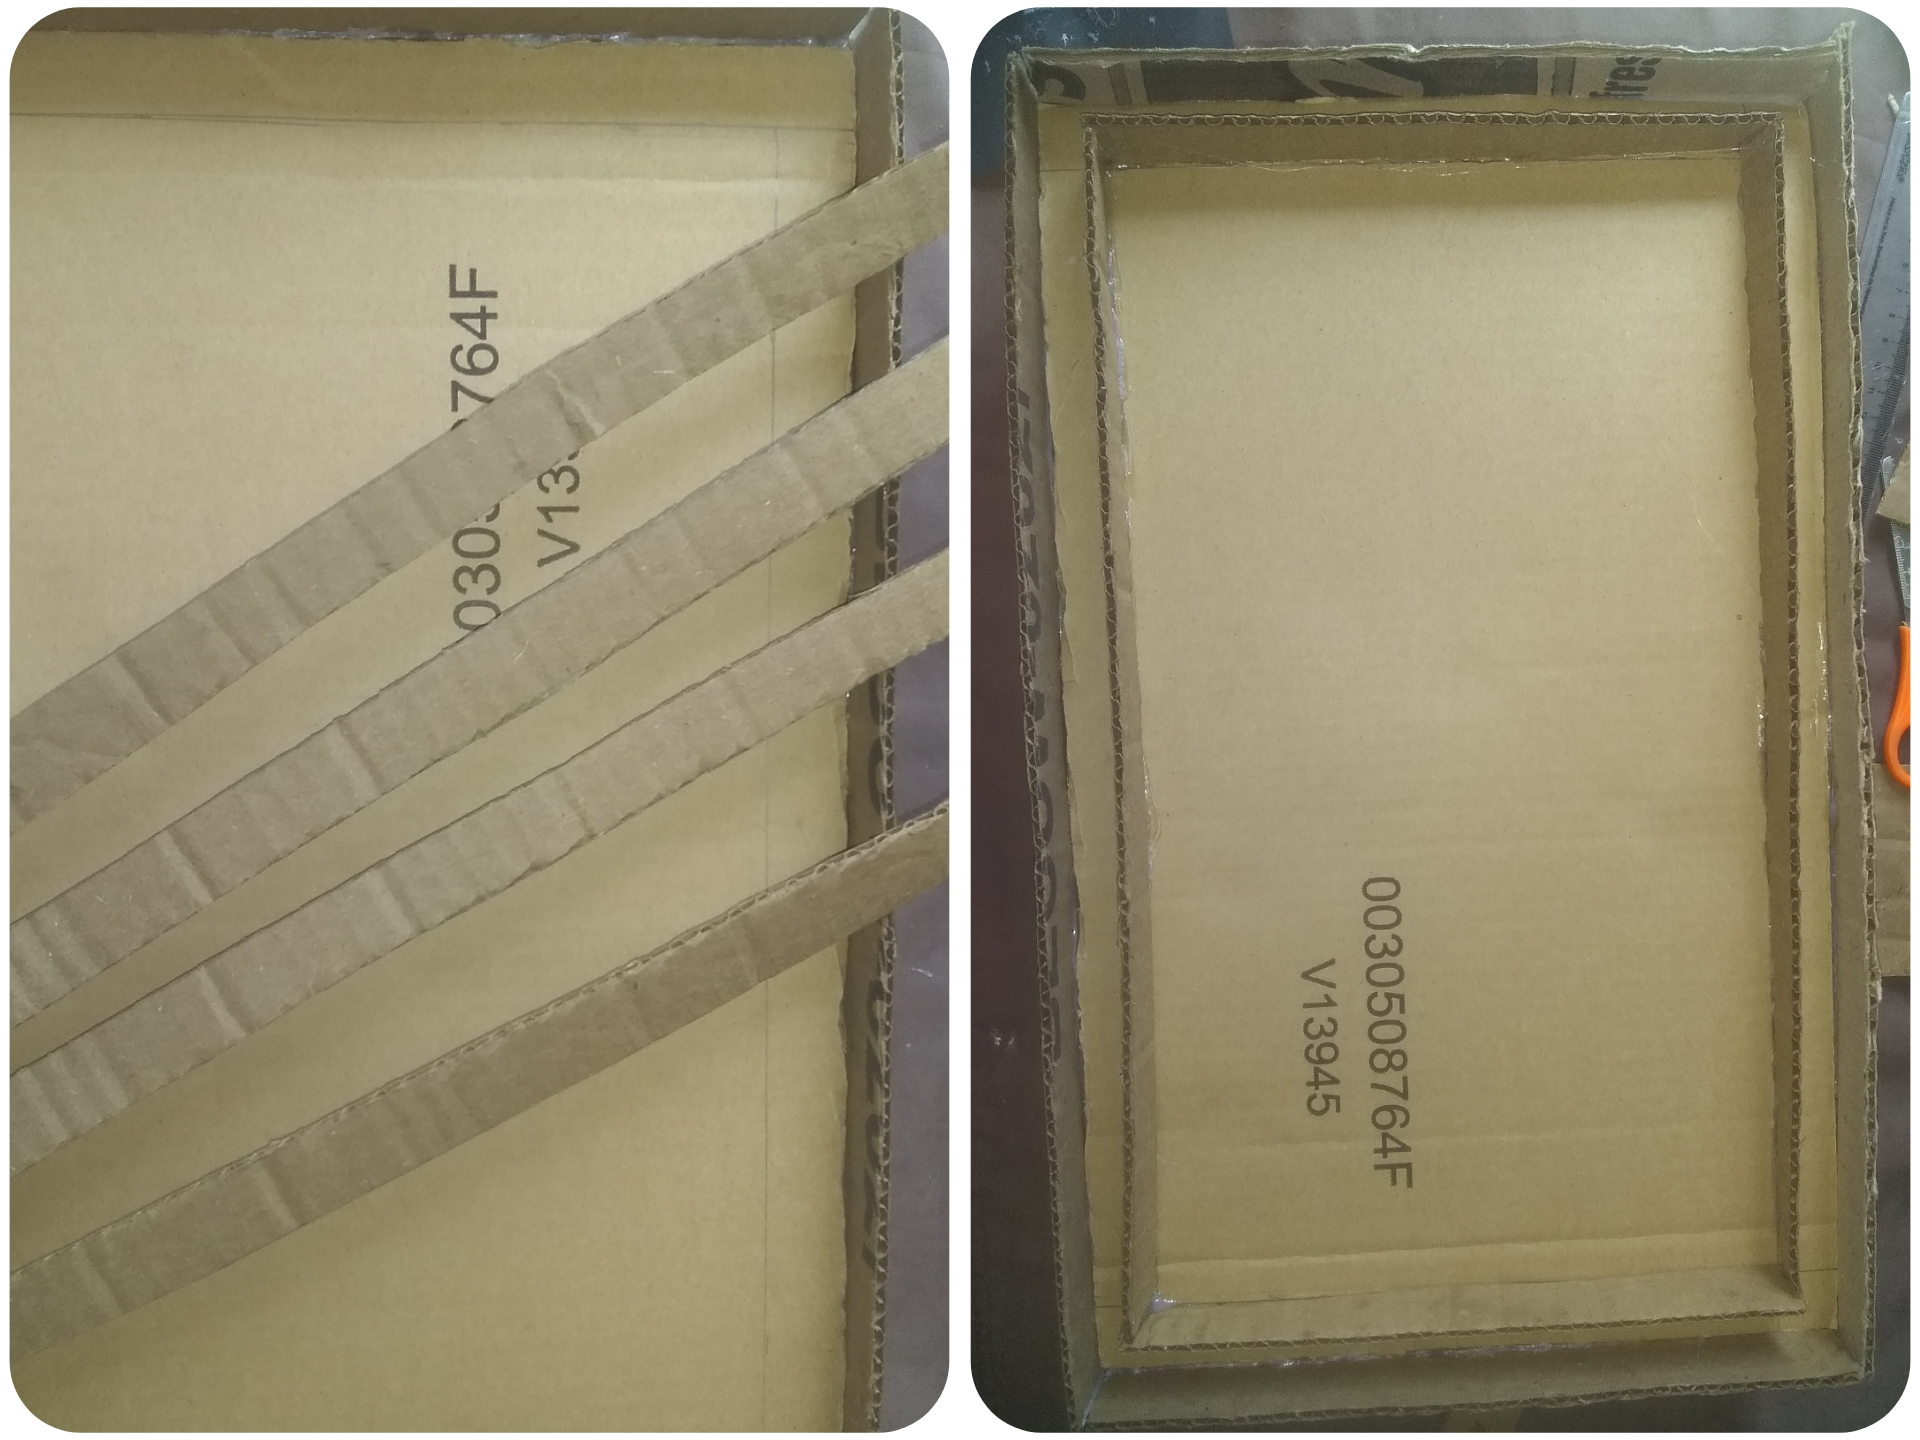
✓ The next step is to cut strips of 2 cm, and glue inside the base leaving 2 cm of space. Cut again strips of 2.5 x 41 cm and glue on top and it will look like a frame. For the division of the center cut three pieces of cardboard in this case is 20x2 cm and two of them will make two doors in the center for the passage of the circles and glue with silicone in the center.
✓ El siguiente paso es corta tiras de 2 cm, y pegamos dentro de la base dejando 2 cm, de espacio. Corta nuevamente tiras de 2.5 x 41 cm y pegamos en la parte superior y quedará como un marco. Para la división del centro corta tres trozo de cartón en este caso es 20x2 cm y dos de ellos haremos dos puertas en el centro para el paso de los círculos y pegamos con silicón en el centro.

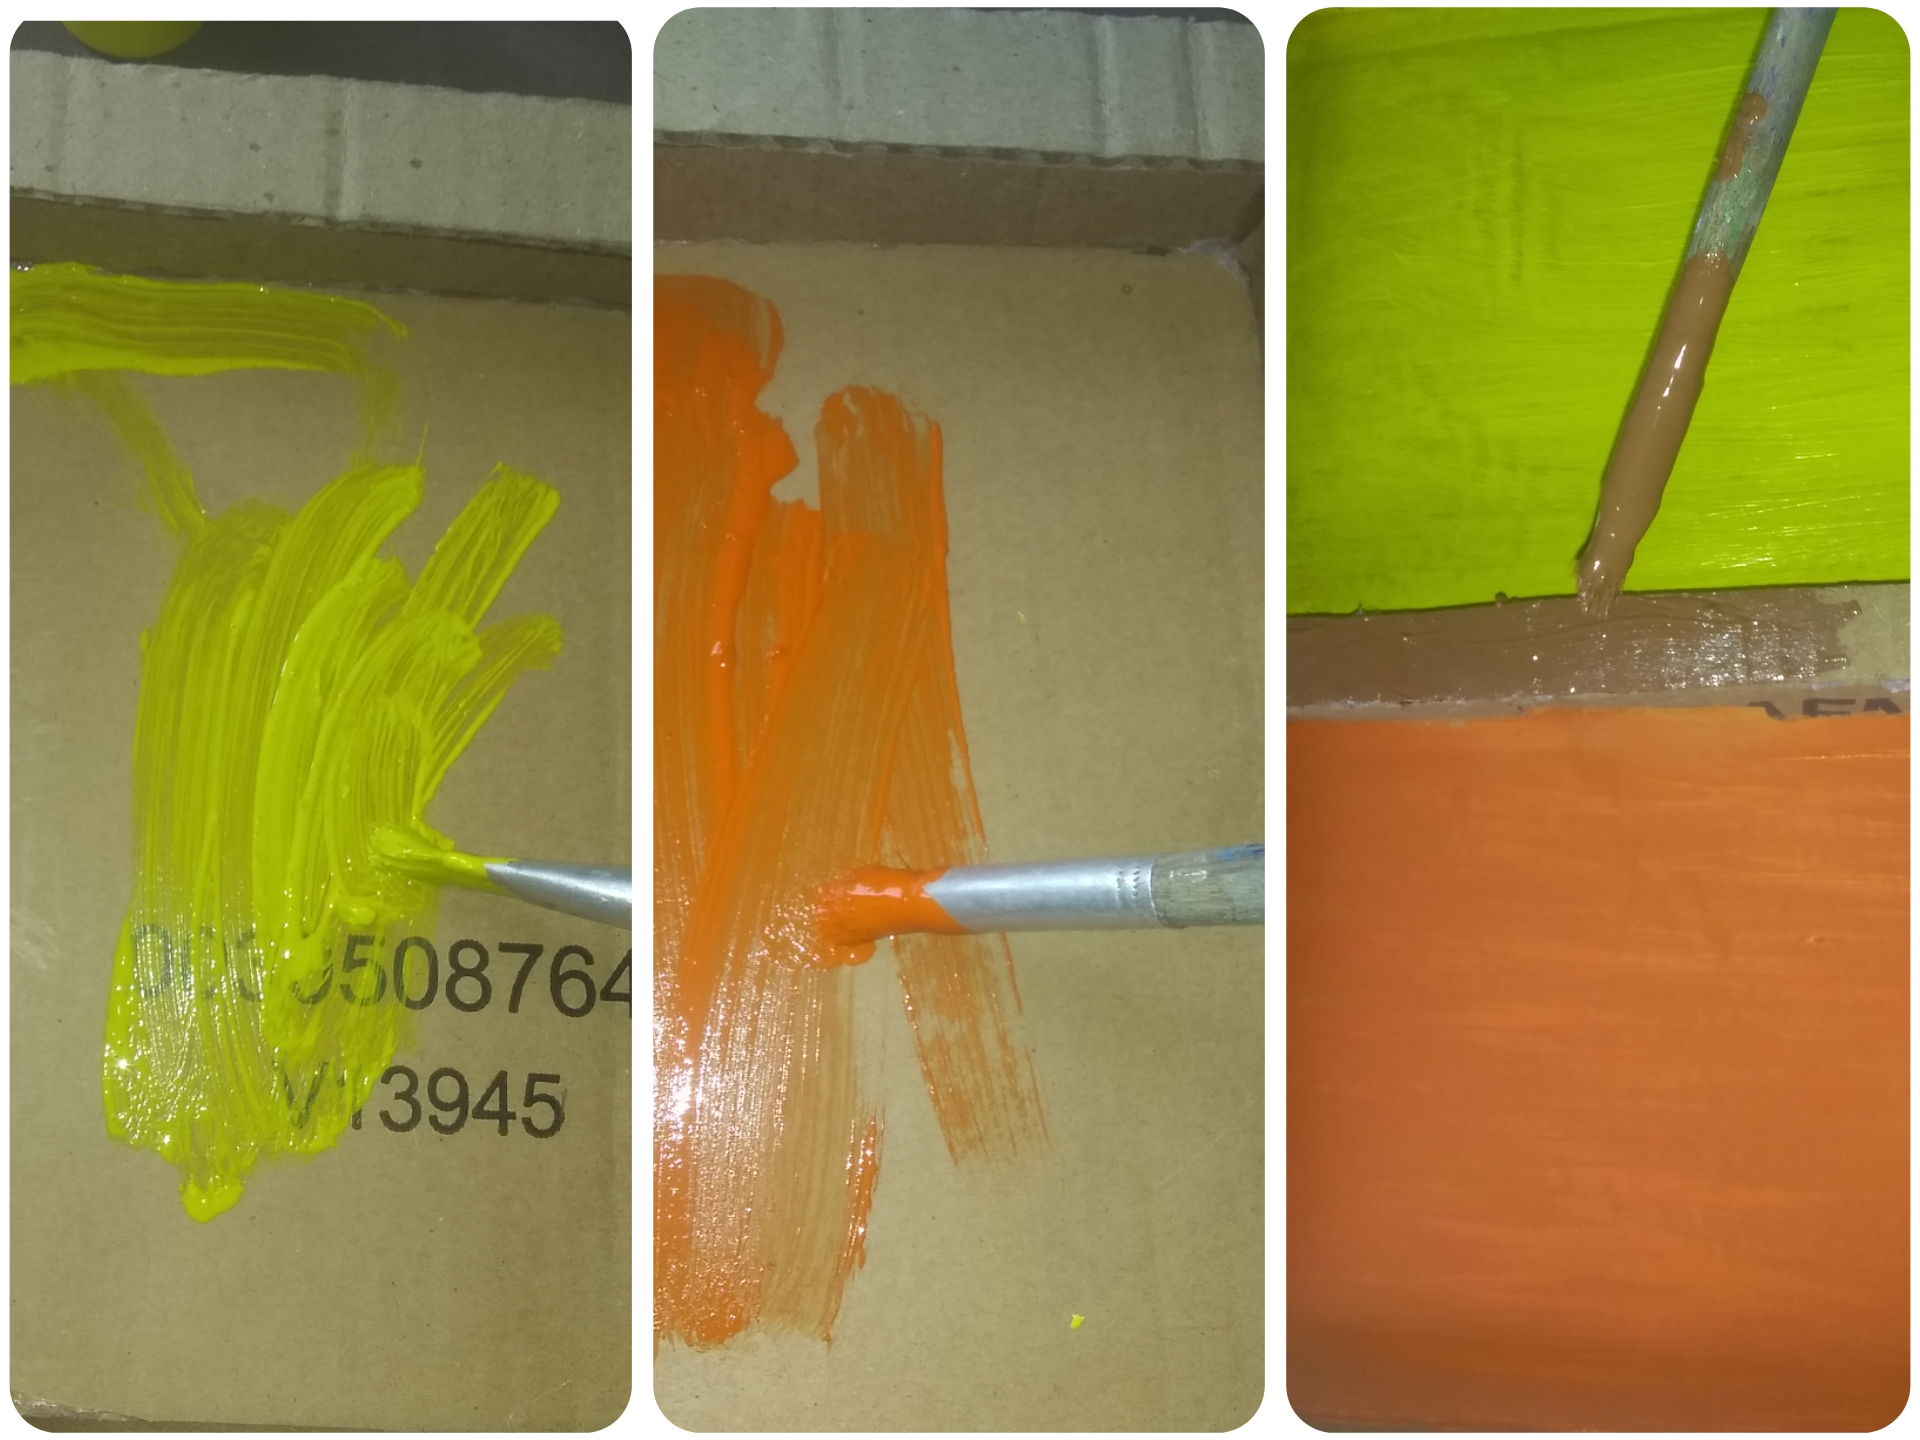
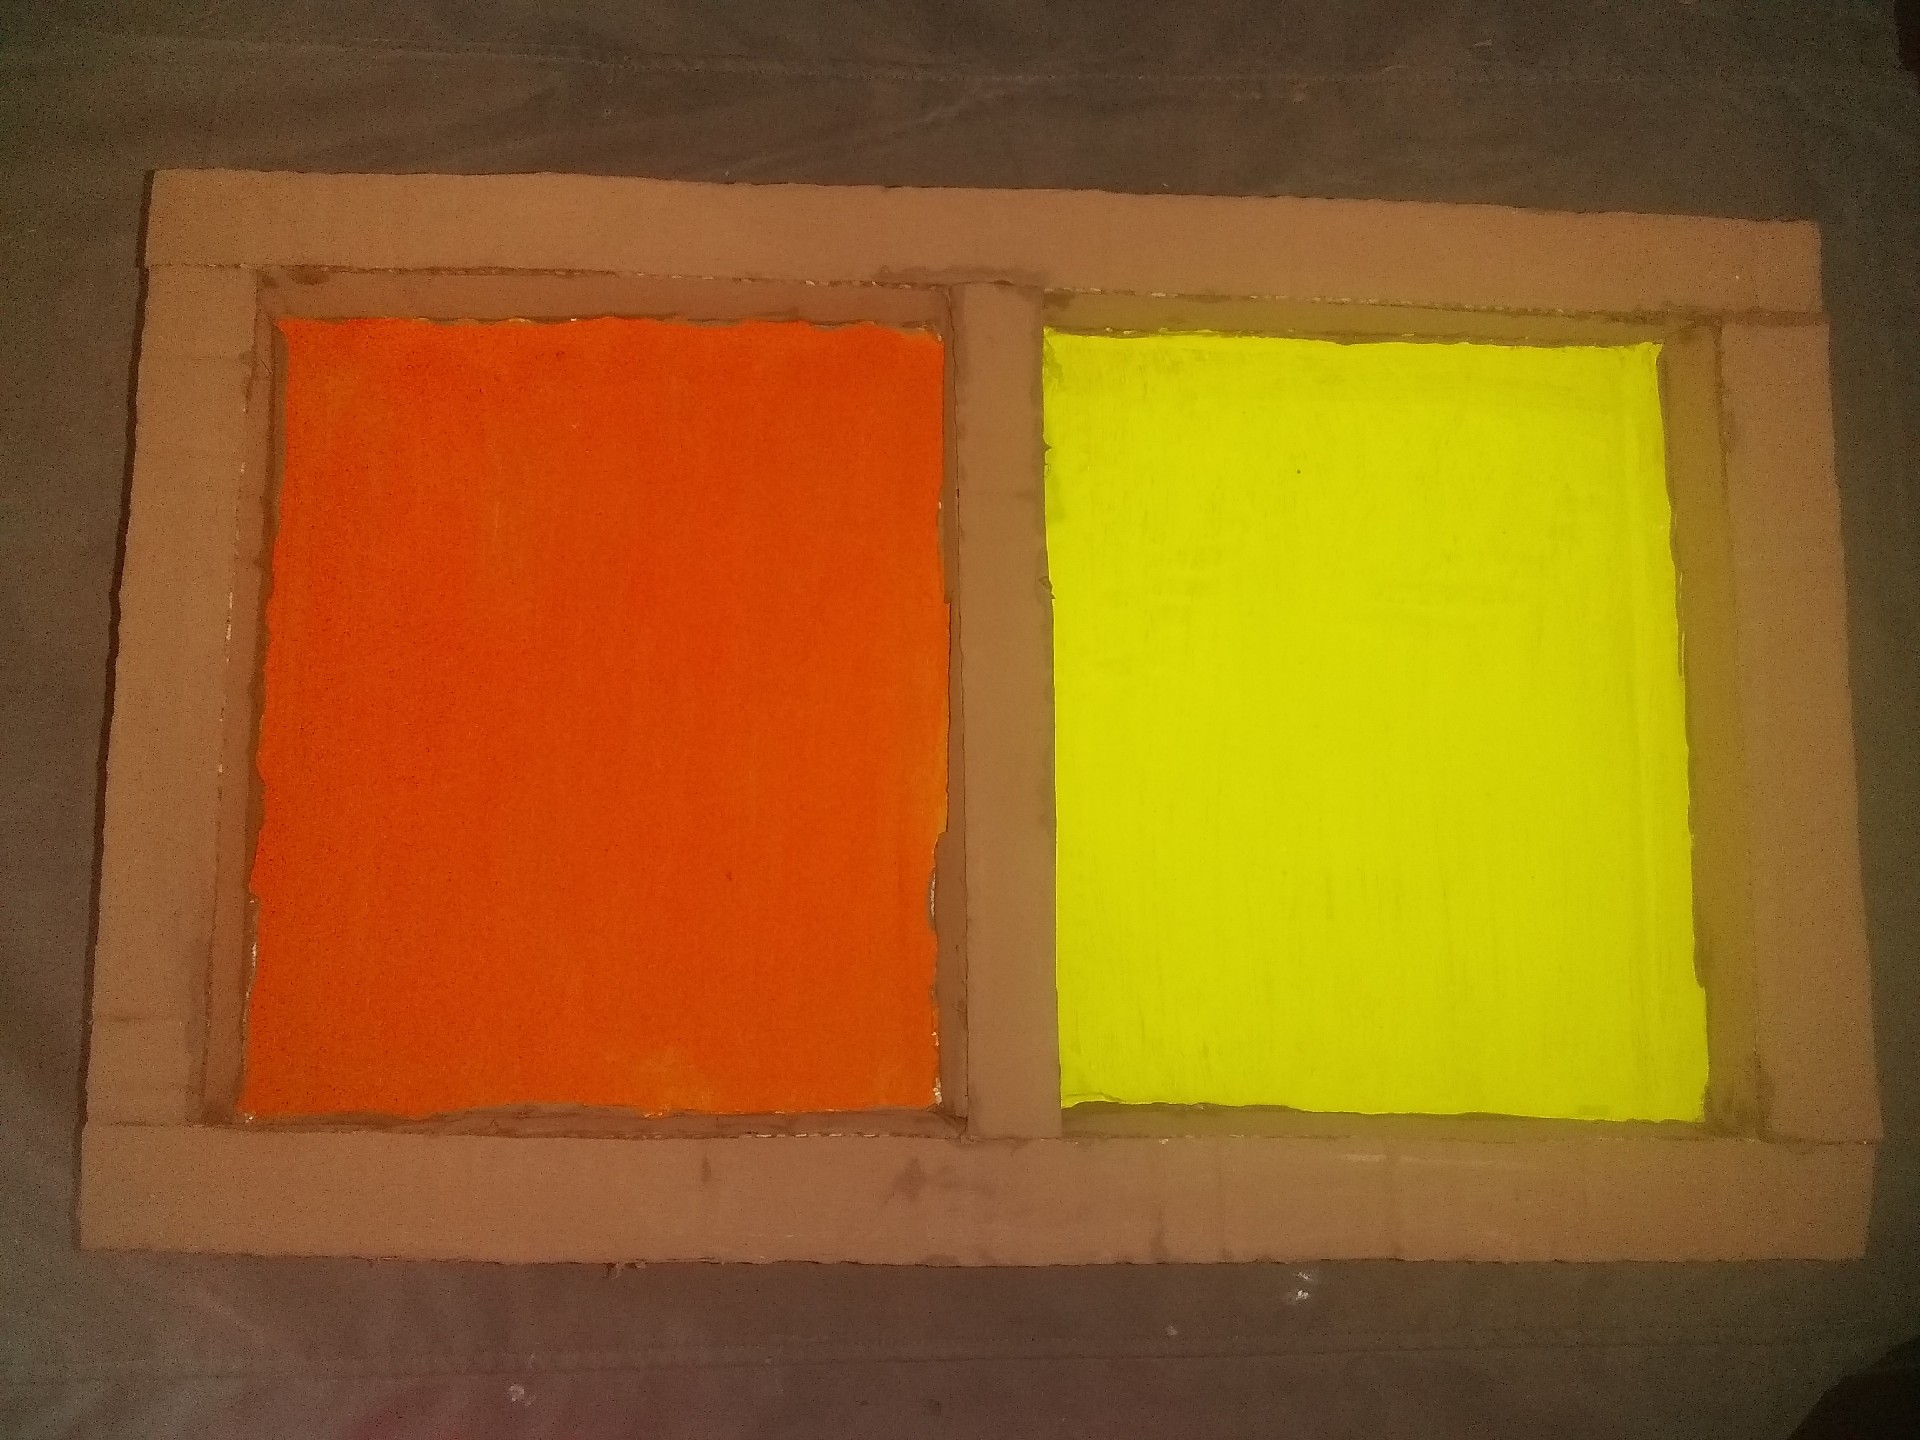
✓ Once the previous step is finished we paint and let dry.
✓ Una vez terminado el paso anterior pintamos y dejamos secar.
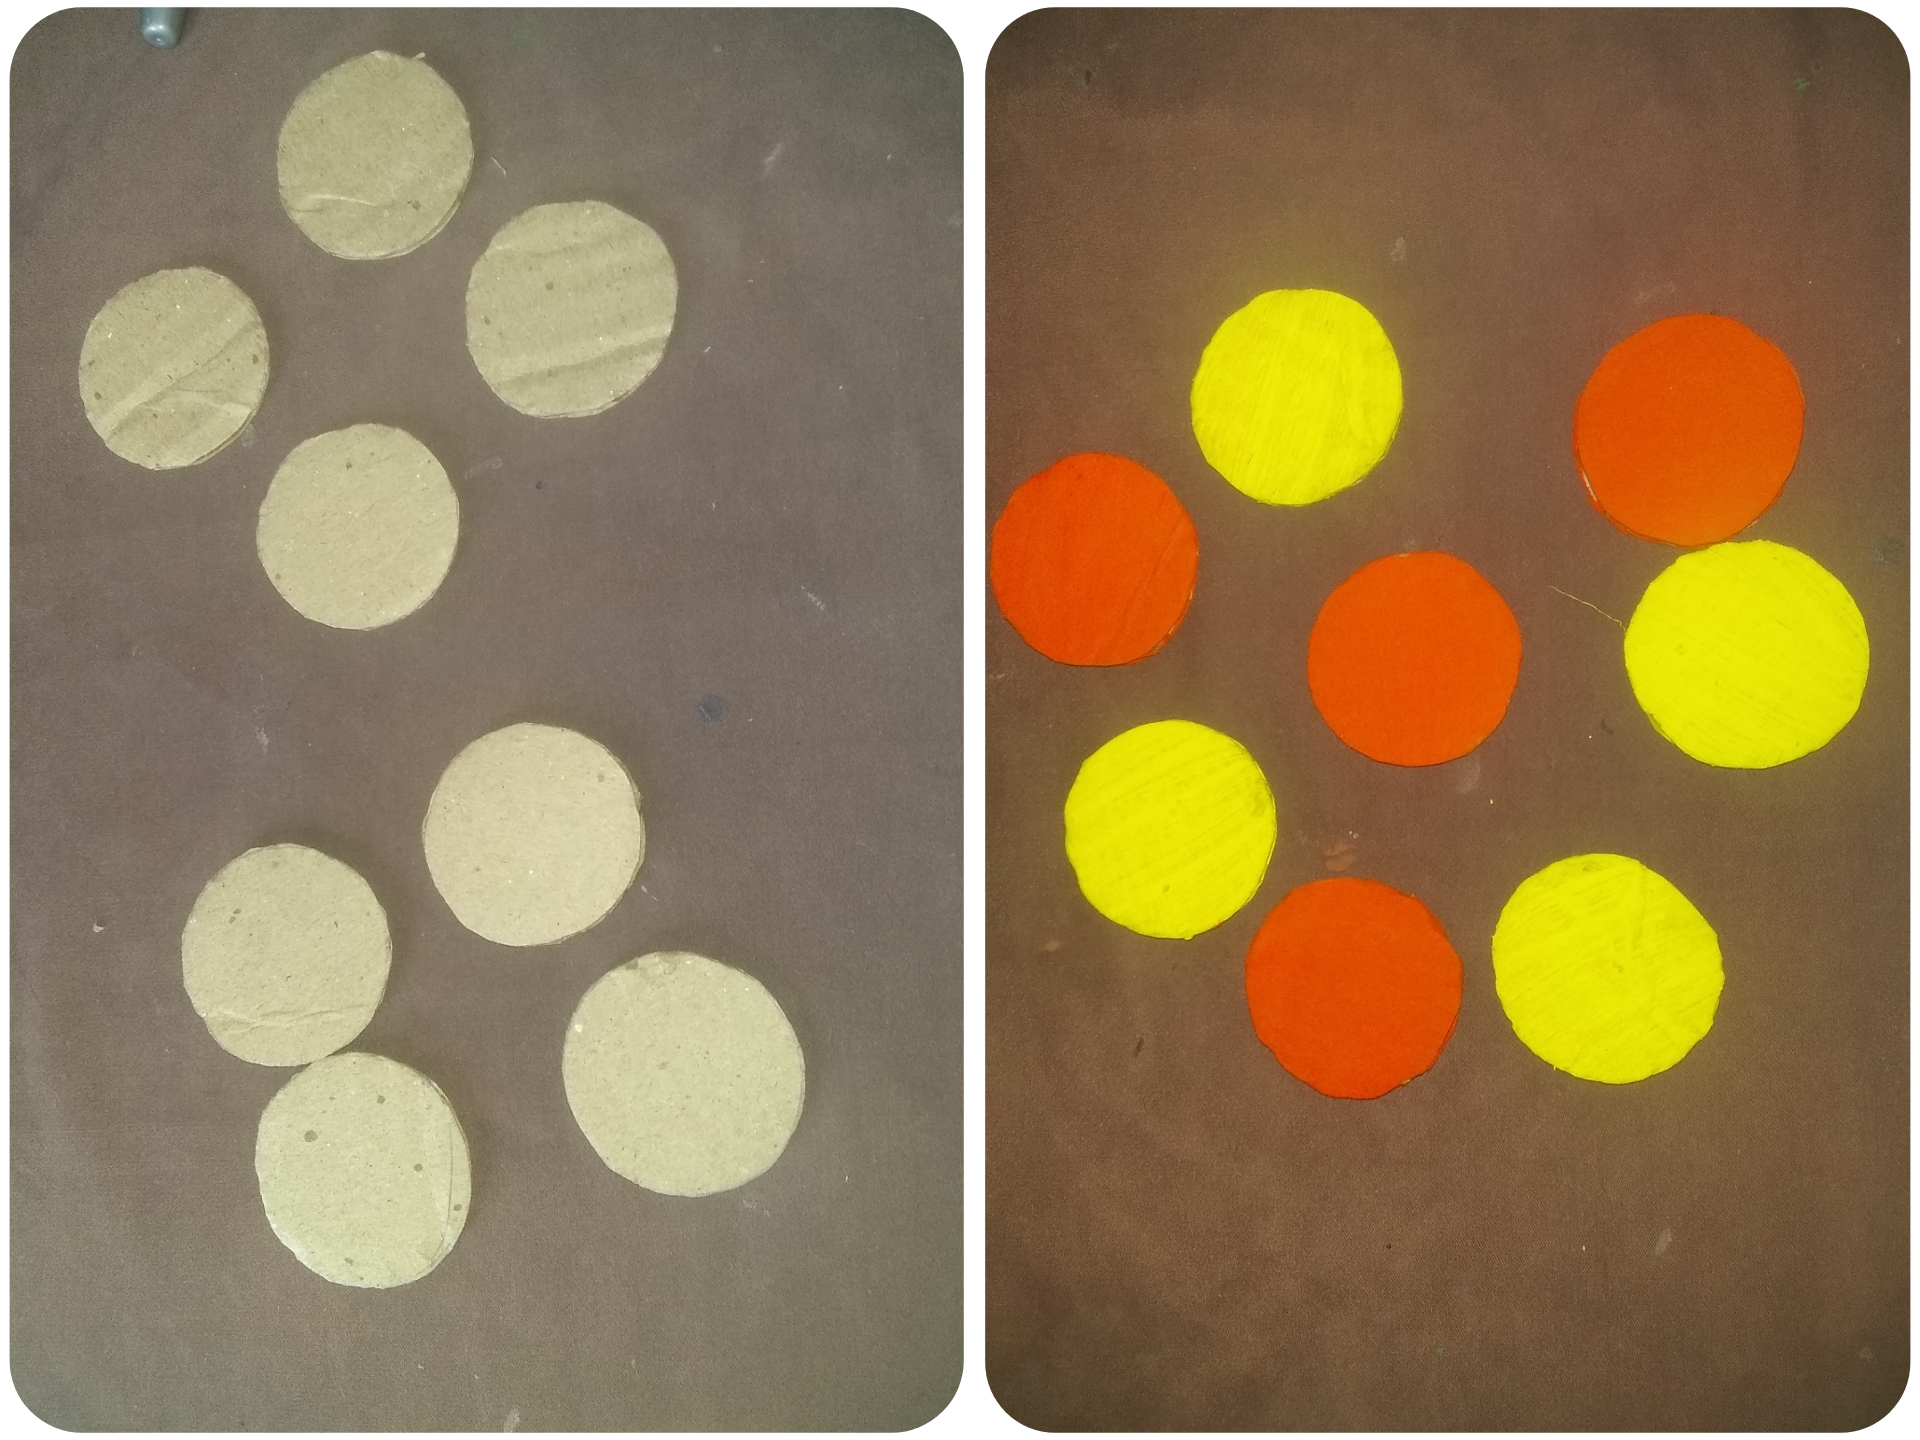
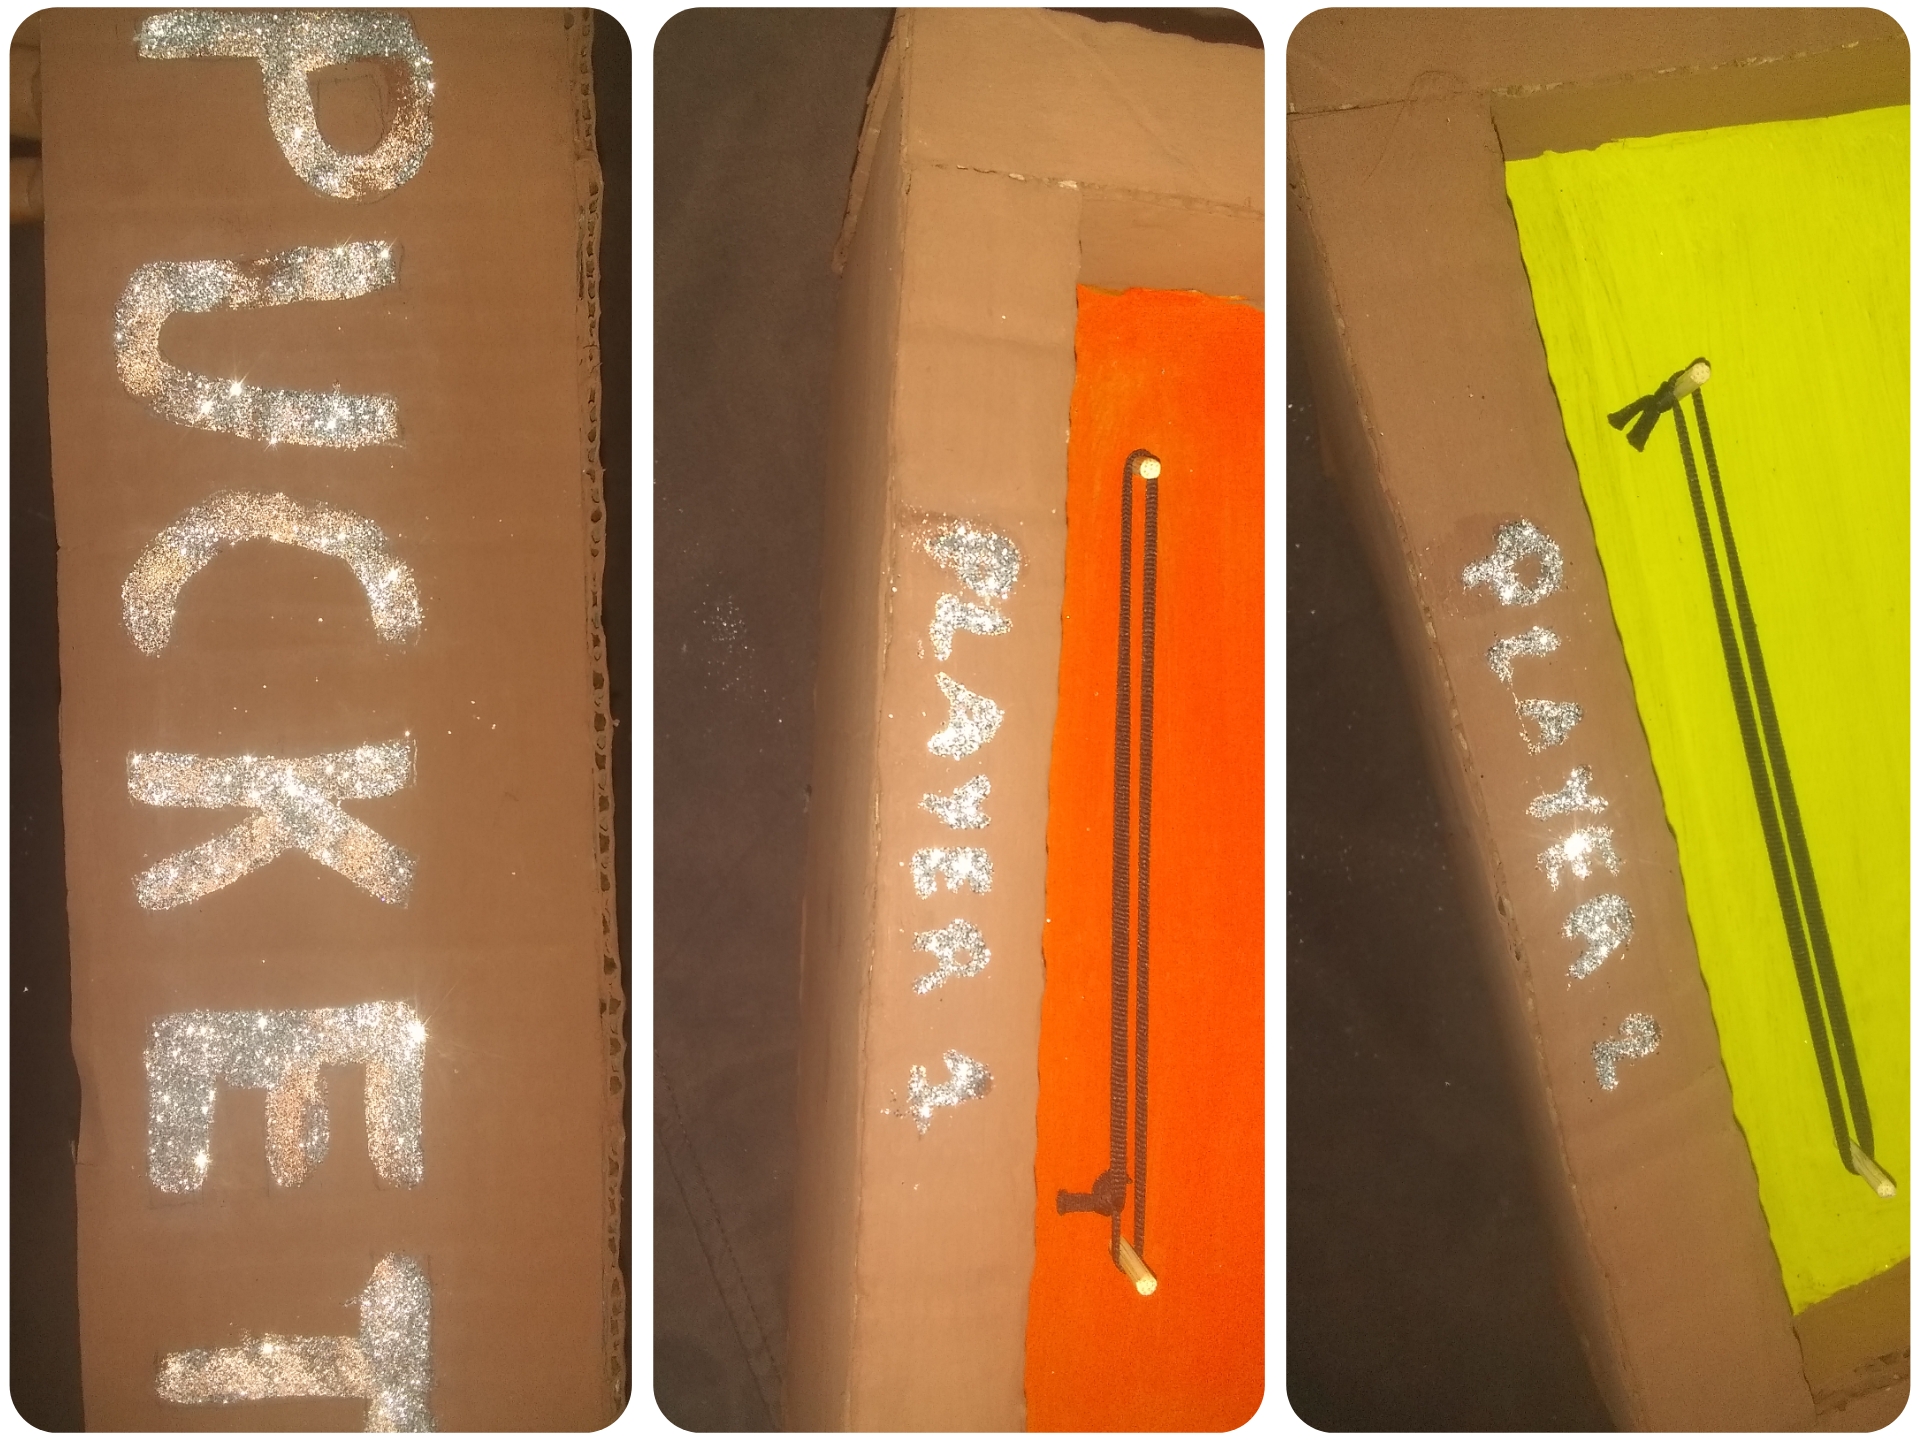
✓ We make several circles and paint. With the lustrillo paper make six arrows or if you want you can also draw them. Cut 4 small sticks and make two holes on both sides, insert the sticks and glue with silicone and place the elastic band. Finally, add a few touches of glitter and it's finished.
✓ Hacemos varios círculos y pintamos. Con el papel lustrillo haz seis flechas o si quieres también puedes dibujarlas. Corta 4 palitos y haz dos agujeros a ambos lados, introduce los palitos y pega con silicona y coloca la cinta elástica. Por último, añade unos toques de purpurina y ya está terminado.
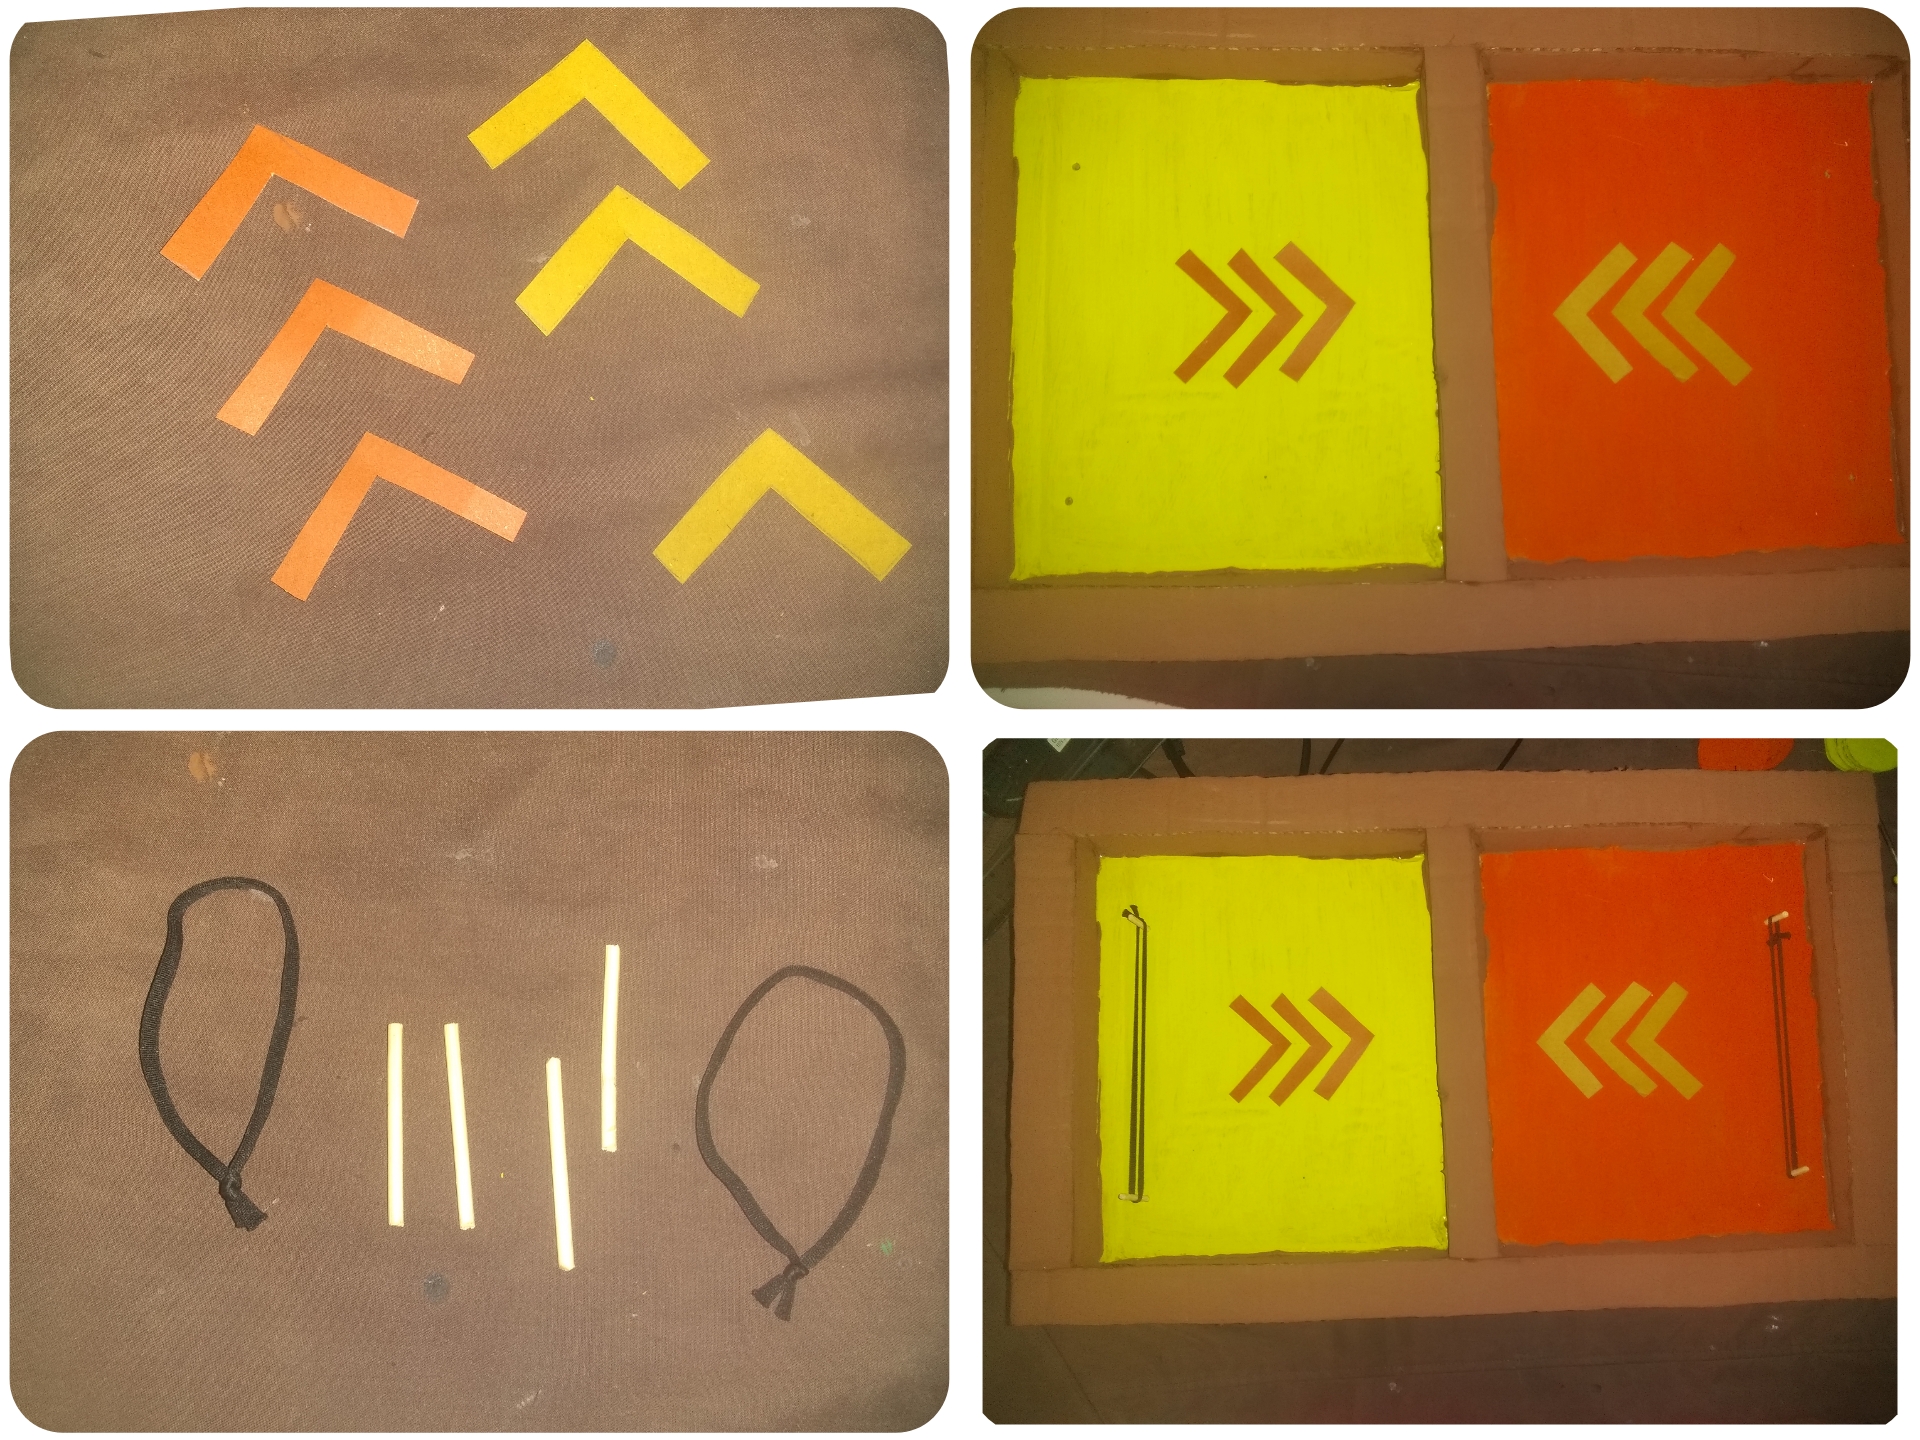
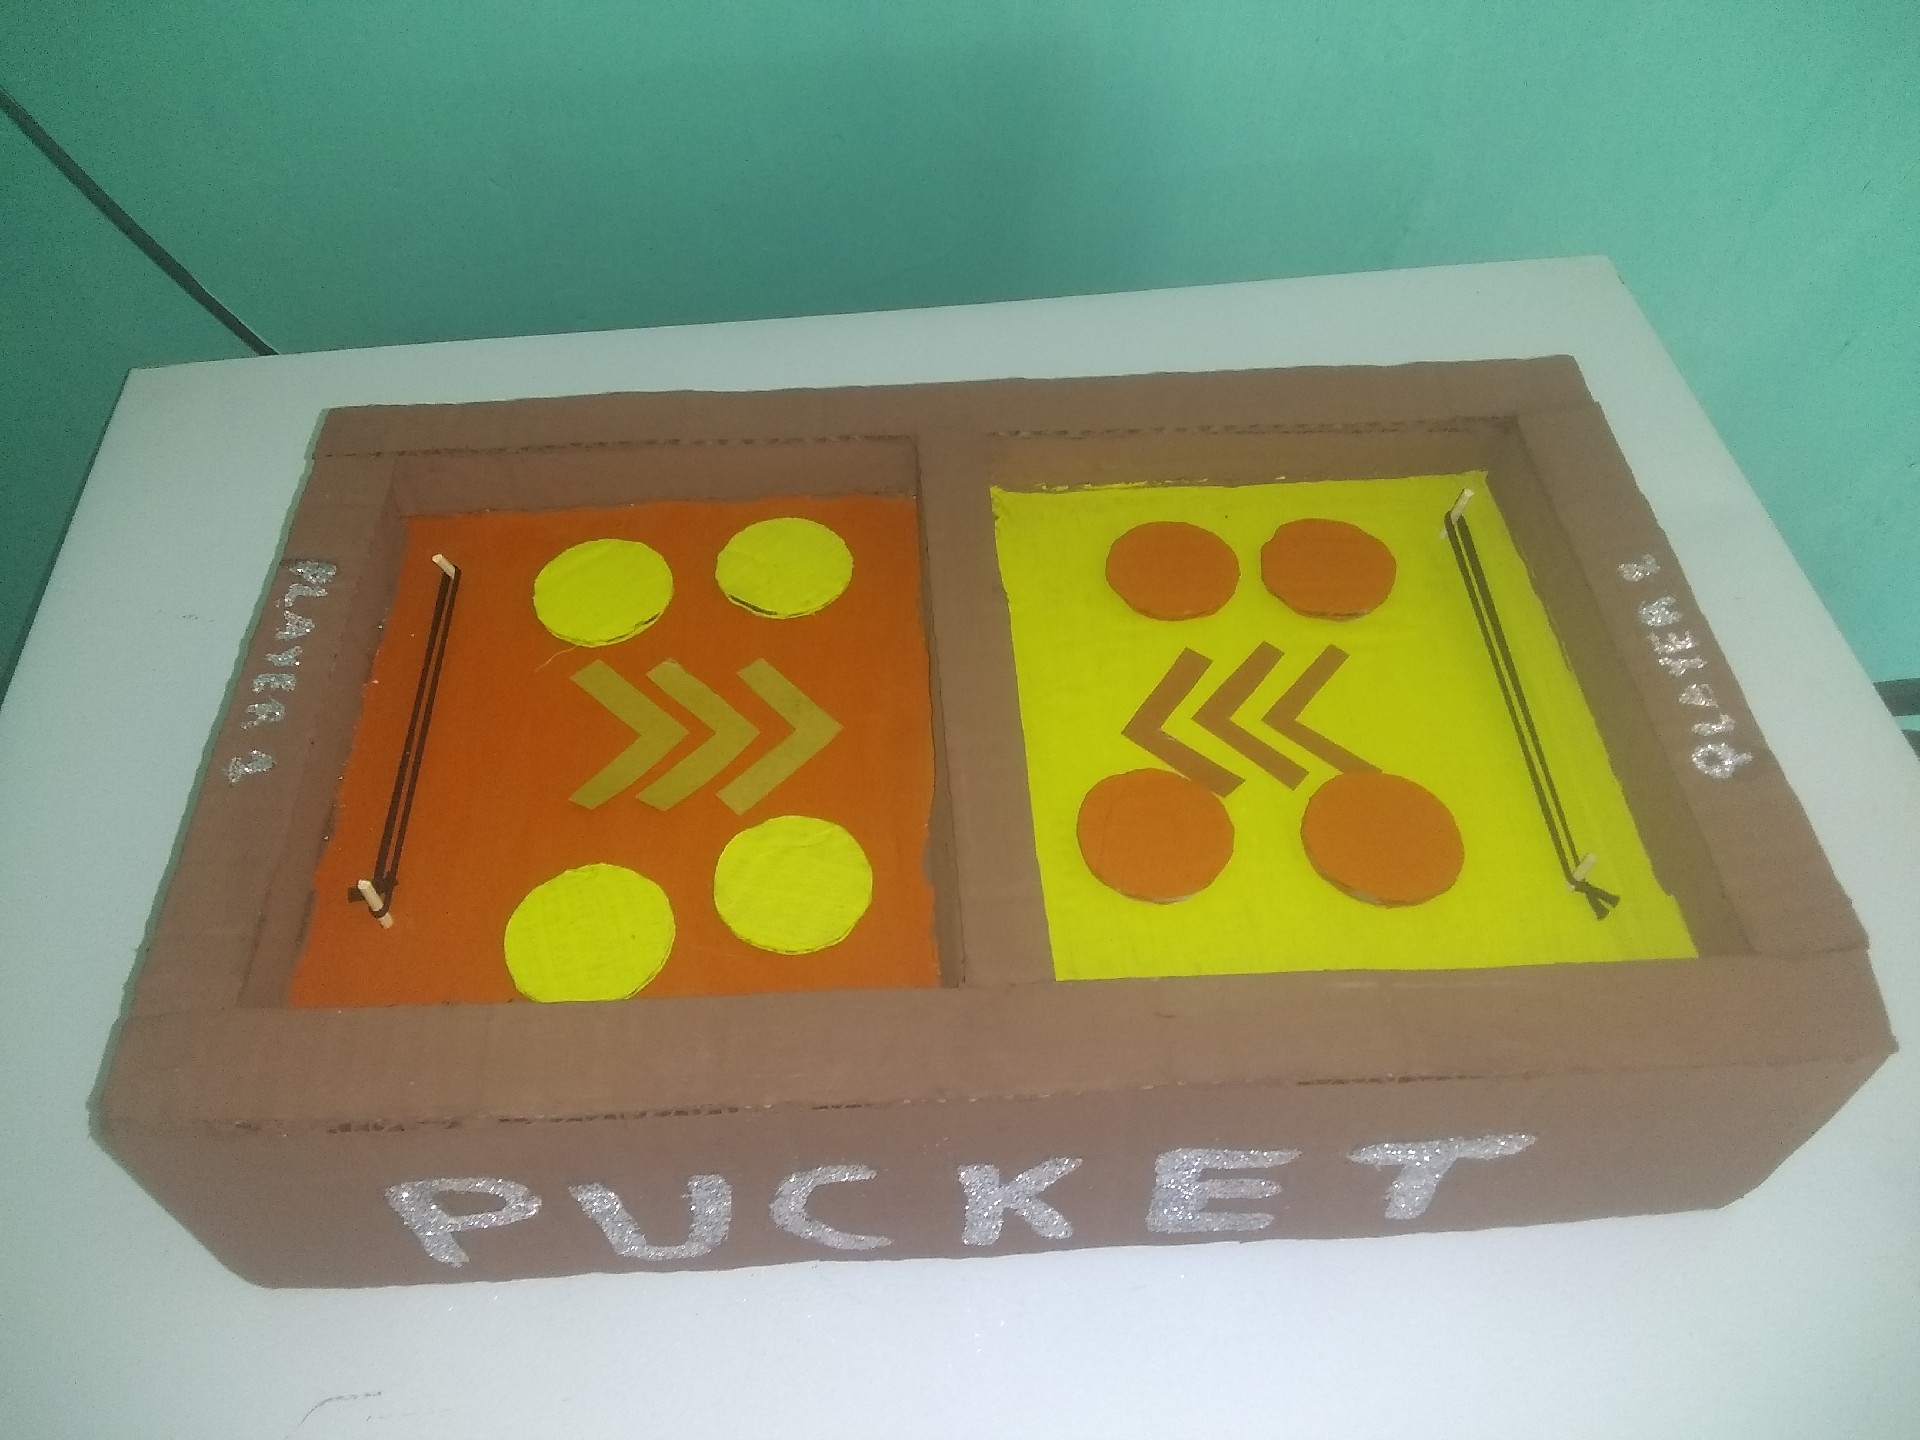
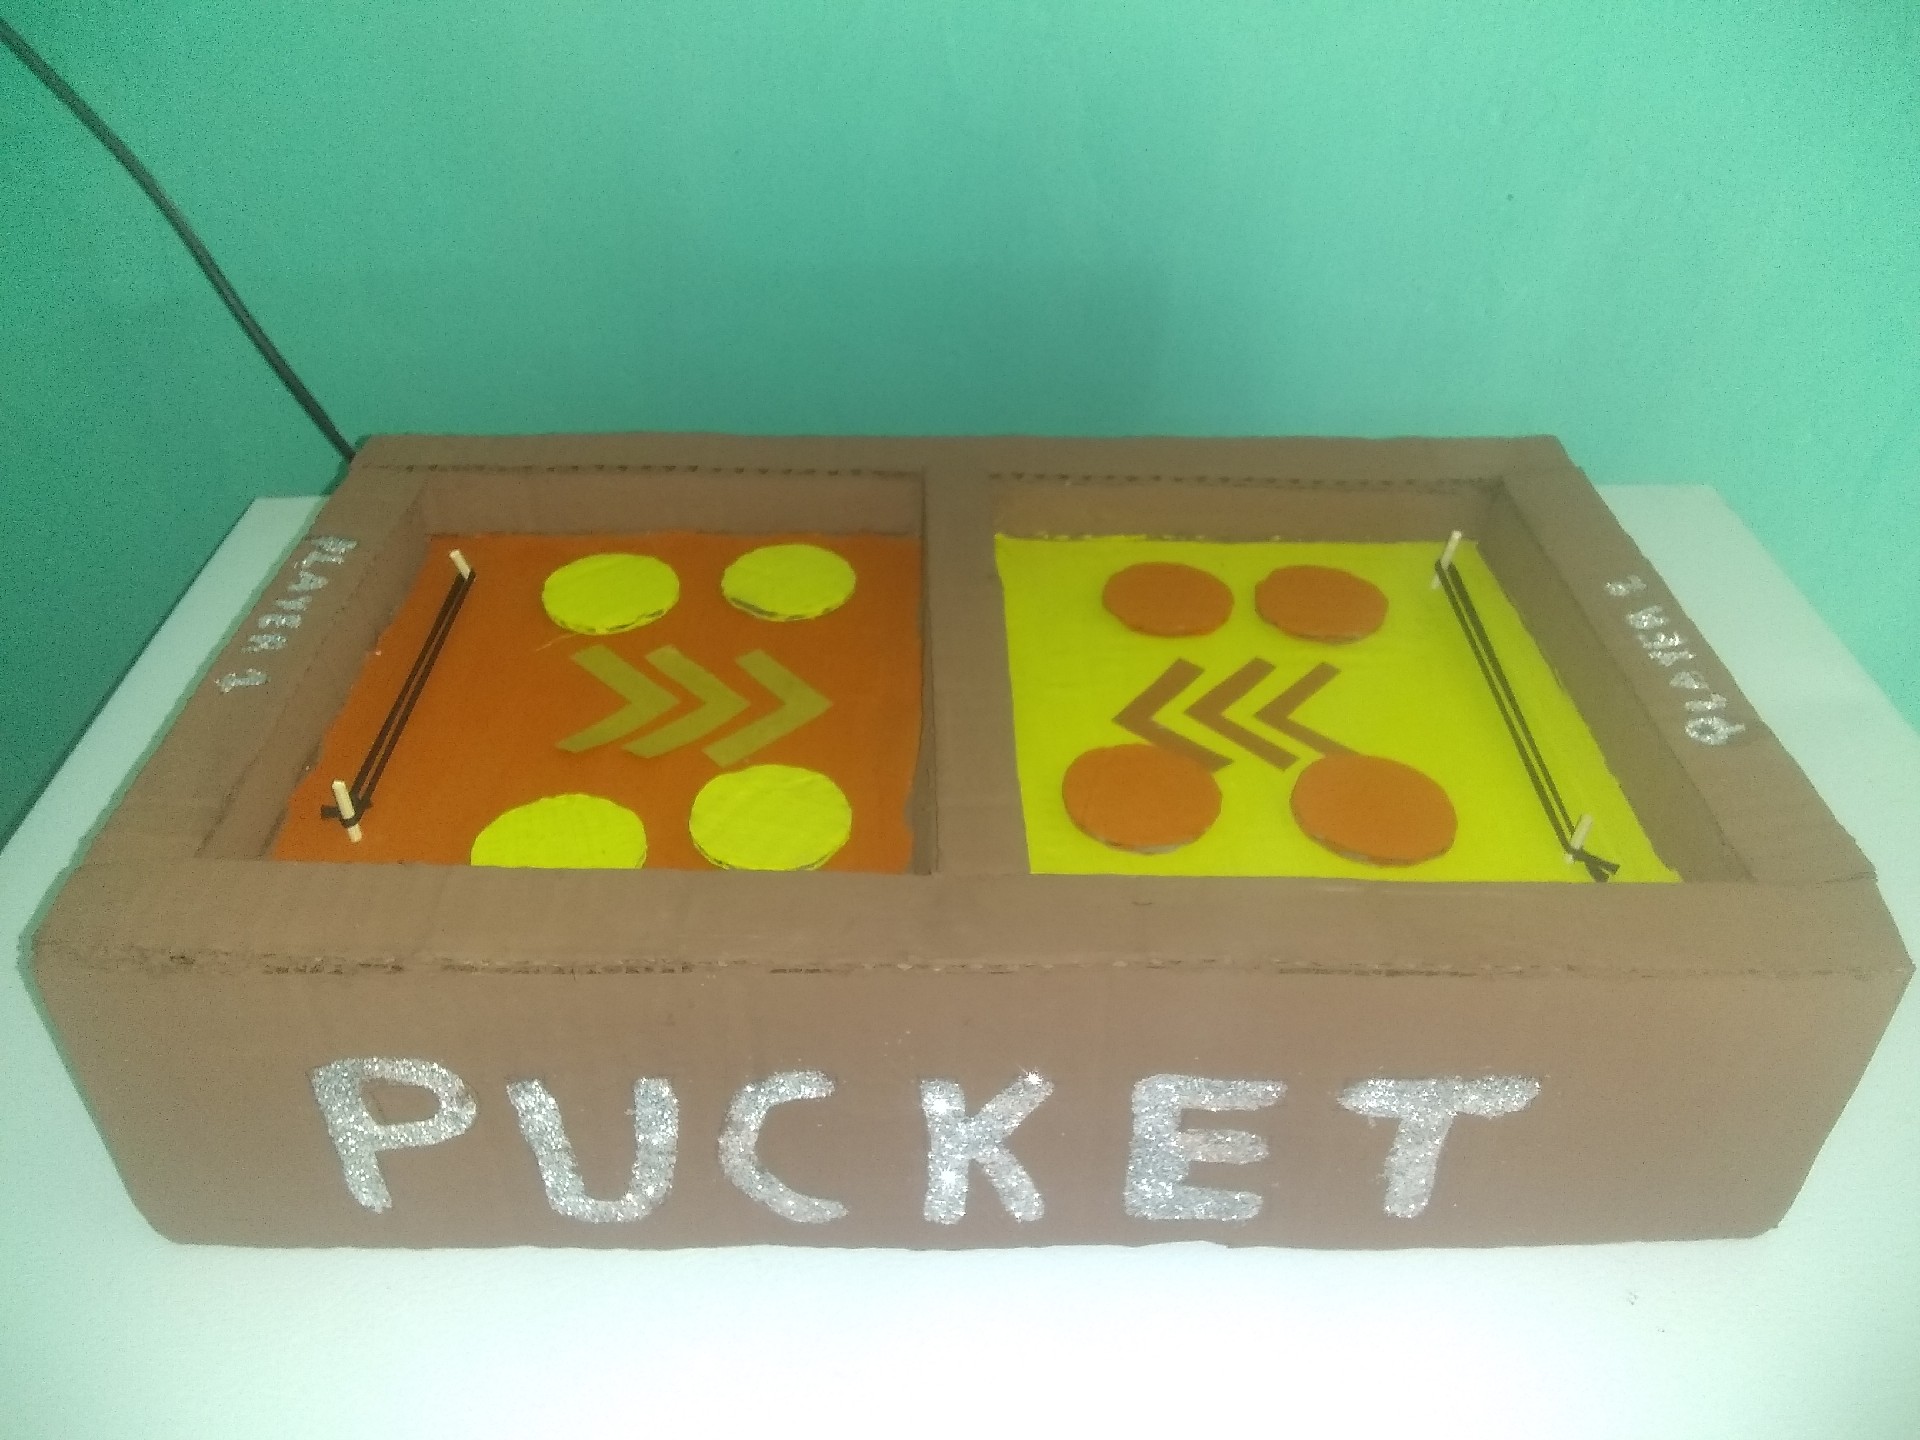
Final result. // Resultado final.
That's very cute, I love using old cardboard boxes to make stuff for my toddler. I've never played this game before.
Thank you, yes it is great for recycling old cardboard the game is very fun and easy to play so your child will love it. Thanks for your comment.
Gracias @fridakahlo por su apoyo que me brinda.