¡Hola, Mundo!
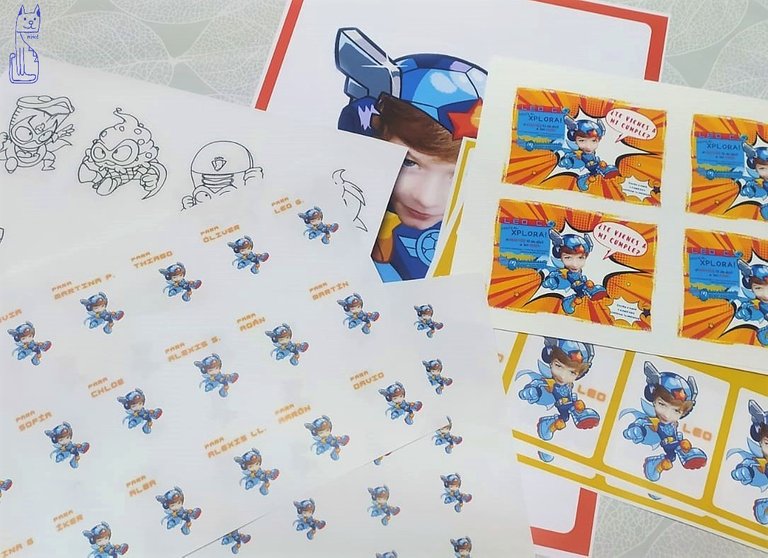
Por fin tenemos las copias en papel de todo lo necesario para el cumpleaños: las invitaciones, el póster para colgar en la mesa, las etiquetas, los sellos y la portada y las páginas de la libreta que vamos a regalar a los invitados. Tendremos que ir recortando todo con ayuda de troqueladoras, cúter y cizalla.
Hi, World!
Finally we have the paper copies of everything we need for the birthday: the invitations, the poster to hang on the table, the labels, the stamps and the cover and pages of the notebook that we are going to give to the guests. We will have to cut everything out with the help of die cutters, cutters and cutters.

1. Las etiquetas
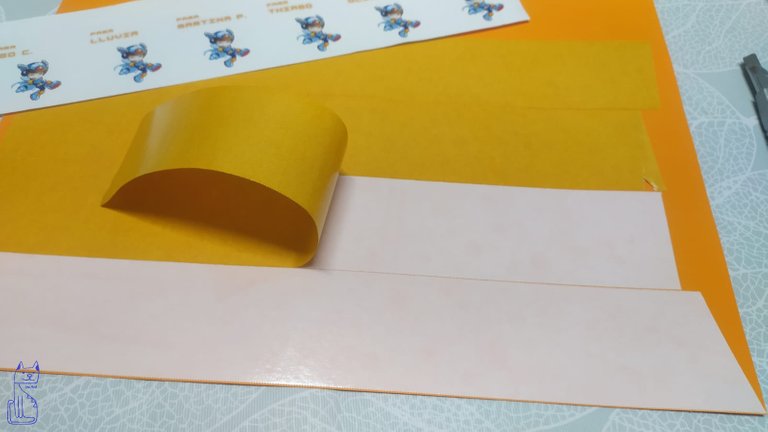
Como la impresión se ha realizado en un papel de poco gramaje (80 gramos por centímetro cuadrado), vamos a pegarlas en un papel más grueso (de 210 gr/cm2) de color naranja. Con esto conseguimos unas etiquetas de mejor aspecto por su grosor y por el juego de colores.
En esta ocasión usaremos una cinta de doble cara bastante ancha (para cubrir con facilidad toda la superficie del pliego) y muy fina (para que la troqueladora no tenga problemas con el corte).
1. The labels
As the printing has been done on a light weight paper (80 grams per square centimetre), we are going to stick them on a thicker paper (210 gr/cm2) in orange. With this we get labels that look better because of their thickness and the play of colours.
This time we will use a double-sided tape that is quite wide (to easily cover the entire surface of the sheet) and very thin (so that the die cutter does not have problems with the cut).
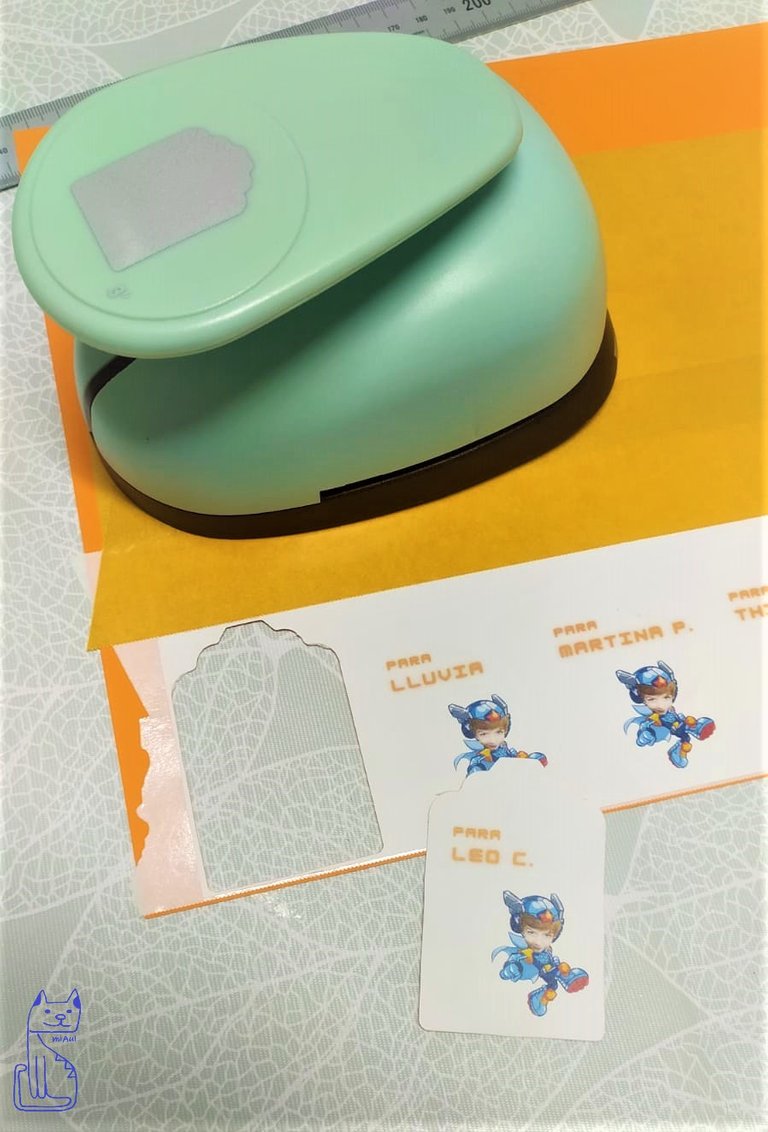
Vamos retirando la cinta protectora poco a poco, conforme vamos cortando etiquetas, así se trabaja más cómodo y seguro. Comprobamos que los cálculos han sido correctos, y la impresión se adapta a la perfección con nuestro troquel.
We remove the protective tape little by little, as we cut the labels, so it is more comfortable and safer to work with. We check that the calculations have been correct, and that the print is perfectly adapted to our die.
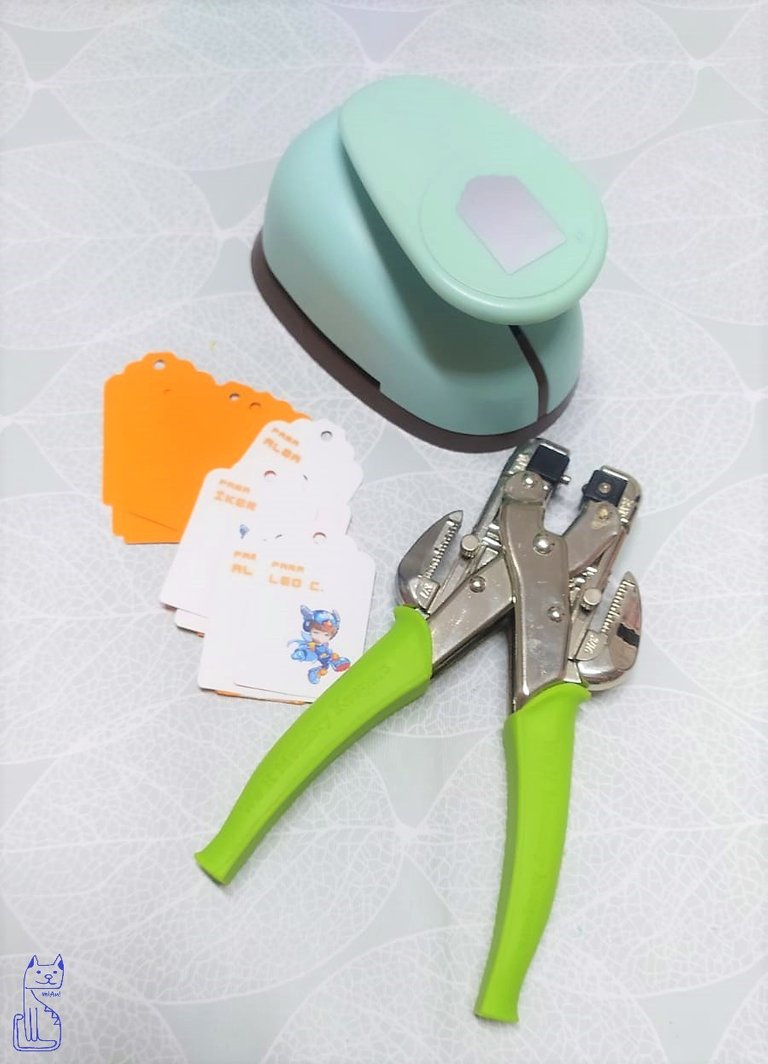
Una vez troqueladas todas las piezas, le realizamos agujeros en el extremo superior con la perforadora. Esta herramienta es capaz de agujerear metal, madera, cartón prensado,... por lo que de una sola vez hemos podido hacerle los boquetes a todas nuestras etiquetas.
Las vamos a reservar para el final, pues por su agujero meteremos un lazo que nos servirá para cerrar la bolsa de regalo.
Once all the pieces had been punched, we made holes in the upper end with the hole punch. This tool is capable of punching holes in metal, wood, pressed cardboard,... so in one go we have been able to make the holes for all our labels.
We are going to save them for the end, as we are going to put a ribbon through the hole that will be used to close the gift bag.
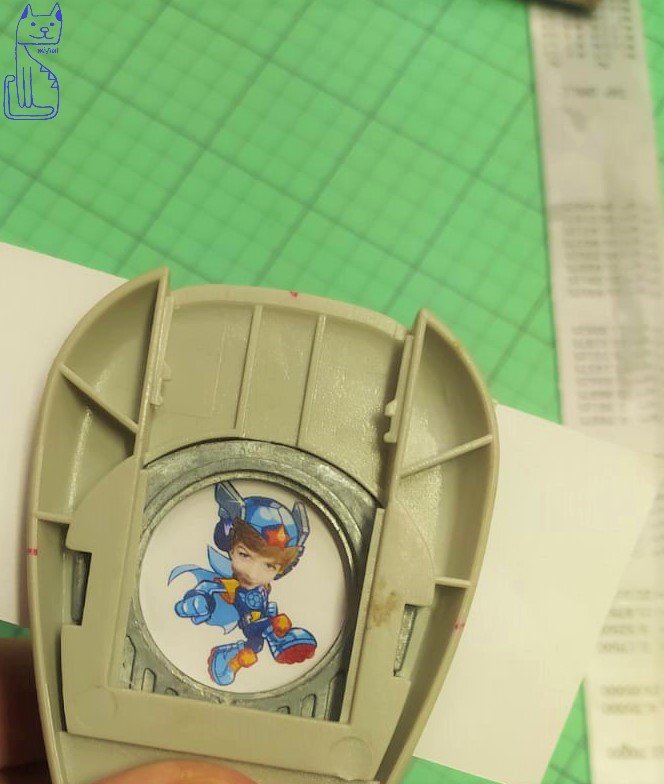
2. Los sellos
Al principio no tenía claro para qué usaría estos sellos, pero me pareció buena idea dejarlos previstos. Efectivamente ya sé cuál será su finalidad: los colocaré a modo de banderita decorativa sobre los pastelitos. Como no habrá tarta, sino una montaña de mini-dulces, la decoración será a base de grajeas de chocolate cubiertas de azúcar coloreada y bolitas de azúcar. Para integrarla en la decoración, le pegaré a cada sello un mondadientes para poder clavarlos en cada pastelito. Seguro que quedan genial.
2. The stamps
At first I wasn't sure what I was going to use these stamps for, but I thought it was a good idea to leave them in place. In fact, I already know what their purpose will be: I will place them as a decorative banner on the cakes. As there won't be a cake, but a mountain of mini sweets, the decoration will be based on chocolate sprinkles covered with coloured sugar and sugar balls. To integrate them into the decoration, I will stick a toothpick to each stamp so that I can stick them into each cupcake. I'm sure they will look great.
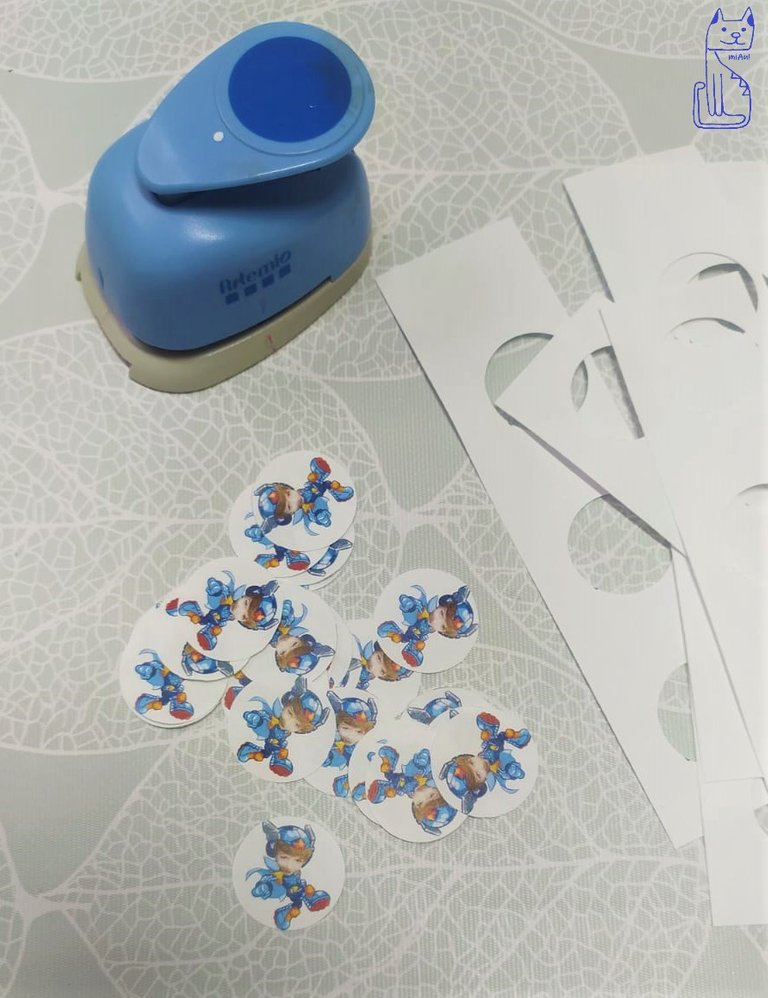
Un truco: cada troqueladora trabaja mejor con un gramaje de papel. Normalmente el fabricante no suele indicarlo (a no ser que sean muy potentes). En cualquier caso, siempre debéis hacer una prueba con un papel que no os sirva. Por experiencia, sé cada una de las troqueladoras que tengo, el papel que admite. Por ejemplo, estas troqueladoras de tipo escolar no tienen un corte limpio en papeles muy gruesos, pero si son muy finos se los "comen" y tampoco los cortan. Así que en este caso, el grosor ideal son dos hojas de 80 gramos: corté mi papel en dos de manera que superponiéndolos coincidieran los dibujos de las dos páginas. Podía ir cortando de esta manera los círculos sin problema.
A tip: each die-cutting machine works best with a certain weight of paper. Usually the manufacturer does not indicate this (unless they are very powerful). In any case, you should always do a test with a paper that doesn't work for you. From experience, I know each of the die-cutters I have, what paper it will accept. For example, these school type die cutters do not cut cleanly on very thick papers, but if they are very thin they "eat" them and do not cut them either. So in this case, the ideal thickness is two sheets of 80 grams: I cut my paper in two so that by overlapping them, the drawings on the two pages would coincide. I could cut the circles in this way without any problem.
¡Qué alegría cuando se avanza en el trabajo! Seguimos mañana con el resto de la decoración.
What a joy when you make progress with your work! We will continue tomorrow with the rest of the decoration.
Gracias por leerme. Encantada de tenerte por aquí 💛
Te doy la bienvenida a miAu!
Traducido gracias a la versión gratuita de www.DeepL.com/Translator
Thank you for reading me. Nice to have you around.
I welcome you to miAu!Translated with www.DeepL.com/Translator (free version)

Gracias por vuestro apoyo, ¡seguimos creando!
Gracias por compartir mi publicación, @cribbio
@marcocasario, muchas gracias por difundir mi post