Feliz y Bendecido nuevo día, deseo estén muy bien, llenos de mucha salud y bienestar, hoy nuevamente les realice un tutorial sencillo explicativo paso a paso con una secuencia de imágenes y ademas de esto e agregado un vídeo tutorial en la parte de abajo, el tutorial de hoy es de un nudo de macrame plano, es uno de los nudos básicos y mas sencillos de macrame y puedes realizar infinidad de cosas con el, todo dependerá de tu imaginación y tus requerimientos, este nudo me gusta mucho porque de el eh aprendido a realizar diversas pulseras que son realmente sencillas y se ven hermosas, pronto te mostrare tutoriales para realizar las pulseras por ahora debemos primero aprender a realizar el nudo. Inténtalo estoy segura que te quedare excelente y si no es así sigue intentando, que así se aprende! Deseo de corazón estés bien, estés lleno de mucha salud, abundancia y prosperidad! Sigue creciendo, sigue brillando, que nada nunca apague tu Luz 🙏😁
Happy and blessed new day, I wish you are very well, full of a lot of health and well-being, today again I made a simple step-by-step explanatory tutorial with a sequence of images and in addition to this and added A video tutorial at the bottom, today's tutorial is about a flat macrame knot, it is one of the basic and simplest macrame knots and you can do countless things with it, everything will depend on your imagination and your requirements, I really like this knot because from him I have learned to make various bracelets that are really simple and look beautiful, soon I will show you tutorials to make the bracelets for now we must first learn how to make the knot. Try it I'm sure it will be excellent and if not, keep trying, that's how you learn! I heartily wish you are well, you are full of much health, abundance and prosperity! Keep growing, keep shining, may nothing ever turn off your Light 🙏😁
Los materiales que requieres son básicos, cualquier hilo puede servir para practicar, yo utilice hilo paracord que es manejable.
The materials they require are basic, any thread can be used to practice, I use paracord thread which is manageable.
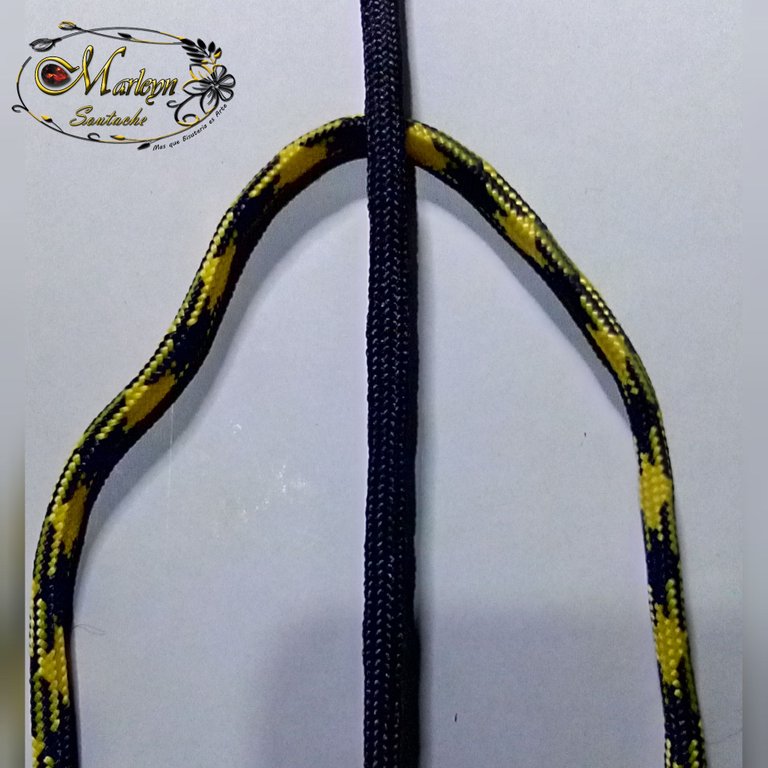
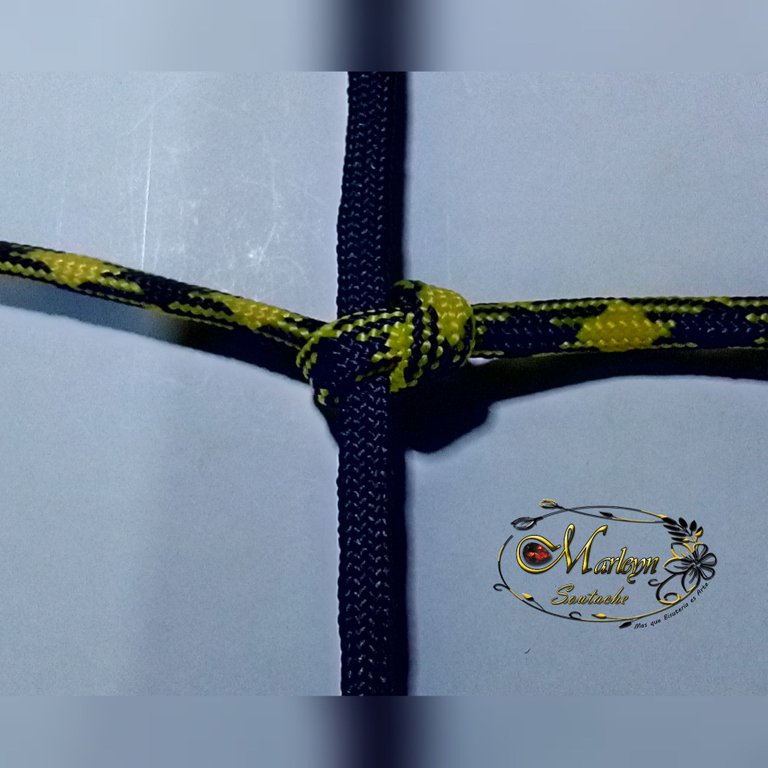
PASO 1: Colocar los hilos como te muestro en la imagen, el central que para este tutorial utilice el hilo negro estará por encima, y cruzado que en este caso es el hilo amarillo estará por abajo del negro.
STEP 1: Place the threads as I show you in the image, the central one that for this tutorial uses the black thread will be above, and crossed that in this case is the yellow thread will be below black.
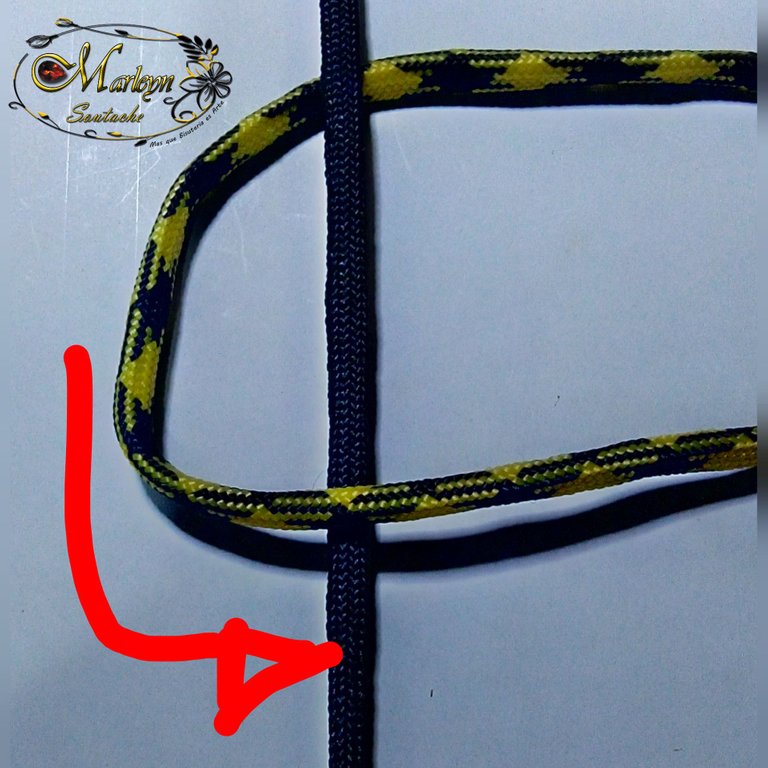
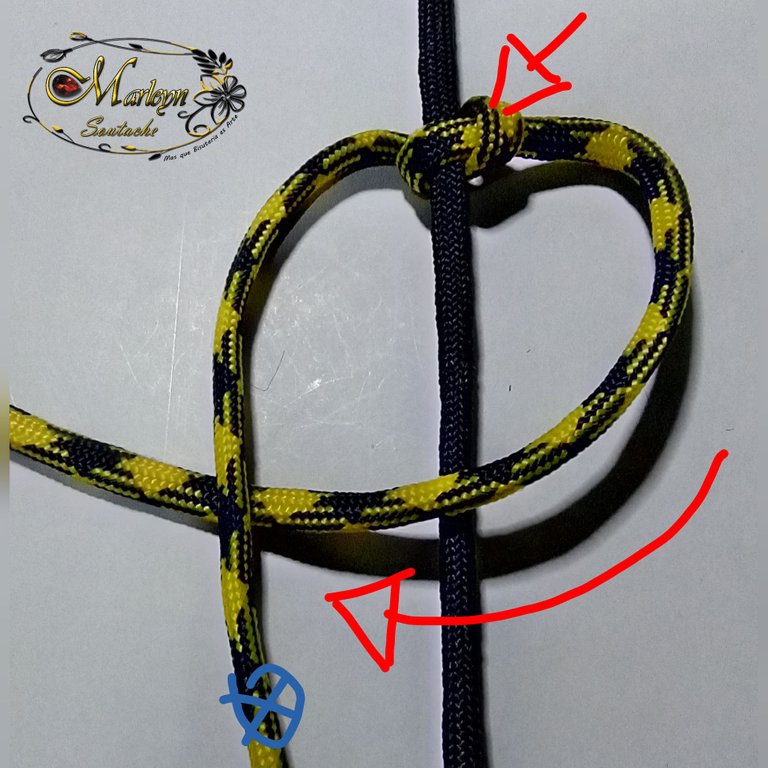
PASO 2: El Hilo amarilla de la Izquierda debe pasar hacia la derecha por encima del hilo negro, te lo eh marcado con una flecha hacia la dirección que debe ir el hilo para una mejor comprensión.
STEP 2: The yellow thread on the left must pass to the right above the black thread, I have marked it with an arrow towards the direction the thread should go for a better understanding.
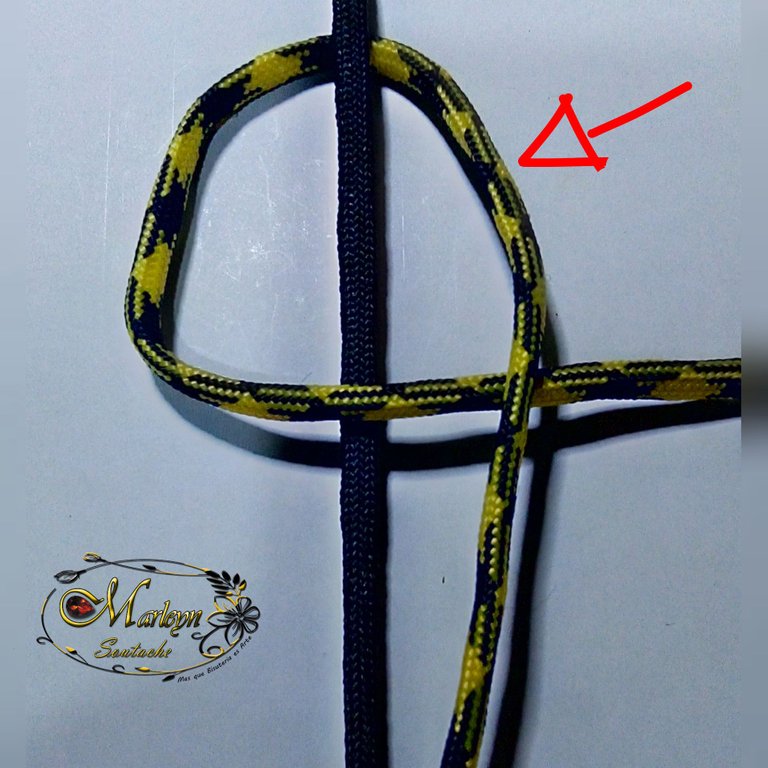
PASO 3: El Hilo amarillo de la derecha, lo colocamos por encima del hilo amarillo que doblaste en el paso anterior.
STEP 3: The yellow thread on the right, we place it above the yellow thread that you folded in the previous step.
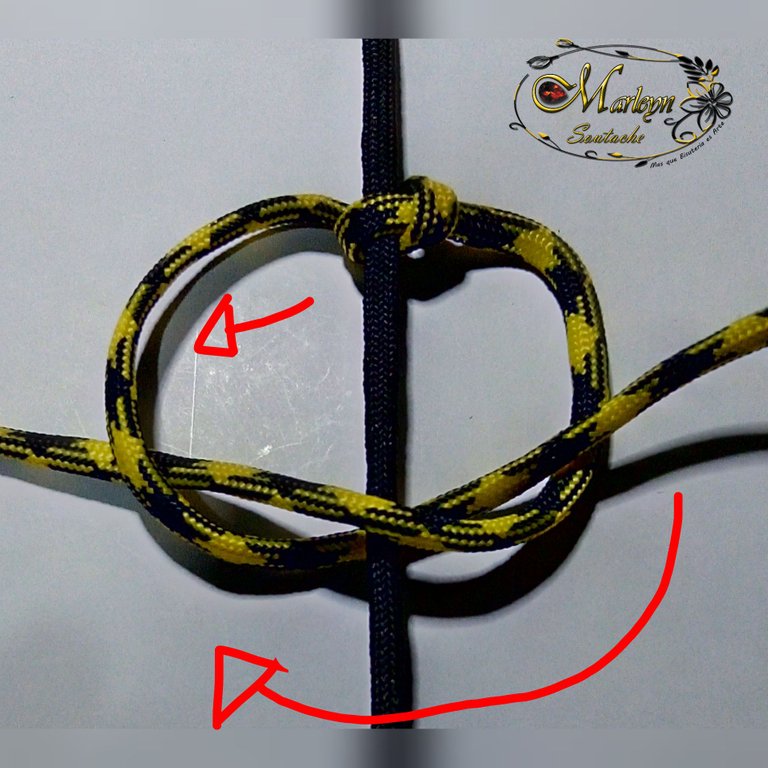
PASO 4: El Hilo amarillo de la derecha que movimos en el paso anterior, lo pasamos a la izquierda por abajo del hilo negro central te lo marque con varias flechas puedes guiarte por la imagen o ver el vídeo que dejare al final de la publicación.
STEP 4: The yellow thread on the right that we moved in the previous step, we pass it to the left below the central black thread. Mark it with several arrows. You can guide yourself by the image or see the video that I will leave at the end of the publication.
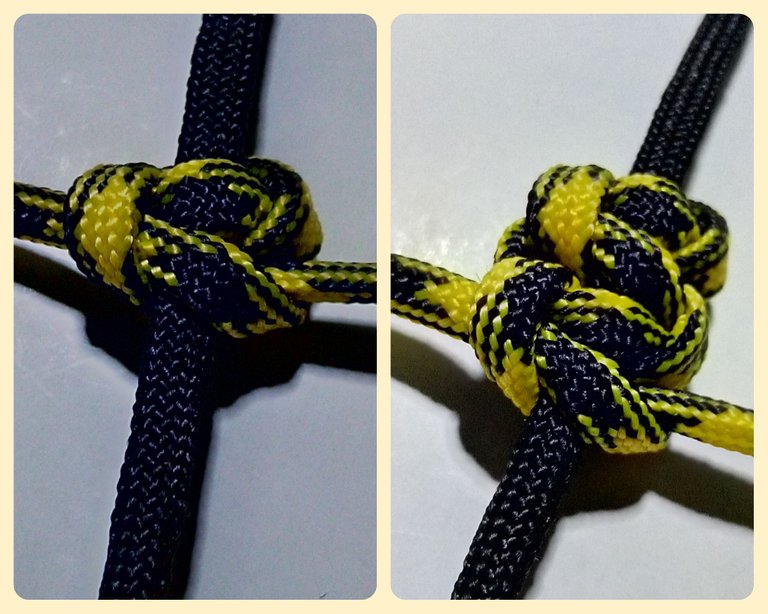
PASO 5: Para terminar el primer nudo solo debes halar los hilos a ambas partes y listo, de esta manera tenemos terminado el primer nudo.
STEP 5: To finish the first knot, you just have to pull the threads to both parts and that's it, in this way we have finished the first knot.
PASO 6: Realizaremos el mismo proceso que en el nudo anterior solo que esta vez lo haremos del lado contrario, siempre comenzando desde la parte donde el hilo quedo arriba te lo e marcado con una flecha, ahora dobla el hilo amarillo de la derecha, por encima del hilo negro central, y por abajo del hilo amarillo de la izquierda.
STEP 6: We will carry out the same process as in the previous knot, only this time we will do it from the opposite side, always starting from the part where the thread was up and marked with an arrow, now fold the yellow thread on the right, over the central black thread, and below the yellow thread on the left.
PASO 7: Luego de doblar el hilo hacia la derecha lo pasaremos por abajo del hilo amarillo de la izquierda y halar, de esta manera terminas el segundo nudo, debes seguir el mismo proceso sucesivamente hasta que termines el largo deseado.
STEP 7: After bending the thread to the right we will pass it under the yellow thread on the left and pull, in this way you finish the second knot, you must follow the same process successively until finish the desired length.
Debe quedar de esta manera! Para tu mejor comprensión dejare un vídeo tutorial en la parte de abajo, espero que te agrade y te atrevas a realizarlo, siempre aprendemos algo nuevo.
It should look like this! For your better understanding I will leave a video tutorial at the bottom, I hope you like it and you dare to do it, we always learn something new.
Si tienes una duda escríbeme un comentario, estaré feliz de ayudarte con cualquier detalle, Espero que mis diseños les gusten tanto como a mí me gusta, aprendan con placer ...!
Nunca olvides que el Poder es Querer y si quieres Puedes...
Eres Luz eres Energía, TU PUEDES ... Que el universo infinito Conspire para que todo siempre sea mejor ... Se les quiere ...
Venezuela FE
Somos Seres Abundantes! Qué las energías del universo vibren en sintonía con las de cada uno de nosotros en armonía! Cuidemos nuestras palabras, acciones y pensamientos!
If you have a question, write me a comment, I will be happy to help you with any details, I hope you like my designs as much as I like, learn with pleasure ...!
Never forget that Power is Wanting and if you want you can ...
You are Light, you are Energy, YOU CAN ... May the infinite universe Conspire so that everything is always better ... They are loved ...
Venezuela FAITH
We are Abundant Beings! May the energies of the universe vibrate in tune with those of each of us in harmony! Let's take care of our words, actions and thoughts!
Mi trabajo es mi pasión y cuando tu trabajo es tu pasión nada es imposible / My work is my passion and when your work is your passion nothing is impossible
The rewards earned on this comment will go directly to the person sharing the post on Twitter as long as they are registered with @poshtoken. Sign up at https://hiveposh.com.


The rewards earned on this comment will go directly to the person sharing the post on Twitter as long as they are registered with @poshtoken. Sign up at https://hiveposh.com.