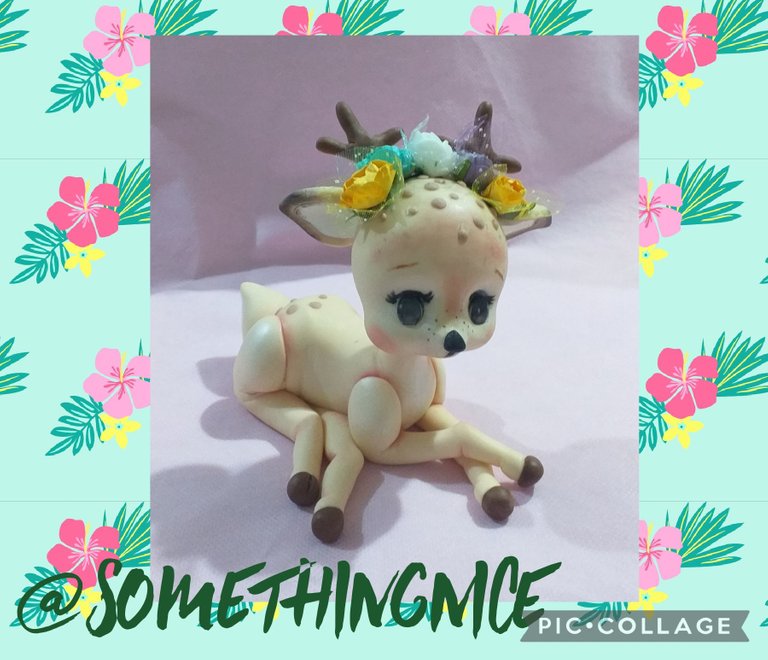
Happy Sunday dear creative friends of this wonderful community!!! First of all I wish you a very happy Easter, may it be a day of rest and much peace. Today I bring you again this beautiful theme that is that of the animals of the forest.
Feliz domingo queridos amigos creativos de esta maravillosa comunidad!!! Primero que nada les deseo muy felices pascuas, que sea un día de descanso y mucha paz. Hoy les vuelvo a traer esta temática tan hermosa que es la de los animalitos del bosque.
I did this project following the step by step video tutorial by Leticia Suárez del Cerro from her YouTube channel. It won't be the last one because it has other videos of other little animals of the forest that I will surely also make.
Este proyecto lo hice siguiendo el paso a paso de un video tutorial de Leticia Suárez del Cerro de su canal de YouTube. No va a ser el último porque tiene otros vídeos de otros animalitos del bosque que seguramente también los voy a hacer.
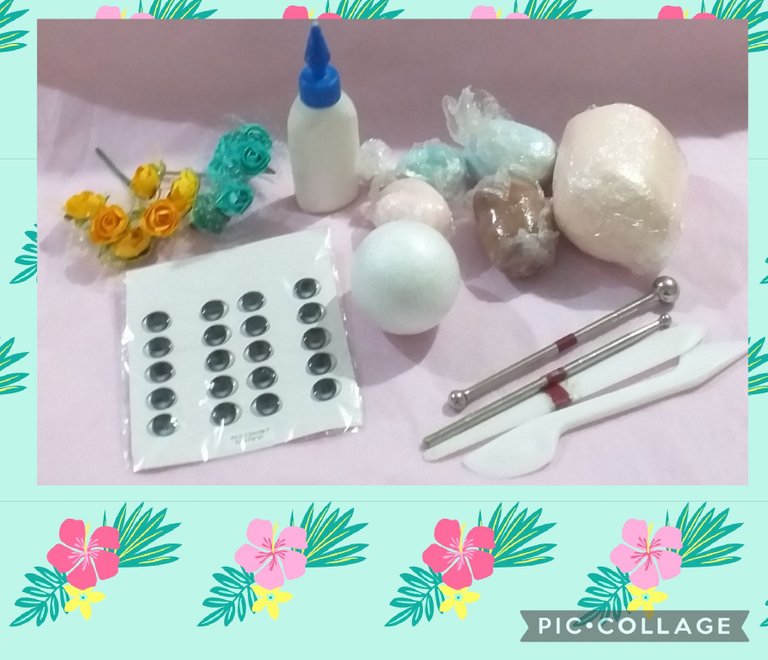
Materials
🦌 cold porcelain
🦌 vinyl glue
🦌 stakes
🦌 styrofoam sphere
🦌 paper flowers
🦌 self-adhesive eyes
Materiales
🦌 porcelana fría
🦌 cola vinilica
🦌 estecas
🦌 esfera de telgopor
🦌 flores de papel
🦌 ojos autoadhesivos
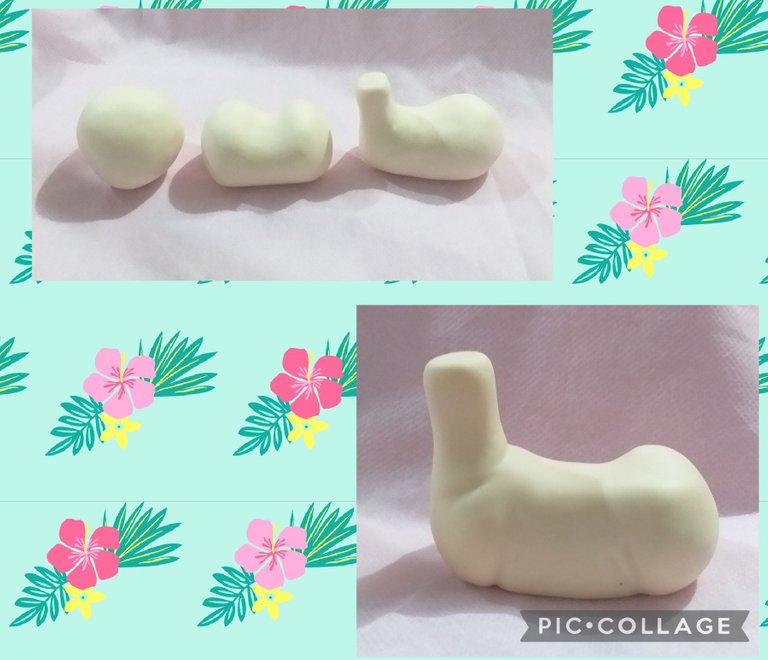
For the body, make a ball that is about twice the size of the sphere that we are going to use for the head. Gently divide in the middle, at one end score in the middle and very slowly bring the dough up to form the neck. With some stick mark the back and front thighs, smooth with your fingers.
Para el cuerpo hacer una bolita que sea más o menos el doble de tamaño de la esfera que vamos a usar para la cabeza. Dividir suavemente al medio, en un extremo marcar en el medio y muy despacio ir llevando la masa hacia arriba para formar el cuello. Con alguna esteca marcar los muslos traseros y delanteros, suavizar con los dedos.
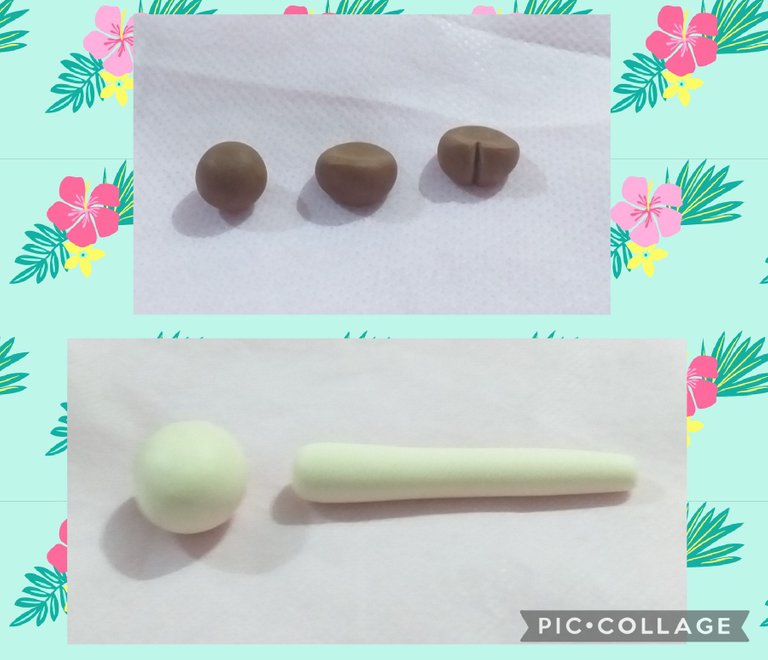
For the hooves, make four equal balls with another color, press on one side to make it wider and mark a line in the center.
For the front legs make two equal balls, stretch leaving thinner at one end.
Para las pezuñas hacer cuatro bolitas iguales con otro color, presionar de un lado para que quede más ancho y marcar una línea en el centro.
Para las patas delanteras hacer dos bolitas iguales, estirar dejando más fino en un extremo.
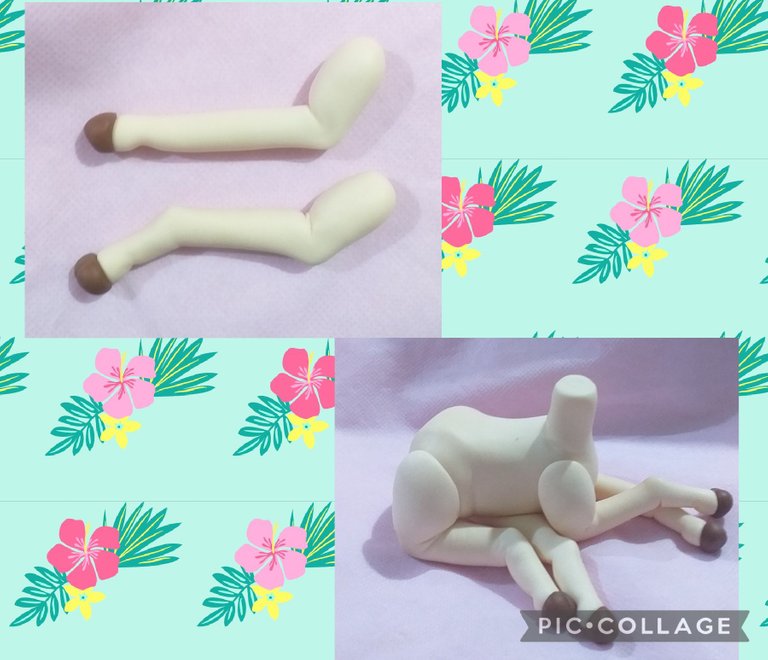
Paste the hooves. In a quarter of the length (of the end where the hoof is) mark to simulate the joint. In a quarter of the length but this time on the widest side mark to form the elbow. Finally, on the opposite side and a little higher where we marked the joint, make another joint.For the hind legs repeat the procedure but with more volume of dough. Glue the four legs to the body.
Pegar las pezuñas. En un cuarto del largo (del extremo donde está la pezuña) marcar para simular la articulación. En un cuarto del largo pero esta vez del lado más ancho marcar para formar el codo. Por último del lado contrario y un poco más arriba donde marcamos la articulación hacer otra articulación. Para las patas traseras repetir el procedimiento pero con más volumen de masa. Pegar las cuatro patas al cuerpo.
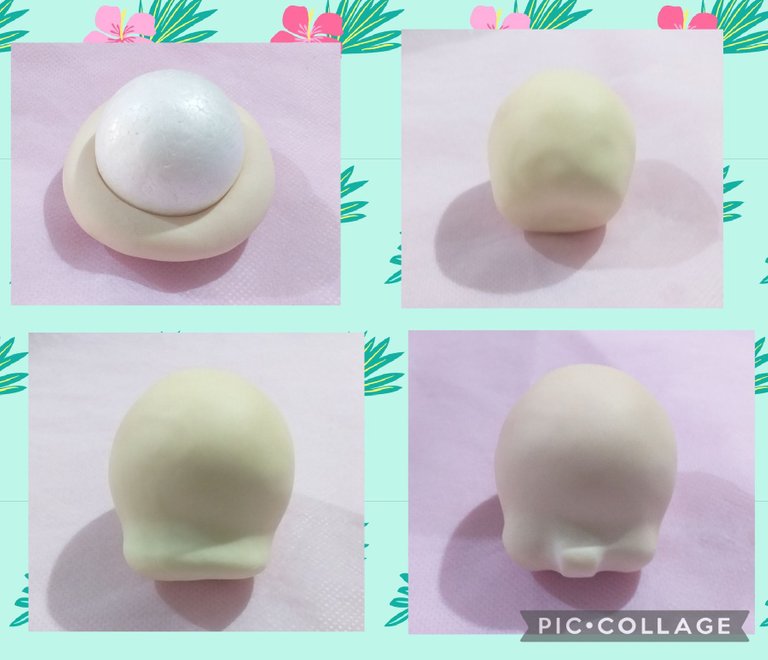
For the head, make a ball slightly larger than the volume of the Styrofoam sphere, insert it, close, mark the separation between the face and the nose. In the middle of the nose make two straight lines.
Para la cabeza hacer una bolita un poco más grande que el volumen de la esfera de telgopor, introducir la misma, cerrar, marcar la separación de la cara y el morro. En la mitad del morro hacer dos líneas rectas.
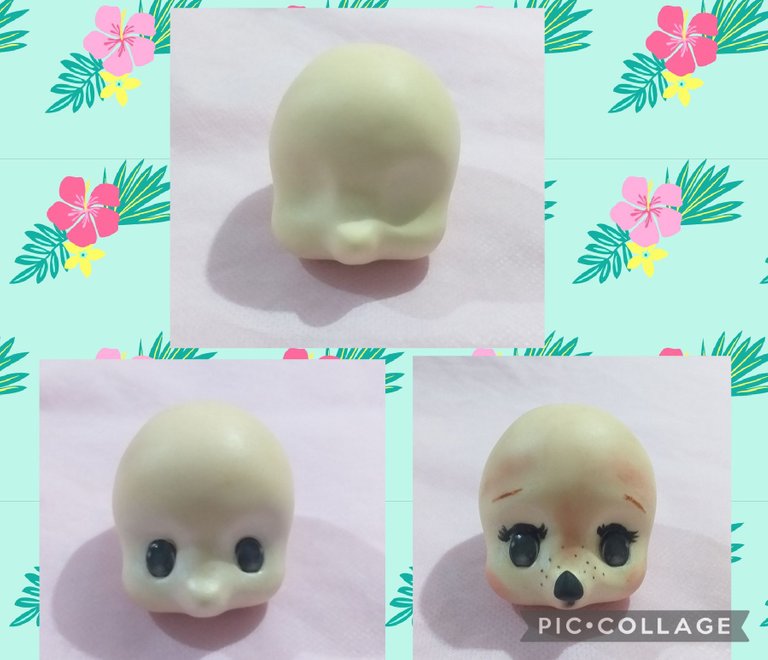
Mark the nose well, separate the cheeks, mark the eye sockets. Use white makeup to lighten the nose and eye sockets. Paste the self-adhesive eyes (if you don't have you can paint with acrylics or markers), with black dough make a small triangle for the nose, mark a straight line below.
Draw eyebrows and eyelashes, make up the septum of the nose and forehead with a brown tone, make up the cheeks with a pink tone. Finally, with a brown marker, make a few dots to simulate freckles.
Marcar bien la nariz, separar los cachetes, marcar las cuencas de los ojos. Usar maquillaje blanco para aclarar la nariz y la cuenca de los ojos. Pegar los ojos autoadhesivos (si no tenes se puede pintar con acrilicos o marcadores), con masa color negro hacer un pequeño triángulo para la nariz, marcar una línea recta por debajo.
Dibujar cejas y pestañas, maquillar con un tono marrón el tabique de la nariz y la frente, con tono rosado maquillar los cachetes. Por último con un marcador marrón hacer unos puntitos para simular las pecas.
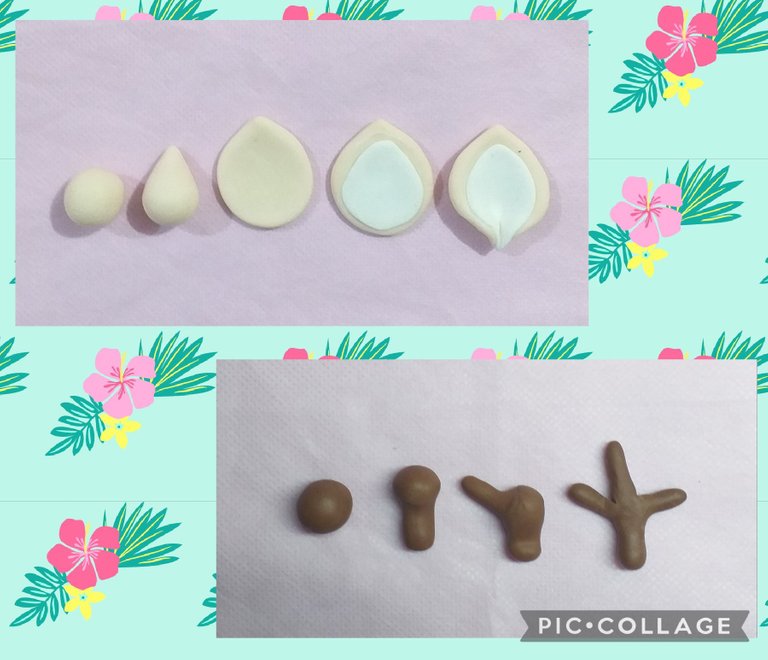
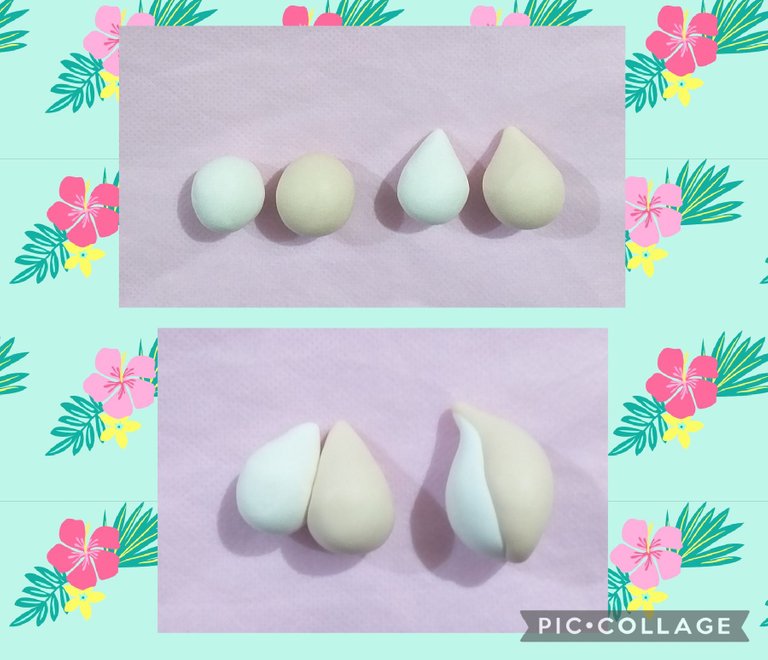
For the ears, make two equal balls, form a drop, flatten enough, repeat the step but with a lighter shade of dough and smaller, paste overlapping and gather at the bottom.
For the horns, make two equal balls, stretch thinning at one end and from the largest part take small portions and stretch.
Para las orejas hacer dos bolitas iguales, dar forma de gota, aplanar bastante, repetir el paso pero con masa en un tono más claro y más pequeña, pegar superponiendo y fruncir en la parte inferior.
Para los cuernos hacer dos bolitas iguales, estirar afinando en un extremo y de la parte más grande ir sacando pequeñas porciones y estirar.
For the tail, make two balls of different sizes and colors, form a drop, unite them, melt them and give a curved shape to the tip.
Para la cola hacer dos bolitas de diferentes tamaños y colores, dar forma de gota, unirlas, fundir y dar forma curva a la punta.
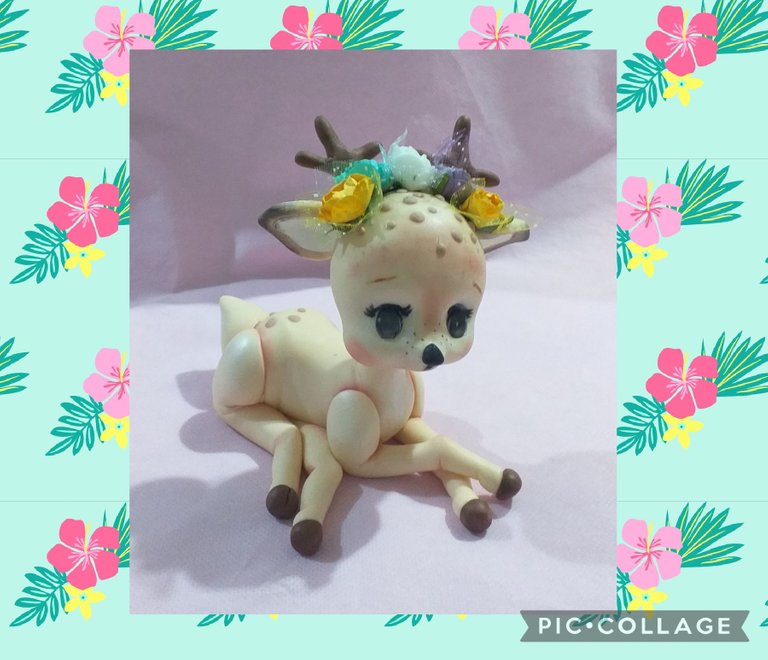
Join everything with vinyl glue, paste the artificial flowers, with small flattened balls make the spots. Make up the body with a white tone on the chest and thighs, with a brown tone on the depths and with black the tips of the ears.
For this post I took photos with my Samsung Galaxy j4 cell phone and used the PicCollage app and Google Translate.
As always hoping that this work is to your liking and that you can do it to decorate or for a cake topper. Greetings. Andrea❤❤❤
Unir todo con cola vinilica, pegar las flores artificiales, con pequeñas bolitas aplanadas hacer las manchas. Maquillar el cuerpo con tono blanco en el pecho y los muslos, con tono marrón las profundidades y con negro las puntas de las orejas.
Para este post tomé fotos con mi teléfono celular Samsung Galaxy j4 y utilicé la aplicación PicCollage y el traductor de Google.
Como siempre esperando que este trabajo sea de su agrado y que puedan hacerlo para decorar o para un adorno de torta. Saludos. Andrea❤❤❤

Wao estoy impresionado por la calidad del trabajo, como pintaste la cara del pequeño Bambi, quedo hasta realista y tiene dimensión.
Wow, I'm impressed by the quality of the work, how you painted little Bambi's face, it's even realistic and has dimension.
Muchísimas gracias @oscargonzalez123 😊
Hola, me gustó la forma que le has dado a esa masa te quedo muy lindo ese trabajo te felicito
Muchas gracias @ingridmar 😊
Hermoso trabajo 💕🌹🌈🐦🥰
Muchas gracias @dayadam ❤😊
Que belloooo muy lindo trabajo amiga💯👍
Muchas gracias @zullyarte 😊❤
You have been manually curated by Brotherhood Community for sharing this awesome work.
Brotherhood community will support 5 bloggers on daily basis.
For more information about how to get curated by Brotherhood Community, check this Hive Blog.
Delegate your Hive Power to @brotherhood for supporting more such blogs and also receive curation rewards.