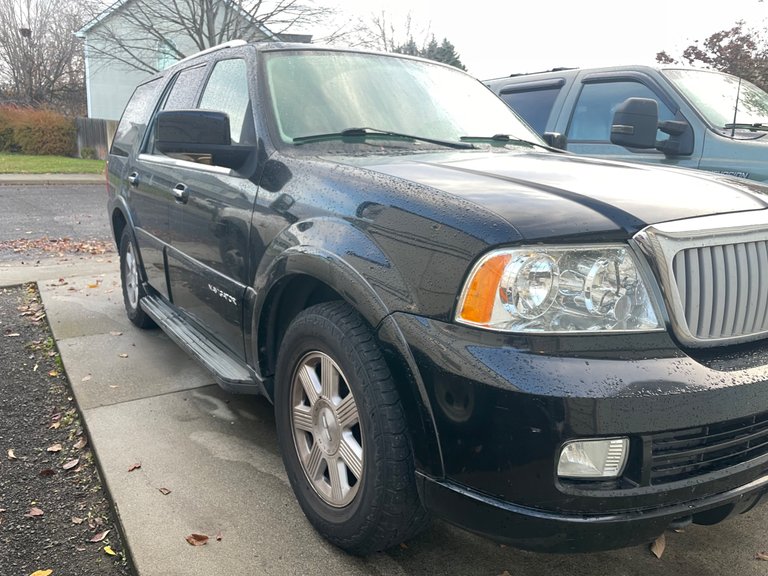
Having owned this car for close to 14 years, I can honestly say it’s been a great running car. The MPG’s aren’t the greatest but I have never had any major issues with it. Besides typical wear and tear items and the dreaded timing chain/cam phaser maintenance… (what a nightmare job that was). This 2005 Lincoln Navigator equipped with a 5.4L 24 valve V8 has over 180,000 miles. I bought it with 70,000 miles, so I’m pretty sure I have gotten my moneys worth out of it.
Over the past several months possibly a year I’ve noticed it being a bit sluggish taking off from a stop. Then other times it does great and just gets up and goes. That had me puzzled… It was like the computer didn’t know how far you were pushing down the accelerator pedal. It would just bog down and barely move, then all the sudden find its way and take off.
I drive this rig back and forth to work quite a bit. I started noticing engine surging while the cruise control was on while driving on level ground. You couldn’t see it on the tachometer but you could feel it in the car. It was like it was having trouble maintaining the set speed. Also when hitting a hill the transmission would kick out of overdrive and the RPM’s would rev up a bit to maintain speed. Then on the downhill instead of going back into overdrive it would stay with the RPM’s cranked up a bit. Push the gas pedal down a bit and ta-da it shifts into overdrive and the RPM’s drop. This also had me shaking my head in confusion…
After doing a bit of Googling and reading on different automotive forums, I figured it’s gotta be a sticky throttle body. I mean it makes sense to me. The throttle body sticking a little then opening up wider than it should could be the surging while cruising. The sluggish start from a stop could also be it sticking and not opening up properly.
I know for a fact this throttle body has never been cleaned. With over 180,000 miles I bet it is long overdue. Ford put this engine in a bunch of vehicles for many years. The F-Series trucks, Expeditions, Mustangs and Navigators. They had a few different versions of the engine spanning over a decade or more. A 2-valve version, 3-valve and 4 valve… that’s valves per cylinder. Anyway let’s take this POS apart and get this throttle body cleaned up shall we??
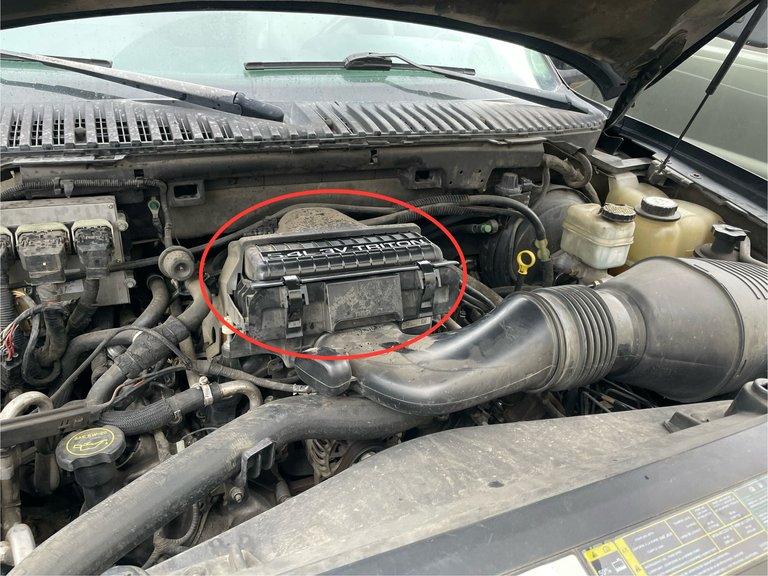
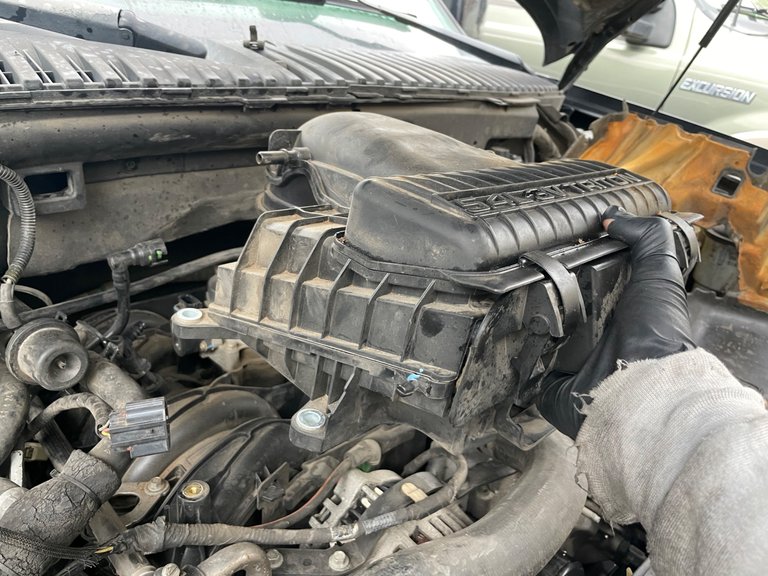
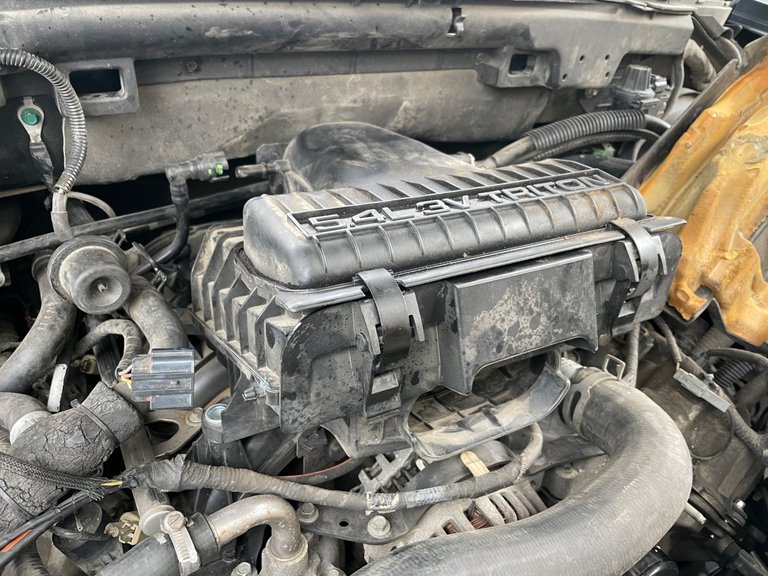
First, disconnect the battery. The throttle body is located underneath the this big ol’ plastic intake filter box.
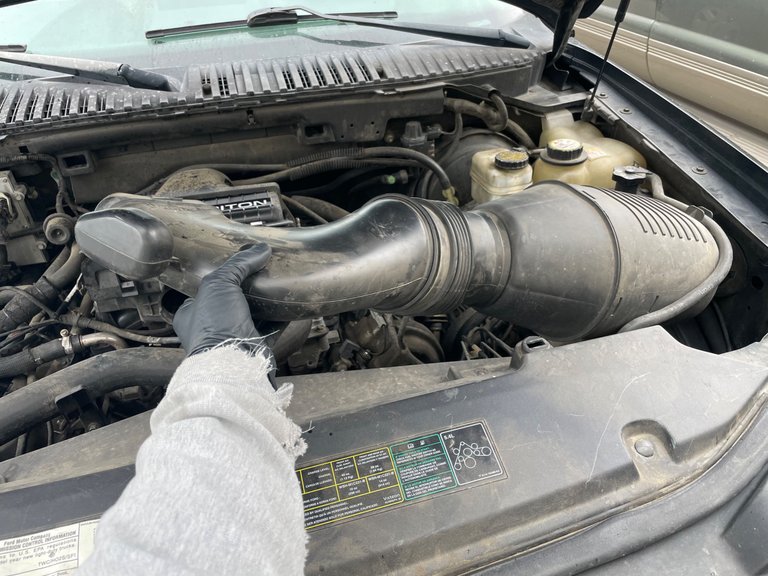
First thing to do is grab a hold of the intake tube where it goes into the air filter box and rip that thing outta there. Then lift it up to release the pegs on the lower right side, then pull to the left. Don't be nice about it, this is a good time to take out a little frustration.
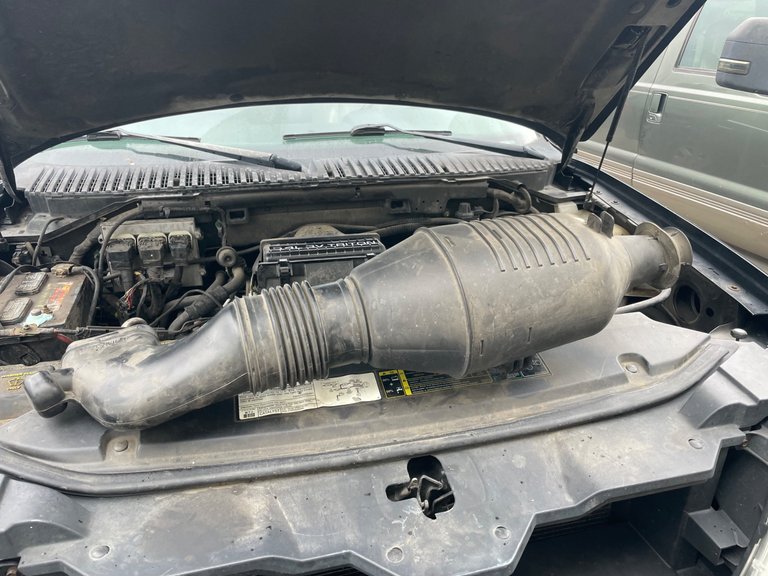
Then toss it over your left shoulder and out of your way. Just watch out for the neighbor’s cat that’s digging in the flower bed leaving you a nice present.
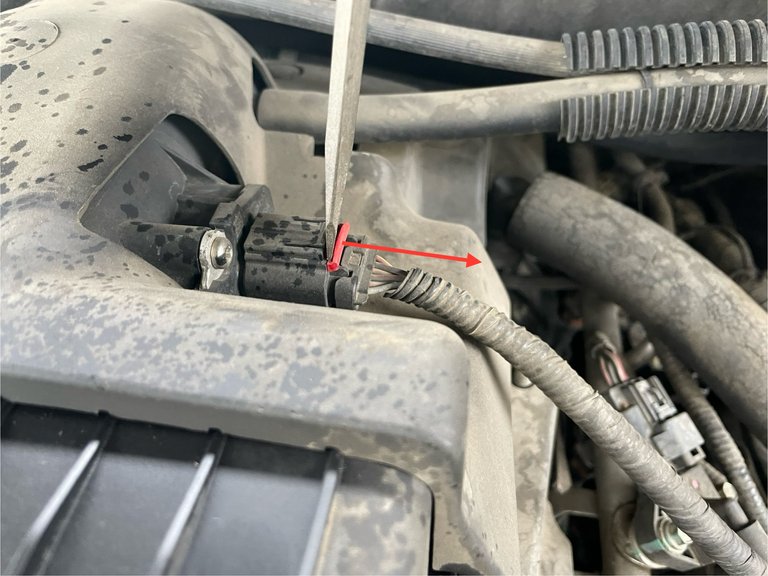
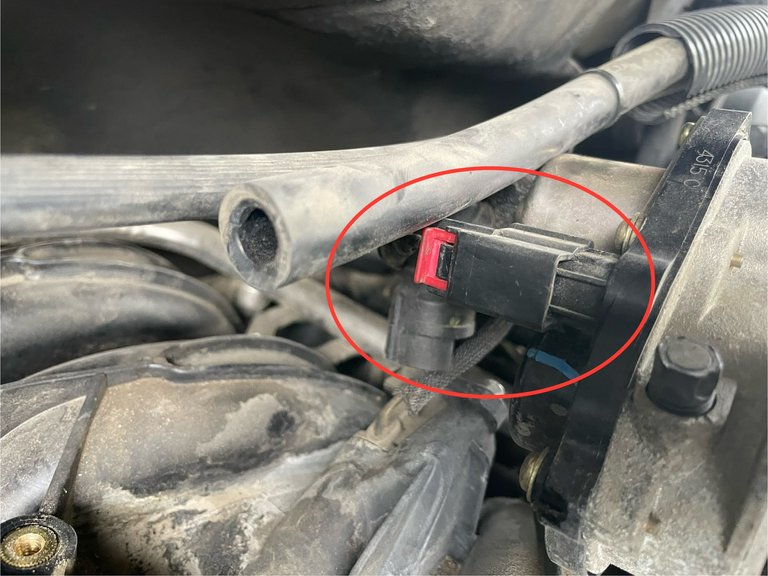
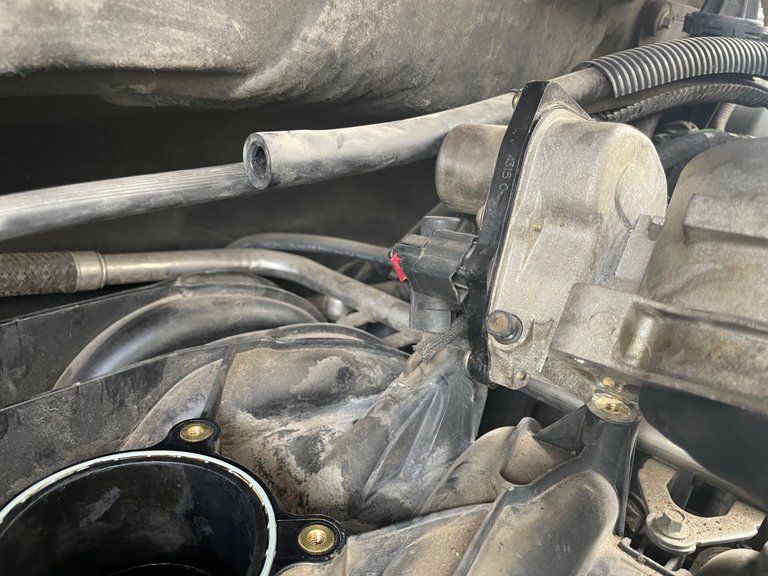
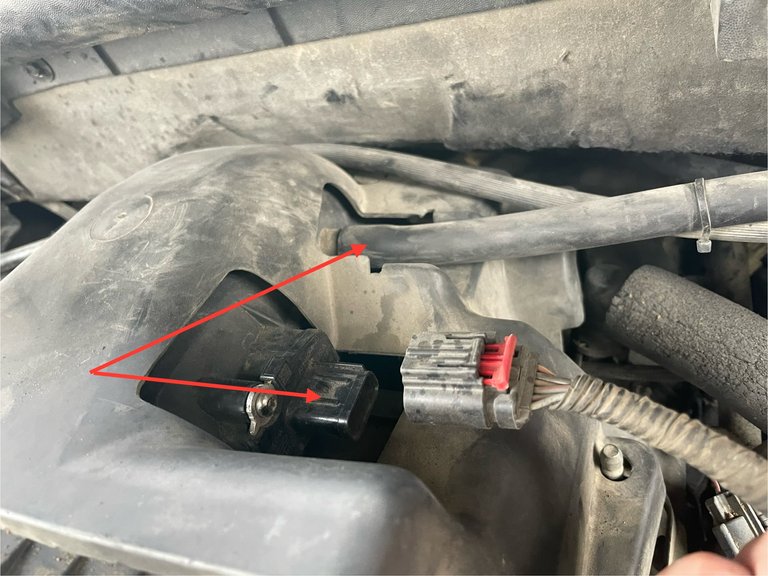
Next we need to disconnect all the different vacuum hoses and electrical connectors. On the Driver side there is an electrical connector and a vacuum hose. To remove the electrical connector you need to slide the red tab away from the connection, then pinch the plug and remove it.
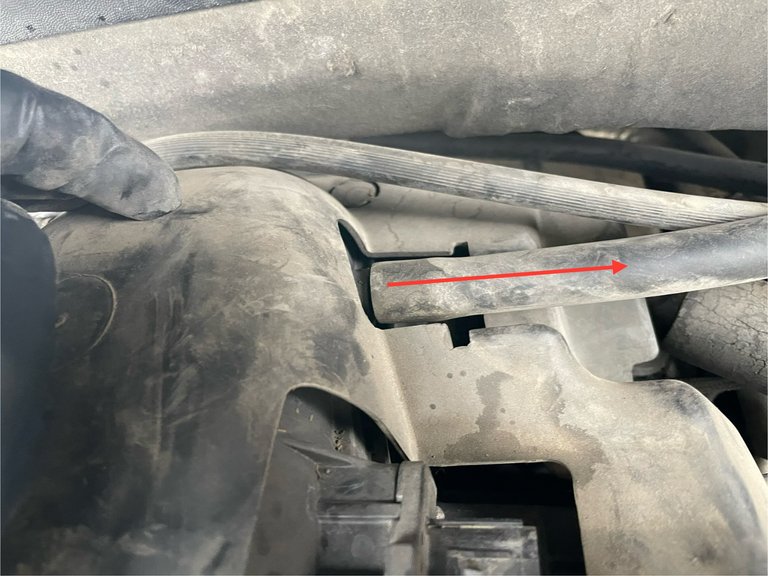
The vacuum hose may require the use of a small flathead screwdriver to break it free from the barbed fitting.
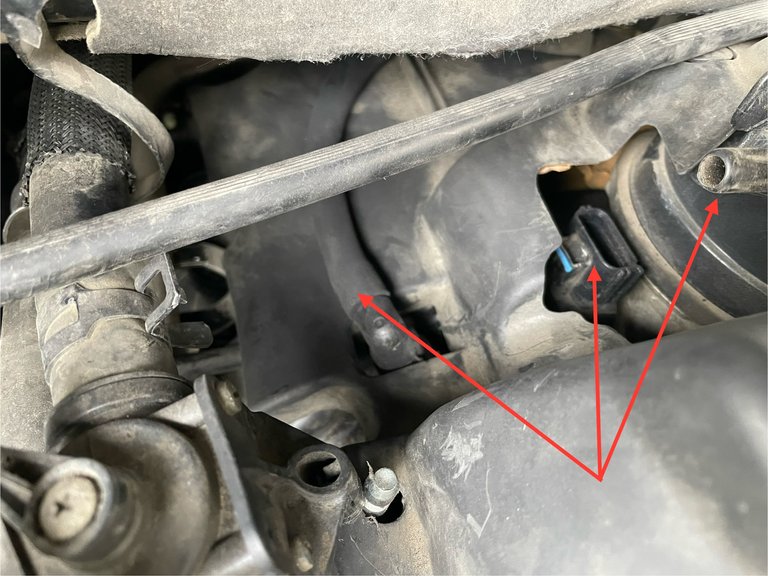
On the passenger side there are 2-hoses that need removed and an electrical connector.
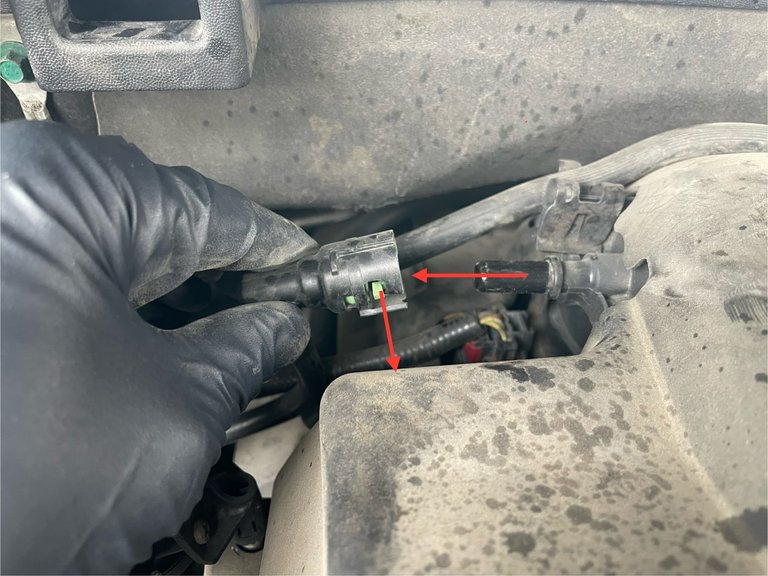
The green tab slides down, which releases the fitting and it can be slid off
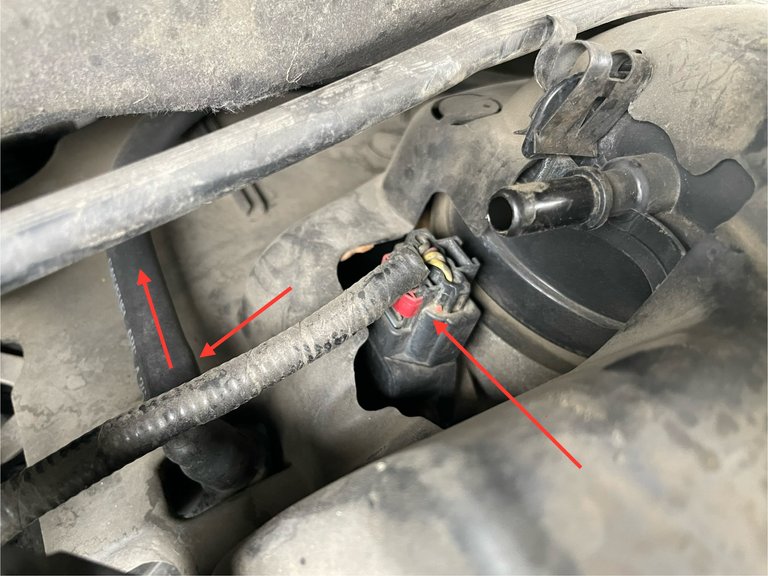
Slide the red tab away from the connector, squeeze, and pull off. The hose is kind of hidden but it needs to be slid off the barbed fitting also. That little flathead screw driver comes in real handy.
Now this pointless cover needs to come off. The Ford F-150’s didn’t have it so why does my Navigator have it? On both sides of the intake box in the front are little tabs that the cover slides over to hold it in place.
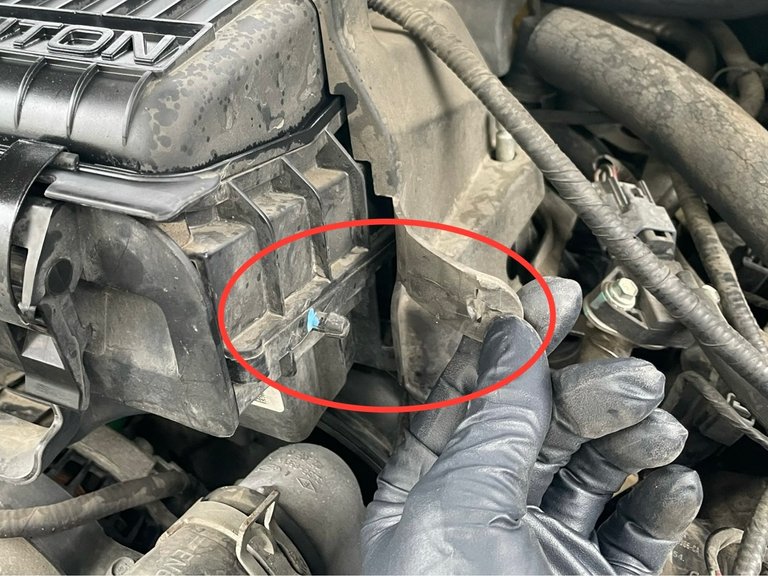
It was a bit of a battle trying to pull this POS cover off. It wouldn’t come out by pulling it toward the front of the vehicle, or to the passenger side.
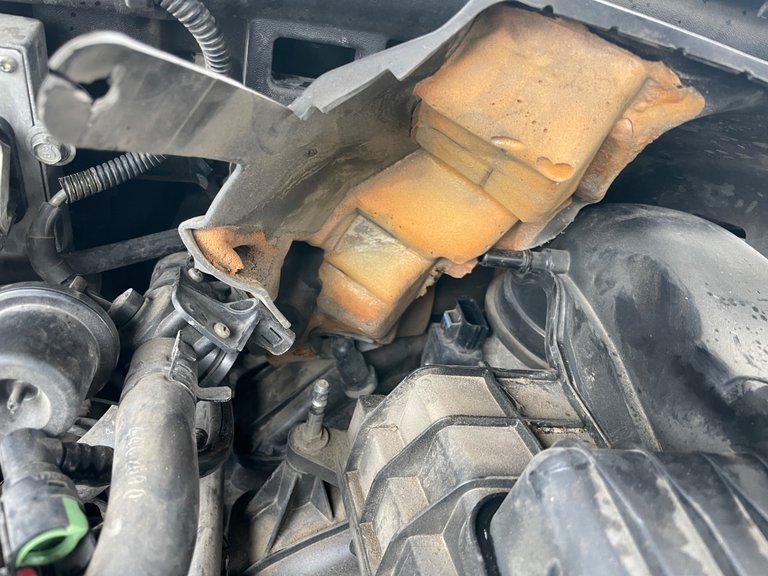
That foam insulation crap was thick in places and the only way to get it out was to slide it out the driver side.
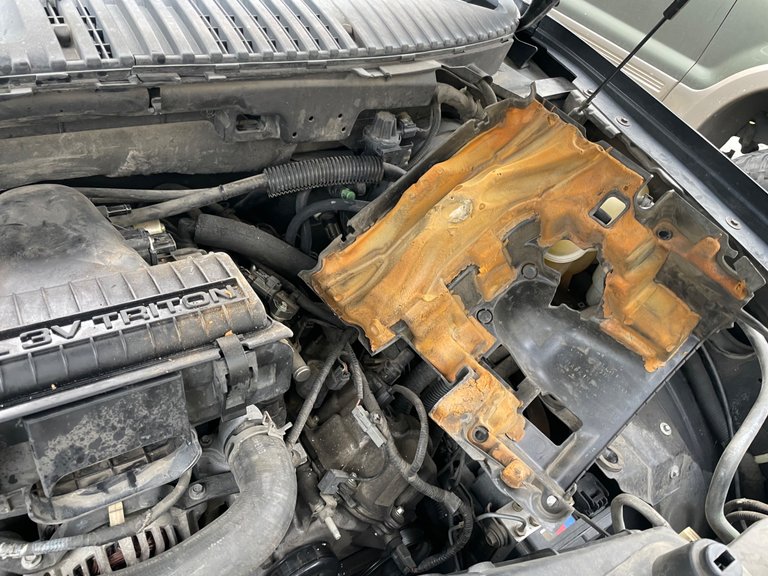
I was this close to taking that POS cover and throwing it in the garbage. I didn’t because there is a hose support bracket on the back that keeps the vacuum hose from rubbing on things.
Now that the useless cover is out of the way, we need a deep 10mm socket to remove the 4 stud bolts that hold the intake filter box in place. 2 on the driver side…
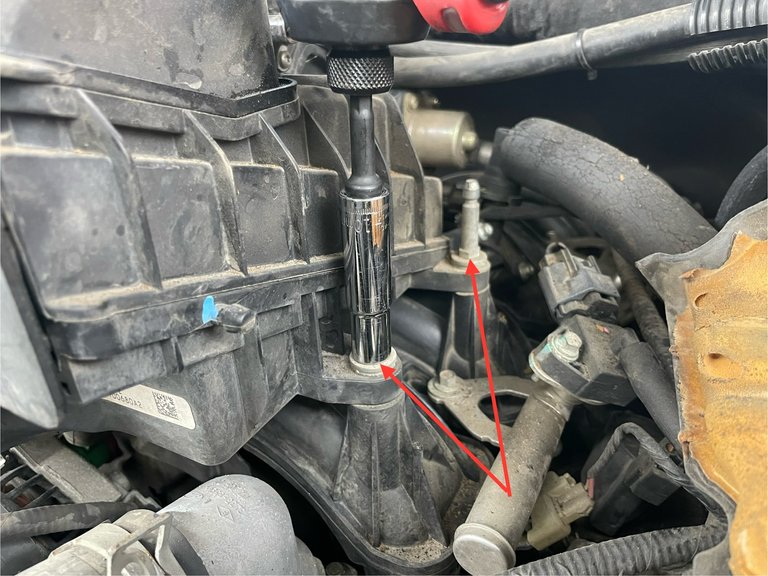
and 2 on the passenger
Now rip that intake filter box right outta there by wiggling and lifting up.
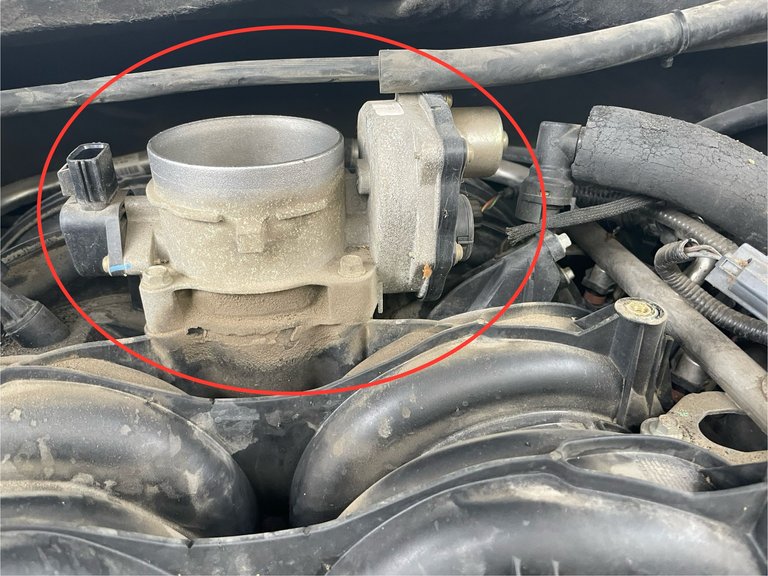
The Throttle Body
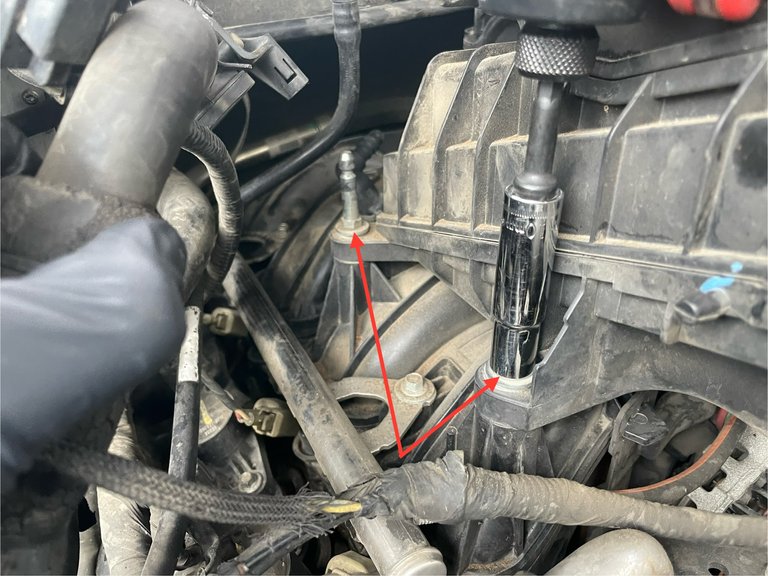
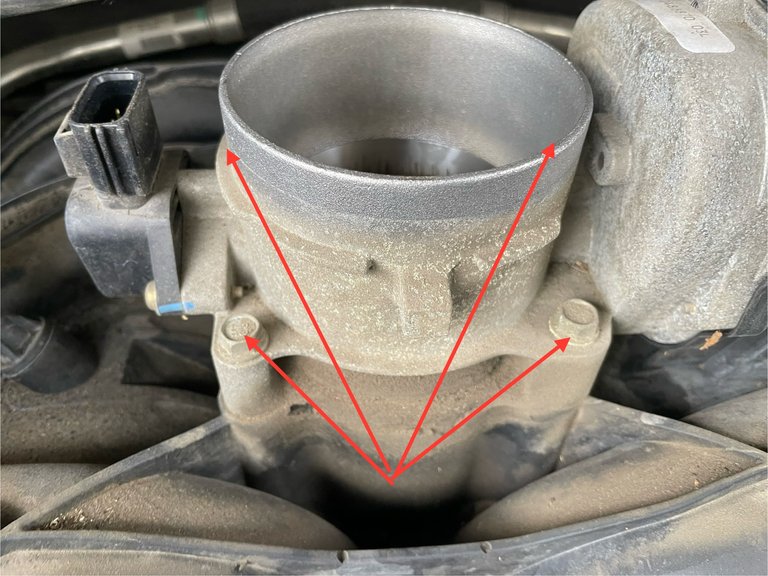
To remove the throttle body there are 4-10mm bolts that hold it in place. 2 in the front and 2 in the back that you cannot see.
Wiggle it and lift it up and off the intake plenum. Be careful there is one more electrical connector that need to be unplugged
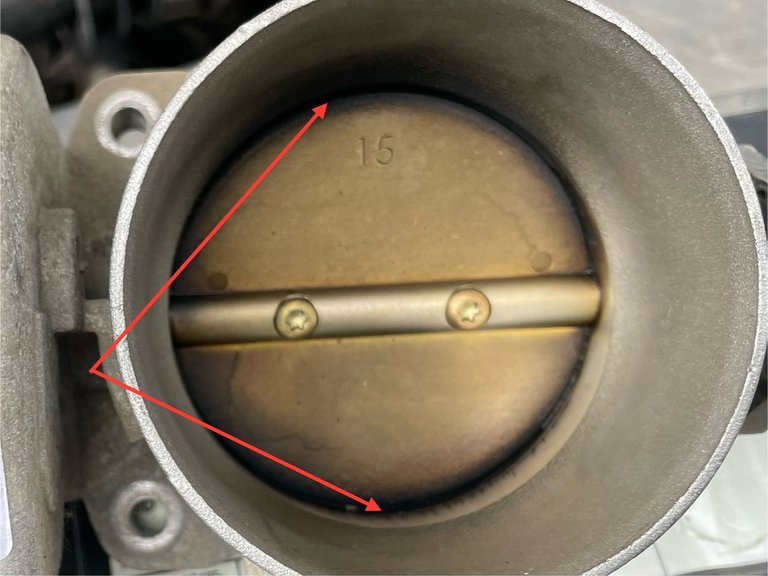
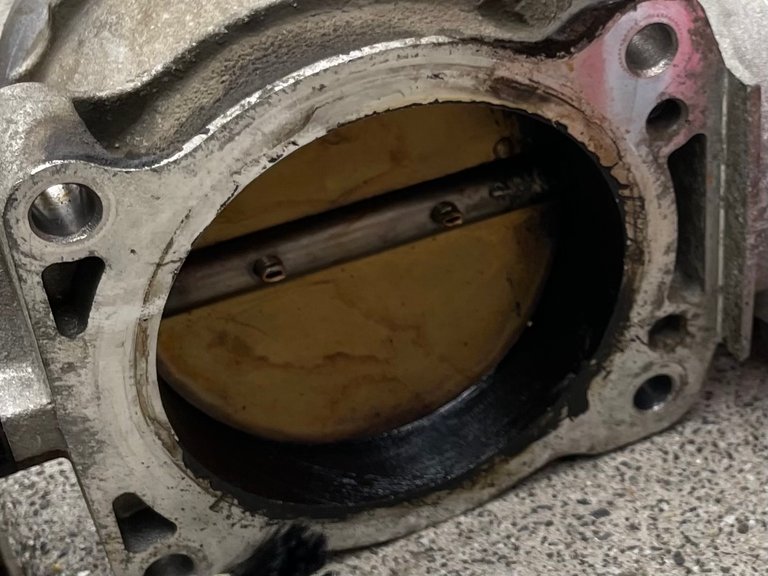
Let’s take a look and see how nasty this thing is. The top side doesn’t look too bad except for the dark ring of black goo around the edge. This could very well be what is causing it to stick.
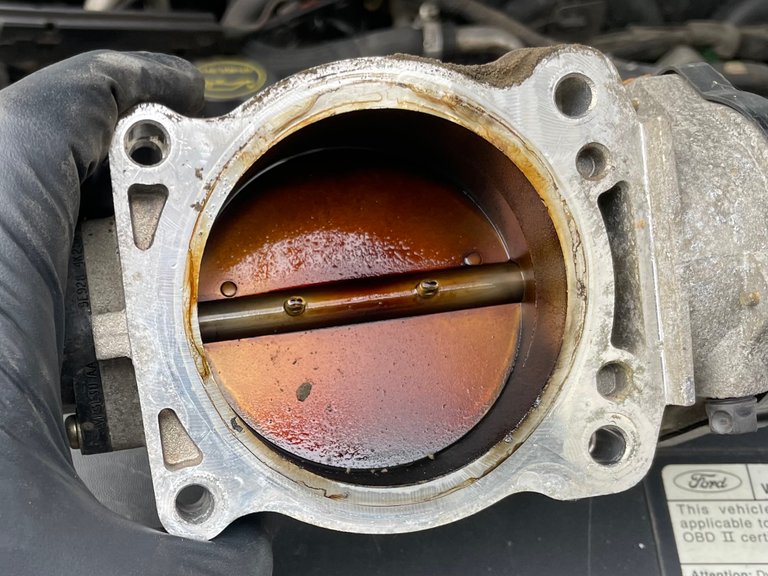
The Bottom side is a different story…
Dang!!
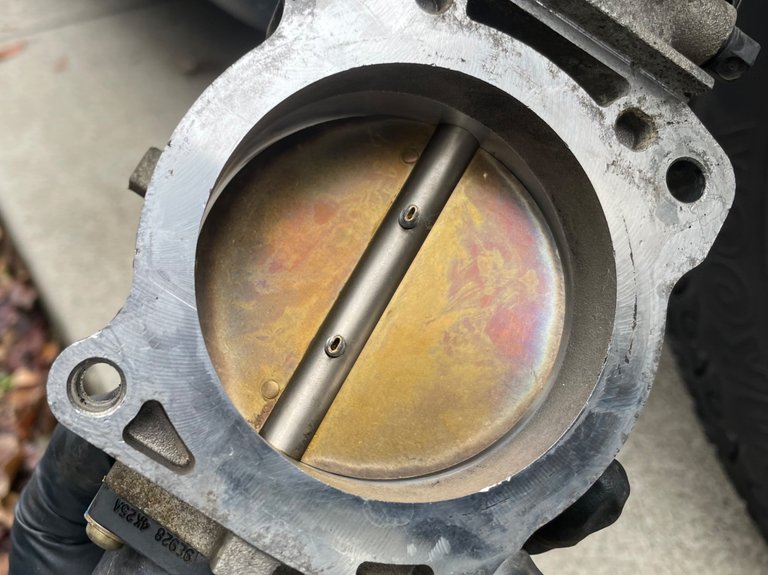
Grab a can of throttle body cleaner and a toothbrush and get this throttle body scrubbed and cleaned up.
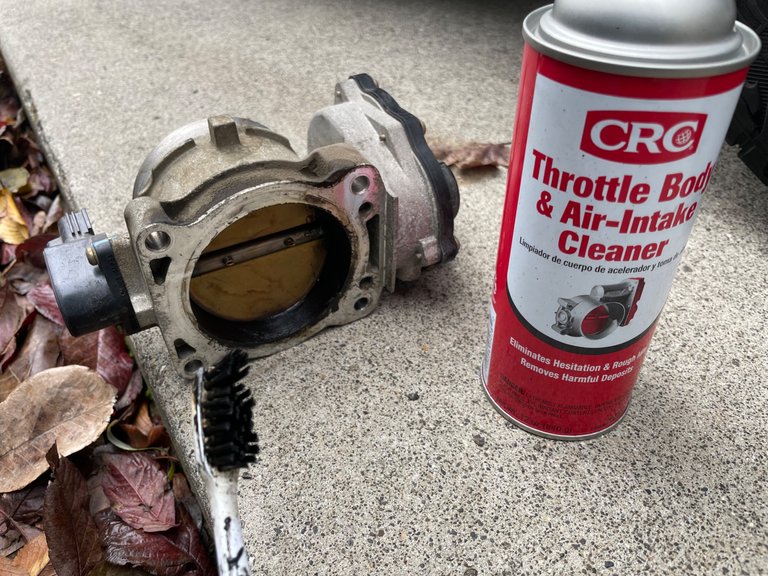
After spraying it down and a couple scrubs of the toothbrush, I could tell how nasty this thing was!
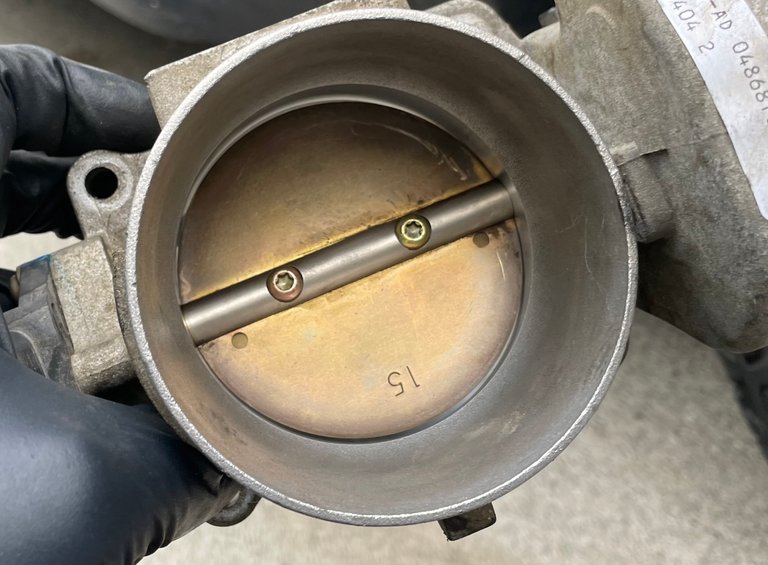
After spraying and scrubbing with a toothbrush, I used some shop rags soaked with the cleaner to get it nice and clean and removed any leftover gunk
Almost…
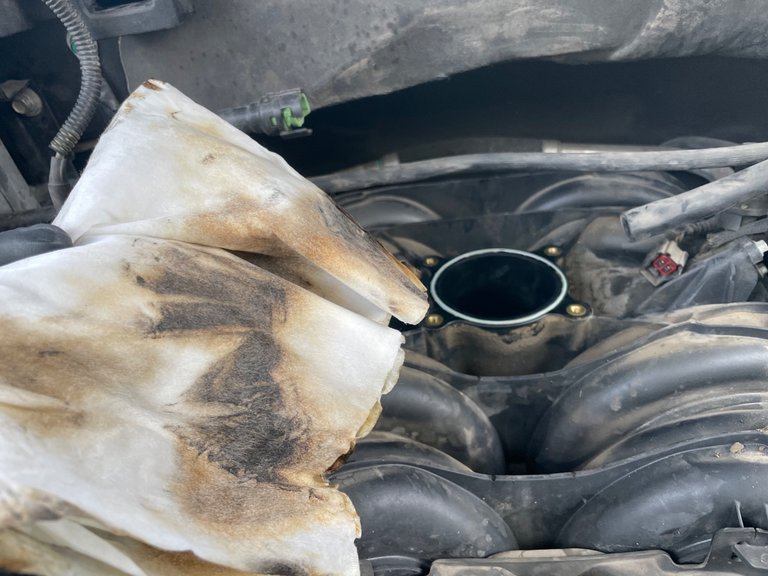
I took a few more rags and soaked them with the cleaner and cleaned up the throttle body mounting surface and inside the plenum tube. Dang this is nast!! I’m starting to think I should pull the whole upper intake off and clean it also. Maybe I will do that some other day…
Now that everything is all cleaned up, let’s slap this bad boy back together. Before placing the throttle body back on the intake plenum, connect the electrical connector.
Place it on the intake plenum and tighten down the 4-10mm bolts. Snug them all up first, then tighten them the rest of the way.
Install the intake filter box onto the throttle body and install the 4-10mm stud bolts
Then wrestle that stupid cover back over the intake filter box and start connecting all the hoses and electrical connectors.
Driver Side
Pop the intake tube back on and into place and reconnect the battery. With fingers crossed, start the car and hope you put everything back together right and take it for a little spin.
It seemed to have fixed the sluggishness from taking off from a stop that is for sure. Later on I will hit the highway and set the cruise control and see if it fixed the surging problem.
While I was at it I changed out the VVT solenoids that operate the variable timing of the engine. I recently had a check engine light pop up and they need to be changed. Stay tuned for the next repair job.

Your Random
Dose of...


Hello friend, without a doubt a successful and interesting repair that you show, in addition to an excellent description of all that disassembly that you had to do to reach the throttle body, which by the way had a lot of dirt, which makes me wonder what the source of all that viscosity? I'm not very mechanically expert but I like it. Greetings
Weldone boss. This car is really a strong car, after 15 years is still looking new. It really nice you are able to fix the little issues the car had
Nice. 😎🤜
still in great shape! thats a pretty clean engine for being 14 y/o
I'm reminded again that I know nothing about this sort of thing, but that's not why I stopped/dropped/flopped by.
This is why...
What happens when you don't wear fancy black latex protection during such mechanical exercises?
And I thought that disassembling my car to access the throttle body was a pain, well for a mechanic this is routine, but it definitely needed cleaning, thanks bud for sharing the process.
For a car that is almost 19 years old, it looks very well cared for, and the fact that it has not given you so many problems speaks well of its quality, however, 180,000 miles is a short distance traveled for that amount of time, that also helps it to deteriorate less. Definitely needed that maintenance, we have enjoyed seeing the result, thanks for sharing.