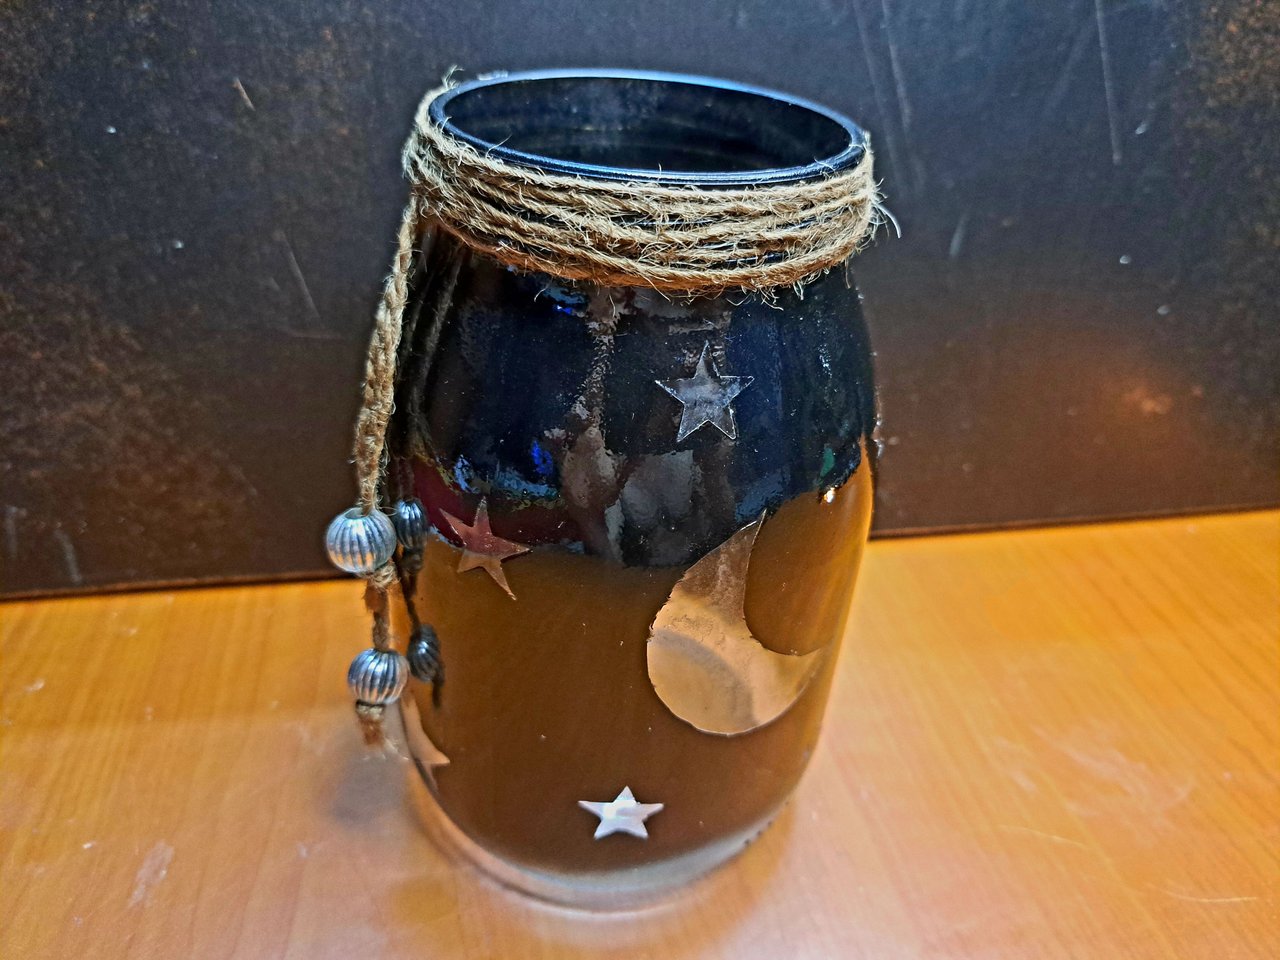
Greetings friends of the HiveDiy community. Today I bring you a tutorial to make a very easy but beautiful craft. I want to show you how to make a night light that projects a starry night. I don't think that's the exact name of this type of craft, but it does describe perfectly how it works. If you know what it's called, please let me know in the comments 😅.
The lamp is meant to help create a romantic and relaxing atmosphere and it works by inserting some light source inside it, either a candle or some light bulb. Different colored lights can be used and depending on the height of the light source the projected pattern varies.
Spanish Version Here
Saludos amigos de la comunidad HiveDiy. El día de hoy les traigo un tutorial para hacer una manualidad muy fácil pero a la vez hermosa. Quiero enseñarles a confeccionar una lámpara nocturna que proyecta una noche estrellada. Creo que ese no es el nombre exacto de este tipo de manualidad, pero sí describe perfectamente como funciona. Si saben como se llama, por favor háganmelo saber en los comentarios 😅.
La lámpara tiene como objetivo ayudar a crear un ambiente romántico y relajado y funciona introduciéndole dentro alguna fuente de luz, ya sea una vela o algún bombillo. Se pueden utilizar luces de distintos colores y en dependencia de la altura de la fuente de luz el patrón proyectado varía.
 |
 |
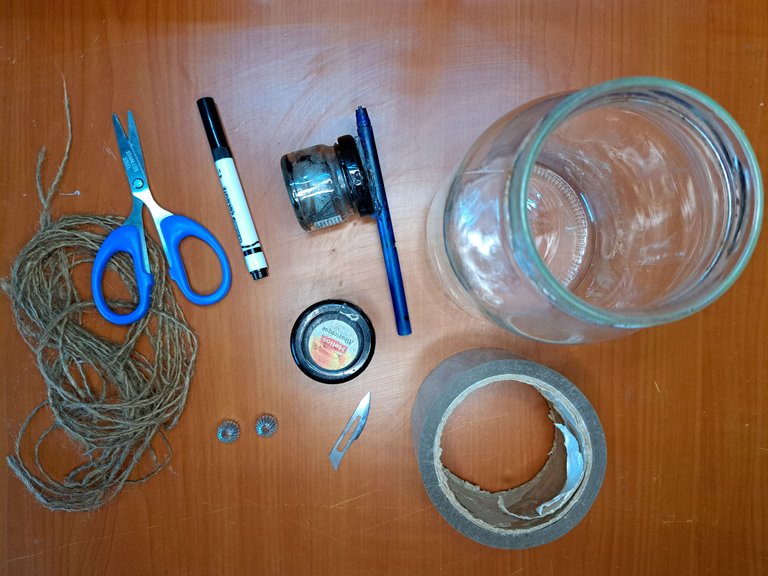
Materials // Materiales
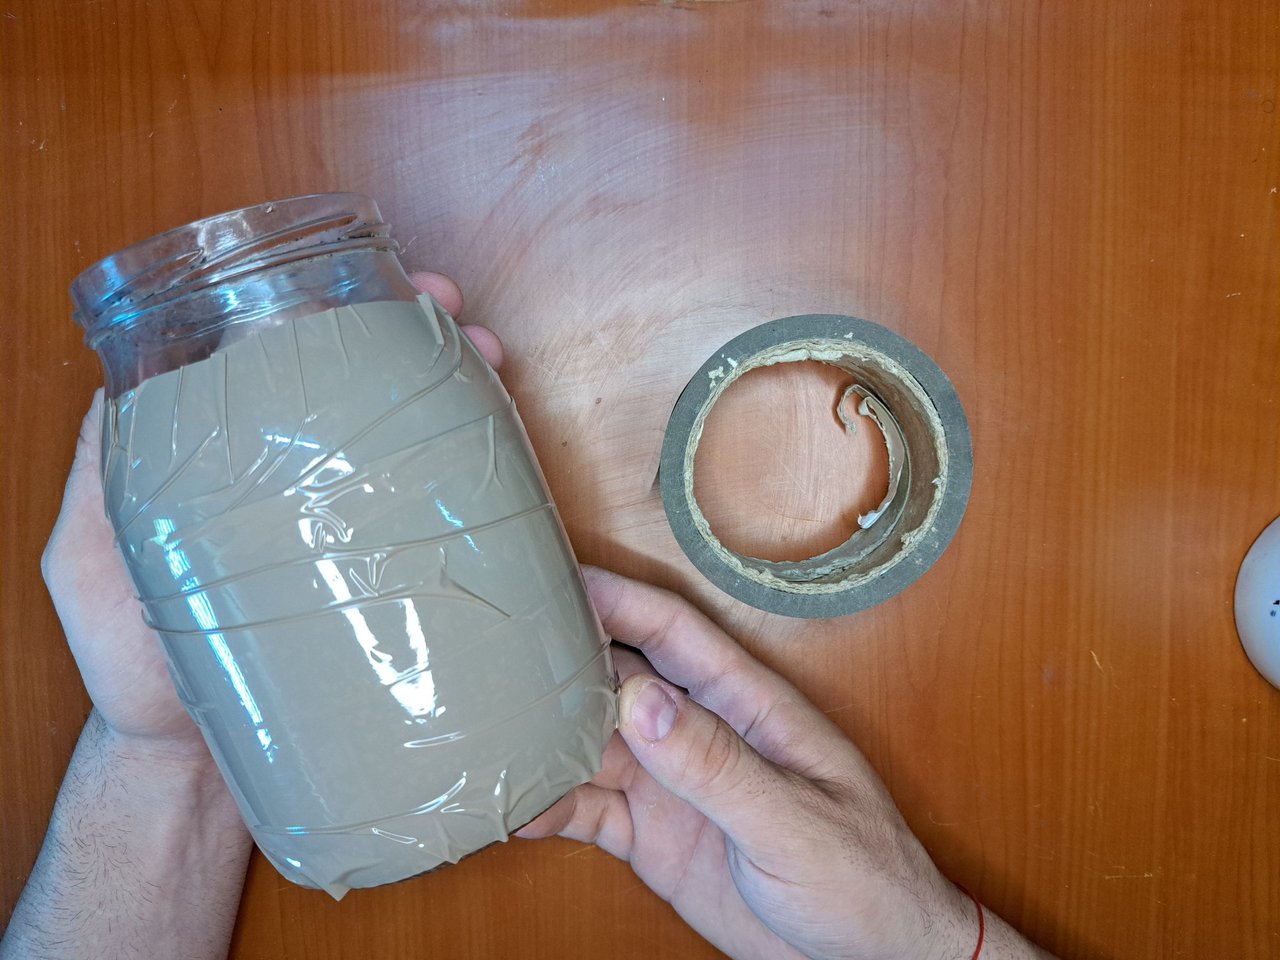
| ✔️ Vase or glass container transparente | ✔️ Jarrón o envase de cristal transparente |
| ✔️ Adhesive tape of any color | ✔️ Cinta adhesiva de cualquier color |
| ✔️ Black oil paint (preferably matte) | ✔️ Pintura de aceite negra (preferentemente sin brillo) |
| ✔️ Scissors and scalpel | ✔️ Tijeras y bisturí |
| ✔️ Black marker | ✔️ Marcador negro |
| ✔️ Airbrush (made by me) | ✔️ Aerógrafo (hecho por mi) |
| ✔️ Perforated plastic beads | ✔️ Perlas plásticas agujereadas |
| ✔️ Jute thread | ✔️ Hilo de yute |
Step by step // Paso a paso
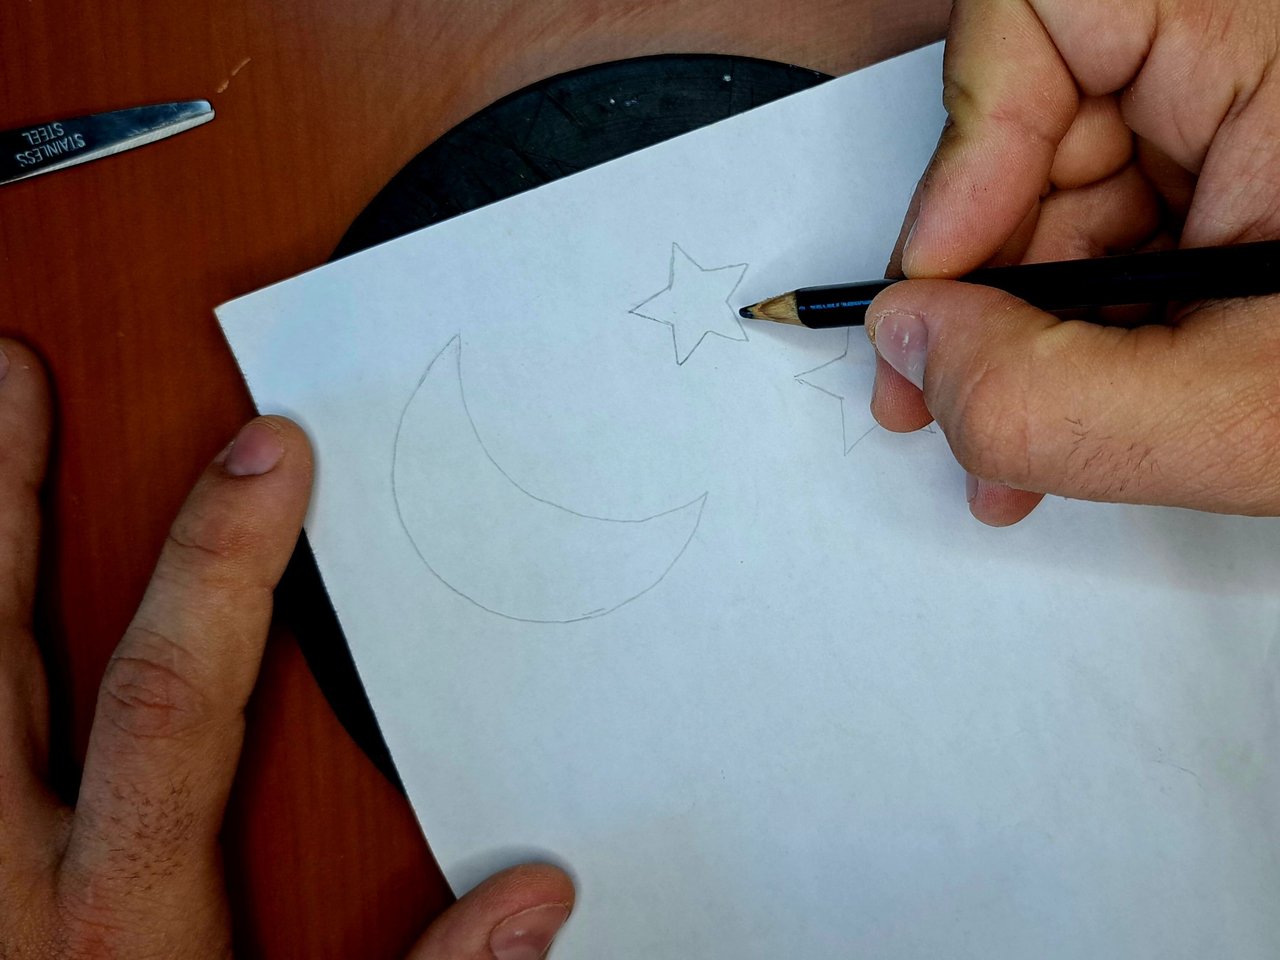
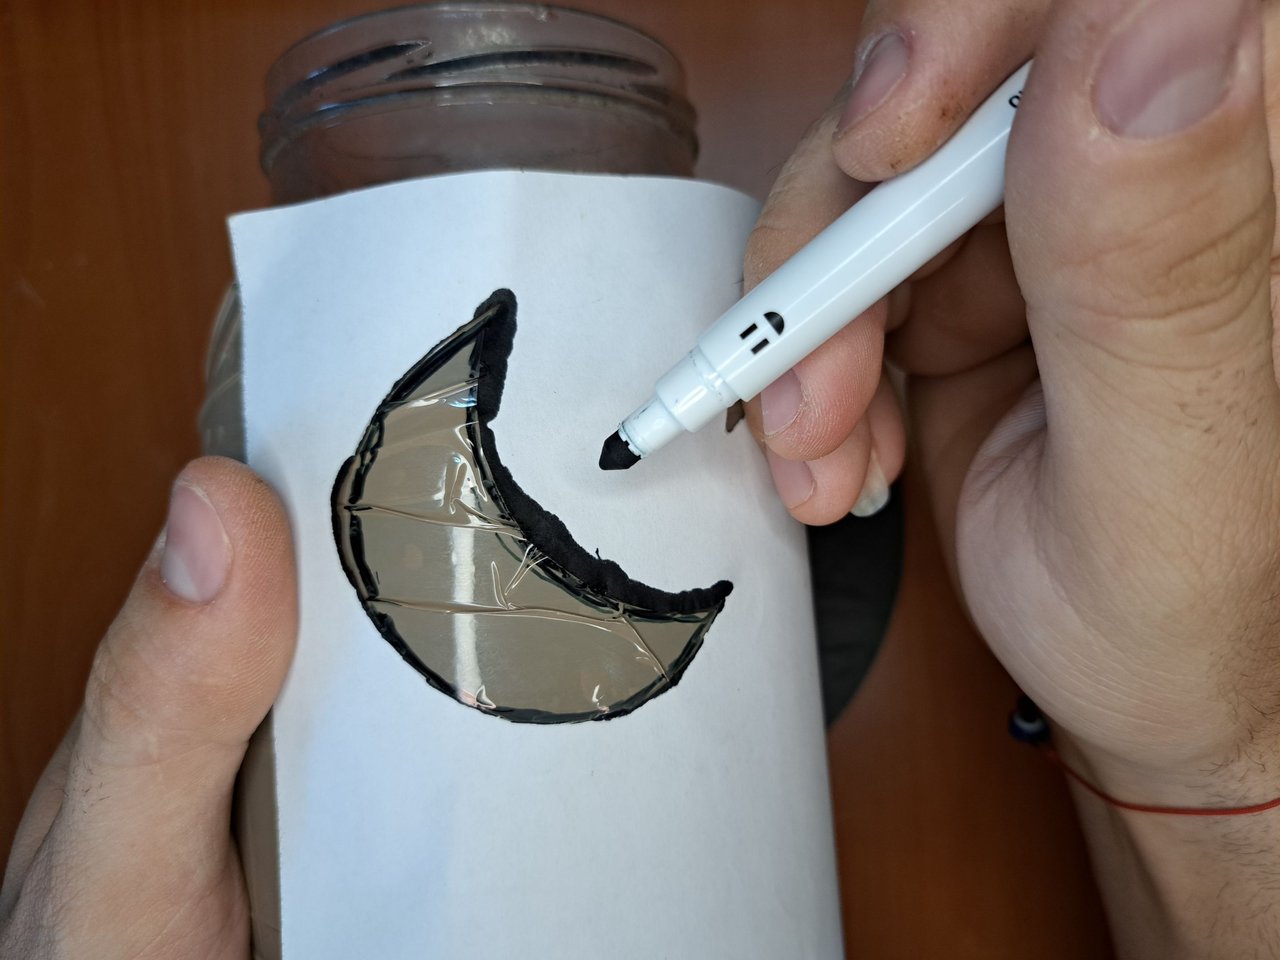
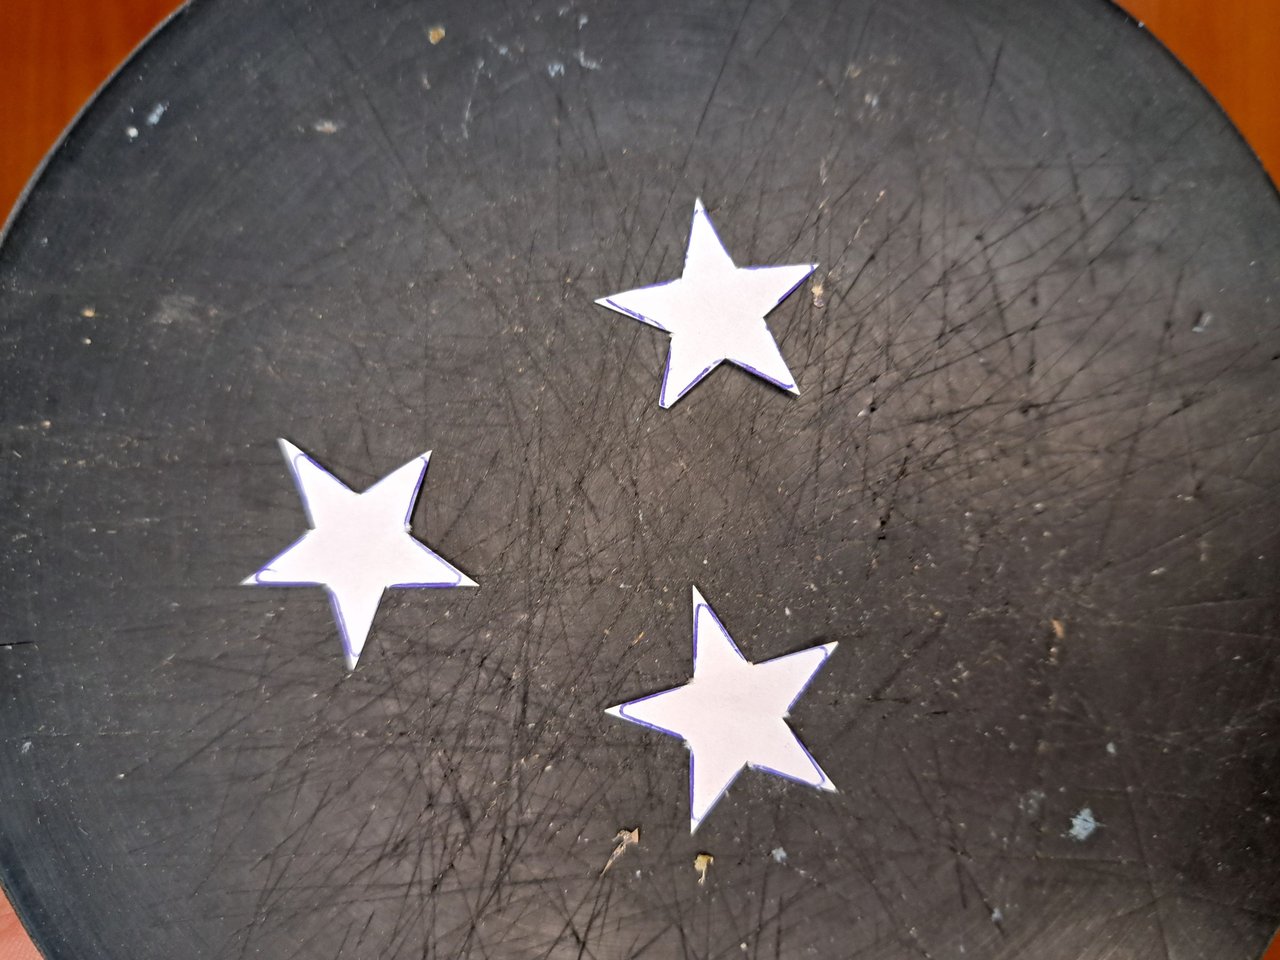
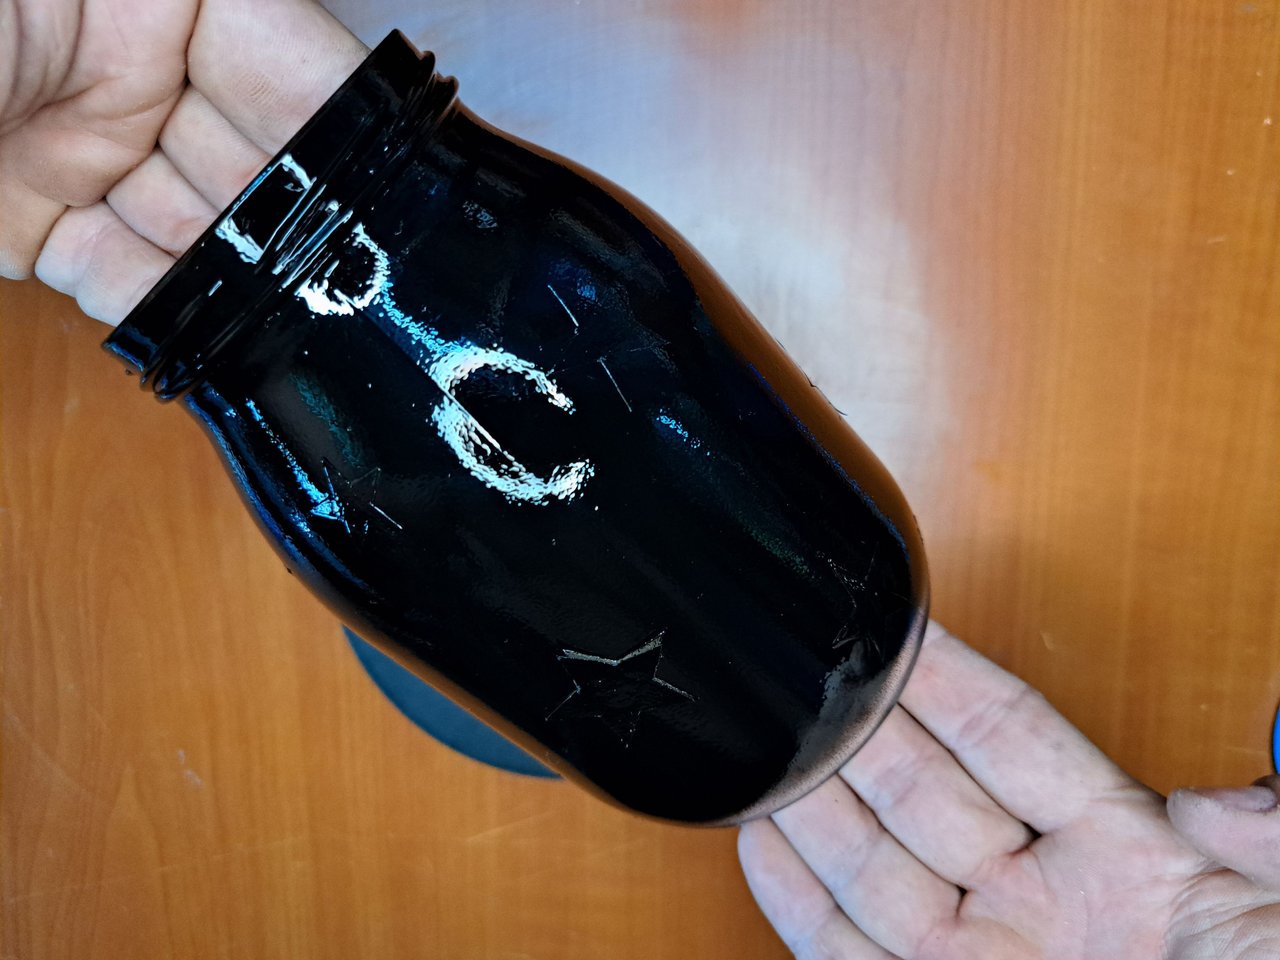
1️⃣ To start we mark and cut out the silhouettes of the moon and stars on a piece of paper. Then we wrap the glass container with tape and using the black marker we mark the morph of the moon and stars on the surface of the container covered with tape. We will mark a single moon and several stars of different sizes.
Spanish Version Here
1️⃣ Para empezar marcamos y recortamos las siluetas de la luna y las estrellas en un papel. Luego envolvemos el envase de cristal con cinta adhesiva y utilizando el marcador negro marcamos la morfa de la luna y las estrellas en la superficie del envase cubierto de cinta. Marcaremos una sola luna y varias estrellas de distintos tamaños.
 |
 |
 |
 |
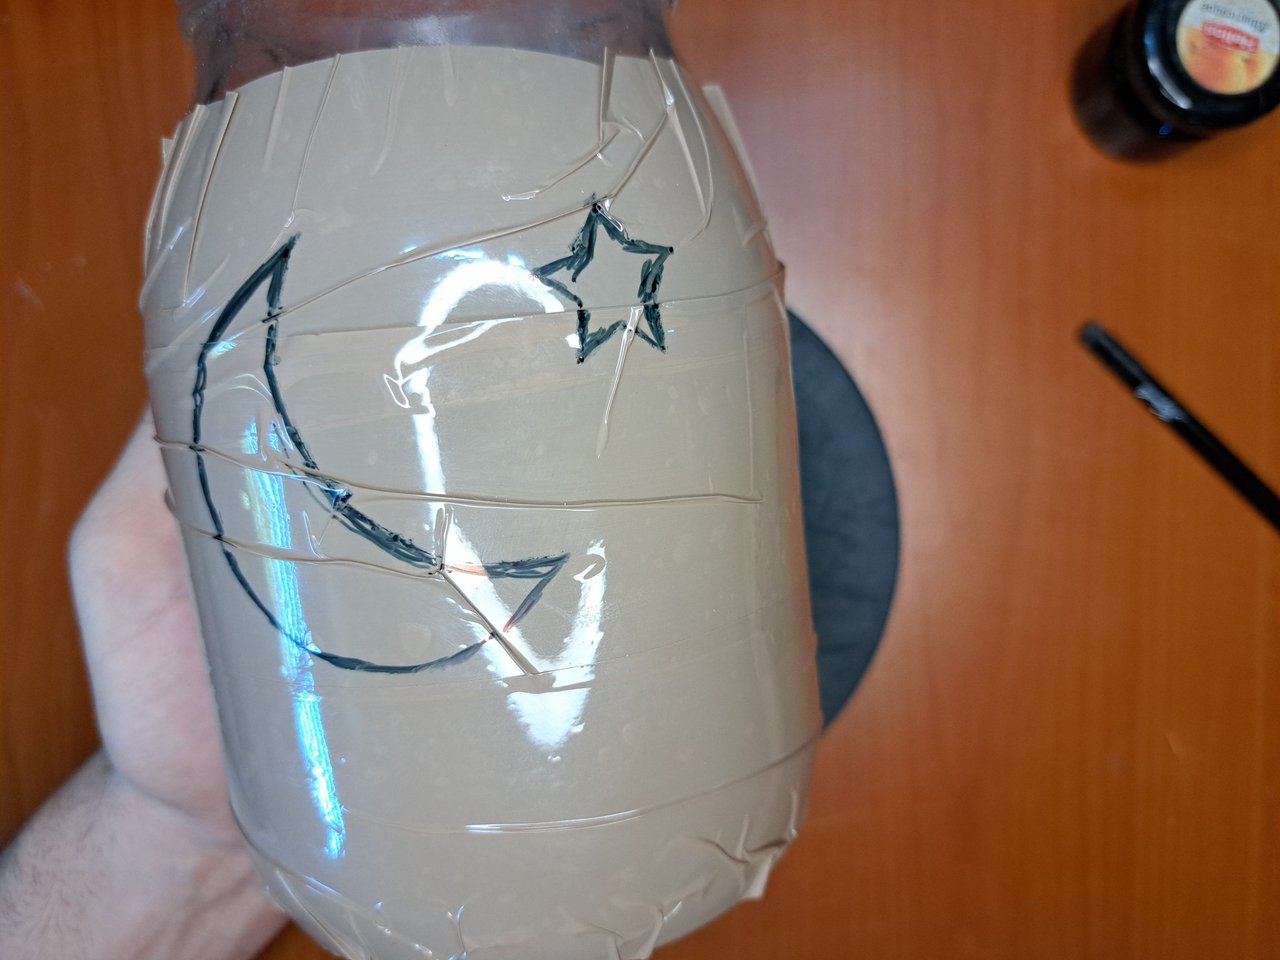 |
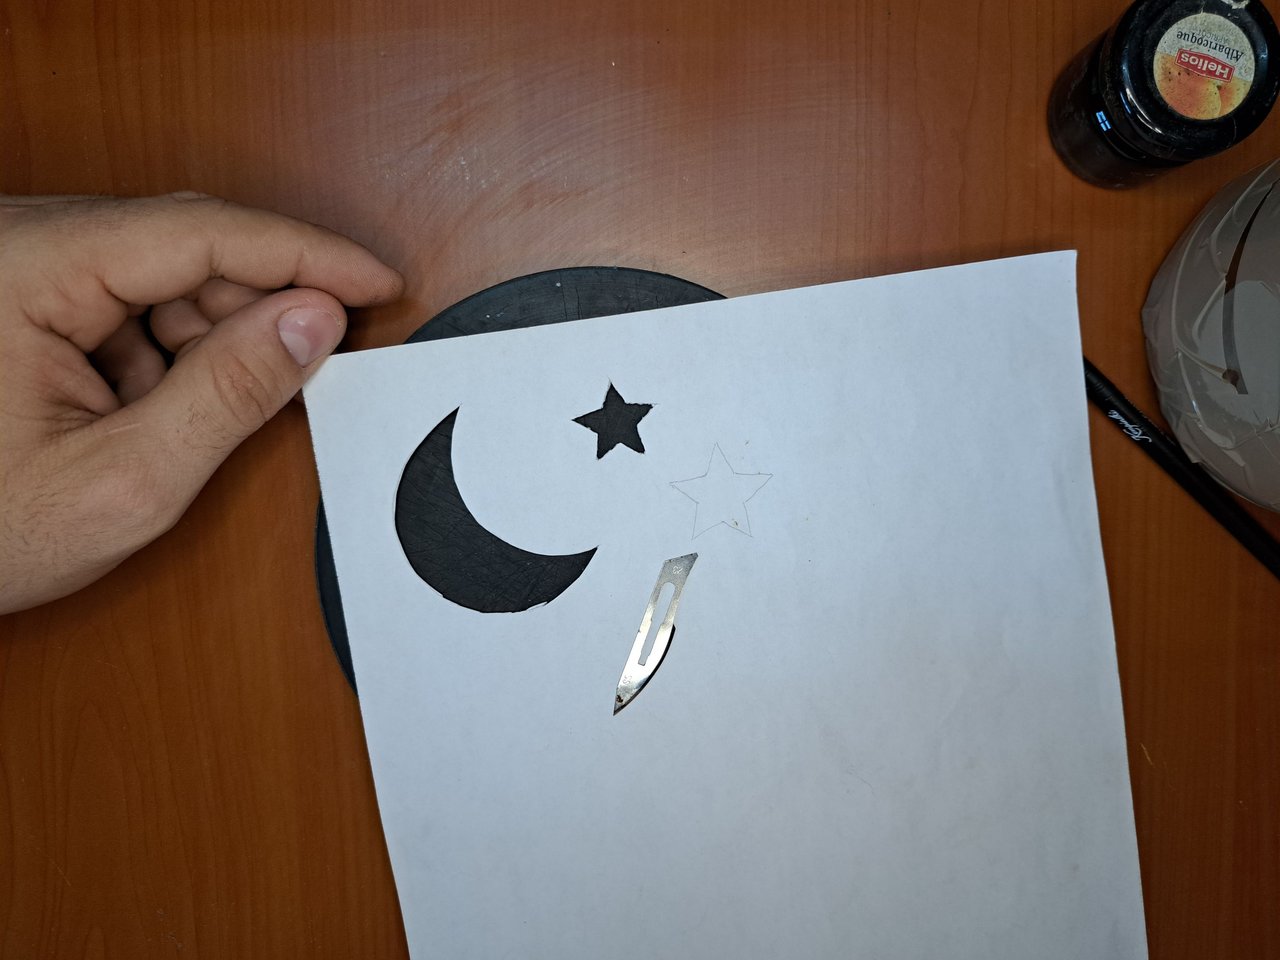
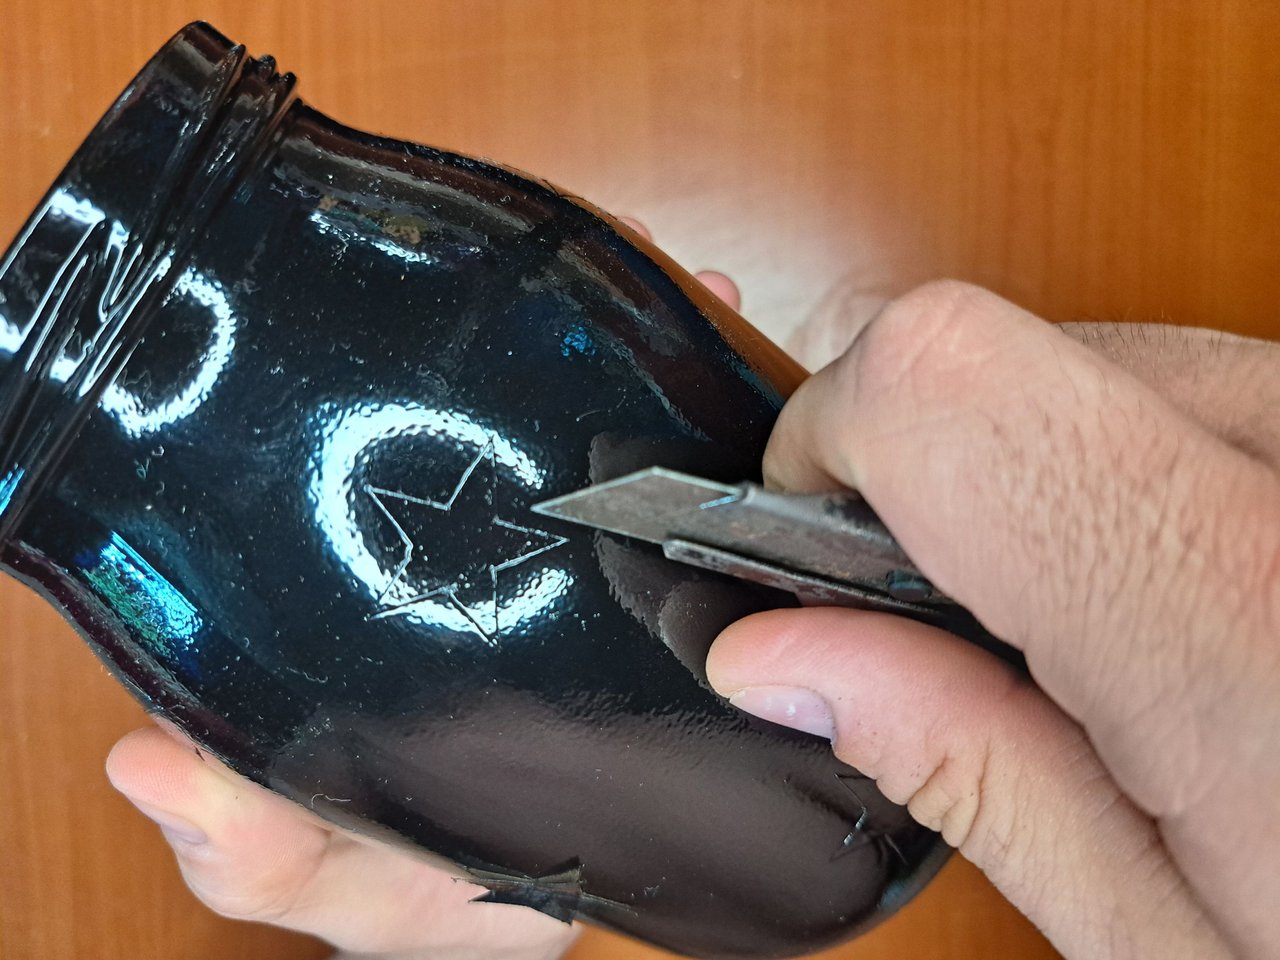
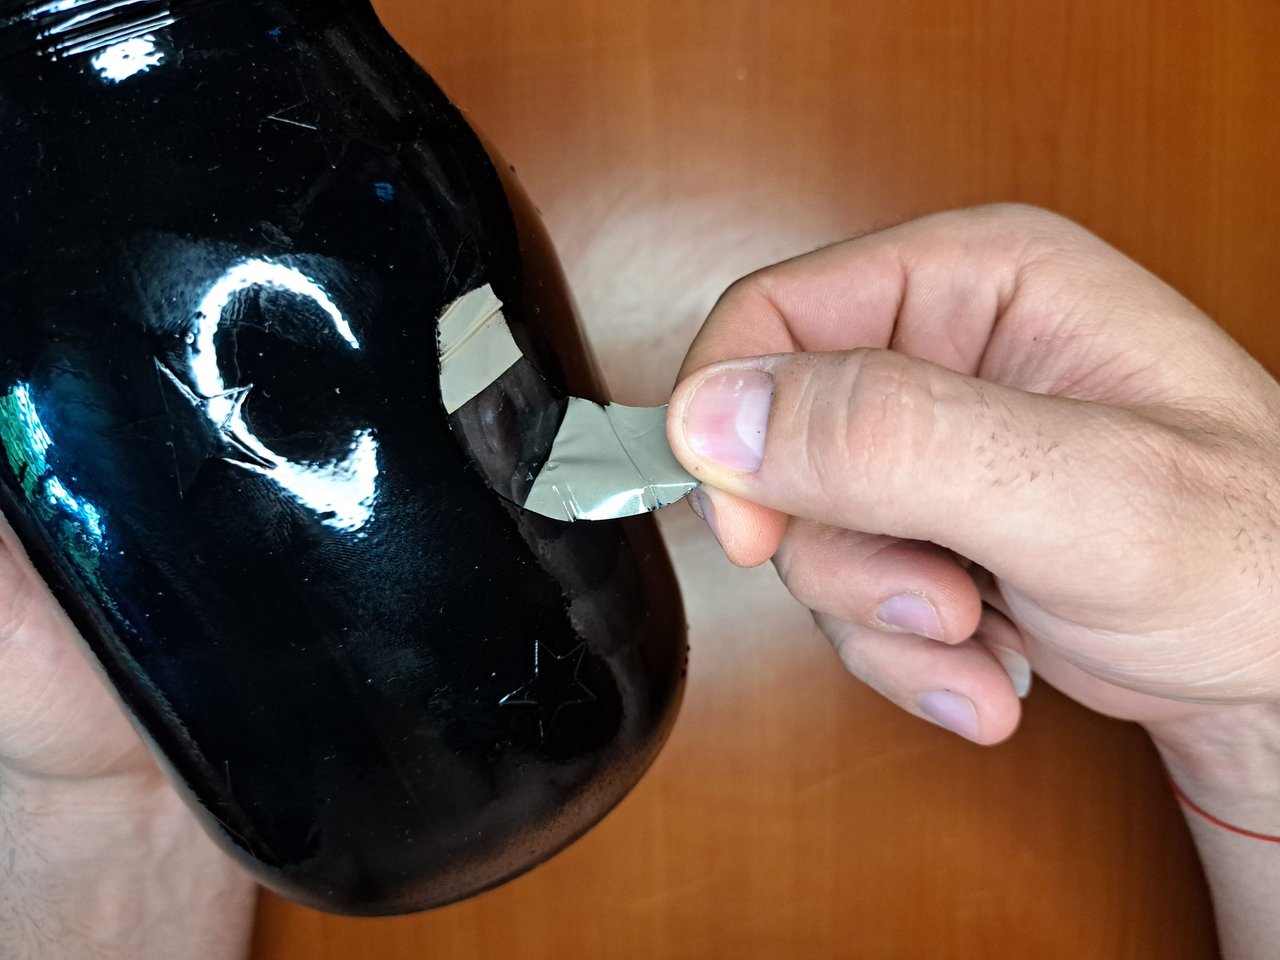
2️⃣ Then with the scalpel we cut the adhesive tape following the marks of the marker. Then, remove the excess tape and the moon and stars will be glued to the container. This procedure must be done very carefully so as not to alter the shape of the figures we want to leave.
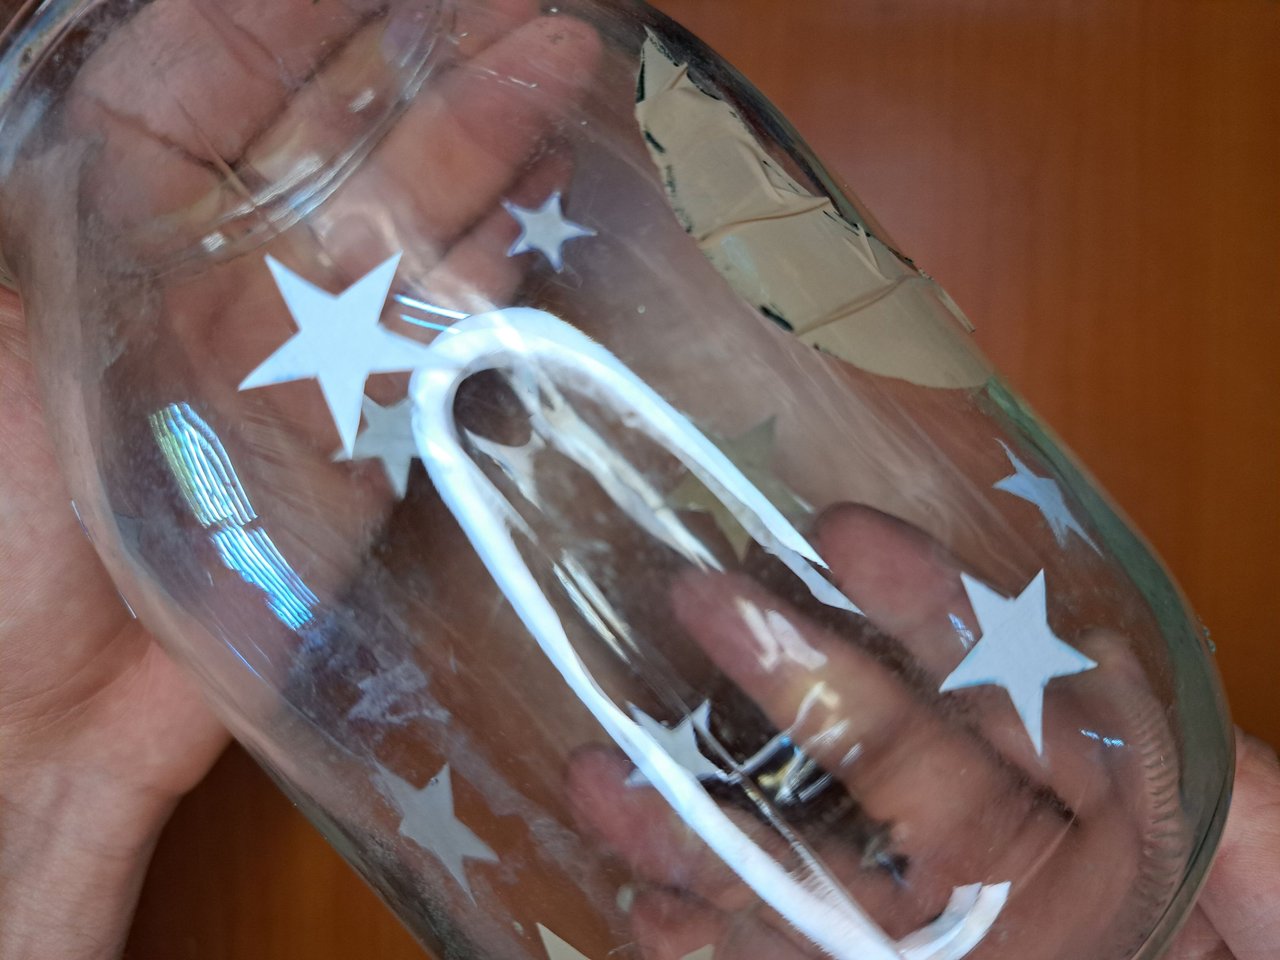
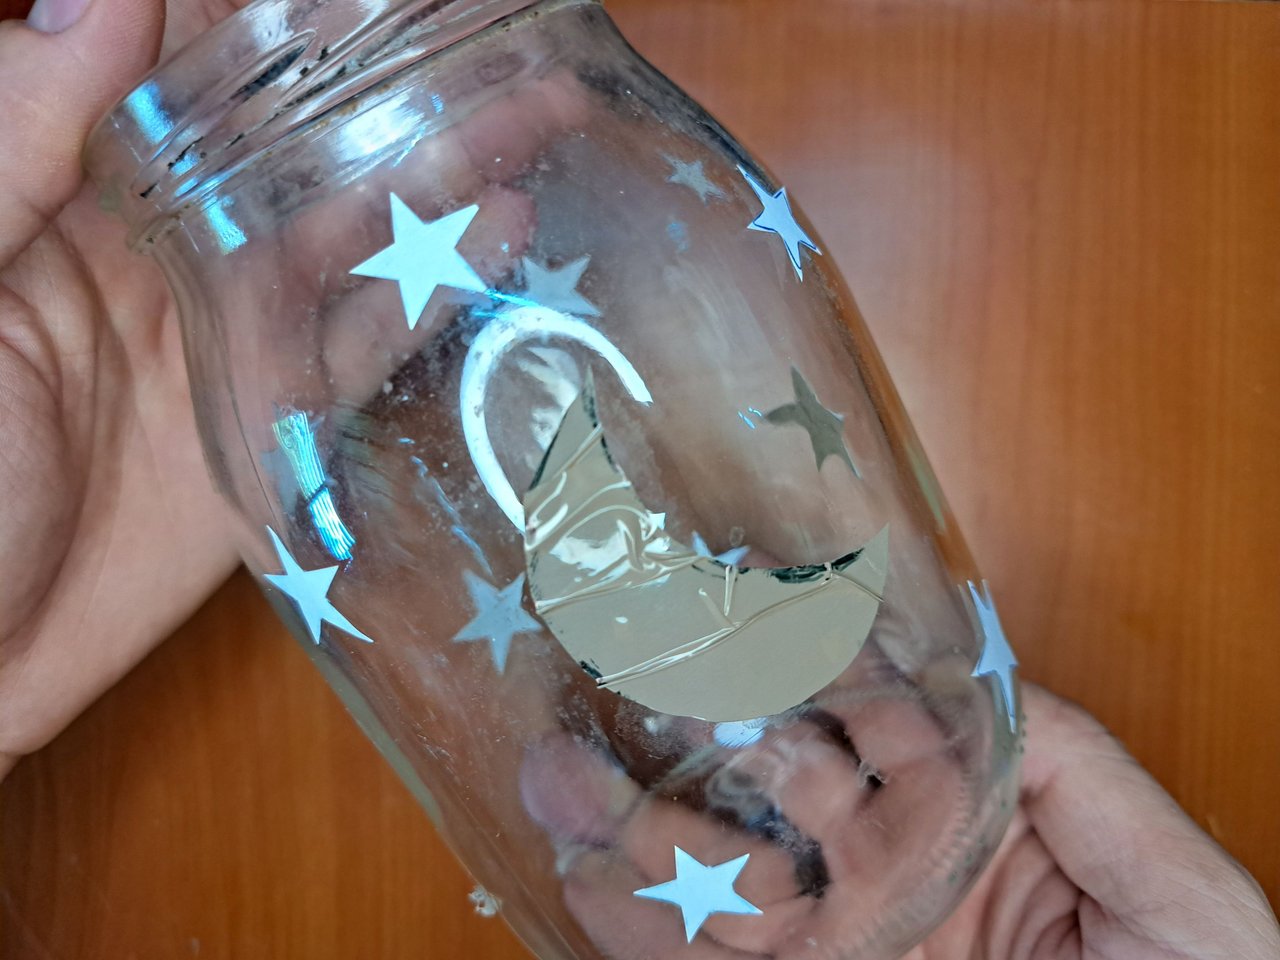
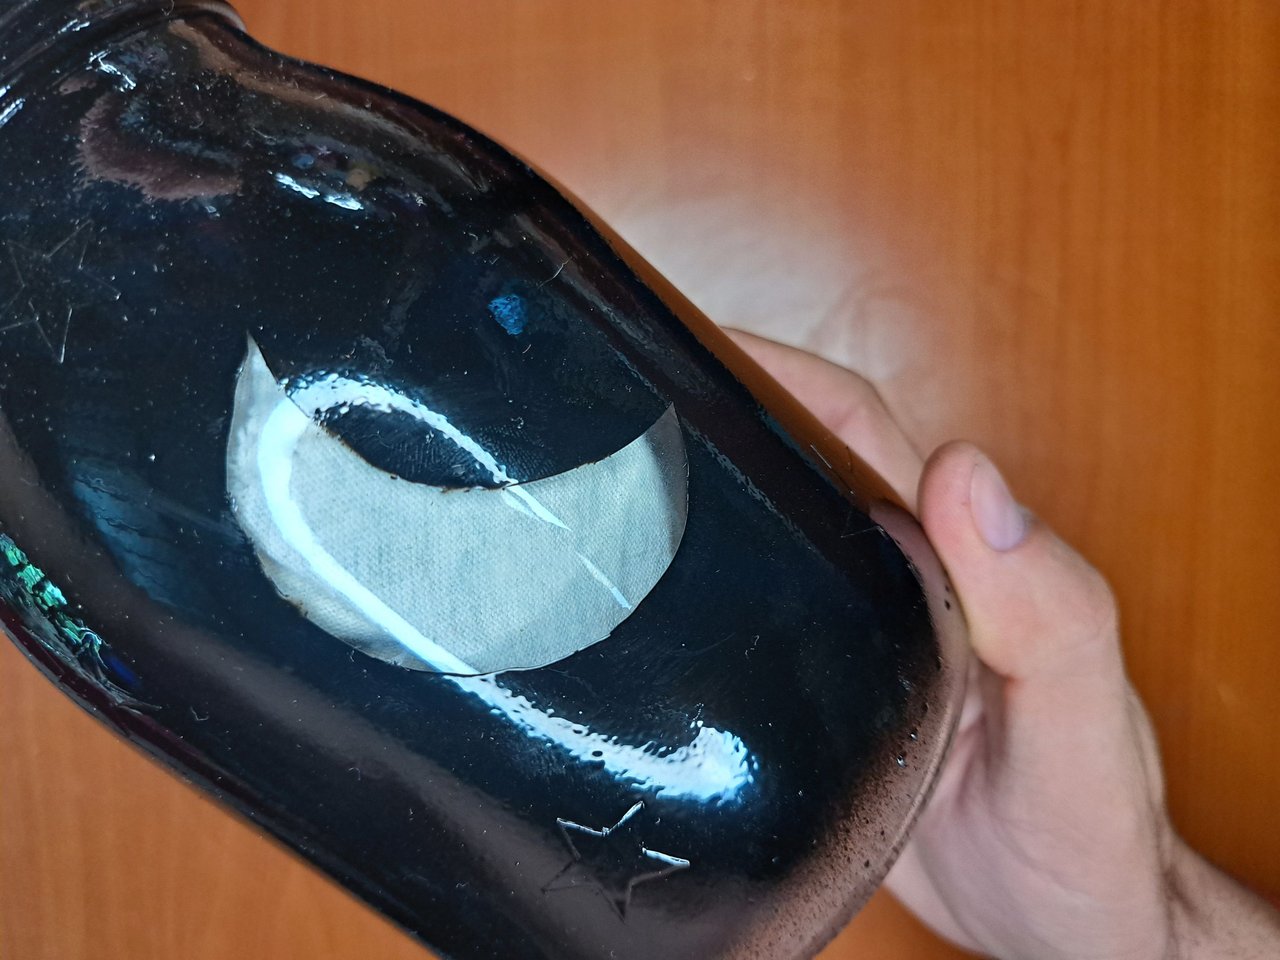
There is a variation for this step and it consists of not using adhesive tape and instead gluing the paper figures cut out in the first step to the surface of the knob. To do this you should use a water based glue in small quantities. In this case I used both ways so you can see and choose the one you prefer.
Spanish Version Here
2️⃣ Luego con el bisturí cortamos la cinta adhesiva guiándonos por las marcas del marcador. Seguidamente, retiramos el exceso de cinta y quedarían la luna y las estrellas pegadas en el envase. Este procedimiento se debe realizar con mucho cuidado para no alterar la forma de las figuras que queremos dejar.
Existe una variación para este paso y consiste en no utilizar cinta adhesiva y en su lugar pegar en la superficie del pomo las figuras de papel recortada en el primer paso. Para ello se debe utilizar un pegamento con base de agua en pocas cantidades. En este caso yo utilicé las dos vías para qué puedan ver y escoger la de su preferencia.
 |
 |
 |
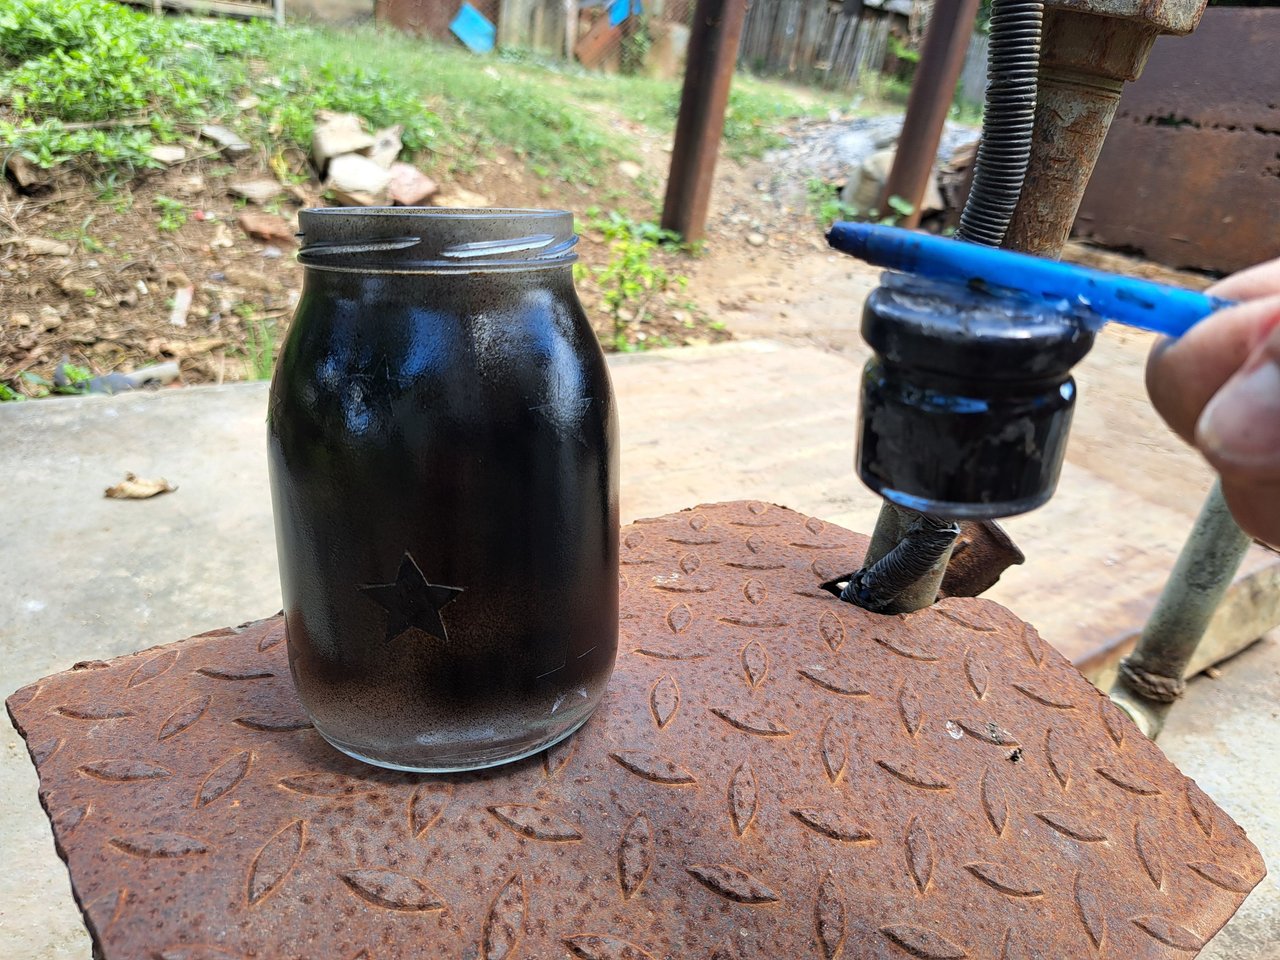
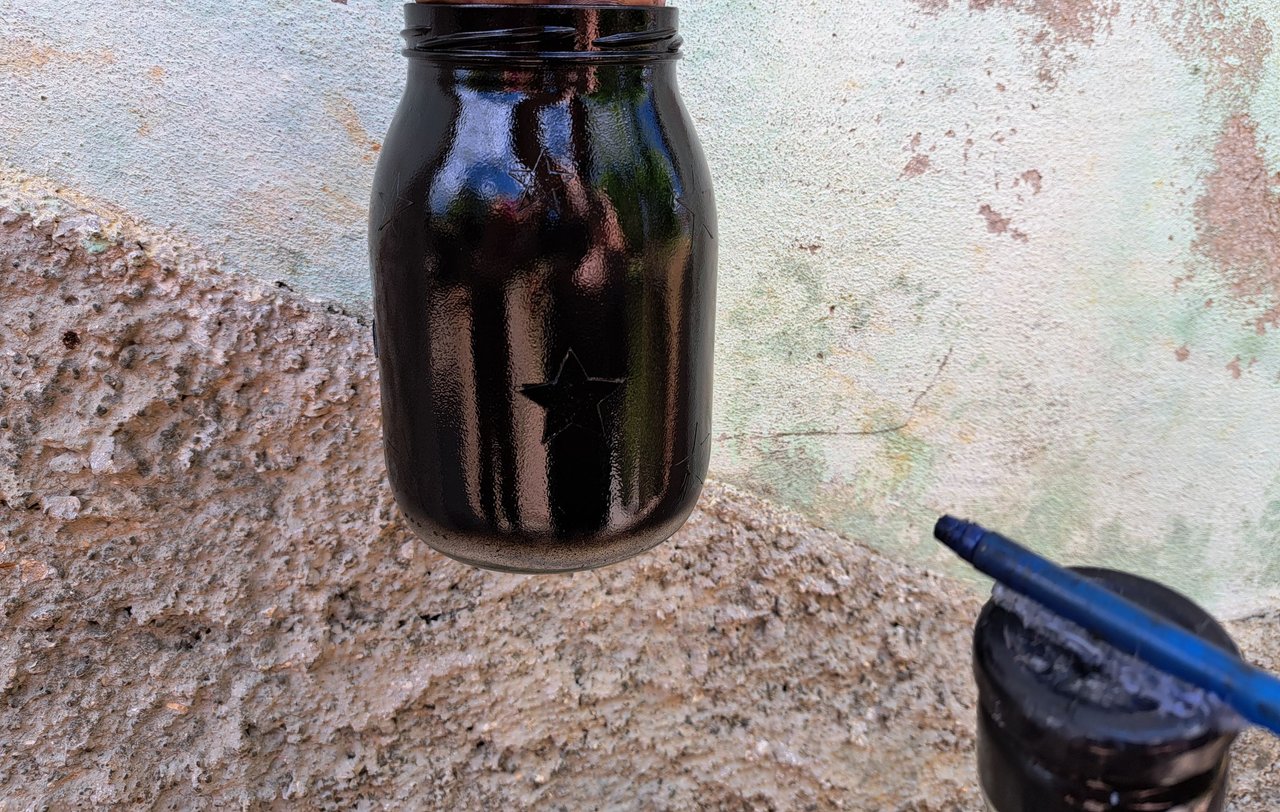
3️⃣ Once the surface of the knob is covered with the moon and stars, move on to paint the container. The painting will be done outdoors and for this we will use an airbrush and black oil paint. The paint should preferably be gloss, because as you will see later the gloss paint looks good, but the fingerprints will be marked when you touch it. The body of the container is painted with several layers to prevent light from coming through the paint, but we will not paint the rim, since it will draw an arc of light on the surface on which it is placed.
Regarding the airbrush, it does not matter if you do not have one, because this procedure can also be done with a soft brush. In my case, the airbrush I use is made by me and is connected to an air compressor. If you wish, I can bring you a tutorial on how to make this airbrush using an empty pen and a glass container with a lid.
Spanish Version Here
3️⃣ Una vez la superficie del pomo esté cubierto con la luna y las estrellas, pasaos a pintar el envase. La pintura la haremos en exteriores y para ello utilizaremos un aerógrafo y pintura de aceite negra. La pintura de preferencia debe ser brillo, ya que como verán más adelante la de brillo queda bien, pero se le quedan marcadas las huellas al tocarla. El cuerpo del recipiente se pinta con varias capas para evitar que salga a luz a través de la pintura, pero no pintaremos el borde, puesto que este dibujará un arco de luz sobre la superficie en la que esté colocado.
Respecto al aerógrafo, no importa que no cuenten con uno, pues este procedimiento también se puede realizar con un pincel suave. En mi caso el aerógrafo que utilizo está elaborado por mí y va conectado a un compresor de aire. Si así lo desean, puedo traerles un tutorial de como hacer este aerógrafo utilizando un bolígrafo vacío y un recipiente de cristal con tapa.
 |
 |
 |
 |
 |
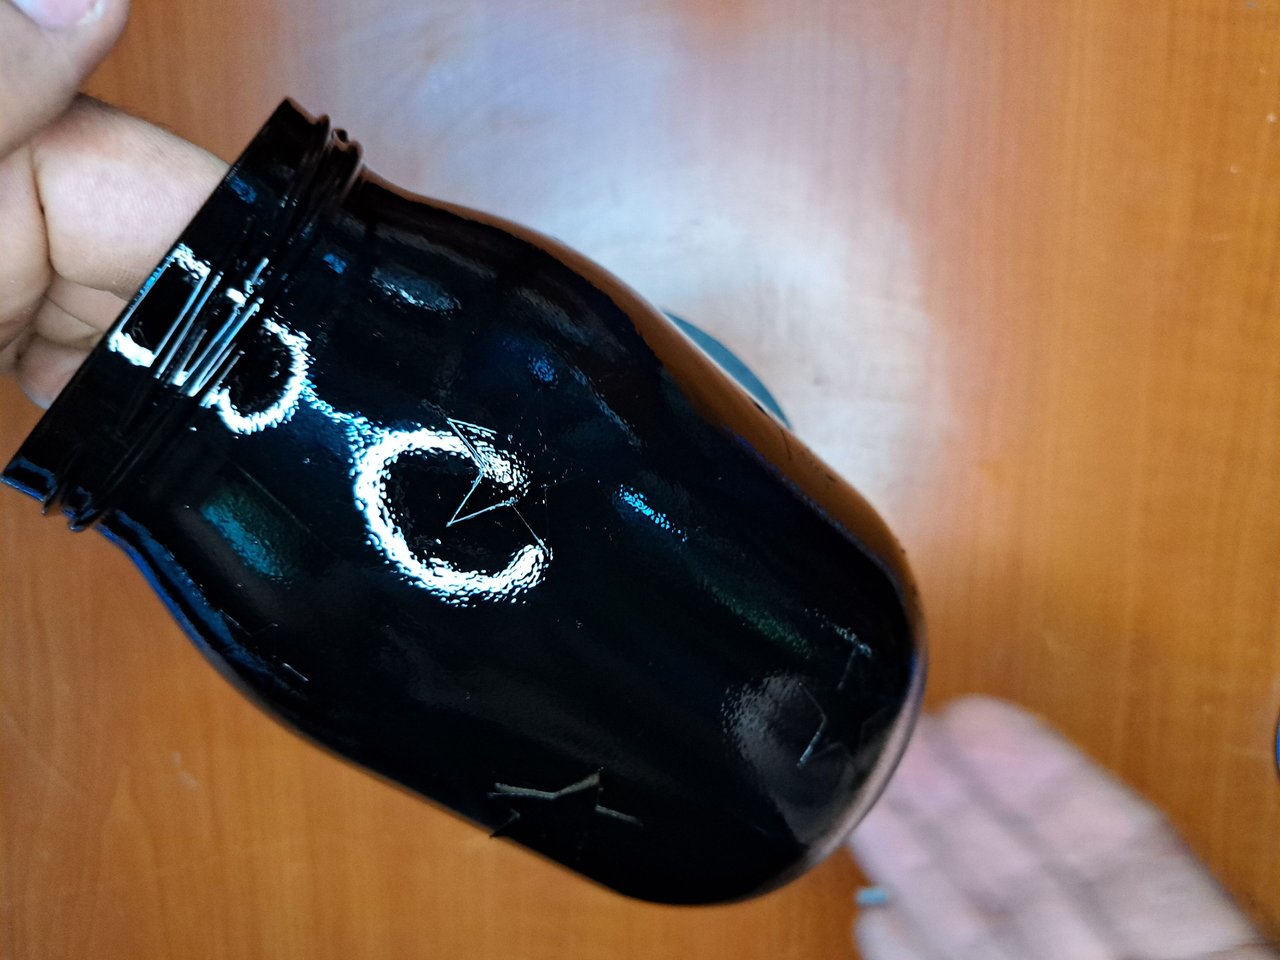
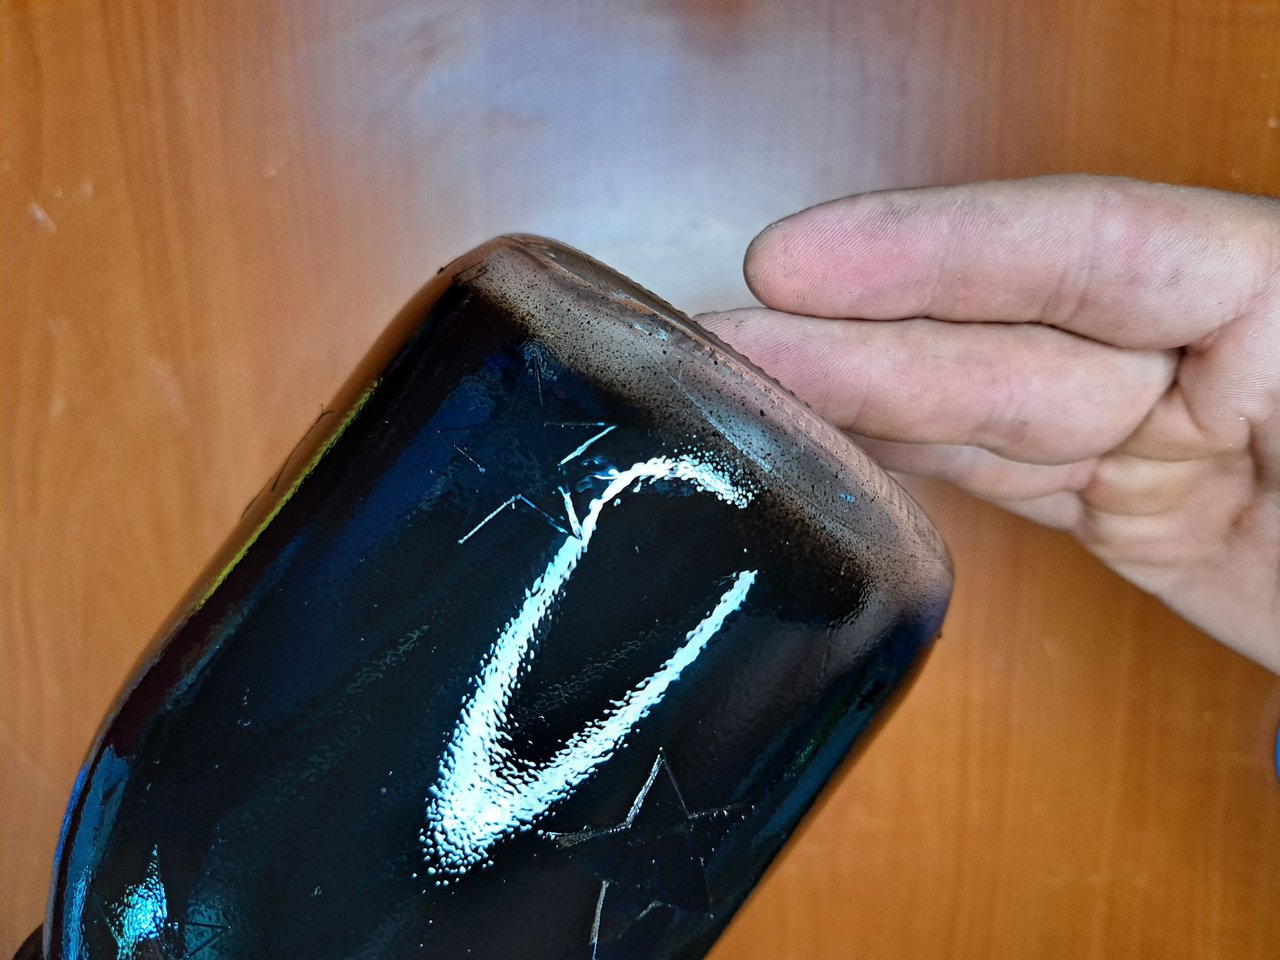
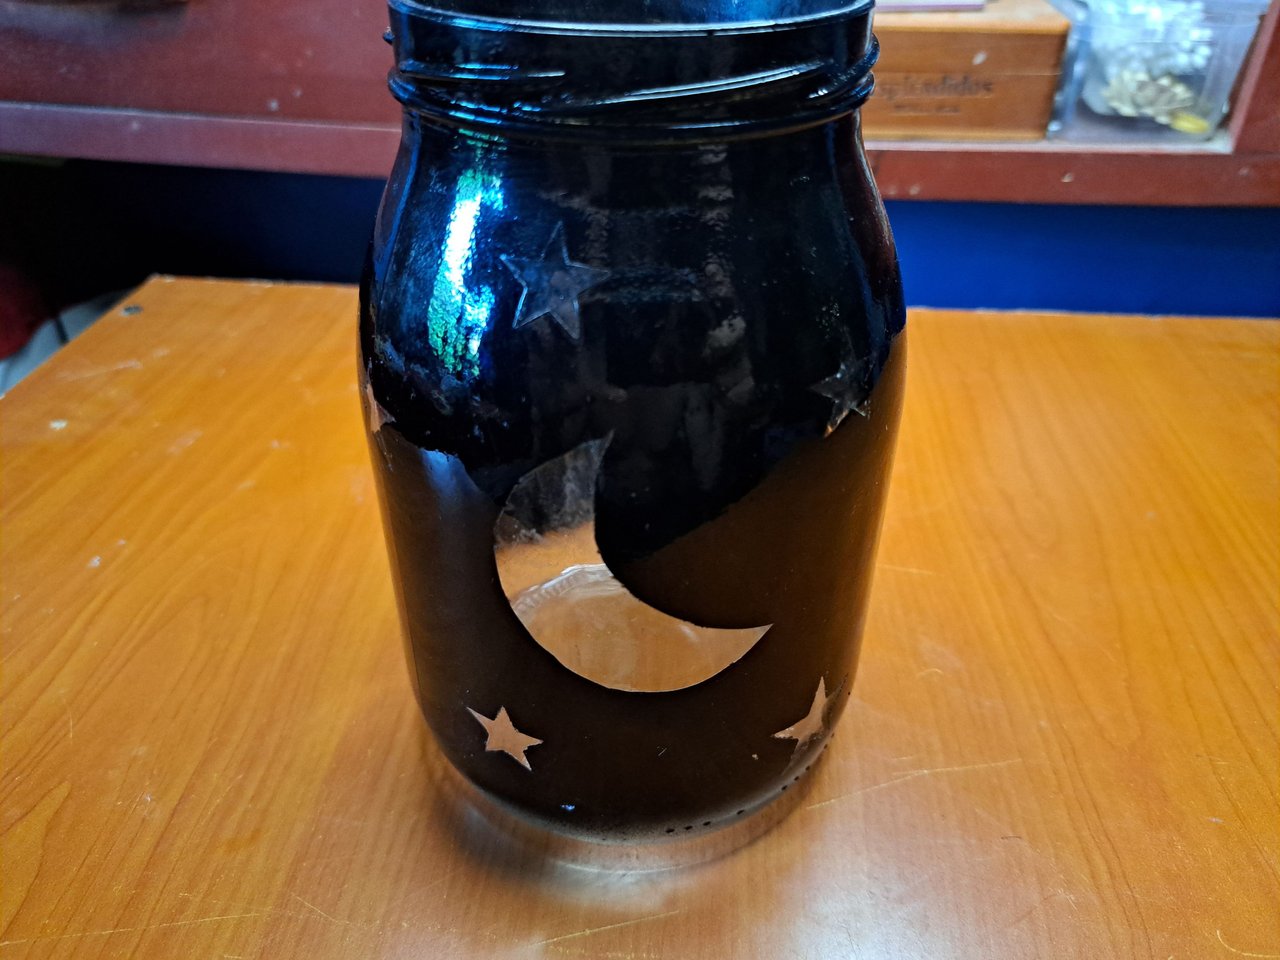
4️⃣ Once the container is painted, we wait for it to dry and then proceed to carefully remove the star and moon stickers. In the case of the adhesive tape stickers, they are removed with a blade and the paper stickers are scraped off and come off very easily with water. I say very carefully, because if you look closely you can see one of the lower stars, which was left with an irregular shape, because when removing the tape part of the paint on the edge came loose.
Spanish Version Here
4️⃣ Una vez pintado el recipiente esperamos que seque y luego procedemos a retirar con muchísimo cuidado las pegatinas con forma de estrella y la luna. En el caso de las de cinta adhesiva se retiran con una cuchilla y la de papel se raspan y con agua salen muy fácil. Digo con muchísimo cuidado, ya que si se fijan bien podrán ver una de las estrellas inferiores, la cual quedó con una forma irregular, pues al retirar la cinta parte de la pintura del borde se soltó.
 |
 |
 |
 |
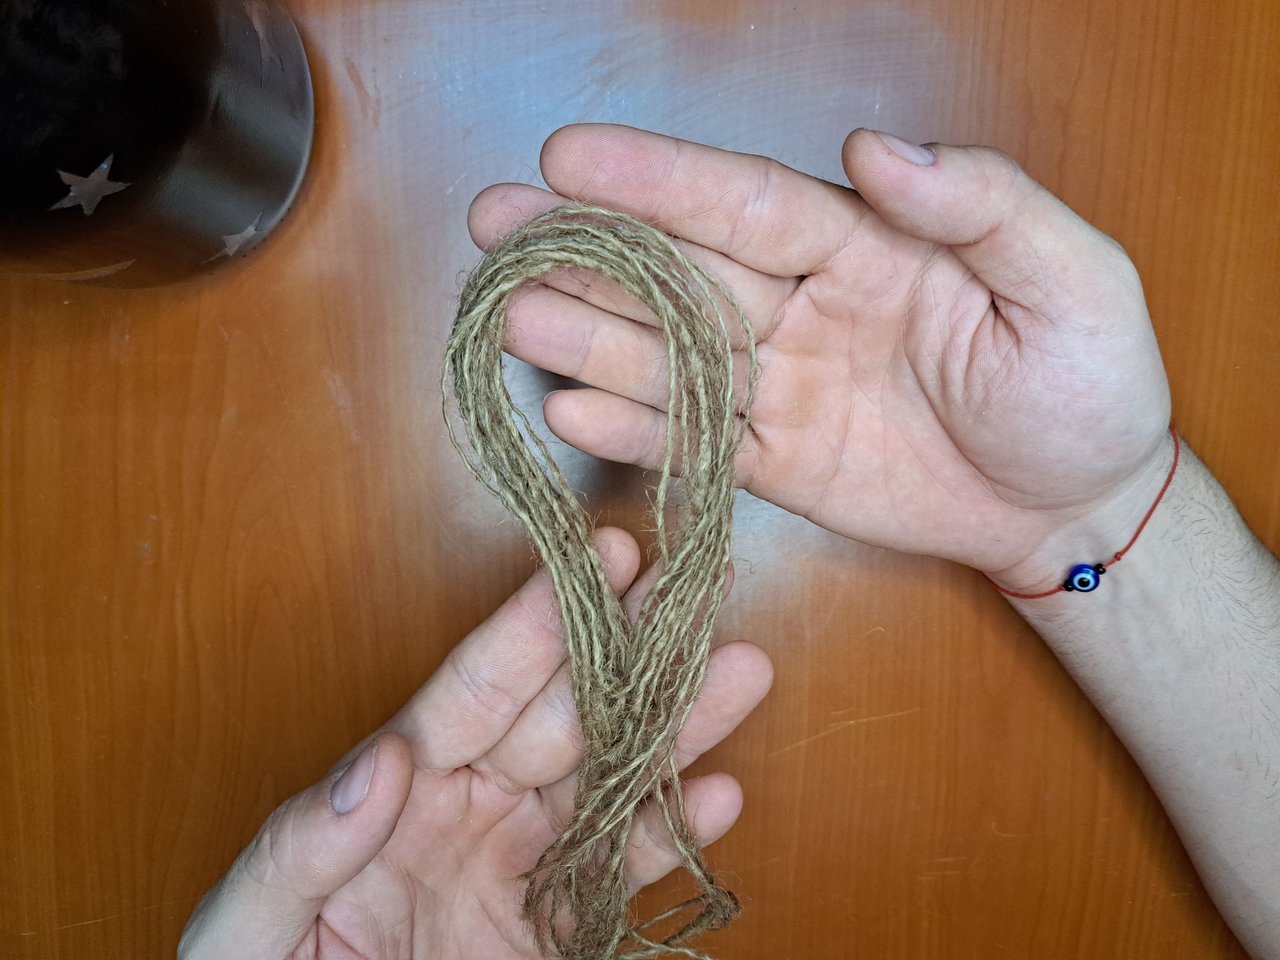
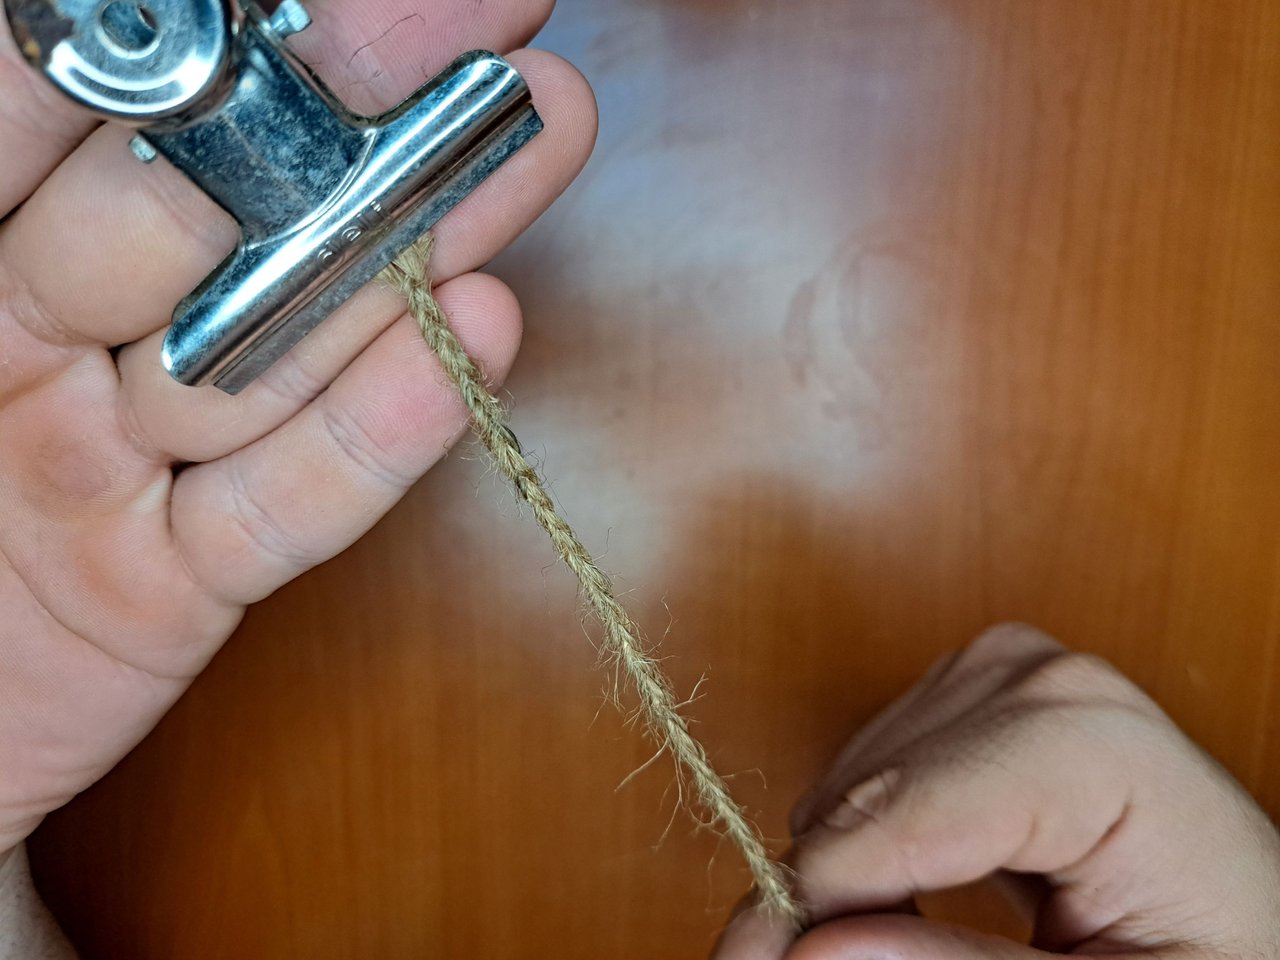
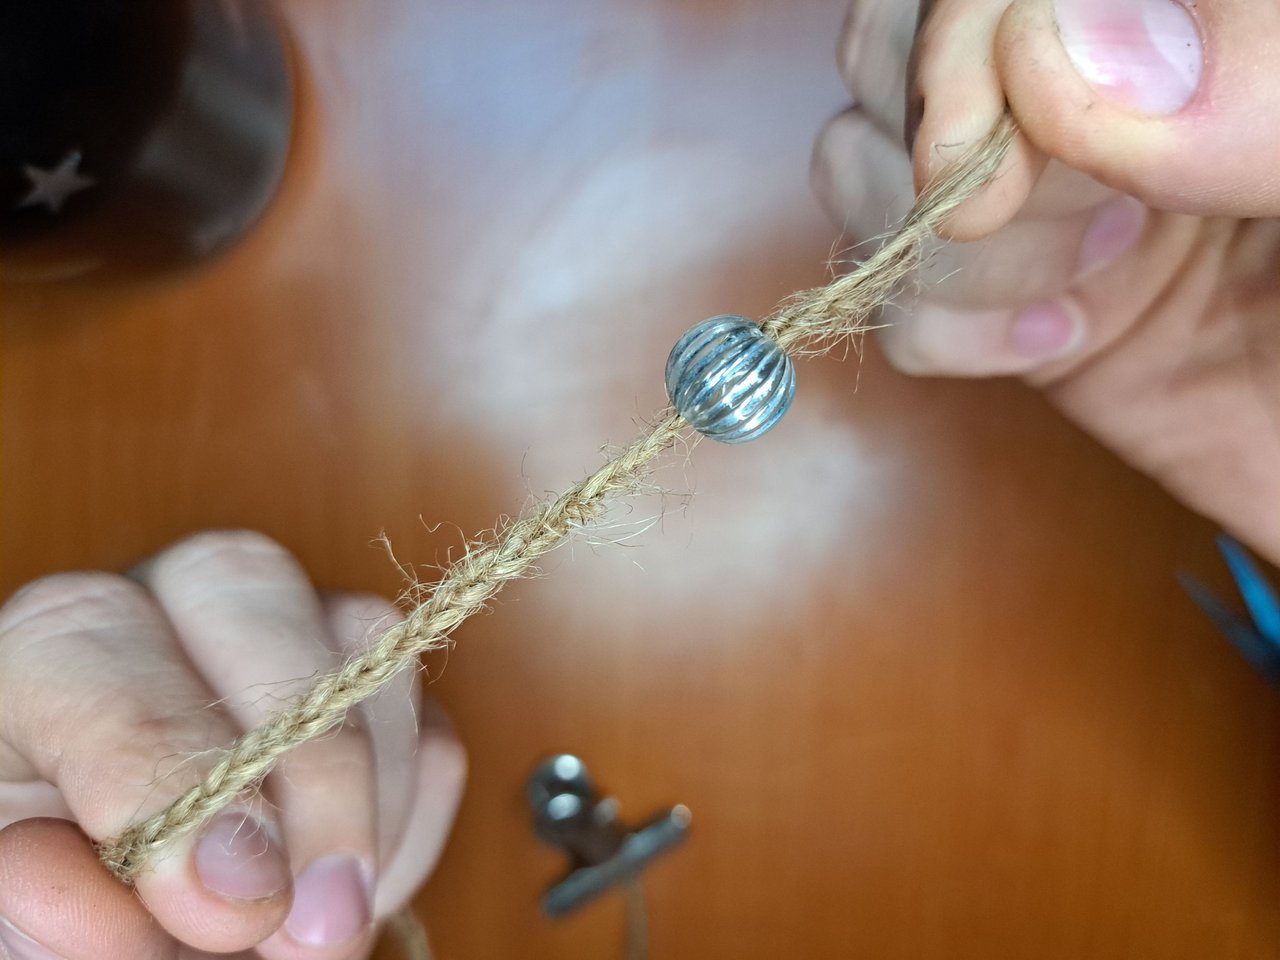
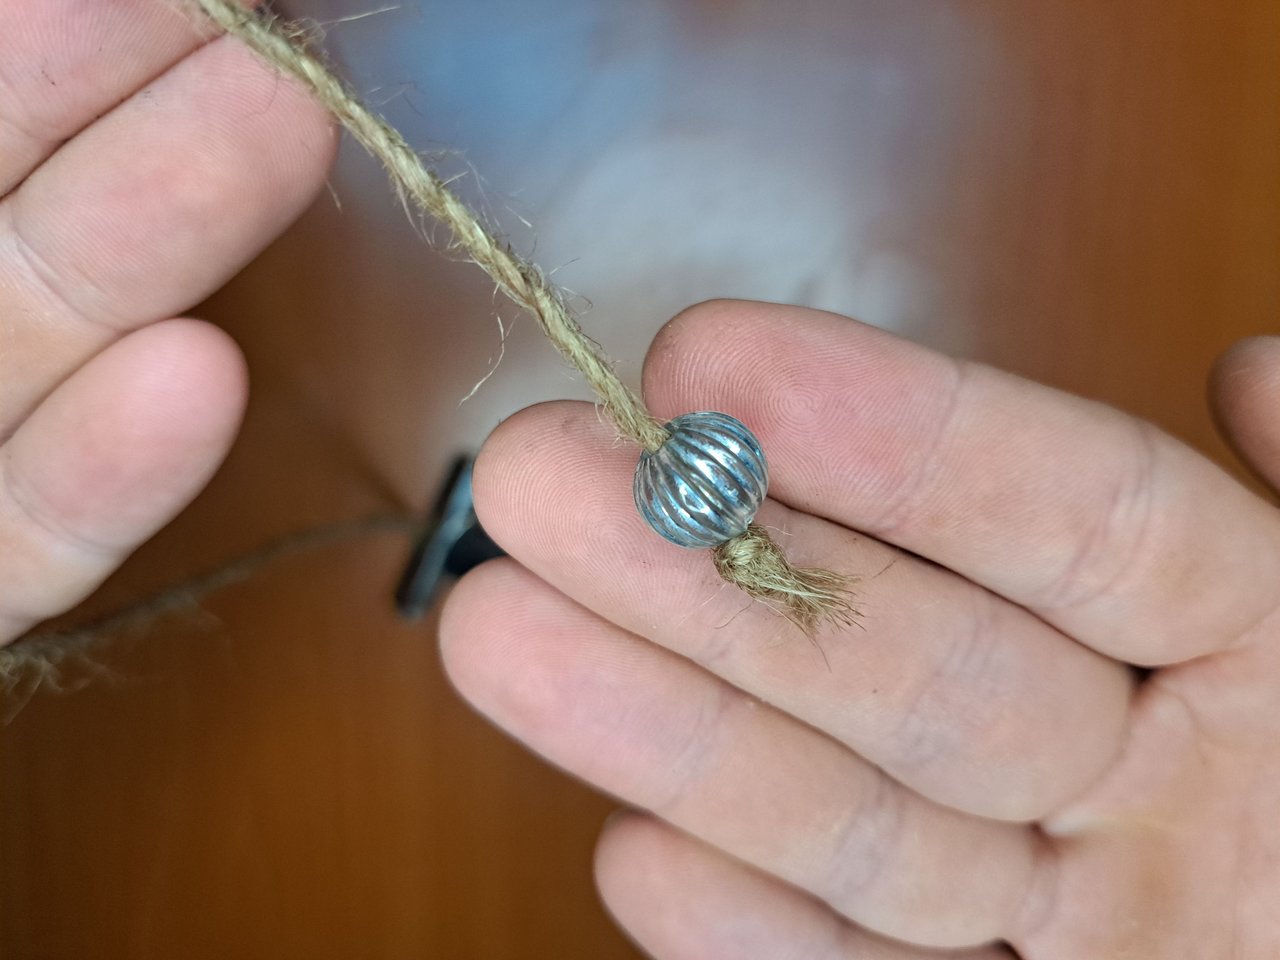
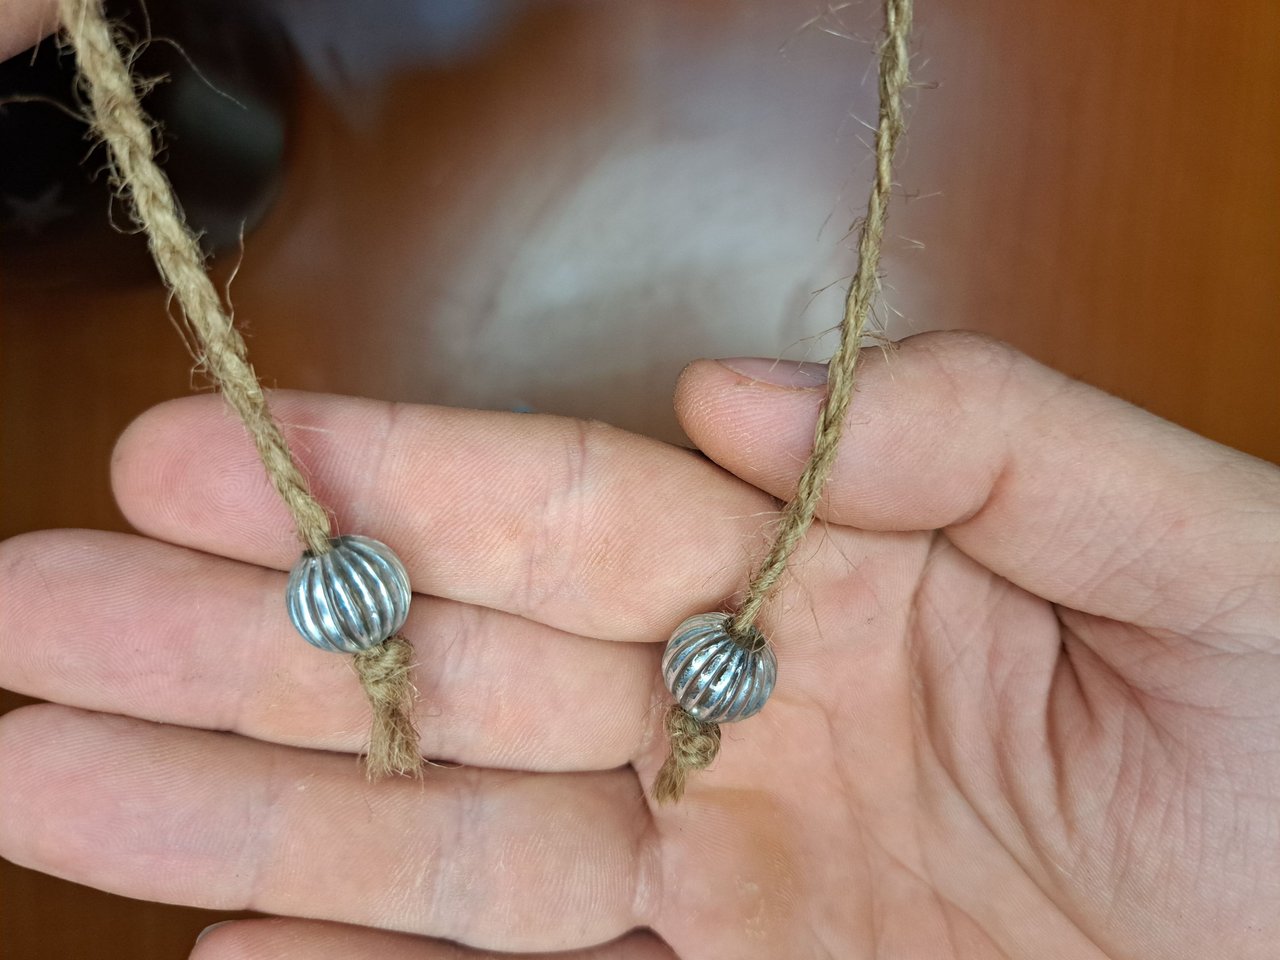
5️⃣ For the neck ornament we will use jute yarn, which we will weave in the form of a braid to add a nicer shape and some thickness. You can use the yarn as it is, but mine is thinner and much hairier because it is not jute. After we make the braid we introduce the pearls with holes in the ends and we make a nice knot so that they do not come out.
Spanish Version Here
5️⃣ Para el adorno del cuello utilizaremos hilo de yute, el cual tejeremos en forma de trenza para agregarle una forma más bonita y algo de grosor. Pueden utilizar el hilo tal y como esta, pero el mío al no ser yute de manualidades es más fino y mucho más peludo. Luego de hacer la trenza le introducimos las perlas agujereadas en sus extremos y le hacemos un bonito nudo para que no se salgan.
 |
 |
 |
 |
 |
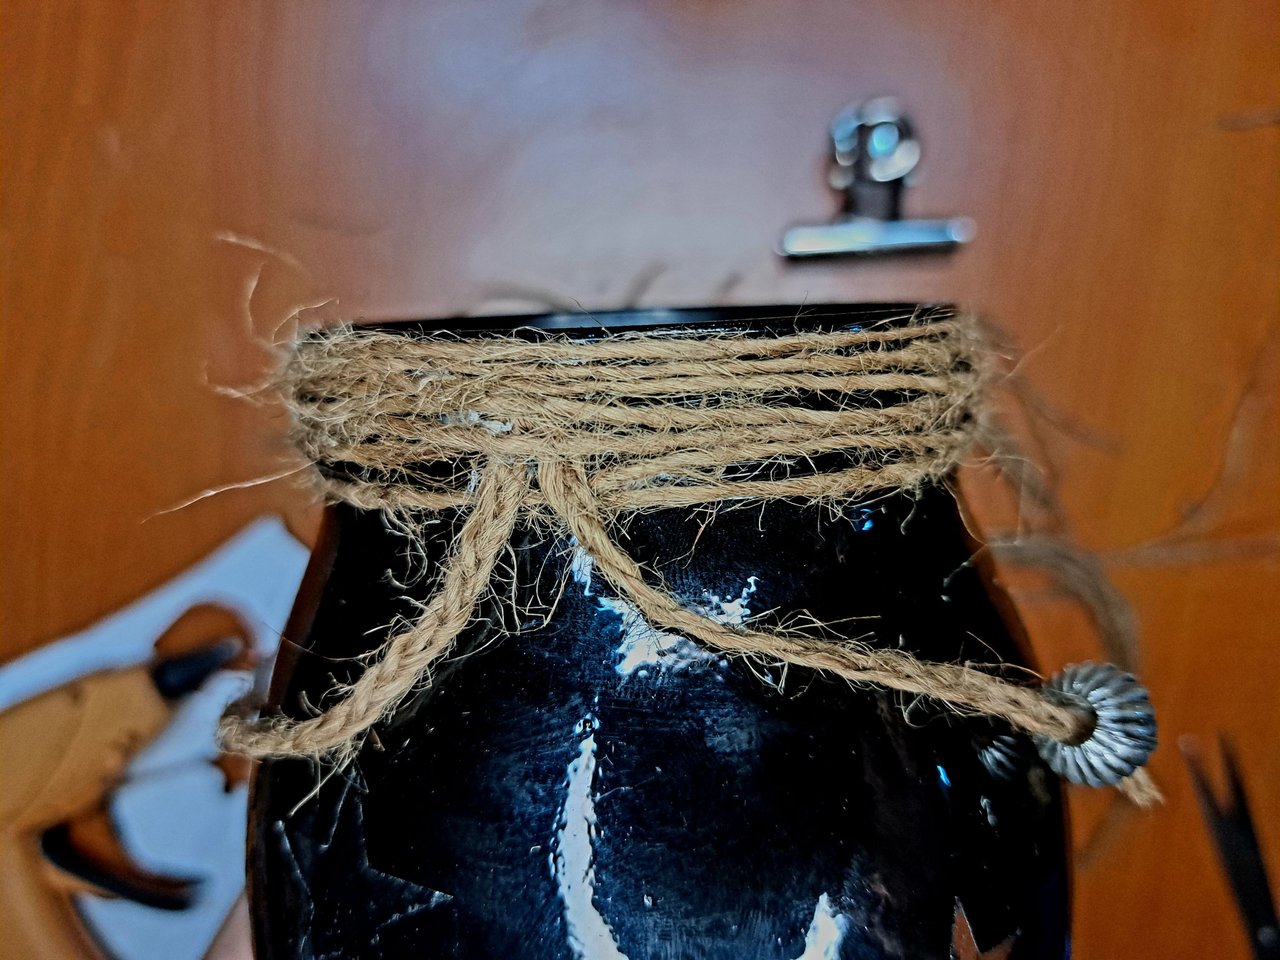
6️⃣ Then we roll and knot the jute braid around the mouth of the container and in such a way that the ends hang to one side of the knob if it is placed with the moon facing forward. As I mentioned in the previous step, the jute thread is very hairy and to correct this you can trim it with scissors or use a lighter and carefully burn the excess fibers.
Spanish Version Here
6️⃣ Seguidamente enrollamos y anudamos la trenza de yute alrededor de la boca de envase y de forma tal que las puntas cuelguen a un lado del pomo si se pone con la luna hacia adelante. Como ya comenté en el paso anterior, el hilo de yute es uy peludo y para corregir esto se puede recortar con una tijera o utilizar un mechero y con mucho cuidado ir quemando el excedente de las fibras.
 |
 |
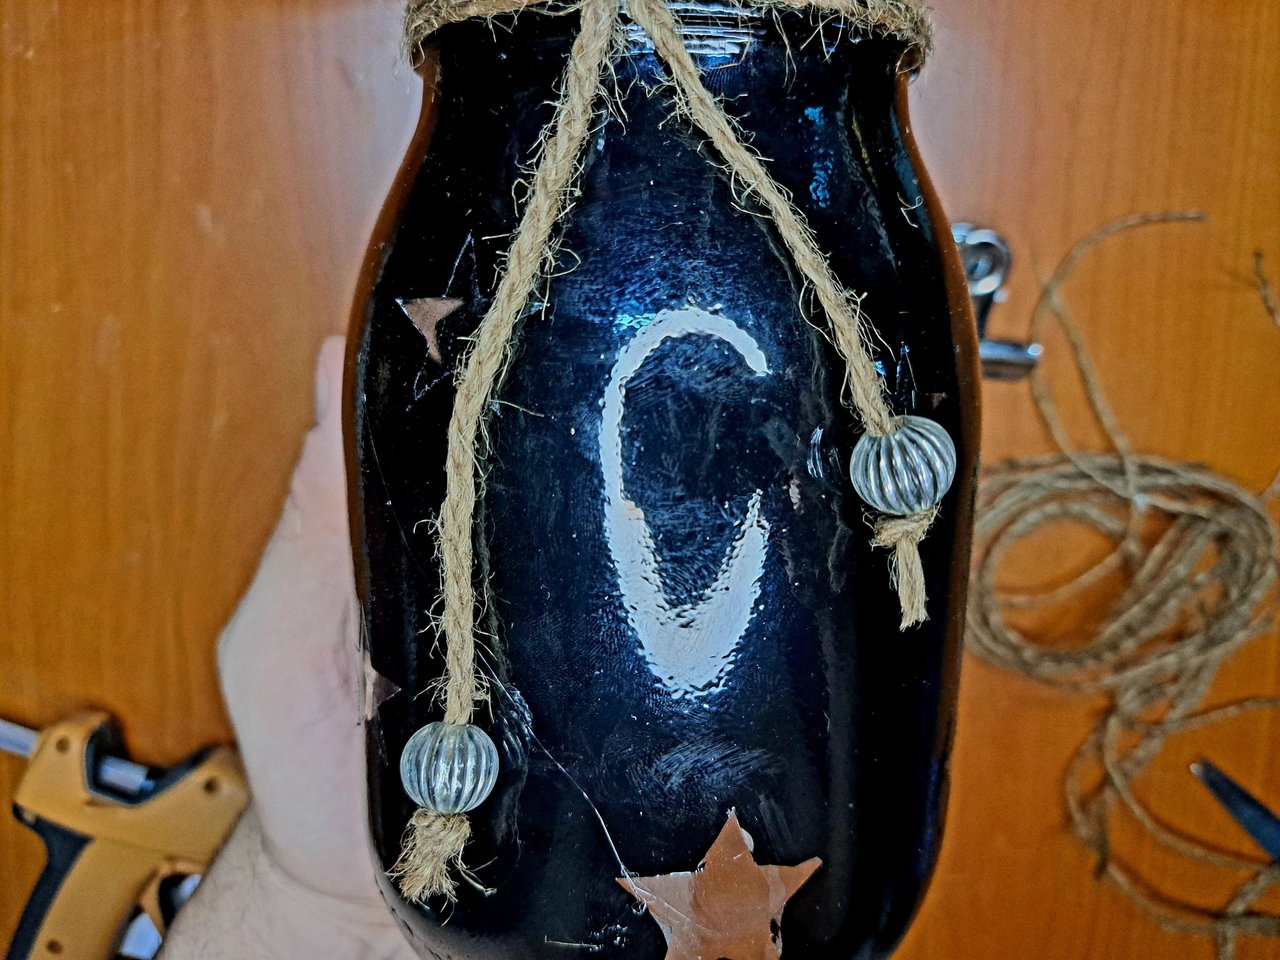 |
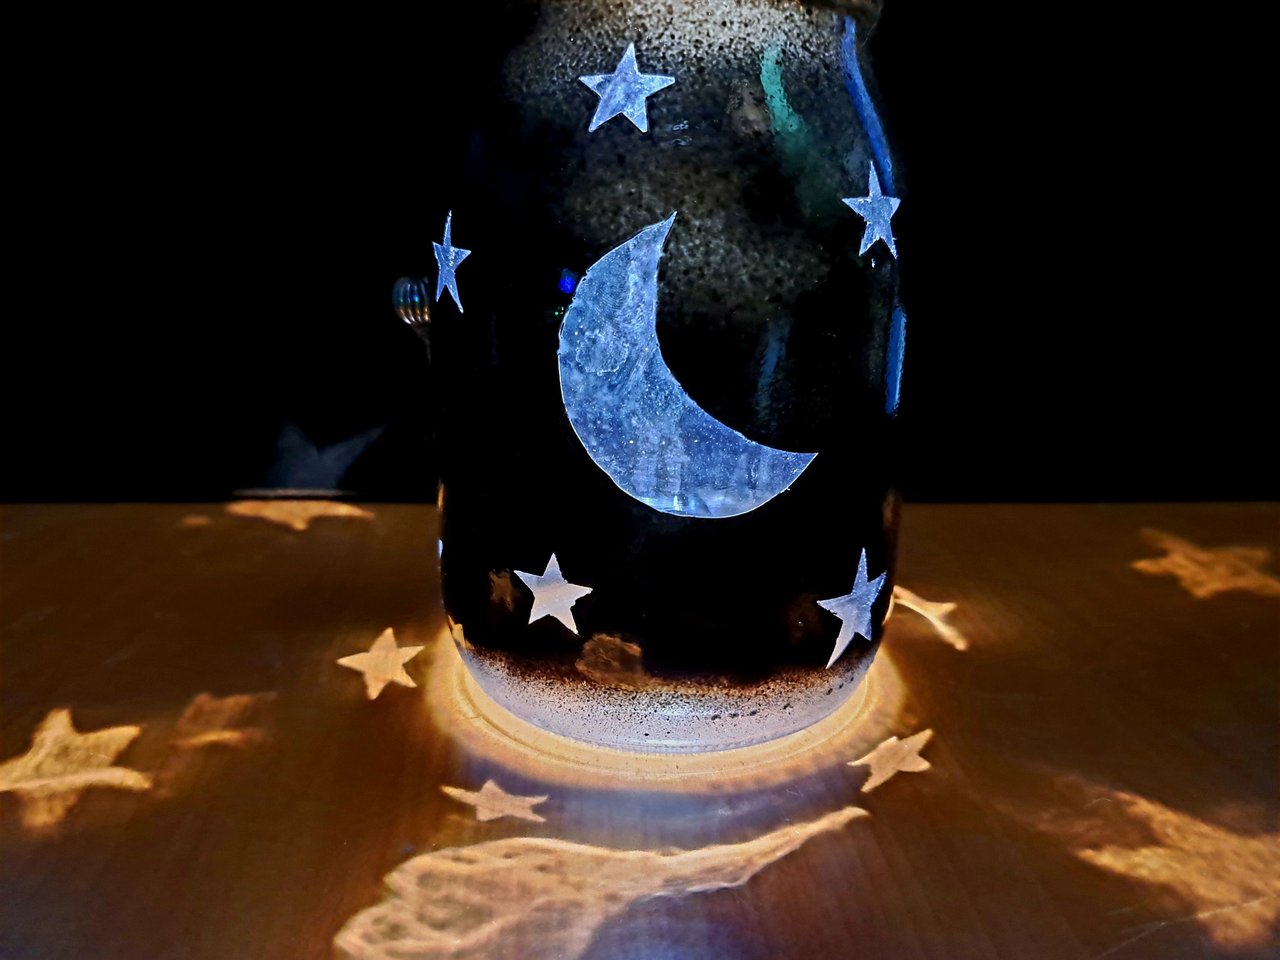
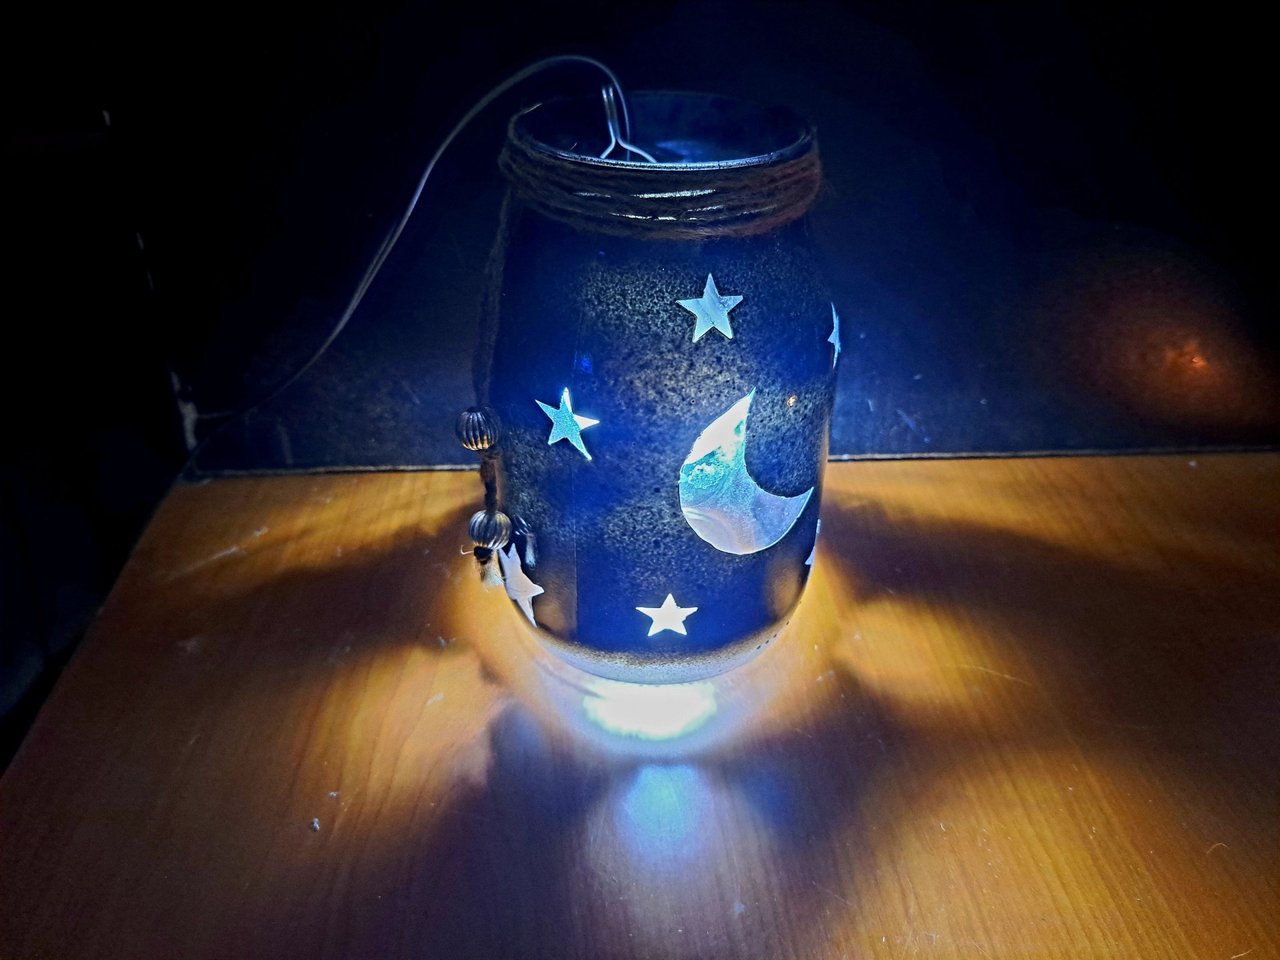
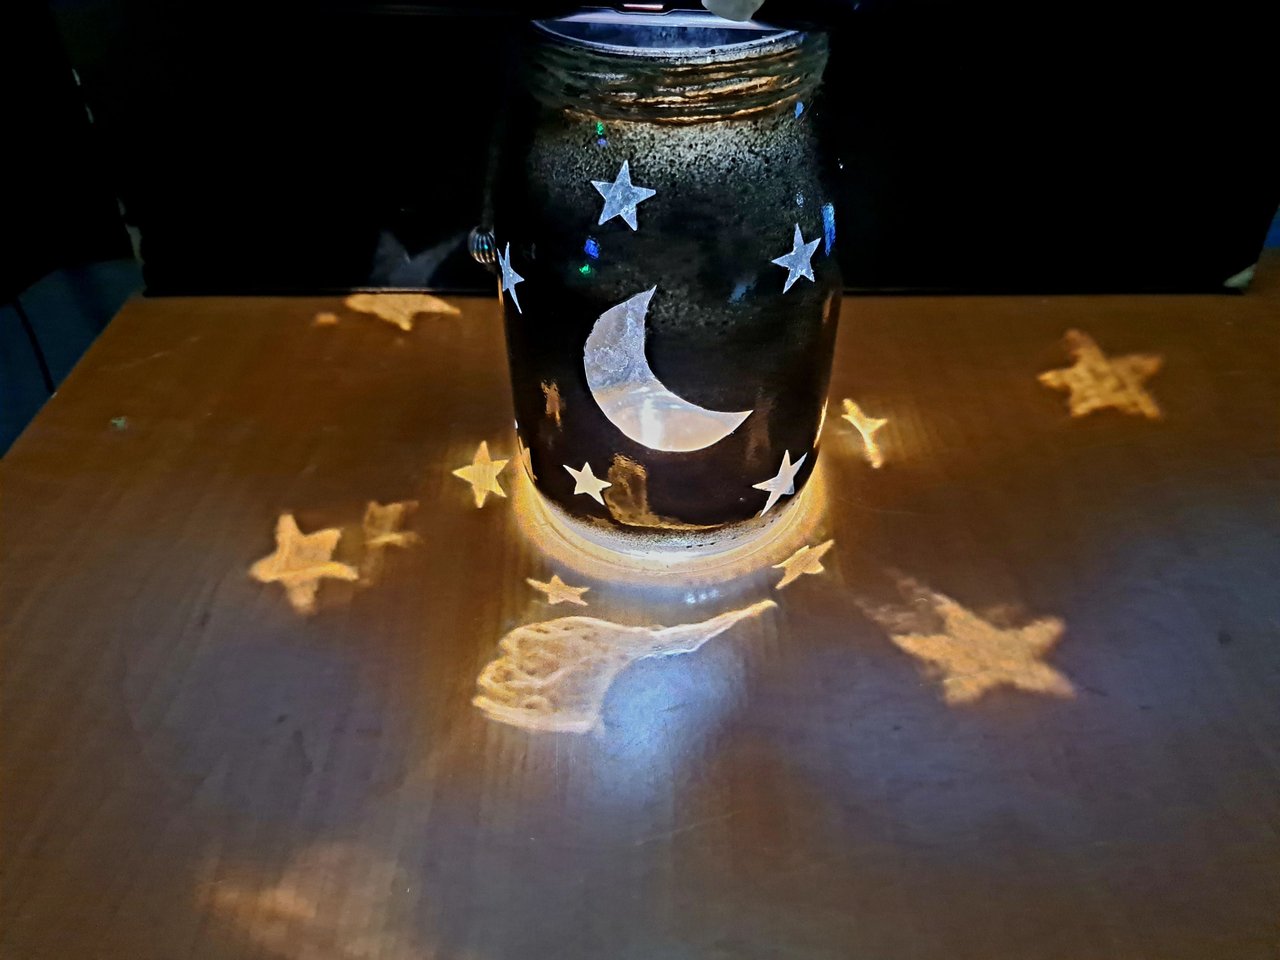
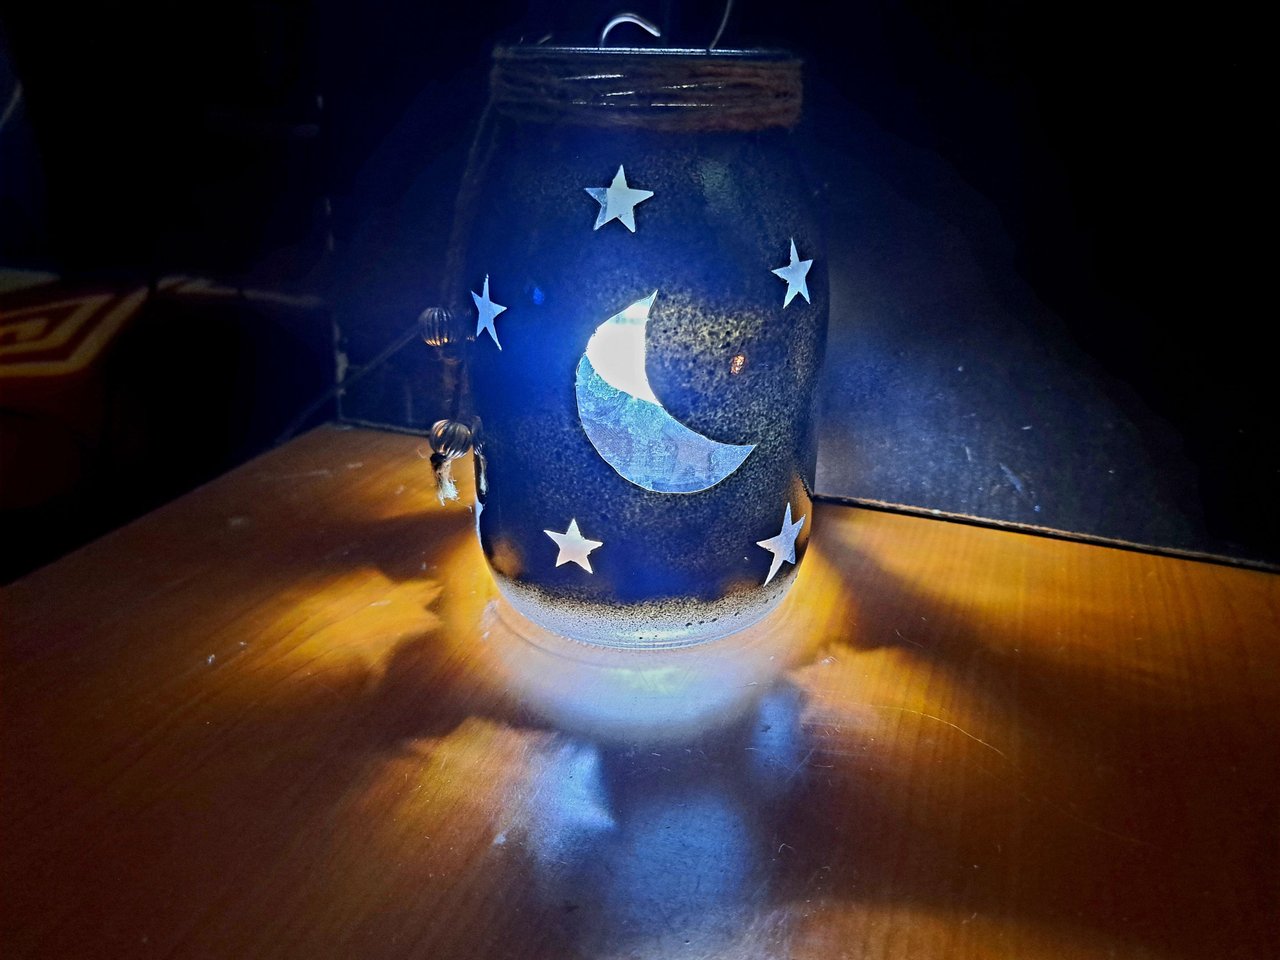
And as you can see below, this is how our night lamp that projects a starry night would look like. I hope you liked and found this tutorial useful to create a very nice ornament for a romantic night. For my part I say goodbye until we meet again to share with you a little piece of my creative world. Bye...
Spanish Version Here
Y como podrán ver a continuación, así quedaría nuestra lámpara de noche que proyecta una noche estrellada. Espero que les haya gustado y les sea útil este tutorial que les permitirá crear un adorno muy lindo para una noche romántica. Por mi parte me despido hasta que nos encontremos nuevamente para compartirles un pedacito de mi mundo creativo. Chao…
Final Result // Resultado Final
 |
|
 |
 |
 |

Thank you very much for reading my post. If you liked it, please leave a comment and consider following me so you don't miss my next posts. I'd love to know your opinion and your thoughts about the topic I discussed in this post, see you in the next one!
Spanish Version Here
Muchas gracias por leer mi post. Si te gustó, por favor deja un comentario y considera seguirme para no perderte mis próximas publicaciones. Me encantaría saber tu opinión y tus ideas sobre el tema que traté en este post. ¡Nos vemos en el próximo!
Cover page created in Canva Pro
Translated by DeepL


Me encantan este tipo de lamparas que proyectan que tampoco se como se llaman 😂 pero son muy bonitas y dejan un rastro de luz muy agradable ❤️
Muy bonito trabajo 🦉
Pues ya somos dos que no sabes el nombre. Creo que se va a quedar como lámpara-proyector 😅
Muy linda y elicada lámpara amigo, quedo genial
Muchas gracias. Me alegra saber que te gustó.
https://reddit.com/r/blogs/comments/1c8q0ru/lamp_with_recycling/
The rewards earned on this comment will go directly to the people( @yolimarag ) sharing the post on Reddit as long as they are registered with @poshtoken. Sign up at https://hiveposh.com.
Saludos quedo hemoso
Muchísimas gracias 🤗
Excelente hermano, ha quedado muy bien la lámpara, hace tiempo estoy por hacer una para ambientar el cuarto de mi niño, Esta via que muestras me sirve de guía. Me ha gustado como has logrado un excelente resultado utilizando solamente materiales reciclados. Por cierto se ve muy práctico el aerógrafo que muestras, es una lástima que no tenga un compresor, siempre he querido hacerme uno jj. Saludos hermano.
Me alegro que te sea útil el tutorial. Más adelante dejaré un tutorial de como hacer el aerógrafo así que si consigues el compresor no dudes visitar mi perfil para hacerte uno.
Very nice lámp.
Thanks 🤗
¡¡¡Buen trabajo!!! Gracias por publicar tu excelente contenido en Hive Diy, me gusto mucho el estilo con el que has coloreado la botella, sobre todo con las luces, hace que se vea muy llamativo y hermoso.
Tu comunidad artesana ahora es testigo

Muchísimas gracias. Se le puede introducir algún tipo de vela, pero preferí utilizar luces de navidad para que a la hora de tomar las fotos se vieran mejor las estrellas proyectadas.
Congratulations, your post has been upvoted by @dsc-r2cornell, which is the curating account for @R2cornell's Discord Community.
Enhorabuena, su "post" ha sido "up-voted" por @dsc-r2cornell, que es la "cuenta curating" de la Comunidad de la Discordia de @R2cornell.
Thanks for the support ❤️
Que excelente trabajo, muy bonito.