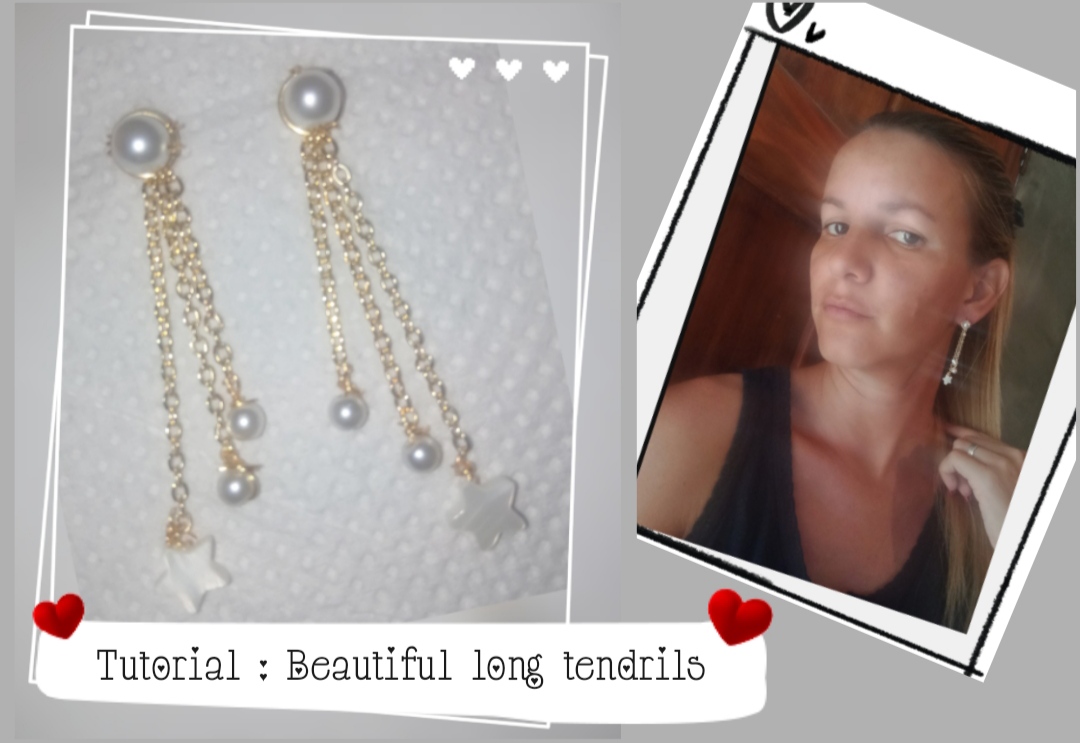
feliz y bendecido día tengan todos ustedes mis queridos y apreciados amigos creativos que esta bella comunidad luego de un par de días de ausencia he regresado para compartir con ustedes este hermoso pero muy sencillo tutorial con el que elaboraremos unos delicados y elegantes zarcillos largos ideales para lucir en ocasiones importantes. Acá les comparto detalladamente paso a paso cómo podremos obtener este hermoso producto final con gran facilidad que podamos elaborarla en casa y con un muy bajo costo, acompáñame a elaborar este nuevo diseño.
happy and blessed day you all dear and appreciated creative friends that this beautiful community after a couple of days of absence I have returned to share with you this beautiful but very simple tutorial with which we will elaborate some delicate and elegant long tendrils ideal for lucir On important occasions.
Here I share in detail step by step how we can get this beautiful final product with great ease that we can elaborate at home and with a very low cost, accompany me to elaborate this new design.
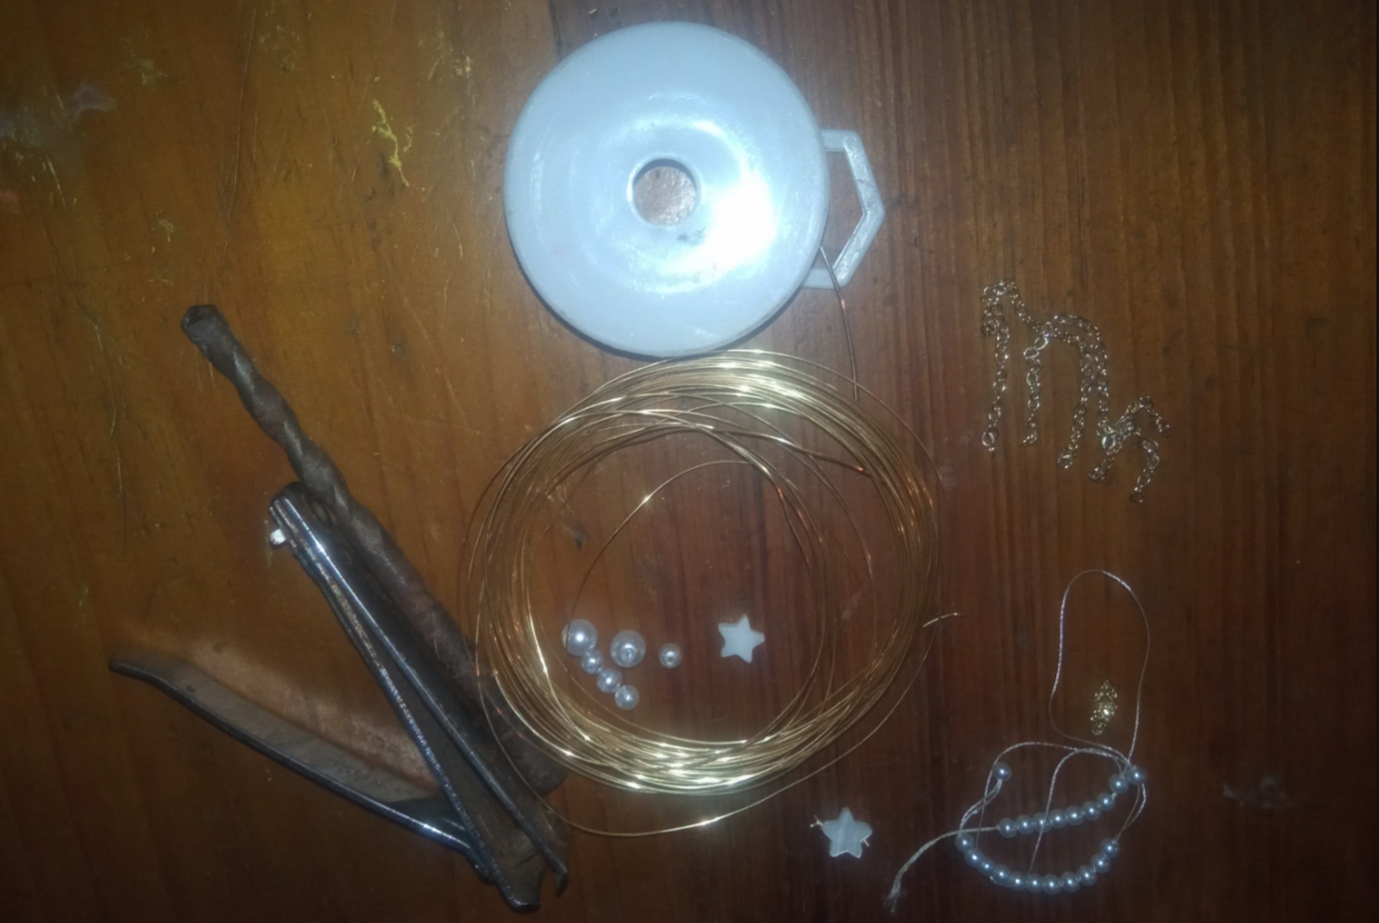
- Alambre de bisutería calibre 20.
- Alambre de bisutería calibre 26
- piedras Perladas blancas dos tamaños (pequeña y mediana)
- medio metro de Cadenita de bisutería.
- 2 estrellitas pequeñas de nácar
- pinza de bisutería.
- Caliber wire gibberry 20.
- Caliber 26 costume jewelery wire
- White pearl stones Two sizes (small and medium)
- Half meter of jewelery chain.
- 2 small starries of nacre
- jewelery peclain.
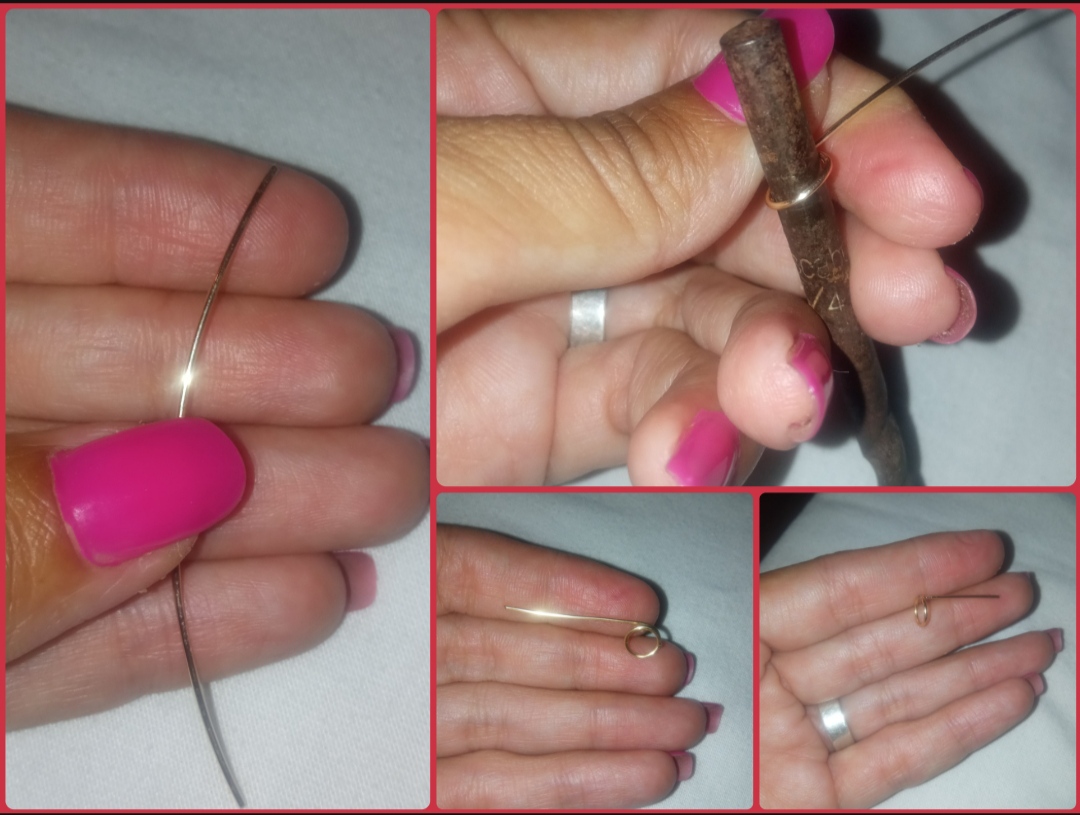
⭐ Paso 1: para iniciar la elaboración de este hermoso diseño lo primero que debemos hacer es tomar el alambre de bisutería calibre 20 y apoyándonos con una pinza ideal para esta función o en mi caso con un objeto y nos permita elaborar una forma circular pequeña tal cual pueden observarla En las siguientes imágenes. Luego elaborar el círculo dejaremos un pedazo de alambre en forma lineal de 2 cm aproximadamente el cual luego con ayuda de la pinza doblaremos hacia la parte de atrás quedándonos así la base principal de nuestro hermoso diseño.
⭐ Step 1: To start the elaboration of this beautiful design, the first thing we must do is take the caliber wire 20 wire and supporting an ideal clamp for this function or in my case with an object and allows us to elaborate a small circular shape as they can Observe it in the following images.
Then elaborate the circle we will leave a piece of wire in a linear form of approximately which then with the help of the clamp we will bend towards the back, there are also the main basis of our beautiful design.
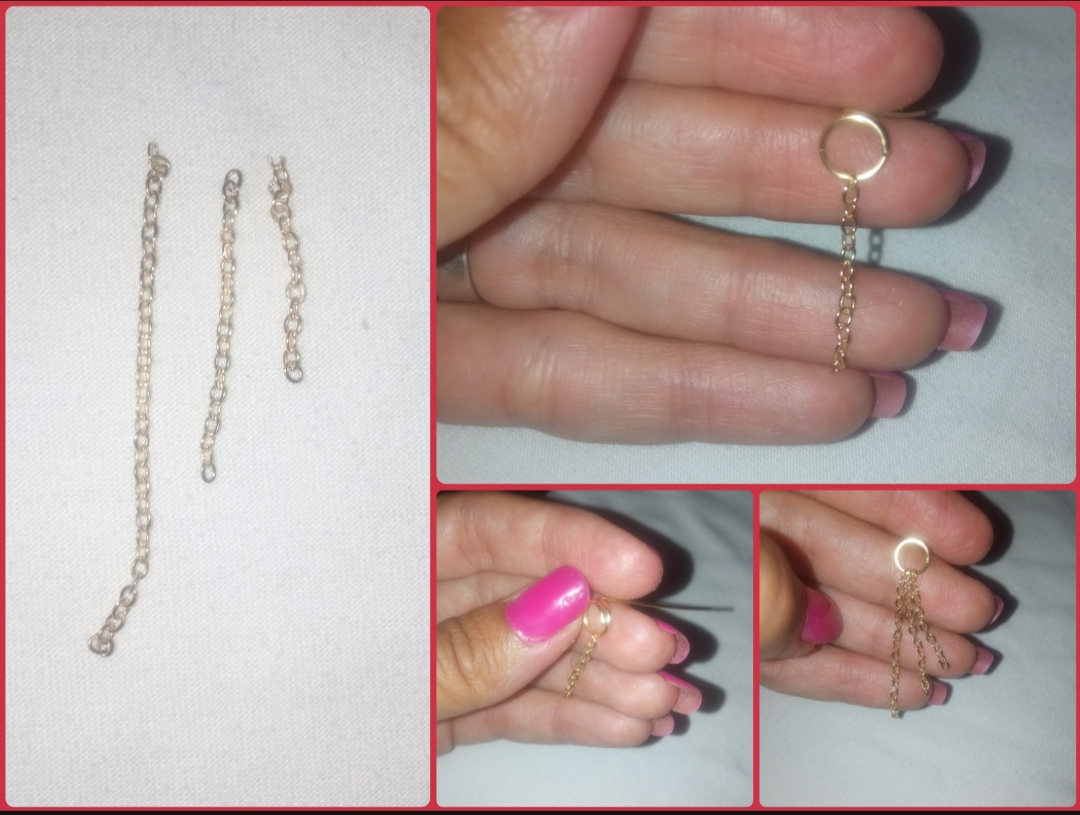
⭐ Paso 2: seguidamente tomaremos la cadenita que hemos seleccionado para esta elaboración la cual podemos encontrar en la tienda de bisutería en venta por metros o por rollo yo procuro comprarla siempre por metro debido a que no compro en grandes cantidades y es un poco más económico, cortaremos tres pedazos de distintos tamaños uno más largo que el otro tal cual pueden observar en las imágenes que les comparto a continuación. Una vez tengamos los tres pedazos cortados procederemos a introducirlo en la circular de la forma base, para ello introduciremos la primera argollita de la cadena por el doblez de la forma circular y la llevaremos hacia la parte posterior central del círculo introduciremos una tras otra y nos quedará de las forma como observan en las siguientes imágenes.
⭐ Step 2: We will then take the chain that we have selected for this elaboration which we can find at the jewelery store for sale by meters or by roll I try to buy it always by subway because I do not buy in large quantities and is a bit more economical, we will cut three Pieces of different sizes One longer than the other as you can see in the images that I share below.
Once we have the three cut pieces we will proceed to introduce it in the circular of the base form, for this we will introduce the first Argollite of the chain by the bending of the circular shape and we will carry it towards the central back of the circle we will introduce one after the other and It will be of the form as they observe in the following images.
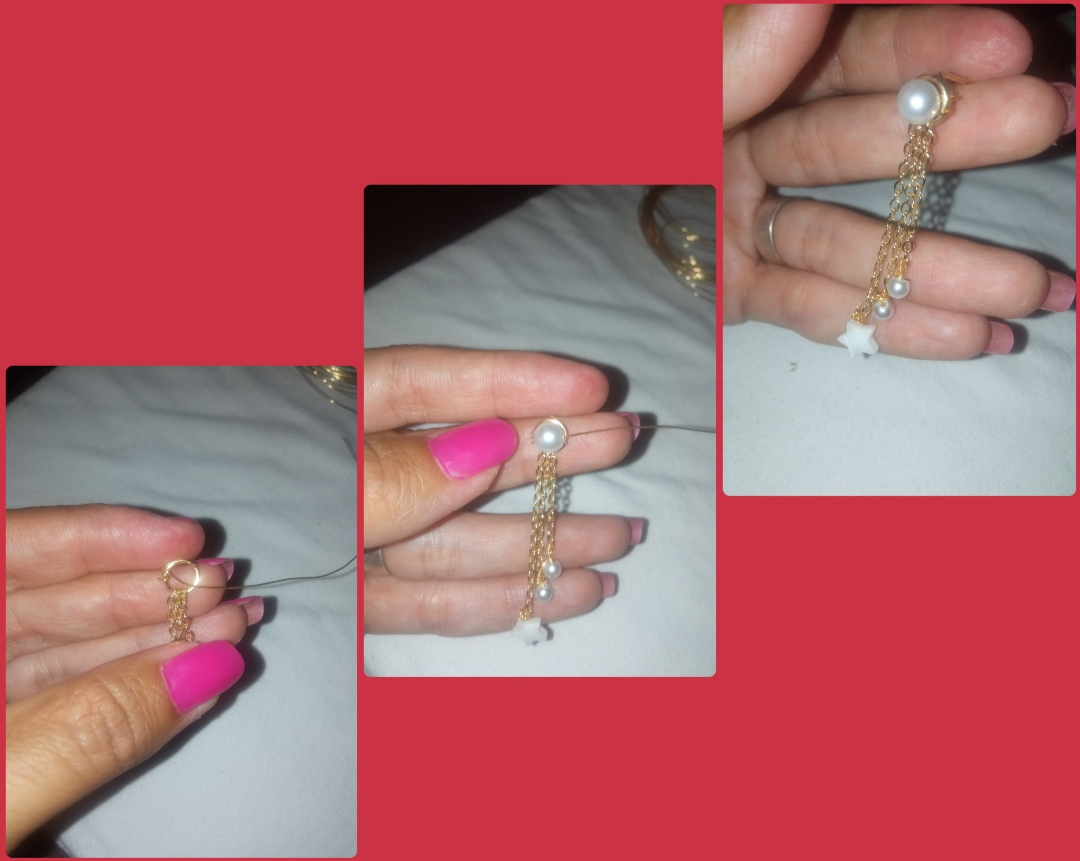
⭐ Paso 3: continuamos tomando un pedazo de alambre de bisutería calibre 26 e introduciremos la pequeña estrella de nácar doblaremos el alambre que queda por la parte de abajo hacia arriba llevándolo por la parte de atrás de la estrellita y lo estrellaremos en su parte superior una vez obteniendo ya esta tirita dónde sujetamos la estrella introduciremos el exceso de alambre que tenemos por encima de la Estrella por la última argolla de la cadenita más larga y doblaremos el alambre hacia abajo y volvemos a enrollar encima de la estrellita para así sujetar esta estrella en la punta de la cadena más larga. De la misma manera tomaremos otro pedacito de alambre de bisutería calibre 26 e introduciremos una pequeña piedra de naca y esta la uniremos a la siguiente cadenita mediana en cuanto a los tamaños así de la misma manera las realizaremos con la cadenita más corta quedándonos el zarcillo de la siguiente manera.
⭐ Step 3: We continue taking a piece of caliber 26 costume wire and we will introduce the small star to bend the wire that remains from the bottom upwards, taking it by the back of the little star and it will crash it in its upper once again obtaining this tread where we hold the star we will introduce the excess wire that we have above the star by the last rind of the longest chain and we will fold the wire down and go back to rolling on top of the star so Hold this star at the tip of the longest chain.
In the same way we will take another bit of wire of caliber costume 26 and we will introduce a small nacch stone and this will unite it to the next median chain as to the sizes so in the same way we will make them with the cadenite shortest remaining the Tendrilla as follows.
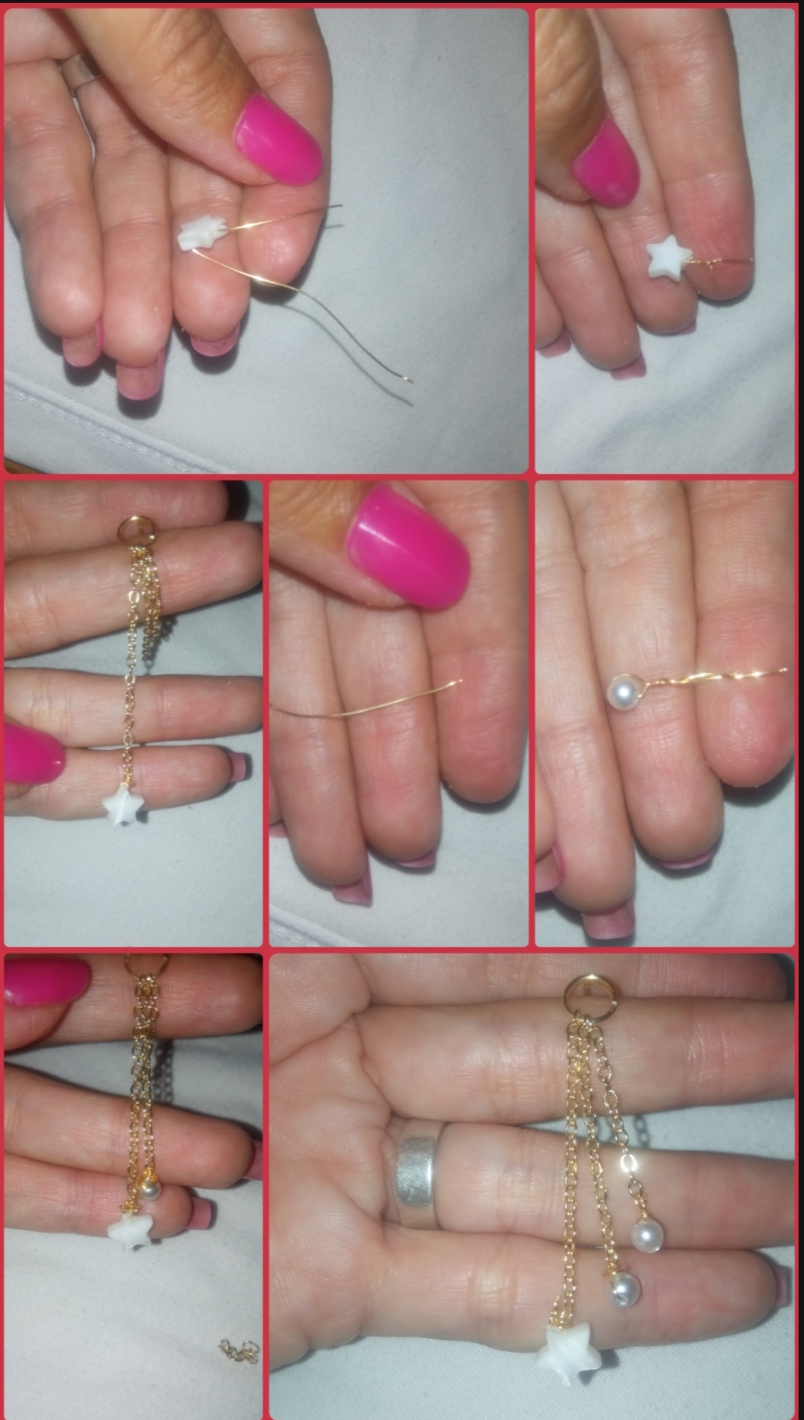
⭐ Paso 4: por último tomaremos un pedazo de la alambre de bisutería calibre 26 y lo enrollaremos en la parte circular de la base principal y por el exceso del alambre introduciremos una piedra perlada la cual colocaremos exactamente encima del círculo y amargaremos el alambre en el otro extremo de la base circular para sujetar esta piedra exactamente en la parte central del círculo. Y de esta manera hemos elaborado la primera pieza de nuestros zarcillos y podrán observar qué hermoso ha quedado.
⭐ Step 4: Finally we will take a piece of 26 caliber wire wire and we will wind it in the circular part of the main base and by the excess of wire we will introduce a pearl stone which we will place up exactly on top of the circle and I will love The wire at the other end of the circular base to hold this stone exactly in the central part of the circle.
And in this way we have elaborated the first piece of our tendrils and can observe what beautiful it has been.
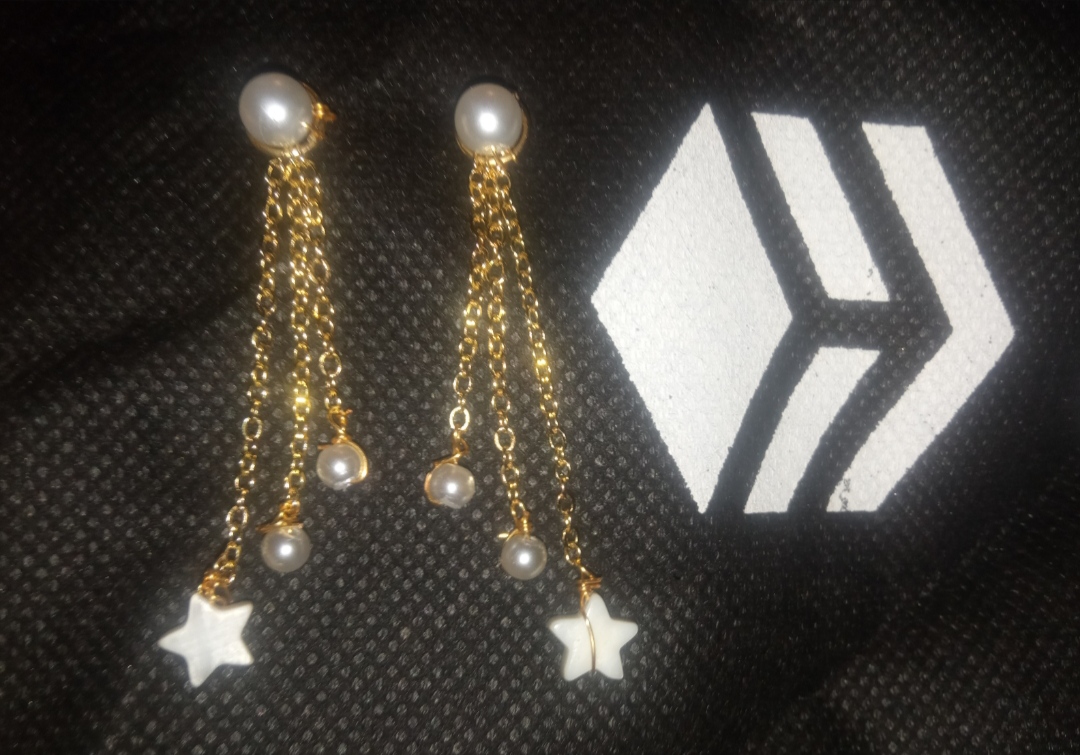
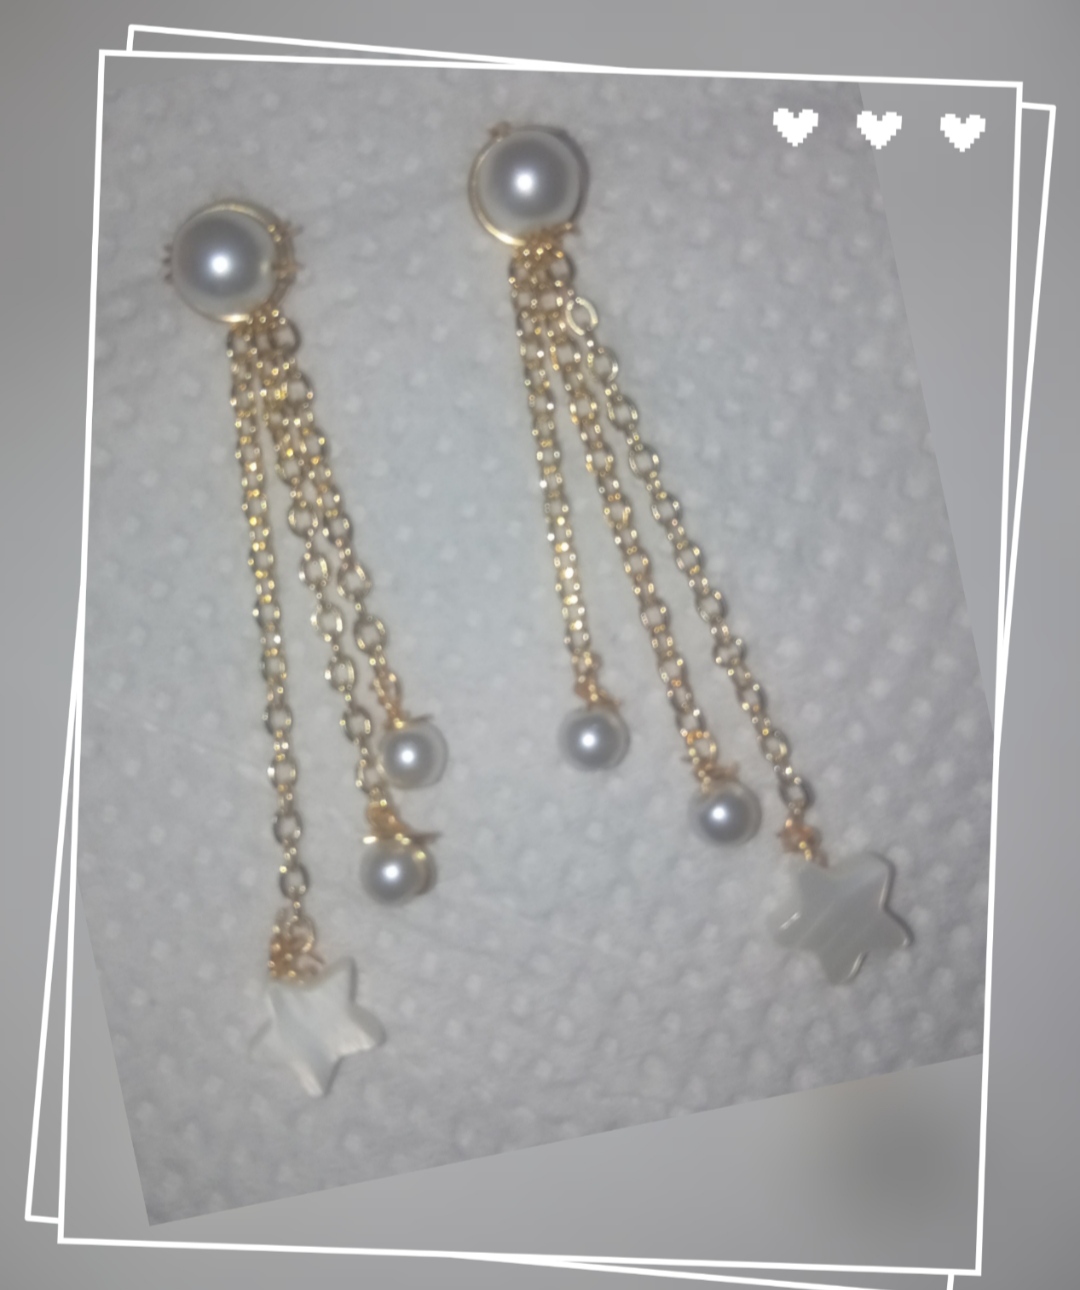
Todas las Fotos son de mi autoría y fueron tomadas con mi Celular Redmi 9.As you can see in our final design we can see that they are very elegant tendrils because the golden color of the chain and the pearl color on the stones we use gives great beauty and eyewear however you can elaborate it with the stones of the color and shape of your liking and also The length of them may vary according to you.
My dear friends This has been my elaboration today to share with all of you which I hope has been from your total pleasure, I say goodbye for this grateful opportunity for your visit.
All Photos are my authorship and were taken with my Redmi 9 Cellphone
The tendrils are lovely. Would suit any outing. Nicely
Thank you very much, I'm glad you liked it.
Congratulations @emmaris! You have completed the following achievement on the Hive blockchain And have been rewarded with New badge(s)
Your next target is to reach 4000 replies.
You can view your badges on your board and compare yourself to others in the Ranking
If you no longer want to receive notifications, reply to this comment with the word
STOPCheck out our last posts:
Enamorada de estos aretes ,hermoso trabajo me encanta el diseño de estrellas que le colocaste 😍✨
Gracias amiga, me alegra mucho que te haya gustado.
Saludos.
Hermosos aretes largos, ideal para lucir hermosa. Te felicito.
Muchas gracias amiga, me alegra mucho saber que son de tu agrado.
Son hermosas amigas, se ven fáciles de hacer. ! Saludos
Hola amiga, como siempre un hermoso trabajo, los zarcillos se ven espectaculares.