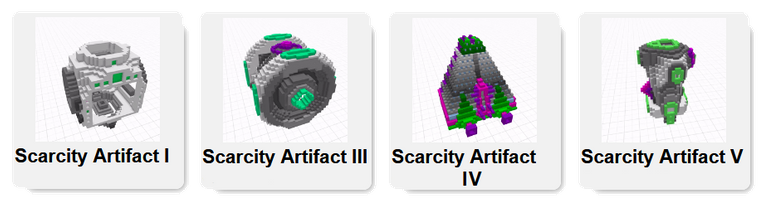
I recently airdropped four wearable tech artifacts to each active Scarcity Island property holder (CryptoVoxels - owners of properties that had been built on, not just bought and left vacant).
These artifacts are designed to be modular building blocks that can be combined in many ways to create different wearable outfits. This is the first of several fitting guides I plan to publish with instructions on how to make specific outfits out of these components. The two outfits presented below are Smol Mecha and Dancing Robot.
For most outfits you will need more than one copy of one or more of the artifacts - swap among your fellow Scarcity residents or make an offer to a holder to acquire the pieces needed. You can locate the artifacts at the official Scarcity Discoveries I public collection on OpenSea. With over 150 holders of each of these artifacts, you should be able to find someone willing to sell or trade with a little luck :)
NOTE: All royalty fees for this collection PLANT TREES - royalties are set up to be automatically distributed to trees.org via the Giving Block (see CryptoVoxels announcement of same ~~~ embed:1489300465171021832 ) twitter metadata:Y3J5cHRvdm94ZWxzfHxodHRwczovL3R3aXR0ZXIuY29tL2NyeXB0b3ZveGVscy9zdGF0dXMvMTQ4OTMwMDQ2NTE3MTAyMTgzMiApfA== ~~~
Keen observers may have noticed that I did not airdrop any of Artifact II. This is a more unusual artifact and will be used in some of the weirder outfits to be published in the future. It is not required to make any of the outfits in this fitting guide. At the current time the only way to procure Artifact II is to make an offer to one of the two owners - myself or bitpixi.eth.
Bonus utility - BUIDL
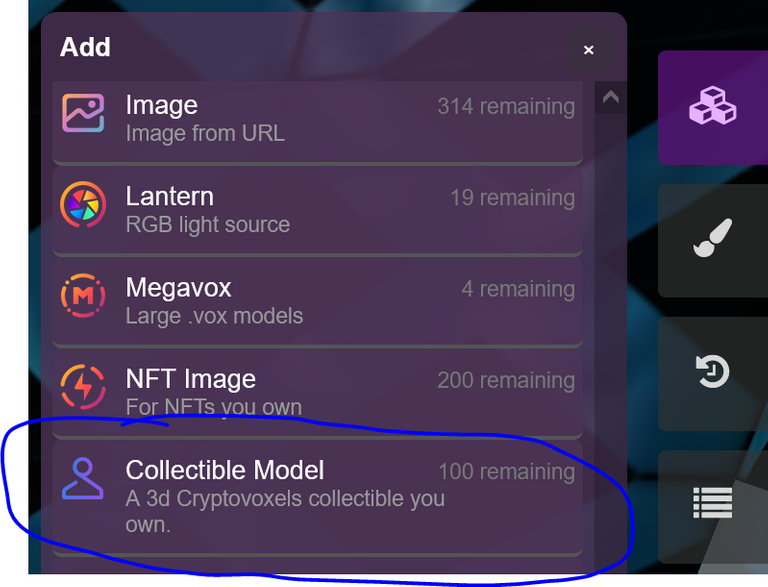
Holders of these artifacts can add them in CryptoVoxels as "collectible models" in the build menu.
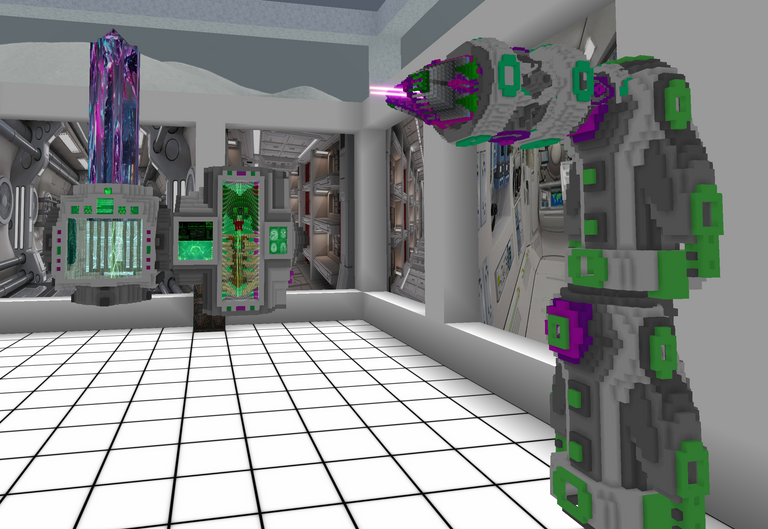
Used as building blocks in game, you can make intricate scifi models/machines by combining these. Visit https://www.cryptovoxels.com/s/scarcityresearch for examples of models built using this technique.
|
|
|
Wearable Outfit Fitting Guides
The first outfit (Smol Mecha) can be assembled with just one each of the artifacts I airdropped, no extra parts needed.
Smol Mecha
Wearable components needed: Scarcity Artifact I x1; Scarcity Artifact III x1; Scarcity Artifact IV x1; Scarcity Artifact V x1
Add a costume
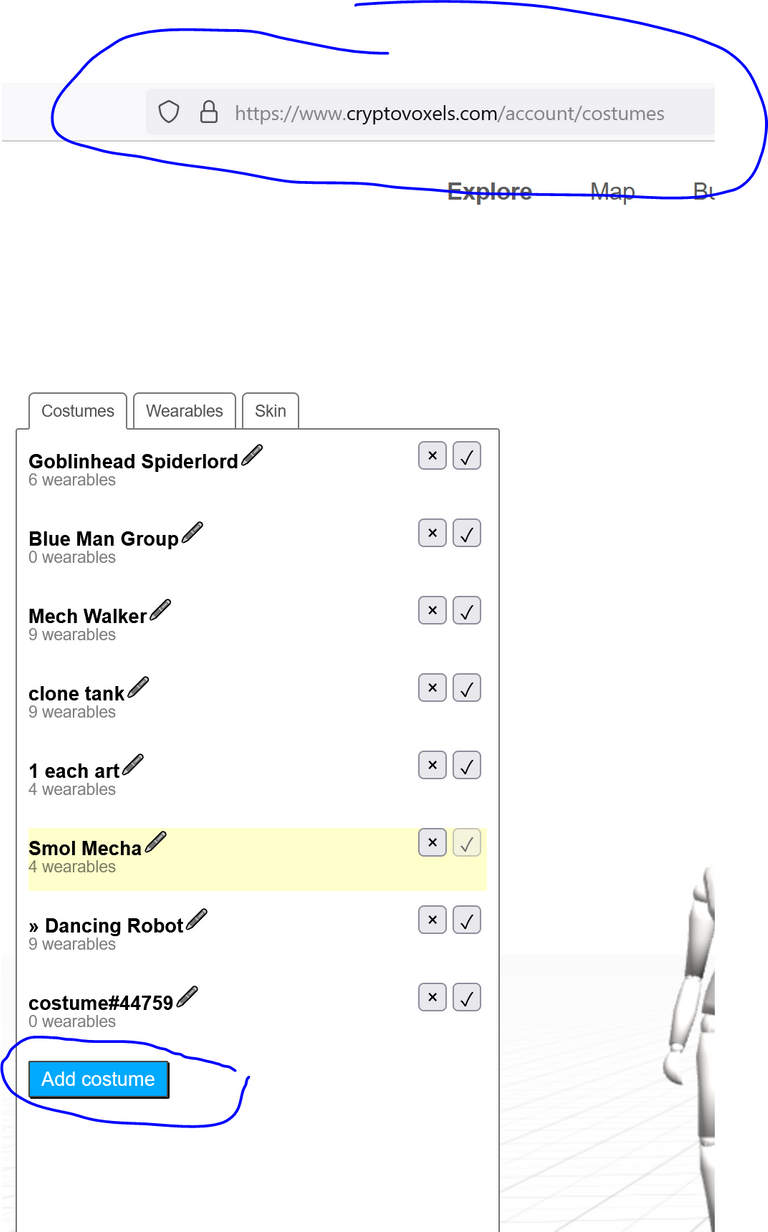
From the "Edit Costume" menu while logged in to CryptoVoxels (https://www.cryptovoxels.com/account/costumes), add a costume. Click the pencil icon to give the costume a name, and save it.
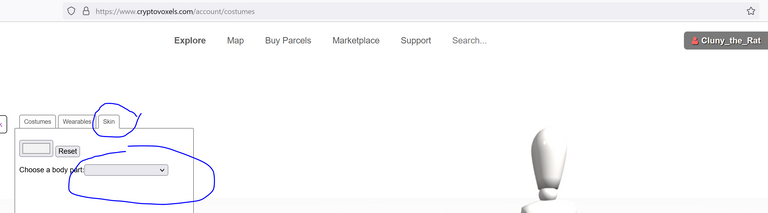
Once the new costume is added, go to the "Skin" tab and proceed with the steps below.
Step 1 - Skin
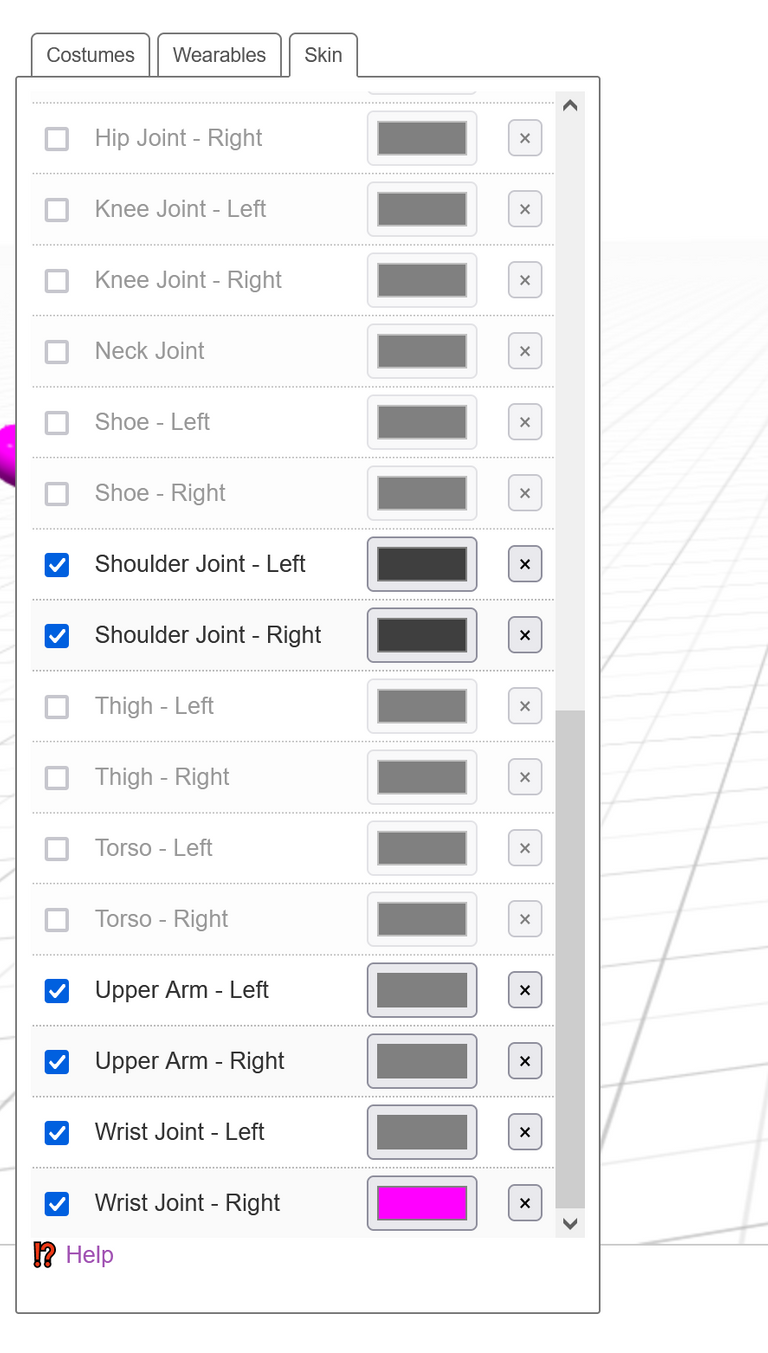
Remove all body parts of the default mannequin except the following: keep the left hand, and both arms from the wrists to the shoulders (keep shoulder joint, upper arm, elbow joint, forearm & wrist joint - both left & right sides, and left hand only). (If you desire your mecha to use a left handed blaster instead of right handed, keep the right hand instead and lose the left hand)
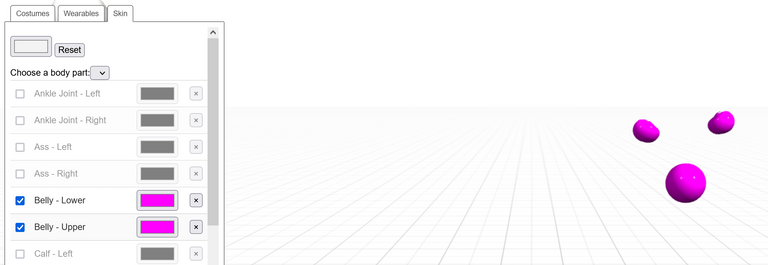
See images below. Select each body part in turn from the drop down menu "Choose a body part" under the "Skin" tab, then uncheck the box to remove that body part from view. Leave the check mark on the arm parts to keep them visible.
Color the right wrist hot pink (this will be part of the blaster). I chose dark greys to color the remaining arm parts, but this is personal preference here.
|
|
|
Body
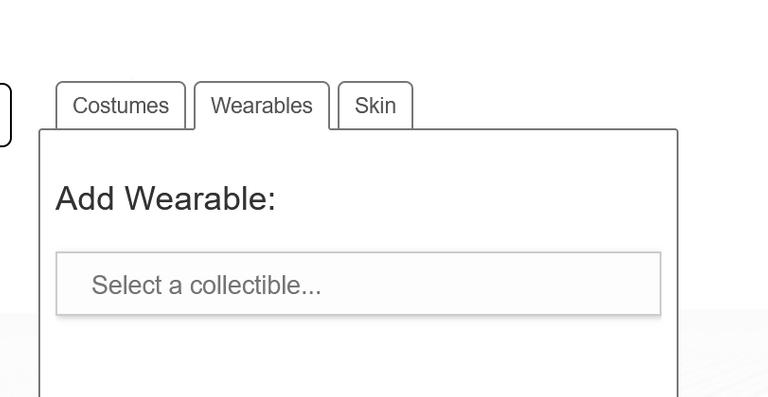
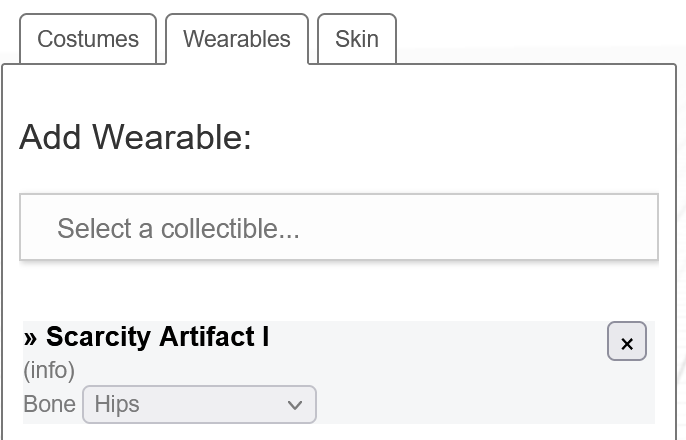
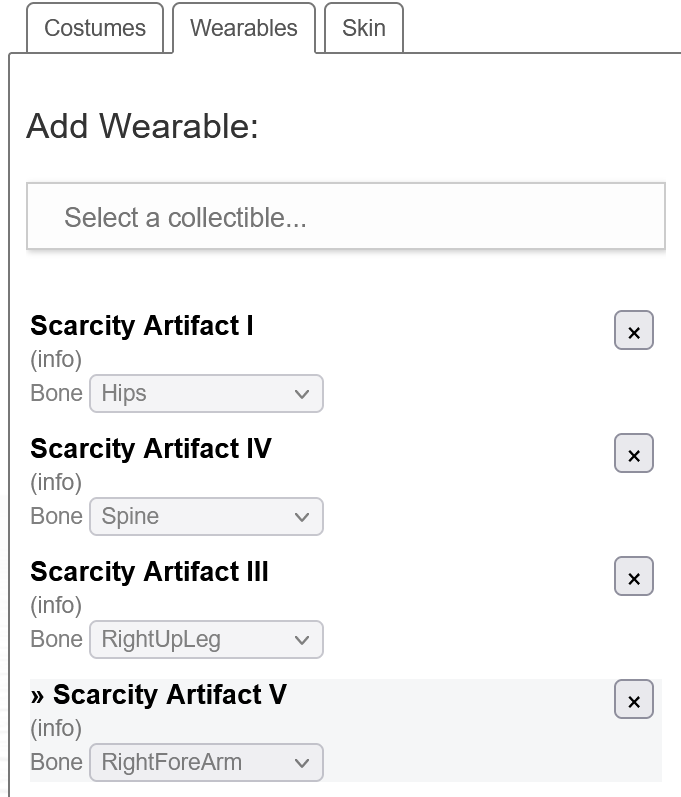
- From the "Wearables" tab, Add Wearable: select Scarcity Artifact I from the drop down menu. Once it appears as a wearable in the costume, set the "Bone" to "Hips" in the drop down menu. See images below.
|
|
|
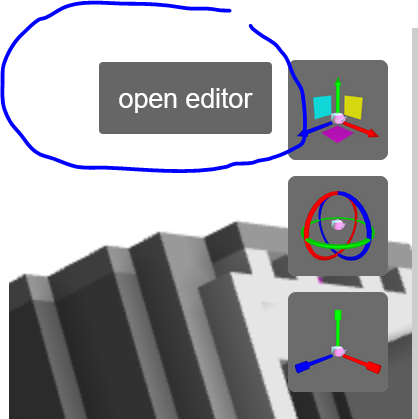
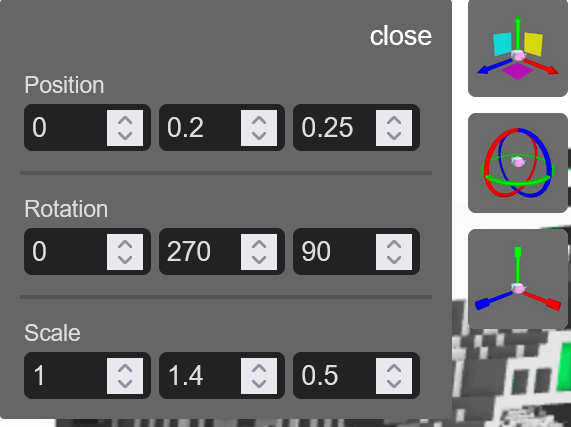
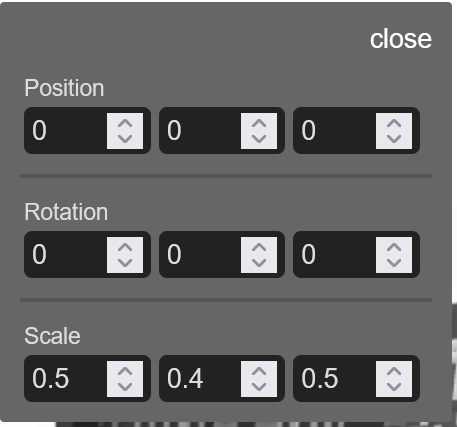
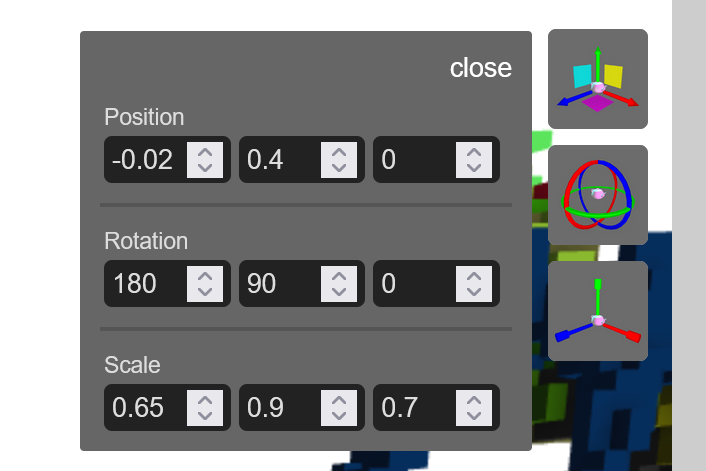
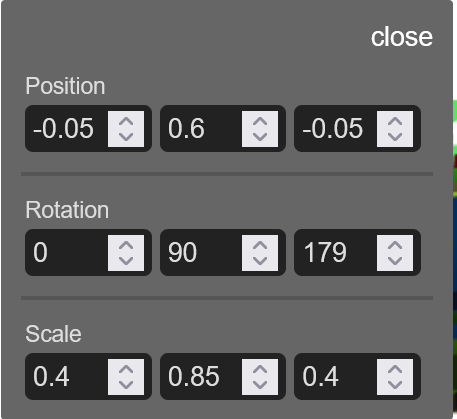
- Open the wearable placement "Editor" (upper right of the edit window - see image below) and enter the settings shown in the image below right.
|
|
|
Head
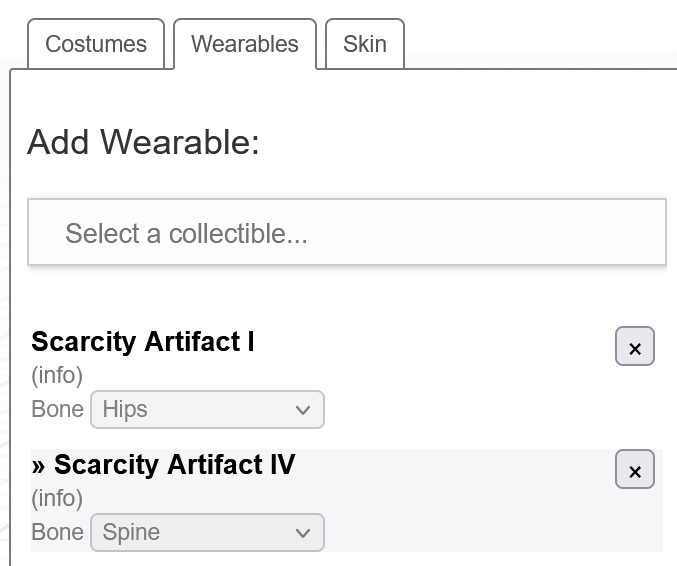
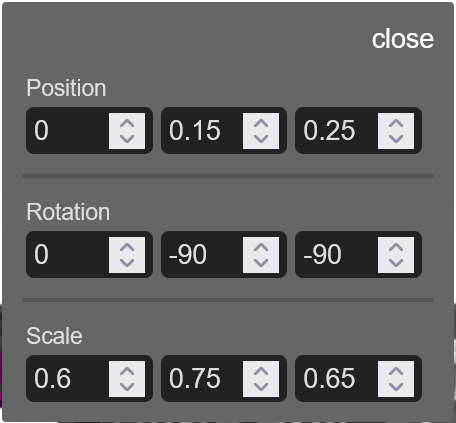
- From the "Wearables" tab, Add Wearable: select Scarcity Artifact IV from the drop down menu. Once it appears as a wearable in the costume, set the "Bone" to "Spine" in the drop down menu. Click the row of the wearable to select it (selected wearable is shaded with a light gray). Open the editor and use the settings shown. See images below.
|
|
|
Alternate Configurations
- play around with placing the head (Artifact IV) on top of the body instead of to the front (keep it attached to the same Spine bone no matter where you put it). Rotate the head so different sides of it face forward - three different sides have eyes. You can use the base Smol Mecha setup to make several different looking robot suits just by moving/rotating the head.
"Legs"/"Wheels"
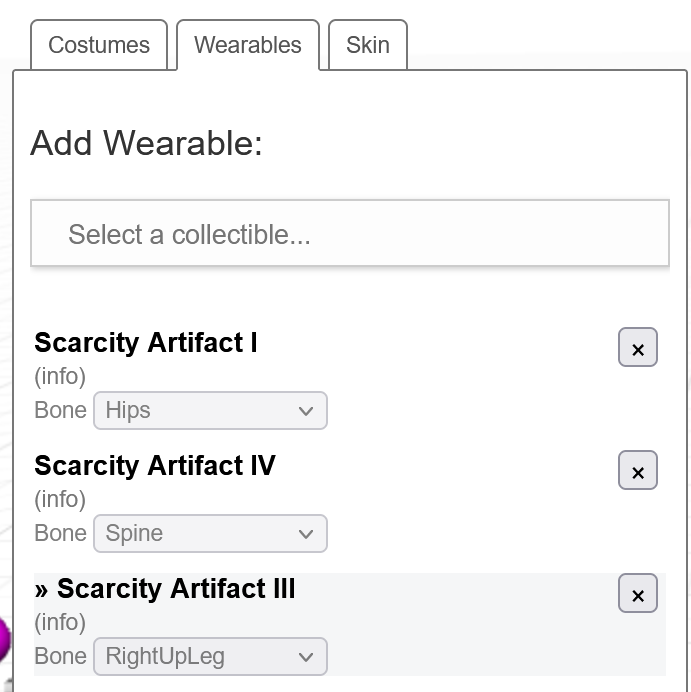
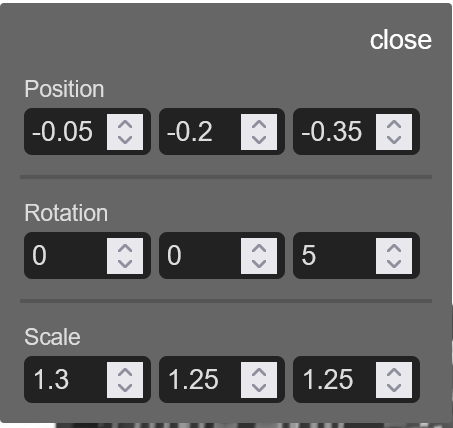
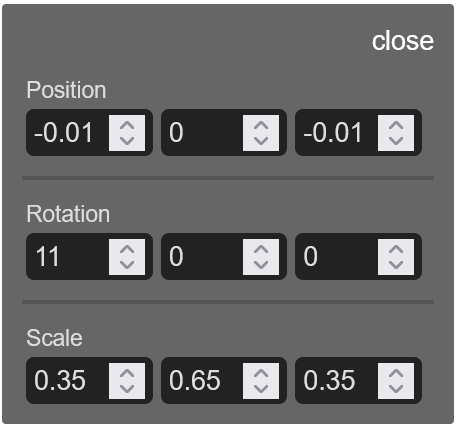
- From the "Wearables" tab, Add Wearable: select Scarcity Artifact III from the drop down menu. Once it appears as a wearable in the costume, set the "Bone" to "RightUpLeg" in the drop down menu. Click the row of the wearable to select it (selected wearable is shaded with a light gray). Open the editor and use the settings shown. See images below.
|
|
|
Blaster
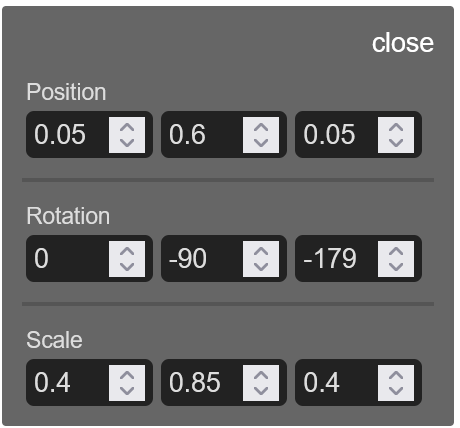
- From the "Wearables" tab, Add Wearable: select Scarcity Artifact V from the drop down menu. Once it appears as a wearable in the costume, set the "Bone" to "RightUpLeg" in the drop down menu. Click the row of the wearable to select it (selected wearable is shaded with a light gray). Open the editor and use the settings shown. See images below.
|
|
|
/ End of Smol Mecha fitting guide
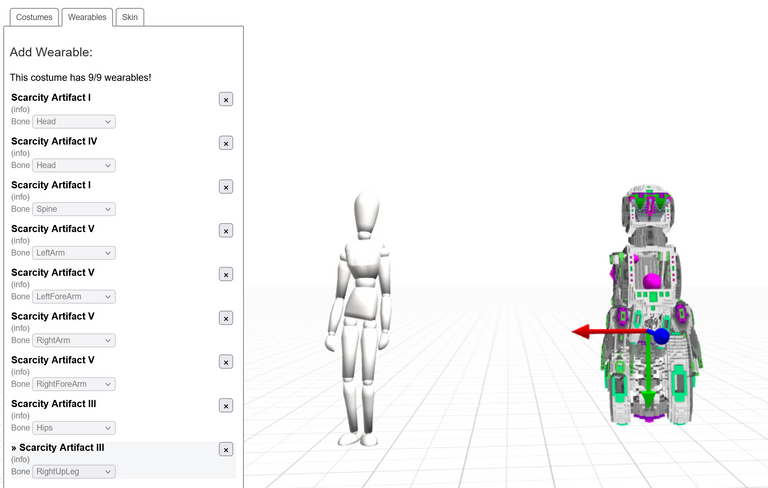
Dancing Robot
Wearable components needed: Scarcity Artifact I x2; Scarcity Artifact III x2; Scarcity Artifact IV x1; Scarcity Artifact V x4
Step 1 - Skin
Remove all body parts of the default mannequin except belly (upper & lower) and shoulders (left & right). See images below. Select each body part in turn from the drop down menu "Choose a body part" under the "Skin" tab, then uncheck the box to remove that body part from view. I chose a hot pink to color the remaining parts to match the pink highlight color of the artifacts, but this is personal preference. If you prefer you could remove all the body parts entirely - I like the way it looks with the spheres visible floating inside the robot torso but that is also personal preference.
|
|
|
Step 2- Wearables
- Add the required Scarcity Artifact Wearables to the costume and attach them to bones as shown in the images below.
HEAD
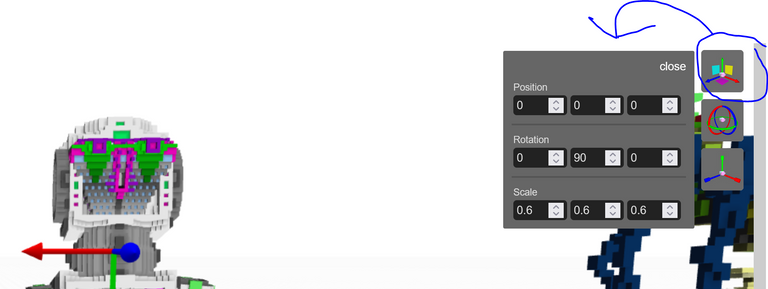
Add one Artifact I to the costume and attach it to the head bone. Open the position editor and use the settings shown in the image below.
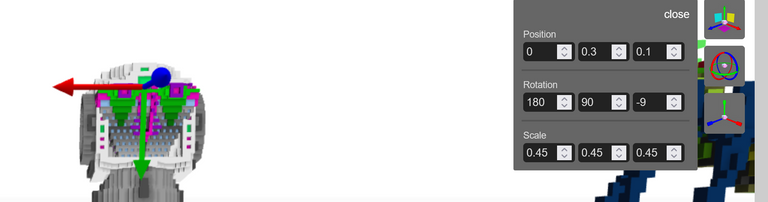
Add one artifact IV to the costume and attach it to the head bone. Open the position editor and use the settings shown in the image below.
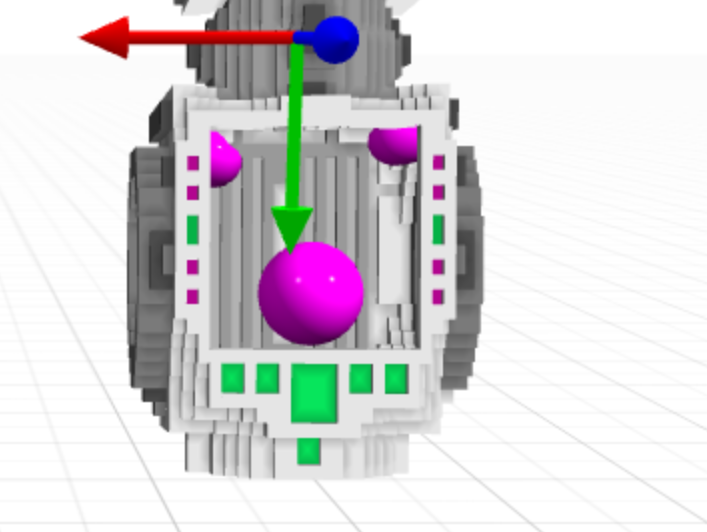
TORSO
Add one Artifact I to the costume and attach it to the spine bone. Open the position editor and use the settings shown in the image below. If you would rather not have a hollow torso cavity from the front view, set the Y axis rotation to 270 instead of 90 to have the solid side in front.
|
|
|
ARMS
The arms use four Artifact V's, attached to the following bones (and settings for each):
LeftArm bone:
LeftForeArm bone:
RightArm bone:
RightForeArm bone:
HIPS
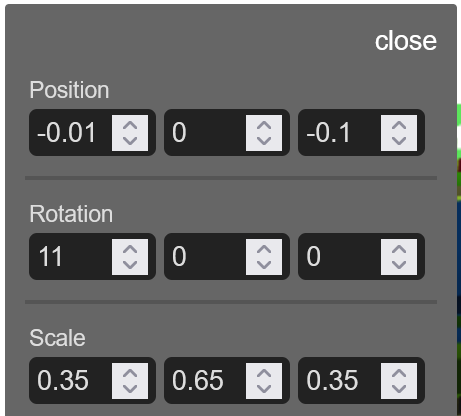
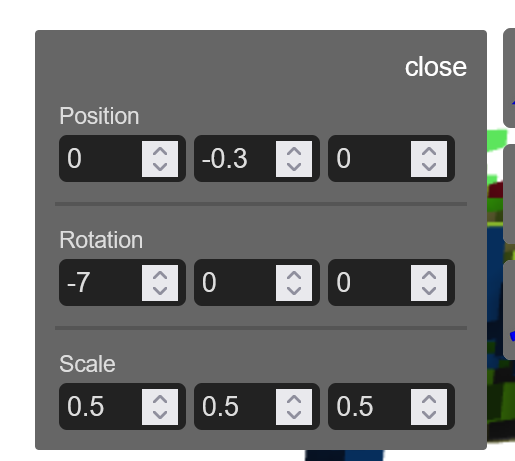
Add one Artifact III to the costume and attach it to the hips bone. Open the position editor and use the settings shown in the image below.
"LEGS" / "WHEELS"
Add one Artifact III to the costume and attach it to the RightUpLeg bone. Open the position editor and use the settings shown in the image below.
