Hi everyone,
I hope this post finds you in good health and high spirits. It's been awhile since my last post here.
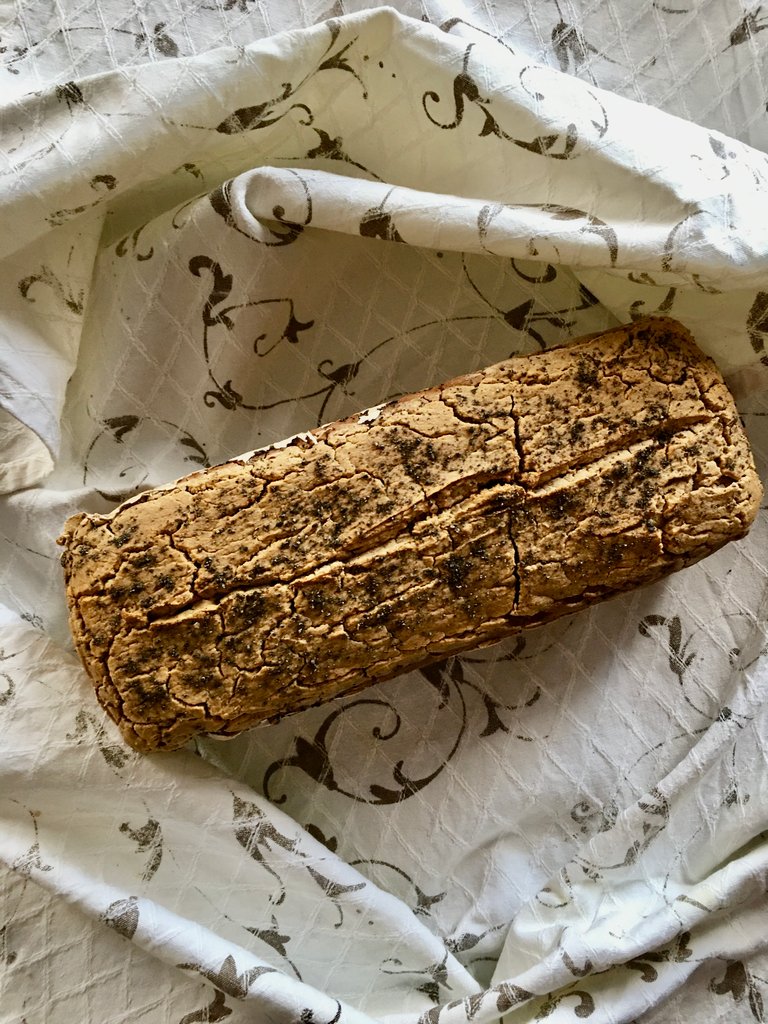
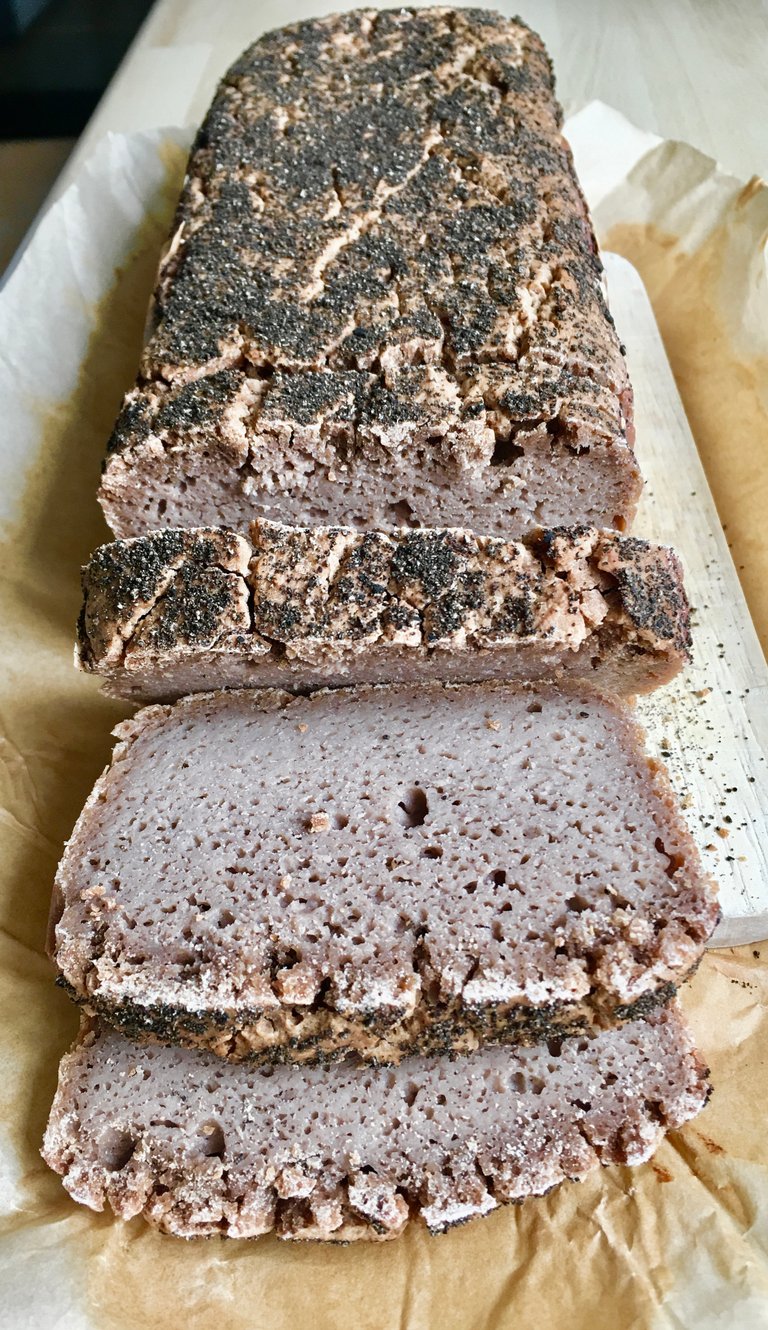
As part of my ongoing cooking and baking adventure, I'm excited to share with you a new alternative to traditional bread—a gluten-free, dairy-free creation made with 100% organic buckwheat flour and a starter dough crafted from scratch.
If you've been following my journey, you might know that I've steered clear of bread for quite some time due to my decision to avoid gluten and its potential contamination. The store-bought gluten-free options never quite satisfied me either, as the lengthy list of ingredients left me questioning the choices we make about what we consume. However, a recent realisation led me to explore alternative grains, such as buckwheat and quinoa, which not only taste fantastic but also offer valuable nutritional benefits.
My husband, sharing this culinary path with me, occasionally expressed a desire for bread. Intrigued by the idea of creating a naturally gluten-free bread, I decided to experiment. The journey started with some not-so-appealing results, but the flavours were promising. Encouraged by my husband's interest, I continued refining my technique.
I must give credit to my husband for inspiring this bread-making venture. His occasional craving for good bread motivated me to delve into the world of baking. The more attention and care I gave to my starter dough, the better the bread became. I'm currently thrilled with the results and find myself wondering why I didn't embark on this bread-making journey sooner.
For those keen on creating their own bread from scratch, using their favourite flour, I wholeheartedly encourage you to give it a try. Making this bread is a simple process that requires constant care. Here's a brief overview of what I did:
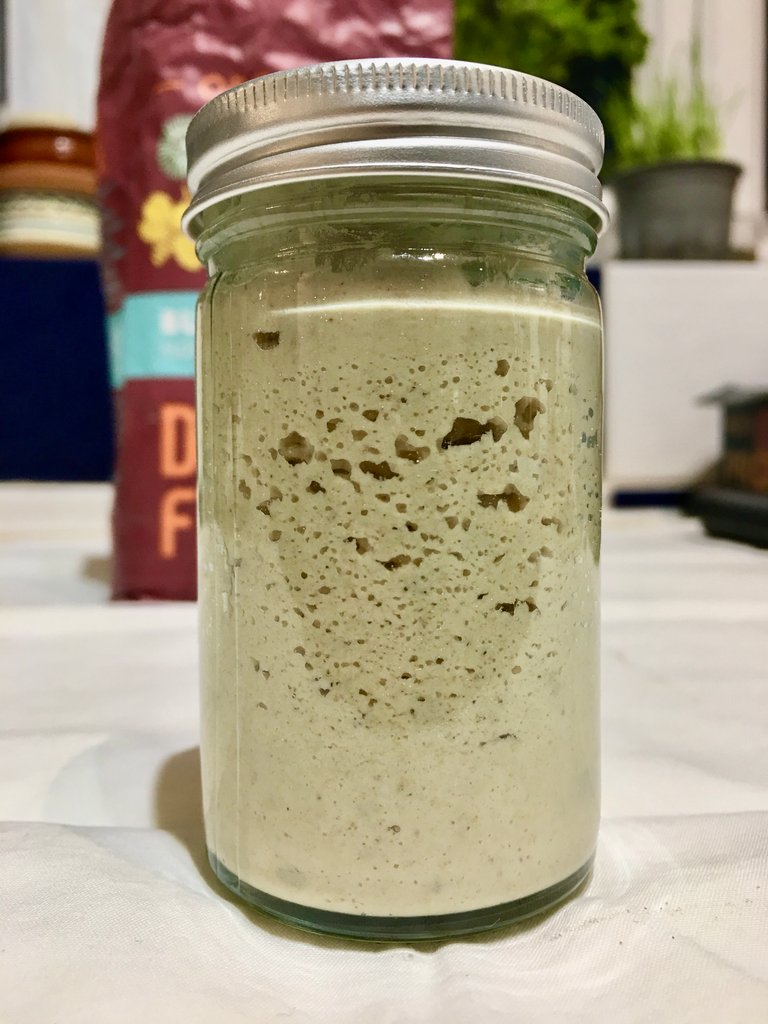
Create the Starter:
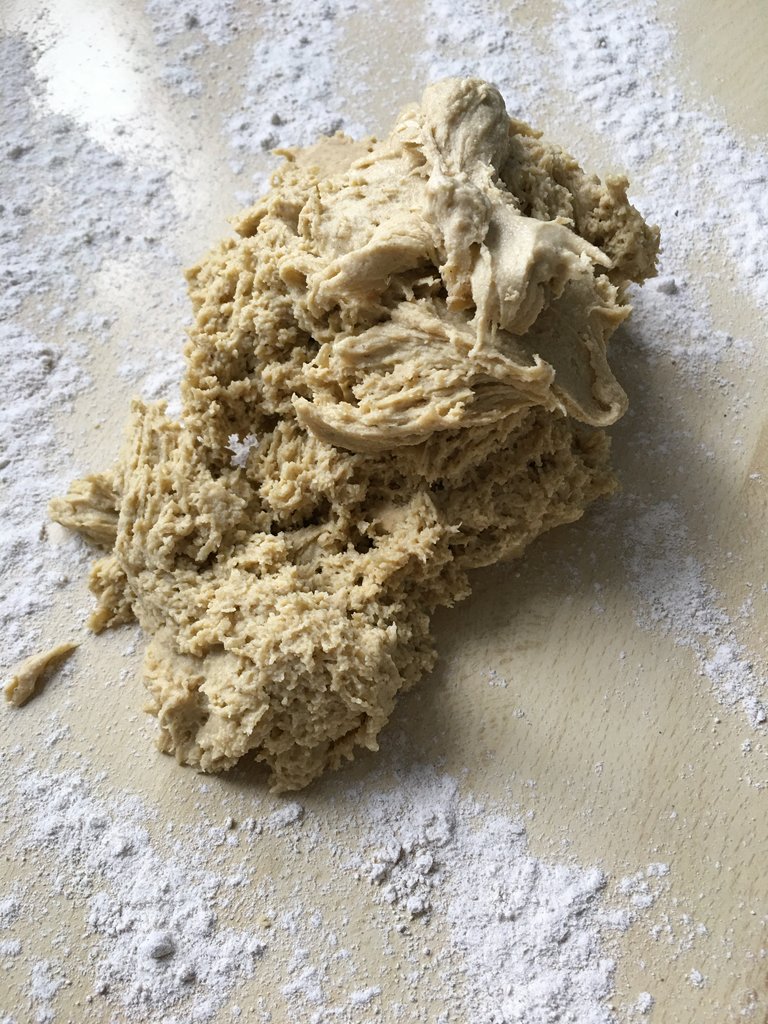
•In a small, clean jar with lid, combine 15g of lukewarm water and 15g of buckwheat flour. Whisk until it forms a dough consistency and over with lid. Place it in a controlled warm environment at 40º C.
Daily Feeding:
•Every day, at the same time, remove 2/3 of the dough and replace it with 1/3 of lukewarm water and 1/3 of buckwheat flour. Whisk well, cover with lid and pour the jar back into the warm place. Repeat this process for at least a week.
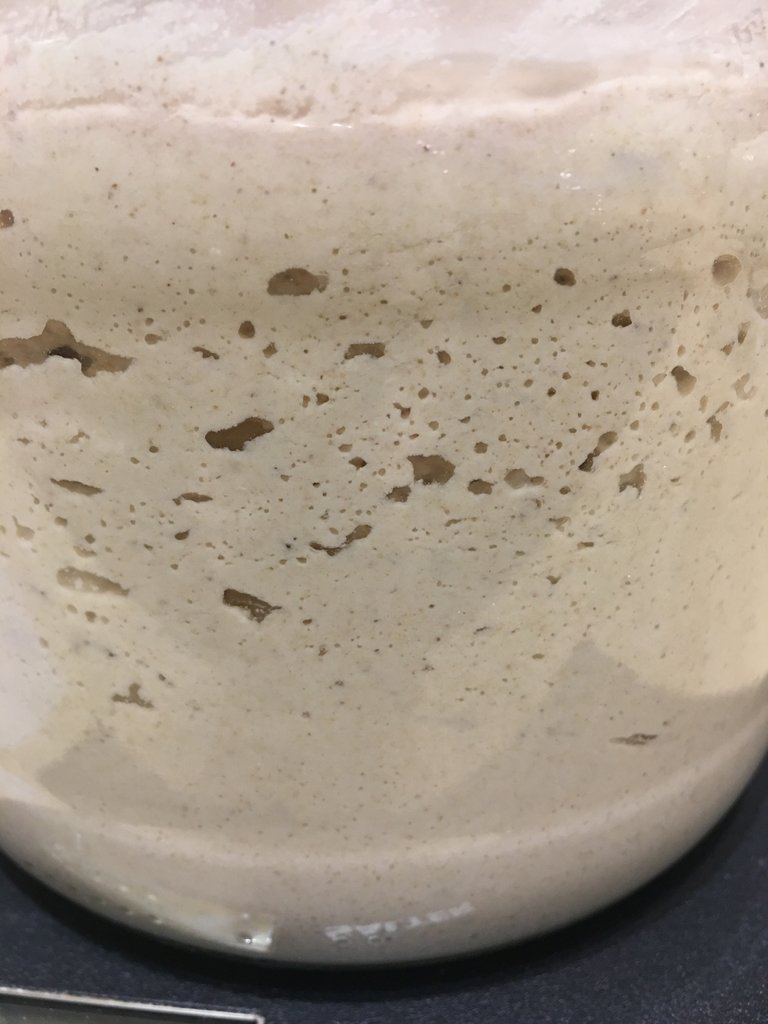
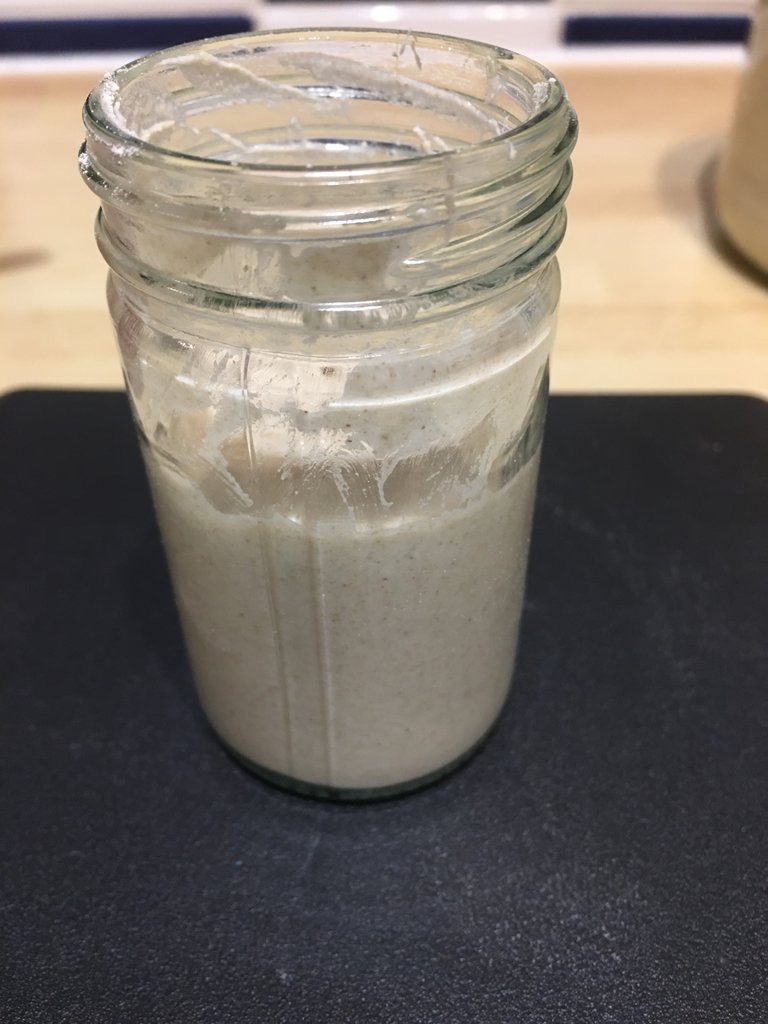
Expansion and Duplication:
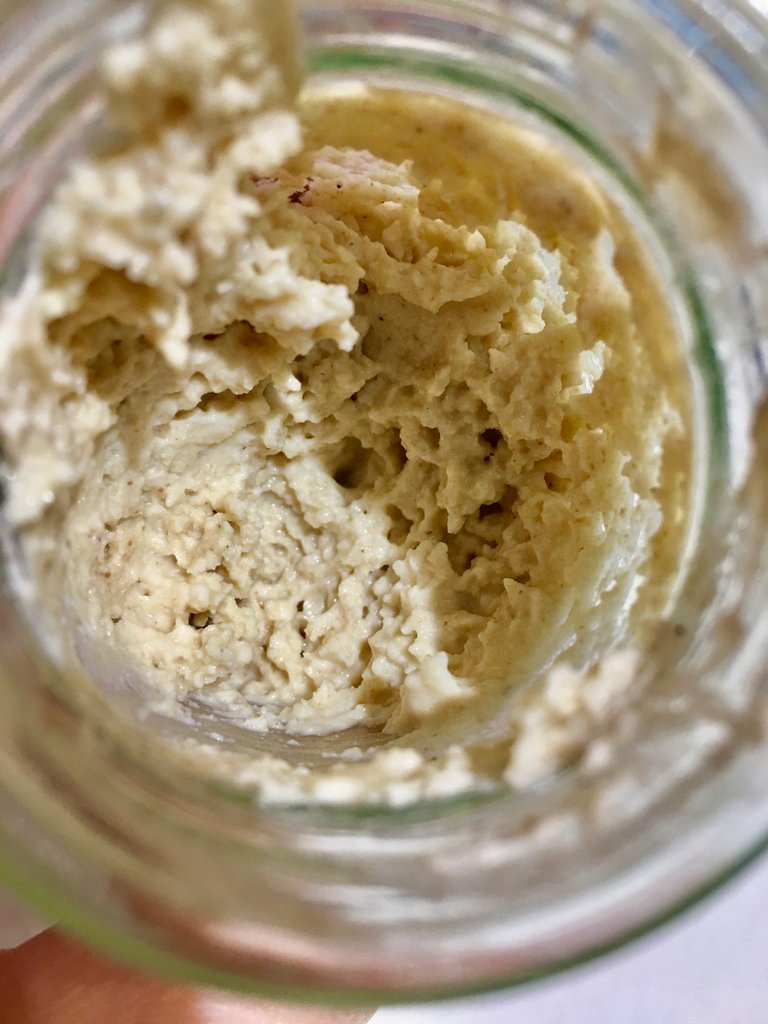
•After about a week, start doubling the quantity to create a stronger starter dough for a crusty, tangy, and flavourful bread. You will measure the dough and you will add the same amount of lukewarm filtered water and the same amount of flour. You should change the jar to a bigger one or a glass container with lid. That's all!
Gluten-Free, Dairy-Free Buckwheat Bread Recipe:
Ingredients:
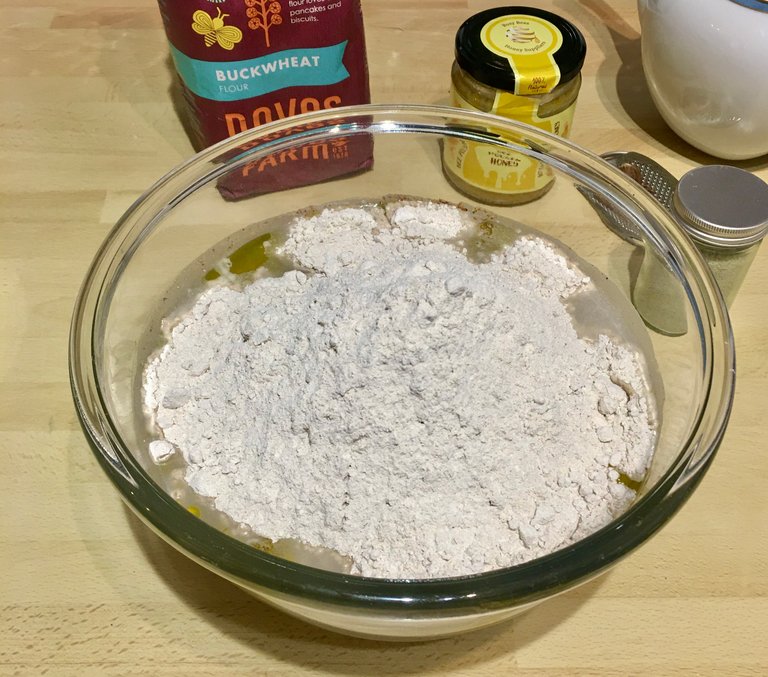
• 900g starter, buckwheat, organic
•300g lukewarm filtered water
•300g buckwheat flour, organic
•10g salt
•10g honey, optional
•20g olive oil, extra virgin
•1/4 tsp nutmeg, freshly grated
•10g of your favourite seeds: nigella, sunflower, or sesame seeds for topping, optional
Instructions:
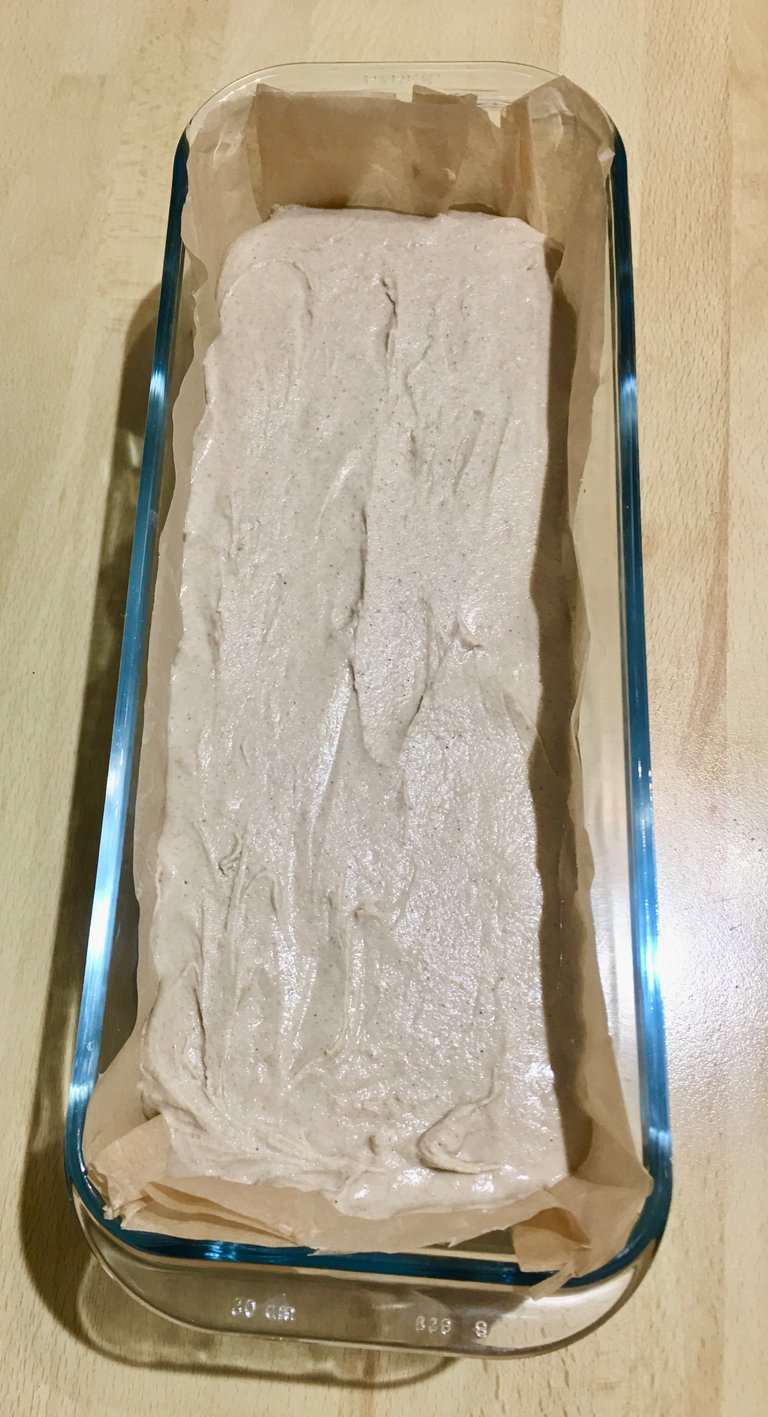
1.Prepare a baking loaf pan covered with parchment paper and set aside.
- In a big mixing bowl, combine together the buckwheat starter, water, oil, honey, salt, nutmeg, and flour. Whisk with a spatula until a smooth and soft batter is formed.

- Pour the batter into a baking loaf pan, level it up with the spatula, and then cover it up with kitchen film. Transfer the baking loaf into the warm place box at 40ºC overnight.
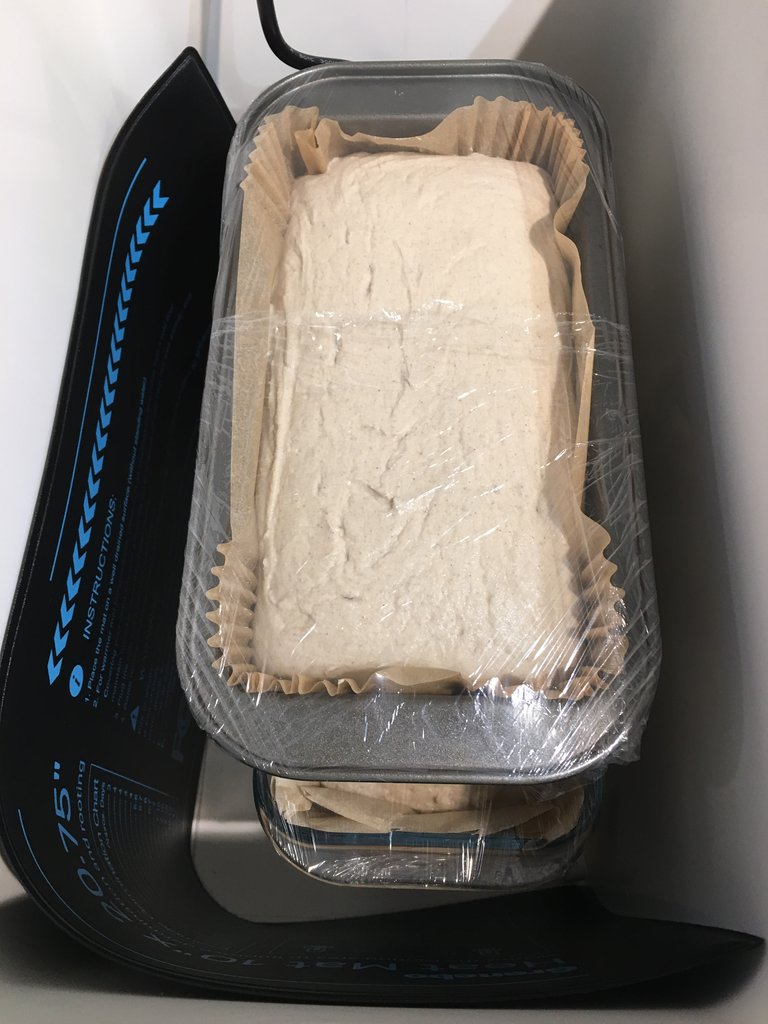
- The next day, once ready to bake, pre-heat the oven at 190ºC.
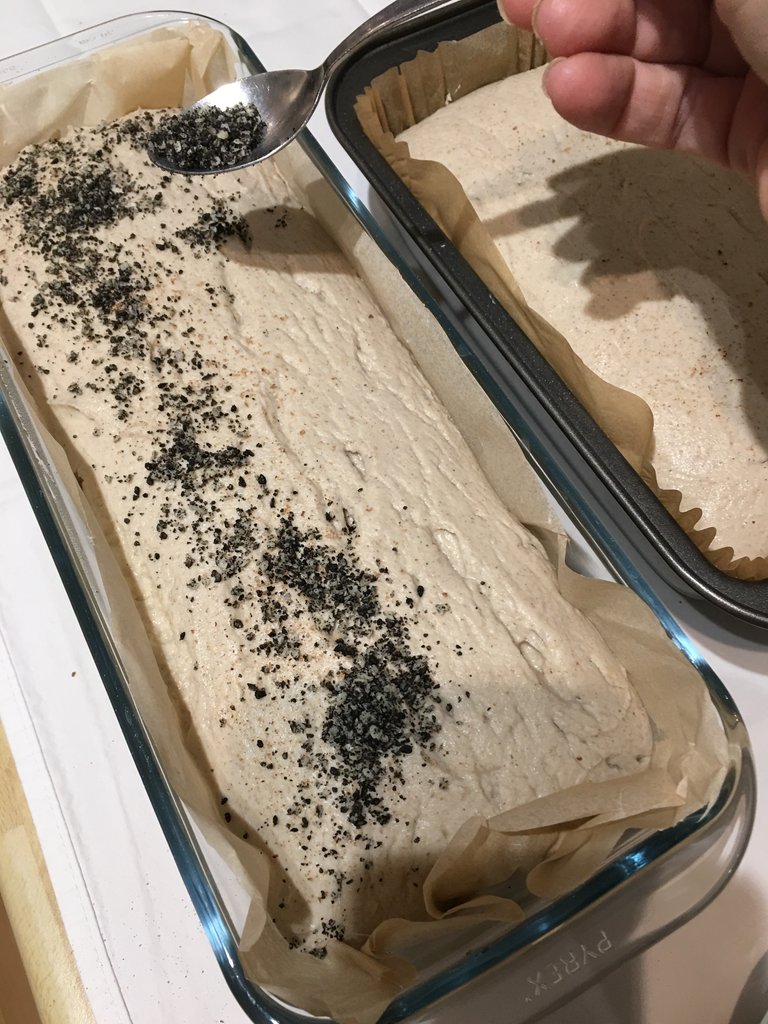
- Take the baking loaf pan out of the box and sprinkle the batter with nigella or sesame seeds.
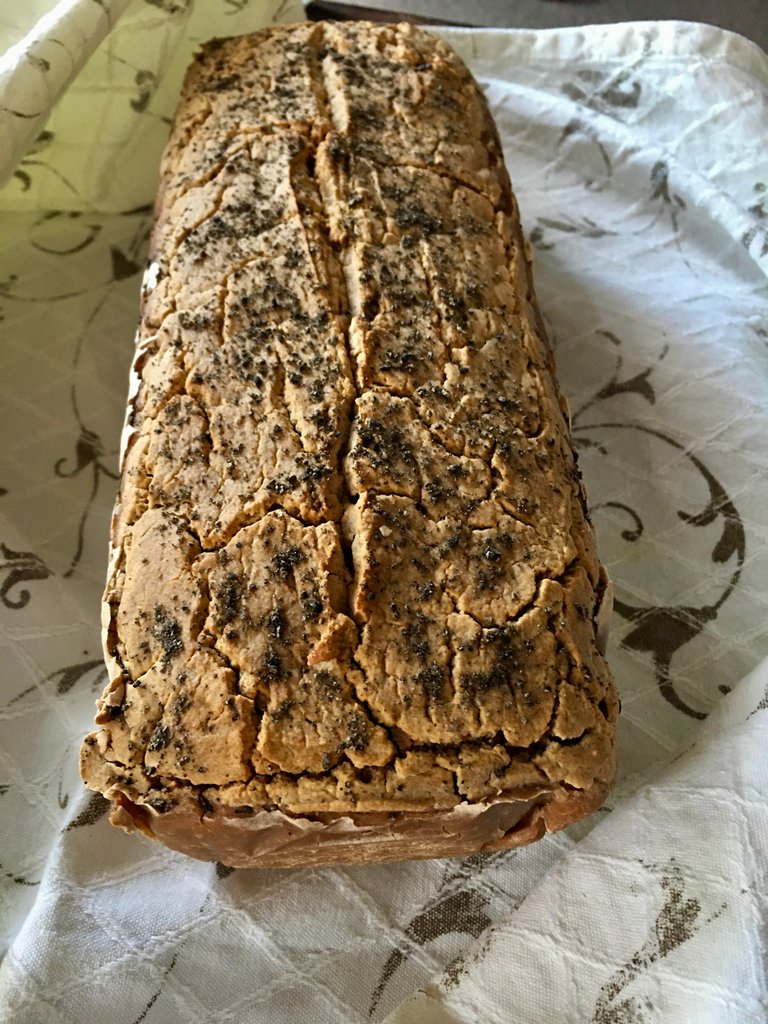
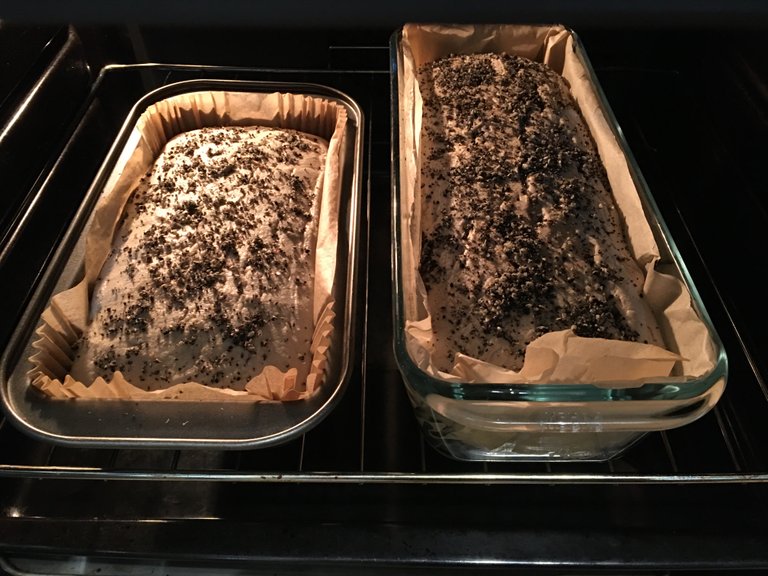
- Bake the bread for 50 minutes at 180ºC, then take the bread out of the baking pan and place it directly in the oven. Continue baking it for another 15 to 20 minutes or until it becomes golden brown.
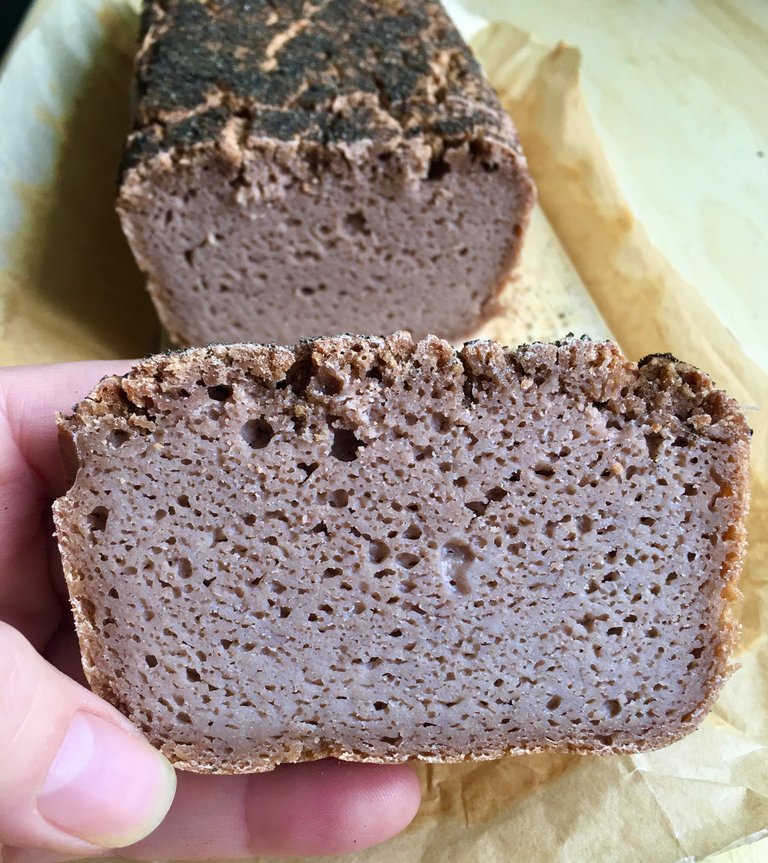
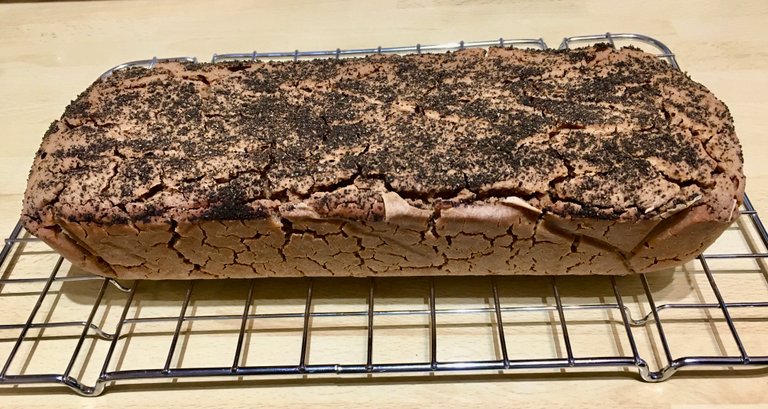
- Transfer the bread over a rack and let it cool at room temperature before slicing it.
- Enjoy!
Note: Once cooled, the bread can be sliced and stored at room temperature for a couple of days. If you think you will not be consuming it sooner, pack the bread slices in parchment paper and then foil and store them in the fridge for up to 10 days, or in the freezer (place them in freezer bags) for up to 6 months.
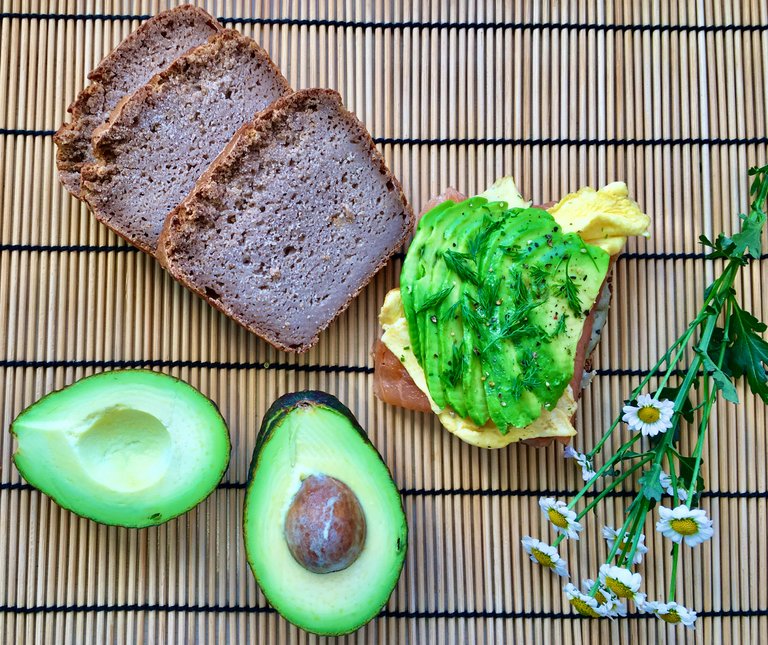
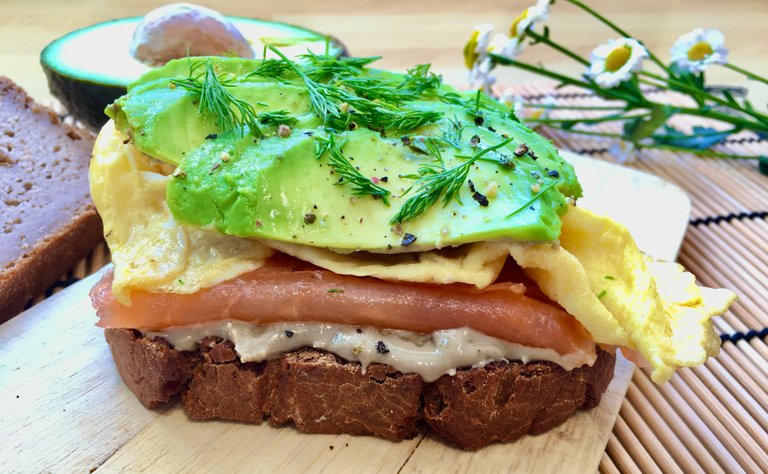
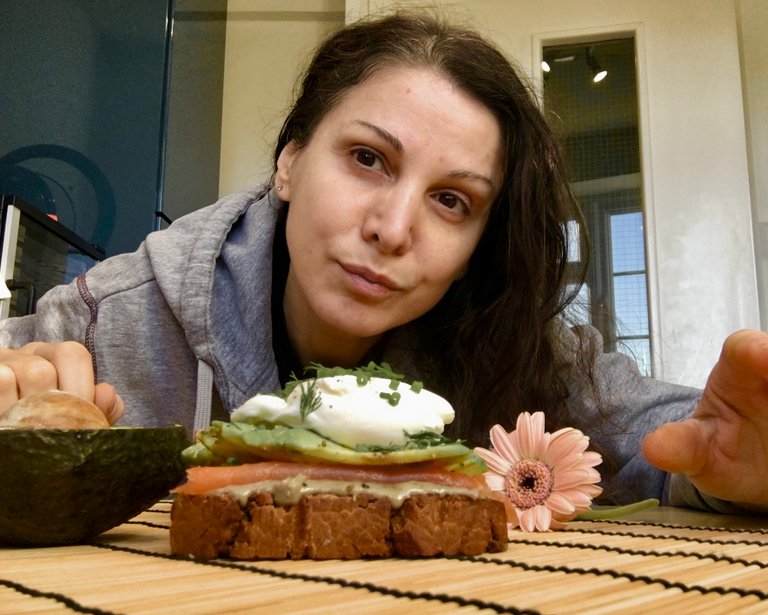
Now, I bake this delightful bread almost every week, and our family truly enjoys it. My favourite way to savour it is toasted, topped with homemade sunflower seeds butter, smoked salmon, avocado, and poached or scrambled eggs. I'm curious to know about your favourite toppings—share them with me!
I encourage you to give this recipe a try. If you decide to embark on a similar bread-making journey, feel free to reach out for support. I'd be more than happy to help.

Thank you for taking the time to read my blog, witch is 100% my original content and I look forward to hearing your thoughts on making your own bread and the reasons behind your decision.
Happy baking!
Simona
>About The Author
When I'm not working, you can find me dancing, foraging in nature, cooking or baking healthy meals in my kitchen, spending time with my grandson, working out in the gym, exploring the world of cryptocurrencies, and much more.
Hi @monivis,
Thank you for participating in the #teamuk curated tag. We have upvoted your quality content.
For more information visit our discord https://discord.gg/8CVx2Am
That looks yummy Simona. I love my wild yeast, I treat it as pet, and feeding is essential.
Thank you so much! It's wonderful to hear that you share the joy of working with wild yeast. Treating it like a pet is a delightful analogy—I couldn't agree more! The feeding process truly adds to the magic of bread-making. 🍞✨
You're welcome.