
¡Hola Chicos!
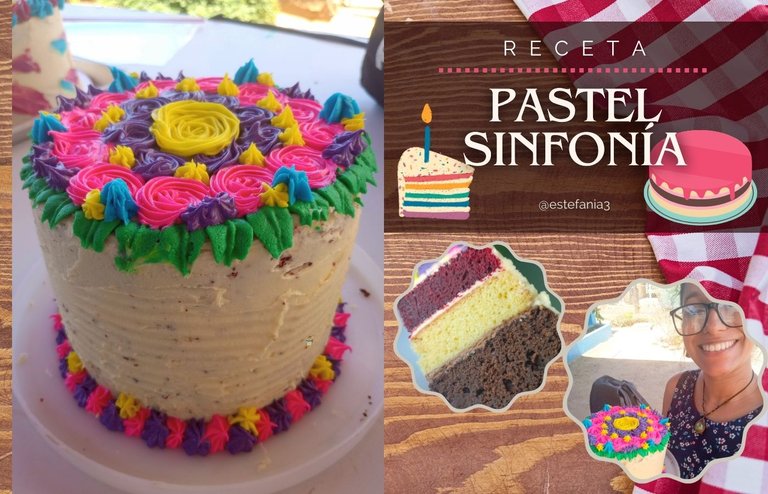
En nuestra última clase de repostería trabajamos con un pastel único y lleno de sabor, el pastel sinfonía. Su nombre es muy curioso y supongo que tiene que ver con la mezcla de estos 3 sabores de pasteles diferentes en su interior, que juntos hacen una mezcla armónica.
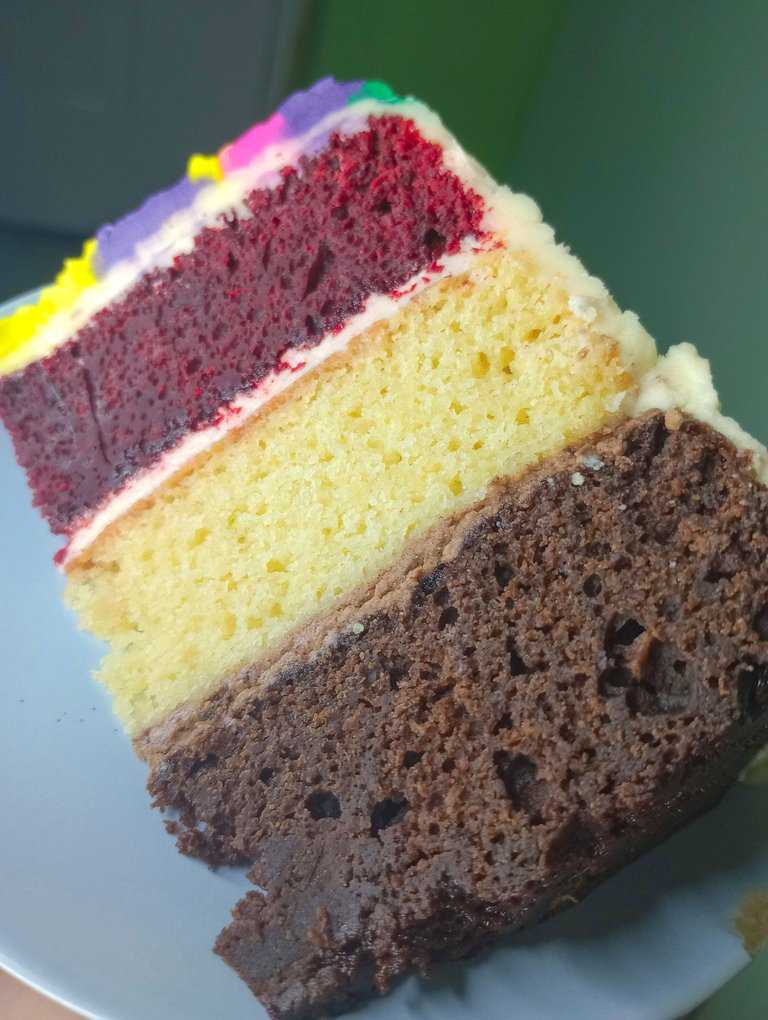
Cuenta con 3 capas, una de pastel de vainilla, otra de red velvet y la última de chocolate. Además tiene dos diferentes rellenos: ganache de chocolate y betún de queso crema. Todo cubierto y decorado con buttercream.
Cada una de las participantes del curso llevaría su pastel y los trabajaría en individual, pues la idea era que aprendiéramos sobre el armado de este pastel y además practicáramos un poco con la decoración.
Había la opción de trabajar en conjunto, pero con el horneado de los pasteles yo tengo una manera de hacerlo y me gusta ser muy cuidadosa con ello. Así que hoy les contaré mi experiencia en todo el proceso, desde el horneado, hasta el armado del pastel. ♥
La receta de estos pasteles se las he compartido anteriormente en mi blog, pero de igual forma les dejaré los ingredientes por acá por si les hace falta y un enlace a los post donde doy detalles de cada preparación.
Hello Guys!
In our last pastry class we worked with a unique and full of flavor cake, the symphony cake. Its name is very curious and I guess it has to do with the mixture of these 3 different cake flavors inside, which together make a harmonious blend.
It has 3 layers, one of vanilla cake, one of red velvet and the last one of chocolate. It also has two different fillings: chocolate ganache and cream cheese frosting. All covered and decorated with buttercream.
Each of the course participants would take her cake and work on it individually, since the idea was that we would learn about the assembly of this cake and also practice a little with the decoration.
There was the option of working together, but with the baking of the cakes I have a way of doing it and I like to be very careful with it. So today I will tell you about my experience with the whole process, from baking, to assembling the cake. ♥
I've shared the recipe for these cakes before on my blog, but I'll leave the ingredients here in case you need them and a link to the posts where I give details of each preparation.
125 gr de margarina repostera
125 gr de margarina Mavesa
500 gr de azúcar
6 huevos
500 gr de harina de trigo
2 taza de leche de larga duración
3 cucharadas de vinagre
4 cucharadas de cacao
3 cucharadas de colorante rojo en polvo
1 cucharadita de bicarbonato
2 cucharadas de esencia de nata
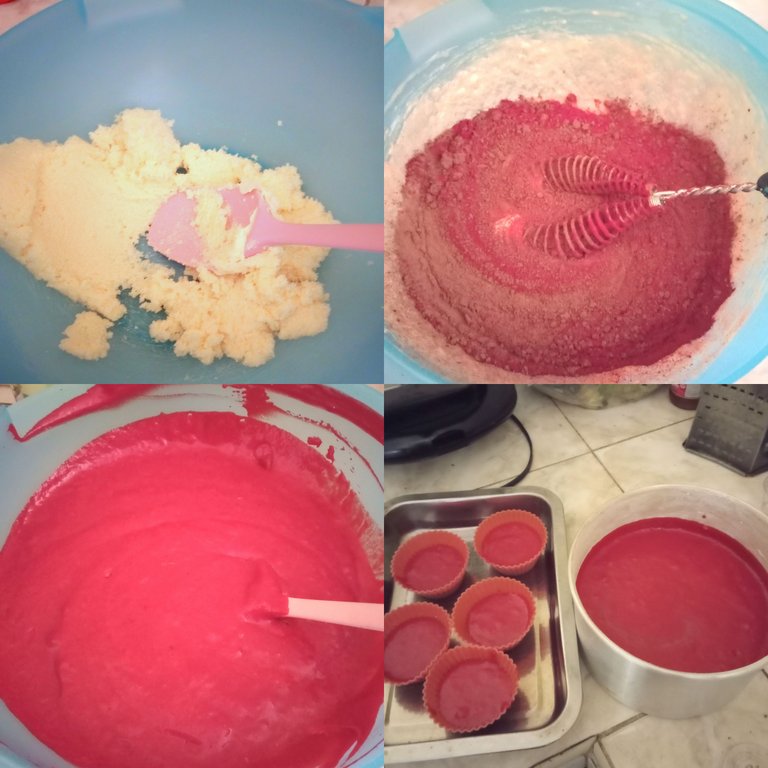
Decidí hacer la mitad de la receta porque hacerla completa me saldría más costoso y la idea era tener una capa pequeña de pastel.
En el momento que comencé a hacer el pastel se me fue la electricidad y no pude revisar cual era el procedimiento correcto para hacer el pastel.
Así que seguí mis instintos y mezclé todo como un pastel igual. La única diferencia con la preparación original es que los huevos se separan y las claras se baten a punto de nieve para ser integradas al final.
A pesar de todo logré hacerlo y llevé al horno. El resultado no fue el mejor, por este pequeño detalle de las claras pero de sabor quedo bien.
125 gr pastry margarine
125 gr Mavesa margarine
500 gr sugar
6 eggs
500 gr wheat flour
2 cup long-life milk
3 tablespoons vinegar
4 tablespoons cocoa
3 tablespoons red coloring powder
1 teaspoon of baking soda
2 tablespoons cream essence
I decided to make half of the recipe because making the full recipe would be more expensive and the idea was to have a small layer of cake.
The moment I started to make the cake the electricity went out and I couldn't check what was the correct procedure to make the cake.
So I followed my instincts and mixed everything as the same cake. The only difference with the original preparation is that the eggs are separated and the egg whites are beaten to stiff peaks to be integrated at the end.
In spite of everything I managed to make it and put it in the oven. The result was not the best, because of this small detail of the egg whites, but the flavor was fine.
2 tazas de harina de trigo leudante
1 taza de azúcar
125 gr de margarina
2 huevos
Esencia de vainilla
1/2 taza de agua o leche
2 cucharadas de ron
Ralladura de limón
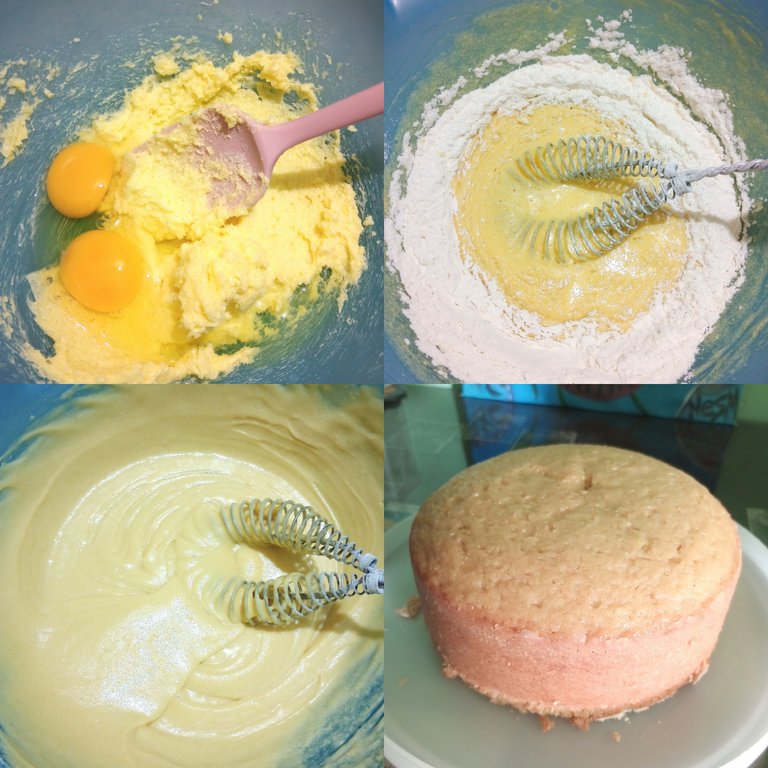
Este es un pastel básico, se mezcla primero la margarina y el azúcar, luego los huevos, el ron y la ralladura de limón y finalmente se intercalan el agua y la harina de trigo.
Es el pastel de vainilla común y el que suelo preparar para la merienda de mi familia.
2 cups leavening wheat flour
1 cup sugar
125 gr margarine
2 eggs
Vanilla essence
1/2 cup water or milk
2 tablespoons of rum
Lemon zest
This is a basic cake, first mix the margarine and sugar, then the eggs, rum and lemon zest and finally the water and wheat flour.
It is the common vanilla cake and the one I usually prepare for my family's snack.
125 gr de margarina repostera
125 gr de margarina Mavesa
500 gr azúcar
6 Huevos
500 gr harina de trigo leudante
2 tazas de leche líquida
1 taza de cacao en polvo
1/2 taza de caramelina
1/2 Cucharadita de canela en polvo
3 cucharadas de vinagre
1 cucharadita de bicarbonato
2 cucharadas de esencia de nata
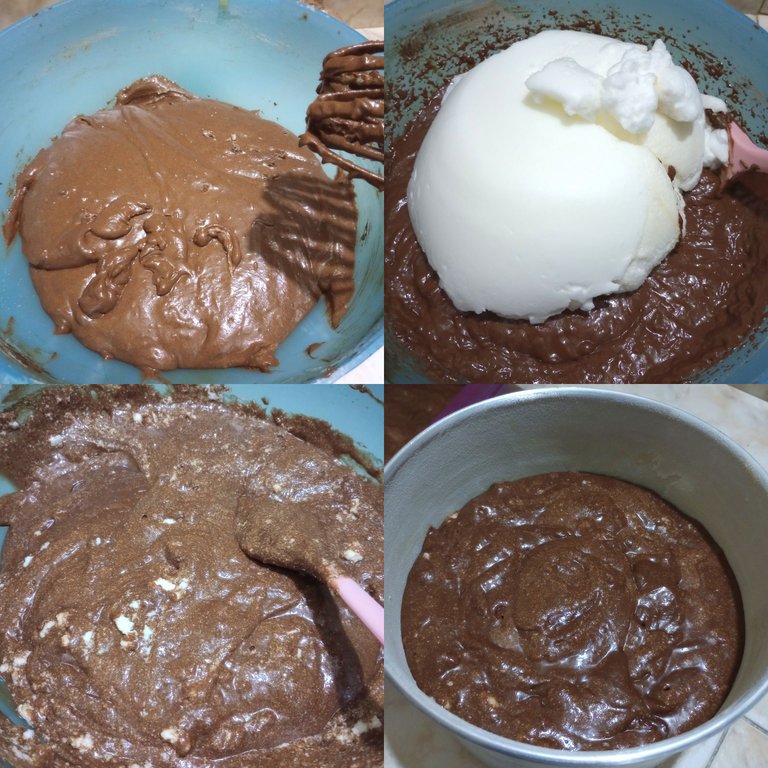
Fue el último pastel que horneé, terminé de hacerlo a las 12 de la noche. Ya al otro día debía asistir a la clase así que había que terminar a la hora que fuera necesario.
La preparación de este pastel es idéntica a las del red velvet, lo único es que cambian los ingredientes pero se hace igual. Esta vez si pude verificar los pasos para saber que debía airear las claras.
125 gr pastry margarine
125 gr Mavesa margarine
500 gr sugar
6 eggs
500 gr leavening wheat flour
2 cups of liquid milk
1 cup cocoa powder
1/2 cup caramel
1/2 teaspoon cinnamon powder
3 tablespoons vinegar
1 teaspoon of baking soda
2 tablespoons cream essence
It was the last cake I baked, I finished baking it at 12 o'clock at night. Already the next day I had to attend class so I had to finish at whatever time was necessary.
The preparation of this cake is identical to the red velvet, the only thing is that the ingredients change but it is made the same way. This time I was able to verify the steps to know that I had to aerate the egg whites.
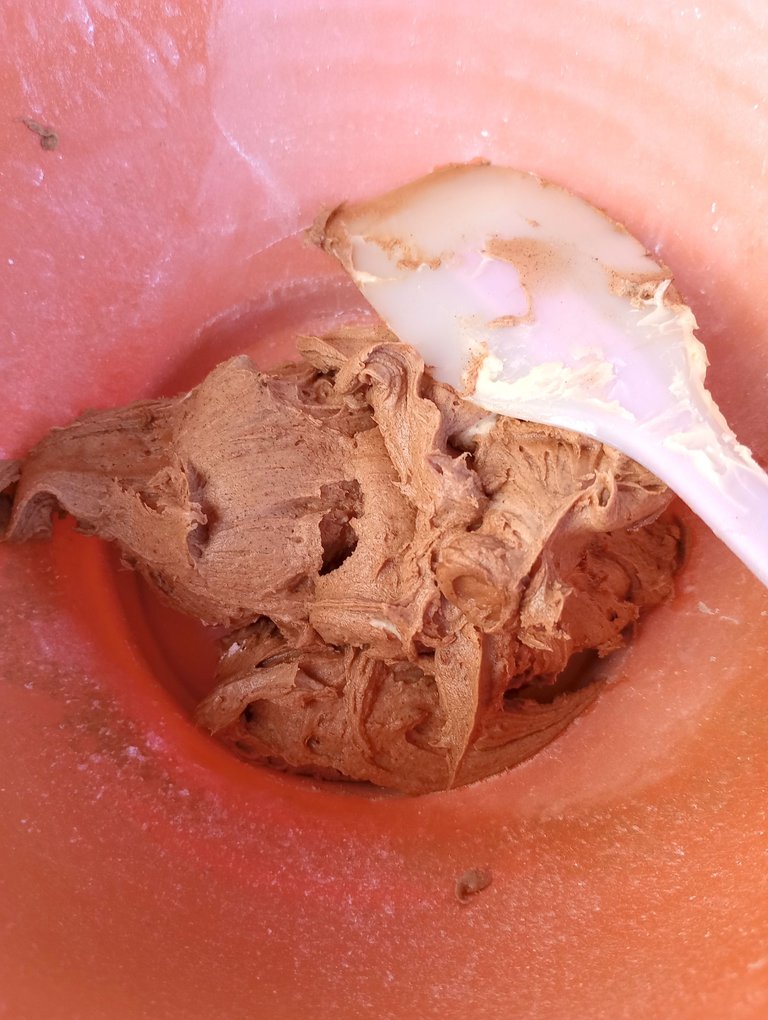
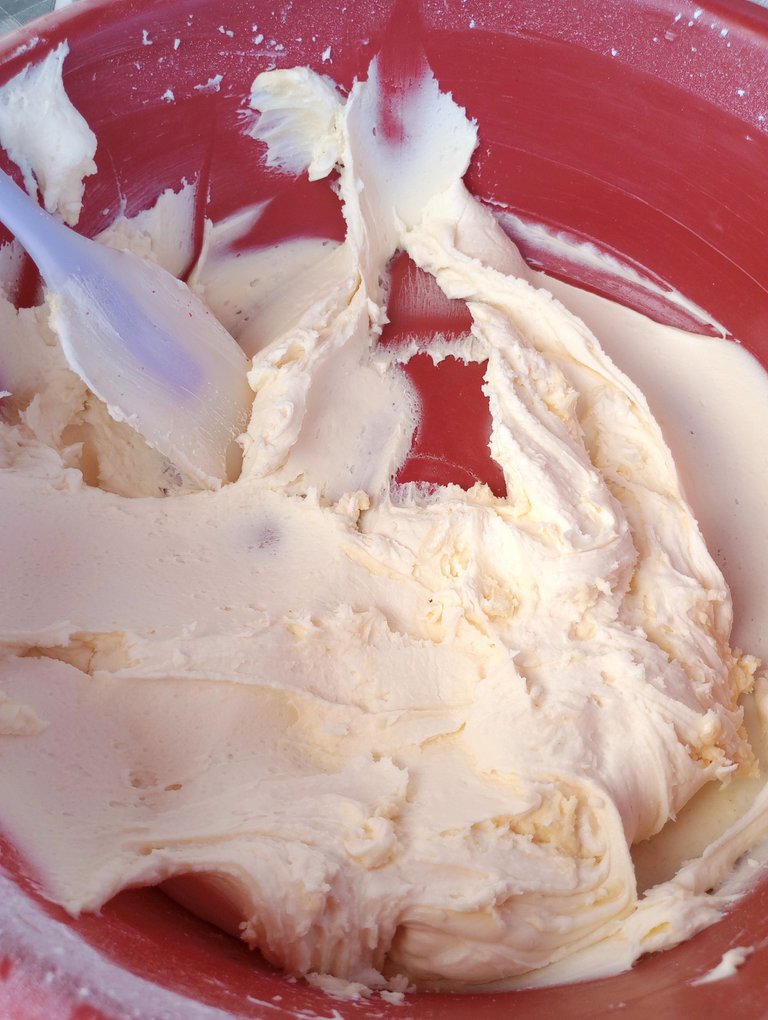
En la clase preparamos los rellenos y la cobertura. En nuestro caso no hicimos ganache sino que hicimos la buttercream de chocolate. También hicimos el betún de queso crema y la buttercream para la cobertura del pastel.
La preparación de estos 3 diferentes tipos de cremas es sencilla, solo hay que tener en cuenta que la formula es: una parte de grasa y dos partes de azúcar pulverizada.
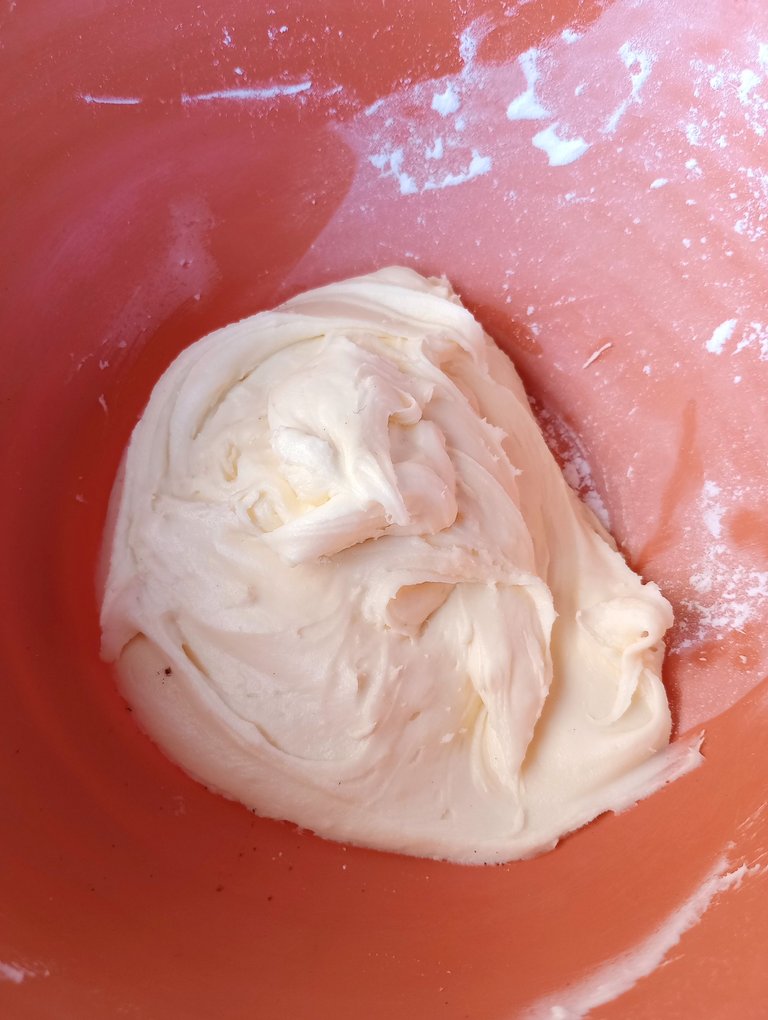
In the class we prepared the fillings and the frosting. In our case we did not make ganache but we made the chocolate buttercream. We also made the cream cheese frosting and the buttercream for the cake topping.
The preparation of these 3 different types of creams is simple, just keep in mind that the formula is: one part fat and two parts powdered sugar.
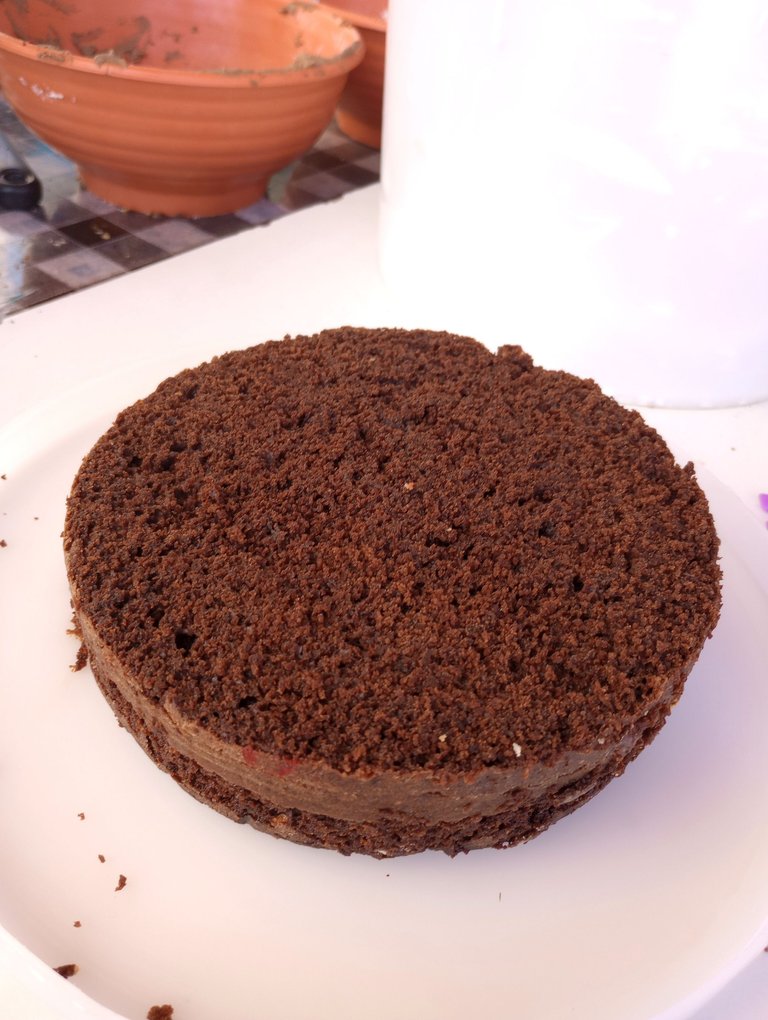
Ahora estaba el proceso del armado. Yo en casa había cortado ya las capas de los pasteles de la misma altura. Tuve que retirar la mitad del pastel para que no quedara excesivamente alto cuando pusiera una capa sobre la otra.
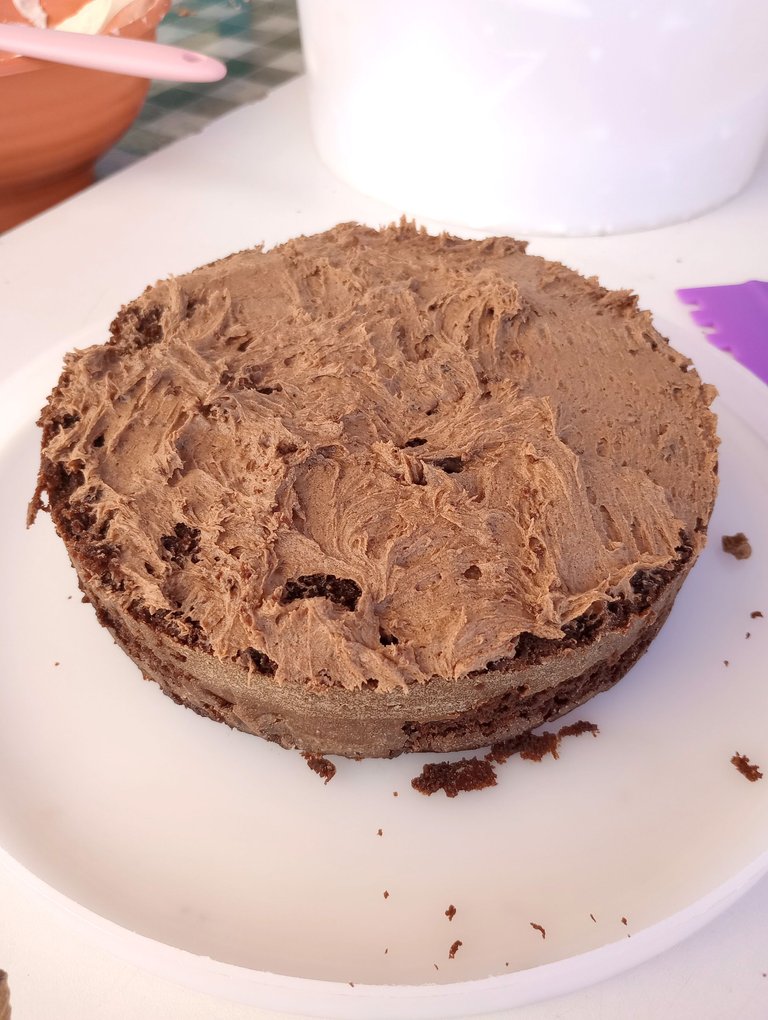
Entonces la primera capa fue la de chocolate y le coloqué la buttercream de chocolate.
Now was the assembly process. At home I had already cut the layers of the cakes to the same height. I had to remove half of the cake so that it would not be too high when I put one layer on top of the other.
So the first layer was the chocolate layer and I put the chocolate buttercream on it.
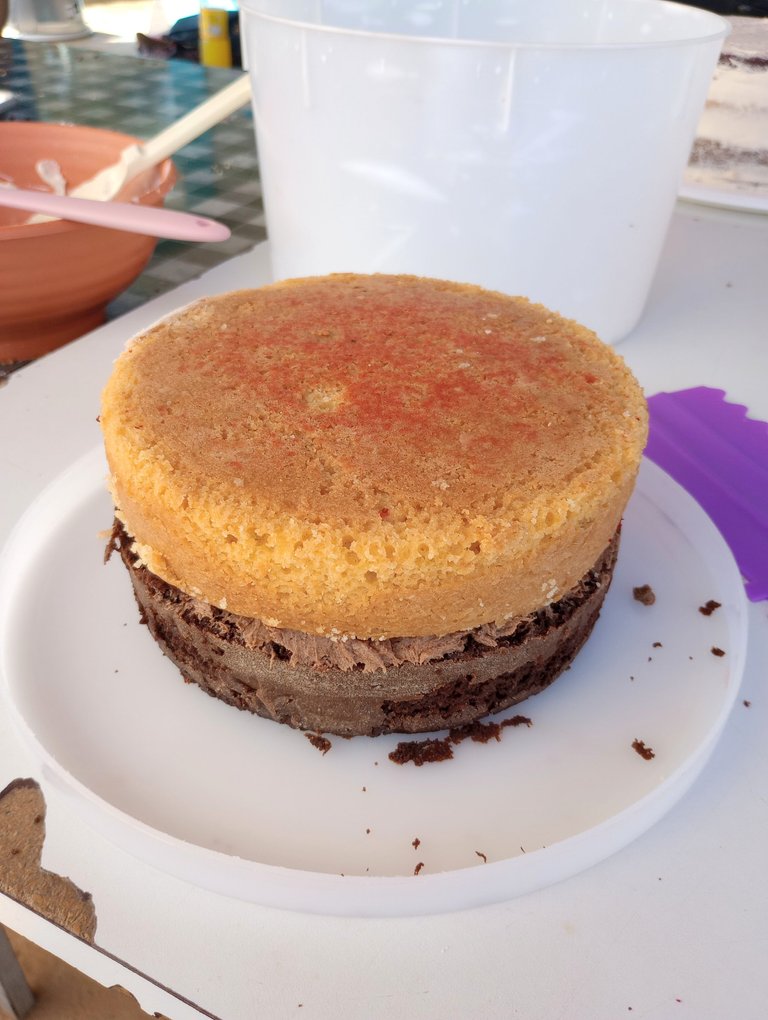
Luego coloqué el pastel de vainilla, que se me había manchado un poco con el red velvet cuando los llevaba de camino a la escuela.
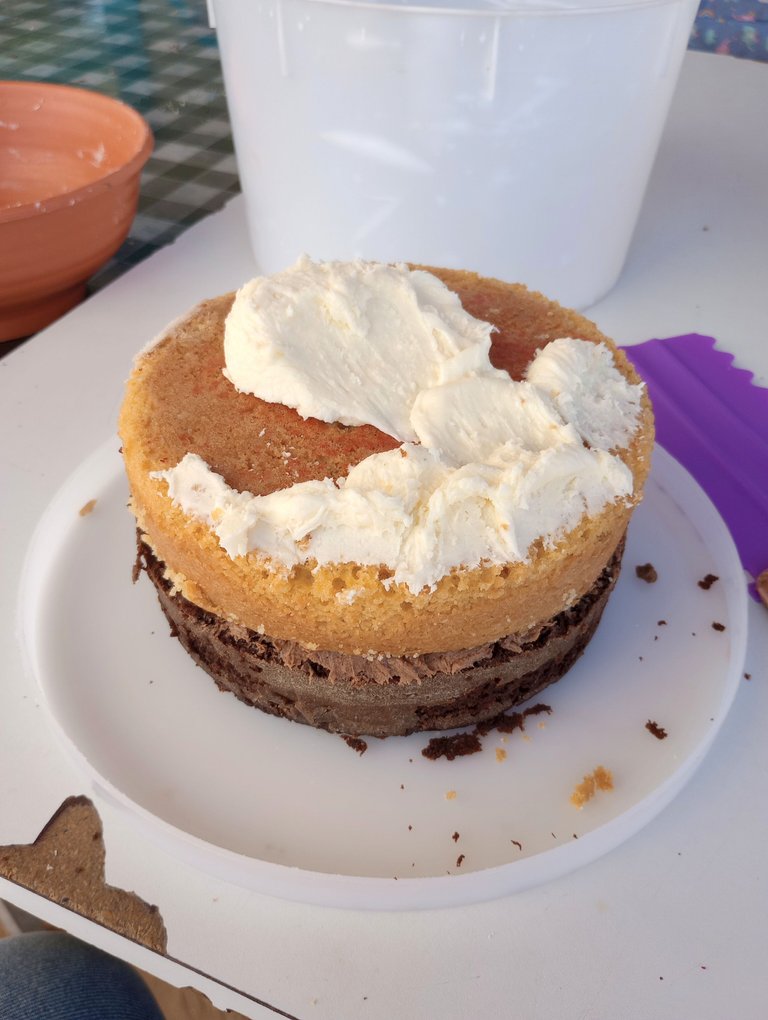
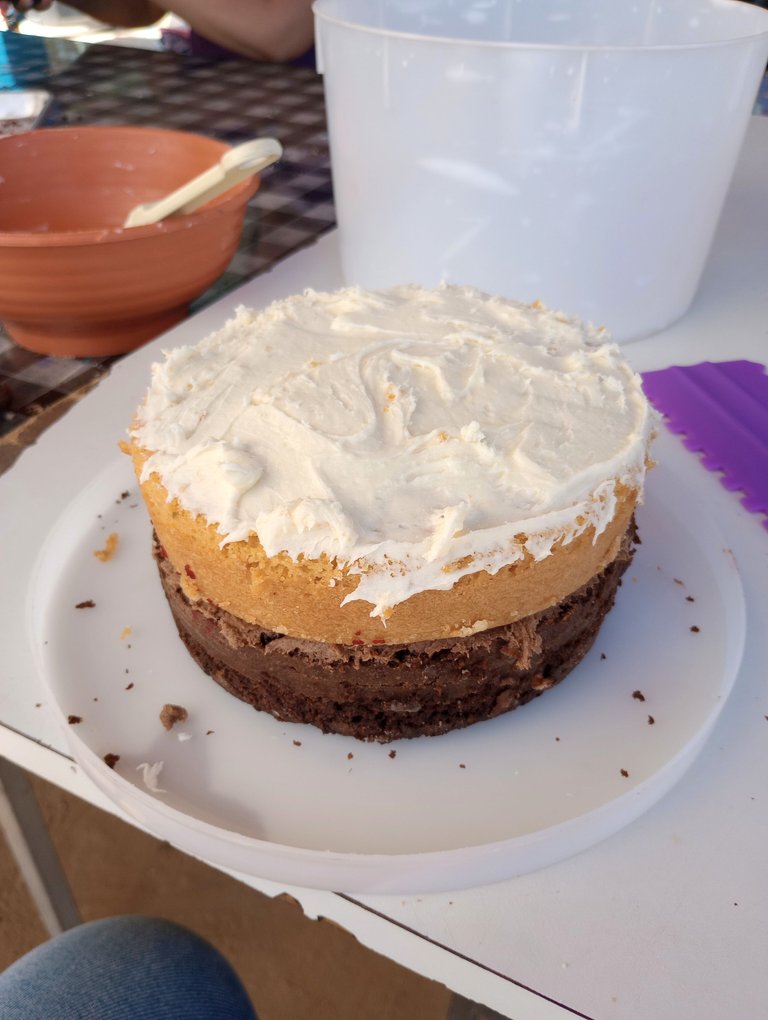
Coloqué el betún de queso crema y esparcí por toda la superficie.
Then I placed the vanilla cake, which I had stained a bit with the red velvet when I took them on the way to school.
I placed the cream cheese frosting and spread it all over the surface.
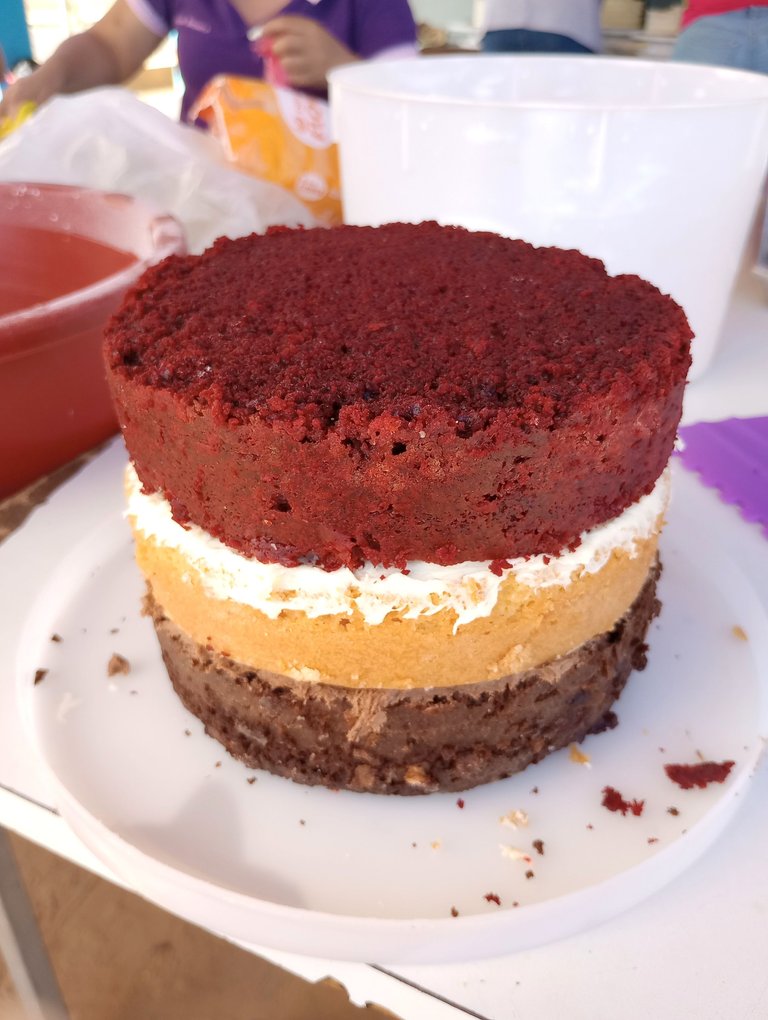
Finalmente coloqué sobre el la capa de red velvet. Así se vería el interior de mi pastel, lleno de color. ♥
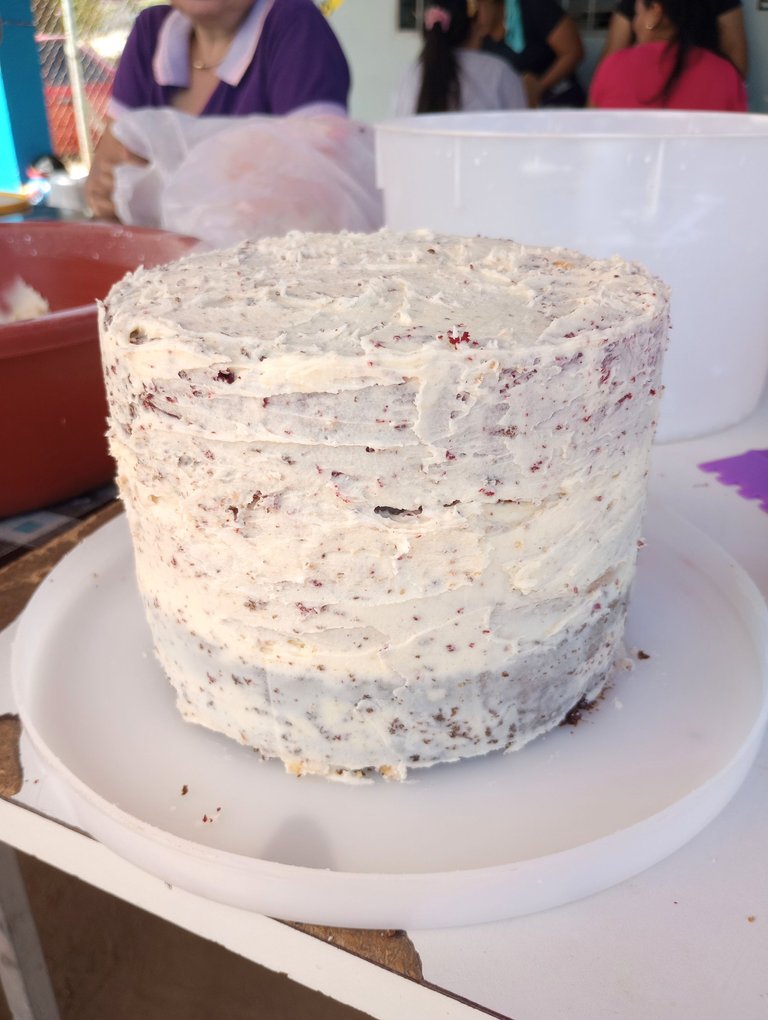
Cubrí toda la superficie y los lados con la buttercream. Esta primera capa es la "recoge migas", que nos ayuda a tapar cualquier imperfección y además recoge cualquier miga suelta que pueda dañar nuestra decoración.
Se debe llevar algunos minutos a la nevera hasta que endurezca y luego se le aplica otra capa de crema.
Yo tuve algunos tropiezos en el proceso y bueno, mi pastel primera capa quedó full de migas 😂.
Finally I placed the red velvet layer on top. This is what the inside of my cake would look like, full of color. ♥
I covered the entire surface and sides with the buttercream. This first layer is the "crumb catcher", which helps us to cover any imperfections and also catches any loose crumbs that may damage our decoration.
Put it in the fridge for a few minutes until it hardens and then apply another layer of buttercream.
I had a few stumbles in the process and well, my first layer cake was full of crumbs 😂.
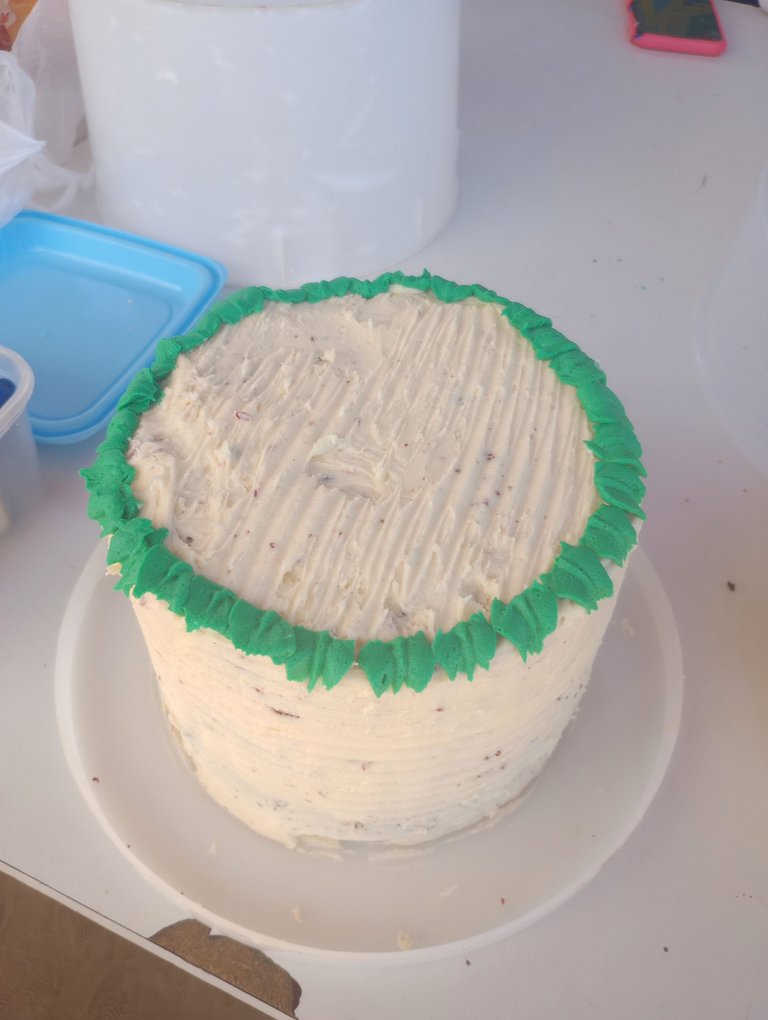
Coloqué la segunda capa y hasta este punto iba a llegar porque no contaba con más crema.
Para mi suerte y gracias a un lindo gesto de algunas compañeras, pude decorar mi pastel ya que me facilitaron crema de la que a ellas le había quedado y hasta me prestaron sus colorantes.
Yo, como siempre, no iba con un diseño en mente, así que dejé volar mi imaginación, tanto que el proceso no lo documenté.
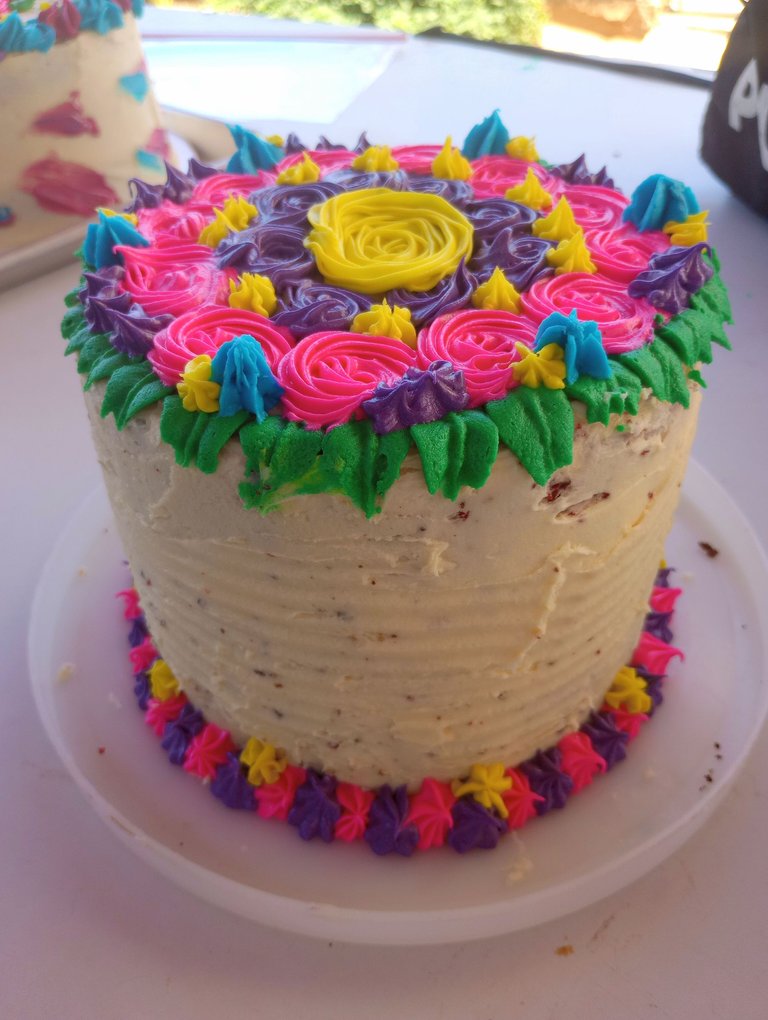
El resultado fue un diseño bastante retro y colorido, sobre todo por la gran flor morada del centro. Me encartaron estos colores del pastel y quedé bien feliz con el resultado.
I placed the second layer and I was going to get to this point because I didn't have any more cream.
Luckily for me and thanks to a nice gesture of some of my colleagues, I was able to decorate my cake since they gave me some of the cream they had left and even lent me their coloring.
As always, I didn't have a design in mind, so I let my imagination run wild, so much so that I didn't document the process.
The result was a very retro and colorful design, especially because of the big purple flower in the center. I loved the colors of the cake and was very happy with the result.
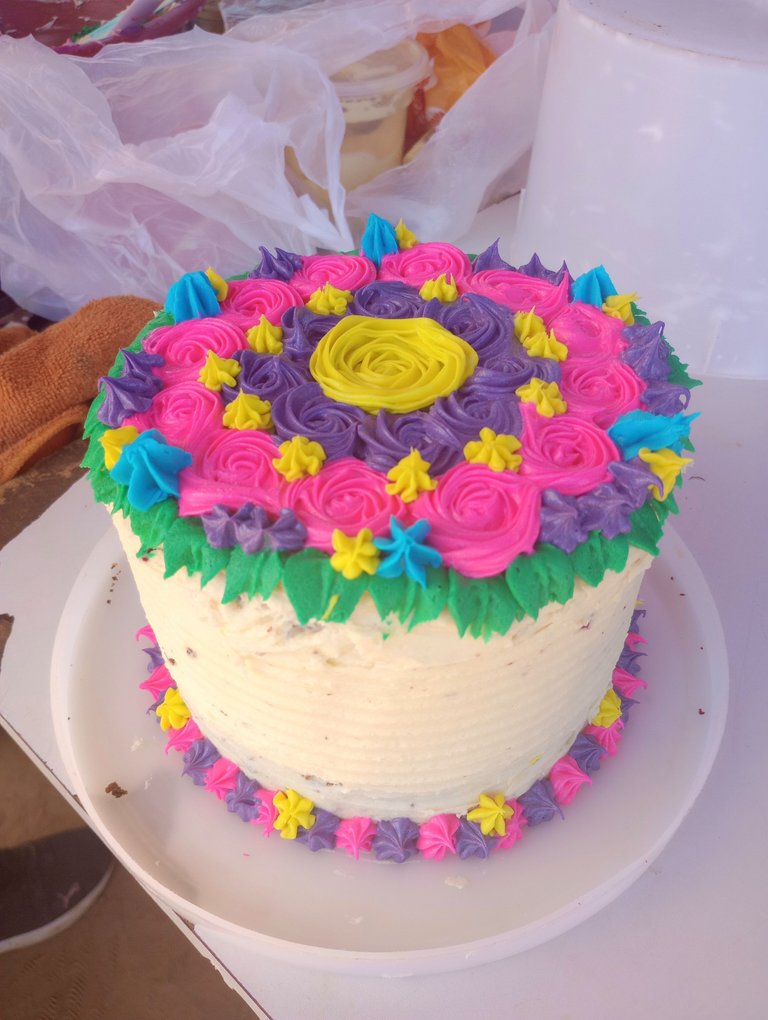

En esta foto se ve algo torcido y no entiendo por qué 😂. Yo estaba súper feliz con mi pastel y agradecida con las compañeras que me tendieron la mano para lograr ese lindo resultado.
Finalmente traje el pastel a casa y llegó la hora de la verdad, cortar y probar el pastel, aunque ya tenía una idea de esto porque había probado la otra parte de cada uno de los pasteles.
Es mi primera vez haciendo esta versión de pastel y me dejó muchas enseñanzas, sobre todo de errores que cometí en el proceso que estaré segura de no repetir a la siguiente.
Es un pastel colorido y súper delicioso. ♥ Espero les haya gustado y ya saben, si tienen dudas me las dejan en los comentarios.
In this photo it looks a little crooked and I don't understand why 😂. I was super happy with my cake and thankful to the colleagues who reached out to me to achieve that nice result.
I finally brought the cake home and the moment of truth came, cutting and tasting the cake, although I already had an idea of this because I had tasted the other part of each of the cakes.
It is my first time making this version of cake and it left me with many lessons, especially of mistakes I made in the process that I will be sure not to repeat the next time.
It is a colorful and super delicious cake. ♥ I hope you liked it and you know, if you have any questions leave them in the comments.

Espero haya sido de tu agrado y provecho.
Un gran abrazo a todos, y nos leemos en un próximo post
• Lakrearte en Hive •
Att: Estefania Garcia ♥

Imágenes y separadores de mi autoría
Portada editada en Canva
Fotografías tomadas con un Moto G31
Texto traducido en Google ImTranslate v.14.27
Se ve delicioso, me hace recordar mucho al helado napolitano de la Efe.💜
Es algo así versión torta jajaja muchas gracias por tu comentario, saludos 😊✨
Está súper creativa esta torta y sobre todo se ve que llevó trabajo. No vi que la hayas umedecido, lo hiciste? O ella quedó bien mojadita. Me sorprendió que la torta de chocolate lleva mucho huevo 😮
Ay si, llevo su largo y tendido trabajo. No, ninguno de los pasteles se humedecio. Y si,.esa receta es así y queda espectacular 😊✨
https://reddit.com/r/blogs/comments/1b878o7/receta_pastel_sinfonía_vainilla_red_velvet_y/
The rewards earned on this comment will go directly to the people( @pacobeta365 ) sharing the post on Reddit as long as they are registered with @poshtoken. Sign up at https://hiveposh.com.
Wao hermoso trabajo, además se ve divino
Muchas gracias amiga, me alegra que te haya gustado. Saludos 😊✨
Saludos 🤗
Quedé fascinada con éste pastel, además de lucir MUY hermoso se ve super esponjoso y sabroso. Me encanta lo delicado que se ven las flores, da lástima cortar! jaja
Muchas gracias por compartir, feliz tarde! <3
Algo así estaba cuando me tocó cortarlo. No quería pero no iba a saber nunca cómo quedó si seguía con la "cosita" de cortarlo jaja muchas gracias por tu comentario, me alegra que haya gustado 😊✨
Se ve exquisita y hermosa 💖 te felicito por tu excelente receta. Gracias por compartir con nosotros, bendiciones para ti🙏 🤗
Muchas gracias amiga, me alegra que te haya gustado y espero sea de provecho la receta. Saludos! 😊✨
Que genial quedo esta torta, me gusta mucho la receta y lo que estas aprendiendo
Gracias amiga, me alegra que te haya gustado. Saludos 😊✨
Que bonita se ve, además no puedo ni imaginar lo rica que debe haber quedado, tiene un estilo decorativo de muy buen gusto es toda una obra de arte pastelera te felicito te quedó perfecta ❤️
Sii. Estaba demasiado sabrosa. Ya hoy nos comimos los últimos pedacitos de pastel. Definitivamente es motivo para repetirlo jaja muchas gracias 😊✨
Uff qué bonitas te quedaron las capas por dentro, todo simétrico y con el relleno parejito, súper!!! Tu post describe toda una aventura pastelera jaja con esos giros inesperados de la falla Electrica y la falta de material que por suerte no fueron impedimento para proseguir. Es un buen grupo de clase, colaborar entre todas para que todos puedan sacar adelante su práctica. El resultado colorido es muy bonito, llamativo y diferente. Ah por cierto, es primera vez que escucho sobre el pastel sinfonía, no lo había visto antes y me parece una creación fantástica, lo tiene todo jajajaja.
Muchas gracias por tu comentario amiga. Si, lo importante es contar con un círculo de apoyo, sobre todo en esos momentos en los que el objetivo es el mismo. Sin duda el apoyo.de mis compañeras fue crucial para poder lograr este resultado. Y me paso exactamente lo mismo. No tenía ni idea de la existencia de este pastel hasta que nos lo pidieron jaja saludos amiga. 😊✨
Wow, aparte la decoración es espectacular!
Muchas gracias, me alegra que te haya gustado 😊✨
An excellent recipe, very well structured step by step and with excellent photos to illustrate the process and the final result!... A round of applause for you and this excellent work!
!discovery 30
!VSC
!PIZZA
@jlinaresp has sent VSC to @estefania3
This post was rewarded with 0.1 VSC to support your work.
Join our photography communityVisual Shots
Check here to view or trade VSC Tokens
Be part of our Curation Trail
@jlinaresp ha enviado VSC a @estefania3
Éste post fue recompensado con 0.1 VSC para apoyar tu trabajo.
Únete a nuestra comunidad de fotografía Visual Shots
Consulte aquí para ver o intercambiar VSC Tokens
Se parte de nuestro Trail de Curación
This post was shared and voted inside the discord by the curators team of discovery-it
Join our Community and follow our Curation Trail
Discovery-it is also a Witness, vote for us here
Delegate to us for passive income. Check our 80% fee-back Program
$PIZZA slices delivered:
@jlinaresp(1/10) tipped @estefania3
Wow! Simply amazing -