Hello again, reliable readers!
Welcome back for another auto repair post! For today's work, we'll be going through another very common repair that is easy to do yourself at home: alternator replacement.
Alternators can be rebuilt, but I'm not really qualified (yet) to instruct anyone on that process. Previously rebuilt alternators are fairly affordable for most vehicles, and available at most auto parts stores. Shops that do electric motor repair will typically rebuild an alternator for you, but you'll have to wait a few days. The cost of a rebuild at a shop in the Eastern US is under $100 for most alternators, so this may be a thing to consider if your particular model costs a lot more than that for a rebuilt one at the auto parts store.
New alternators will typically cost twice as much (or more) as a rebuilt one, and in my experience, they're less reliable. Across all makes and models of vehicles, I have found that rebuilt alternators and starters out-perform brand new ones.

For this repair, we'll once again be working on my '03 Accord. Previous posts have covered brake and exhaust repair for this vehicle, and future posts will cover ball joint replacement (in a very precarious position, that you can see at the end of this post), work on door locks and windows, and some trunk latch repair.
This car is a perfect storm of problems waiting to happen: it's had at least 4 owners, none of them maintained it well, it has nearly 300,000 miles on it, and I use it like it was a pickup truck almost every day. I keep it because it is reliable, the parts are cheap, and it's pretty easy to work on.
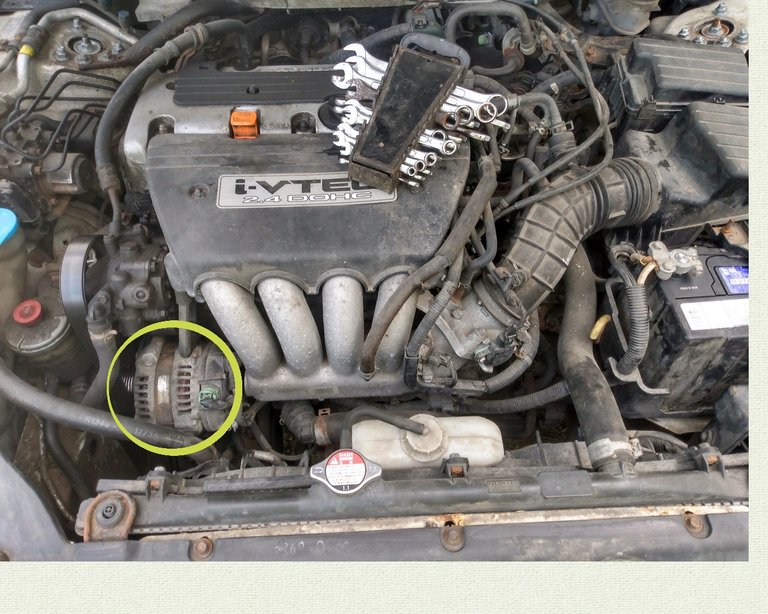
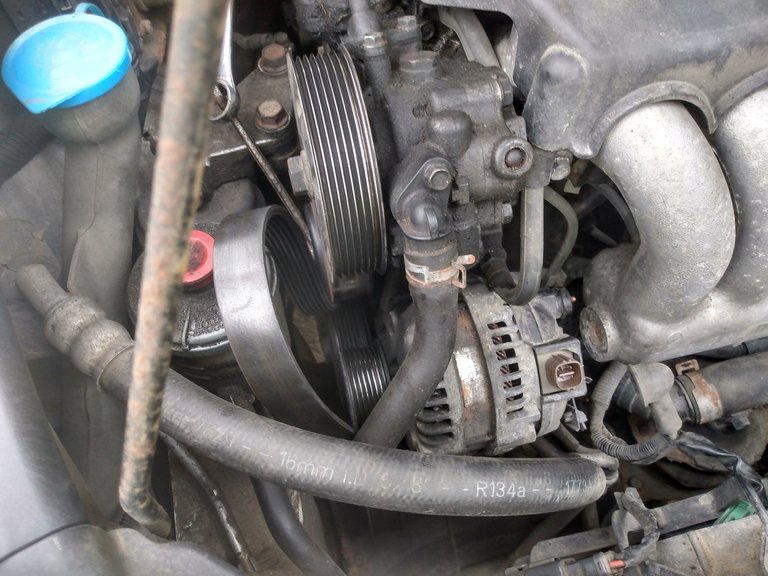
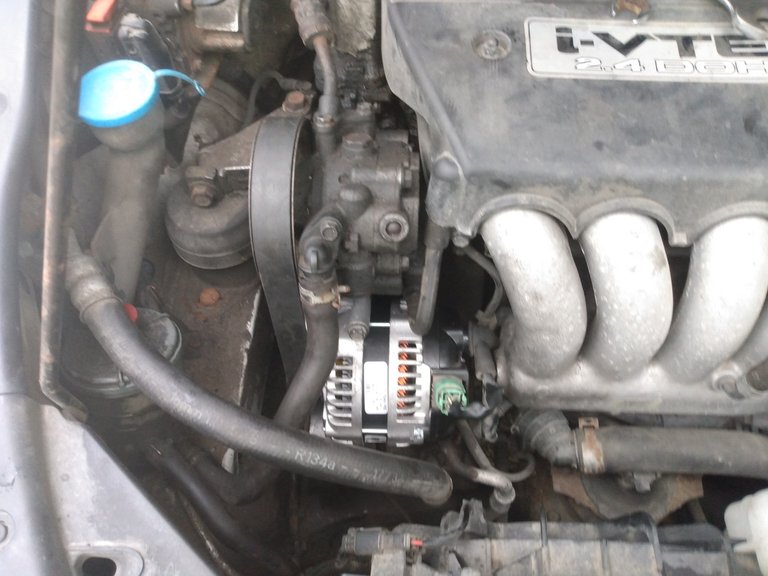
This repair is usually easier on older vehicles, which would typically have the alternator mounted closer to the top of the engine. In the photo below, you can see the alternator circled in yellow, below the power steering pump.
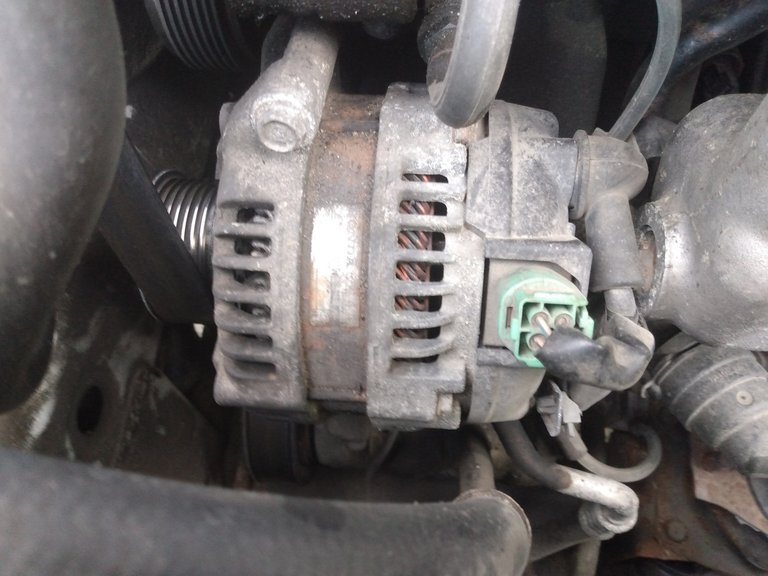
Looking at the alternator close up, we can see one mounting bolt near the top, a green electrical connector, and just above that, a heavier gauge wire that is bolted to the alternator and covered with a rubber boot. The second mounting bolt is below the alternator.
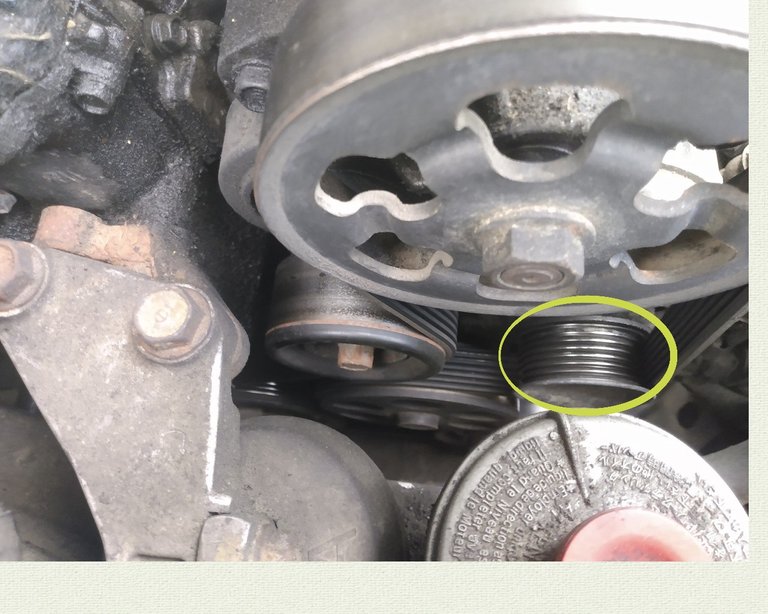
In this photo of the pulleys on the front of the engine, you can see the alternator pulley circled in yellow. Immediately to the left of that is the belt tensioner. By turning the bolt on the front of that pulley clockwise, we can release the tension on the serpentine belt.
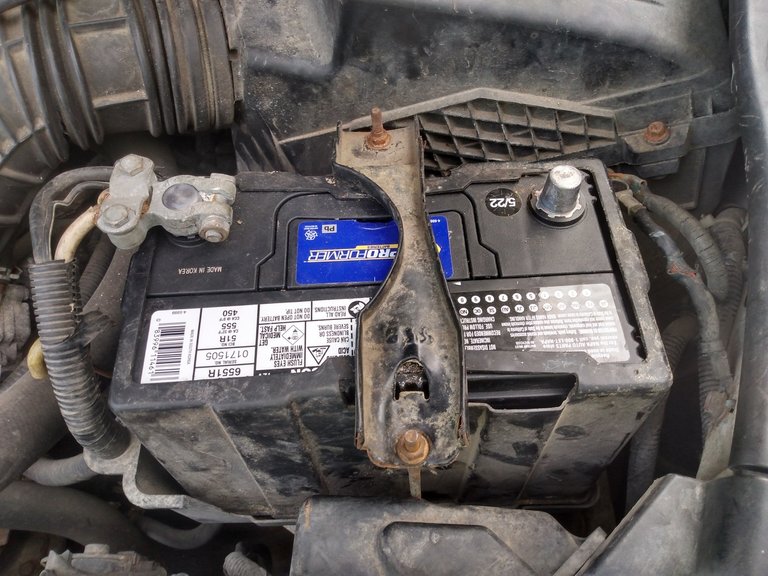
Before doing any kind of repair to a vehicle's electrical system, it's a good idea to remove the negative (-) power cable from the battery. This will prevent sparks when connecting and disconnecting electrical wires, which can harm you and your vehicle's electrical system.
Once the negative battery cables are disconnected, you can remove the electrical connections from the alternator. Most plugs will have some kind of retainer clip, like the one seen in the photo below. Ridges, like those you see below my thumb, will usually mark where you need to press to release the clip. These connectors will often be stuck if they haven't been changed recently, but come free fairly easy with a little patience. While pressing on the release for the retainer clip, work the plug back and forth while pulling gently. Most plugs will come free after just a few seconds of this. If the plug is damaged during removal, you will need to repair the plug before you can successfully install your new alternator.
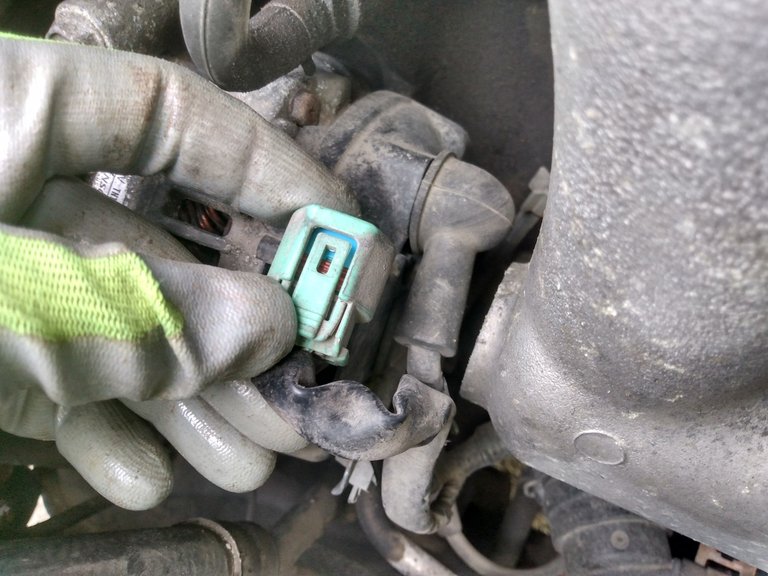
To remove the heavy duty electrical cable, pull back the rubber boot to expose the nut holding it in place. These nuts are tightened to a low torque, and usually come off very easily. If it is stuck in place, it's not that big of a deal to just break the bolt off the old alternator.
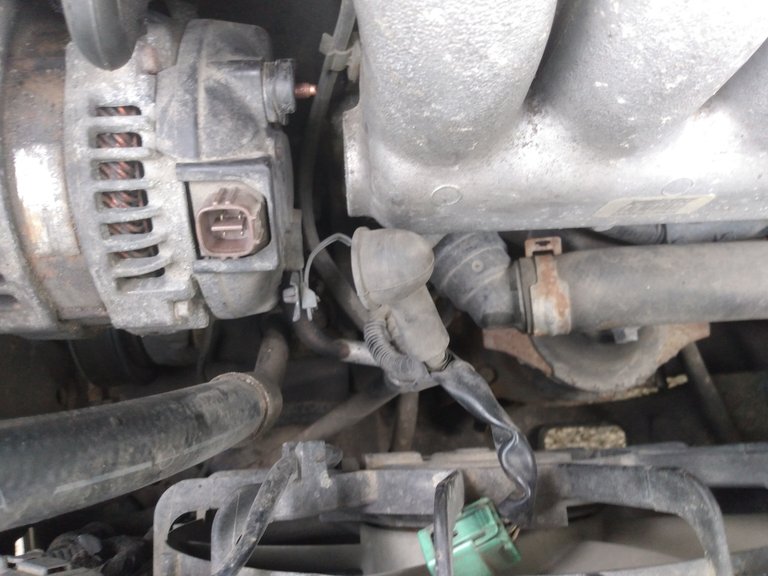
Once the wires are disconnected, you'll want to get them out of the way while you remove the alternator. On this vehicle, I was able to wedge to plug behind the guard for the cooling fan, which kept things nicely to the side. You can see that there is a zip tie attached to a tab on the alternator. This wiring harness probably used to be attached there, but someone cut this before I got the car.
To remove the serpentine belt, I put a wrench on the tensioner pulley, then used another wrench to get some extra leverage, as it can take quite a bit of force to move the tensioner pulley. On most vehicles this can be done with a ratchet and socket, but on this particular car, the wrenches are easier for me. Turning the pulley clockwise will release tension on the belt.
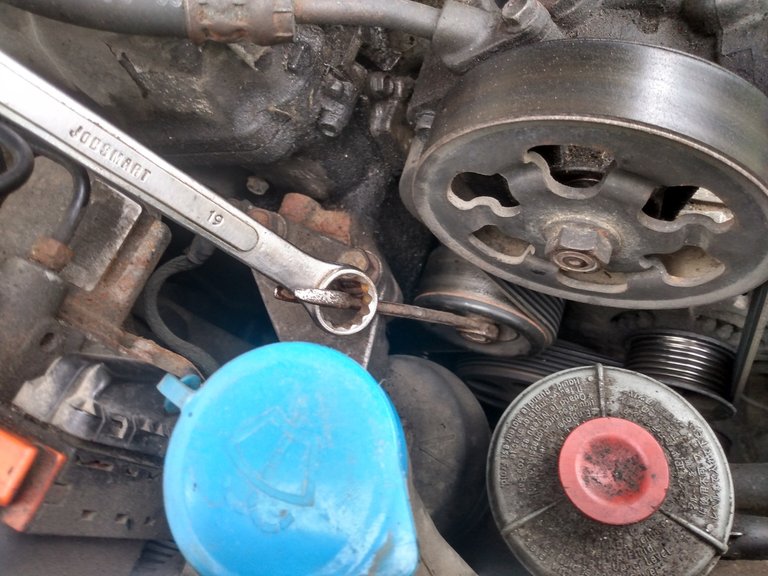
Once you've moved the tensioner puller, the belt should slip fairly easily off the power steering pulley. Once the belt is removed, as you let the tension off the tensioner pulley, it will move a great deal farther than it was when the belt was in place, causing your wrenches to hit against other engine components. In the photo below, you can see my wrench came to rest against an engine mount. Since it's not in the way and has no potential to damage any wires, I'll leave this in place until I replace the serpentine belt. You'll want to keep the serpentine belt in place around the lower pulleys as well as you can... it can be very difficult to get the belt properly reinstalled if it comes all the way off the engine.
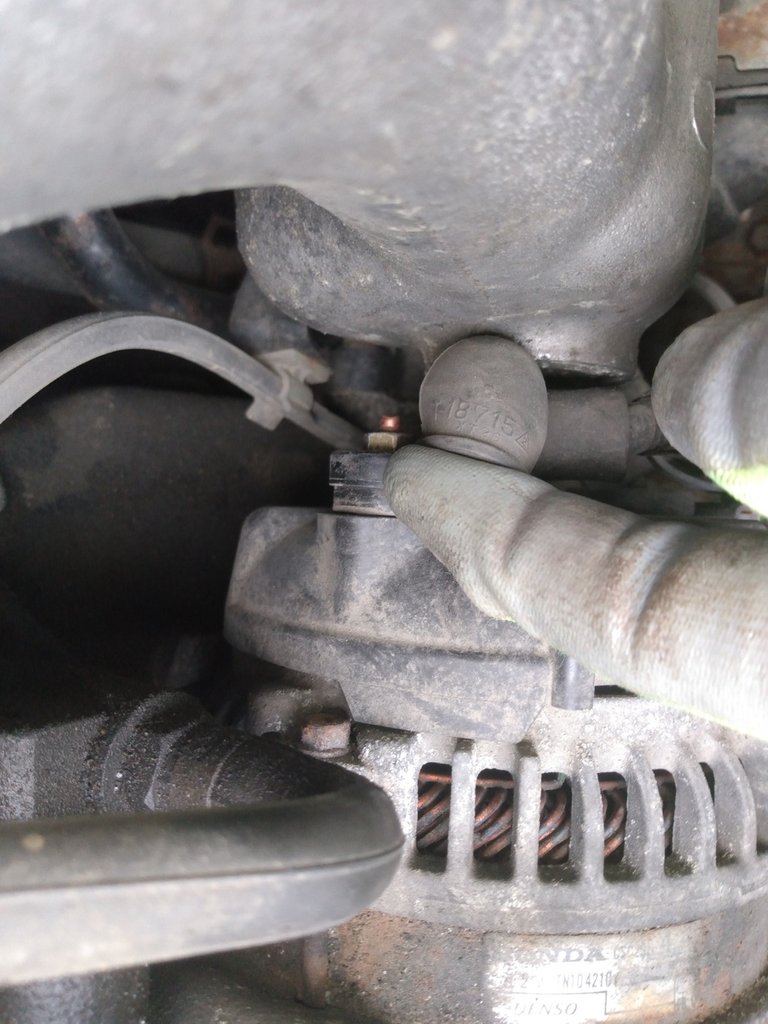
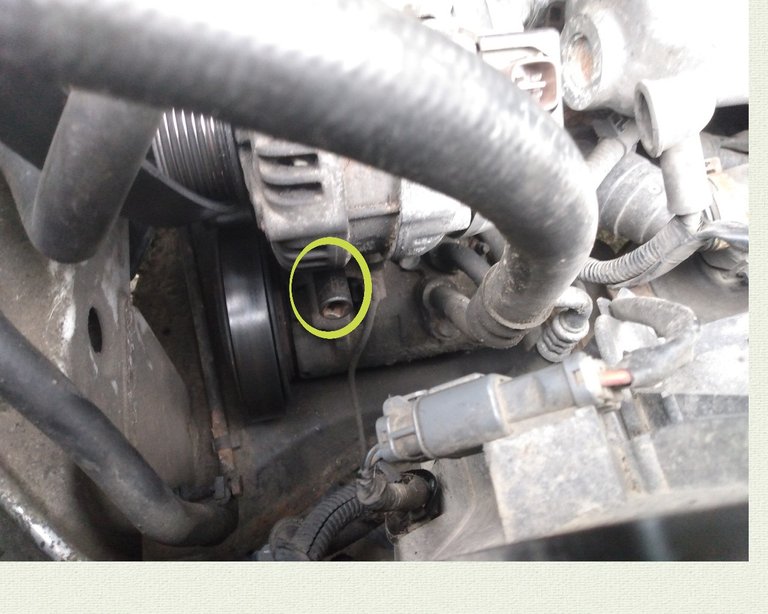
Removing the upper mounting bolt on the alternator is pretty self-explanatory, but you'll want to remove the lower bolt first. To do that on this vehicle, you will need a socket (14mm) and extensions. The end of my extension is circled in the photo below, which should give you a good idea of where the lower mounting bolt is located. The location was way too dark and close to be able to get a decent picture of the bolt itself.
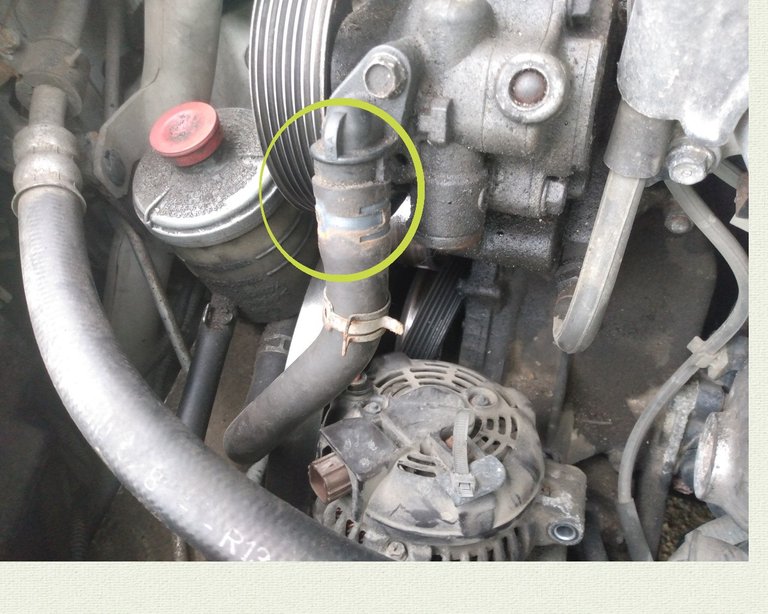
Once both of the mounting bolts have been removed, the alternator should come free very easily. If it does not, a couple very light taps with a hammer will break it loose. After the alternator is free, it still may be difficult to get it out of the engine compartment. There may have been a way to work this alternator out like a Chinese puzzle, but for me it was easy to just remove low pressure hose from the power steering pump, which is circled in the photo below. With this hose out of the way, it was easy to remove the old alternator and put the new one in place.
When installing the new alternator, install the top mounting bolt first, just enough to hold the alternator securely in place. This way you can still move the alternator a little, which will make it easier to hook the electrical connections back up. Be careful not to over-tighten the nut on the heavy duty electrical cable... the bolt that comes out of the alternator can break off easily. After you've reconnected the electric, tightening the upper mounting bolt until it's snug will help align the alternator, making it easier to get the lower bolt threaded in.
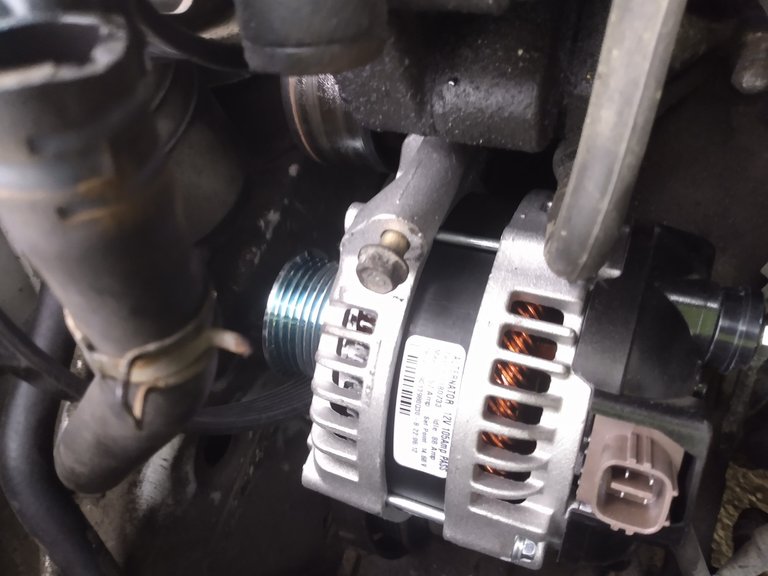
There is probably a factory torque spec for the alternator mounting bolts, but I've always just hand tightened them. Once the new alternator is fastened into place, I reattach my power steering hose and reinstall the serpentine belt. There's very little to double-check on this repair, and a quick start of the vehicle confirmed that the newly rebuilt alternator install was a success!
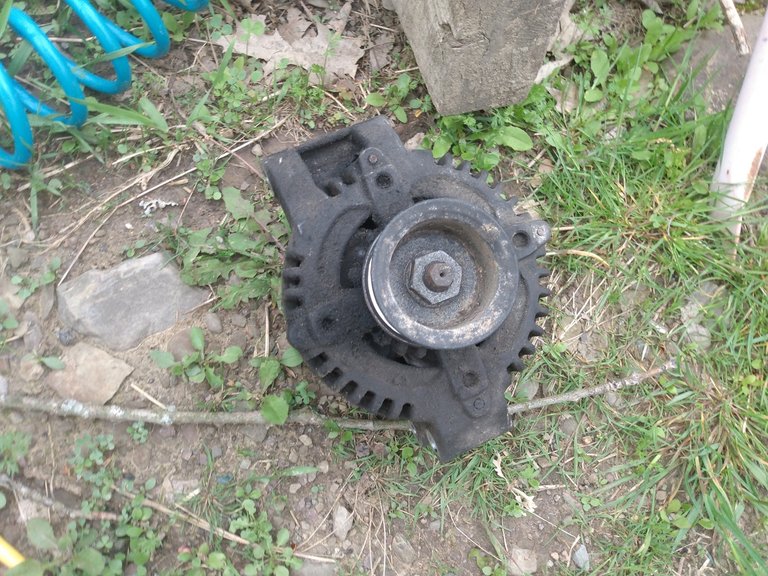
If you bought a rebuilt alternator at a repair store, there was a probably a core charge, which they will refund when you bring in your old alternator. Even a 'broken' alternator can be used in all sorts of fun projects that you can find on YouTube and other conventional sites. I decided to keep this one, as a test subject for further experimentation. 😉
That's all there is to alternator replacement! This should work as a good general guide for most front wheel drive sedans, or rear wheel drive, rear engine vehicles, like the Pontiac Fiero. Trucks and other standard rear wheel and four wheel drive vehicles will usually be even easier to replace than this, with the alternator mounted in a very easy to reach spot on the front of the engine.
I hope you've enjoyed this repair guide, and I look forward to seeing you all back for many more. Until then, may your tools and bolts never fracture!
THANKS FOR READING!!!

Hello, I'm surprised by your assessment of a rebuilt alternator, although it is true that there are those who repair them very well, I think that a new original part is just as reliable, but I think you have had bad experiences.
This brand of vehicles is very good, despite the 300 miles I think it is a great project to recover the vehicle, and if you say that in your country the parts are economical, even more, here where I live they are one of the most expensive cars to maintain.
I've also thought that it's strange that rebuilt parts seem more reliable, but after replacing many hundreds, perhaps even 1000 alternators and starters, rebuilt parts have been, in my experience, significantly better. I think the reason is that every rebuilt part is basically rebuilt to factory (or better) specifications, and then each one is individually tested. In production run parts, a factory may only test one unit out of every 1000 that they make. Many rebuild shops will also test to higher tolerances than original factory specs.
Most of the parts I order for this car actually come from overseas, so they should be cheap to maintain almost anywhere in the world, as long as you have access to global shipping. I also have easy access to used parts here in the US, because they sold millions of these vehicles here. At this point, I've already replaced many of the steering and suspension parts, so I'm expecting to get at least another 200,000 miles out of this car. Someday, I may even fix the dents and make it pretty! 😂
Thanks for reading!!
Thanks for sharing you made it look very easy, I think if I would dare to replace an alternator, it was very didactic your blog. Greetings my friend @paradoxtma (66)
I am wondering why you didn't use the #diy tag, which would have made this post appear in https://www.build-it.io giving you additional eyeballs and the opportunity to earn BUIDL tokens as well?
Simply an oversight... I've been trying to make sure I have tags that make the post easily searchable for people seeking a specific repair.