

Best regards friends of @HiveDiy.
It was always very difficult for me to make the maps that I was sent to do in high school because I did not have the right shape, especially the map of my country Venezuela which is a map that has the shape of an animal with a body with head and tail and if we did not draw it well we were the mockery of classmates who were just waiting for an opportunity to attack. In view of this, we had to manage to make our maps look good and not be victims of that kind of mockery that today is called bullying, but in my time it was pure fucking.
One of the techniques that we used in those days was to place the machine sheet in a window with glass so that the light coming through the window would allow us to draw the map clearly.
The other technique that I also used a lot to make the maps was to impregnate a piece of cotton with a little bit of oil and rub the sheet until it was translucent, almost transparent, so that I could make the map very easily.
As everything changes and everything evolves with the passing of time I learned a new technique to draw, especially at large scales. This technique was taught to me by a co-worker who makes large drawings during the Carnival season to draw very large butterflies.
Below, I show you the step by step of this technique that I used to draw a map of Venezuela to my son who was asked to do it as homework on a Bond paper.
STEP BY STEP
Materials to use
Bond paper, 2 unused milk cans, 2 small wooden boxes, a glass, a lamp, a cut out map of Venezuela, colors and colored chalk.
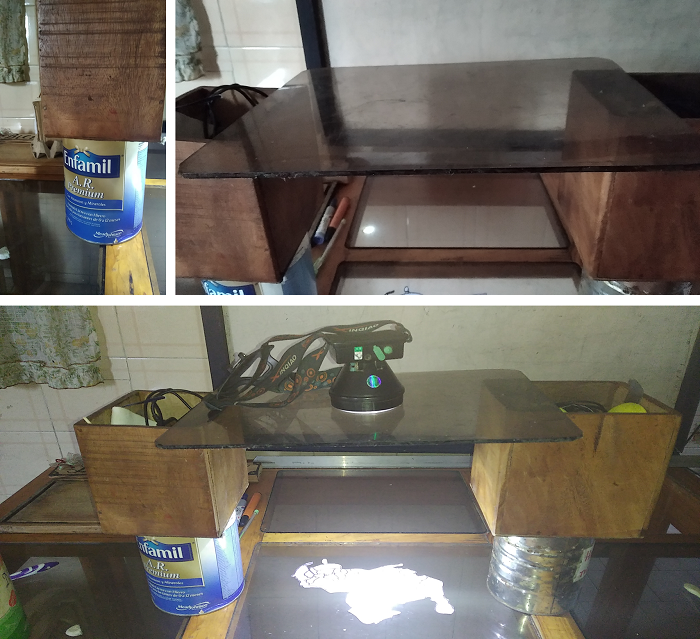
The first thing I did was to place the milk cans on the table. On top of the milk cans I placed the wooden crates. Then on top of the wooden crates I placed the glass. Then on top of the glass I placed the lamp. Once this mini tower I built was ready I placed under the glass the already cut out map.

For the next step I placed the Bond paper on the floor, turned on the flashlight so that the shape of the map would be reflected on the bottom of the Bond paper and once the shape was reflected I got comfortable on the table on the floor and started to go over it with a pencil on the Bond paper.
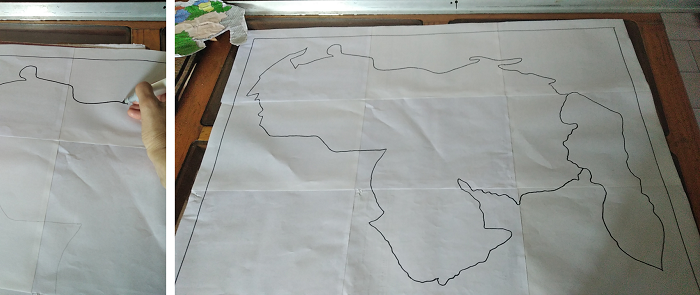
When you have finished drawing the map highlight it with black marker.
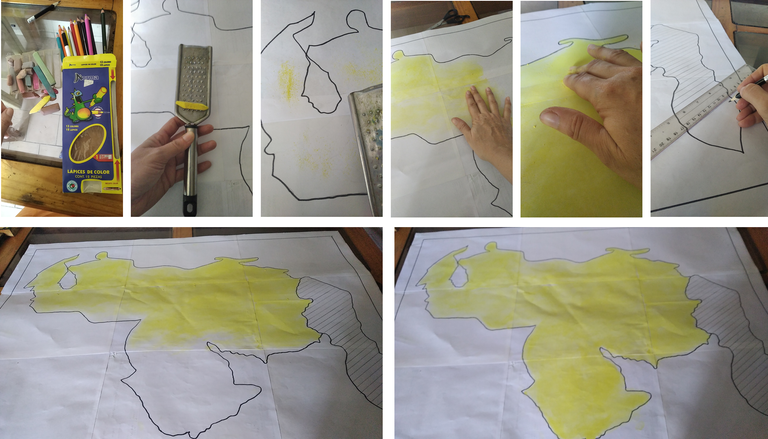
Then paint the body of the map with yellow chalk which I scratched with a cheese grater and make the stripes on the tail of the map with a square and pencil
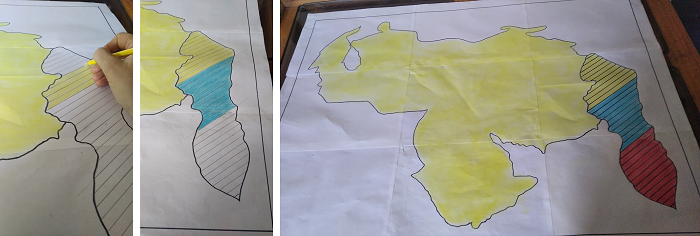
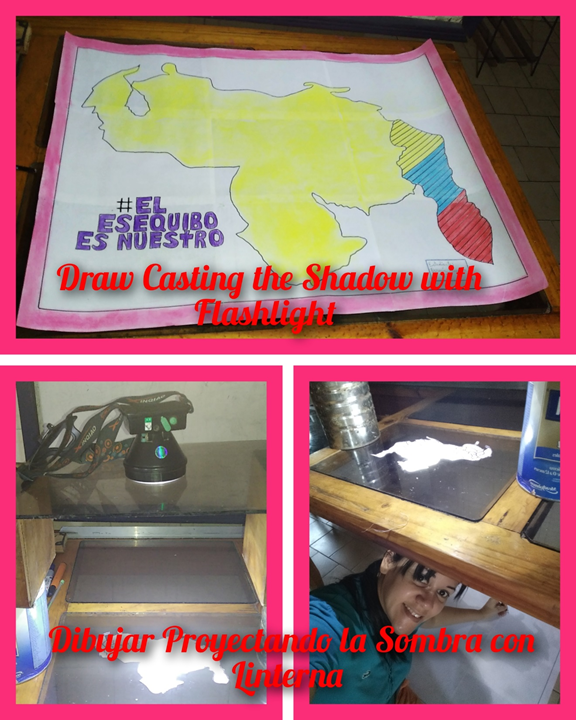
After having made the stripes on the tail of the map (El Esequibo) I painted it yellow, blue and red, the colors of our Patriotic Flag.
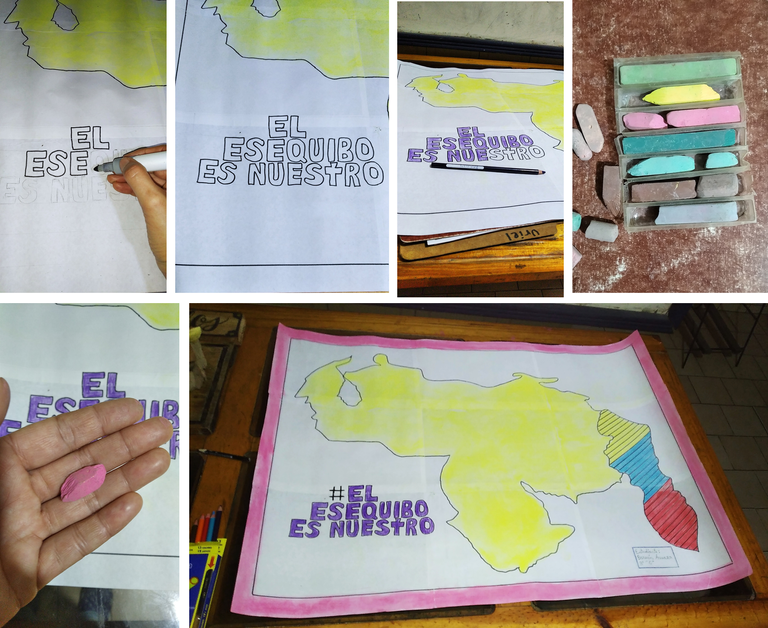
I wrote the slogan requested by the teacher on the bottom of the map, color the letters with purple color. Then I colored the edges of the bond paper with pink chalk and identified the map with my child's name, ID, subject and section.
FINAL RESULT
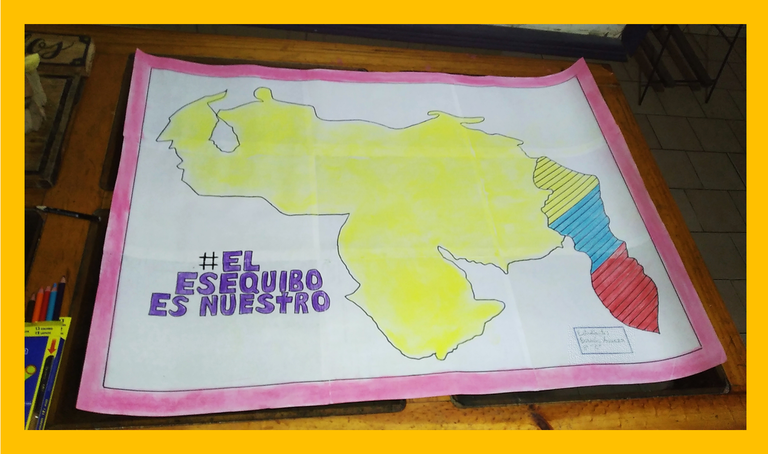
This is the best way I have to help my children to make drawings such as maps of the countries, it is very practical and easy. I hope it helps you at some point in your lives
The photos are my own and were taken with my Xiaomi Redmi 7A cell phone
Edit photos with PowerPoint
Separators @brume7
Translated with www.DeepL.com/Translator (free version)
Thank you for your support will be until next time


Saludos cordiales amigos de @HiveDiy.
Siempre fue muy difícil para mí realizar los mapas que me mandaban a hacer en el liceo ya que no me quedaban con la forma correcta, en especial el mapa de mi país Venezuela que es un mapa que tiene la forma de un animal con cuerpo con cabeza y cola y si no lo dibujábamos bien éramos la burla de los compañeros de clases que solo estaban esperando a oportunidad para atacar. En vista de esto, nos las teníamos que ingeniar para que nuestros mapas quedaran bien y no ser víctimas de ese tipo de burlas que hoy en día se le llama Bullying, pero en mis tiempos era pura jodedera.
Un de las técnicas que utilizábamos en esos tiempos era la de que colocar la hoja de máquina en una ventana que tuviera vidrio para que la luz que entraba por la ventana permitiera que se pudiera dibujar el mapa con claridad.
La otra técnica que utilizaba mucho también para realizar los mapas era impregnar un algodón con un poquito de aceite y frotar la hoja hasta que quedara translucida casi transparente y así podía realizar el mapa con mucha facilidad.
Cómo todo cambia y todo va evolucionando con pasar del tiempo aprendí una nueva técnica para dibujar, sobre todo a grandes escalas. Esta técnica me la enseñó una compañera de trabajo que realiza dibujos a gran tamaño en la temporada de Carnaval para dibujar mariposas bien grandes.
A continuación, les muestro el pasó a pasó de esta técnica que utilice para dibujar un mapa de Venezuela a mi hijo que se lo pidieron como tarea en un papel Bond.
PASO A PASO
Materiales a utilizar
Un papel Bond, 2 latas de leche que tenía desuso, 2 cajitas de madera, un vidrio, una lámpara, un mapa de Venezuela recortado, colores y tizas de colores
Lo primero que hice fue colocar las latas de leche sobre la mesa. Sobre las latas de leche coloque las cajas de madera. Luego sobre las cajas de madera coloque el vidrio. Después, sobre el vidrio coloque la lámpara. Una vez que esta mini torre que construí estuvo lista coloqué debajo del vidrio el mapa ya recortado.
Para el siguiente paso coloque el papel Bond en el piso, encendí la linterna para que la forma del mapa se reflejará en la parte de abajo del papel Bond y una vez reflejada dicha forma me puse cómoda debejo de la mesa en el piso y comencé a repasar con un lápiz en el papel Bond.
Cuando termine de dibujar el mapa lo remarque con marcador de color negro
Después pinte el cuerpo del mapa con tiza de color amarillo la cual raye con un rayador de queso y realice las rayas en la cola del mapa con un escuadra y lápiz
Después de haber realizado las rayas a la cola del mapa (El Esequibo) lo pinte de amarillo, azul y rojo los colores de nuestra Bandera Patria
Escribí el eslogan que solicito la profesora en la parte de abajo del mapa, coloree las letras con color morado. Después coloree los bordes del papel Bond con tiza rosada e identifique el mapa con los datos de mi hijo el nombre, la cedula, la materia y la sección
RESULTADO FINAL
Esta es la mejor forma que tengo para ayudar a mis hijos a realizar dibujos como los mapas de los países, es muy práctico y fácil bueno esta demás decirles que esto es para las personas que como a mí se les dificulta hacer este tipo de dibujos, espero le sea de ayuda en algún momento de su vida.
Las fotos son de mi autoría y fueron tomadas con mi celular Xiaomi Redmi 7A
Edite las fotos con PowerPoint
Separadores @brume7
Traducido con www.DeepL.com/Translator (versión gratuita)