Hey dear artist friends!!
You already know that I love crafts, it is an activity that I love to do and that I also find super therapeutic. That's why, every time I have free time at home, I like to make some detail to give to the people I really appreciate. On this occasion, I made a fox-themed painting for my roommate, since it is her favorite animal. Here I tell you how I did it. I hope you like it ❤️.
Hey queridos amigos artistas!!
ya saben que me encantan las manualidades, es una actividad que me encanta realizar y que también me resulta super terapéutica. por eso, cada vez que tengo un tiempo libre en casa, me gusta realizar algún detalle para obsequiarle a las personas que aprecio mucho. En esta ocasión, he hecho un cuadrito con temática de zorro para mi roomie, ya que es su animal favorito. aquí les cuento como lo hice. Espero les guste ❤️.
Well, my friends, as I anticipated above, on this occasion I made a decorative painting and I did it using elements that I had at home such as, for example, a cardboard box, pieces of colored eva rubber (or foamy), acrylic paints and a little white glue with paper napkins to make the frame. What I like most about this activity is precisely that, that it is not necessary to spend money to do artistic work, but rather, see what elements I have at home and based on that, put creativity to work.
Bueno, mis amigos, como ya anticipé mas arriba, en esta ocasión realicé un cuadrito decorativo y lo hice utilizando elementos que tenía en casa como por ejemplo, un caja de cartón, retazos de goma eva (o foamy) de colores, pinturas acrílicas y un poco de cola blanca con servilletas de papel para hacer el marco. Lo que mas me gusta de esta actividad, es justamente eso, que no sea necesario gastar dinero para realizar un trabajo artístico, sino, mas bien, ver qué elementos tengo en casa y en base a eso, poner a trabajar la creatividad.
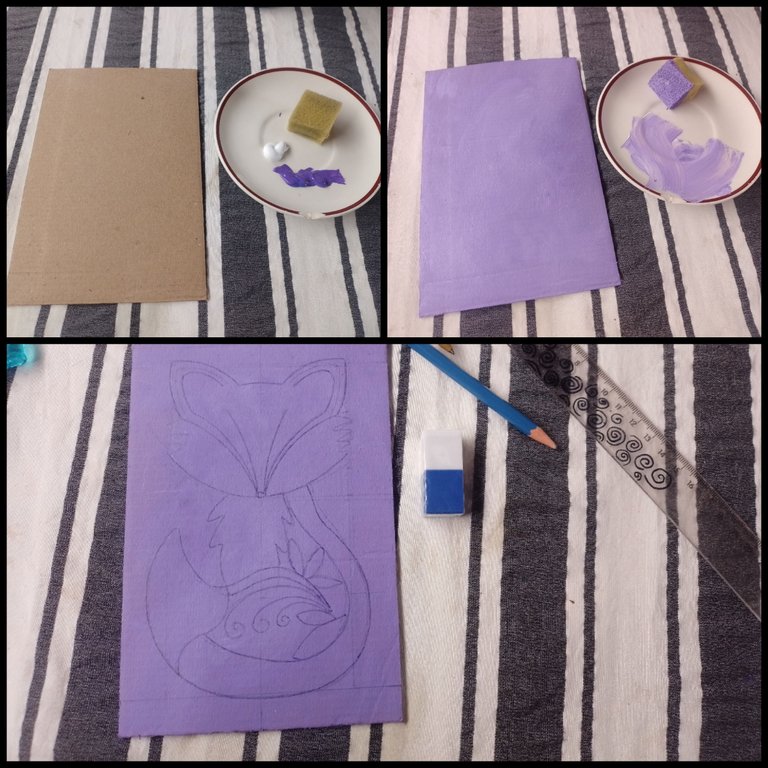
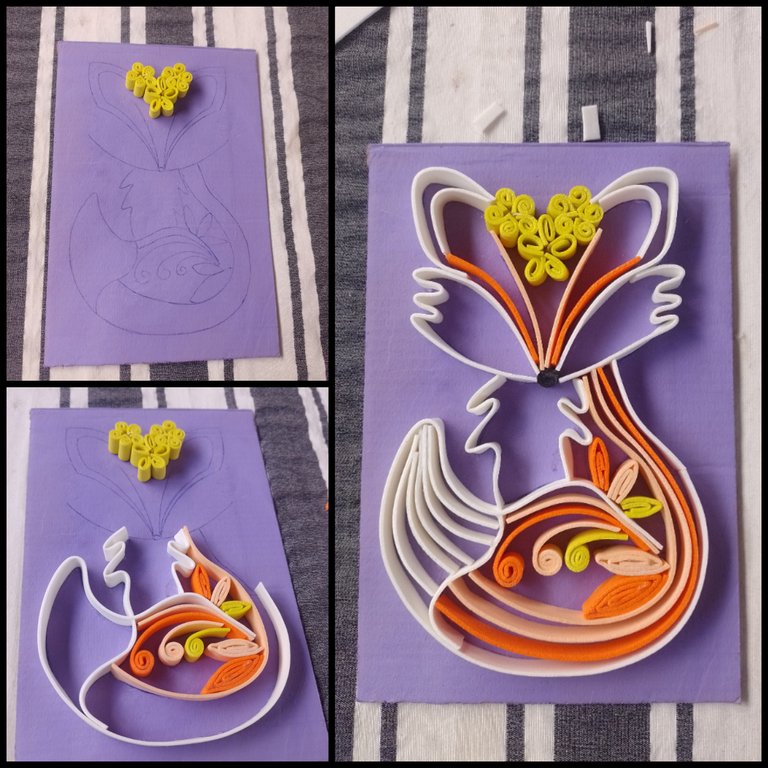
I disassembled a cardboard box and used one of its sides for the base of our decorative painting. With the help of a cutter, I cut a rectangle 18 centimeters high by 12 centimeters wide, which I then painted by mixing white and purple acrylic paint to create a lilac tone, and I helped myself with a piece of sponge to give it a texture. porous.
Then, with a pencil, draw a drawing of a little fox to have it as a base and thus, when gluing the foam tapes, they remain well centered in their place.
Desarme una caja de cartón y utilicé uno de sus lados para la base de nuestro cuadrito decorativo. con la ayuda de un cutter, corté un rectángulo de 18 centímetros de alto, por 12 centímetros de ancho, que luego pinté mesclando pintura acrílica blanco y morado, para crear un tono lila, y me ayudé con un pedacito de esponja para darle una textura porosa.Luego, con un lápiz, realice el dibujo de un zorrito para tenerlo como base y así, a la hora de pegar las cintas de foamy, éstas queden bien centradas en su lugar.
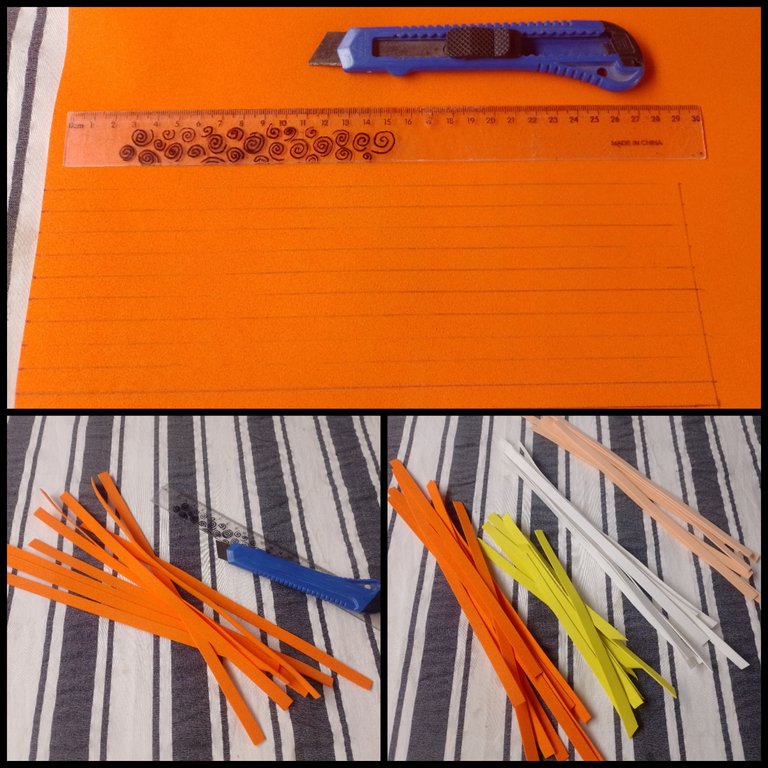
Then I started cutting strips and strips of foam, in the colors I was going to use for the fox, like orange, yellow, white and cream.
I cut all the strips with a width of 1 centimeter. As for the length, the truth is that I did not calculate them, since I needed ribbons of different lengths to do the job, so I preferred that they all be long and then cut them as I glued them.
Luego comencé a cortar tiras y tiras de foamy, de los colores que iba a utilizar para el zorro, como anaranjado, amarillo, blanco y color crema.corté todas las tiritas con el ancho de 1 centímetro. En cuanto al largo, la verdad es que no las calculé, ya que necesitaba cintas de diferentes largos para realizar el trabajo asique preferí que todas sean largas y luego ir cortándolas a medida que las iba pegando.
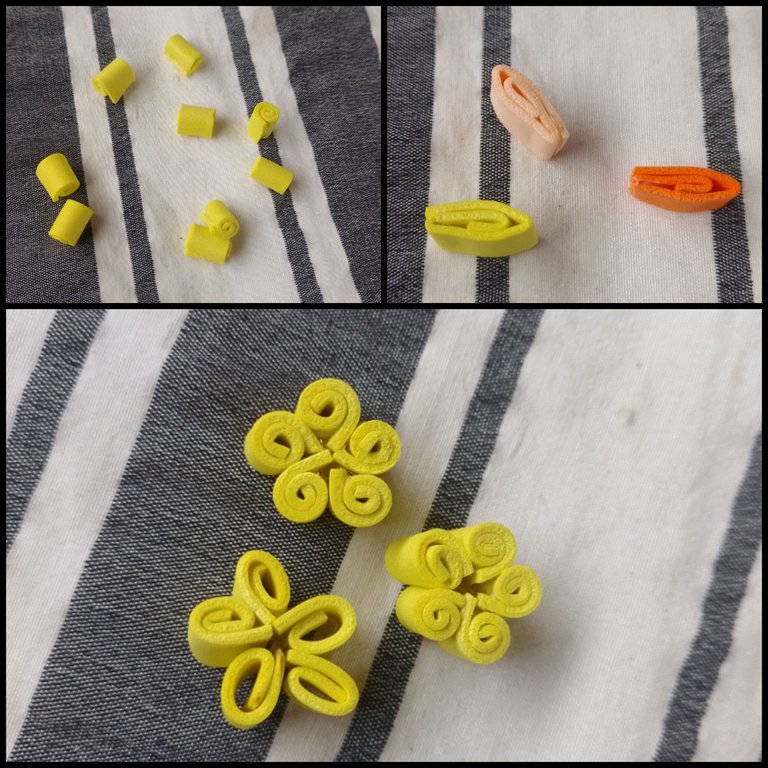
For the design I chose, I needed some foam flowers, some spirals and a few petals, so I decided to make those elements first since then I will complete the drawing with the ribbons.
I glued everything I could with hot silicone, and in the smallest spaces, I opted for glue, since in those areas, the silicone generated too much residue and it didn't look neat.
Generally, this type of work is done with paper tapes or colored cardboard, but I wanted to experiment with foamy, since it is the material I had at the time 😅.
Para el diseño que escogí, necesitaba algunas flores de foamy, algunos espirales y unos cuantos petalos, por lo que decidí hacer esos elementos primero ya que luego será completar el dibujo con las cintas.fui pegando todo lo que pude con silicona caliente, y en los espacios mas reducidos, opté por pegamento, ya que en esos sectores, la silicona me generaba demasiado residuo y no se veía prolijo.
Por lo general, este tipo de trabajos se realizan con cintas de papel o cartulina de colores, pero quise experimentar con foamy, pues es el material que tenia en el momento 😅.
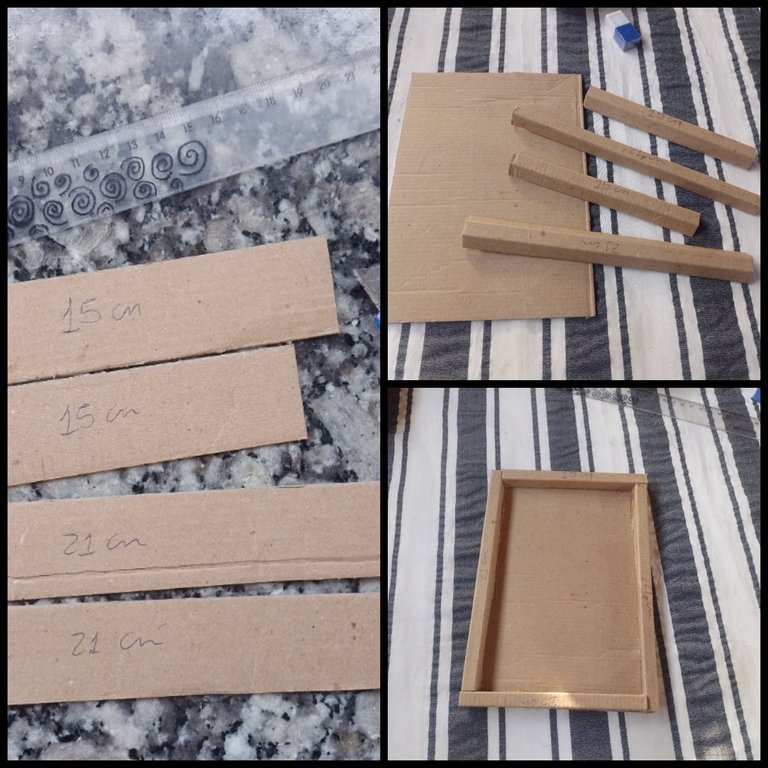
To make the frame, I'm not going to lie to you, it was a little complicated, but I wanted to make it as pretty as possible, so I took the trouble to cut out 4 rectangles, two of them measuring 21 centimeters long by 3 centimeters. wide, and the other two 15 centimeters long by 3 wide. I did this to create relief in the frame, and in this way, the ribbons of the painting would not stand out. I folded all the rectangles into 3 parts of 1 centimeter each and glued them around a new cardboard base, which I previously cut out to measurements of 15 centimeters wide by 21 centimeters long.
Para realizar el marco, no les voy a mentir, fue un poco complicado, pero quería hacerlo lo mas lindo posible, por lo que me tomé el trabajo de recortar 4 rectángulos, dos de ellos con las medidas de 21 centímetros de largo por 3 de ancho, y los otros dos de 15 centímetros de largo por 3 de ancho. Ésto lo hice para generar relieve en el marco, y de esa manera, que las cintas del cuadrito no sobresalieras. Doblé todos los rectángulos en 3 partes de 1 centímetro cada una y los pegué al rededor de una base nueva de cartón, que recorté previamente con las medidas de 15 centímetros de ancho por 21 de largo.
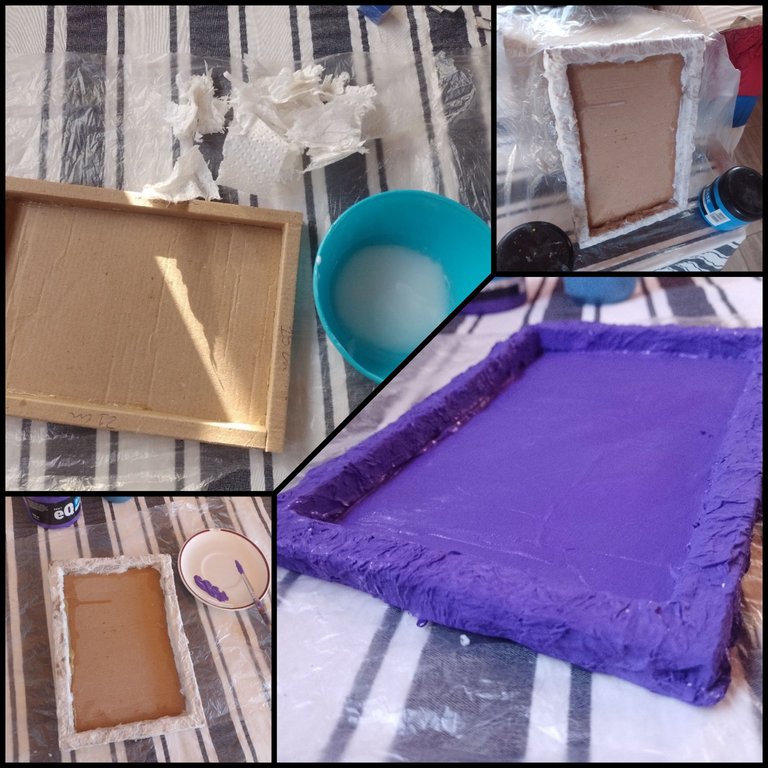
Next, I covered the entire frame with pieces of paper napkins and a mixture of white glue with water (2 parts white glue + 1 part water) and repeated the procedure several times, to give it several layers and so on later, when it dried , remains rigid and resistant. and with a super rustic texture, which I love.
When it finally dried, I covered the entire frame and base with purple acrylic paint, to give more contrast to the previous design.
A continuación, cubrí todo el marco con pedazos de servilletas de papel y una mescla de cola blanca con agua (2 partes de cola blanca + 1 parte de agua) y repetí el procedimiento varias veces, para darle varias capas y así luego, al secar, quede rígido y resistente. y con una textura super rustica, que me encanta.Cuando por fin secó, cubrí todo el marco y la base con pintura acrílica morada, para darle mas contraste al diseño previo.
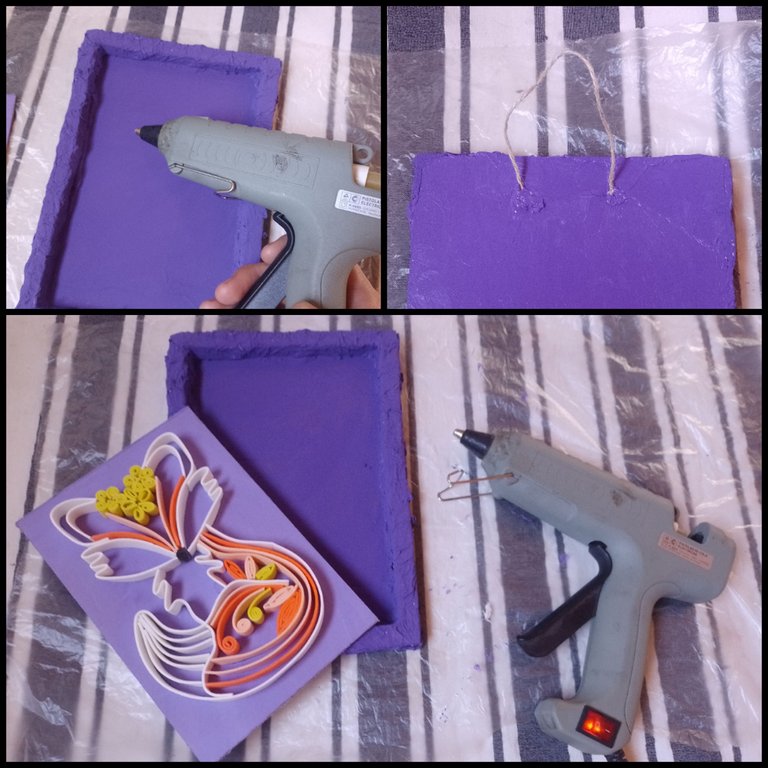
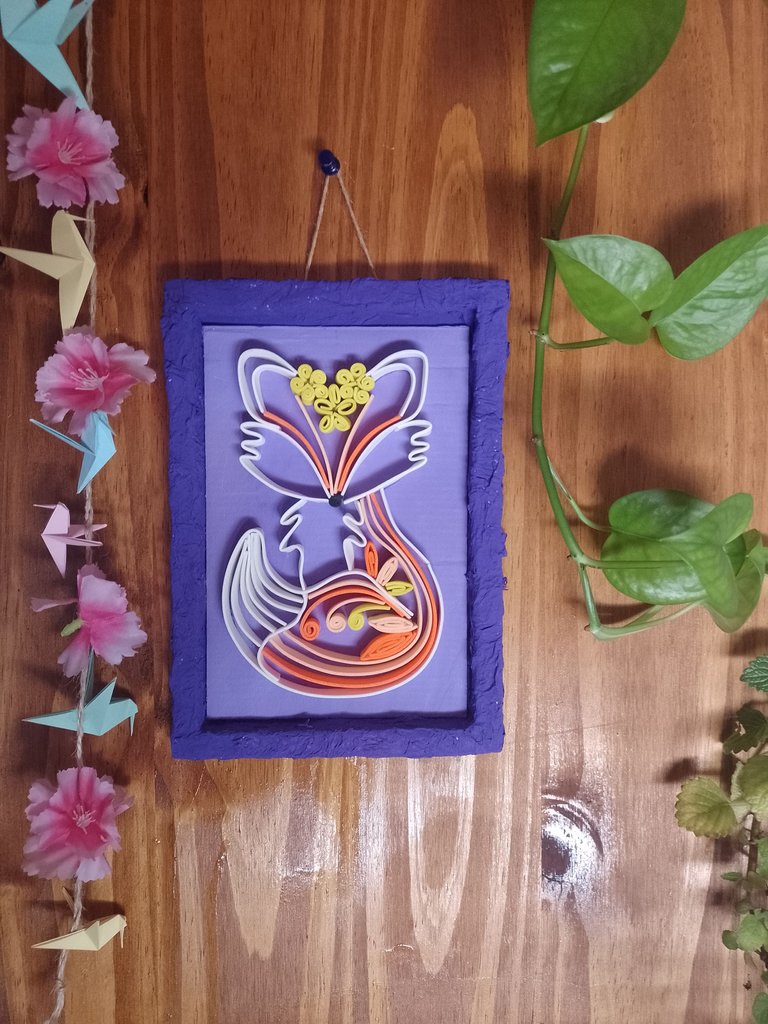
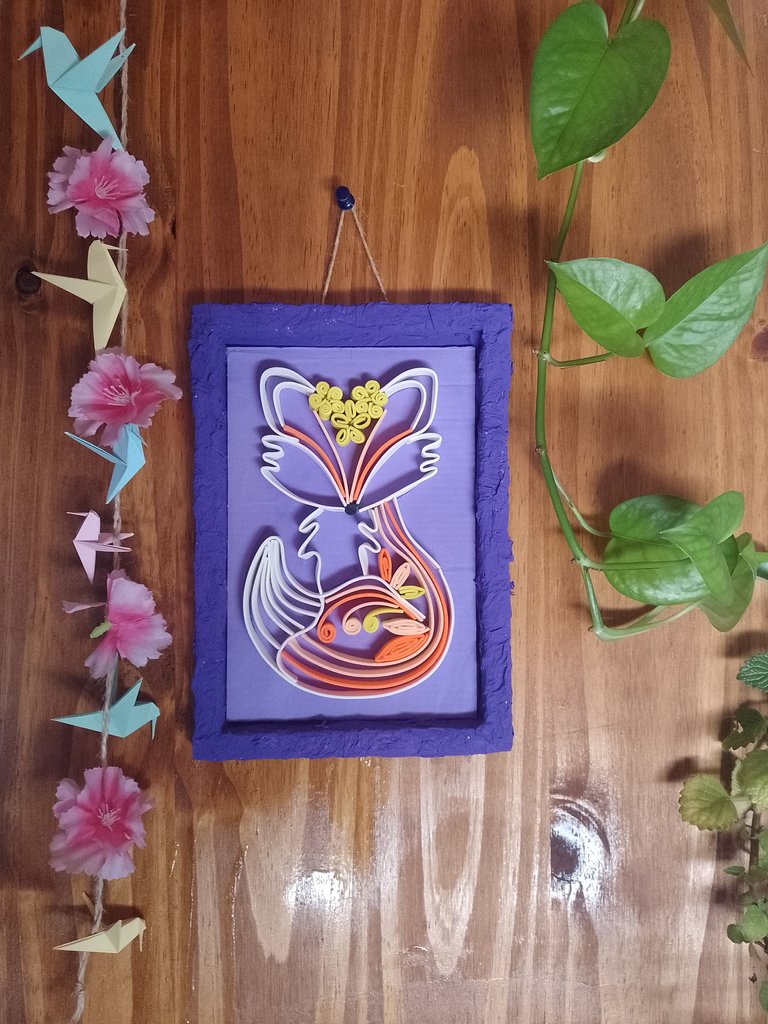
Once dry, glue the design we previously made in the center of the frame, using the hot silicone gun, and on the back side, glue a jute twine rope to hang our picture.
Una vez seco, pegue en el centro del marco, el diseño que hicimos previamente, ayudándome con la pistola de silicona caliente, y por el lado de atrás, pegue una cuerda de hilo de yute para poder colgar nuestro cuadrito.
And that's it friends! I don't know about you, but I loved it and my roommate even more!
Y listo amigos! no se ustedes, pero a mi me encantó y a mi roomie mucho mas!
Thank you for reading my content. a big hug for everyone
Gracias por leer mi contenido. Un abrazo grande para todos
Todas las fotografías y ediciones son de mi autoría. Realizado con la aplicación picsart y canva.

mira con foami, waoo no me lo hubiera imaginado, te felicito te quedo muy lindo, hermoso arte, saludos.
This turned out to be a amazing piece. I like very much and it would look better on the wall at home and office. Great job.
!discovery 39
This post was shared and voted inside the discord by the curators team of discovery-it
Join our Community and follow our Curation Trail
Discovery-it is also a Witness, vote for us here
Delegate to us for passive income. Check our 80% fee-back Program
Una pieza verdaderamente increíble. Muy buen trabajo. Gracias por compartir.
Hermoso trabajo ❤️❤️. Me encanta la prolijidad y tu creatividad para que quede tan lindo. Es cierto que generalmente está técnica la usan con papel, pero con este material quedó excelente también.
Te felicito, que tengas un buen día 😘.
¡Te quedó precioso! Los colores, el diseño, todo está muy hermoso y bien hecho. Este tipo de arte da resultados muy bonitos ✨
!DIY
You can query your personal balance by
!DIYSTATSQue diseño tan hermoso lograste!!! Me gustan muchísimo los zorros, a mi niño también. Así que intentaré replicarlo para él en casa.
Omg I simply love it! Thanks for sharing with us :) :)