Greetings friends, this weekend I dedicated myself to continue learning and looking for new ideas to recreate through the origami technique, where many of them are easy as others that are complicated, however, everything is in patience and make the corresponding folds. Today's origami is very nice, eye-catching, but it is characterized by having to make more than four folds during the whole process and thus make it look very good, where I was encouraged to make a small duck to continue expanding my collection of paper animals, since I already have several of them.
Ducks are very striking animals, by their appearance and we can find a variety of species and colors, no doubt this paper duck is quite simple and the figure of the same is noted, also will serve to assemble a large family of ducks and put them in a space to decorate. So do not miss this new release and get to work.
Saludos amigos, este fin de semana que paso me dedique a seguir aprendiendo y buscando nueva ideas para recrear mediante la técnica del origami, donde muchas de ellas son fáciles como otras que son complicadas, sin embargo, todo está en la paciencia y hacer los dobles correspondientes. El origami de hoy es muy bonito, llamativo, pero se caracteriza por tener que hacer más de cuatro pliegues durante todo el proceso y de esa manera lograr que se vea muy bien, donde me anime a realizar un pequeño pato para seguir ampliando mi colección de animales de papel, puesto que ya tengo varios de ellos.
Los patos son animales muy llamativos, por su aspecto y podemos encontrar una gran variedad de especies y colores, sin duda este pato de papel es bastante sencillo y se nota la figura del mismo, además te servirá para armar una gran familia de patos y ponerles en un espacio para decorar. Así que no te pierdas esta nueva entrega y manos a la obra.
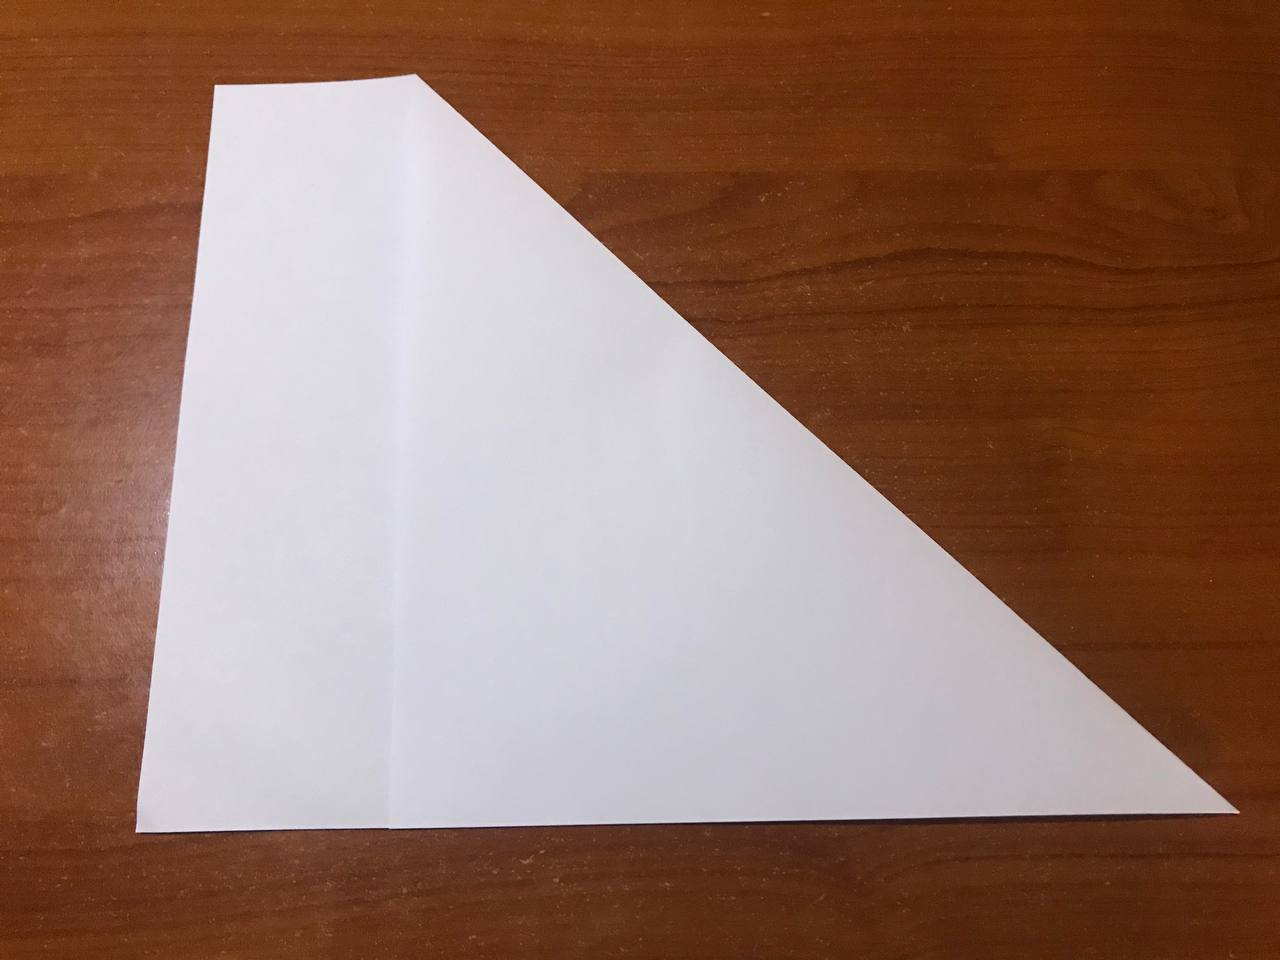
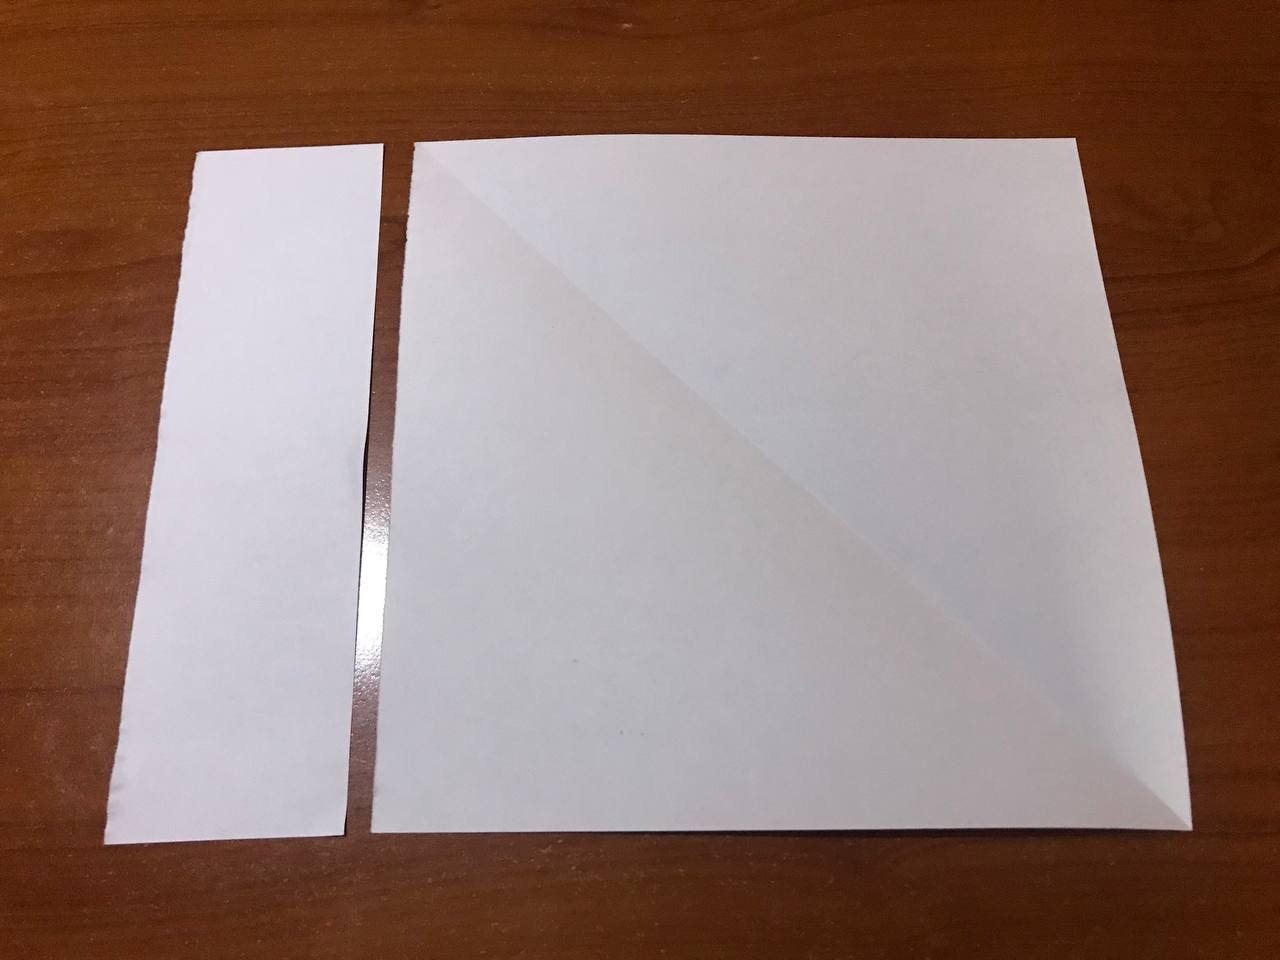
We take a blank sheet of paper and from there we start folding along one of the diagonals, with the idea of being able to get a square on the sheet, where we will cut the excess part with the help of the scissors and from here is where we will begin to make the different folds, creases and cuts to assemble our paper duck.
Tomamos una hoja en blanco y de allí comenzamos doblando por una de las diagonales, con la idea de poder sacar un cuadrado en la hoja, donde el parte sobrante la vamos a cortar con la ayuda de la tijera y a partir de aquí es donde vamos a comenzar a realizar los diferentes dobleces, pliegues y cortes para armar nuestro pato de papel.
|
 |
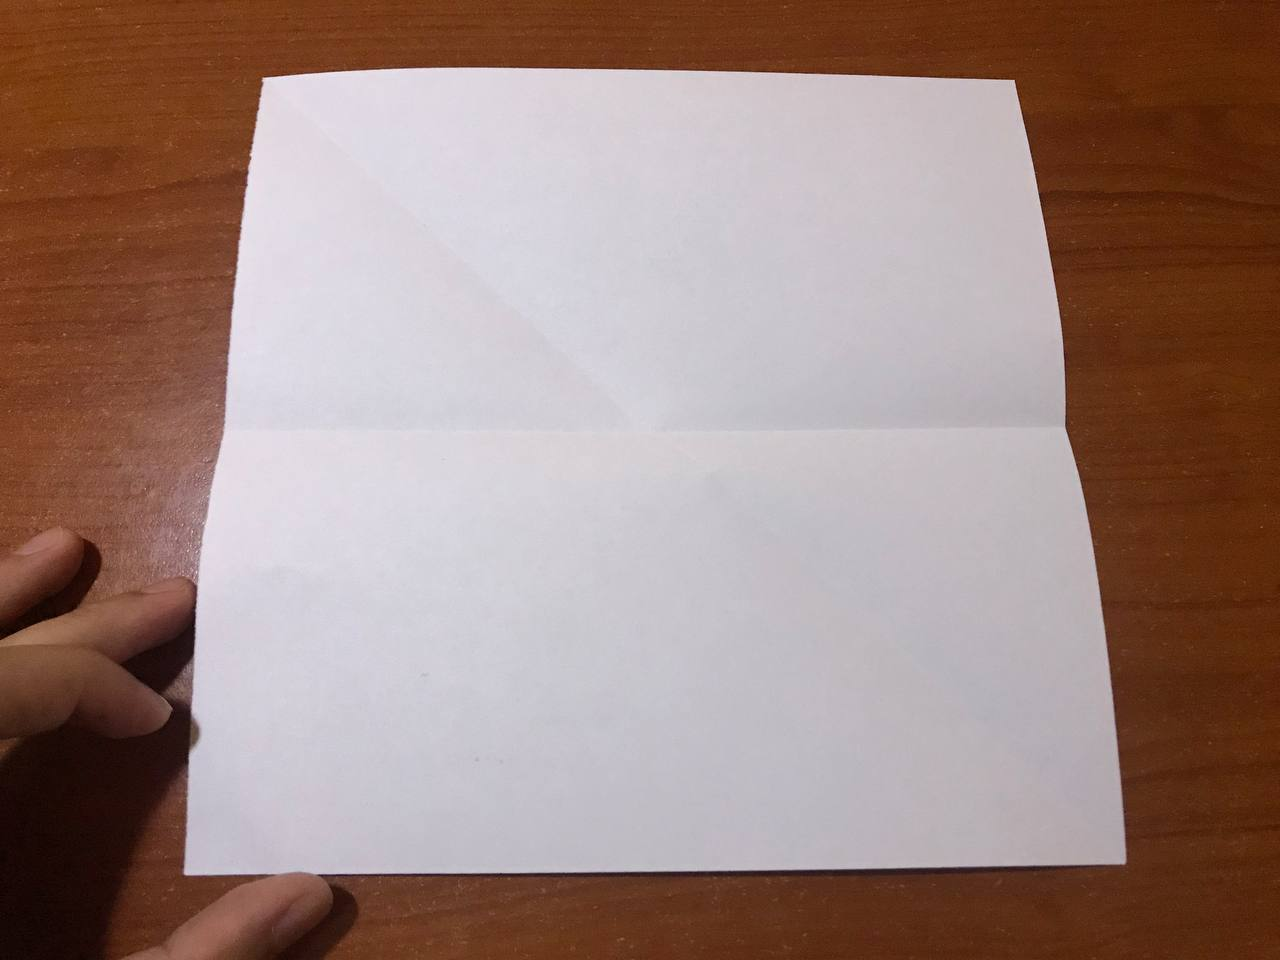
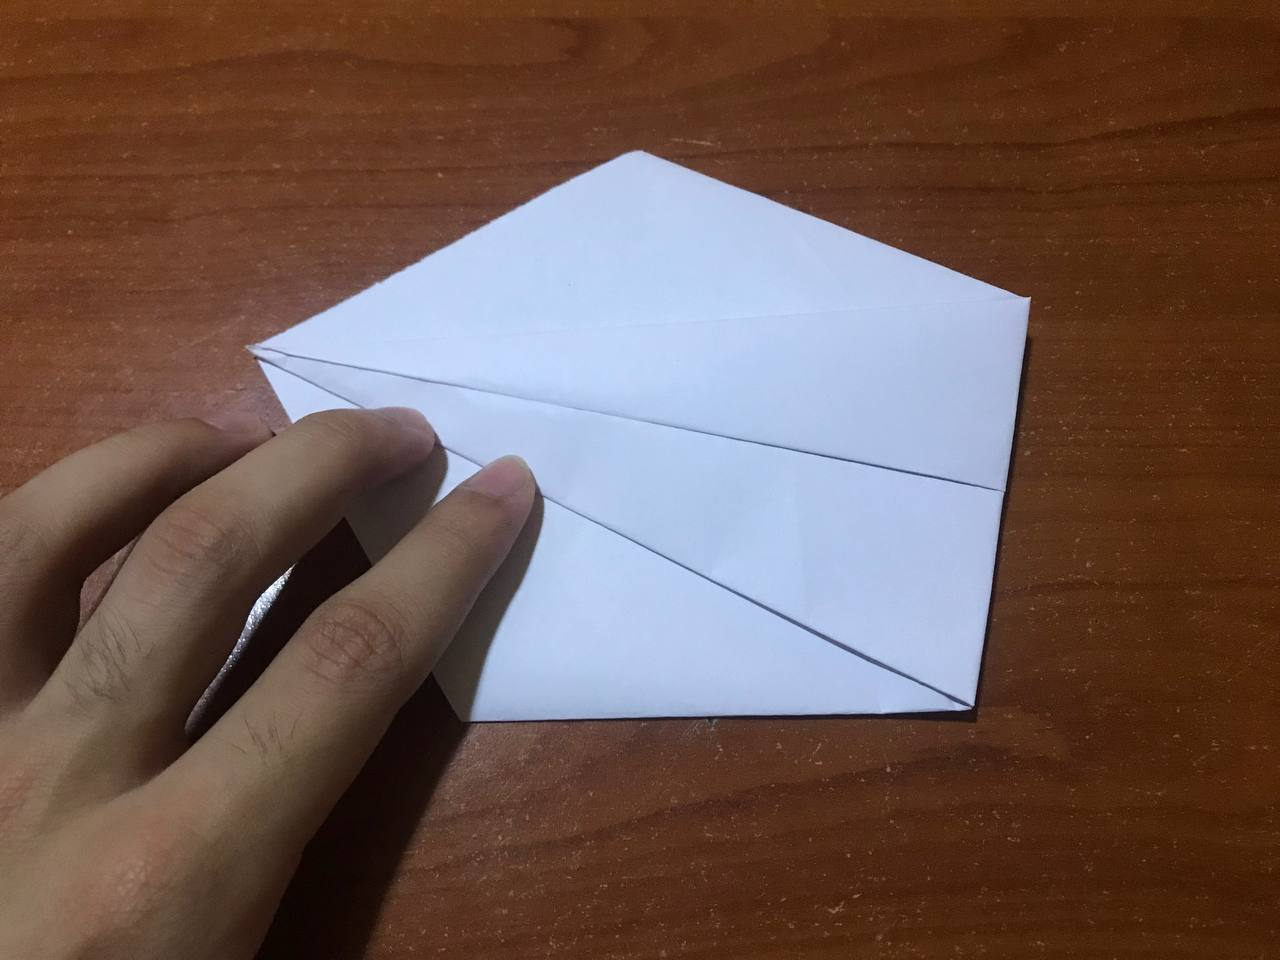
Once the sheet is cut we are going to fold it in half, with the idea that we mark the center line and the diagonal line on the paper, to make it easier to fold. Then we are going to take one of the ends of the sheet and we are going to take the tip towards the center of the line to match and flatten it, now we take the other end of the sheet and take it to the edge of the other fold as you can see in the pictures.
Una vez cortada la hoja vamos a doblarla por la mitad, con la idea de que se marca la línea del centro y la línea diagonal sobre el papel, para que sea más fácil doblar. Luego vamos a tomar uno de los extremos de la hoja y vamos a llevar la punta hacia el centro de la línea para que coincidan y aplastamos, ahora tomamos el otro extremo de la hoja y lo llevamos hasta el borde del otro doblez como se puede notar en las fotos.
|
|
|
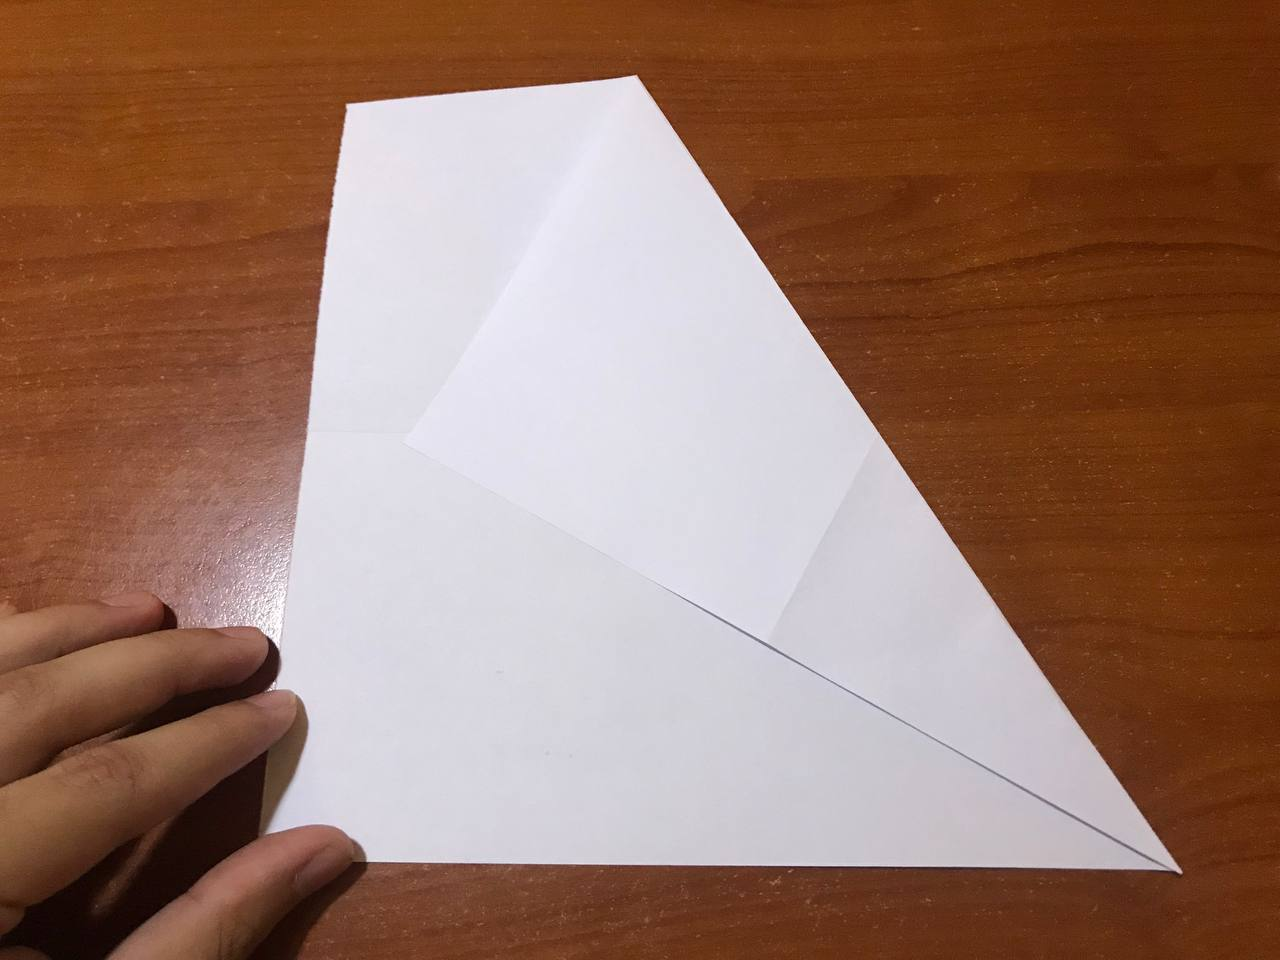
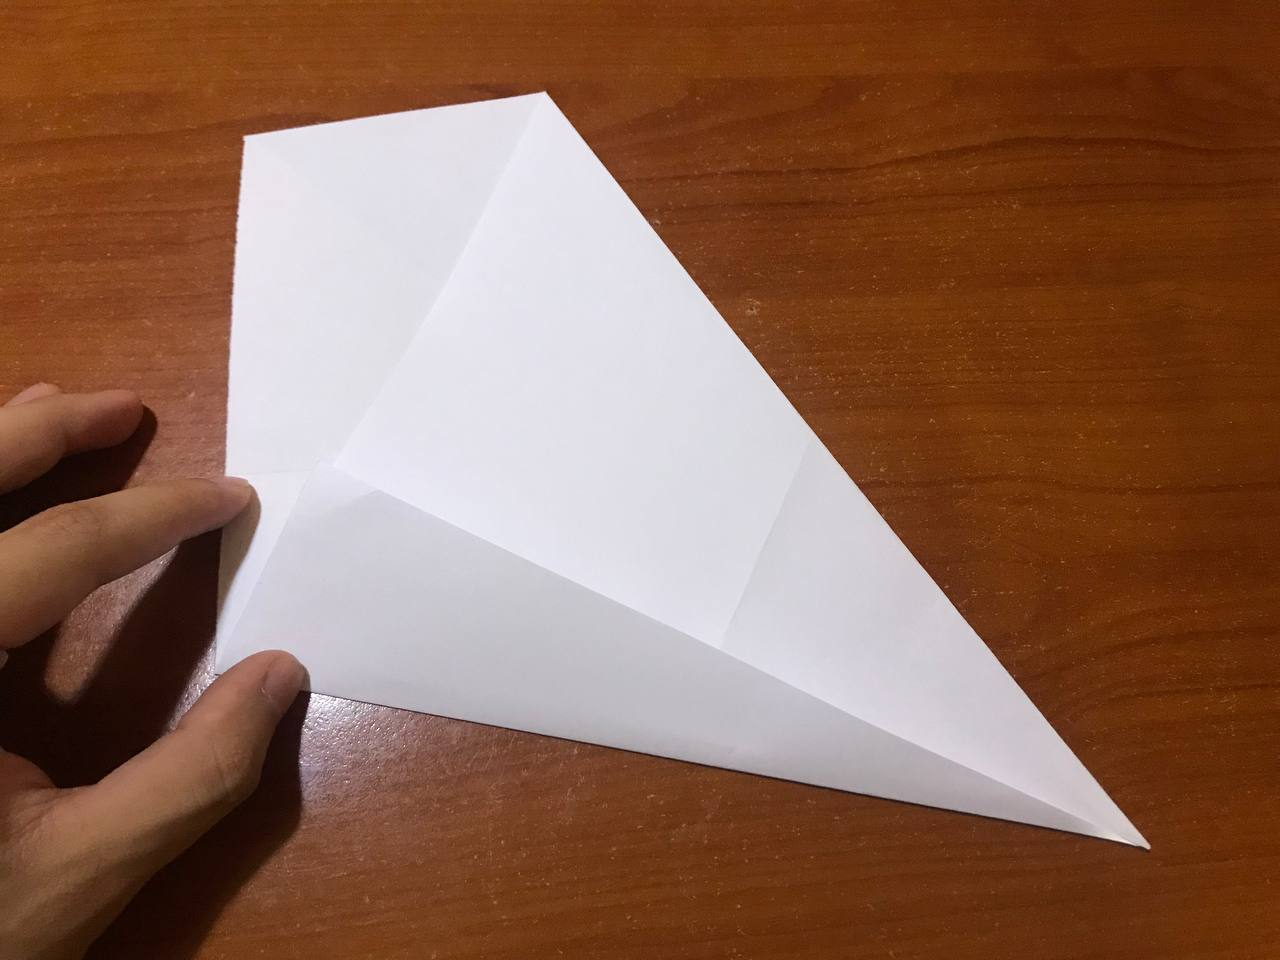
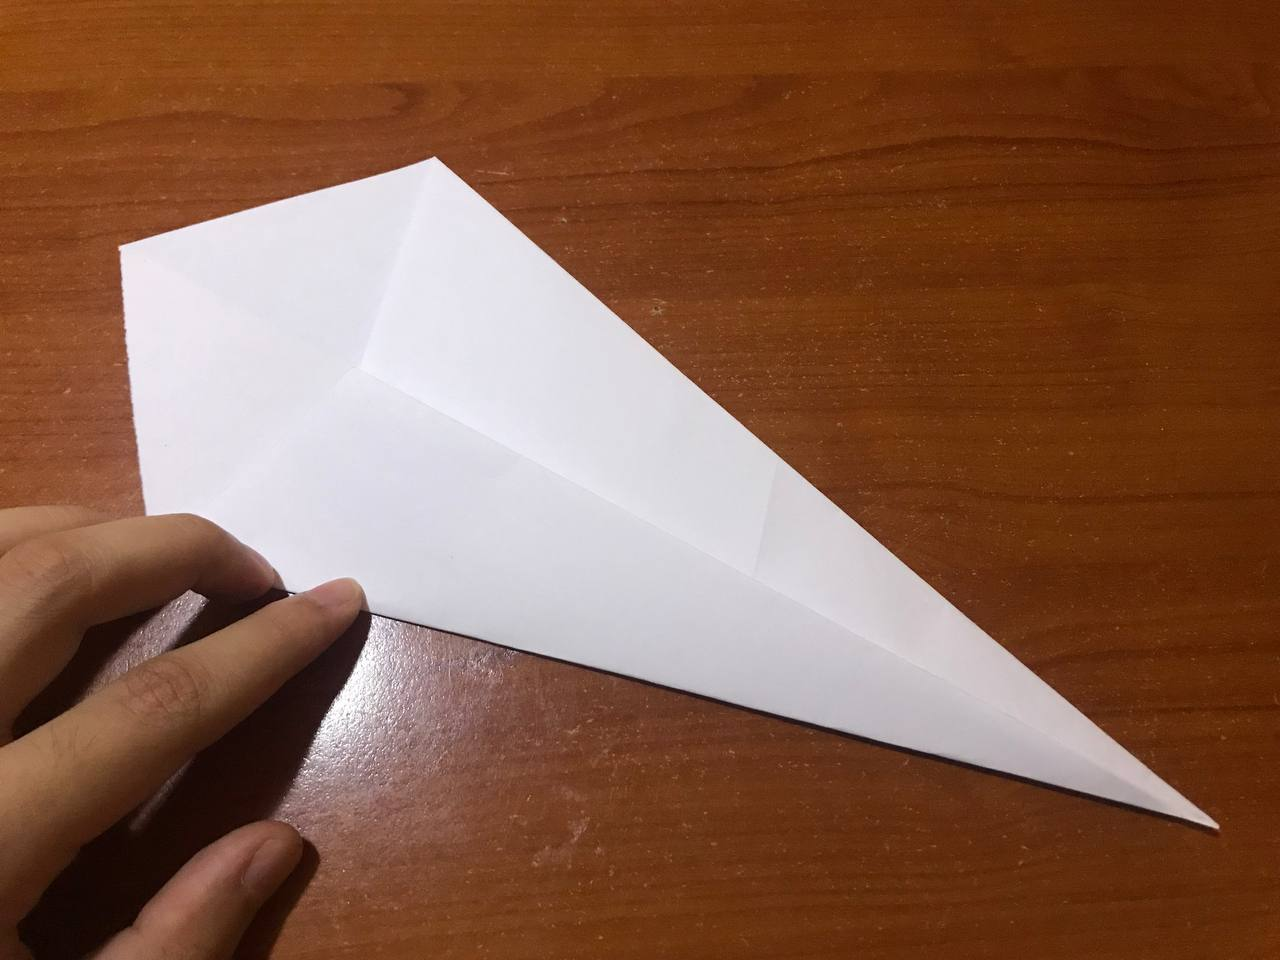
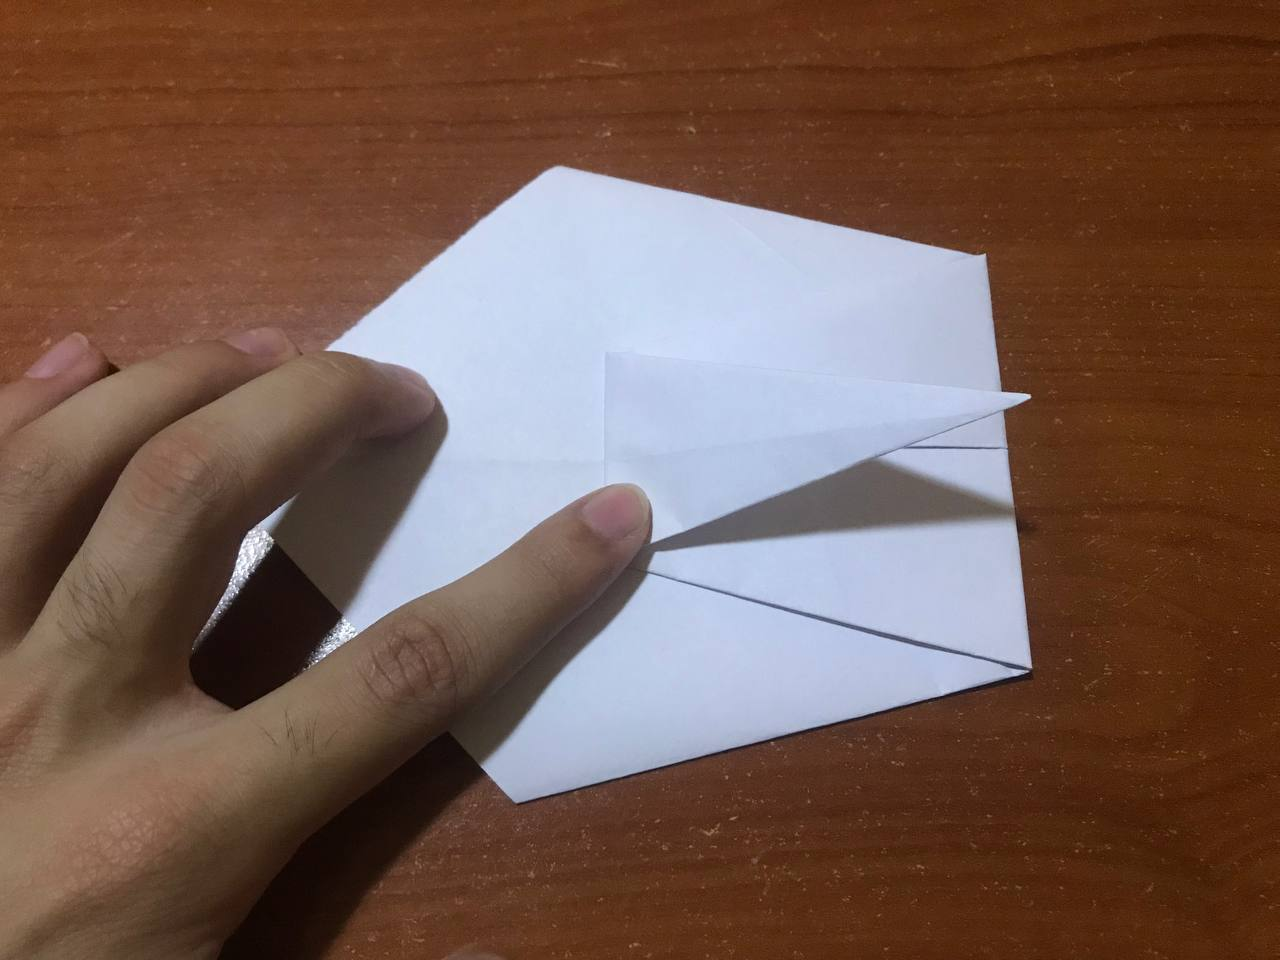
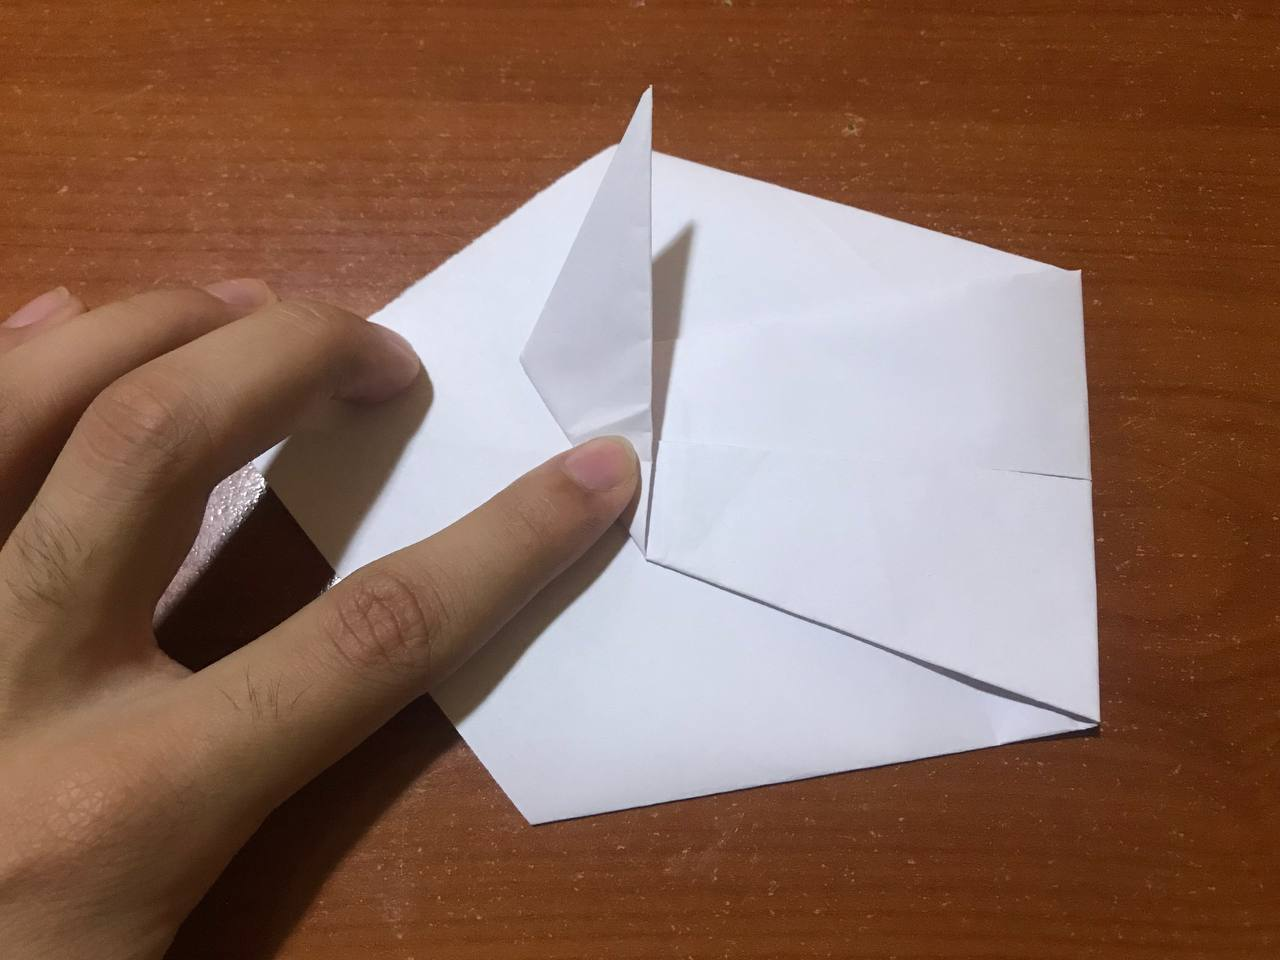
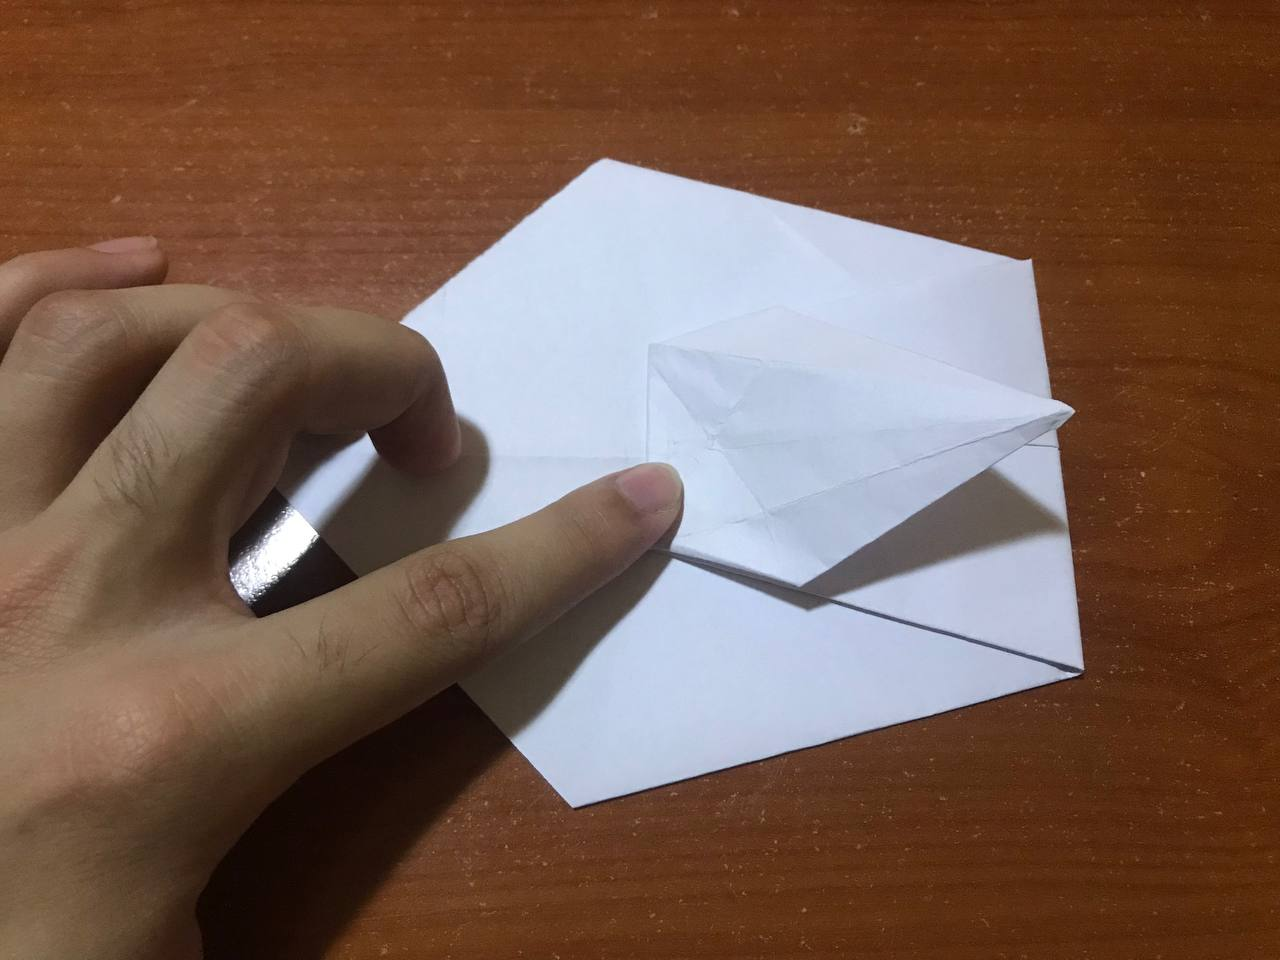
Now open the sheet and bring the larger end of the sheet towards the line we marked in the previous step. Once marked, we are going to fold that same part of the leaf inward along the corresponding line. And the other side we will bring it over the other and we will have a kind of a big cone on the sheet. A somewhat complicated step, but it is important to do each of the folds very well so that this duck looks great.
Ahora abrimos la hoja y vamos a llevar el extremo más grande de la hoja hacia la línea que marcamos en el paso anterior. Una vez marcado vamos a doblar esa misma parte de la hoja hacia adentro por la línea correspondiente. Y el otro lado lo vamos a llevar sobre el otro y nos quedará especie de un gran cono en la hoja. Un paso algo complicado, pero es importante hacer cada uno de los dobles muy bien para que este pato quede genial.
|
|
|
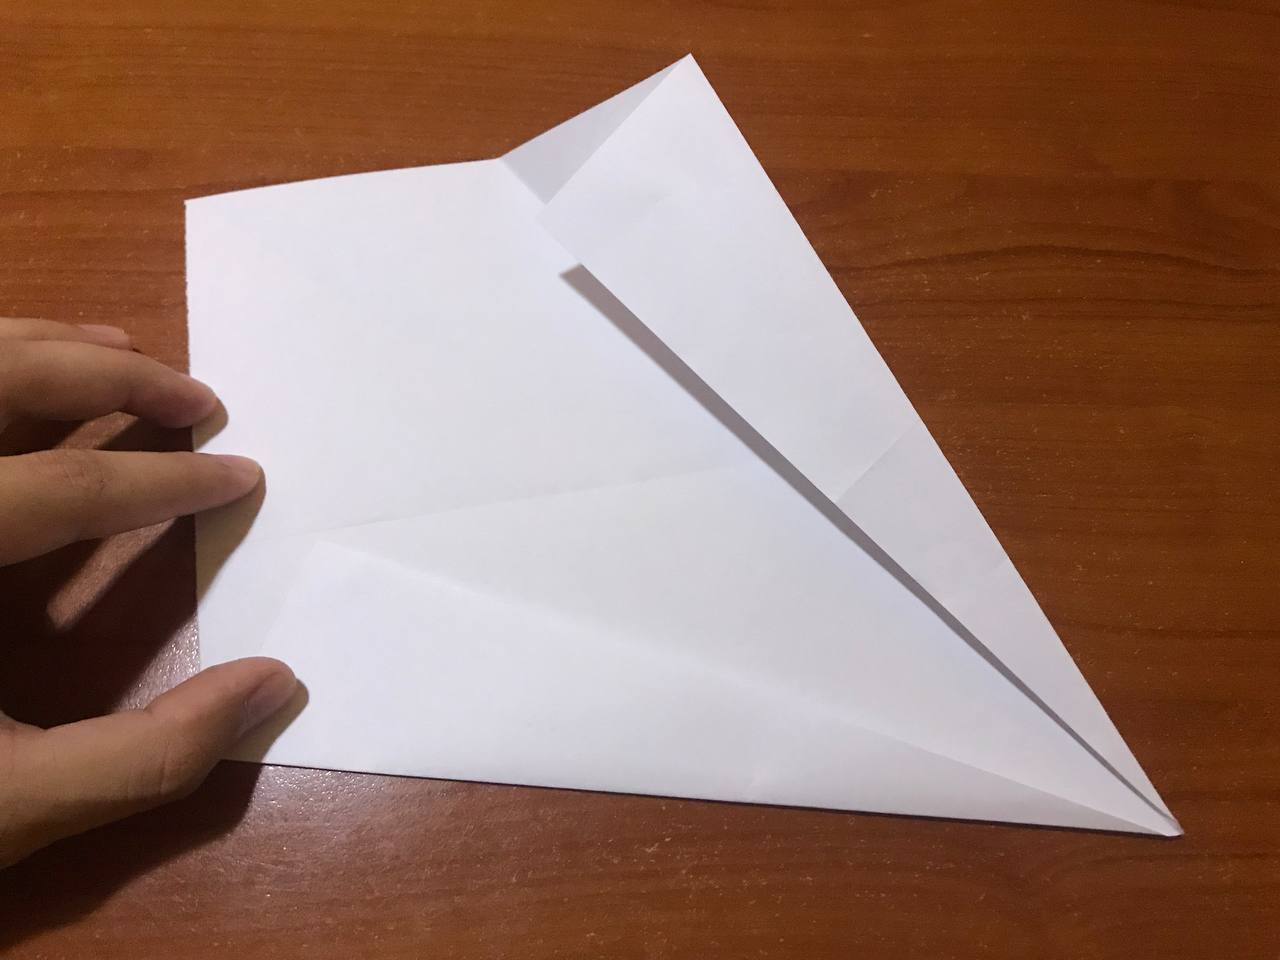
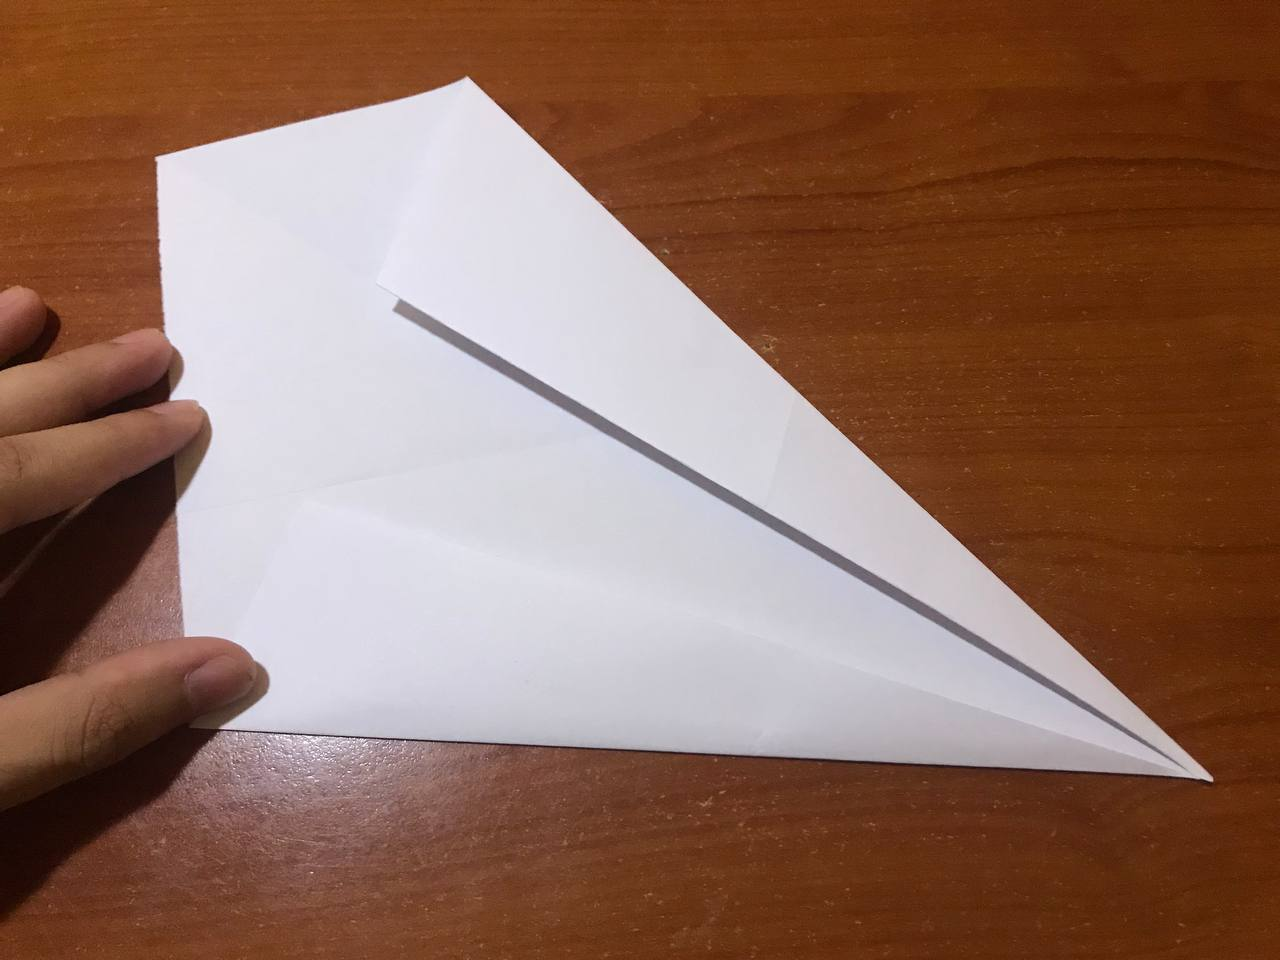
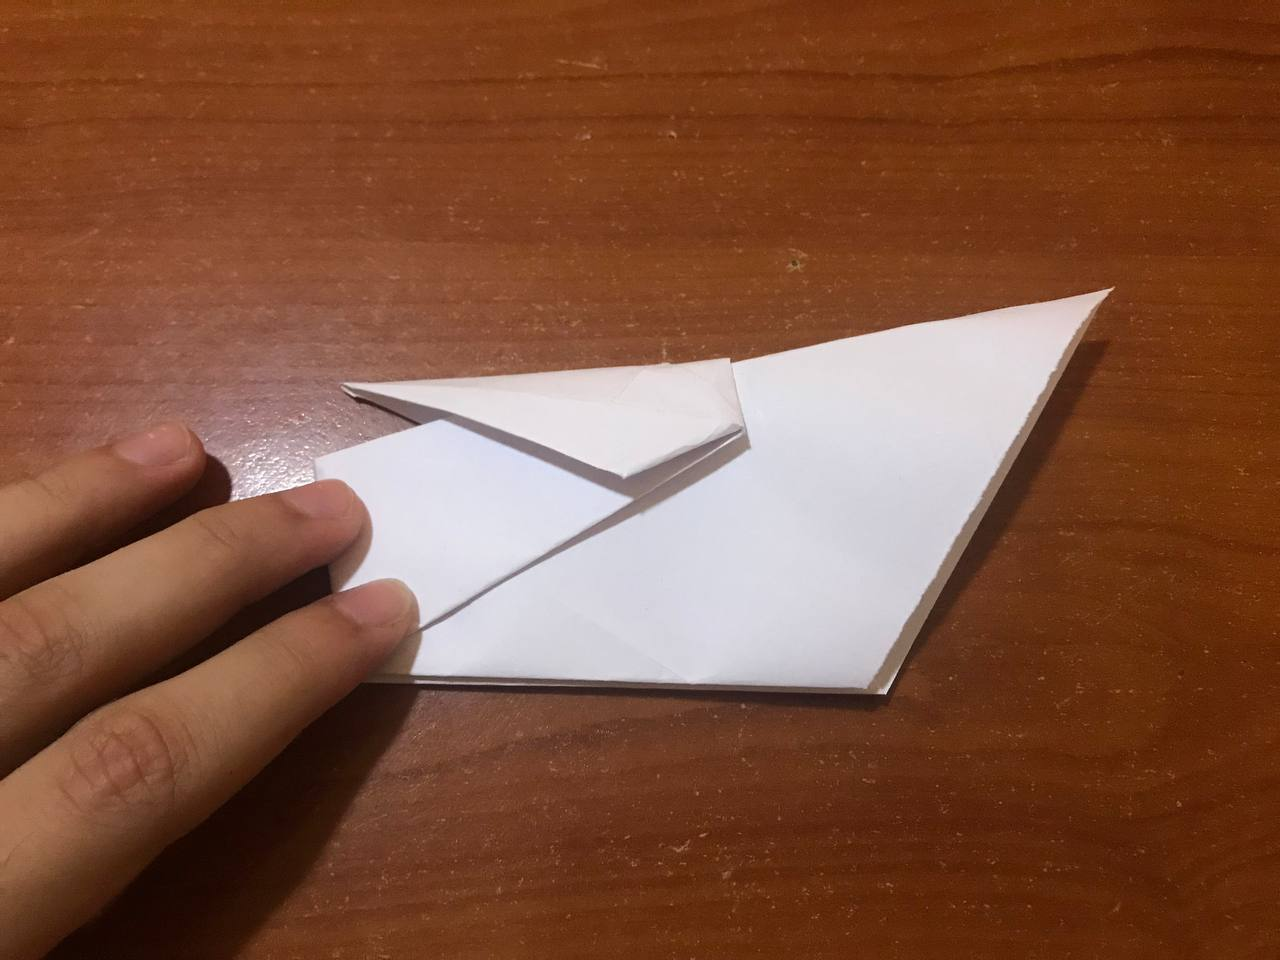
Next, we are going to turn our leaf over and we are going to join the two tips until they coincide to flatten, then we take the tip backwards as shown in the photos, all this to assemble the duck. Right there on the tip of the leaf we will make a small fold inward, where we have to mark the lines and then push the leaf inward and this step will be ready.
Seguidamente, vamos a voltear nuestra hoja y vamos a unir las dos puntas hasta que coincidan para aplastar, luego volvemos a llevar la punta hacia atrás como se aprecia en las fotos, todo esto para ir armando el pato. Allí mismo en la punta de la hoja vamos a realizar un pequeño pliegue hacia adentro, donde tenemos que marcar las líneas y luego empujamos hacia adentro la hoja y estará listo este paso.
|
 |
|
 |
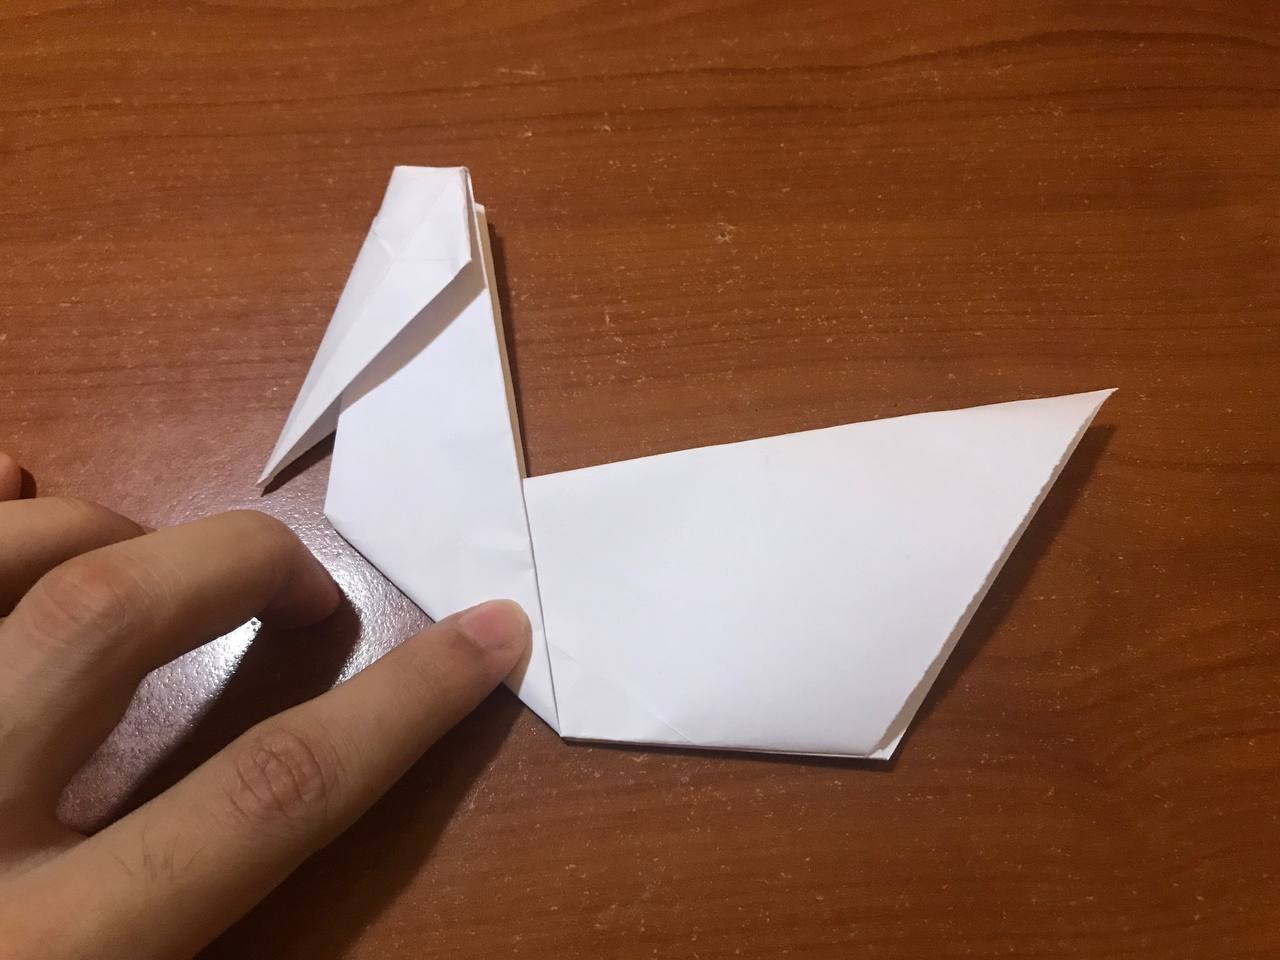
We fold in half, to take the top part of the sheet and we will lift a little to take out the top of the head and with a small inclination we flatten it. Once that is ready, we will also hold the head and we will take it outwards, as shown in the pictures, where little by little the duck will take shape.
Doblamos por la mitad, para tomar la parte de arriba de la hoja y vamos a levantar un poco para sacar la parte superior de la cabeza y con una pequeña inclinación aplastamos. Una vez listo eso, también vamos a sujetar la cabeza y vamos a llevarlo hacia afuera, como se nota en las fotos, donde poco a poco el pato irá tomando forma.
|
|
|
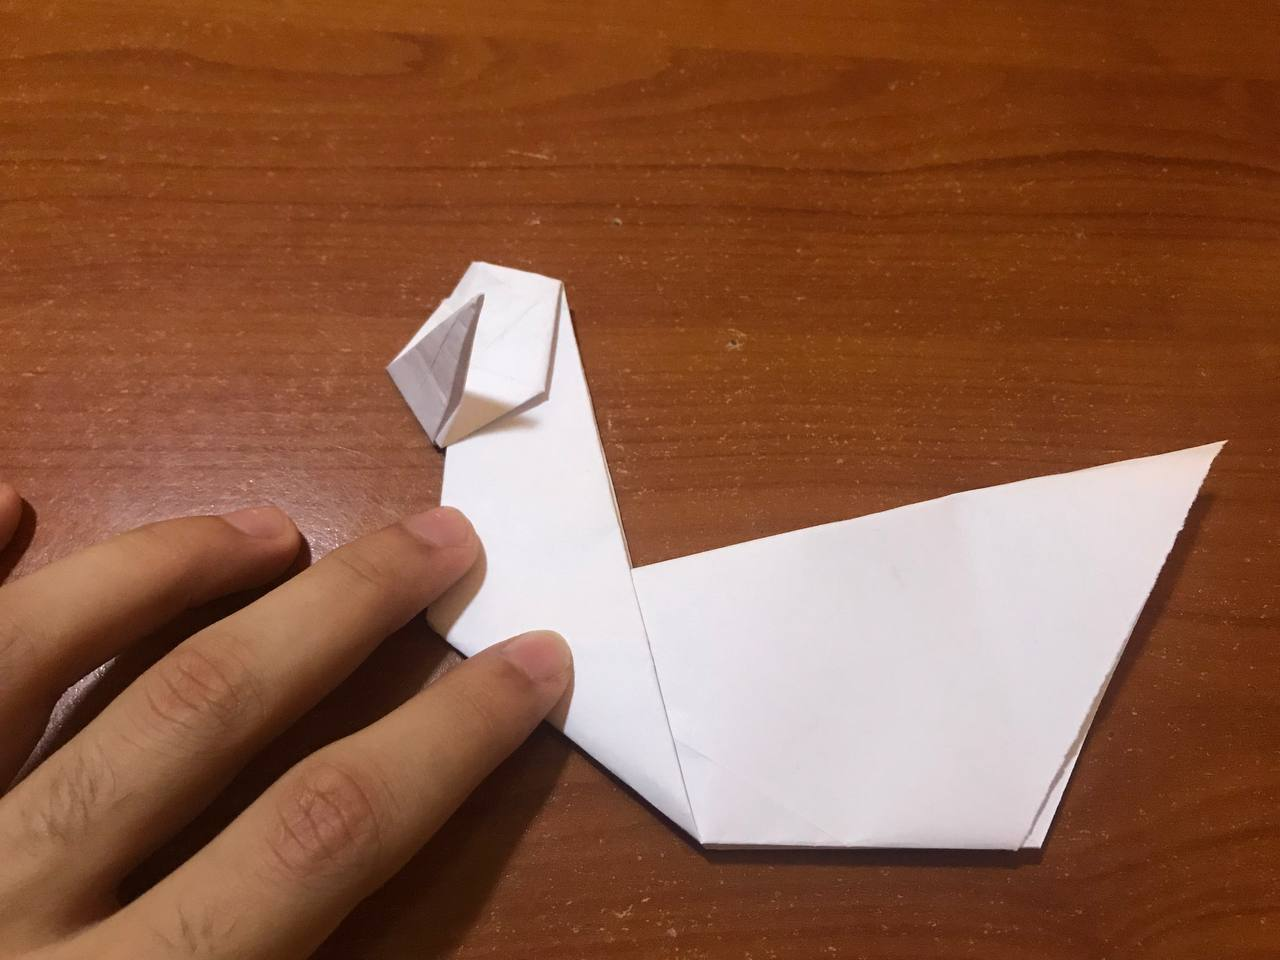
To make the equipment of our duck, what we have to do is to take the tip and fold backwards very carefully and once ready we make a fold inwards and the duck's beak will be ready, this will depend on the fold that is made.
Para hacer el equipo de nuestro pato, lo que tenemos que hacer es tomar la punta y doblamos hacia atrás con mucho cuidado y una vez listo hacemos un pliegue hacia adentro y nos quedará listo el pico del pato, esto dependerá del doblez que se haga.
|
 |
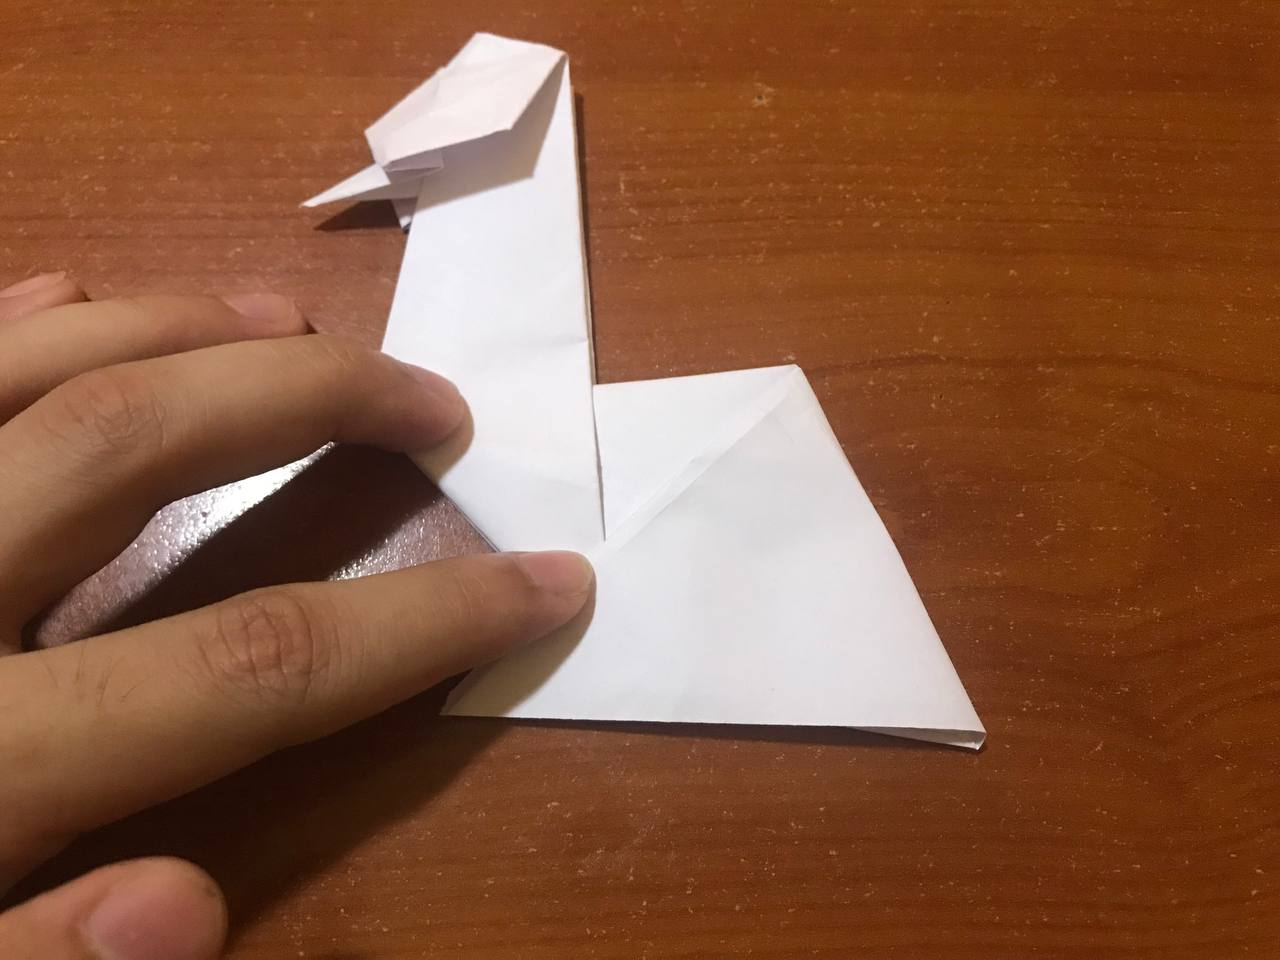
For the tail we bring the tip to the bottom of the duck and there we fold, we repeat the step outwards, but with a small inclination upwards. Then we open the leaf and we will make a fold inwards pushing the leaf very carefully and we fold. With that we will have the duck fully assembled.
Para la cola llevamos la punta hasta la parte de abajo del pato y allí doblamos, repetimos el paso hacia fuera, pero con una pequeña inclinación hacia arriba. Luego abrimos la hoja y vamos a hacer un pliegue hacia adentro empujando la hoja con mucho cuidado y doblamos. Con eso vamos a tener el pato totalmente armando.
|
|
|

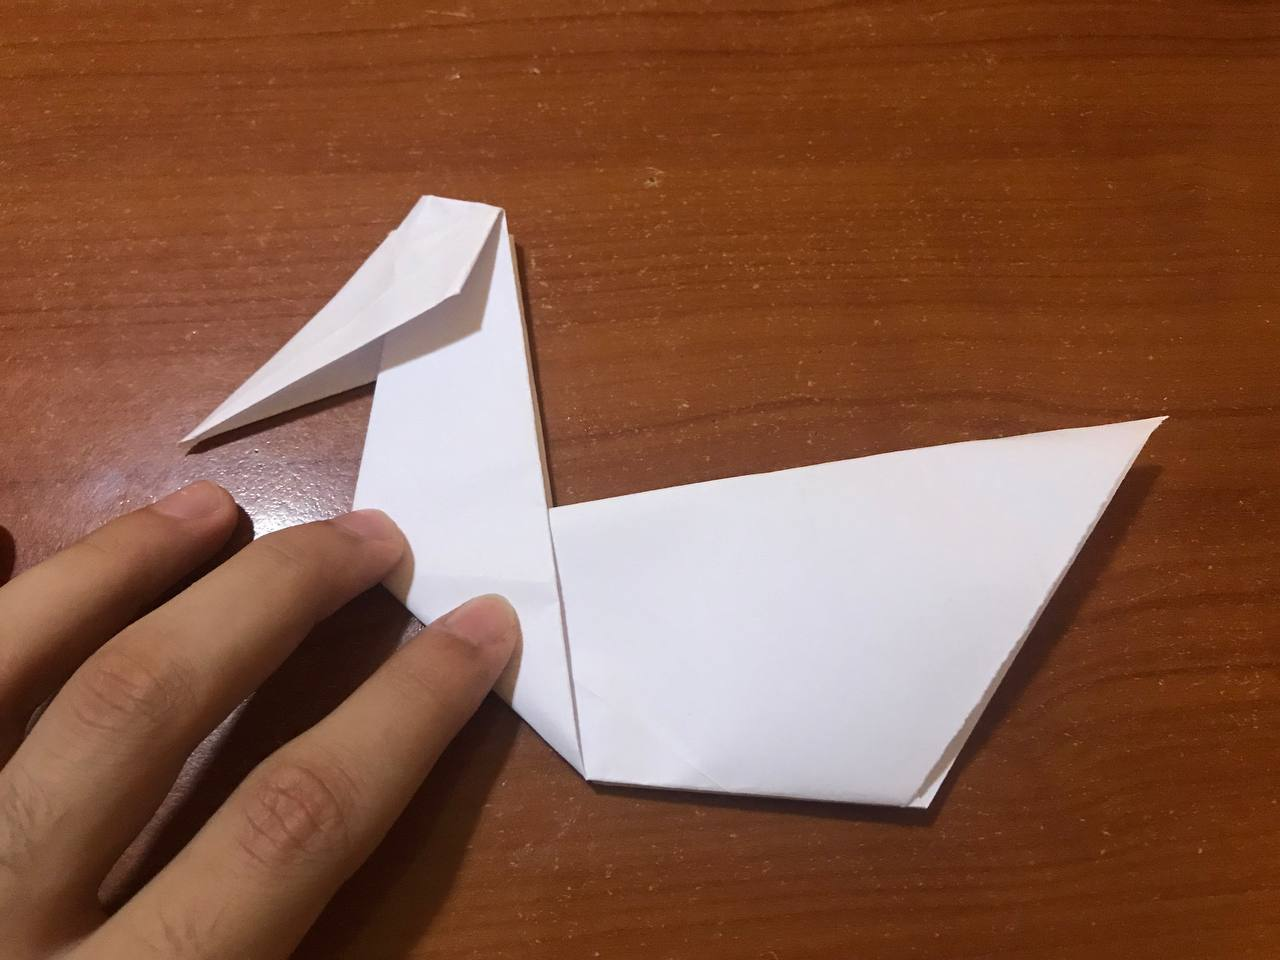
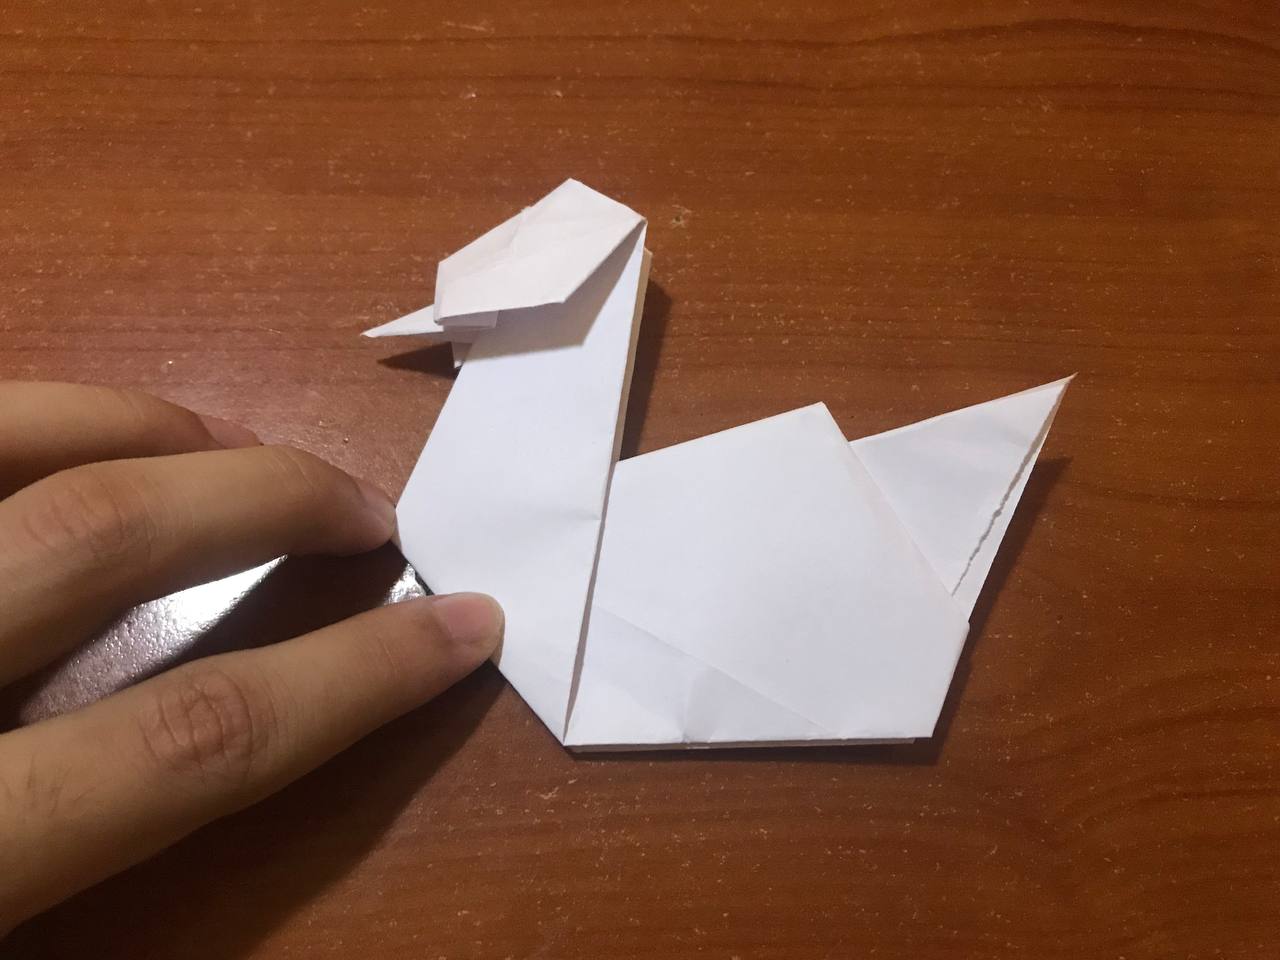
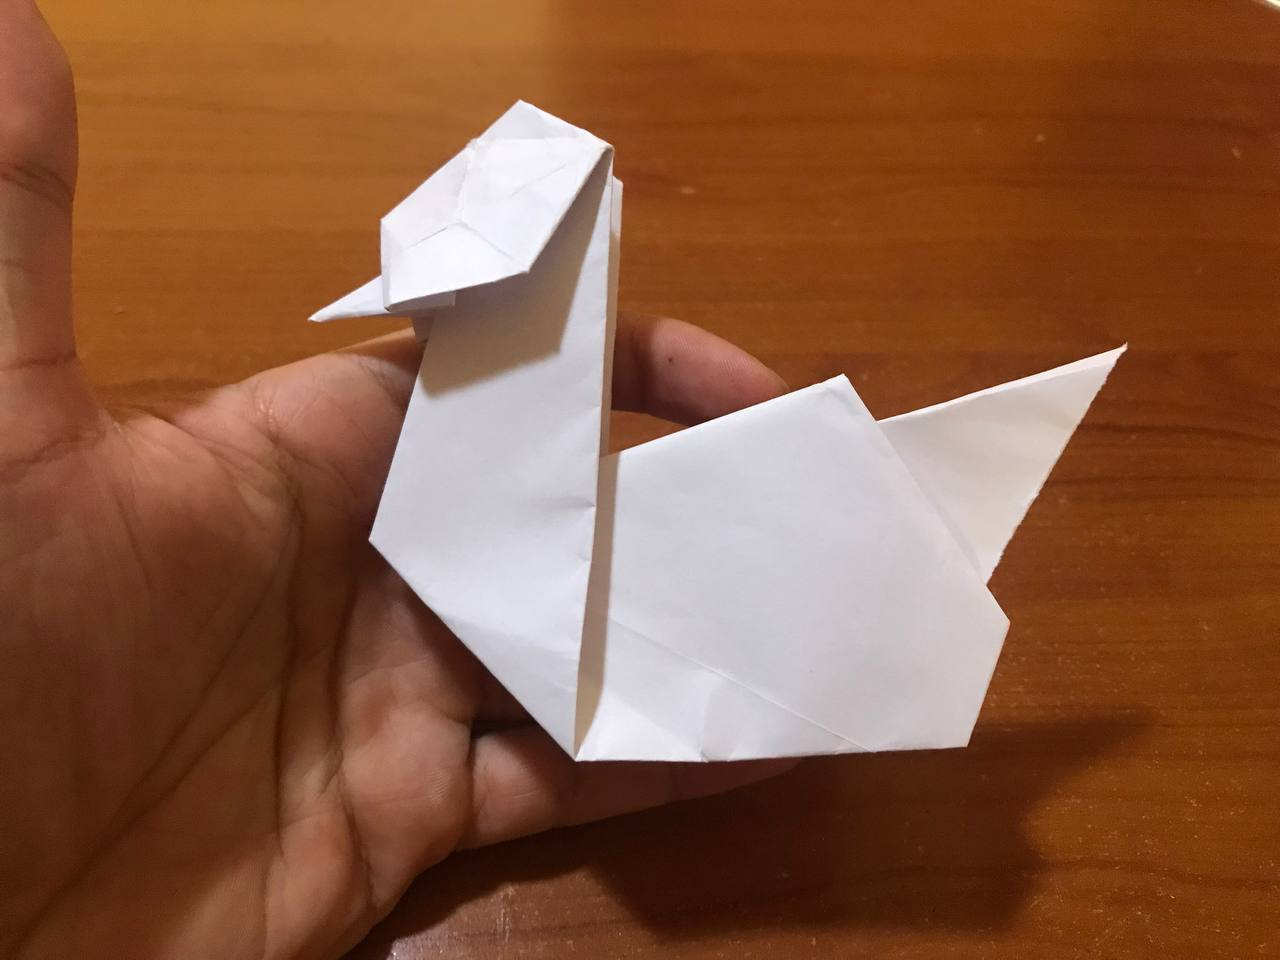
Resultado // Result
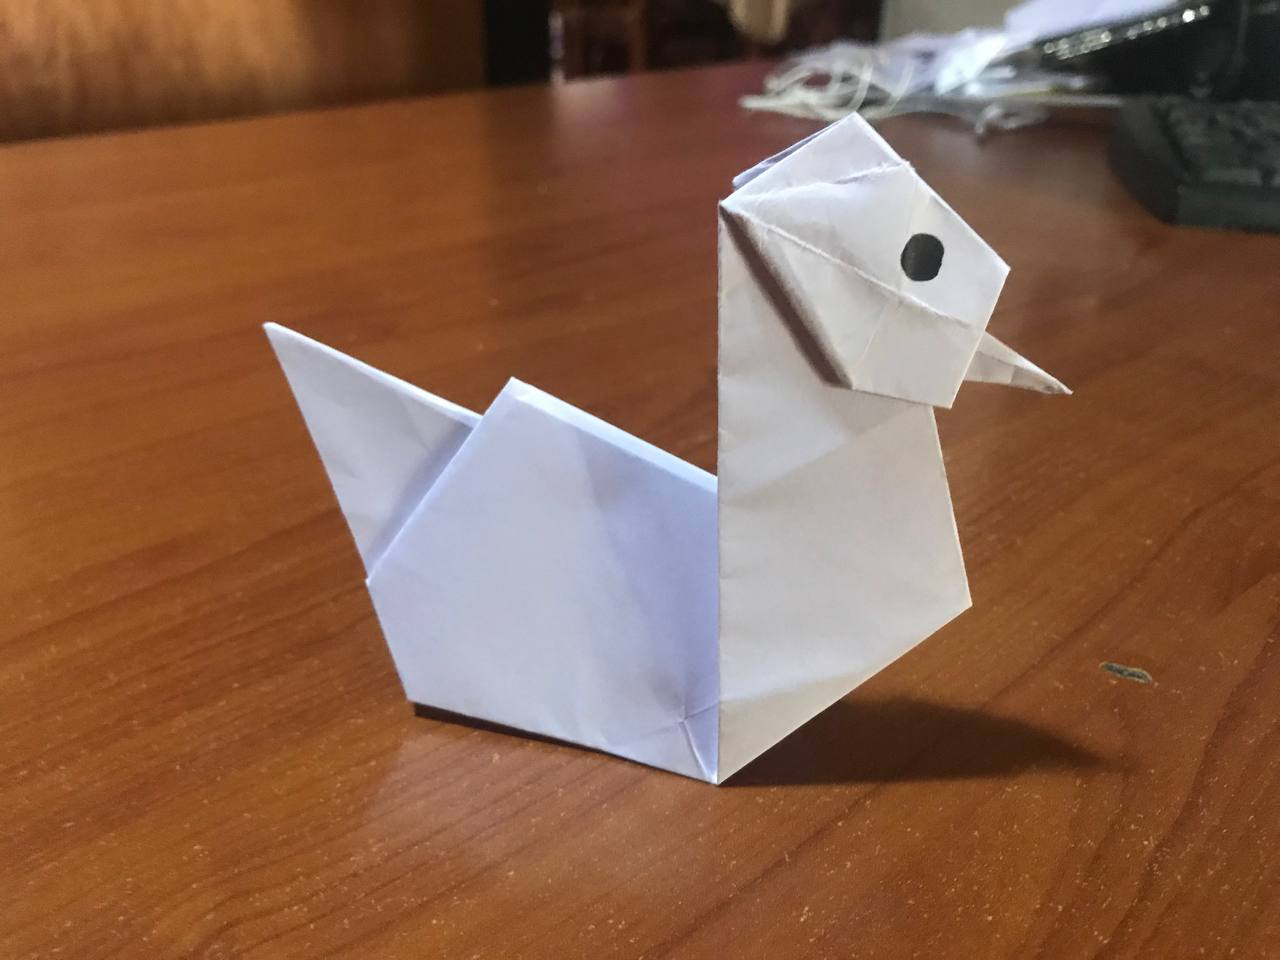
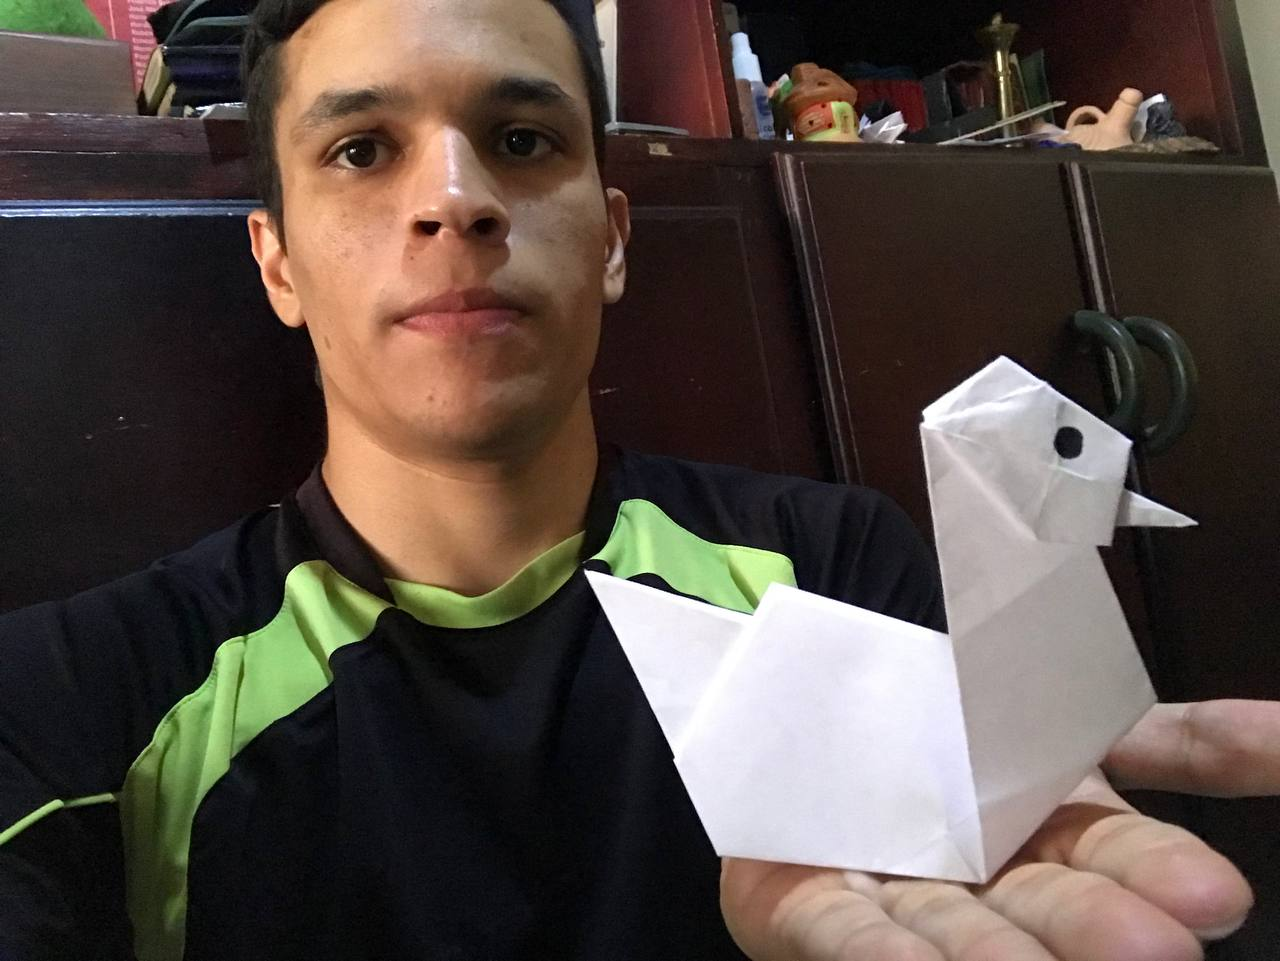
A very nice and unique result, where this little duck will serve you for many things, you can vary and play with the style and thus achieve a great collection, where it is perfect for playing, gifts and many other things. So see you next time with another origami.
Un resultado muy bonito y único, donde este pequeño pato te servirá para muchas cosas, puedes variar y jugar con el estilo y de esa manera lograr una gran colección, donde es perfecto para jugar, regalarlo y muchas otras cosas. Así que nos vemos en la próxima con otro origami.
Fotos tomadas con un Iphone 7 // Photos prises avec un iPhone 7.
Hi David, this is something that kids love to do, I told my son to recreate it, he was very excited, it still comes out a little messy but he was very encouraged. This is also a very mentally relaxing practice.
@sagarkothari88 vote
Muchas gracias amiga, genial que le sirva de apoyo y de esa manera practicar este gran arte, con la practica lo lograra.
A mi nunca se me ha dado lo de hacer figuras de papel y tampoco le tengo paciencia pero de verdad que quedan bonitas las figuras, este pato está hermoso 😊
Gracias amiga, eso es muy fácil, solo tienes que practicar y practicar.