Hola amigos creativos de @Hivediy, iniciando este Lunes con energías positivas y decretando una excelente semana para todos!!!🙏 🙌
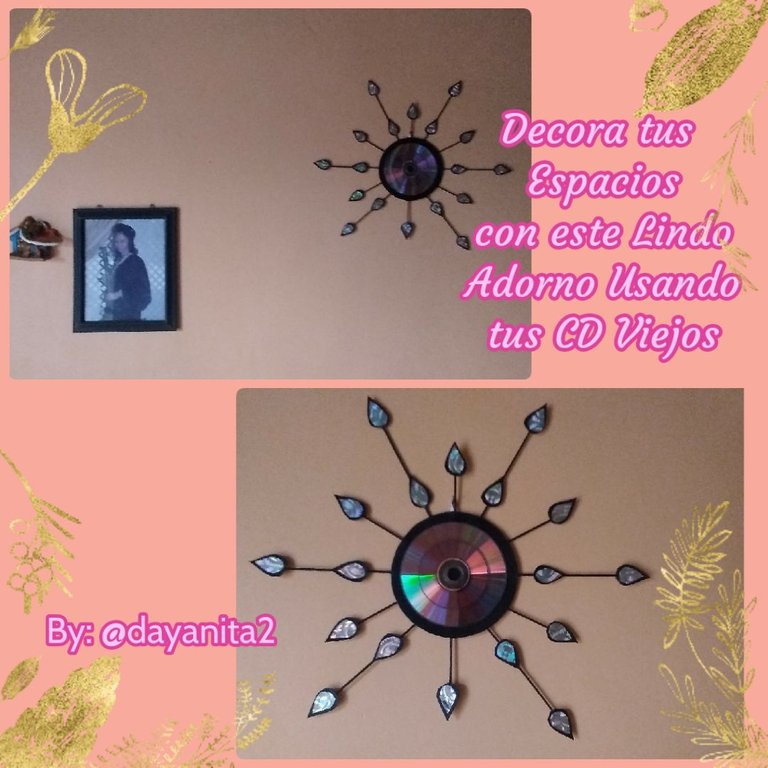
Hoy les traigo un lindo y funcional proyecto, lo realice para decorar la sala de mi casa ya que tenia una pared vacía y sentía que le hacia falta algo 🤔.
Hace unos meses había visto un lindo adorno en la pared de la casa de una amiga, y me encanto pero este era a base de espejos y su diseño era en forma de rombo, entonces pensé yo puedo elaborar uno similar, sin gastar, no tenía el espejo, reemplace los materiales usando lo que disponía en casa como siempre recicle,reuse y cree este hermoso adorno que se espectacular en la pared de mi sala por eso te invito a este sencillo paso a paso.
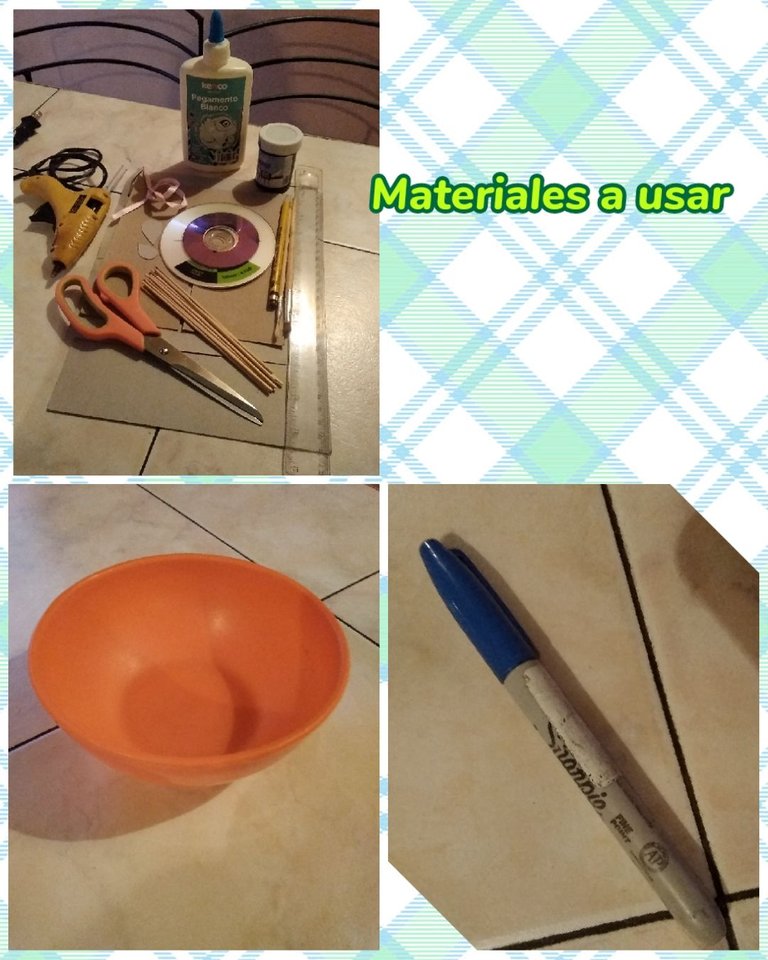
MATERIALES A USAR 📝
✏️ Cartón, 9 palitos de altura, lápiz, tijera, regla, 2 pinceles y un marcador.
✏️ Pega, pintura al frío negra y una taza circular mediana.
✏️ Pistola de silicón, cinta de razo delgada y papel de regalo metalizado plateado.
✏️ 2 Cd uno grande y uno pequeño y los patrones.
Hello creative friends of @Hivediy, starting this Monday with positive energies and decreeing an excellent week for everyone!!!🙏 🙌
Today I bring you a nice and functional project, I did it to decorate the living room of my house since I had an empty wall and I felt that something was missing 🤔.
A few months ago I had seen a nice decoration on the wall of a friend's house, and I loved it, but this one was based on mirrors and its design was in the shape of a diamond, so I thought I could make a similar one, without spending, I didn't have the mirror, replace the materials using what I had at home as always, recycle, reuse and create this beautiful ornament that looks spectacular on my living room wall, that's why I invite you to this simple step by step.
MATERIALS TO USE 📝
✏️ Cardboard, 9 sticks high, pencil, scissors, ruler, 2 brushes and a marker.
✏️ Paste, black cold paint and a medium circular cup.
✏️ Silicone gun, thin razor tape and silver metallic gift paper.
✏️ 2 Cd one big and one small and the patterns.
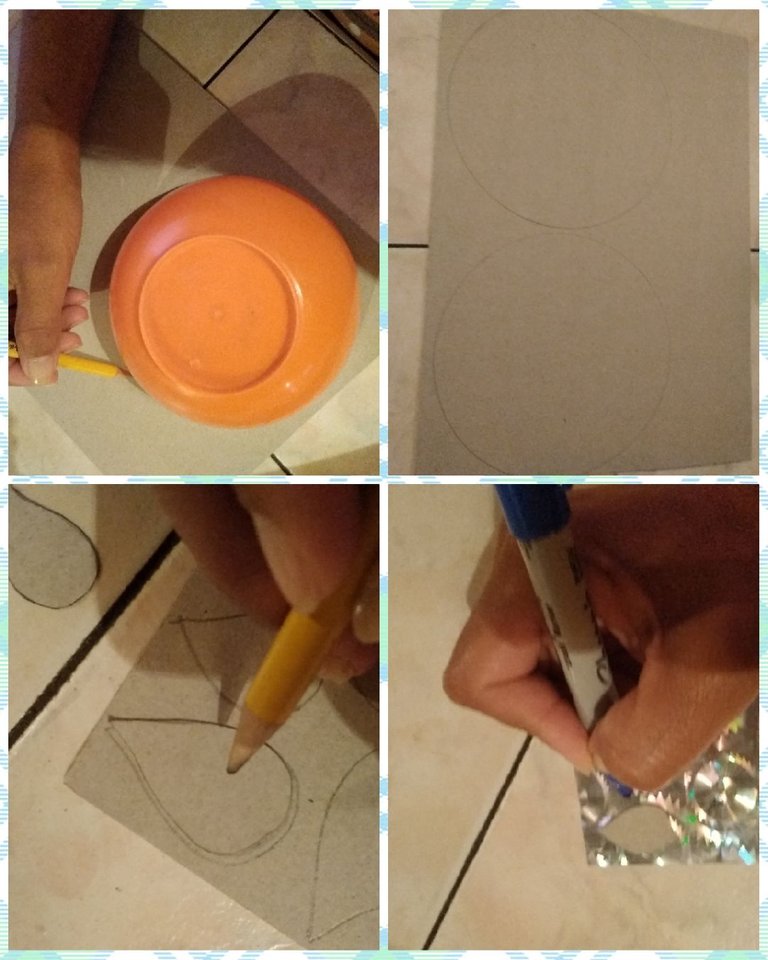
Paso 1
Lo primero que haremos es tomar la taza y en el cartón con ayuda del lápiz marcaremos 2 círculos este será nuestro base para el adorno, también marcaremos 18 hojitas del patrón grande y en el papel de regalo metalizado marcamos las 1 hojita pequeña esto lo haremos con el marcador porque con el lápiz no se verán.
Step 1
The first thing we will do is take the cup and on the cardboard with the help of the pencil we will mark 2 circles, this will be our base for the ornament, we will also mark 18 leaves of the large pattern and on the metallic gift paper we will mark the 1 small leaf. We will do this with the marker because with the pencil they will not be seen.
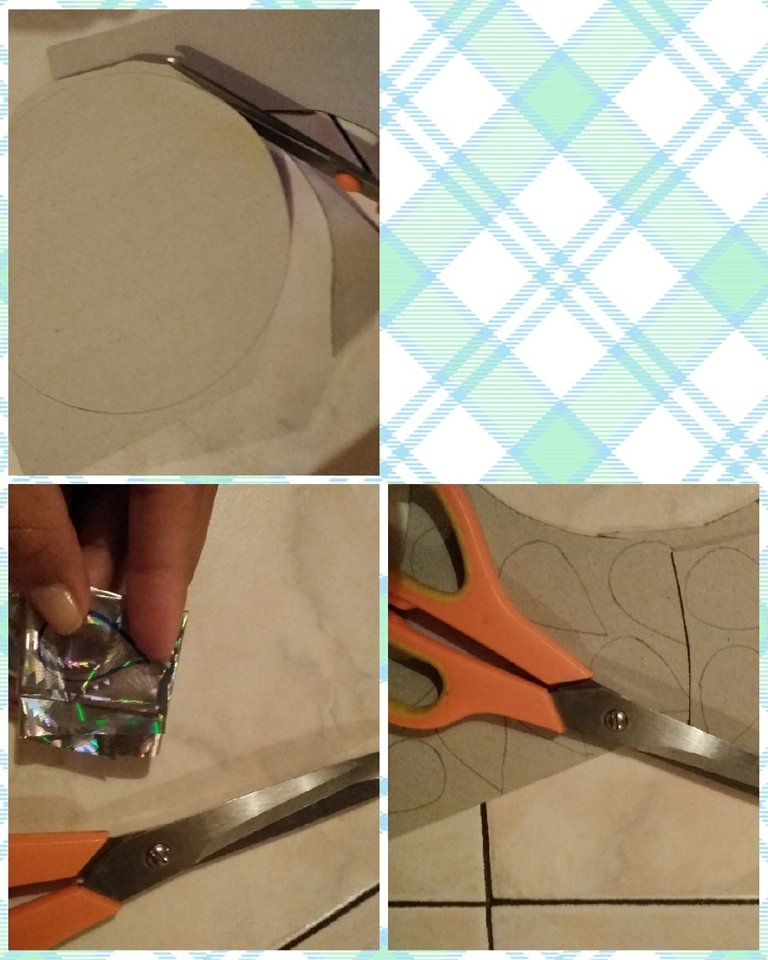
Paso 2
Hora de recortar ✂️ todos los patrones que pasamos al cartón, en el caso del que marcamos en el papel de regalo metalizado doblaremos el papel en varias partes y recortamos de esta manera será más fácil sacar las hojitas y agilizamos el trabajo, este procedimiento lo repetiremos hasta tener las 18 hojitas.
Step 2
Time to cut out ✂️ all the patterns that we transfer to the cardboard, in the case of the one that we mark on the metallic wrapping paper, we will fold the paper in several parts and cut it in this way, it will be easier to remove the sheets and we will speed up the work, we will repeat this procedure until you have 18 leaves.
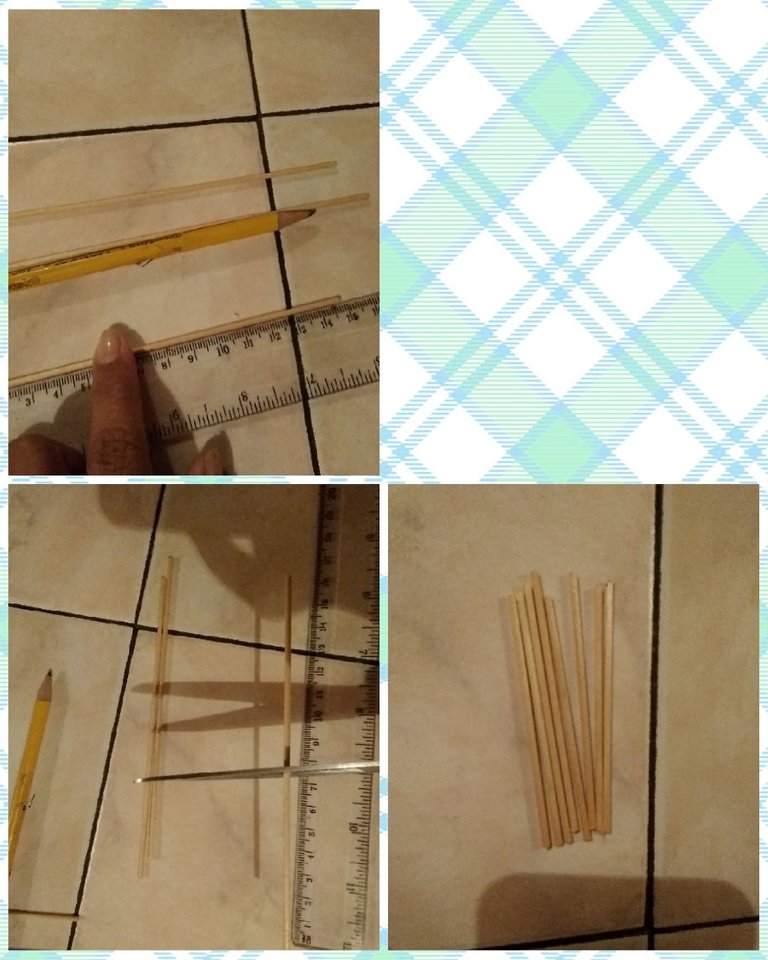
Paso 3
Tomaremos los palitos de altura le tomamos la medida, en este caso miden 15cm los pique a la mitad quedando en 7,5cm se picaran solo 3 palitos.
Step 3
We will take the height sticks we take the measure, in this case they measure 15cm, chop them in half, leaving 7.5cm, only 3 sticks will be chopped.
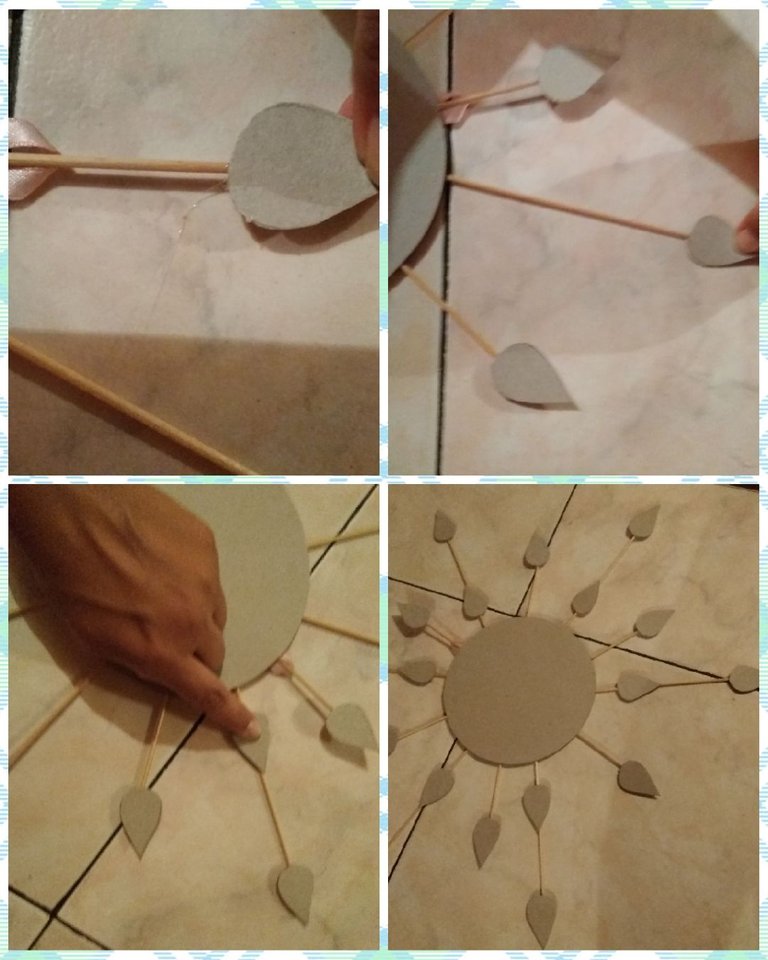
Paso 4
✏️ Seguidamente tomamos uno de los círculos de cartón y a este le pegaremos el guindadero que haremos con la cinta de razo, este se hará cortando la cinta a la medida que queremos el mismo le colocamos silicón en una punta y se le coloca encima la otra punta, se le colocara silicón al círculo se presionara durante unos segundos para que quede bien pegado.
✏️ Continuaremos pegando los palitos de altura, primero los grandes comenzando en un lado de donde pegamos el guindadero y del otro lado se pegara otro palito largo y el guindadero nos quedara en medio de ambos. Los otros dos palitos se pegan en la mitad del círculo, los dos deben quedar alineados el uno con el otro y por último los dos restante se pegan abajo tratando que queden a medida con los de arriba.
✏️ Ahora tomaremos los palitos que cortamos a la mitad estos se pegaran en el centro de donde esten dos palitos grandes, recordando que todos deben quedar alineados, este procedimiento se repite hasta culminar contodos los palitos.
✏️ Por último pegaremos encima el otro círculo de cartón colocandole abundante silicón para sellar muy bien nuestro trabajo.
Step 4
✏️ Next we take one of the cardboard circles and to this we will glue the guindadero that we will make with the razor tape, this will be done by cutting the tape as we want it, we place silicone on one end and the other end is placed on top Silicone will be placed on the circle and pressed for a few seconds so that it sticks well.
✏️ We will continue sticking the tall sticks, first the big ones starting on one side where we hit the peg and on the other side another long stick will be glued and the peg will stay in the middle of both of us. The other two sticks are glued in the middle of the circle, the two must be aligned with each other and finally the remaining two are glued down trying to match the ones above.
✏️ Now we will take the sticks that we cut in half, these will stick in the center of where two large sticks are, remembering that they must all be aligned, this procedure is repeated until all the sticks are finished.
✏️ Finally, we will paste the other cardboard circle on top, placing abundant silicone to seal our work very well.

Paso 5
Ahora tomamos las hojitas que sacamos en cartón y con silicón se pegaran primero en las puntas de todos los palitos grandes, después en todos los palitos pequeños, por último en los palitos grandes se pegaran una segunda hojita se tomara como referencia la hojita de los palitos pequeños y se pegara para que quede más abajo, observa la imágen 👇.
Step 5
Now we take the leaves that we took out of cardboard and with silicone they will be glued first to the tips of all the large sticks, then on all the small sticks, finally on the large sticks a second leaf will be glued, the leaf of the sticks will be taken as a reference small and it will stick so that it is lower, see the image 👇.
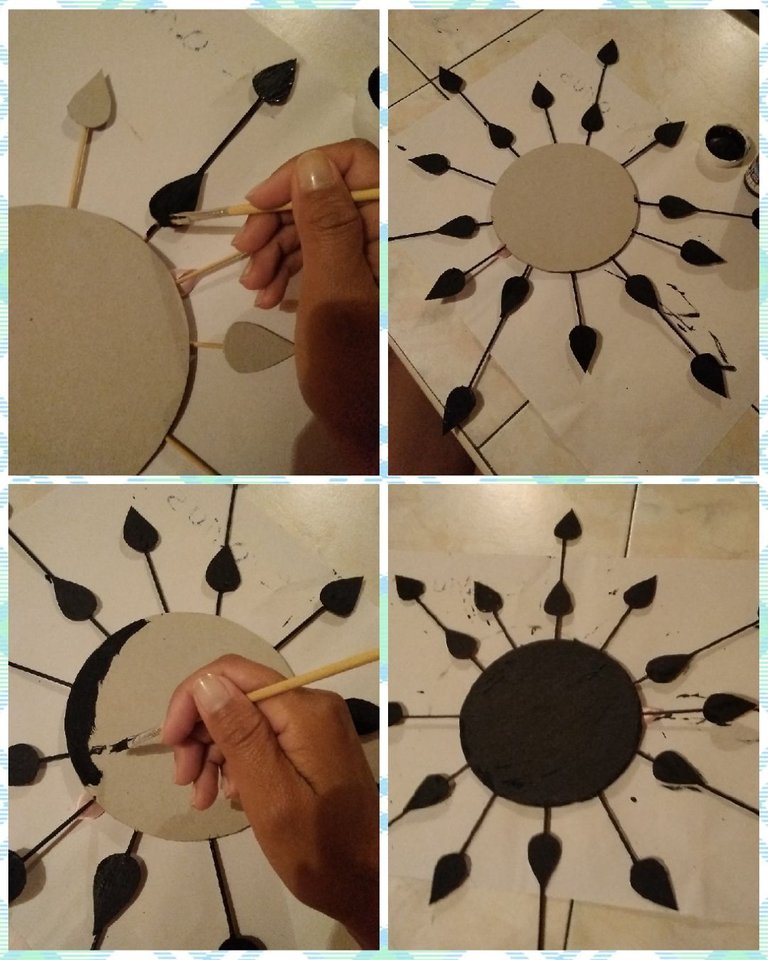
Paso 6
✏️ Hora de comenzar a pintar usando la pintura al frío negra y un pincel, iniciaremos por los palitos y las hojitas coloca debajo una hoja o revista para evitar manchar tu mesa, también pintaremos el círculo cubriendo en su totalidad toda la superficie dejaremos secar la pintura, en mi caso le pase dos manos de pintura.
✏️ Ahora tomaremos la pega para barnizar y dar firmeza a nuestro proyecto, se la aplicaremos con un pincel a toda la superficie, aprovecharemos la pega para colocarle las hojitas que recortamos en el papel de regalo metalizado, al colocarla encima de las hojitas que estan en negro lo haremos bscando que nos queden centradas de esta manera resaltaran al tener como base el negro. Después de realizar este procedimiento dejaremos que se seque muy bien la pega, al estar seca veremos un bello resultado nuestro proyecto quedara fuerte y se vera abrillantado.
Step 6
✏️ Time to start painting using the black cold paint and a brush, we will start with the sticks and the leaves, place a sheet or magazine below to avoid staining your table, we will also paint the circle covering the entire surface in its entirety, we will let the paint dry In my case, I gave it two coats of paint.
✏️ Now we will take the paste to varnish and give firmness to our project, we will apply it to the entire surface with a brush, we will take advantage of the paste to place the leaves that we cut in the metallic wrapping paper, placing it on top of the leaves that are in black we will do it looking for them to remain centered in this way they will stand out as they are based on black. After carrying out this procedure we will let the paste dry very well, when it is dry we will see a beautiful result, our project will be strong and will look polished.
![photocollage_2023423201127802[1].jpg](https://images.hive.blog/768x0/https://files.peakd.com/file/peakd-hive/dayanita2/EopuJbUSZKJH3pCWSEJnFCNNsQc9M7B8AwpDvzQipLrBR9asxaNzQUg1Fzvy3oAtMCb.jpg)
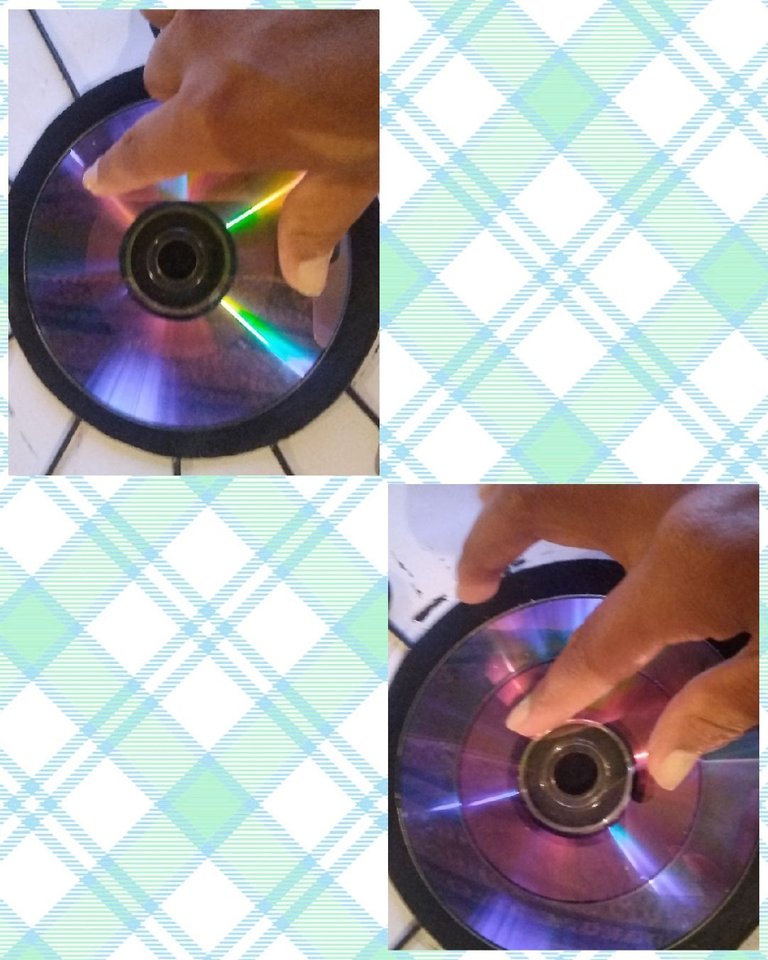
Paso 7
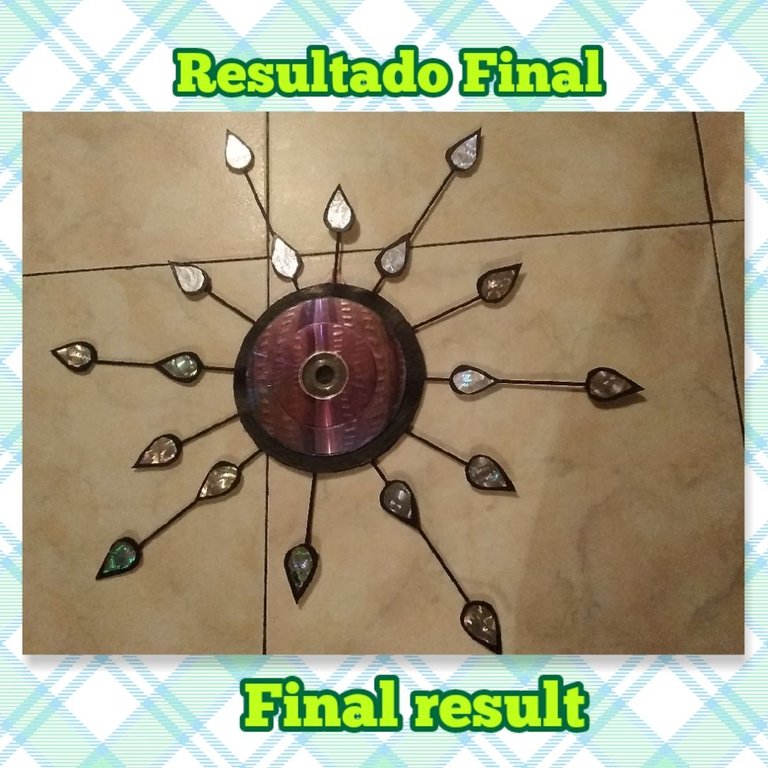
Para culminar nuestro proyecto, pegaremos con abundante silicón primero el CD grande que nos quede centrado dentro del círculo que pintamos en negro, el CD pequeño le colocamos también abundante silicón y se pega encima del grande presionamos unos segundos para que no se despegue, de esta manera termine este lindo adorno para decorar la pared de mi sala, es sencillo pero me encanto esa combinación entre el negro los colores del CD al entrar en conacto con la luz y el papel de regalo metalizado son una combinación perfecta en mi pared luce muy bien.
Animate tú a realizarlo para decorar cualquiera de tus espacios, además no implica ningún gasto y de esta manera reciclas, reusas y creas algo funcional para tu hogar.
Por acá les dejo mi bello resultado.
Step 7
To complete our project, we will first glue the large CD that is centered within the circle that we painted in black with plenty of silicone, we also place plenty of silicone on the small CD and it sticks on top of the large one, pressing for a few seconds so that it does not come off, in this way This is how I finished this beautiful ornament to decorate the wall of my living room, it is simple but I loved that combination between black, the colors of the CD when they come into contact with the light and the metallic wrapping paper, they are a perfect combination on my wall, it looks very good .
Be encouraged to do it to decorate any of your spaces, it also does not imply any expense and in this way you recycle, reuse and create something functional for your home.
Here I leave my beautiful result.
Gracias a ti que te detienes a leer cada una de mis publicaciones que tengas un lindo y bendecido día!!!🤗 🙏
Las fotos fueron tomadas y editadas con mi celular
use la aplicación "Foto Collage"
La traducción la realice con el traductor de google
Hasta un Próximo Encuentro!!!
🤗😘
Thanks to you who stop to read each of my posts, have a nice and blessed day!!!🤗 🙏
The photos were taken and edited with my cell phone.
use the "Photo Collage" app
The translation is done with google translator
Until a Next Meeting!!!
🤗😘
The rewards earned on this comment will go directly to the people( @dayanita2 ) sharing the post on Twitter as long as they are registered with @poshtoken. Sign up at https://hiveposh.com.
Muy lindo tu trabajo amiga.
Gracias por compartirlo.
Gracias a ti amiga por visitarme @elmundodebetty
Saludos un abrazo 🤗
Congratulations @dayanita2! You have completed the following achievement on the Hive blockchain And have been rewarded with New badge(s)
Your next target is to reach 70 posts.
You can view your badges on your board and compare yourself to others in the Ranking
If you no longer want to receive notifications, reply to this comment with the word
STOPTo support your work, I also upvoted your post!
Check out our last posts:
Support the HiveBuzz project. Vote for our proposal!
Thanks for the support @hivebuzz
Go for it @dayanita2! You've got what it takes to reach your new target on Hive.
BTW, please support our funding proposal and help us bring more fun and badges to Hive. Together we can make Hive a more exciting place!
All you need to do is to click on the "support" button on this page: https://peakd.com/proposals/248.
Thank you!
🤗🙏
Hermoso trabajo, me encantan este tipo de decoraciones 👍
Gracias amiga @andreamtovar19 me alegra que te guste mi creación
Un abrazo 🤗
Que gran trabajo has realizado, reutilizando este material de los antiguos cds de música!
Muchas gracias @fixie
Saludos 🤗
Desde el primer momento en que lo vi, me encantó demasiado, que buen uso de materiales reciclados💕
Gracias amiga @sylregne me alegra conocer tu apreciación 🤗
Muy lindo y creativo, para decorar y dar un toque diferente y especial, muy bien mostrado el paso a paso, te felicito, saludos.
Muchísimas gracias @ikigaidesign me alegra saber que te gusto
Saludos un abrazo 🤗