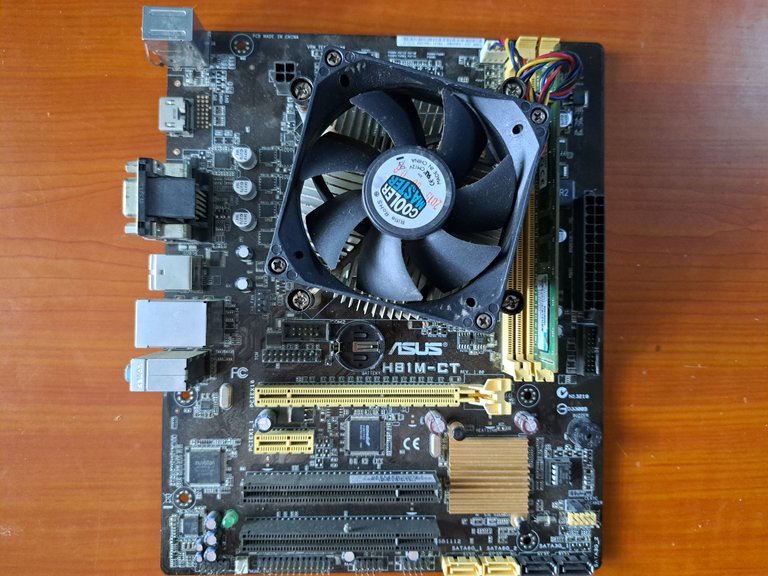
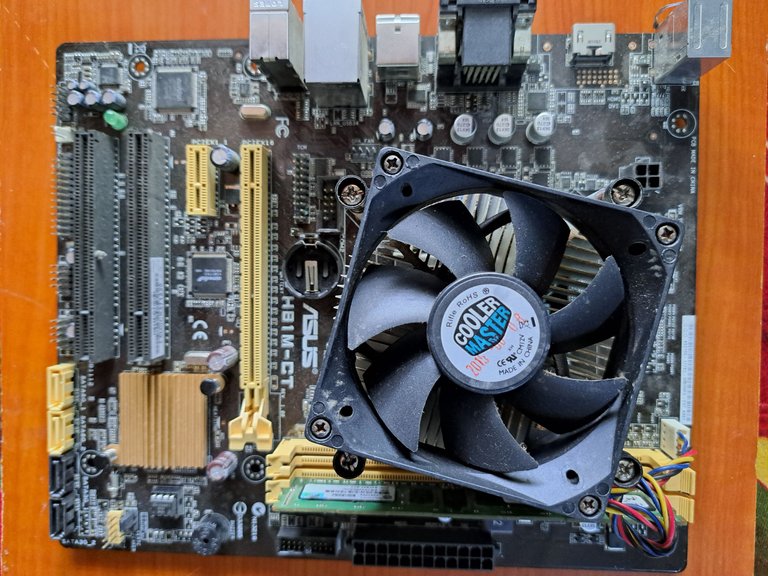
Greetings friends of the community. For some time I've been wanting to resume the electronics tutorials I did before, but the reality is that I can not go through life breaking the equipment in the house to fix them. Luckily, for me, I had the opportunity to rescue this beautiful motherboard, which caught my attention, since at first glance it had nothing on it and was in a corner awaiting to be recycled.
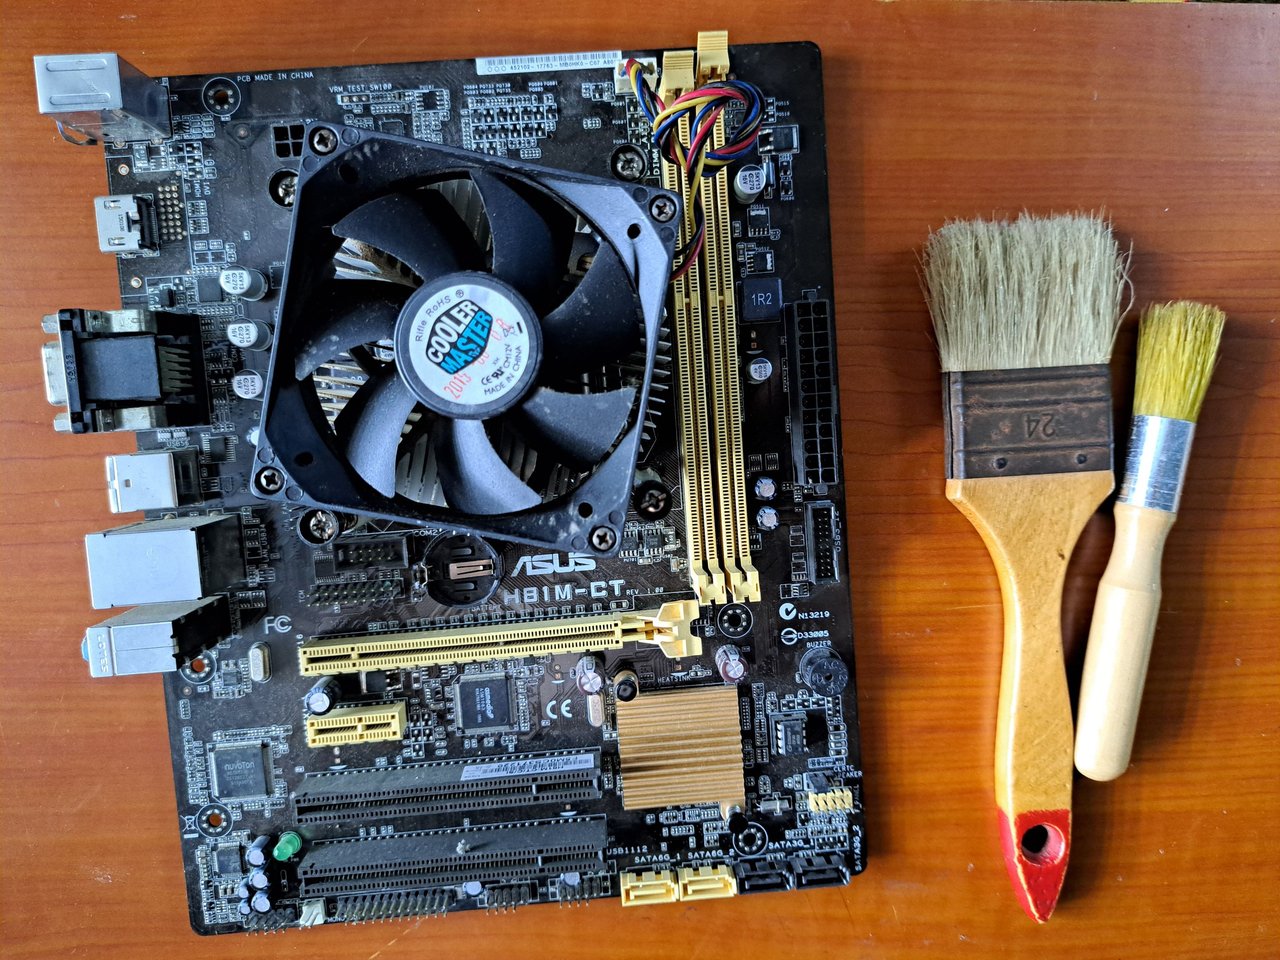
The board in question is an Asus H81M-CT that supports 4th generation Intel processors. The repair turned out to be easier than I expected, although it came to my attention that the flaw I had was caused by mishandling. So if you want to know how I repaired this motherboard, I invite you to join me in the following tutorial, which I will be doing as a story.
Spanish Version Here
Saludos amigos de la comunidad. Desde hace un tiempo vengo queriendo retomar los tutoriales de electrónica que hacía anteriormente, pero la realidad es que no puedo ir por la vida rompiendo los equipos de la casa para arreglarlos. Por suerte, para mí, tuve la oportunidad de rescatar esta hermosa placa madre, la cual me llamó mucho la atención, ya que a simple vista no tenía nada y estaba en un rincón pendiente de ser reciclada.
La placa en cuestión es un Asus H81M-CT que soporta procesadores Intel de 4.ª generación. La reparación resultó ser más fácil de lo que esperaba, aunque me llamó la atención que el desperfecto que tenía fue causado por mala manipulación. Así que si quieres saber cómo reparé esta placa madre, te invito a acompañarme en el siguiente tutorial, el cual estaré haciendo a modo de historia.
 |
 |
Materials // Materiales
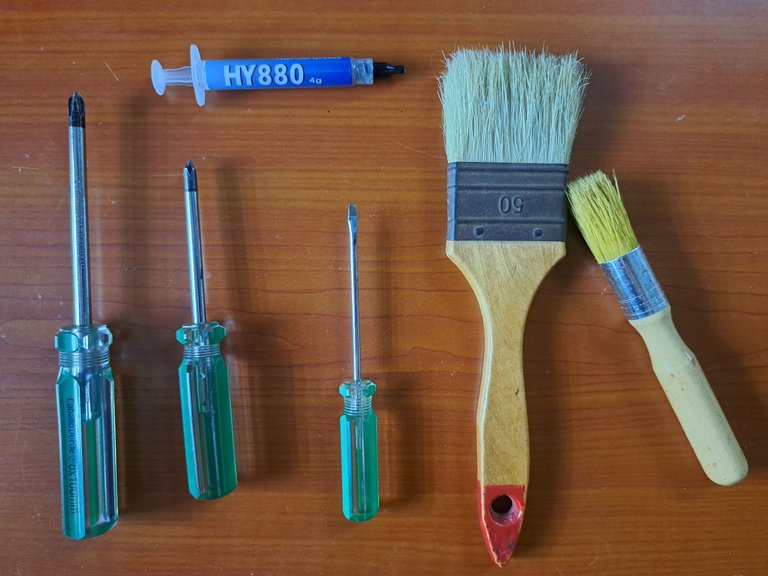
| ✔️ Thermal paste | ✔️ Pasta térmica |
| ✔️ Screwdrivers of different sizes | ✔️ Desarmadores de distintas medidas |
| ✔️ Large and small circular brush | ✔️ Brocha grande y pequeña circular |
| ✔️ Sewing needle | ✔️ Aguja de coser |
Step by step // Paso a paso
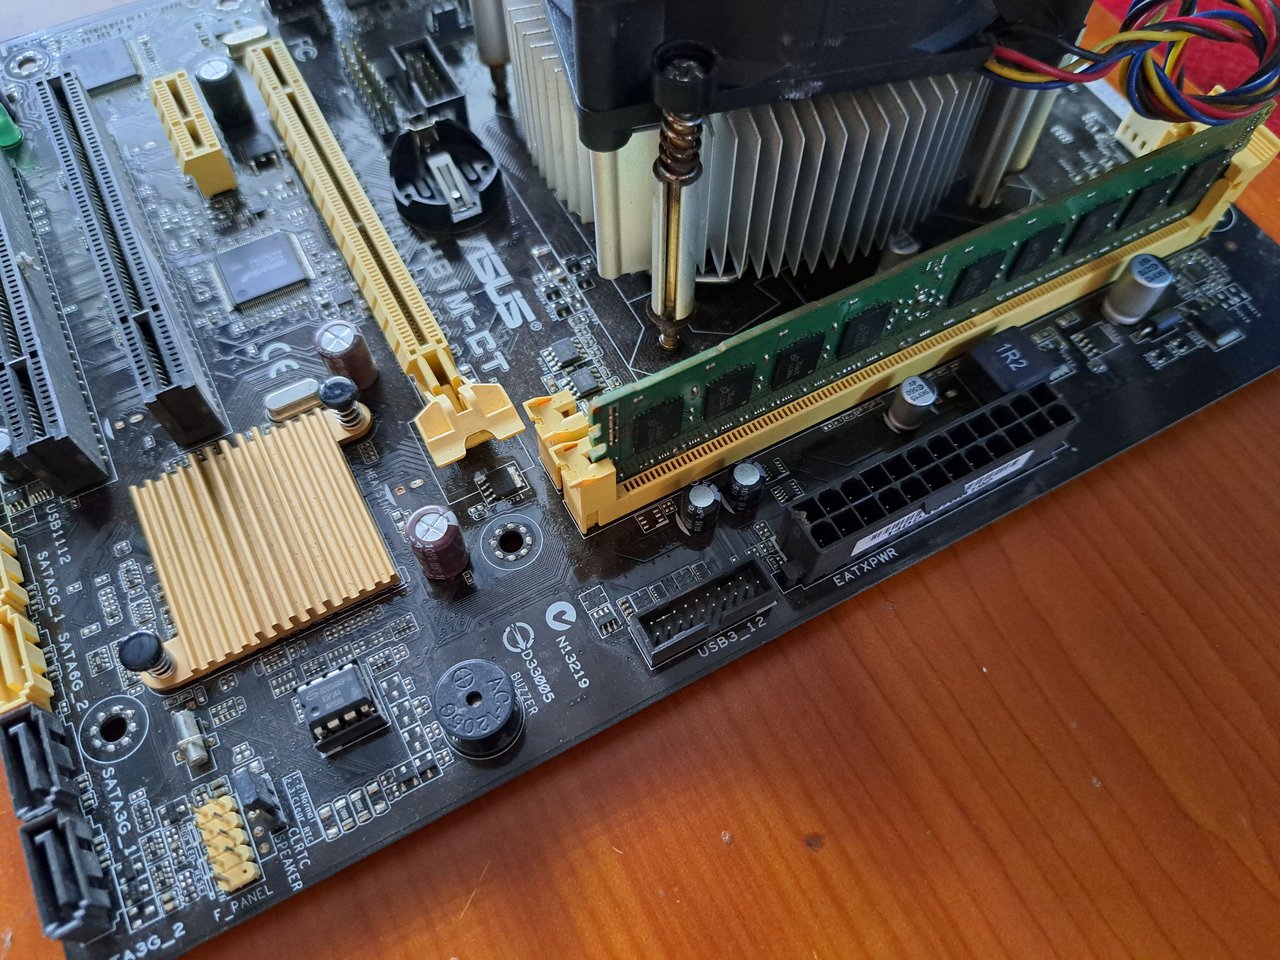
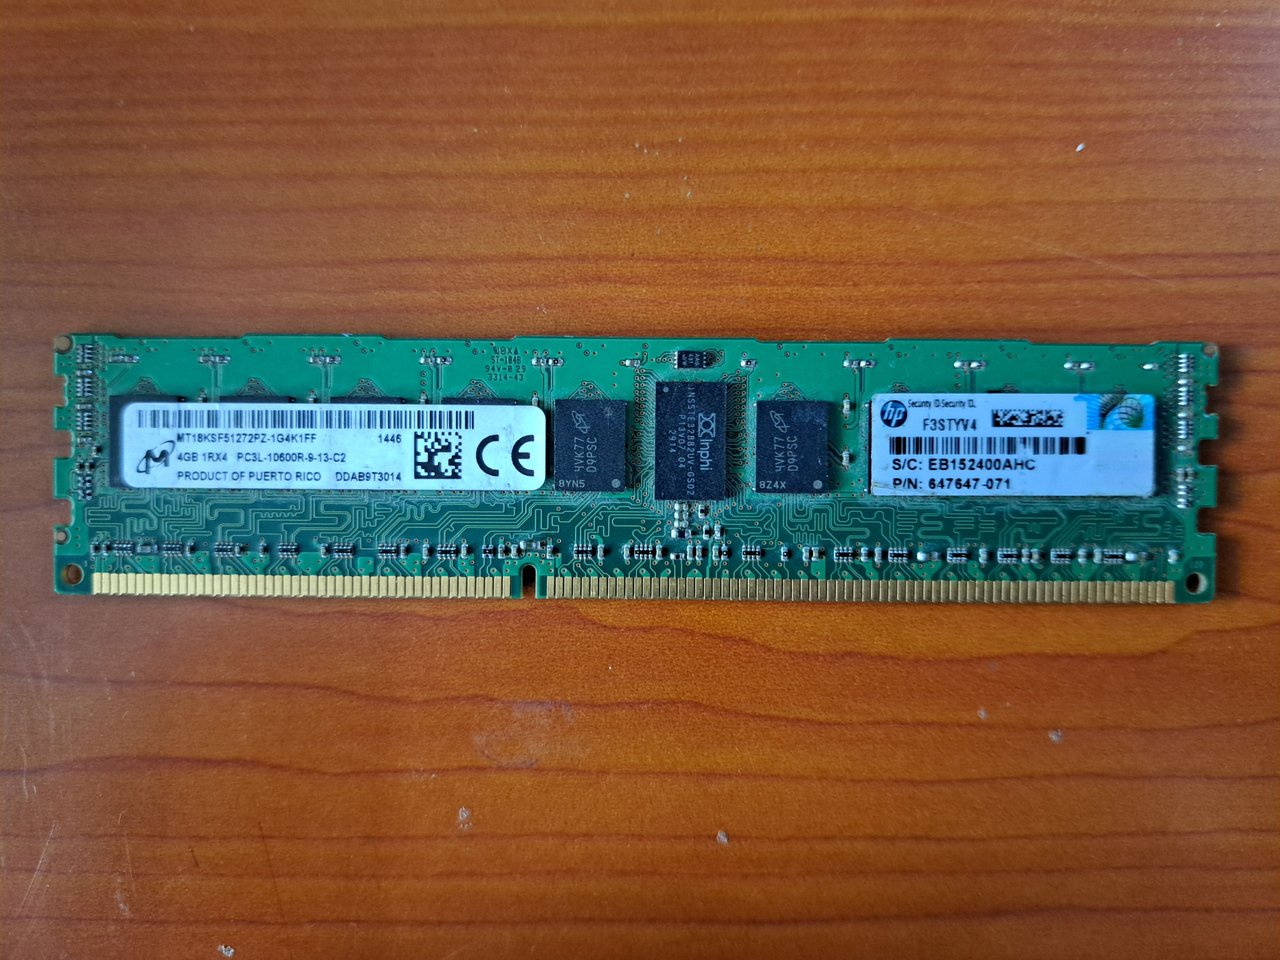
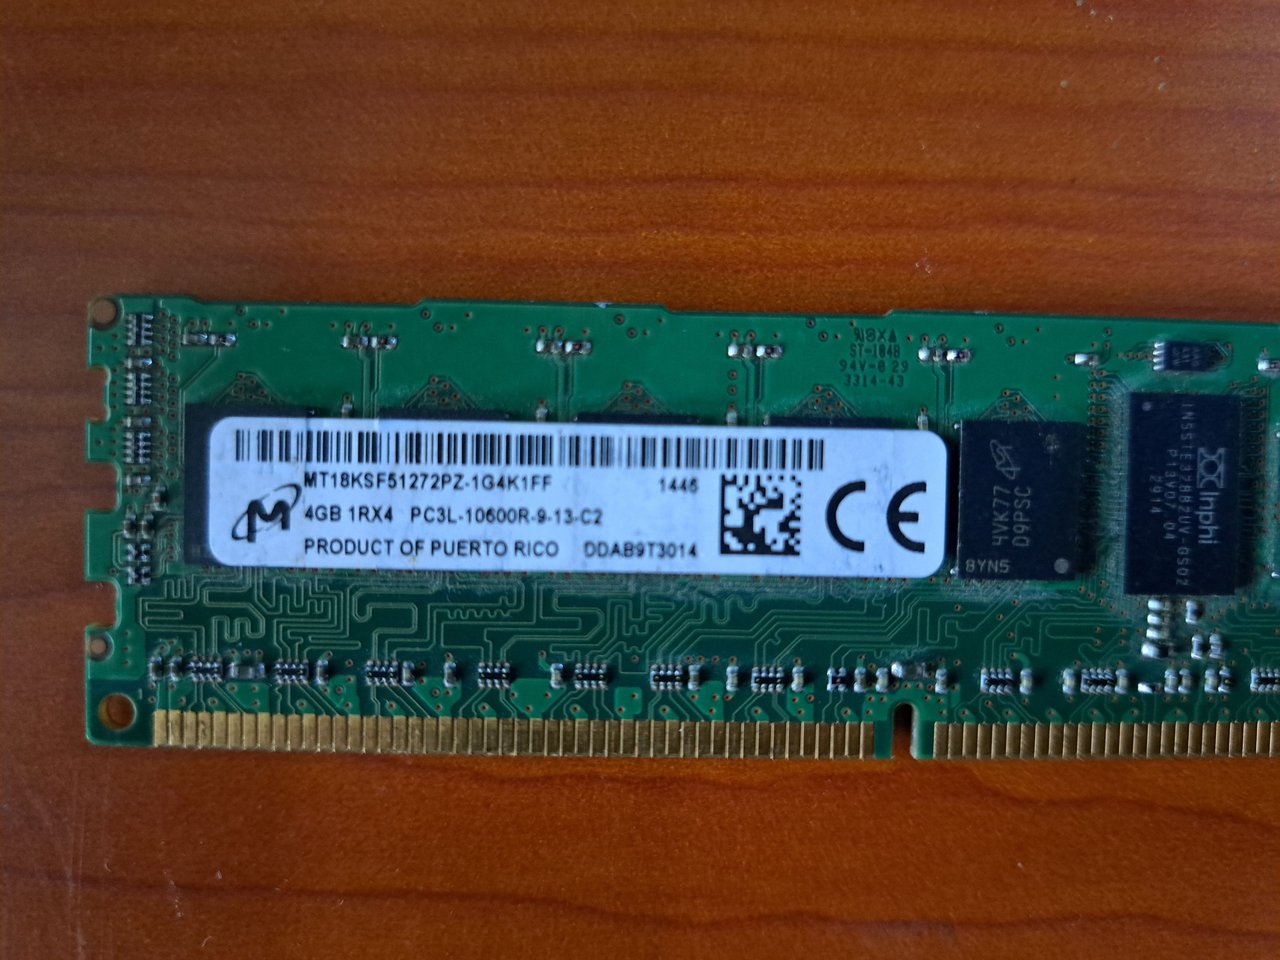
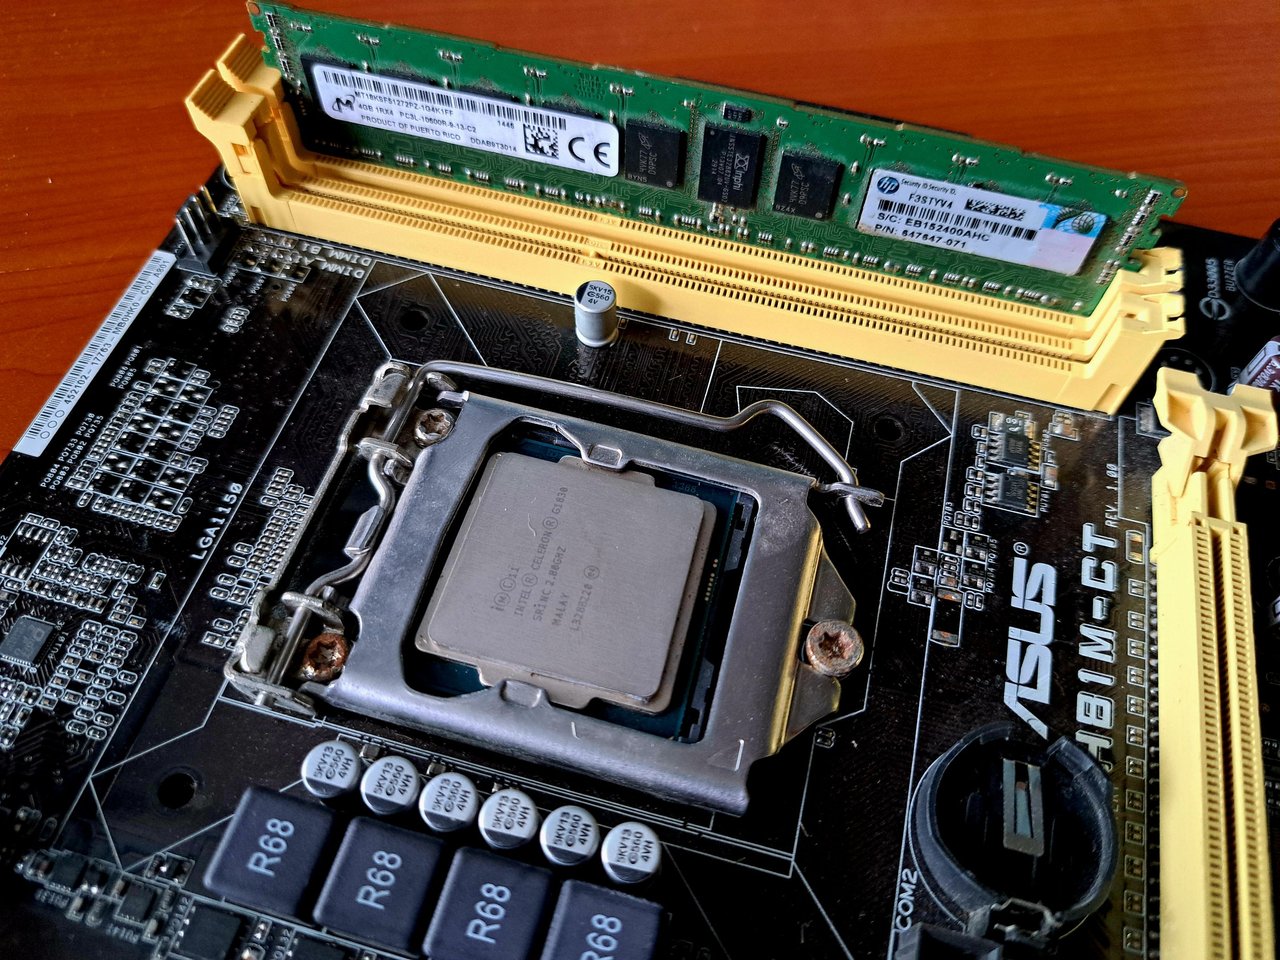
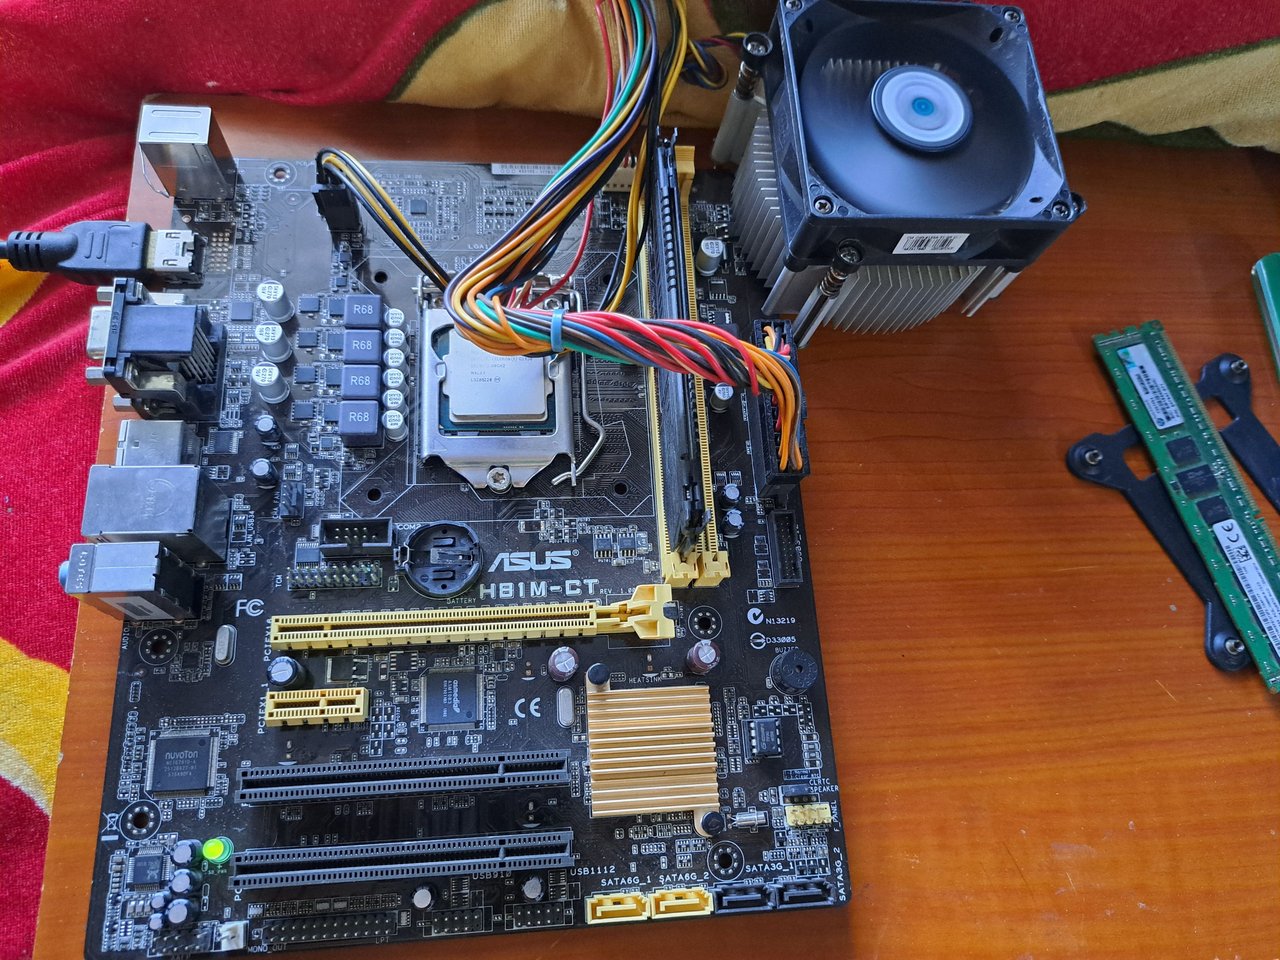
When I got home, the first thing I did was to inspect the board again for any exploded components or a short circuit that had left external burns. In the absence of any signs of any serious breakage, I removed the RAM and could tell it was a generic 4GB RAM, which wasn't bad but not great for today's demands either.
Spanish Version Here
Al llegar a casa, lo primero que hice fue inspeccionar nuevamente la placa en busca de algún componente explotado o de un cortocircuito que haya dejado quemaduras exteriores. Ante la ausencia de indicios de alguna rotura grave, retiré la memoria RAM y pude notar que era una RAM genérica de 4 GB, lo cual no era malo pero tampoco muy bueno para las exigencias actuales.
 |
 |
 |
 |
 |
 |
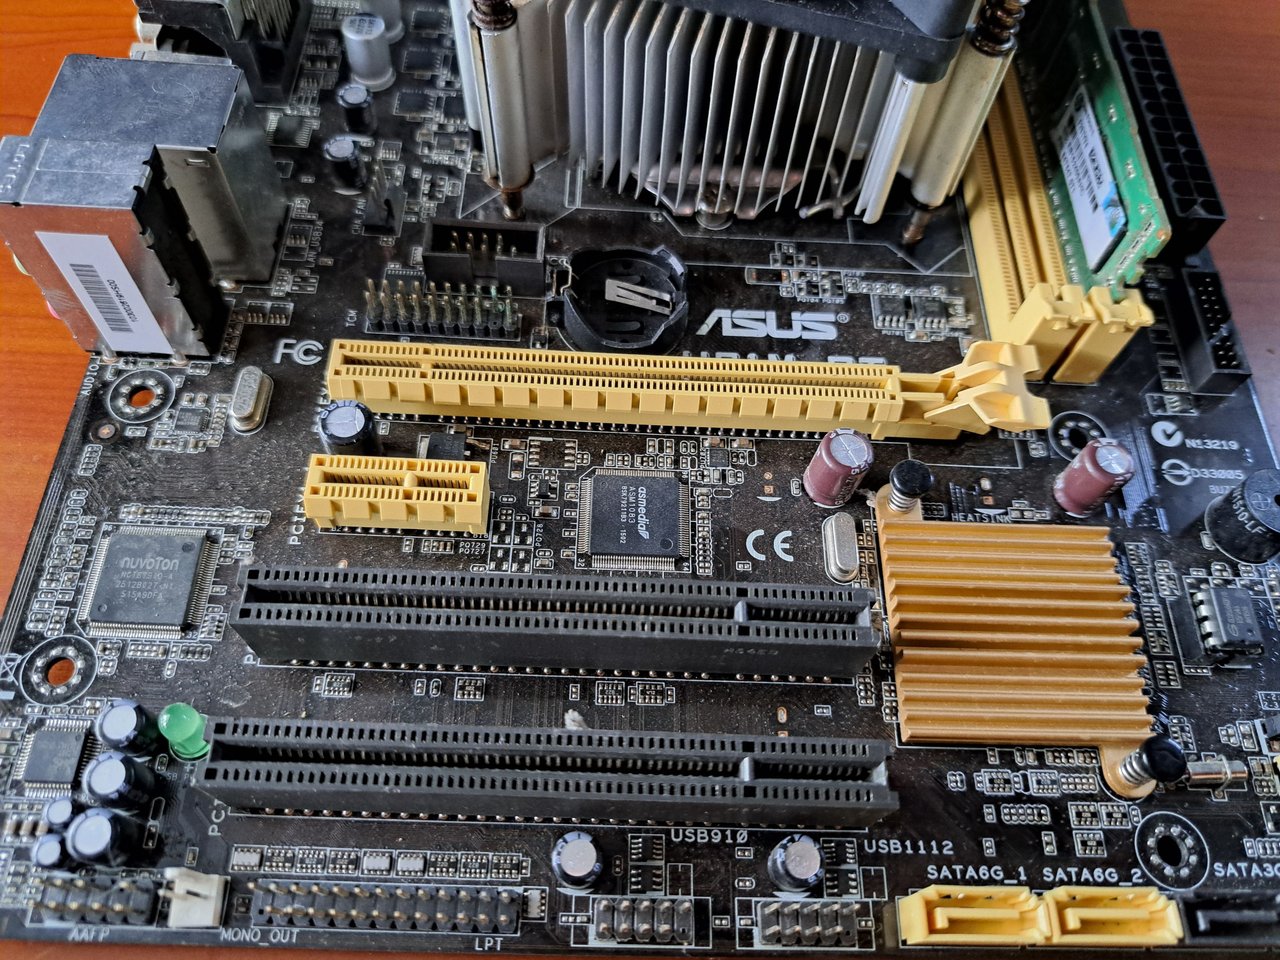
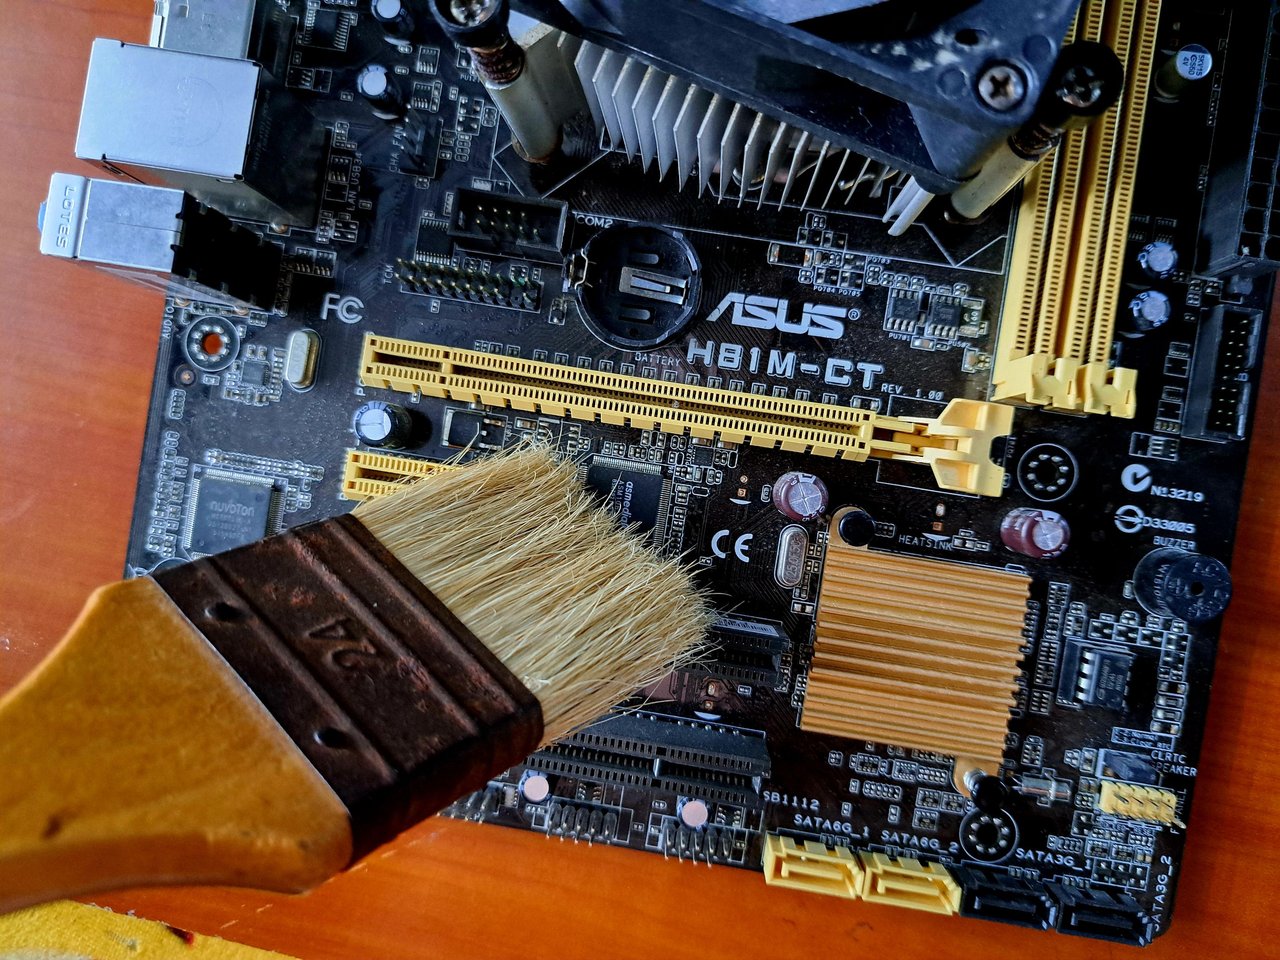
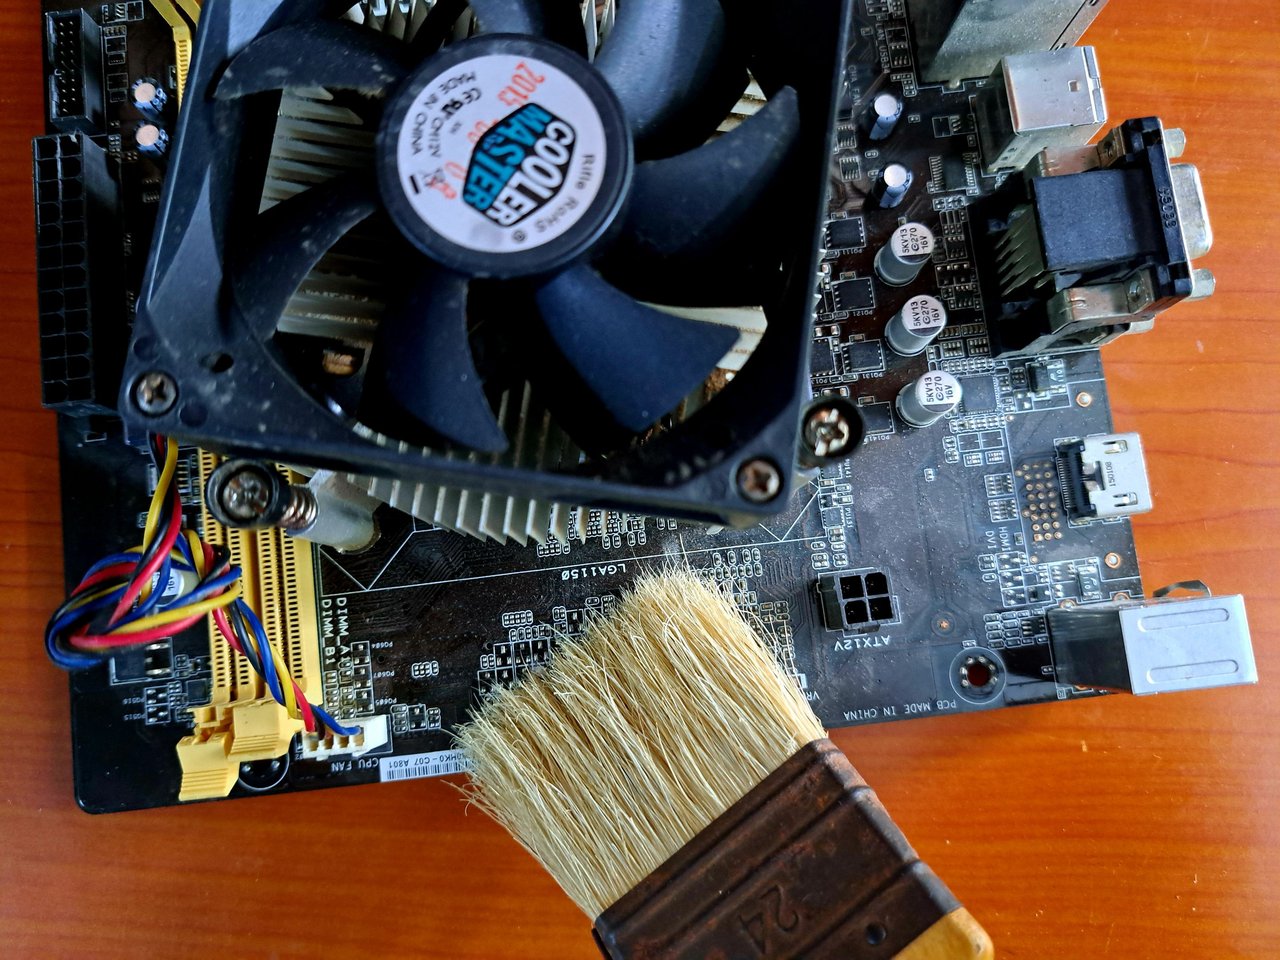
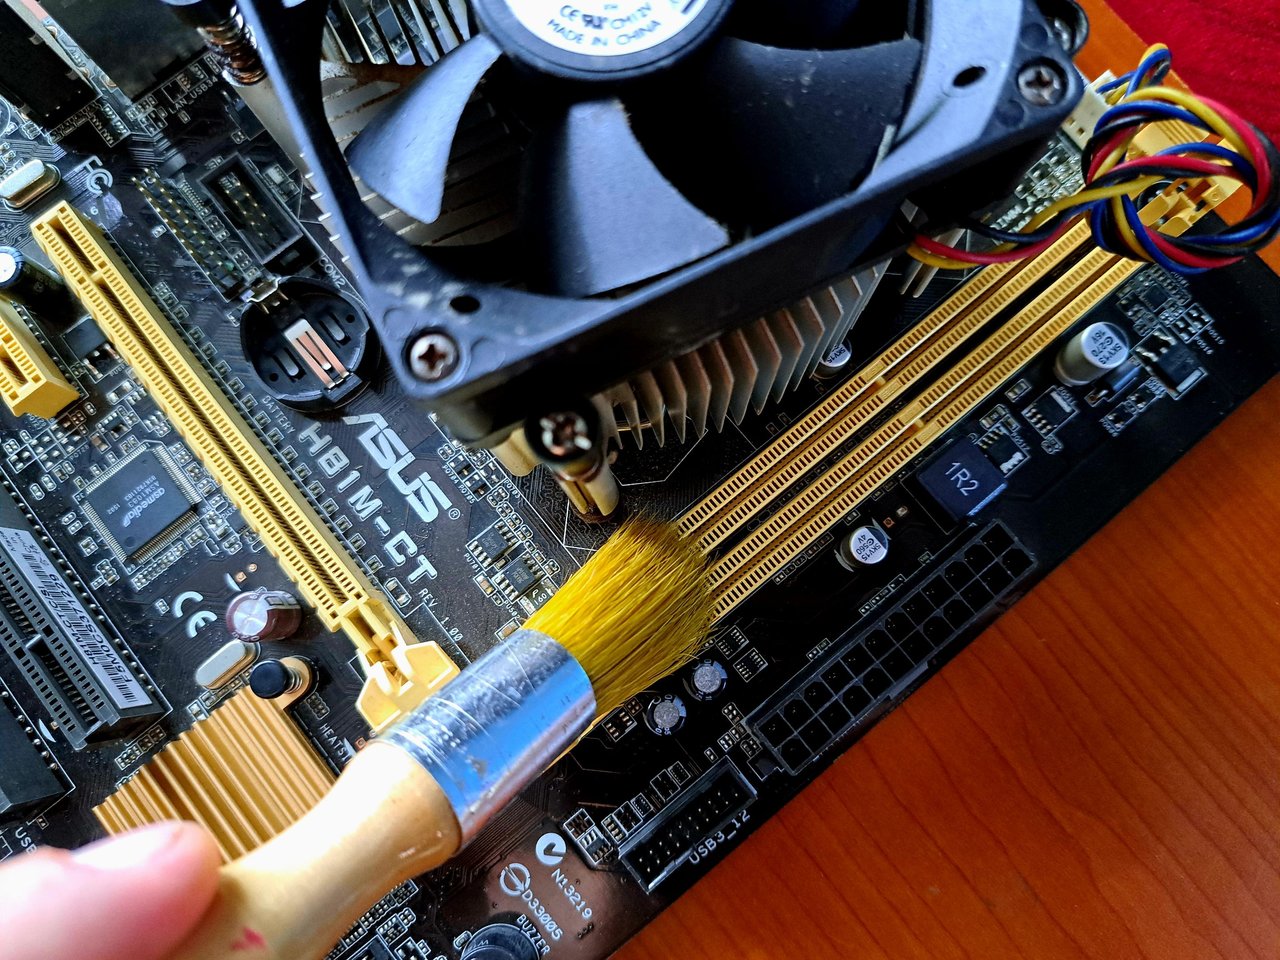
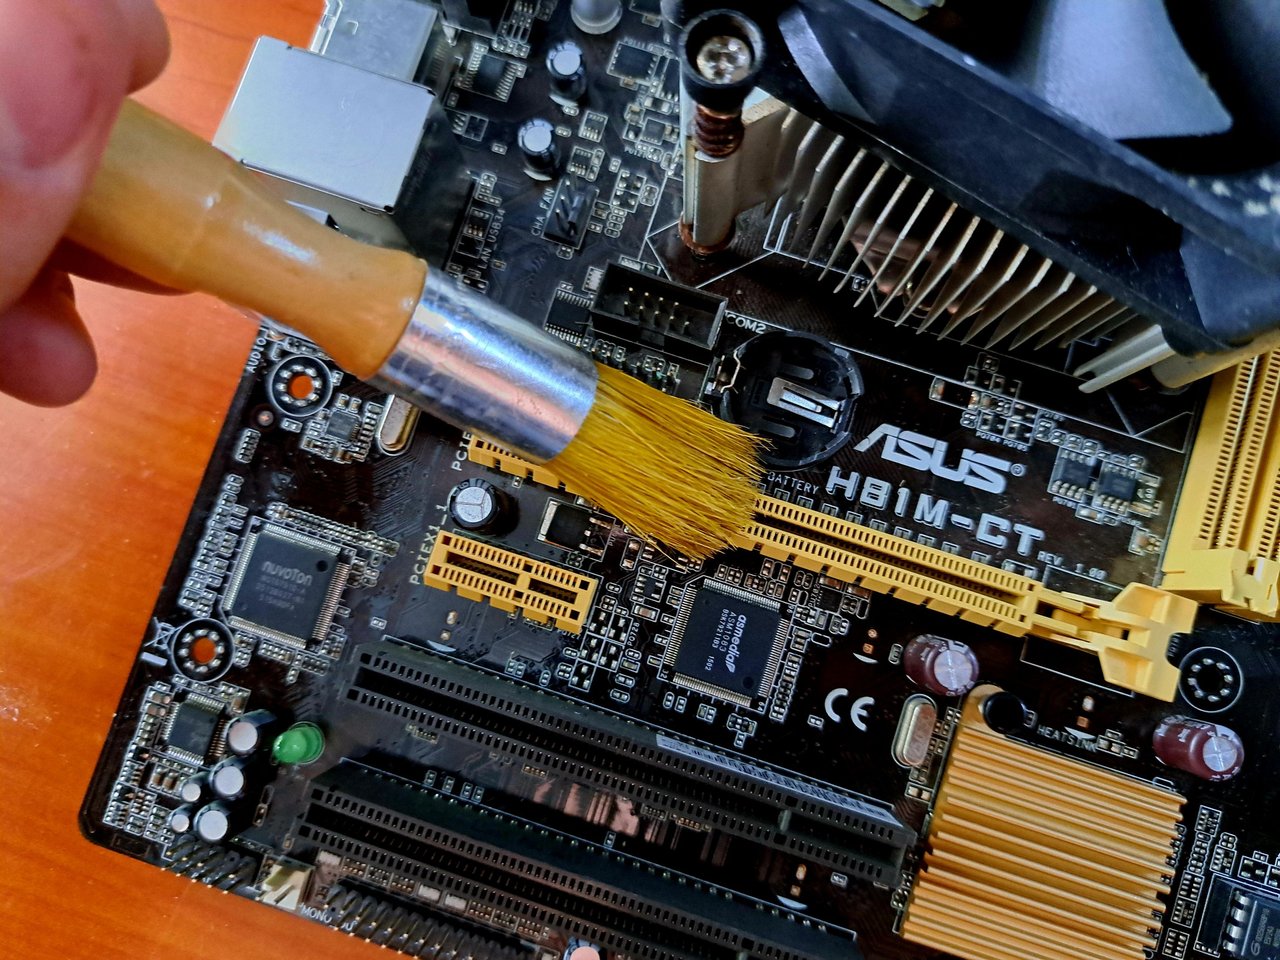
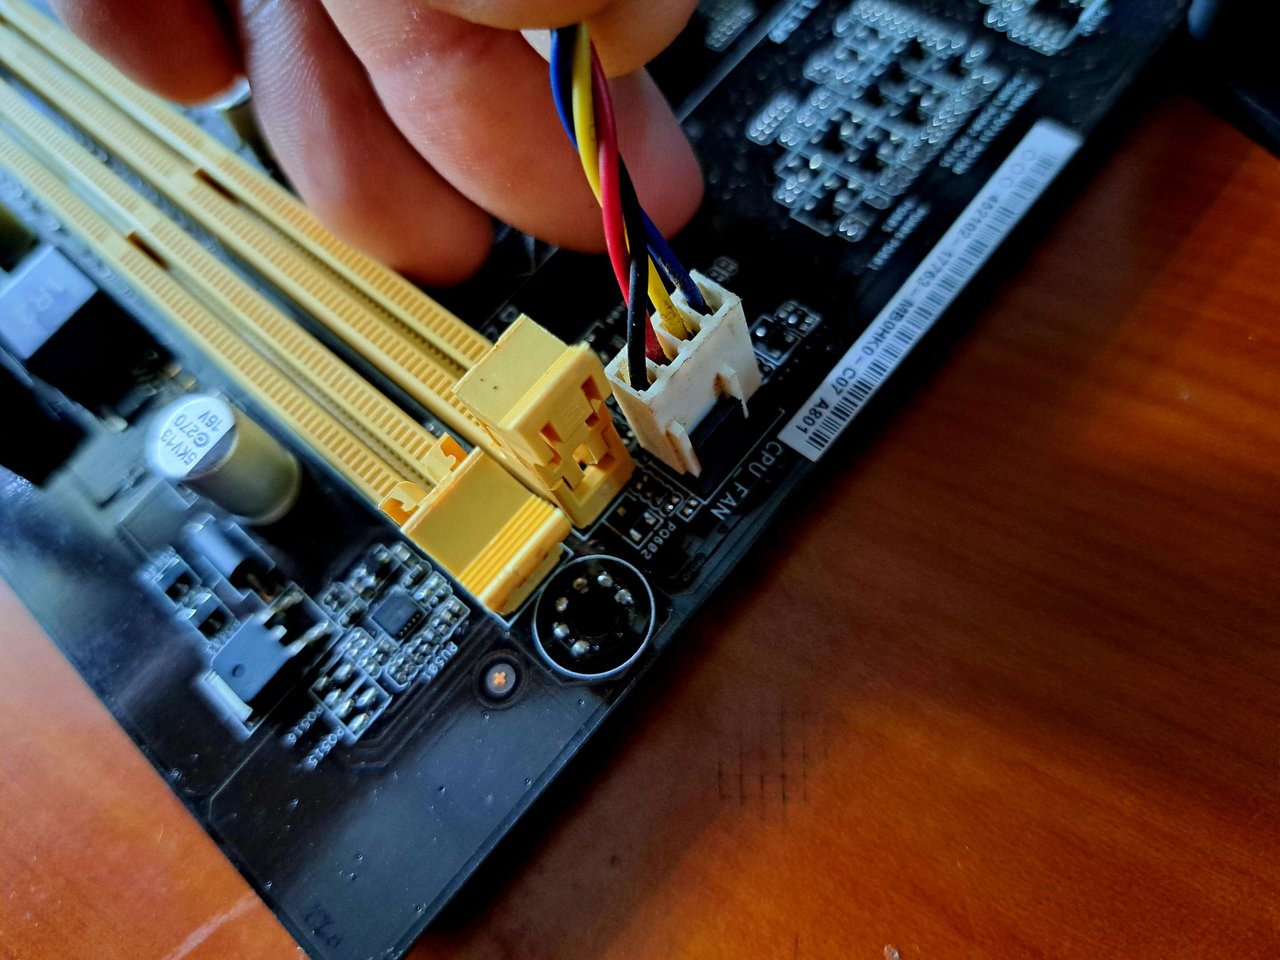
Normally, with this kind of components, the first thing I would do would be to connect it to a power supply and turn it on to see what kind of error it throws, but seeing the place where it was stored, I didn't want to risk damaging it any more. That's how I decided to give a deep cleaning to all the slots and then disconnect the heatsink and the processor.
Spanish Version Here
Normalmente, ante este tipo de componentes, lo primero que haría sería conectarla a una fuente y encenderla para ver qué tipo de error lanza, pero al ver el lugar donde la tenían almacenada, no quise arriesgarme a dañarla más. Así fue como decidí darle una limpieza en profundidad a todas las ranuras para luego desconectar el disipador y el procesador.
 |
 |
 |
 |
 |
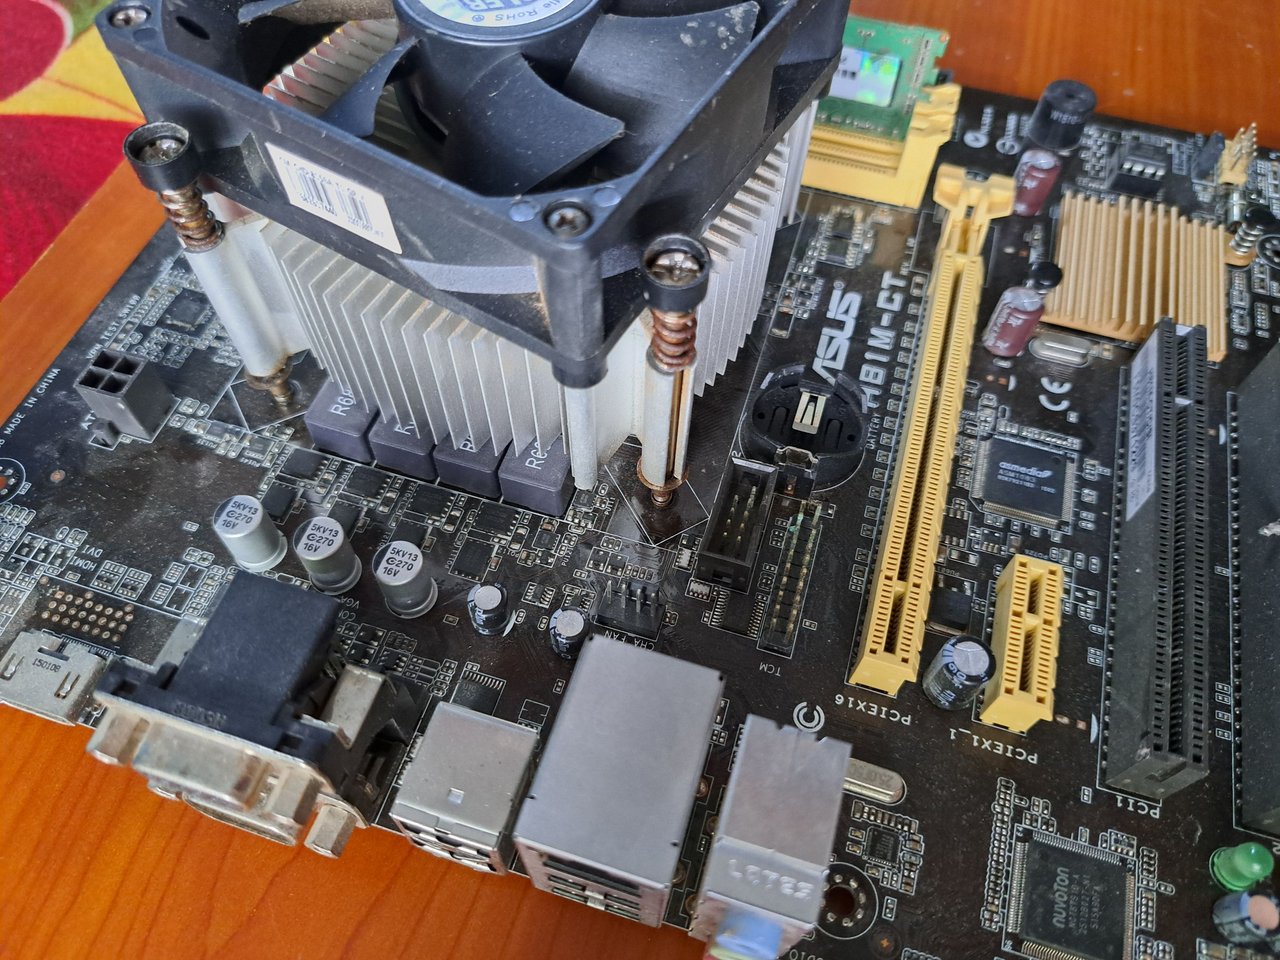
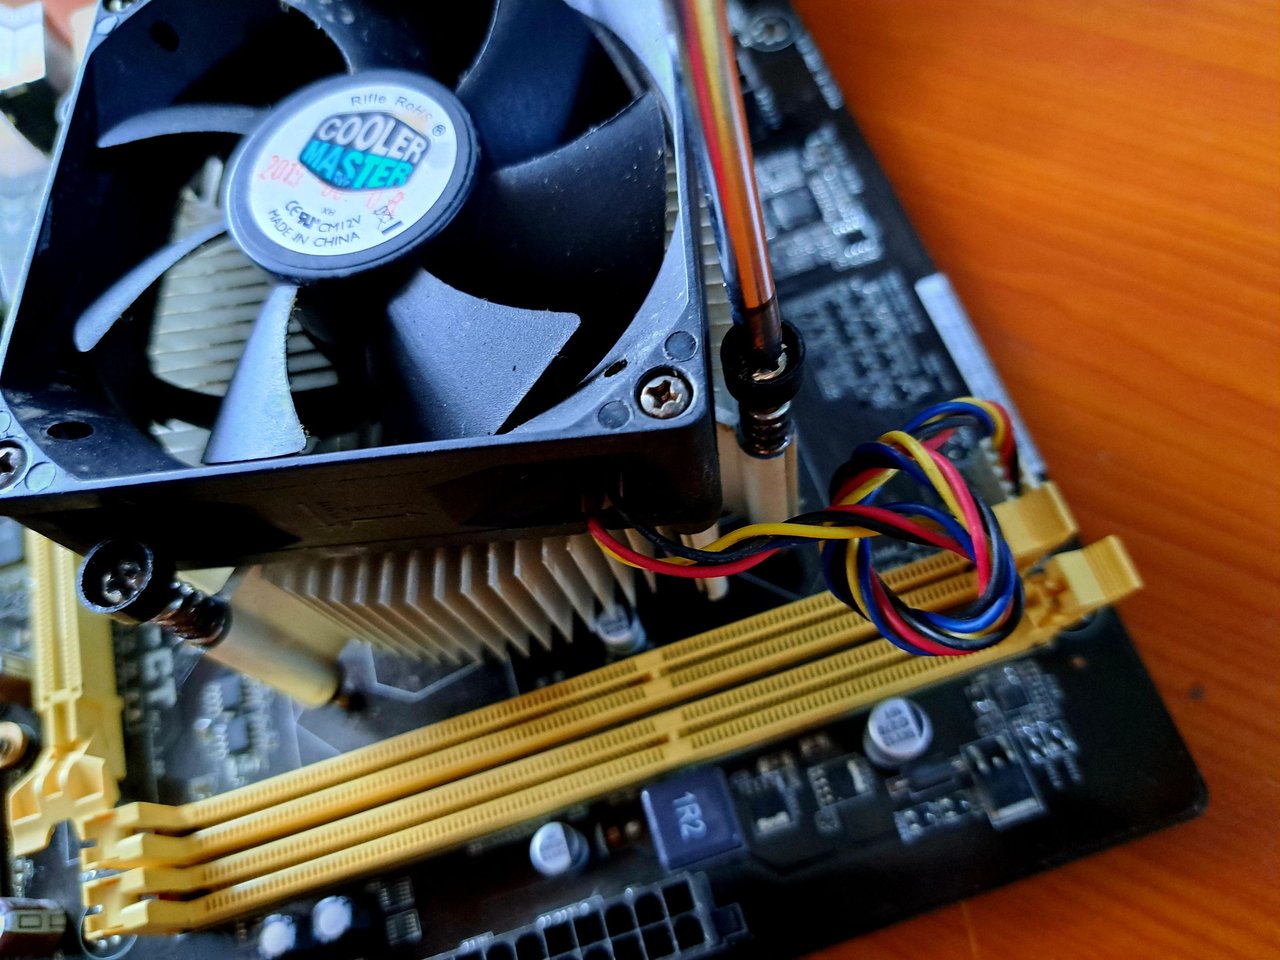
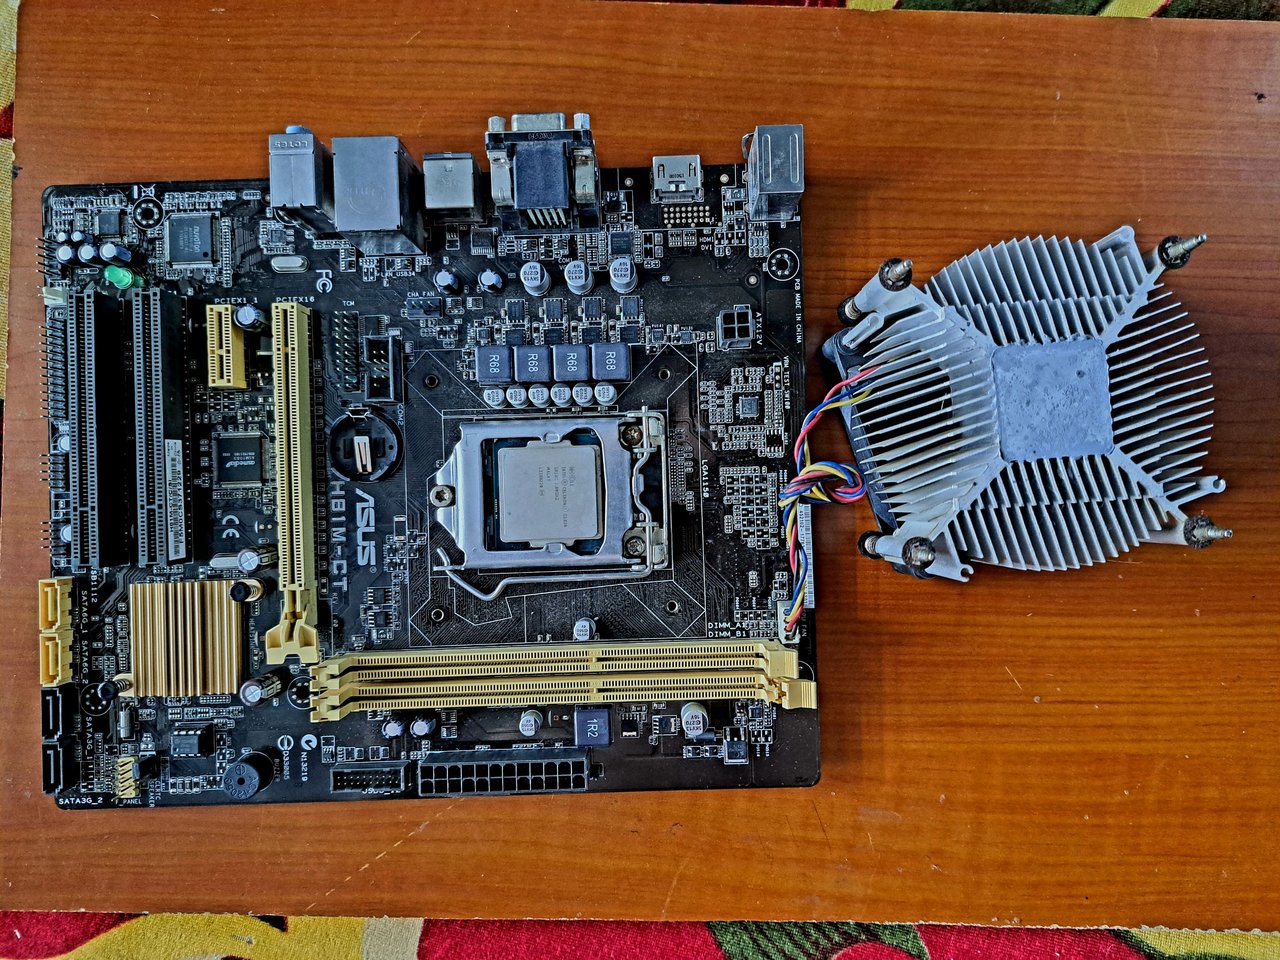
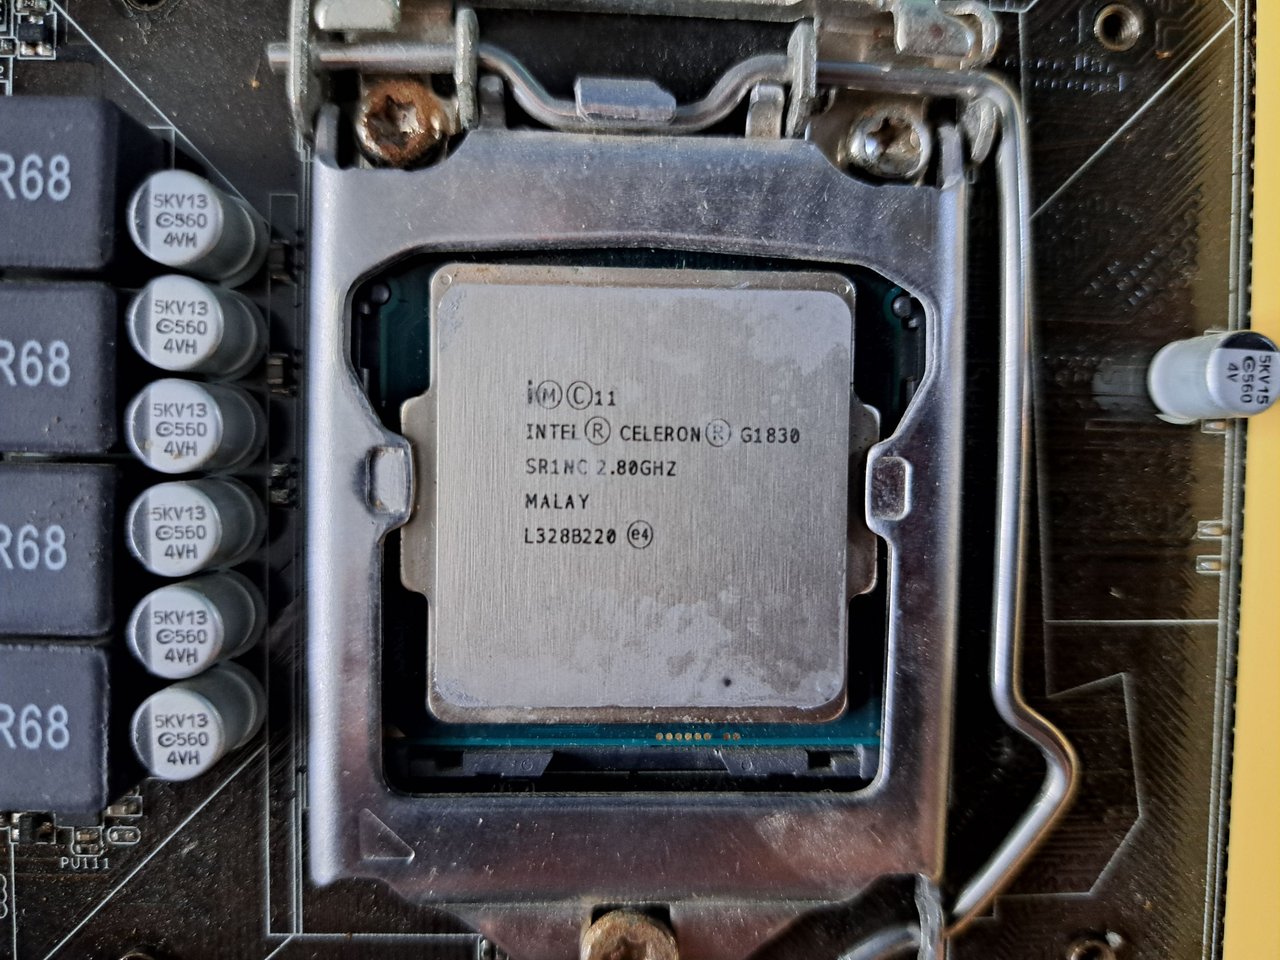
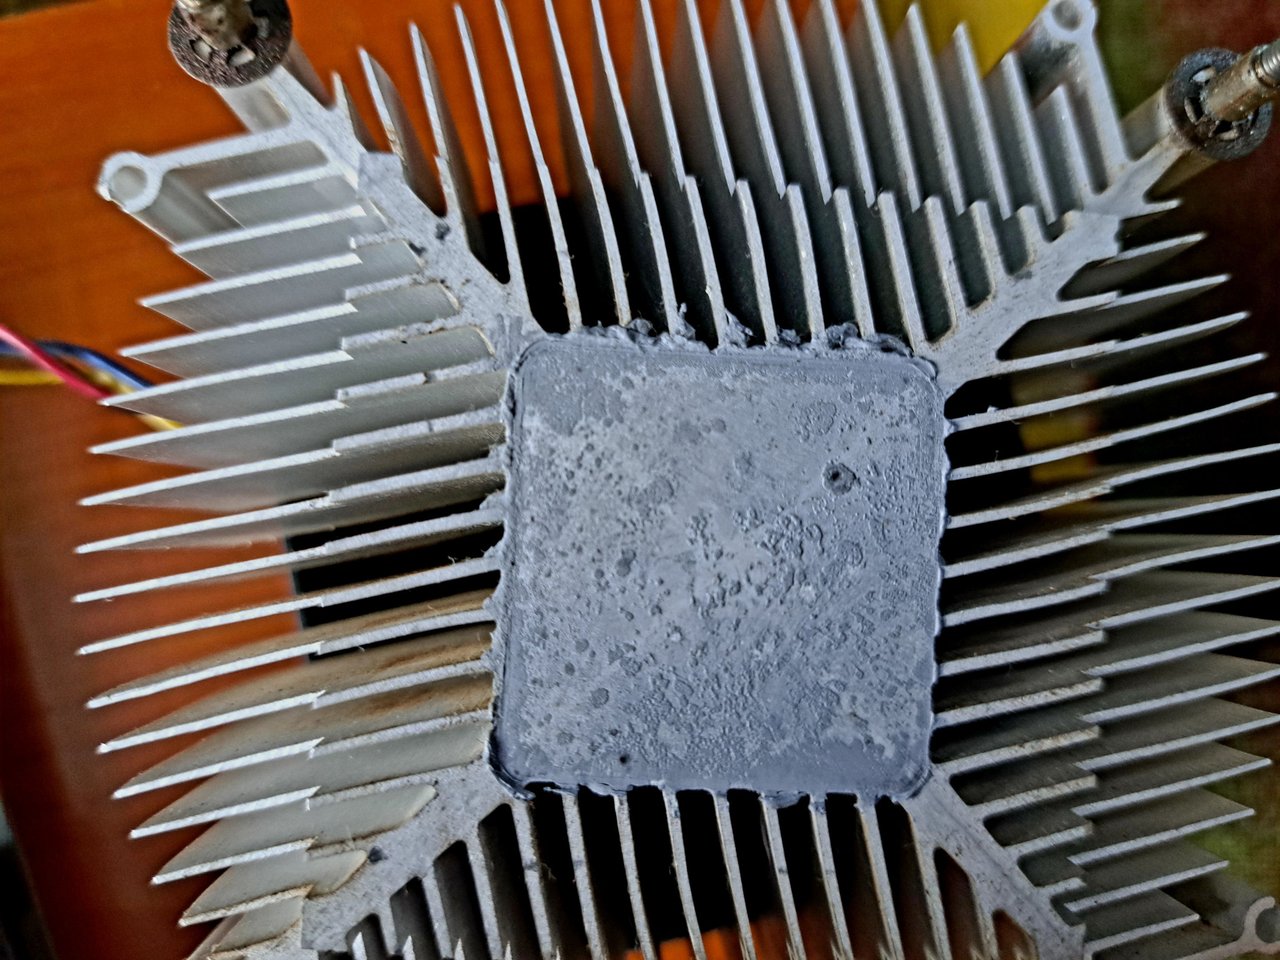
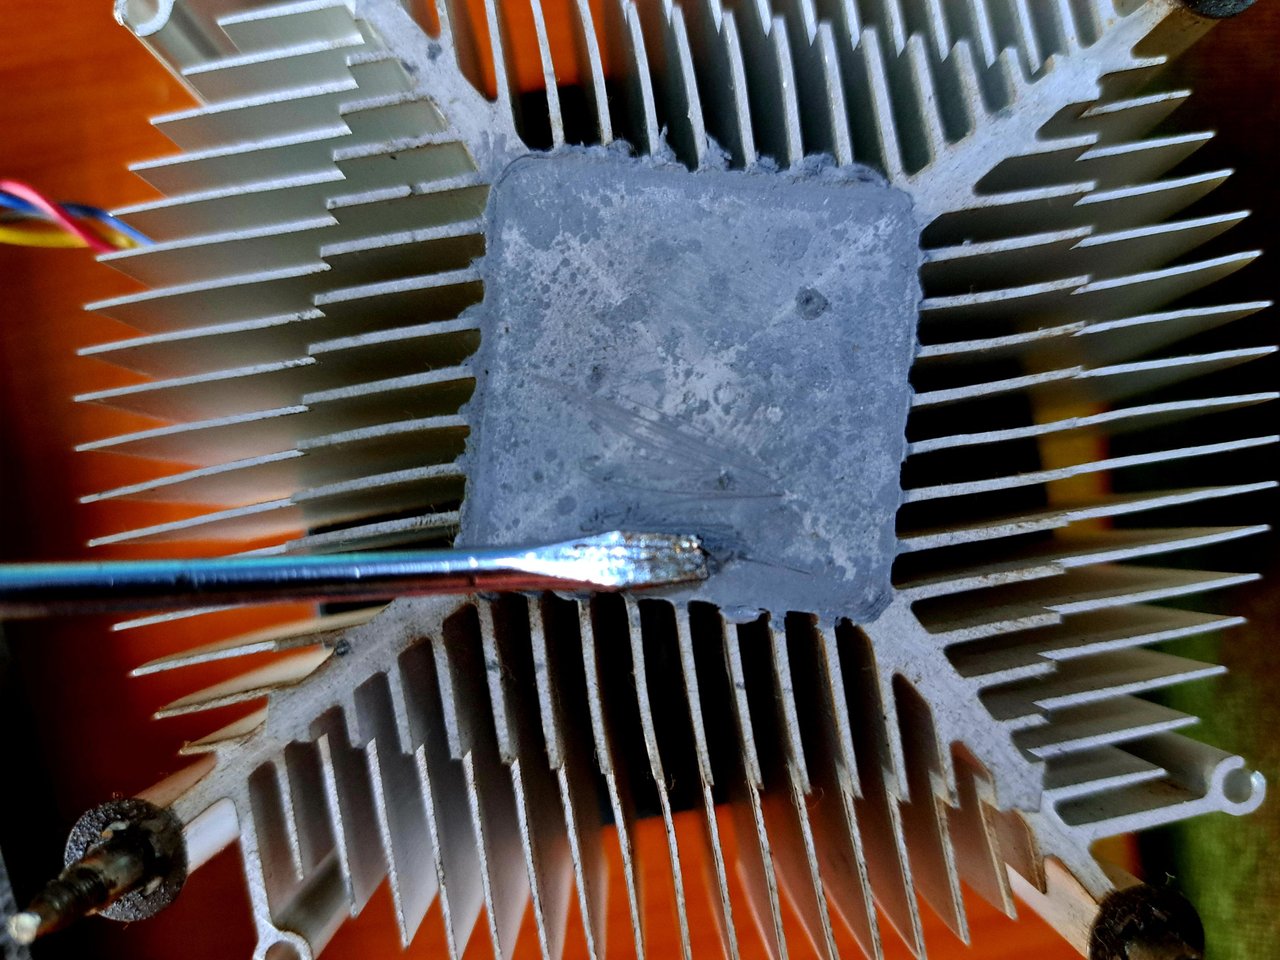
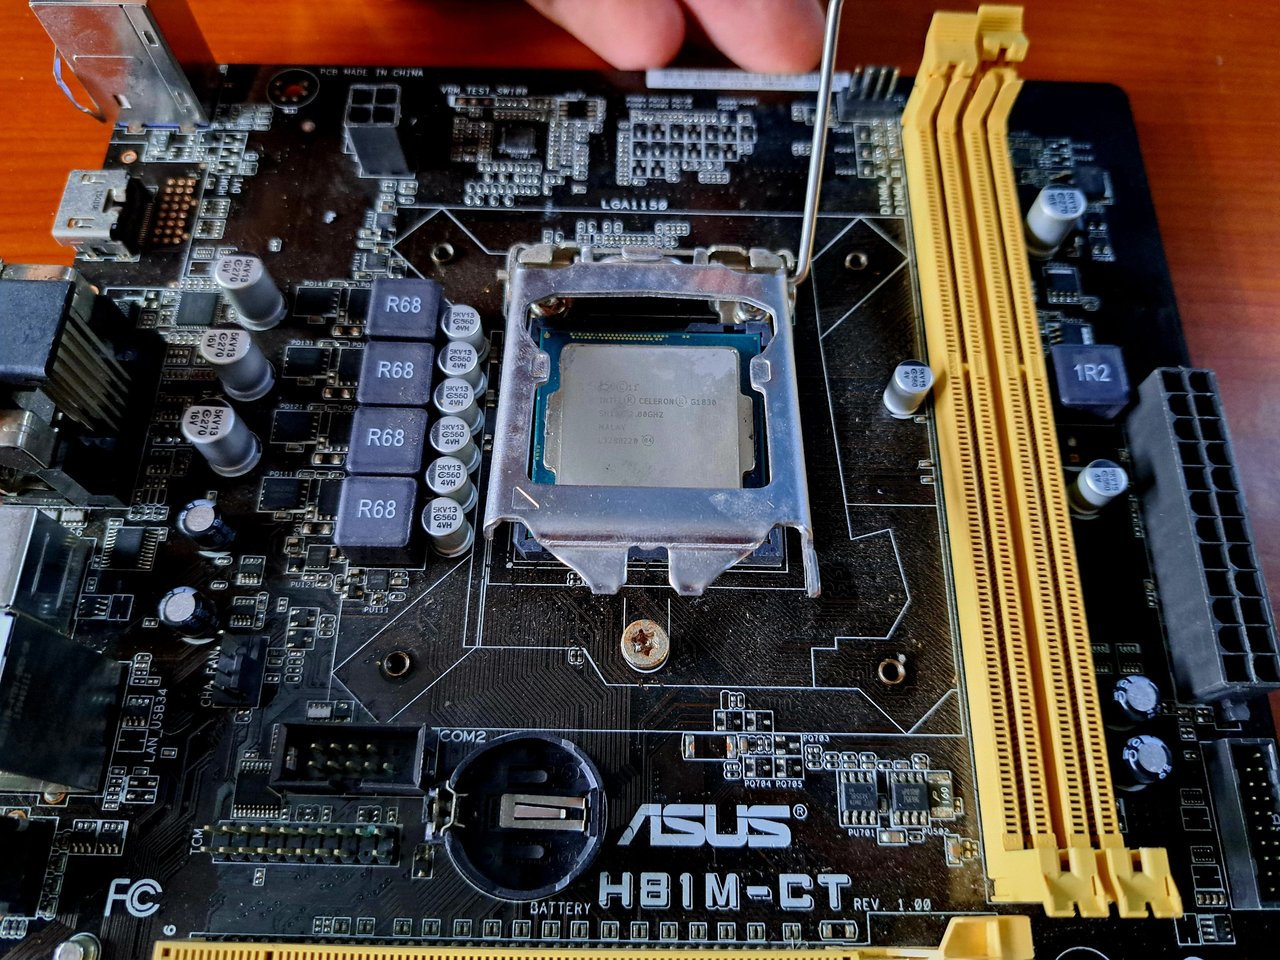
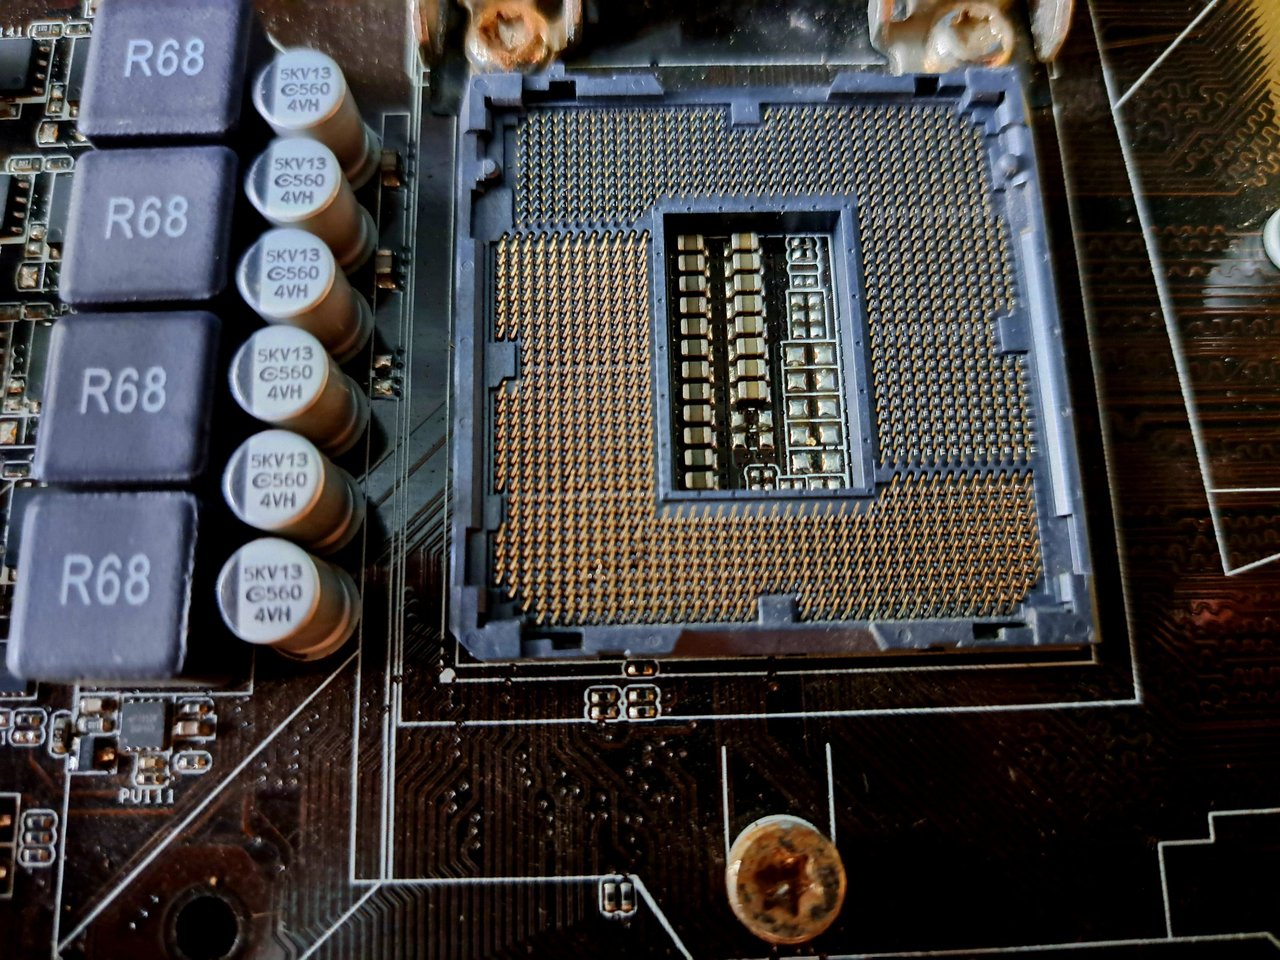
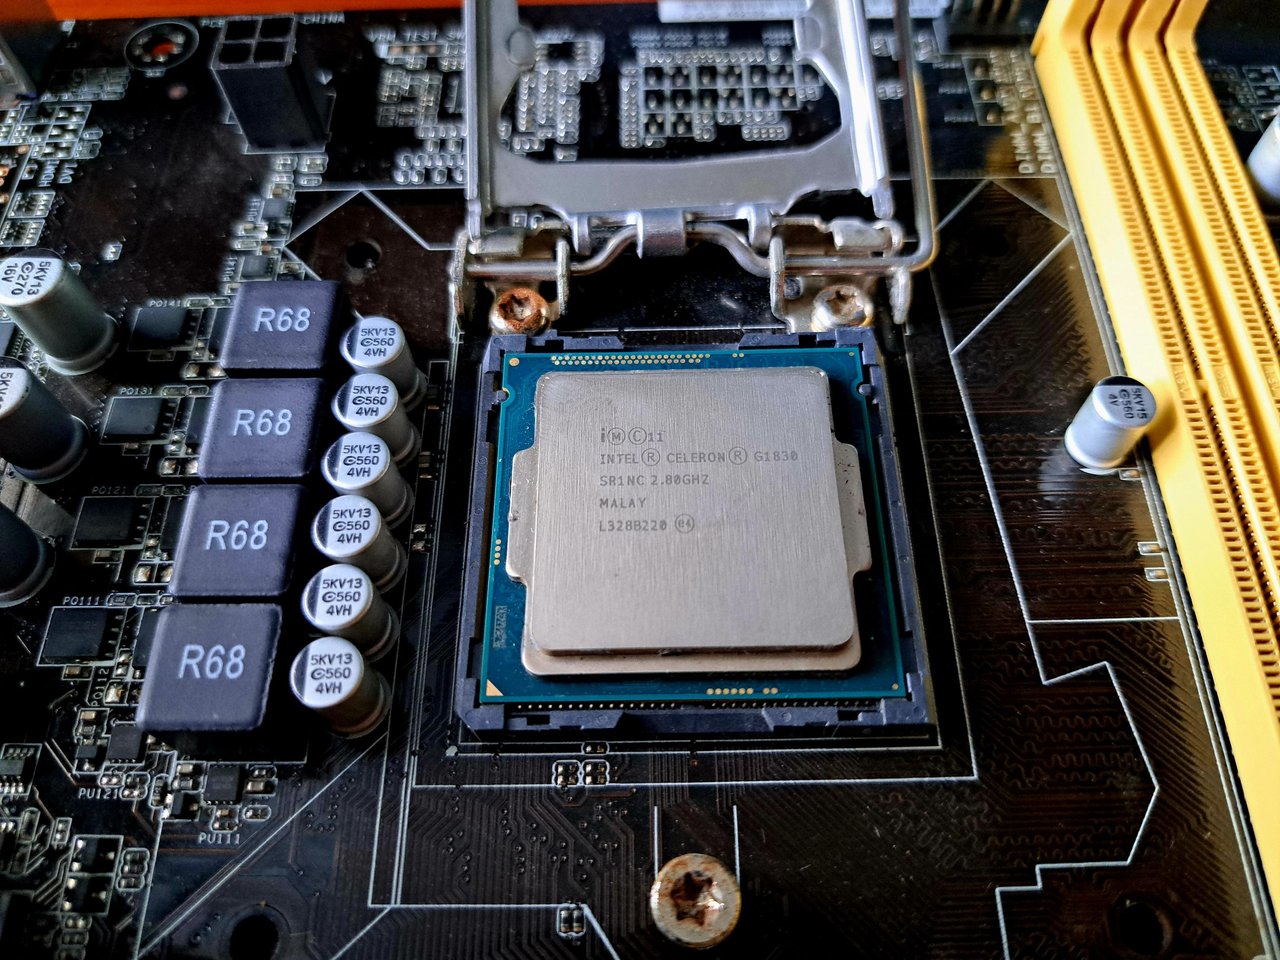
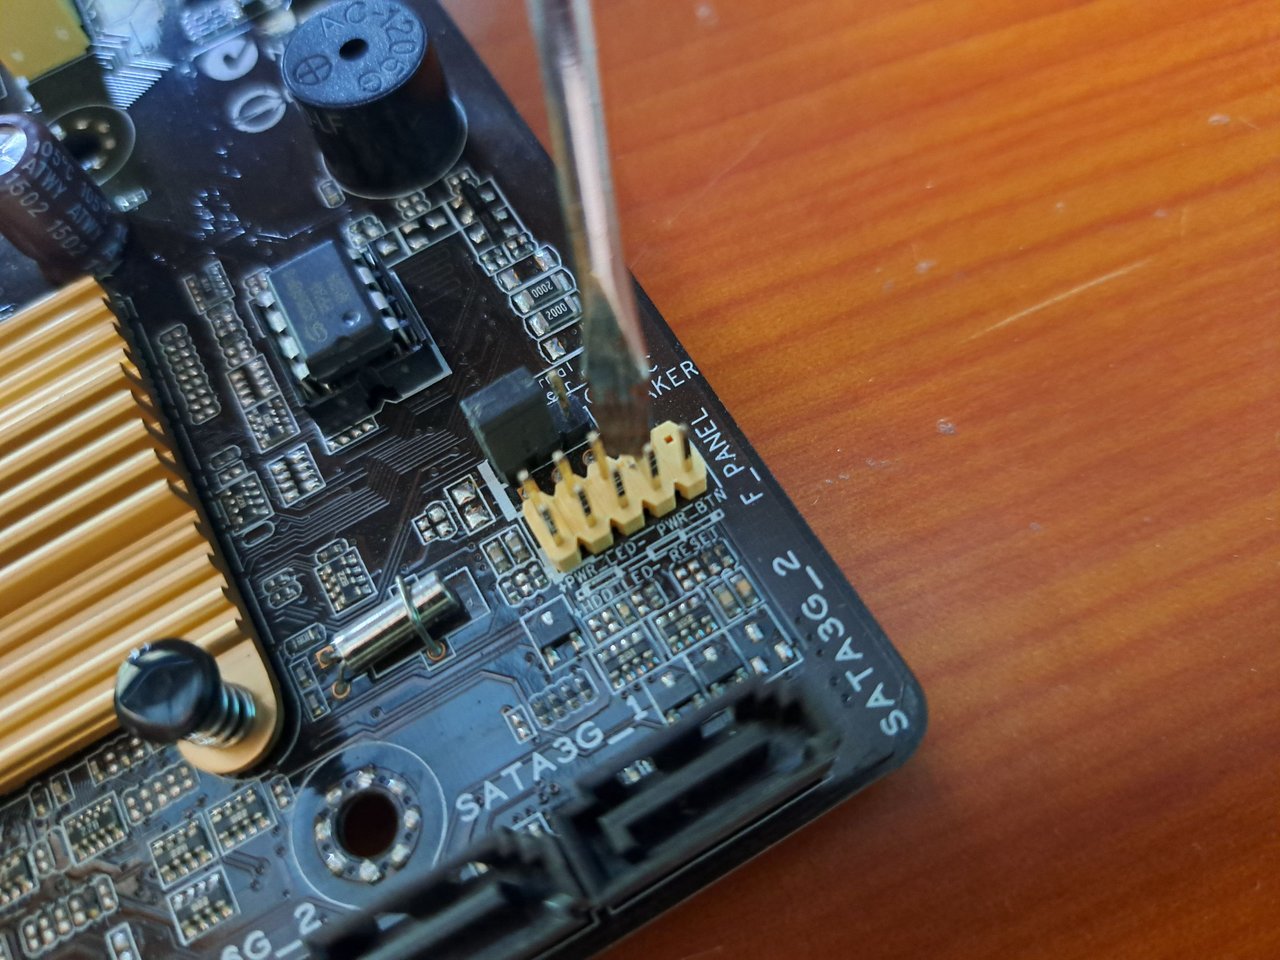
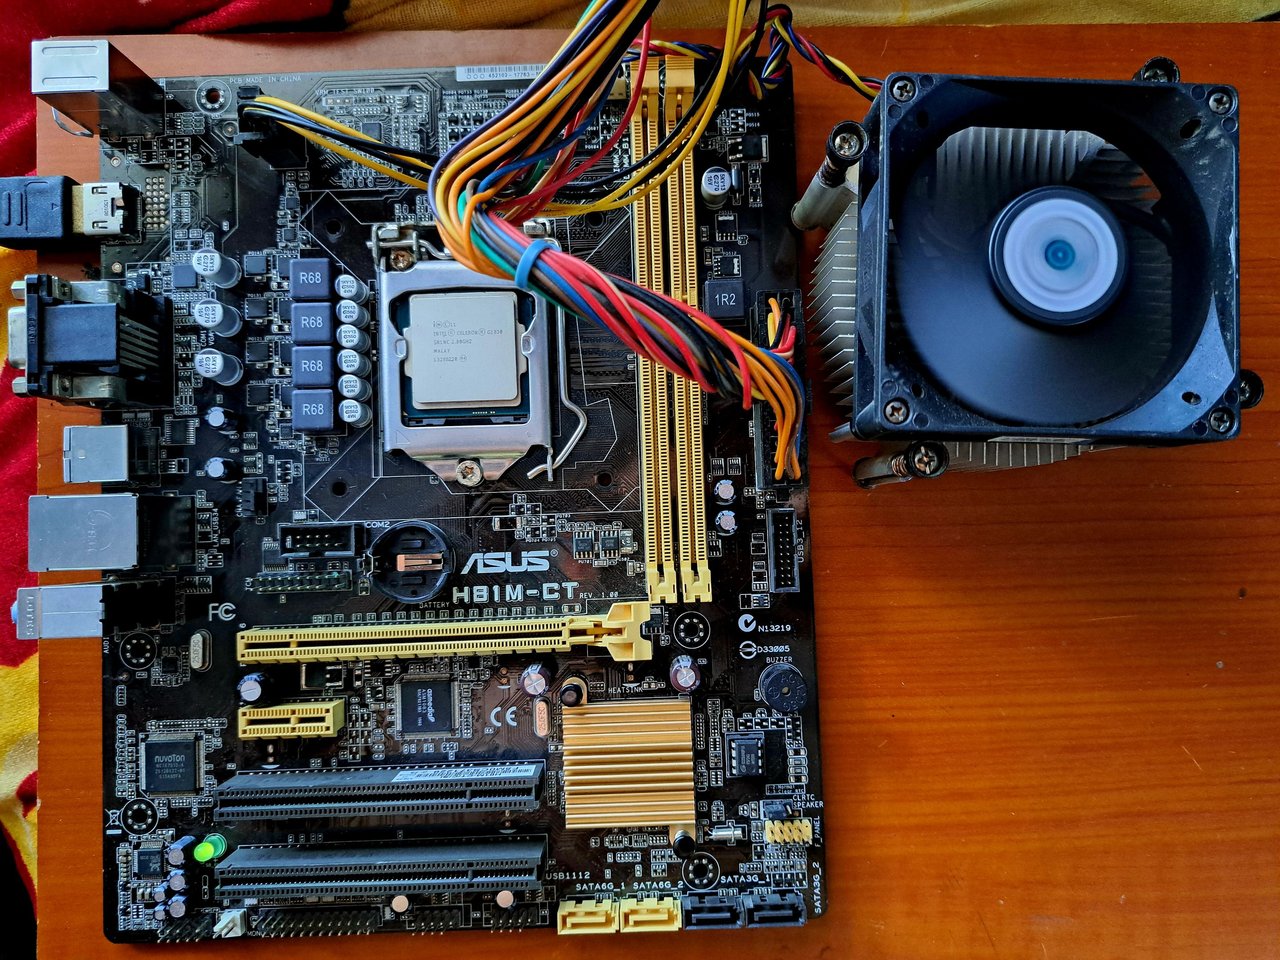
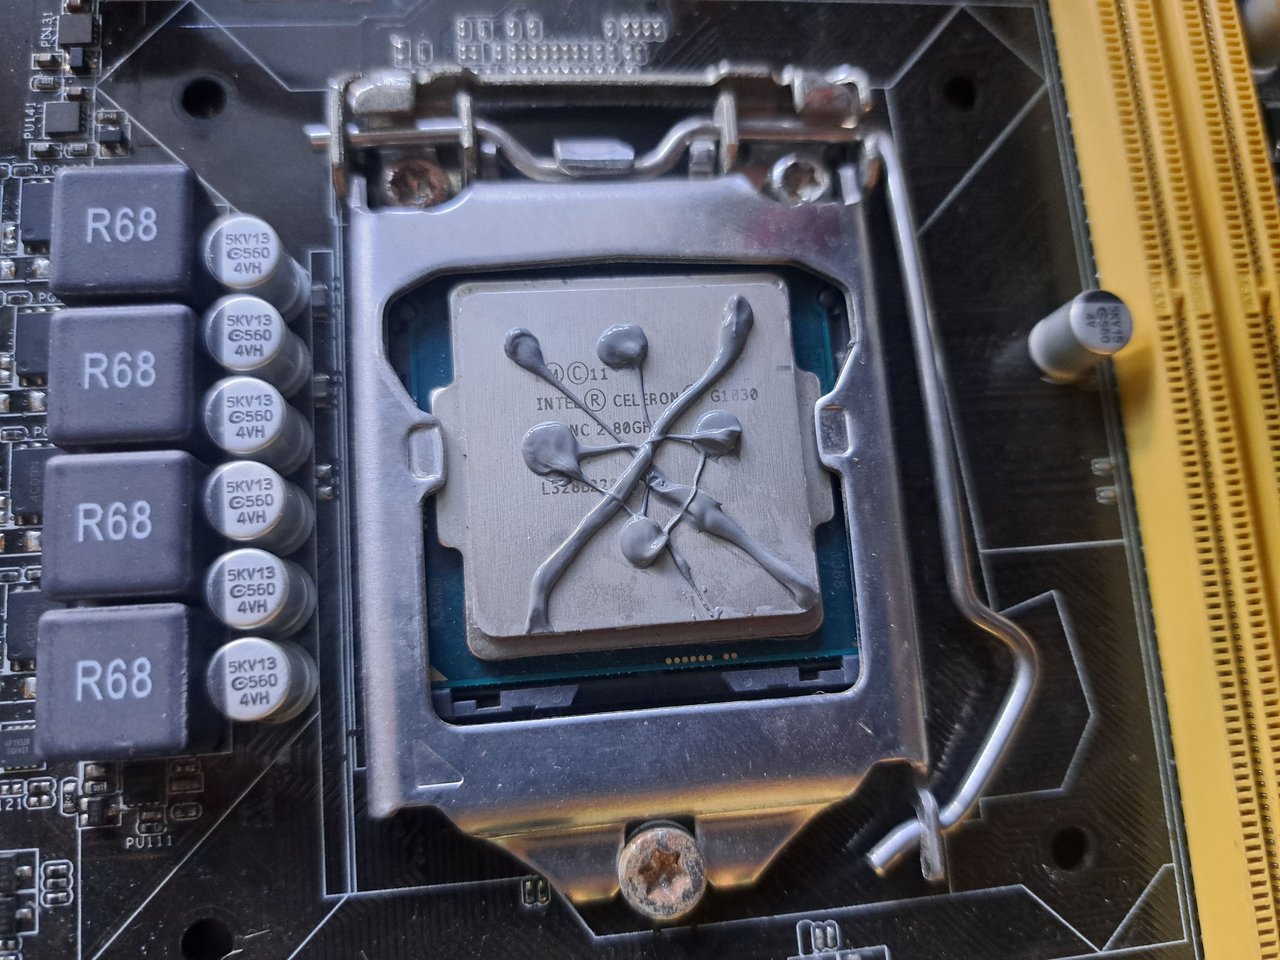
When everything was cleaner, I proceeded to remove the heatsink to access the processor and the power phase coils, since sometimes there are power outages. To my surprise, the heatsink was an Intel Celeron G1830, which is not common to see in this type of boards, since I usually find boards with a Core i5-4160. What worried me was to see that the processor had no thermal paste at all, and the heatsink had some, but it had dried some time ago. You can see in one of the pictures that I scraped off the thermal paste using a screwdriver.
Spanish Version Here
Cuando todo estaba más limpio, procedí a retirar el disipador para acceder al procesador y a las bobinas de las fases de alimentación, ya que a veces hay cortes eléctricos. Para mi sorpresa, el disipador era un Intel Celeron G1830, lo cual no es común ver en este tipo de placas, puesto que normalmente encuentro placas con un Core i5-4160. Lo que me preocupó fue ver que el procesador no tenía pasta térmica en absoluto, y el disipador tenía un poco, pero ya se había secado hace tiempo. Pueden ver en una de las fotos que raspo la pasta térmica utilizando un desarmador.
 |
 |
 |
 |
 |
 |
 |
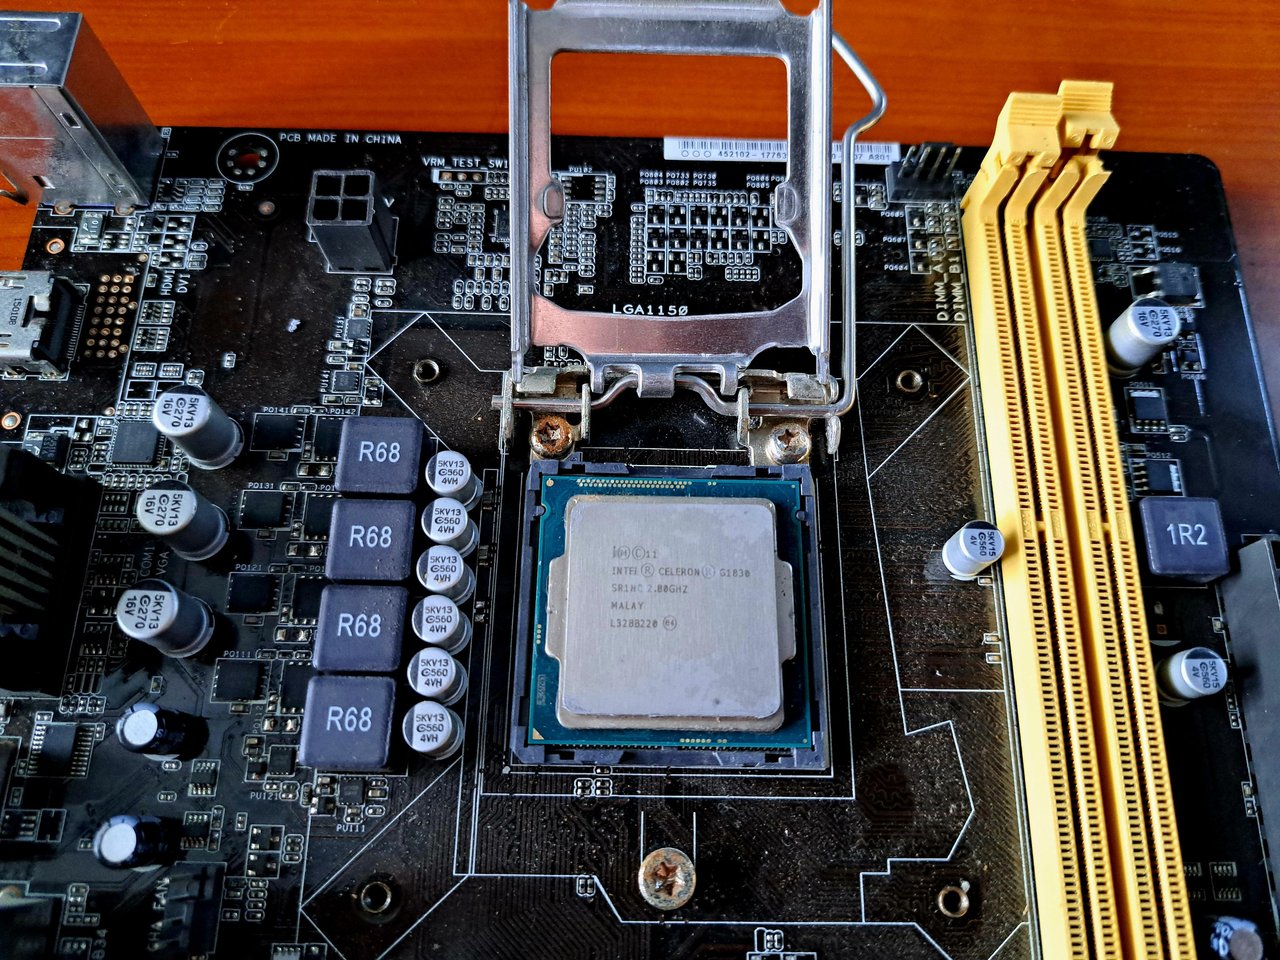
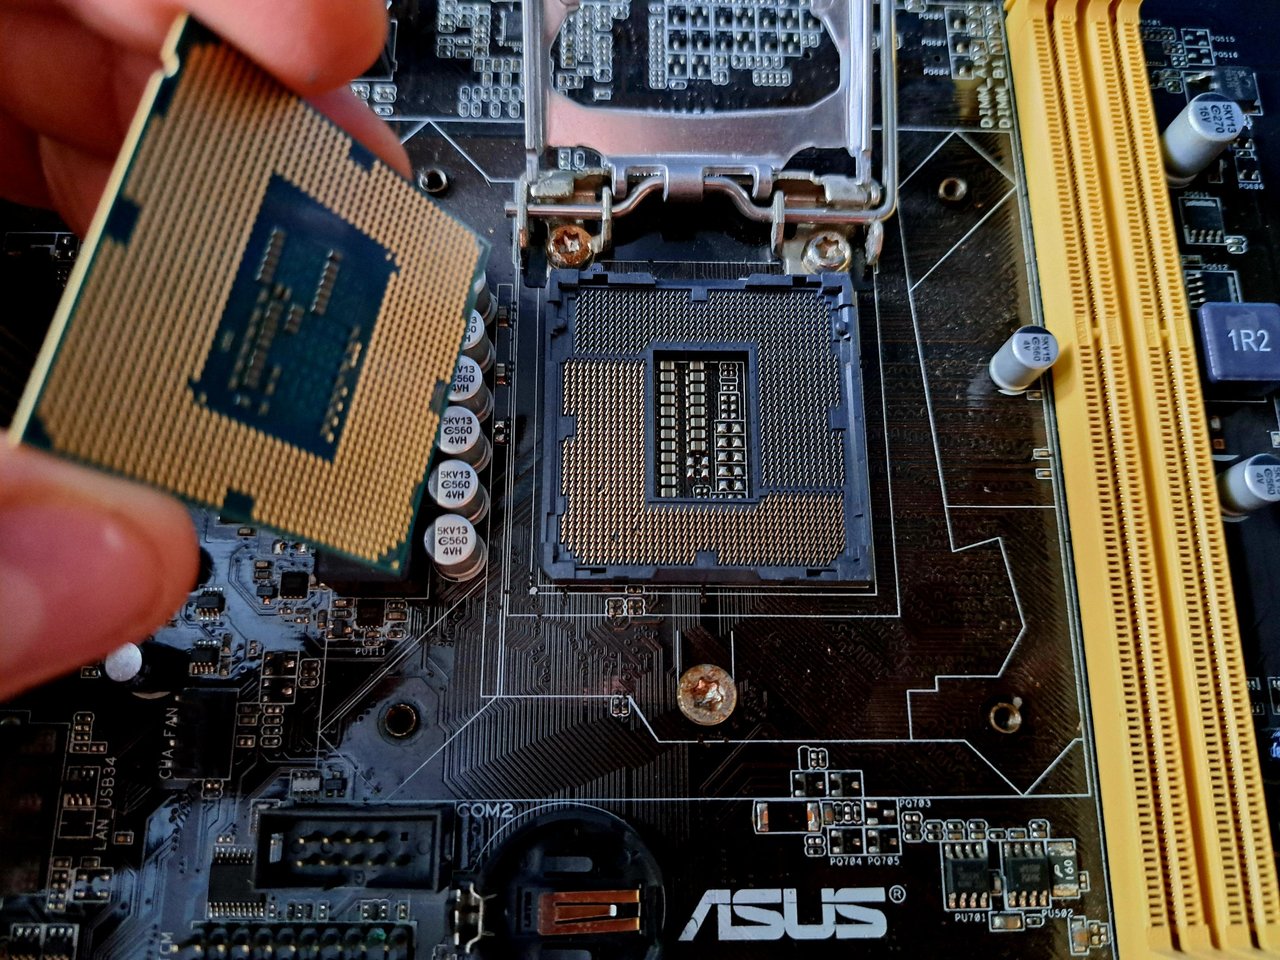
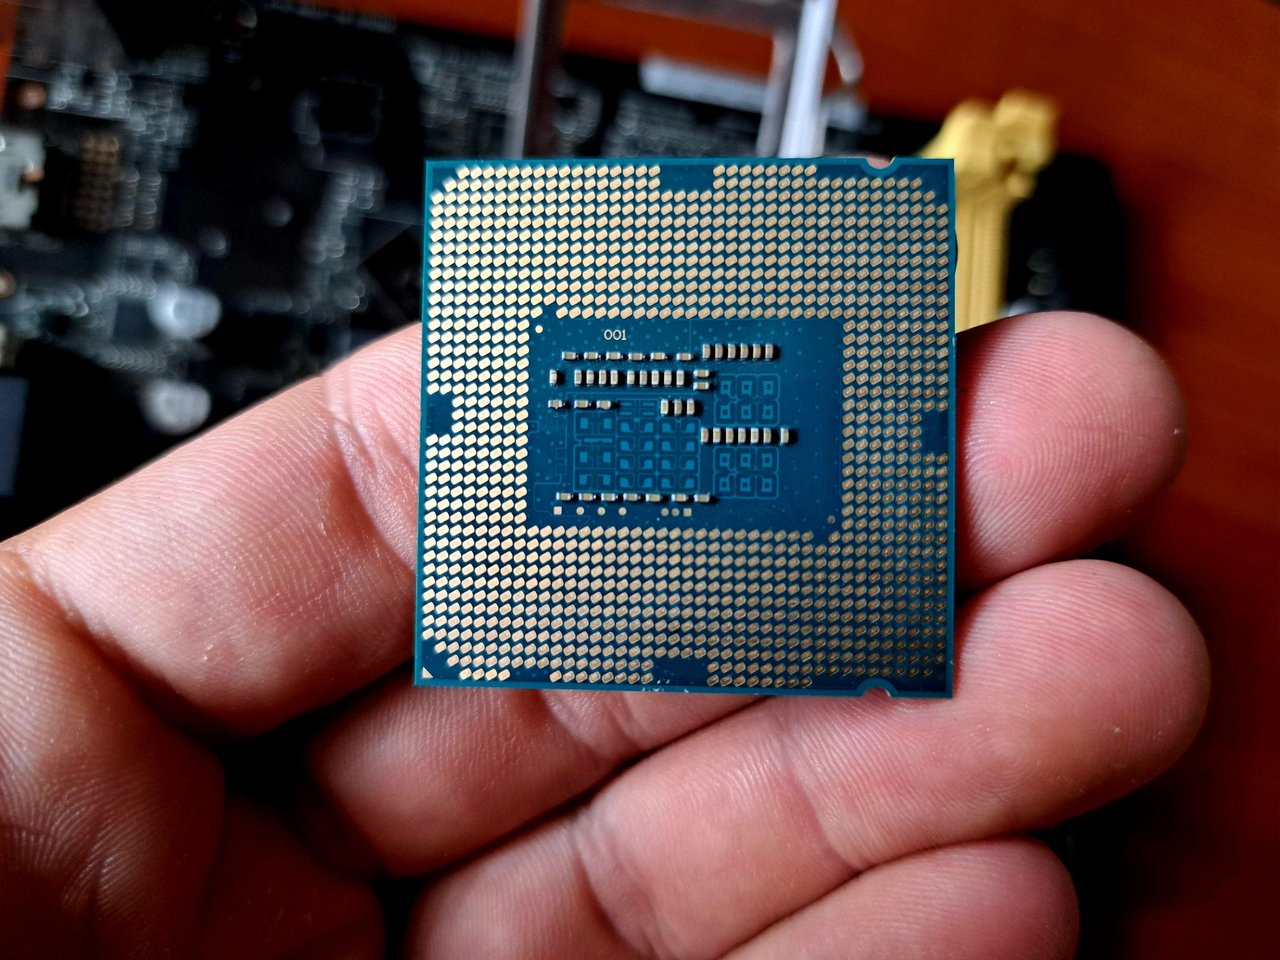
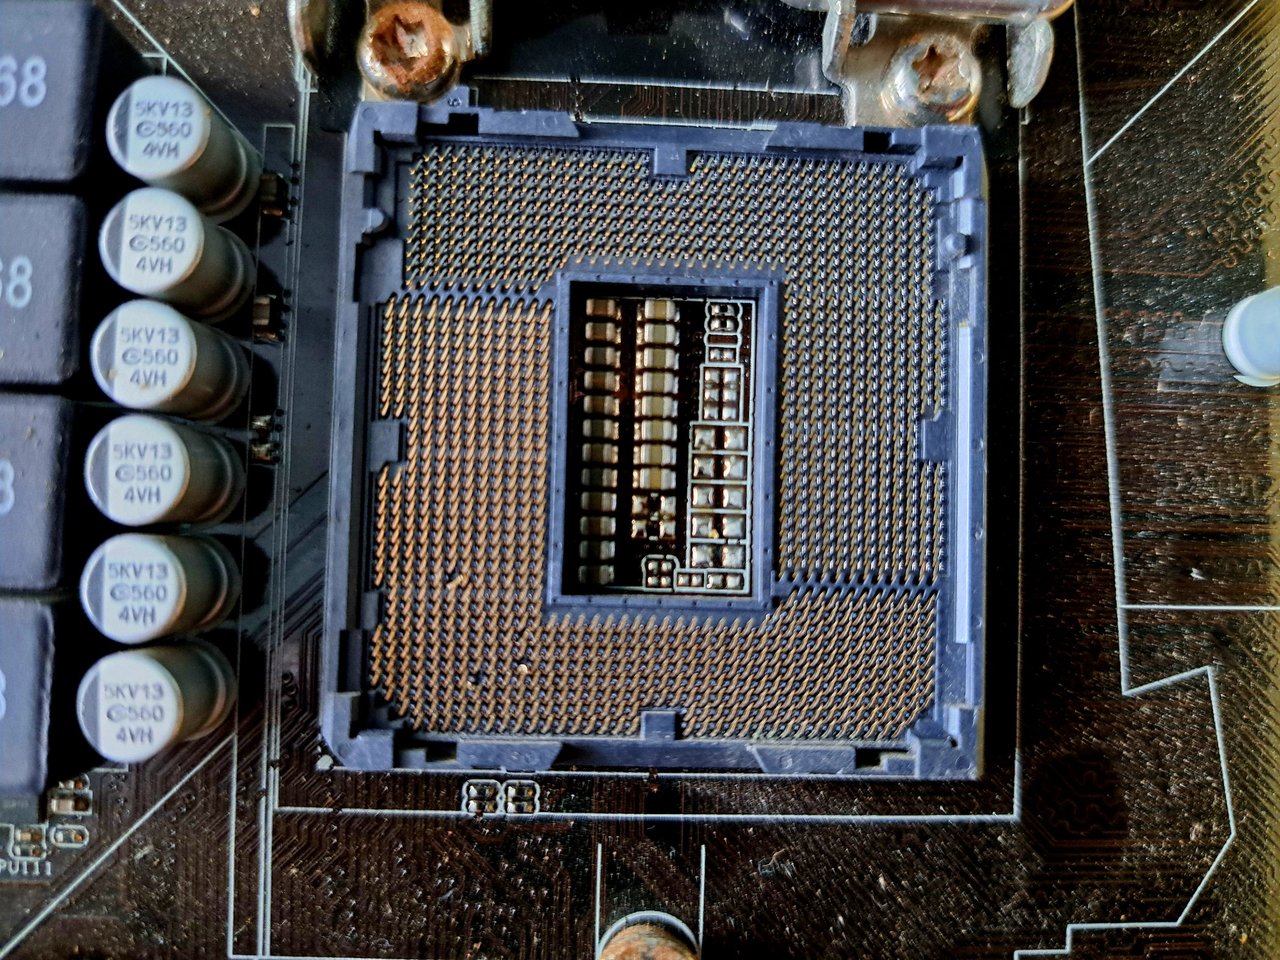
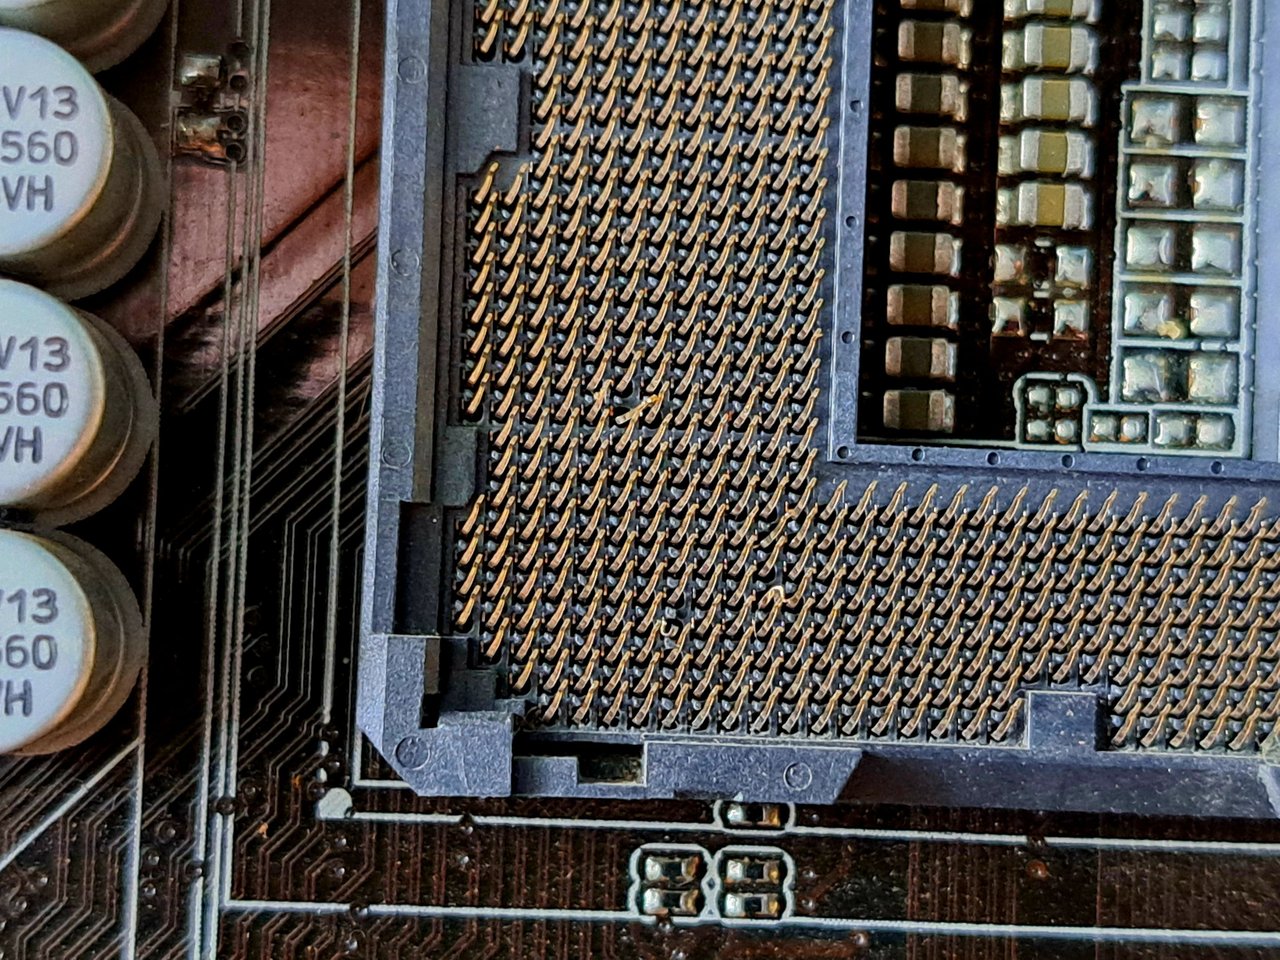
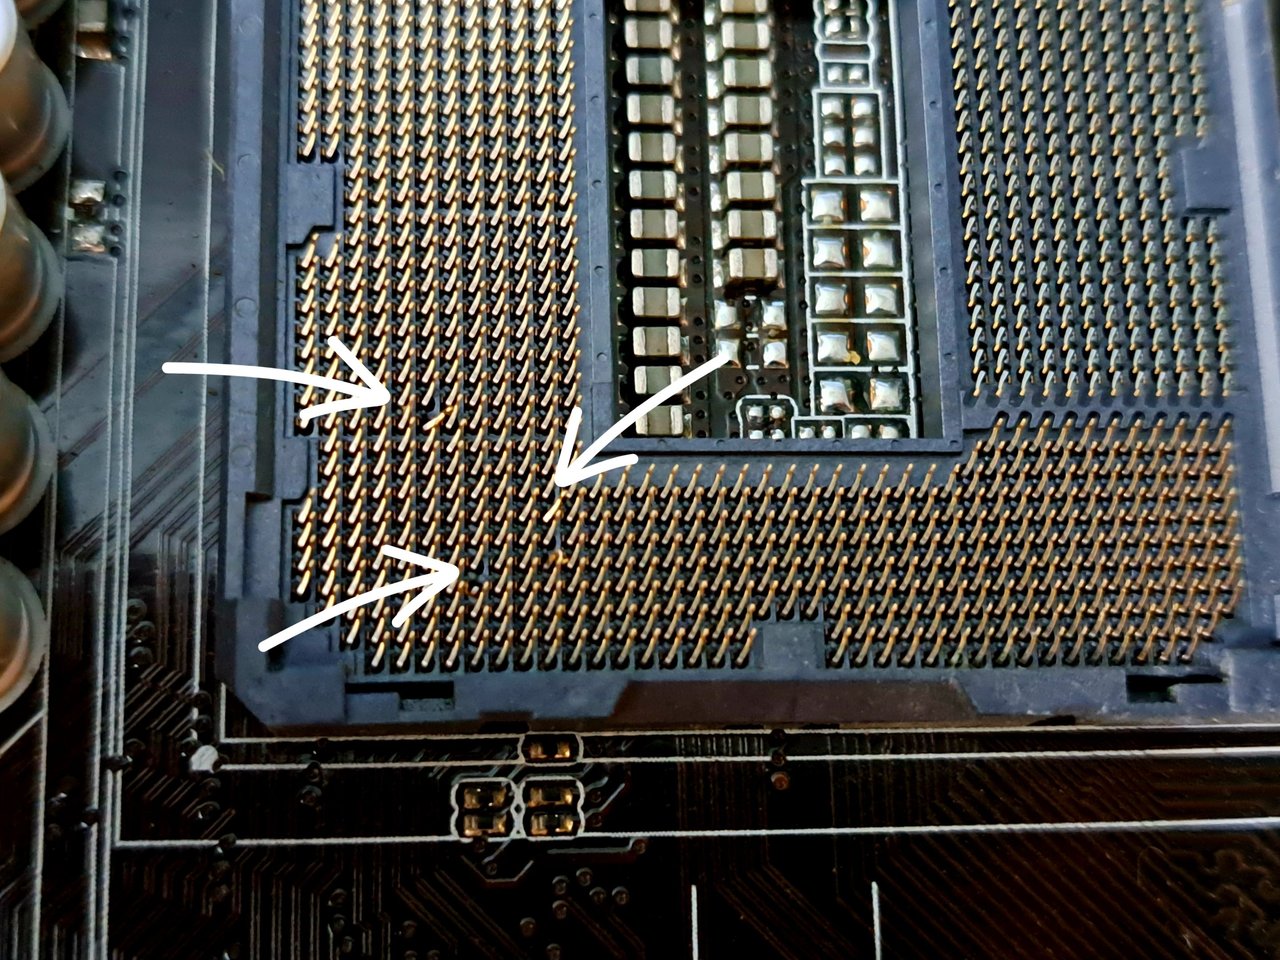
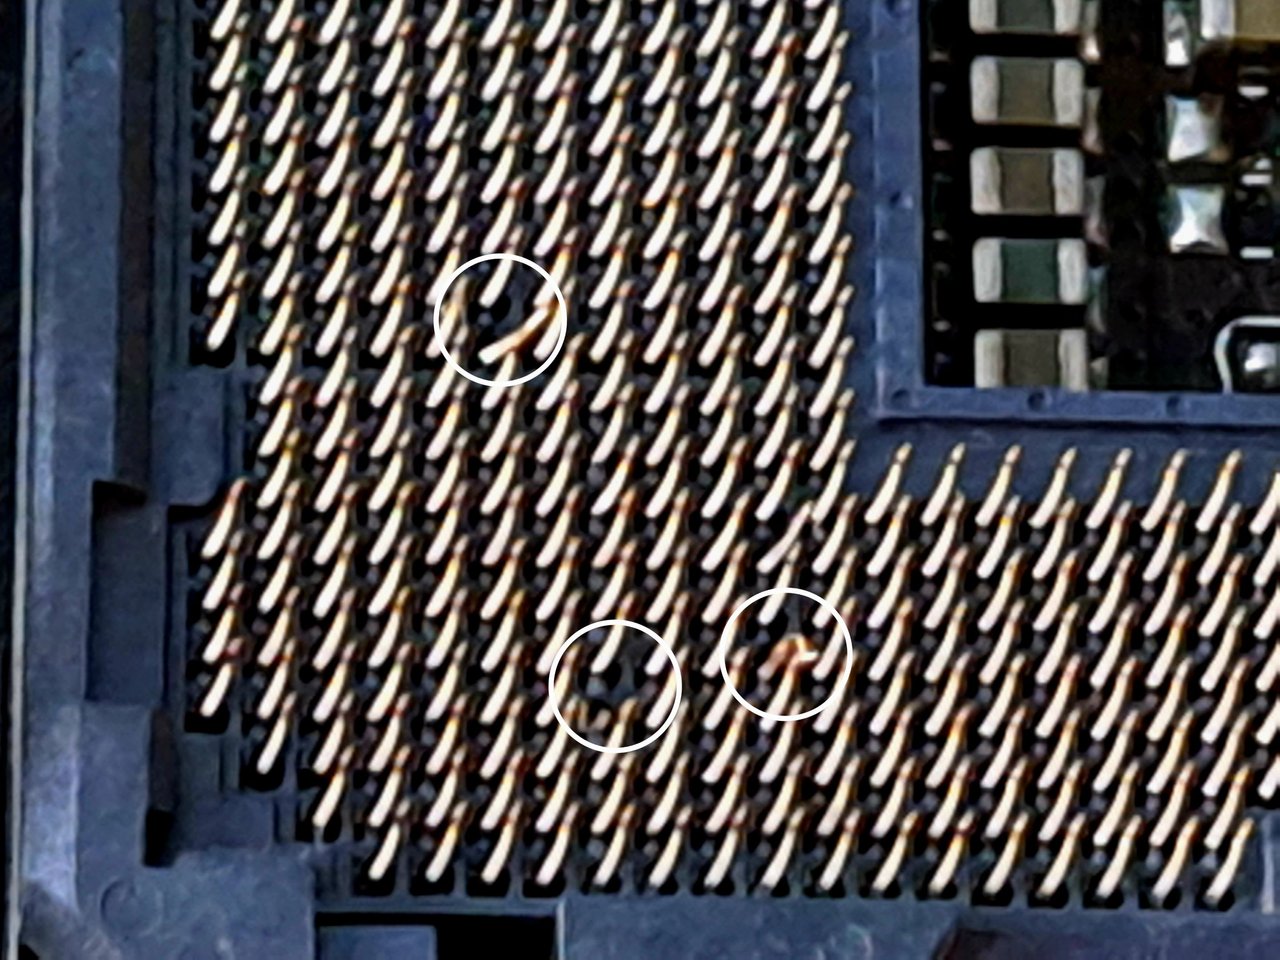
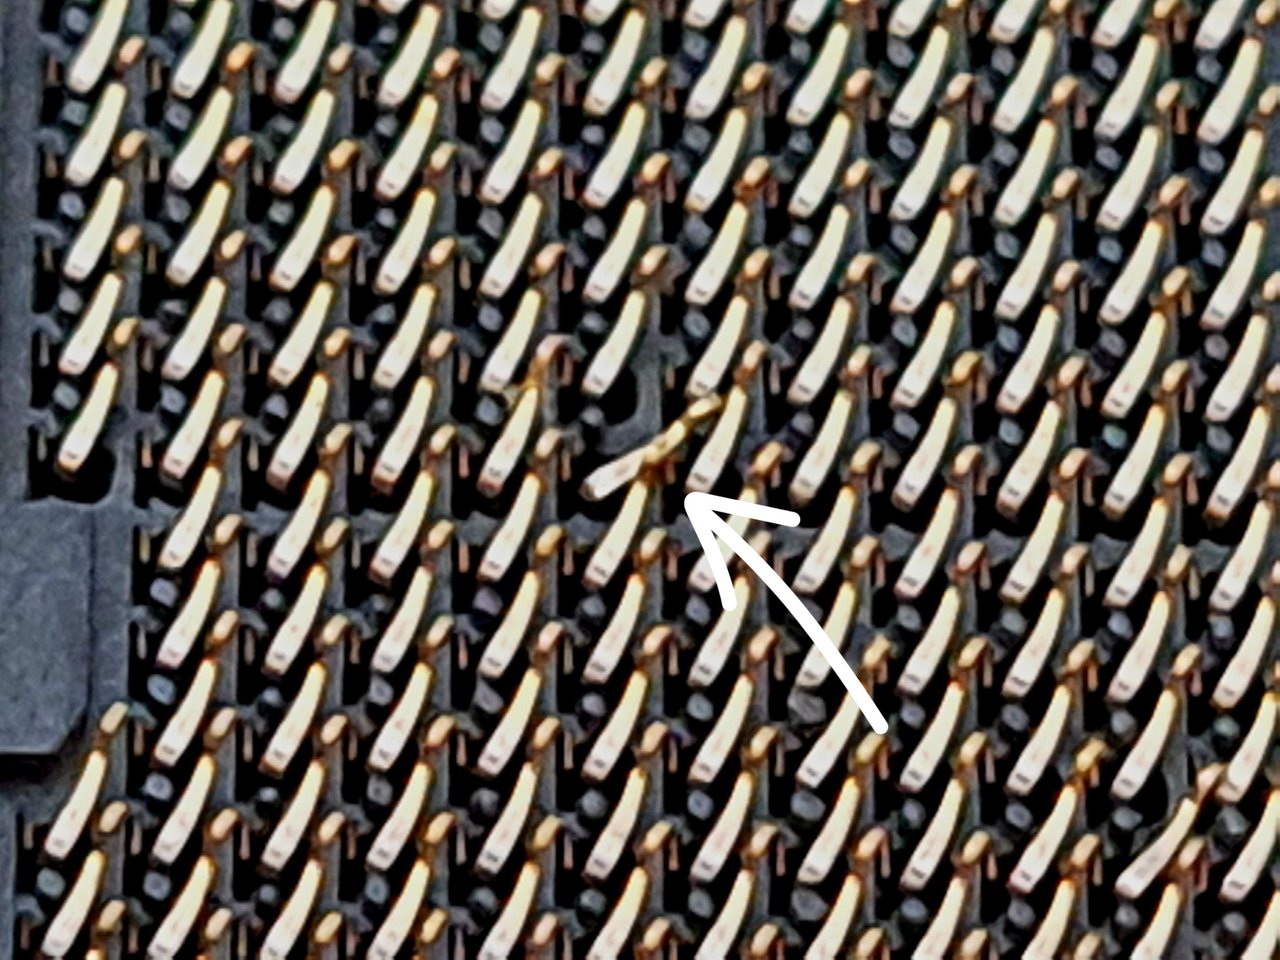
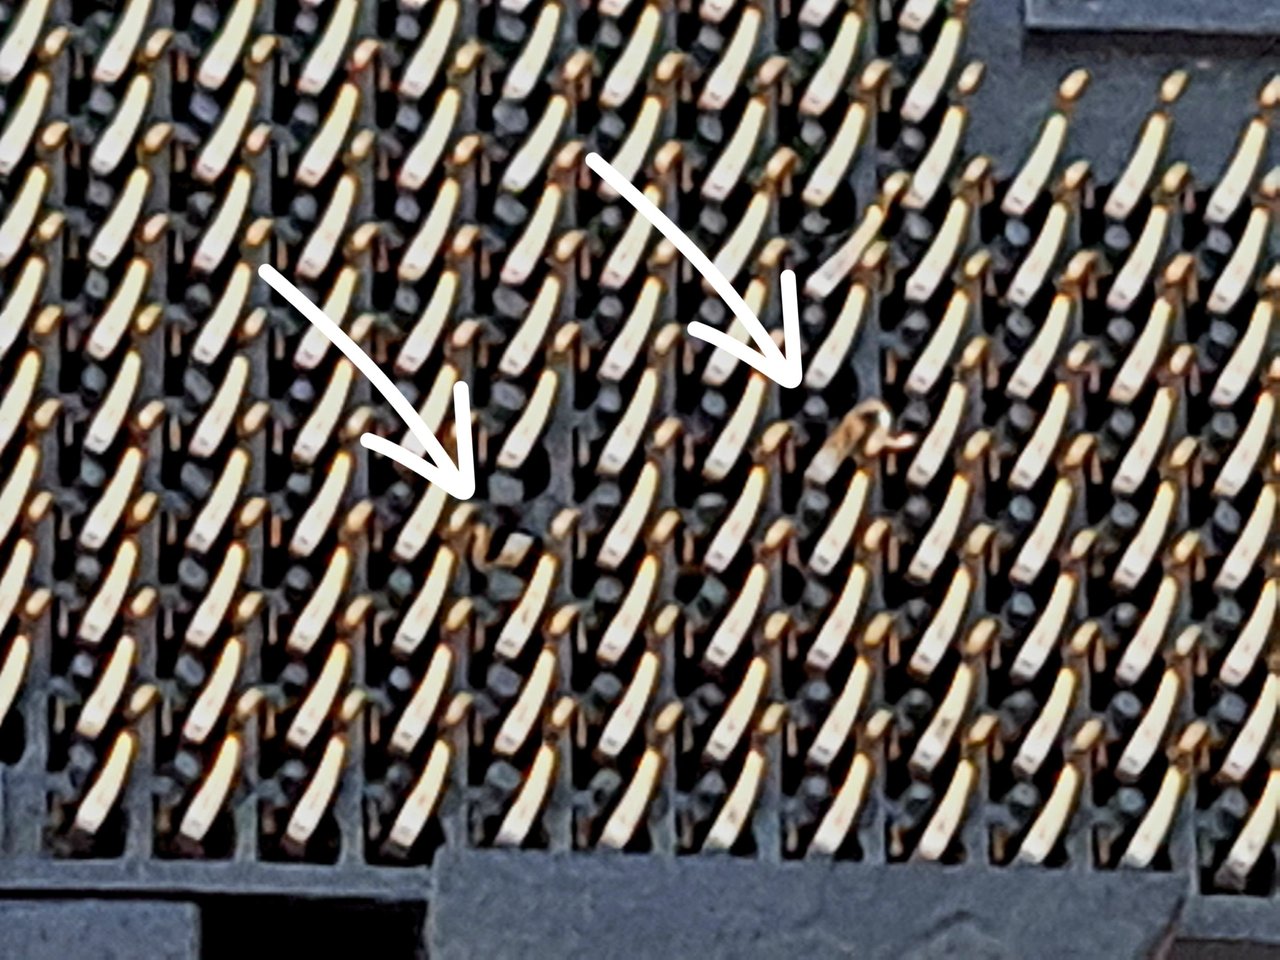
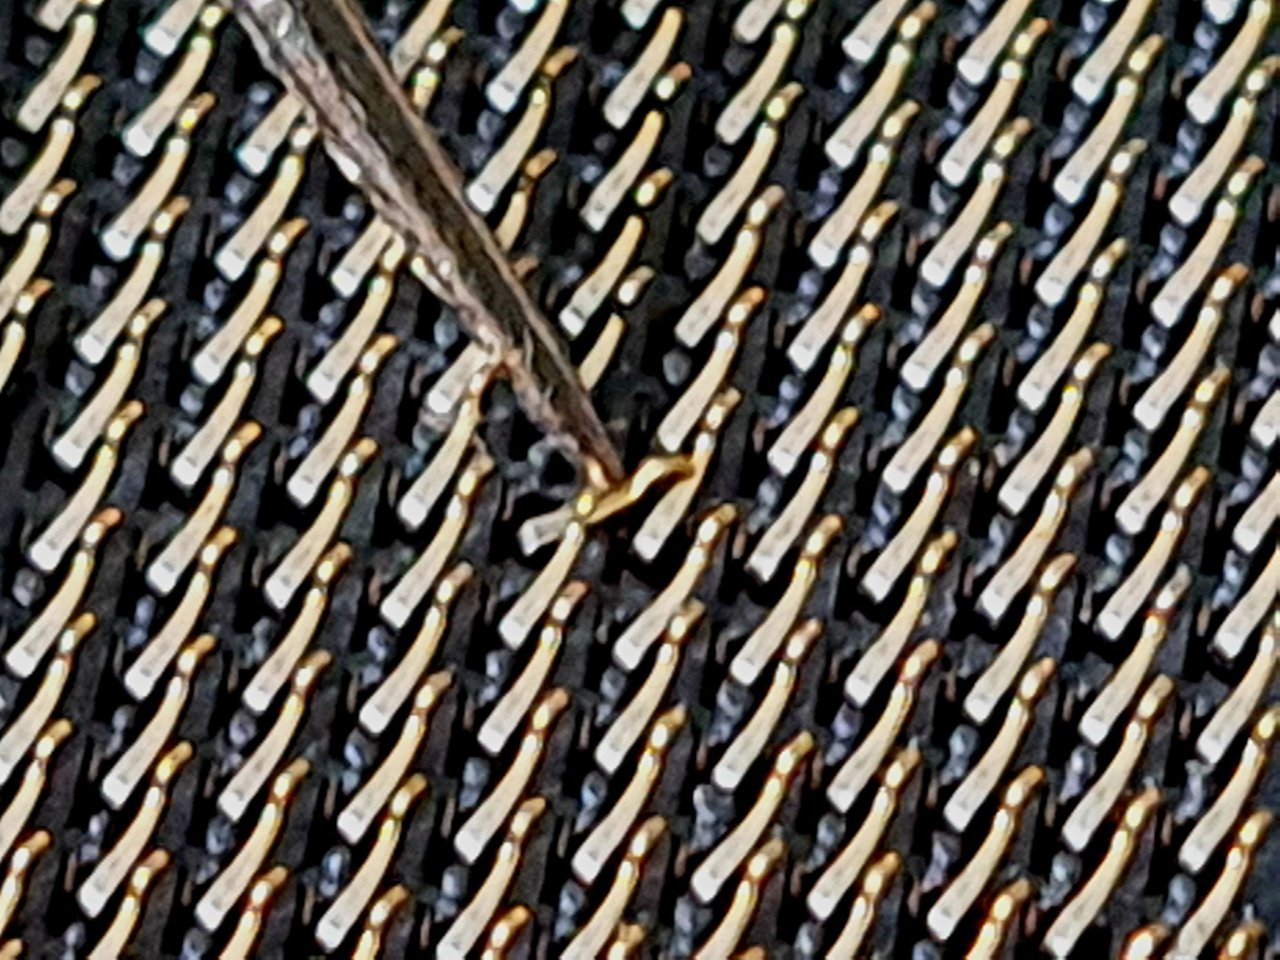
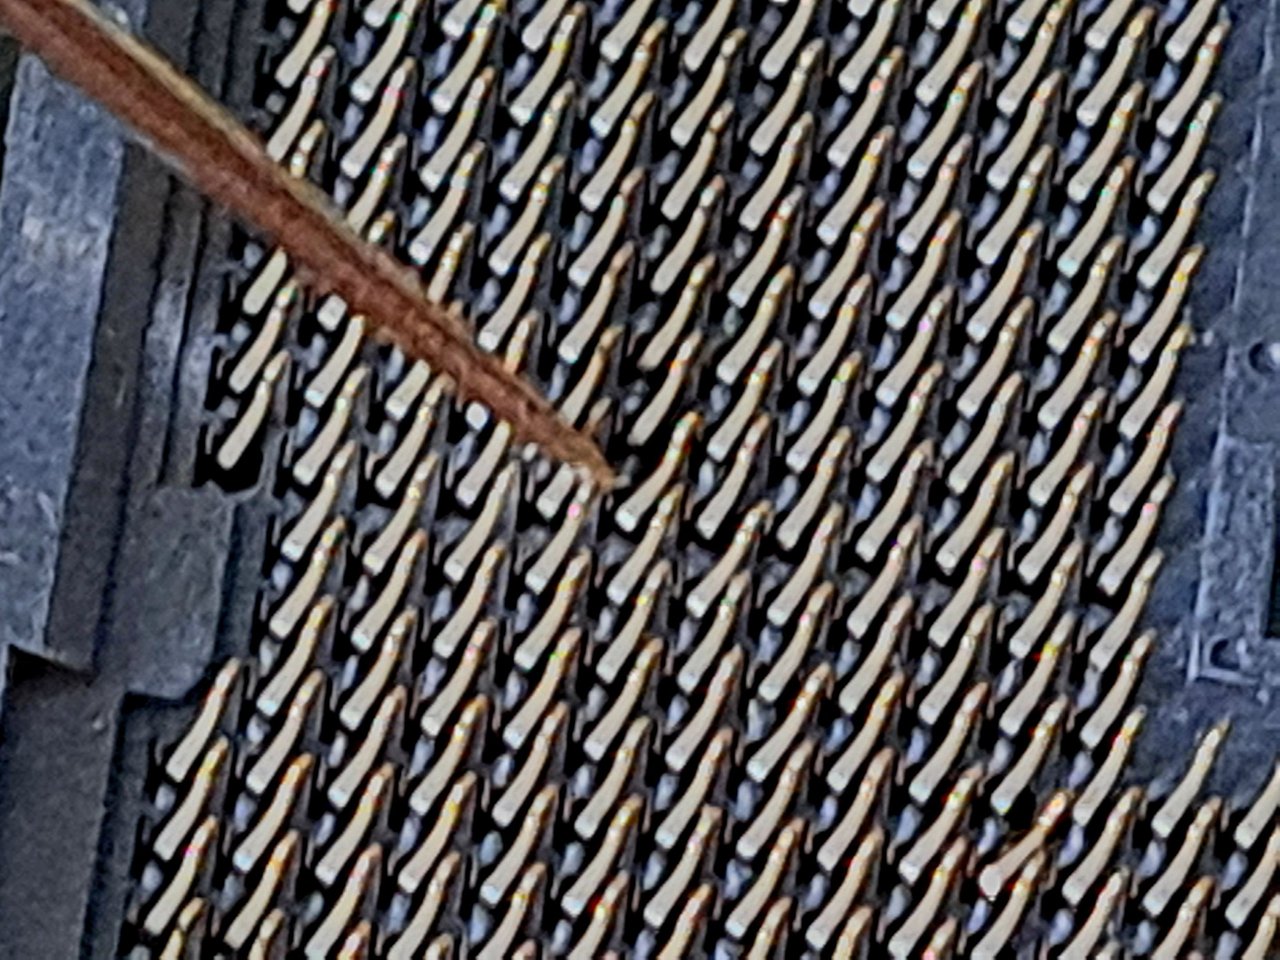
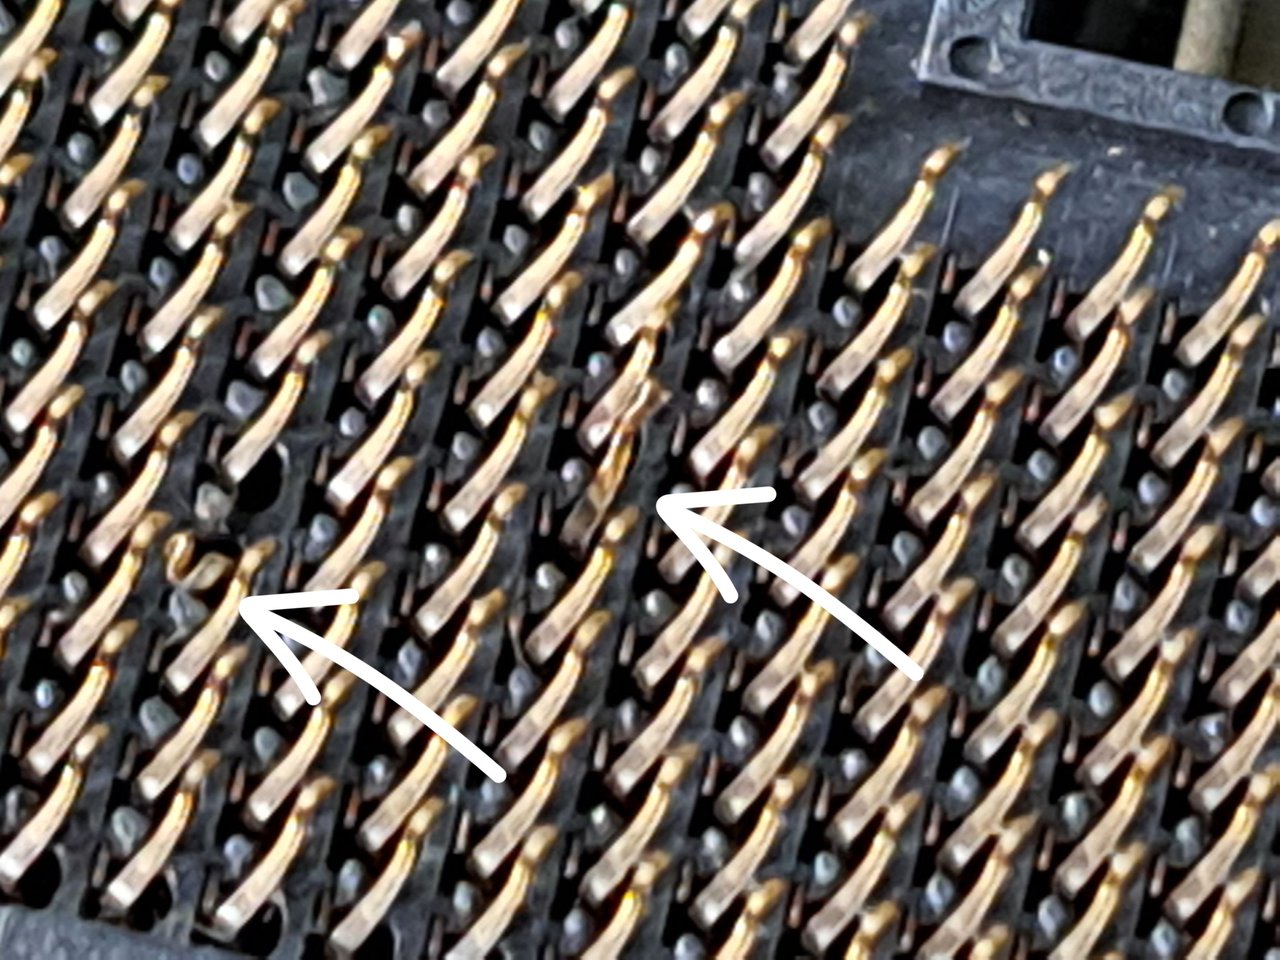
Seeing that, I started to worry, as the excess temperature might have damaged the processor. Instead of measuring the power supply phases, I removed the processor to check its connections and fortunately everything seemed fine. What was not fine was the socket, which had 3 bent pins. This was either an accident or mishandling, as it is usually very difficult to come across this type of breakage on a motherboard.
In case it didn't look good, I marked on the pictures the location of the bent pins. From here, I want to apologize for the quality of some of the photos, since not being a specialized technician, I lack a microscope and I had to squeeze the most out of my smartphone camera.
Spanish Version Here
Al ver eso, comencé a preocuparme, ya que el exceso de temperatura podría haber dañado el procesador. En lugar de medir las fases de alimentación, retiré el procesador para revisar sus conexiones y afortunadamente todo parecía estar bien. Lo que no estaba bien era el socket, el cual tenía 3 pines doblados. Esto era o un accidente o una mala manipulación, pues normalmente es muy difícil toparse con este tipo de roturas en una placa base.
Por si no se veía bien, marqué en las fotos la ubicación de los pines doblados. A partir de aquí, quiero pedir disculpas por la calidad de algunas fotos, ya que al no ser un técnico especializado, carezco de un microscopio y tuve que exprimir al máximo la cámara de mi smartphone.
 |
 |
 |
 |
 |
 |
 |
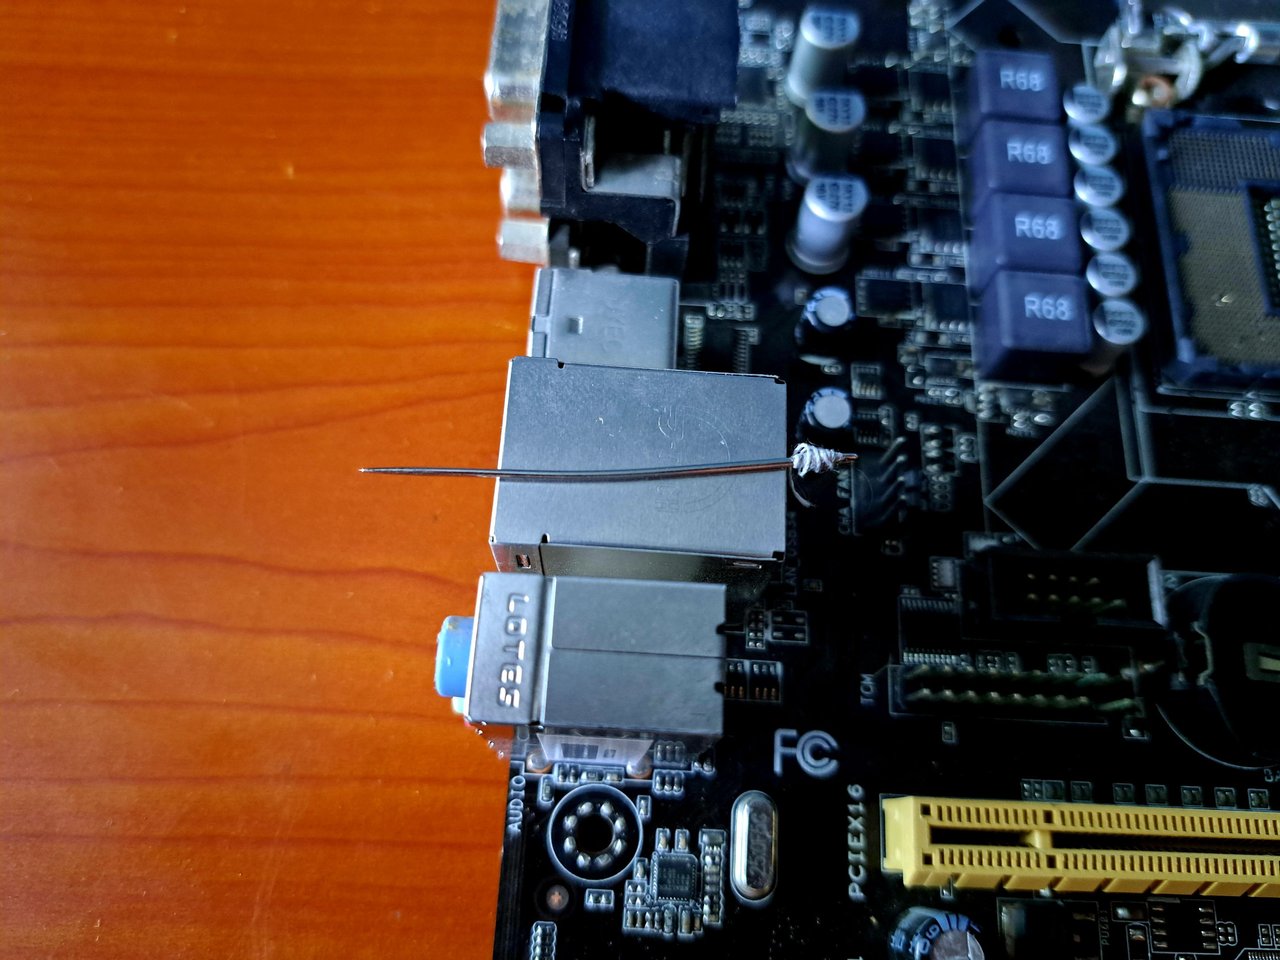
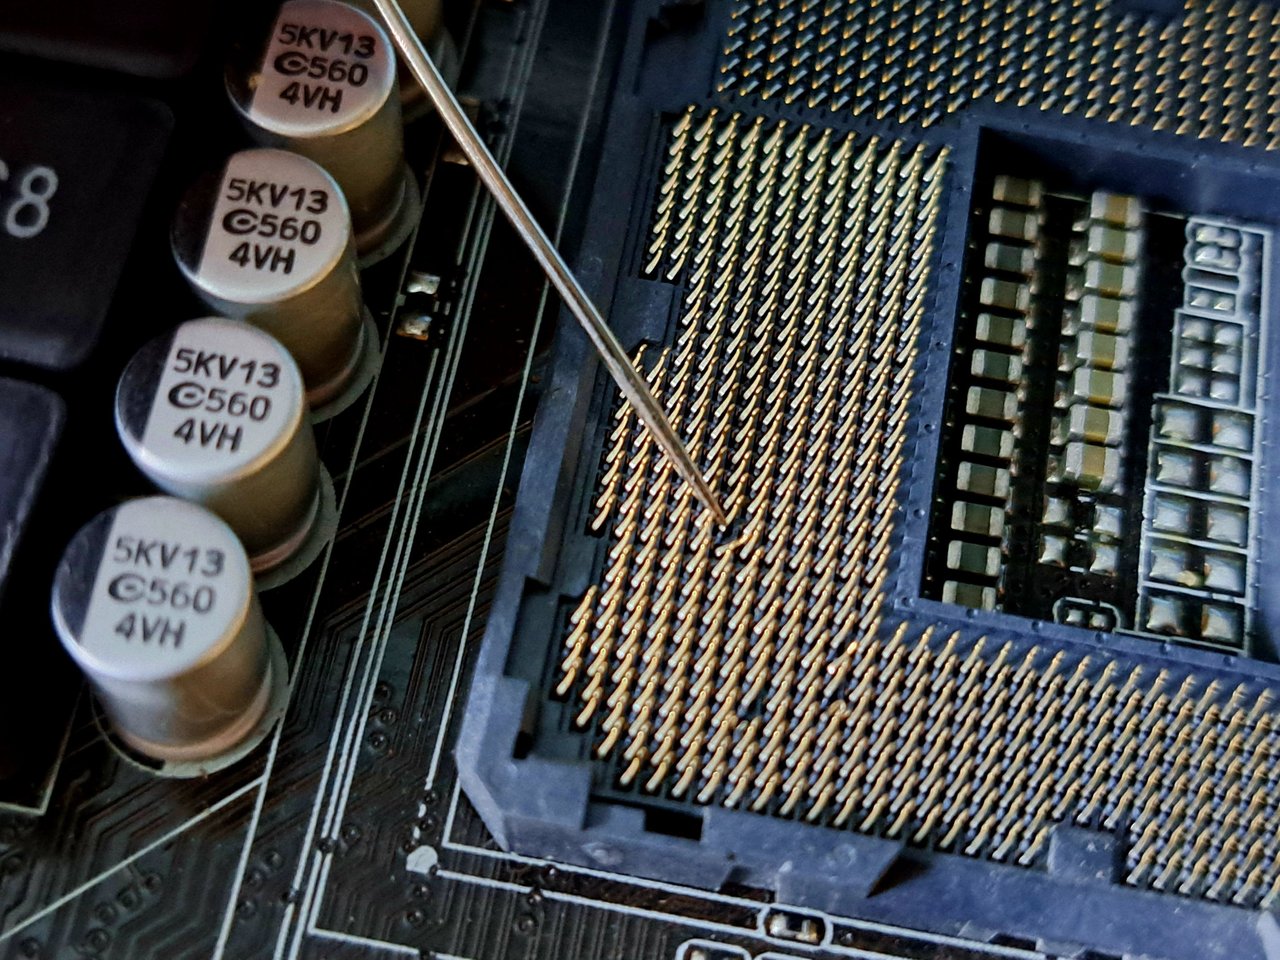
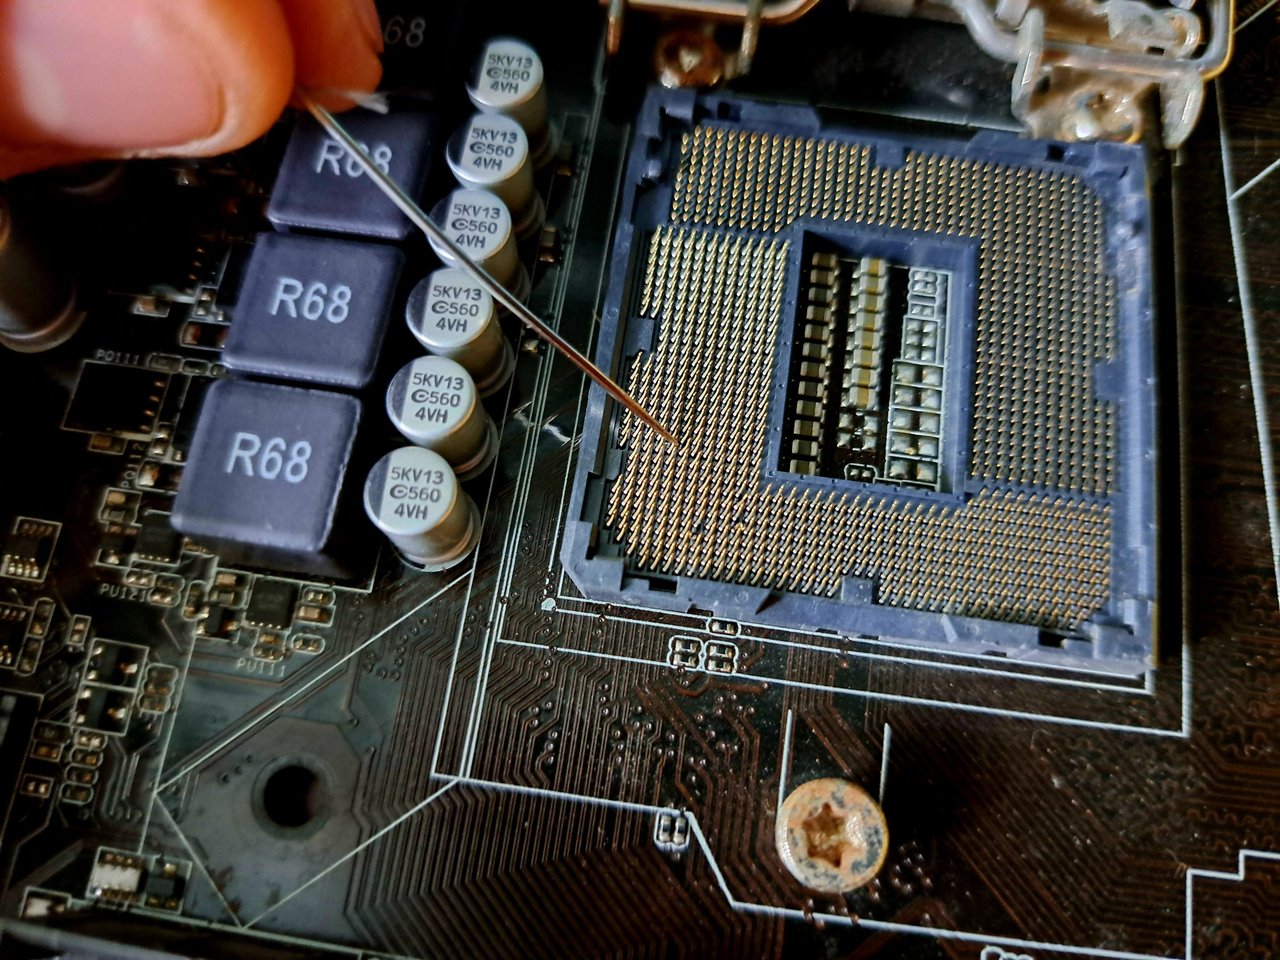
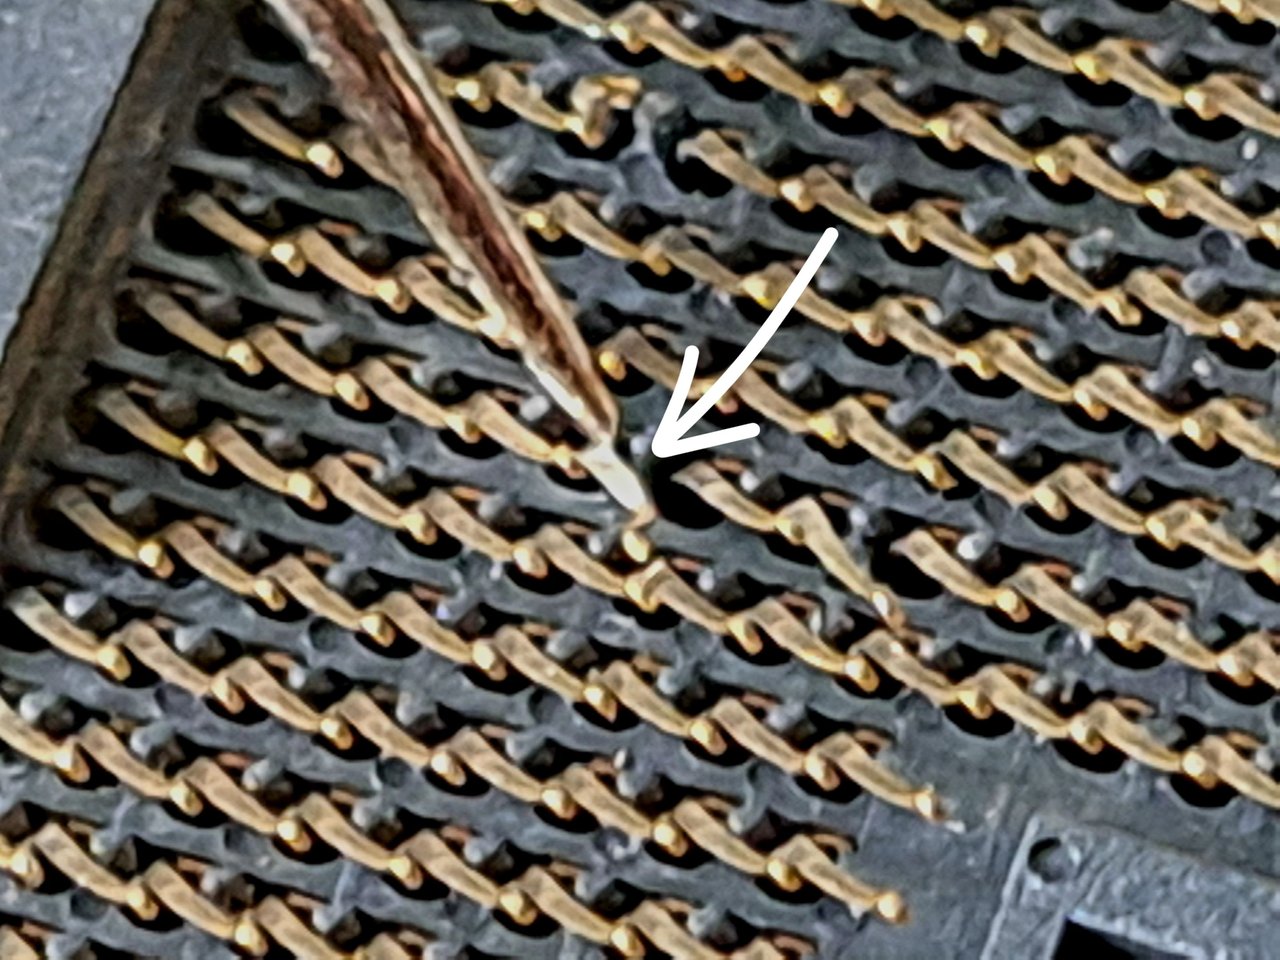
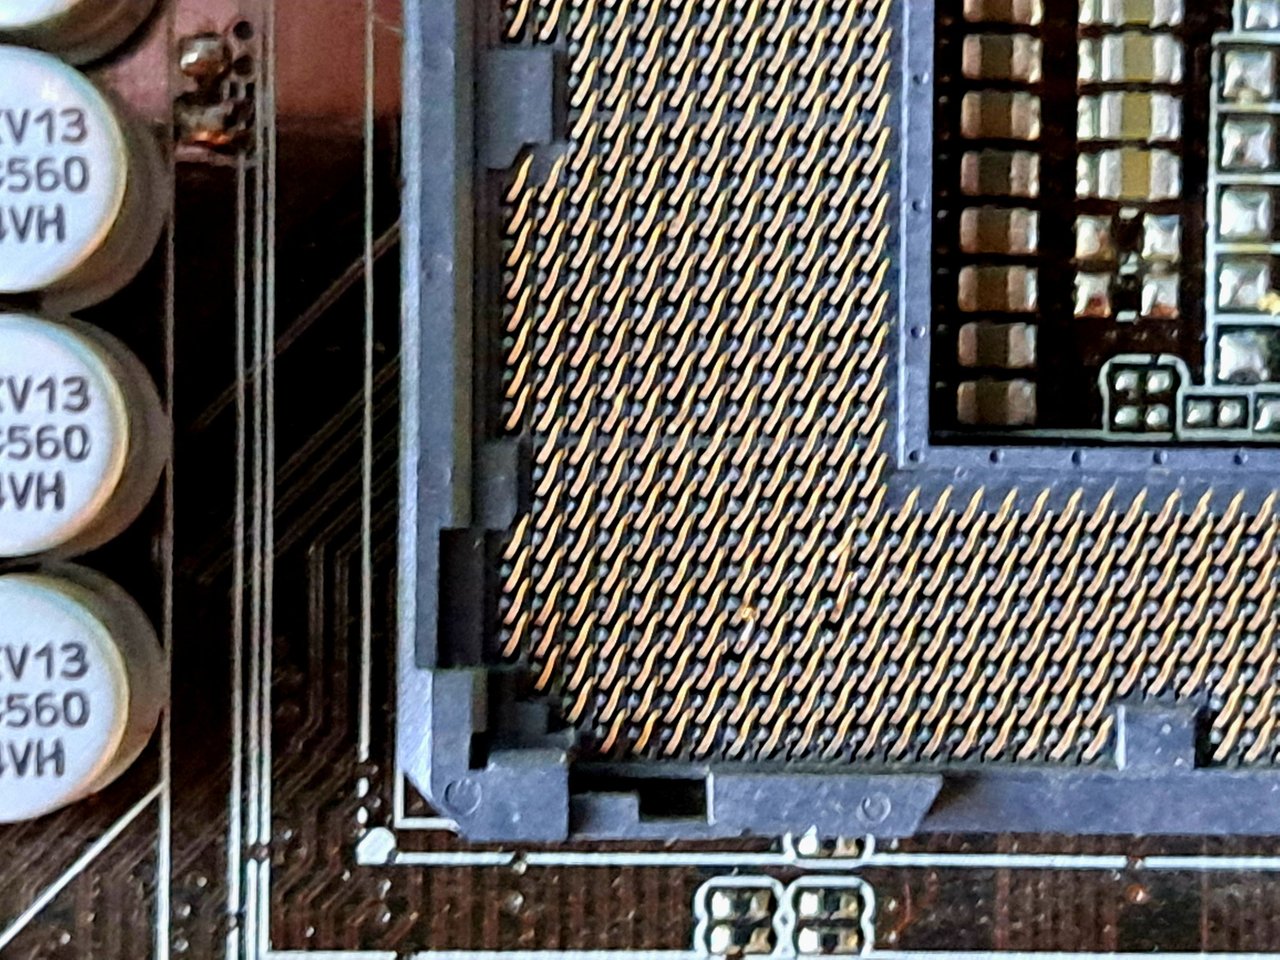
After examining the socket from several angles and correctly locating the direction of the bent pins, I began to straighten the first one bit by bit. To straighten the pins, I used a sewing needle with some thread wrapped around the end to make it easier to hold. Of the three pins, I started with the easiest one so that I could get the technique down and not break the other pins that were more bent.
These pins are extremely fragile, and when bent backwards it is very easy to break them when trying to straighten them. Fortunately, I was able to straighten the first one without problems, in fact I had to point it with the needle to photograph it, since once straight it is almost imperceptible.
Spanish Version Here
Después de examinar el socket desde varios ángulos y ubicar correctamente la dirección de los pines doblados, comencé a enderezar el primero poco a poco. Para enderezar los pines, utilicé una aguja de coser a la que le envolví un poco de hilo en el extremo para que me fuera más fácil sujetarla. De los tres pines, empecé por el más fácil para ir adquiriendo técnica y no romper los otros que estaban más doblados.
Estos pines son extremadamente frágiles, y cuando se doblan hacia atrás es muy fácil que se partan al intentar enderezarlos. Afortunadamente, pude enderezar el primero sin problemas, de hecho tuve que señalarlo con la aguja para fotografiarlo, ya que una vez recto es casi imperceptible.
 |
 |
 |
 |
 |
 |
 |
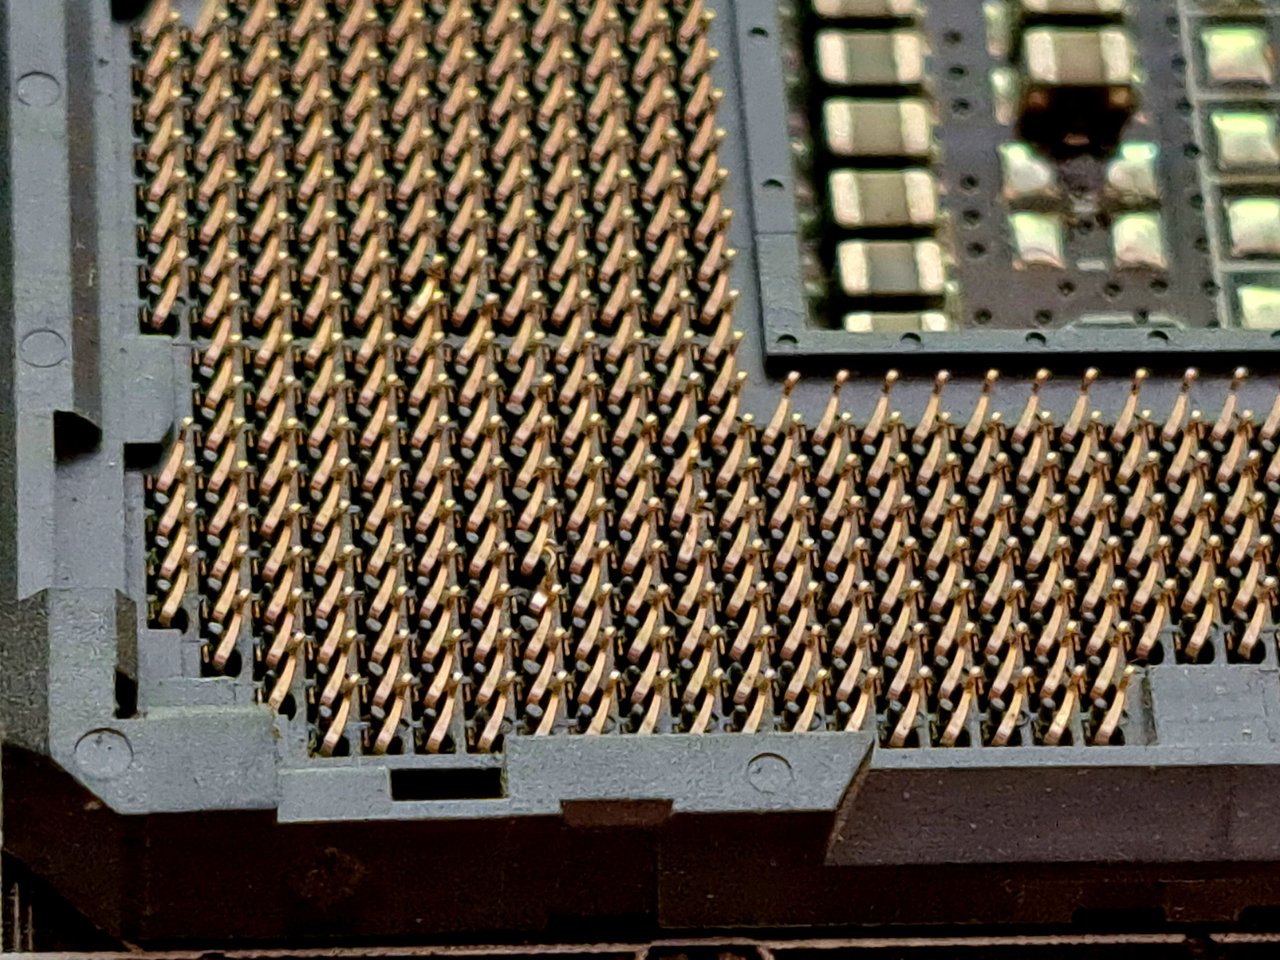
With the rest of the pins I thought I would have more problems, since it was evident that they were in worse condition than the first one, but it was not so. Although it is true that I had to turn the board constantly and play a lot with the angles and the light, in the end I was able to straighten them. Except for the most damaged one, the others no longer looked bent and the most damaged one I was able to get it back in place.
Spanish Version Here
Con el resto de los pines pensé que tendría más problemas, ya que era evidente que estaban en peor estado que el primero, pero no fue así. Si bien es cierto que tuve que ir girando la placa constantemente y jugar mucho con los ángulos y la luz, al final pude enderezarlos. A excepción del más dañado, los otros ya no se veían doblados y el más dañado pude llevarlo a su lugar.
 |
 |
 |
 |
 |
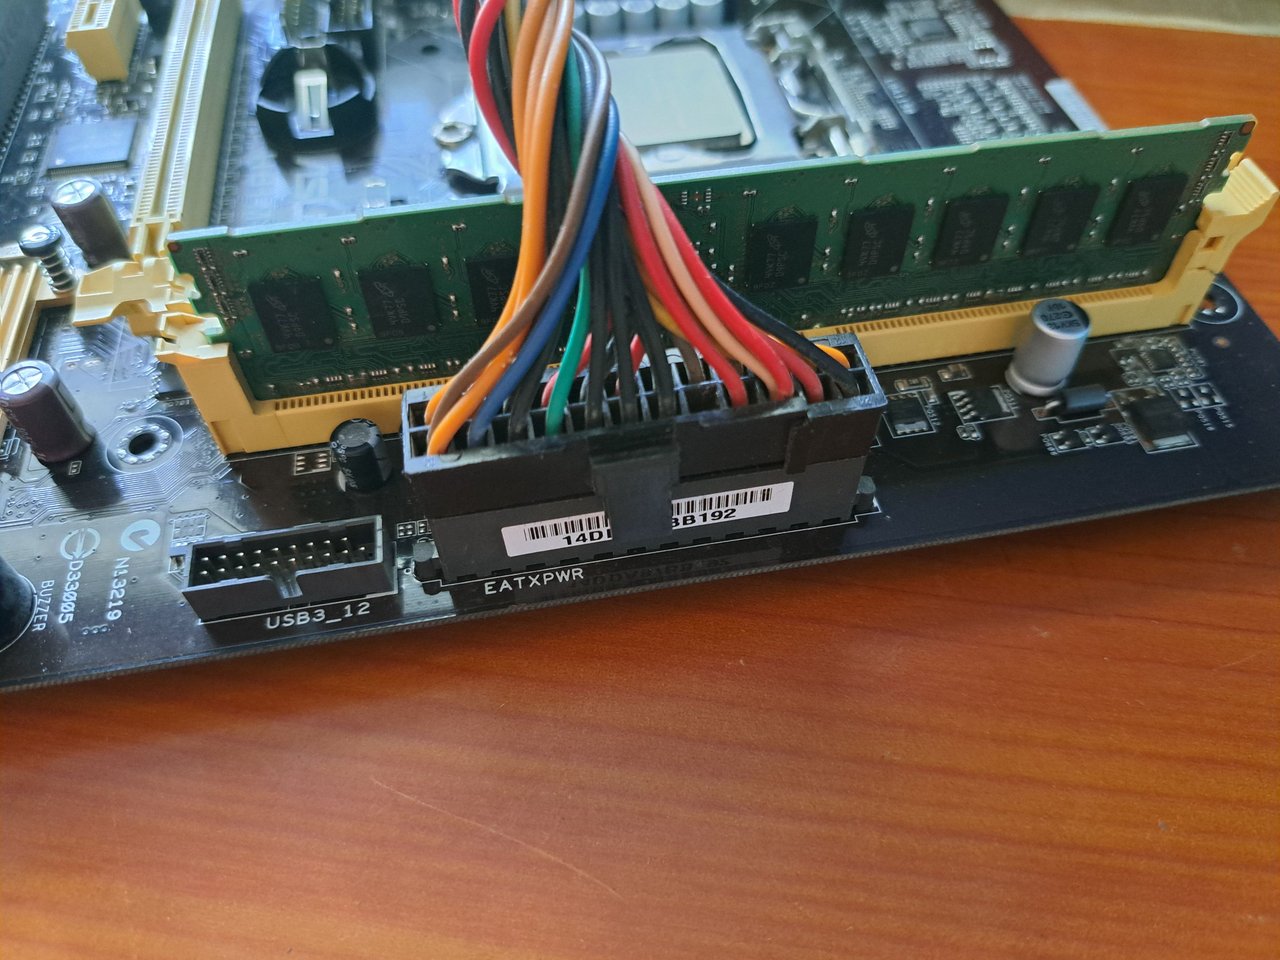
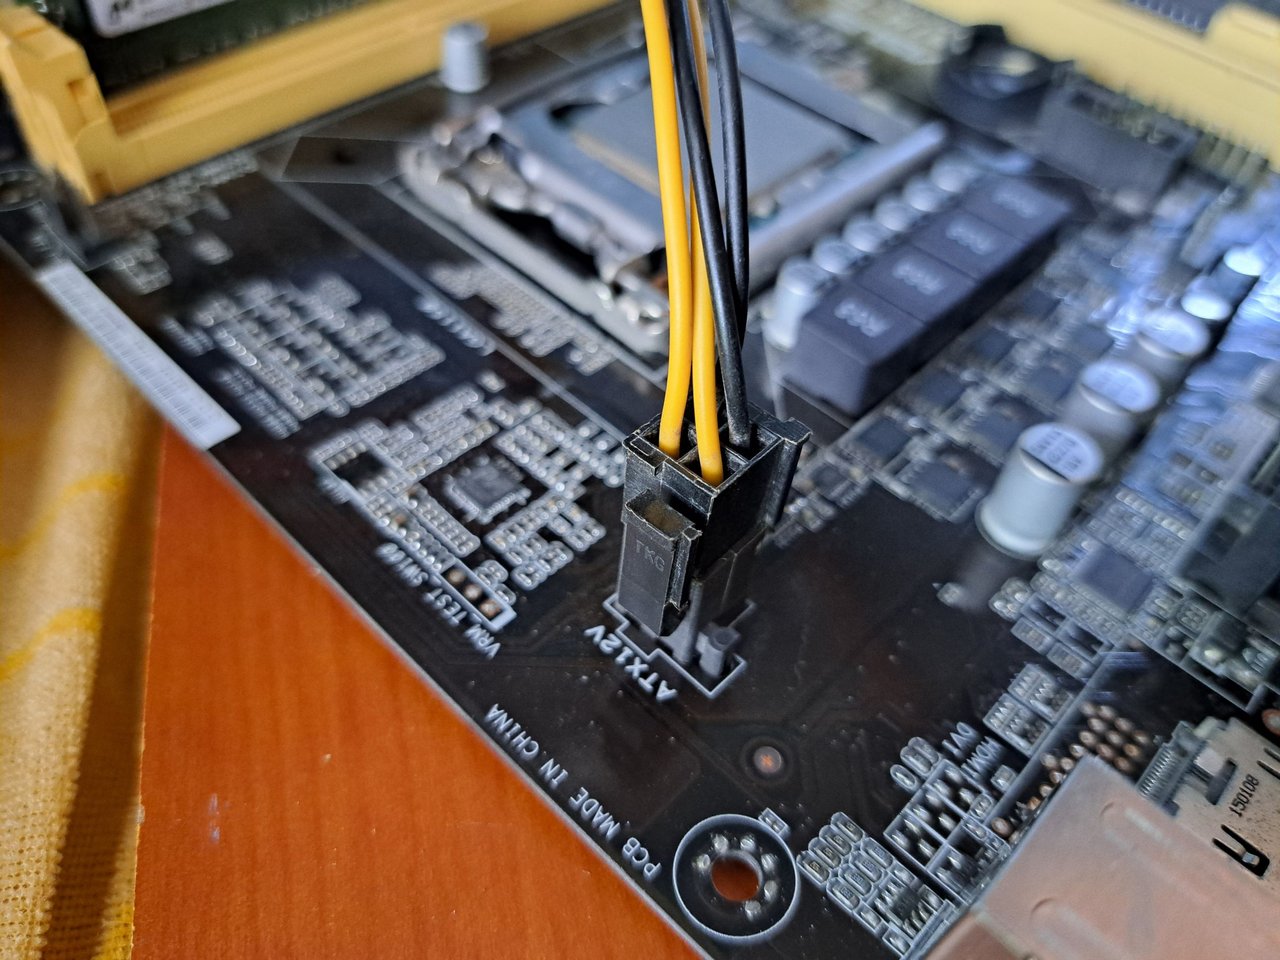
The only thing left to do was to connect the processor again, cross my fingers and hope for a miracle. I put the processor in its place, inserted the RAM in its slot and in the same way I connected the board power supply and the processor phases. With a small screwdriver I made contact on the boot pins and the board turned on, but it started beeping.
I disconnected the RAM and tried again, but the beeping still continued. After searching the internet for the meaning of the beeping, I realized that it was the processor telling me that the heatsink was not on and it was getting hot.
Spanish Version Here
Ya solo quedaba conectar nuevamente el procesador, cruzar los dedos y esperar que sucediera un milagro. Para ello coloqué el procesador en su lugar, inserté la RAM en su ranura y de igual forma conecté las alimentaciones de la placa y las fases del procesador. Con un desarmador pequeño hice contacto en los pines de arranque y la placa encendió, pero comenzó a pitar.
Desconecté la RAM y volví a probar, pero aún continuaba el pitido. Luego de buscar en internet el significado del pitido, me di cuenta de que era el procesador diciéndome que no tenía puesto el disipador y se estaba calentando.
 |
 |
 |
 |
 |
 |
 |
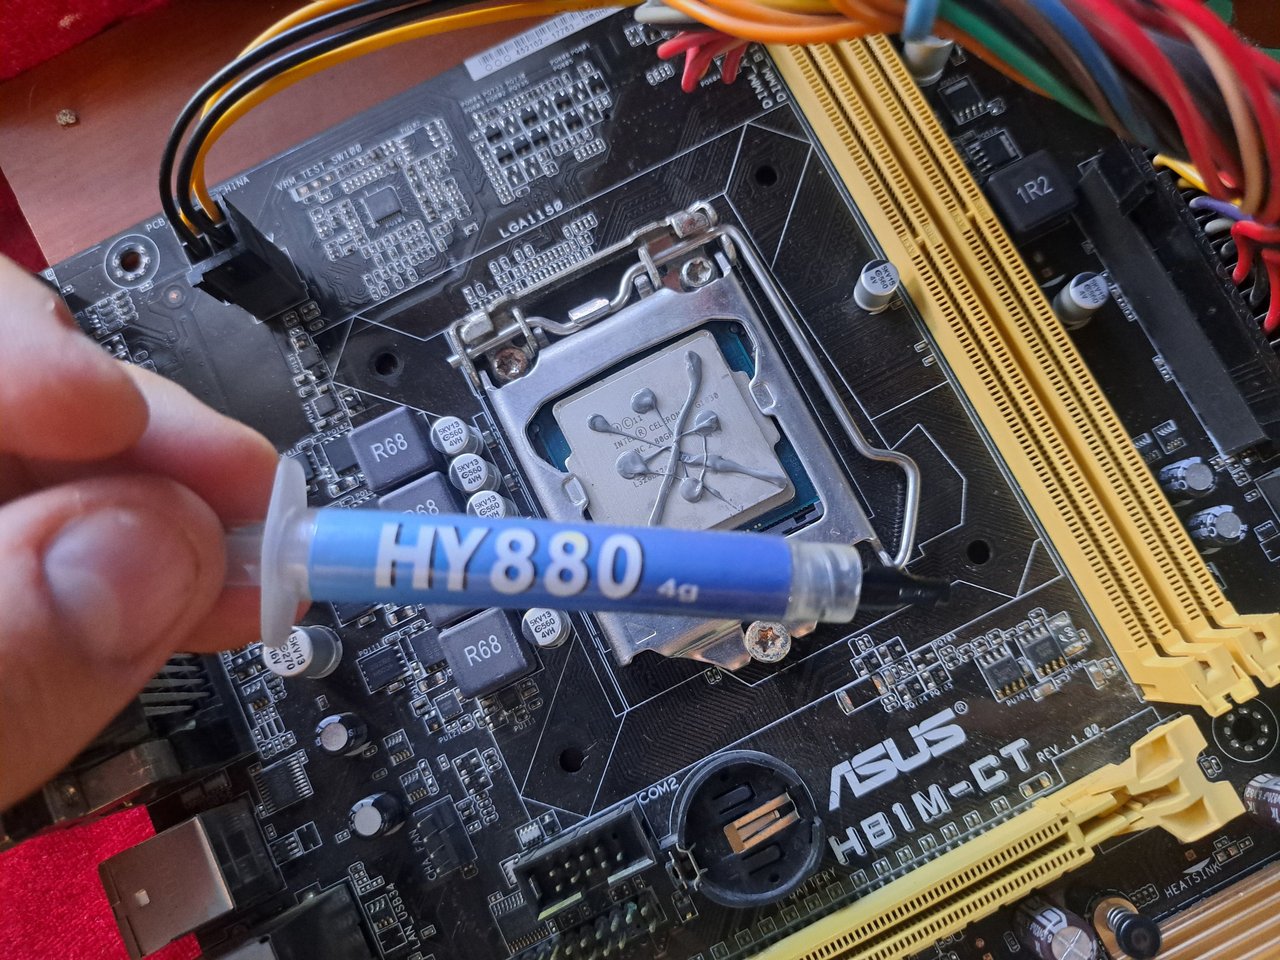
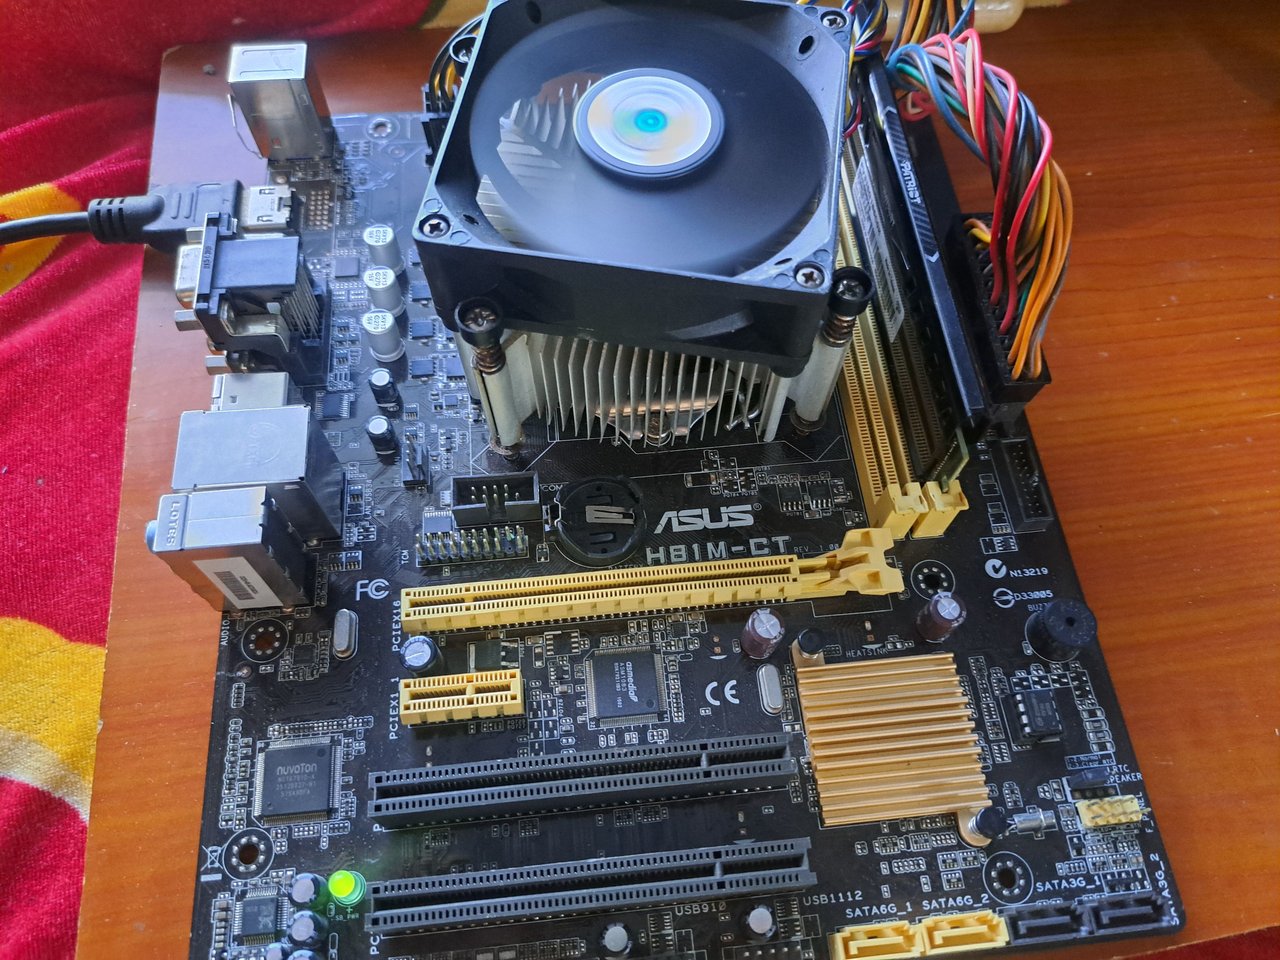
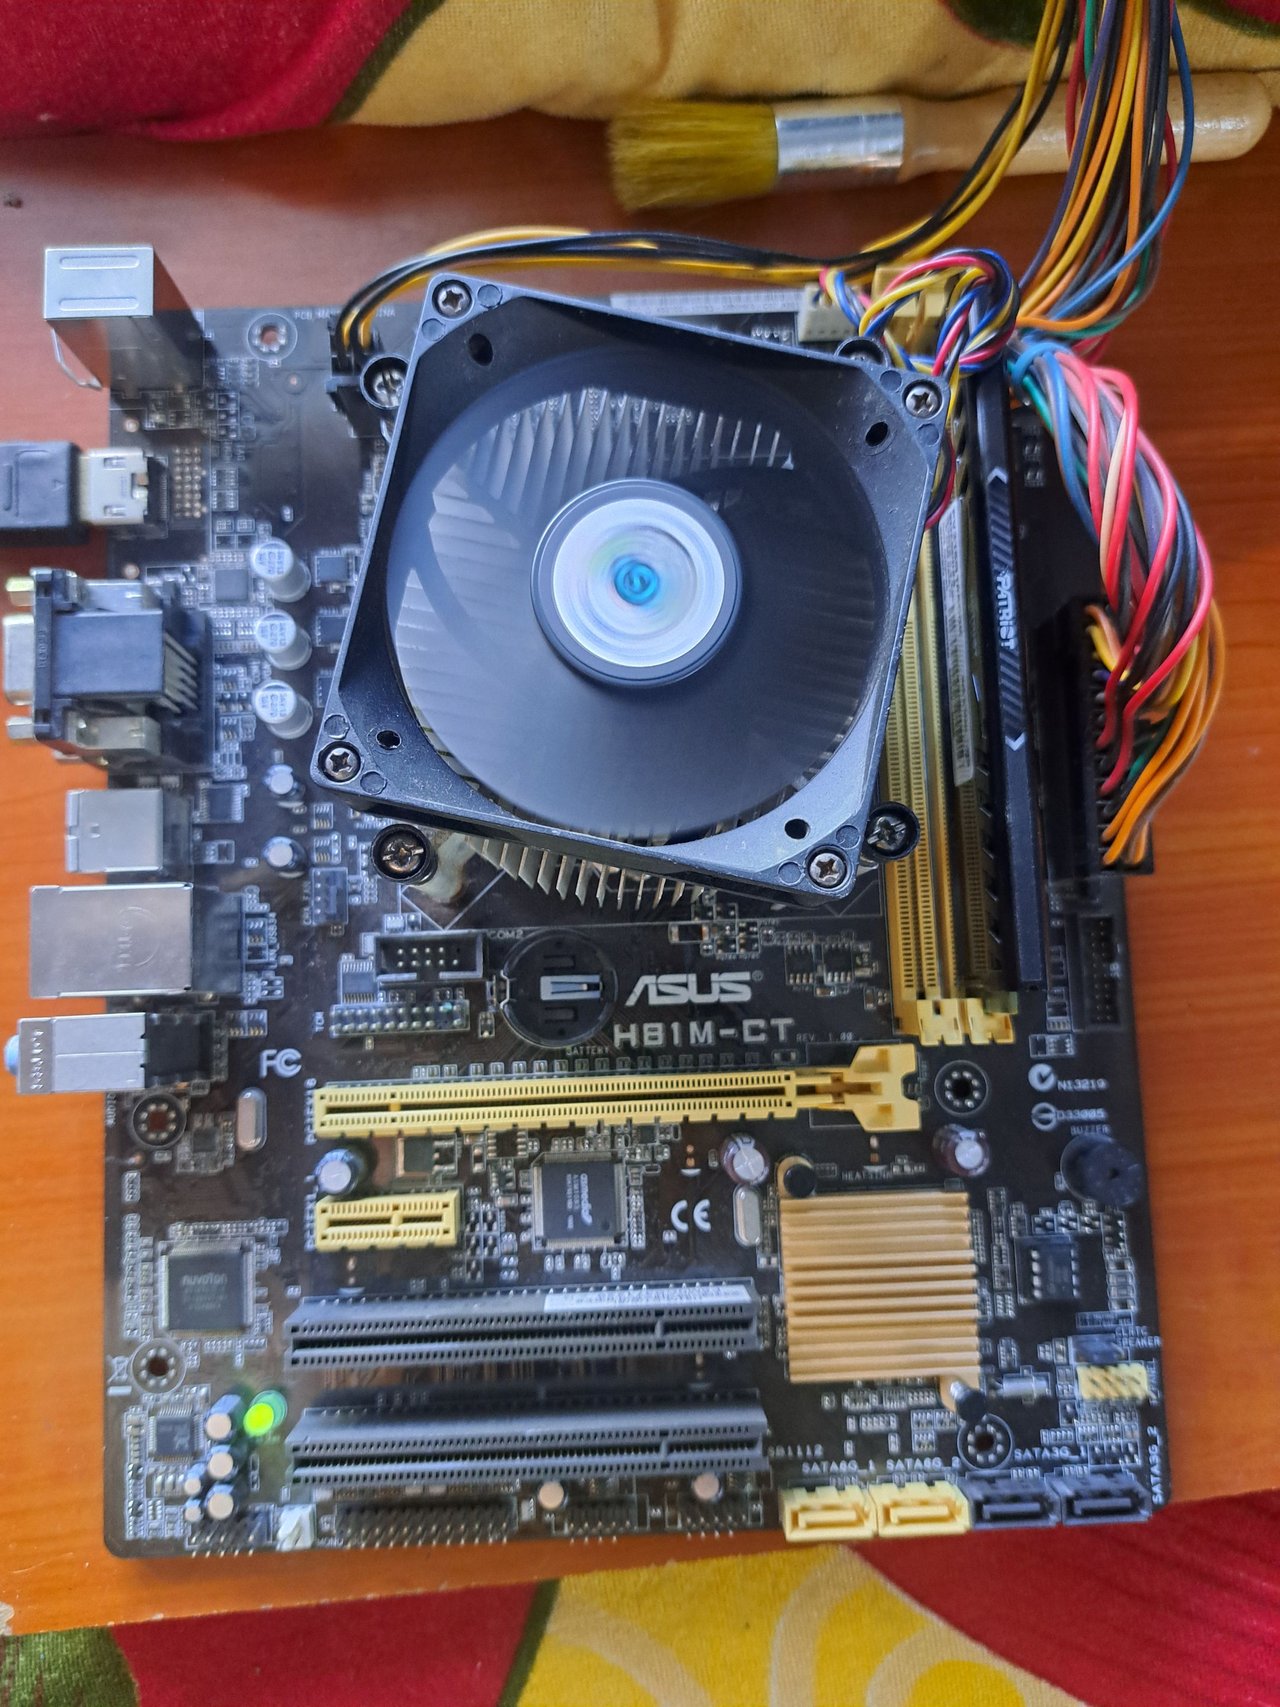
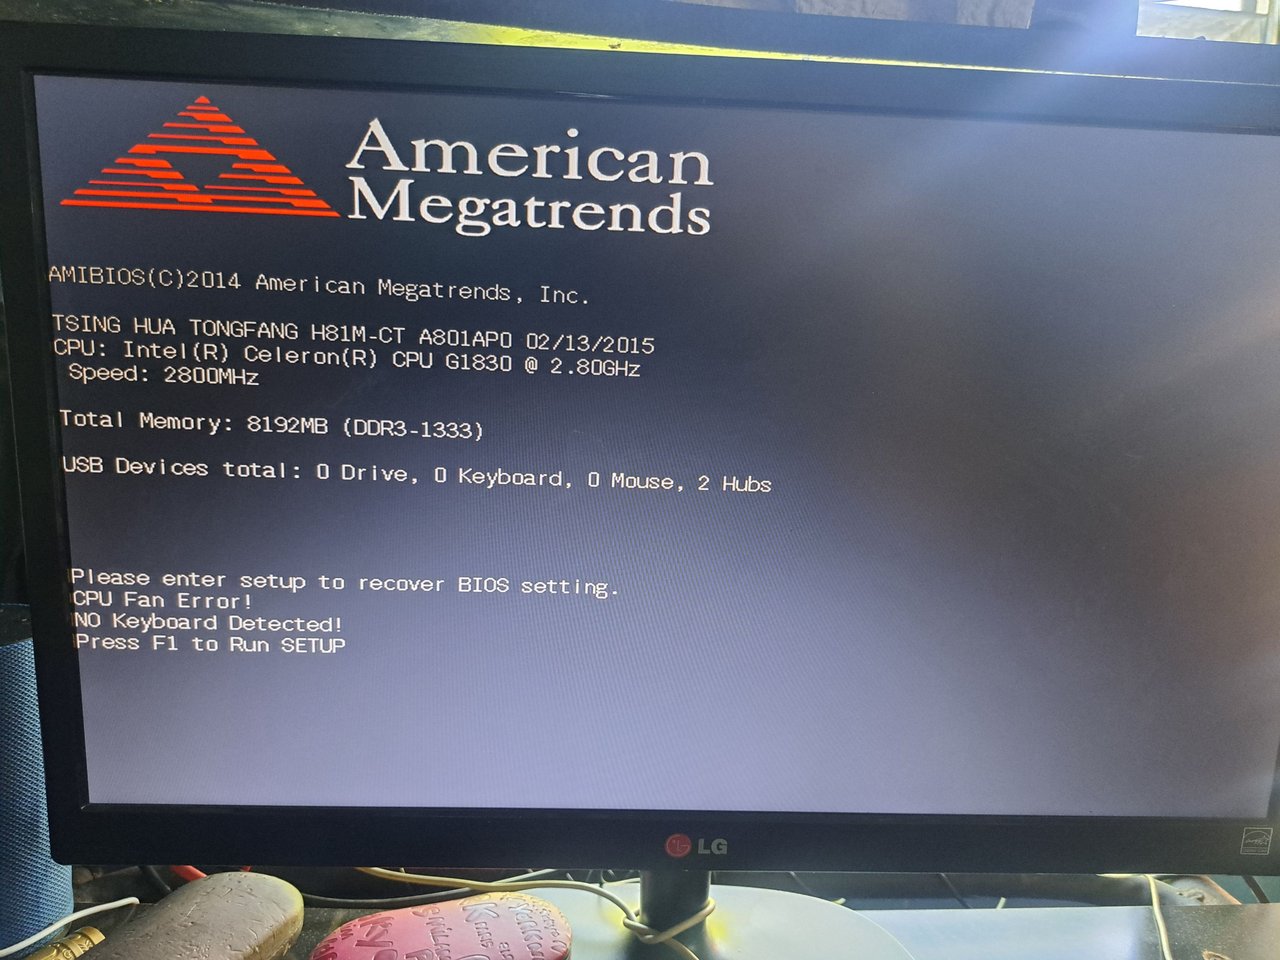
To fix this, I applied HY880 thermal paste to the processor and put the heatsink in place. I crossed my fingers and again did a power-up test, but using another RAM card. On power up, I heard no error codes and it gave video immediately. I turned it off and put the original RAM in, on power up everything worked correctly.
Spanish Version Here
Para solucionar esto, le apliqué al procesador pasta térmica HY880 y coloqué el disipador en su lugar. Crucé los dedos y nuevamente hice una prueba de encendido, pero utilizando otra tarjeta de RAM. Al encender, no escuché ningún código de error y dio video inmediatamente. La apagué y le coloqué la RAM original, al encender todo funcionó correctamente.
 |
 |
 |
 |
 |
 |
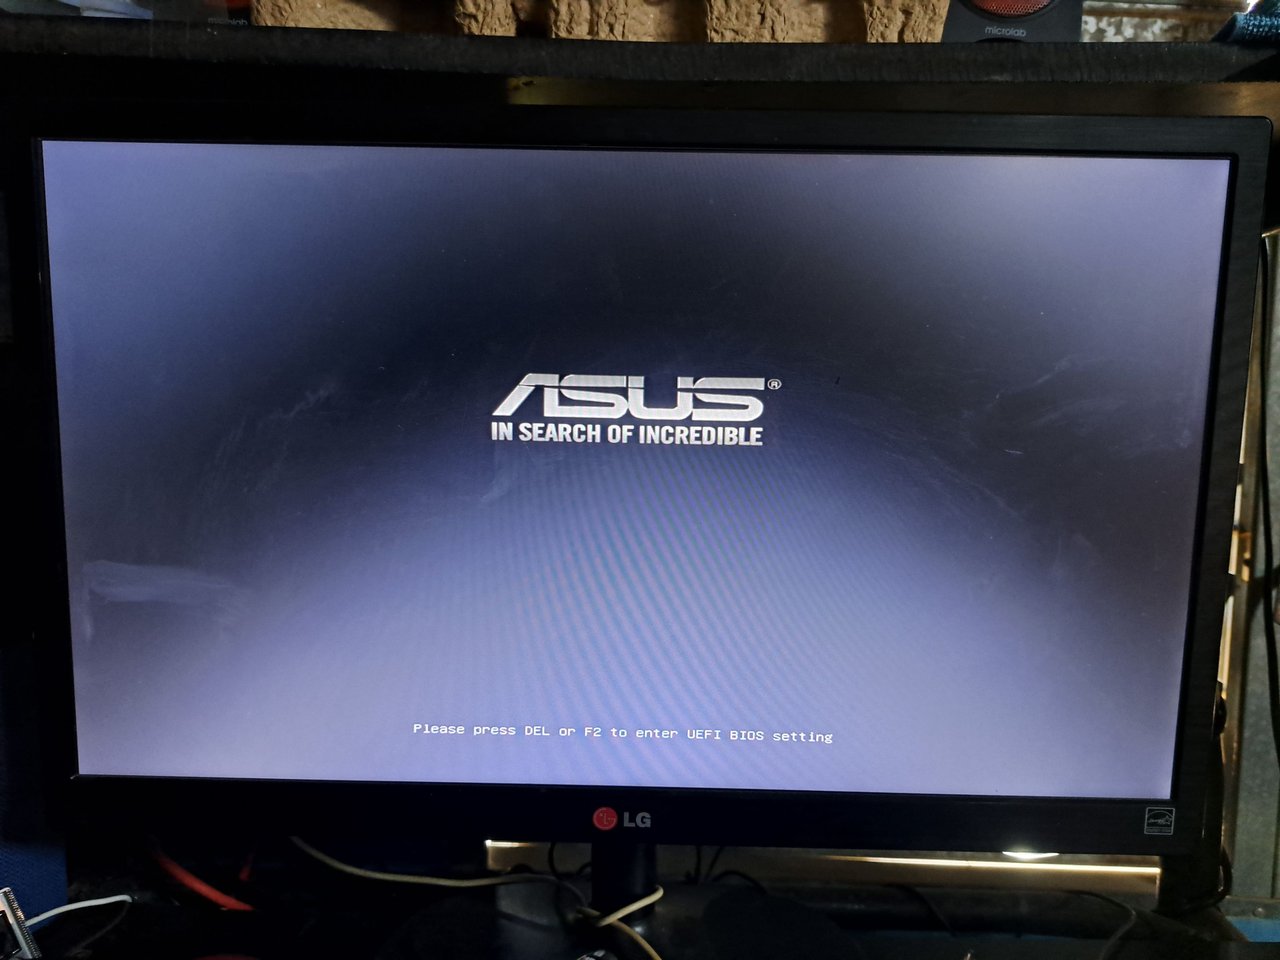
I really couldn't believe it. I was thrilled to see that the board had come back to life, who would have thought that it was about to be discarded because it had some bent pins? Honestly, I'm very happy to have repaired it, so I hope this story mode tutorial can be useful if you ever come across a breakage similar to this one.
Spanish Version Here
De verdad no podía creerlo. Me entró una emoción al ver que aquella placa había vuelto a la vida. ¿Quién iba a pensar que estuvo a punto de ser desechada por tener algunos pines doblados? Sinceramente, estoy muy contento por haberla reparado, así que espero que este tutorial modo historia les pueda ser útil por si en algún momento se topan con una rotura semejante a esta.

Thank you very much for reading my post. If you liked it, please leave a comment and consider following me so you don't miss my next posts. I'd love to know your opinion and your thoughts about the topic I discussed in this post, see you in the next one!
Spanish Version Here
Muchas gracias por leer mi post. Si te gustó, por favor deja un comentario y considera seguirme para no perderte mis próximas publicaciones. Me encantaría saber tu opinión y tus ideas sobre el tema que traté en este post. ¡Nos vemos en el próximo!
Cover page created in Canva Pro
Translated by DeepL


Me encantó el orden y la pulcritud con la que trabajas ademas de toda tu presentación, la parte técnica muy bien lograda, querido tu publicación es estupenda, gracias por todas tus recomendaciones y el tutorial.
Es un verdadero honor para mí saber que te gustó. Tus palabras me motivan a seguir creando. Muchísimas gracias por todo el apoyo.
aha interesting you are good at this thanks for sharing.
A real pleasure. Thank you for your support.
From Venezuela, our witness drives decentralization and the adoption of Web3 technology, creating opportunities for the local community and contributing to the global ecosystem. // Desde Venezuela, nuestro testigo impulsa la descentralización y la adopción de la tecnología Web3, generando oportunidades para la comunidad local y contribuyendo al ecosistema global.
Sigue, contacta y se parte del testigo en: // Follow, contact and be part of the witness in:
Muchísimas gracias por todo el apoyo 🤗
Wow! con tantas piezas por organizar la idea de la foto me parece genial, gracias por compartir, muchas veces dejamos los equipos a un lado porque pensamos que es difícil repararlos y fíjate que te resultó muy fácil la reparación; gracias por compartir.
Saludos!
Así mismo. Muchas veces no se sabe lo que tienen y suele ser complicado. Por suerte está vez aunque no sabía lo que era pude repararlo.
It's amazing that you can repair it. Most of us take out pc or laptop to the repair shop. Congrats.
There are repairs that I can't do at home due to lack of equipment or knowledge. But many times if I see that it is something simple I try to repair it myself.
Congratulations @edeyglezsosa! You have completed the following achievement on the Hive blockchain And have been rewarded with New badge(s)
Your next target is to reach 30000 upvotes.
You can view your badges on your board and compare yourself to others in the Ranking
If you no longer want to receive notifications, reply to this comment with the word
STOPCheck out our last posts:
Excelente trabajo compañero, recuerdo que un familiar tuvo ese inconveniente con su tarjeta madre ,por eso es muy bueno saber de todo un poco y poder solucionar cuestiones que se presentan cuando menos lo esperamos, mi respeto y admiración para usted !
Dicen que el conocimiento no ocupa espacio y yo eso me lo tomo muy en serio. Siempre estoy probando cosas nuevas y cuando no se algo pregunto muchísimo.
Así es, el conocimiento tiene dos funciones : Aplicarlo y compartirlo! Soy nuevo en la famila Hive , y me alegra muchísimo saber que personas tan talentosas y aplicadas como usted formen parte de la misma .
Excelente trabajo amigo, de verdad que es sorprendente ver como restauraste esos pides del procesador, me imagino el momento al ver que todo funciono perfectamente, en horabuena amigo!
Luego de repar algo todo es alegría pura.