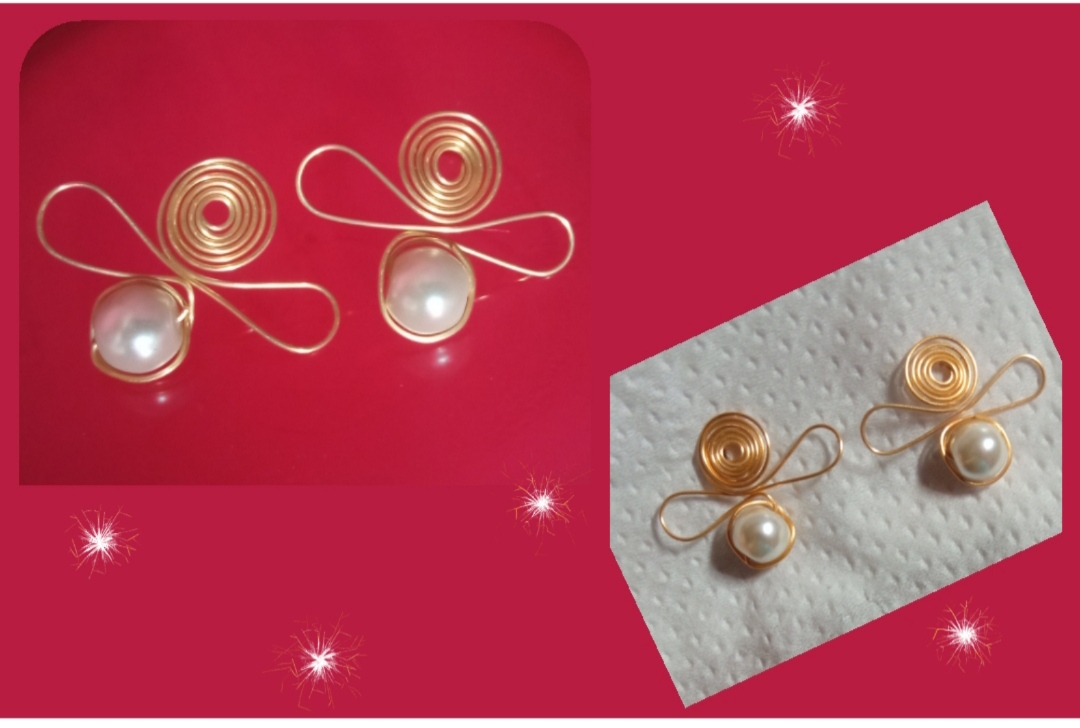
Feliz y bendecido día tengan todos, ya estamos a mitad de semana y a pesar de que últimamente e estado muy ocupada pues se acerca el final de año escolar estaba anciosa por poder compartir una vez más con ustedes, el día de hoy les traigo unos hermosos diseños de zarcillos bellos y elegantes elaborados con la técnica del alambrismos. Y lo mejor de todo es que solo necesitamos dos materiales para elaborarlos y obtener el resultado que pueden observar, acá podemos observar que muchas veces con Muy poco pero con mucha creatividad podemos realizar grandes cosas. Y para ustedes que desean aprender a elaborar sus acsesorios en casa les quise regalar este sencillo tutorial que espero les pueda ser de utilidad.
Happy and blessed day everyone, we are already halfway through the week and despite the fact that lately I have been very busy as the end of the school year is approaching, I was anxious to be able to share with you once again, today I bring you some beautiful designs of beautiful and elegant tendrils made with the technique of wire wrapping.
And the best of all is that we only need two materials to make them and obtain the result that you can see, here we can see that many times with very little but with a lot of creativity we can do great things.
And for you who want to learn how to make your accessories at home, I wanted to give you this simple tutorial that I hope can be useful.
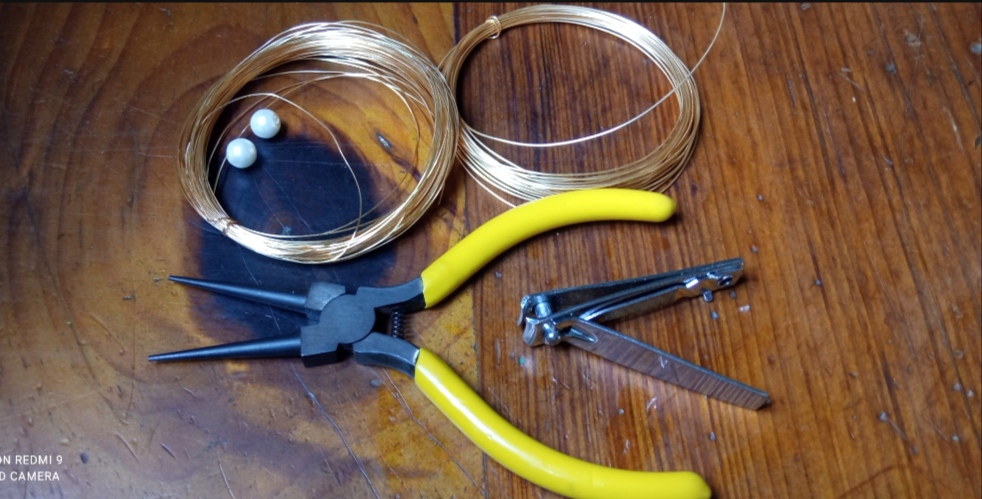
- Alambre de bisutería calibre 20.
- Piedras perladas medianas.
- pinza de bisutería.
- 20 gauge jewelry wire.
- Medium pearl stones.
- jewelry clip.
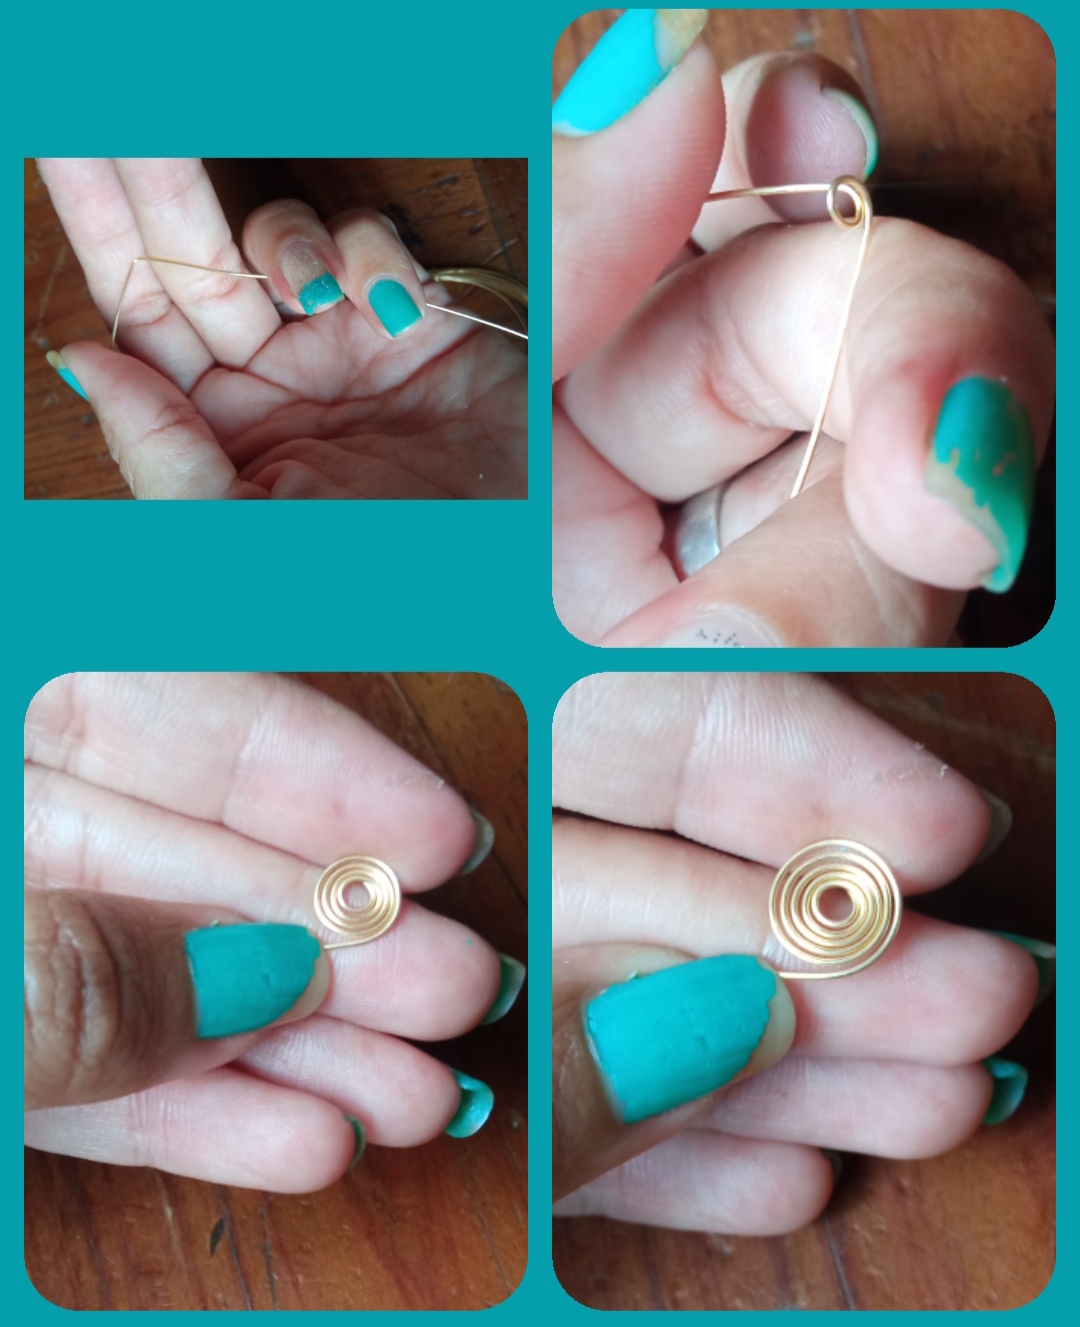
✴️ Paso 1: para iniciar la elaboración de este bello y creativo diseño lo primero a realizar es tomar el alambre de bisutería calibre 20 y doblaremos un pedacito de aproximadamente 2 cm, este será el clavito de nuestro zarcillo que nos servirá para colocarlo a la hora de lucirlo, Seguidamente con ayuda de la punta de la pinza comenzaremos a elaborar un pequeño espiral, para ello elaboramos un muy pequeño círculo y vamos dando vueltas circulares al alambre alrededor de este hasta obtener el resultado y tamaño deseado.
✴️ Step 1: to begin the elaboration of this beautiful and creative design, the first thing to do is take the 20-gauge costume jewelry wire and we will bend a little piece of approximately 2 cm, this will be the nail of our tendril that will help us to place it When it's time to wear it, then with the help of the tip of the pliers we will begin to make a small spiral, for this we make a very small circle and we go around the wire in circular turns until we obtain the desired result and size.
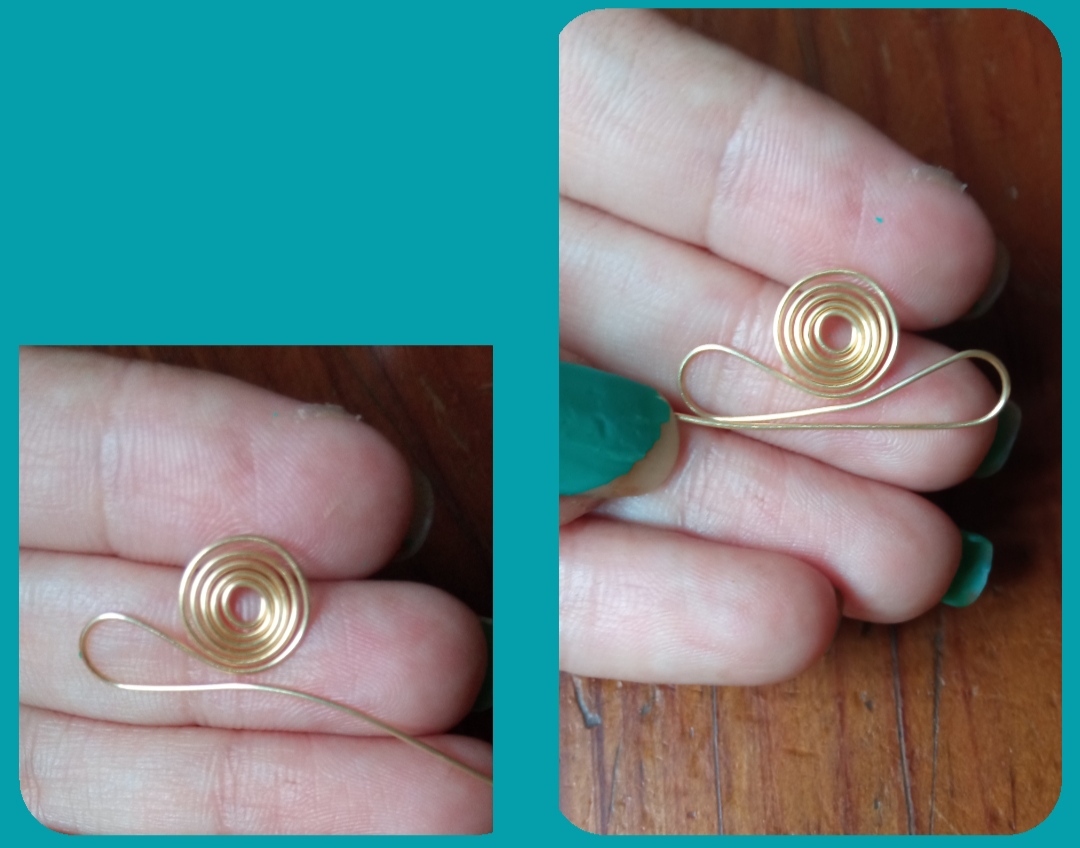
✴️ Step 2: Next, with what we have left over from the wire under the spiral, we will make the following shape similar to two leaves, we bend the wire to one side and leaving a length of 2 cm, we will fold the double into a semicircular shape and return the wire to the center below the spiral and now we take the wire to the opposite side and perform the same procedure and return the wire to the center of our tendril.
✴️ Paso 3: ahora tomamos el extremo de alambre que nos queda que es de aproximadamente 6 cm, lo doblamos hacia abajo e Introducimos la piedra perlada y dejándola en la punta del alambre doblamos el alambre por encima de la piedra para sujetarla y Seguidamente comenzamos a enrrollar la piedra en el alambre hacia arriba hasta llevarla al centro de nuestro diseño y listo. Ahora solo repetimos estos tres simples pasos para elaborar la pareja de nuestro zarcillo.
✴️ Step 3: now we take the end of the wire that we have left, which is approximately 6 cm, we bend it downwards and we introduce the pearl stone and leaving it at the tip of the wire we bend the wire over the stone to hold it and Next we begin to roll the stone up on the wire until we take it to the center of our design and that's it.
Now we just repeat these three simple steps to make the pair of our tendril.

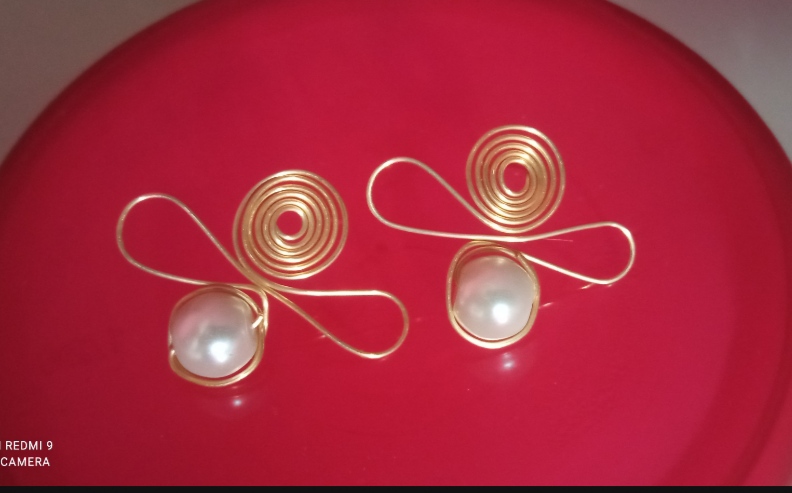
Queridos amigos este a Sido mi creación de hoy para todos ustedes deseando que haya Sido de su total agrado y se animen a seguir estos pasos y crear sus acsesorios en casa, me despido por esta oportunidad agradecida con ustedes por haberme acompañado en este tutorial, les deseo un excey día y una semana muy productivo y llena de bendiciones.And so we will be able to make this beautiful design with only jewelry wire and two beautiful stones that can be pearled or one of your preference, as you can see this is a super easy, fast and simple design to make and also very economical.
And the result will be a beautiful design that we can wear wherever you want, on any occasion and with any outfit, they are super comfortable and light to wear.
Todas las Fotos son de mi autoría y fueron tomadas con mi Celular Redmi 9Dear friends, this has been my creation today for all of you, hoping that it has been to your liking and that you are encouraged to follow these steps and create your accessories at home, I say goodbye for this opportunity, grateful to you for having accompanied me in this tutorial, I wish you an excellent day and a very productive week full of blessings.
All Photos are my authorship and were taken with my Redmi 9 Cellphone
This post has been manually curated by @bhattg from Indiaunited community. Join us on our Discord Server.
Do you know that you can earn a passive income by delegating to @indiaunited. We share more than 100 % of the curation rewards with the delegators in the form of IUC tokens. HP delegators and IUC token holders also get upto 20% additional vote weight.
Here are some handy links for delegations: 100HP, 250HP, 500HP, 1000HP.
100% of the rewards from this comment goes to the curator for their manual curation efforts. Please encourage the curator @bhattg by upvoting this comment and support the community by voting the posts made by @indiaunited.
Amiga que hermoso te quedaron los zarcillos y con muy poco material gracias por habernos traído el paso a paso ya me estaré haciendo uno me gusta el diseño te felicito. Feliz día.
Gracias, me alegra saber que le haya gustado.
Fue un placer hacerte la visita y encontrarme con este post muy elegante.
Gracias, me alegra saber que le haya gustado.
Síii me encantaron amiga feliz tarde.
Me tienes encantada con tu trabajo, que don más lindo, saludos amiga.💜✨
Que linda Amiga gracias.