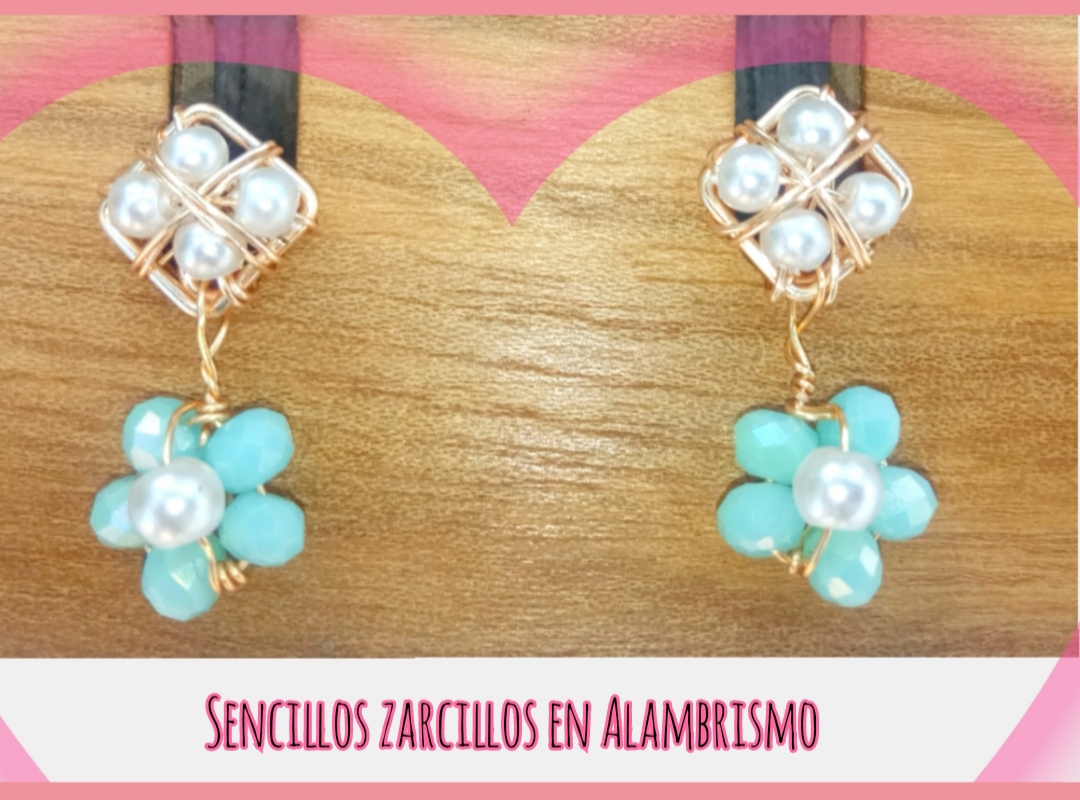
feliz y bendecido día tengan todos ustedes mis queridos y apreciados miembros de esta hermosa y creativa comunidad Espero hayan tenido una muy hermosa semana, Como cada semana pasó por aquí para compartir con ustedes una nueva creación realizada con la técnica del alambrismo, Este es un diseño súper fácil y muy sencillo de elaborar. Este diseño a pesar de ser elegante es muy sencillo lo cual es ideal para aquellas personas que desean y son de gustos menos exuberantes y prefieren utilizar algo cómodo Y poco pesado para el día a día y el trabajo.
Happy and blessed day to all of you my dear and appreciated members of this beautiful and creative community I hope you had a very beautiful week, As every week I stopped by here to share with you a new creation made with the wire technique, This is a design super easy and very simple to make.
This design, despite being elegant, is very simple, which is ideal for those people who want and have less exuberant tastes and prefer to use something comfortable and light for everyday use and work.
Here I share a simple step by step so that all of you can make your own accessories from the comfort of your home. I hope you like this one.
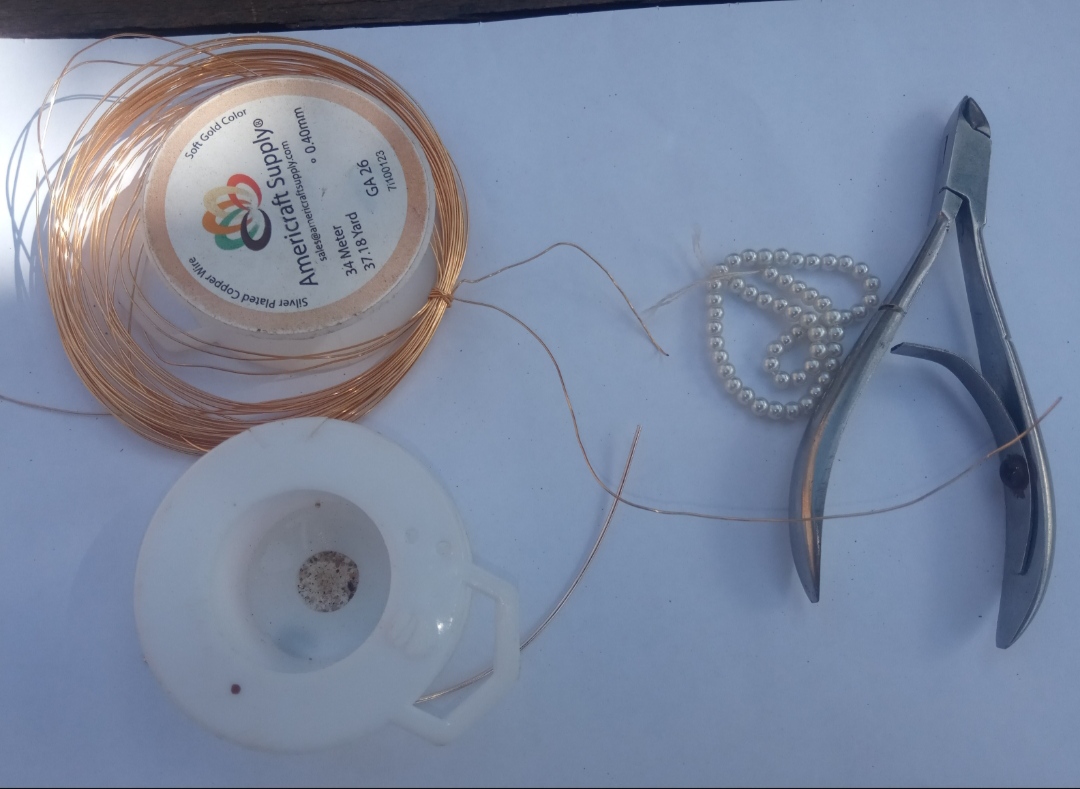
- Alambre de bisutería calibre 20.
- Alambre de bisutería calibre 26
- cristales pequeños azulados.
- piedras Perladas pequeñas.
- pinza de bisutería.
- 20 gauge jewelry wire.
- 26 gauge jewelry wire
- small bluish crystals.
- small pearl stones.
- jewelry clamp.
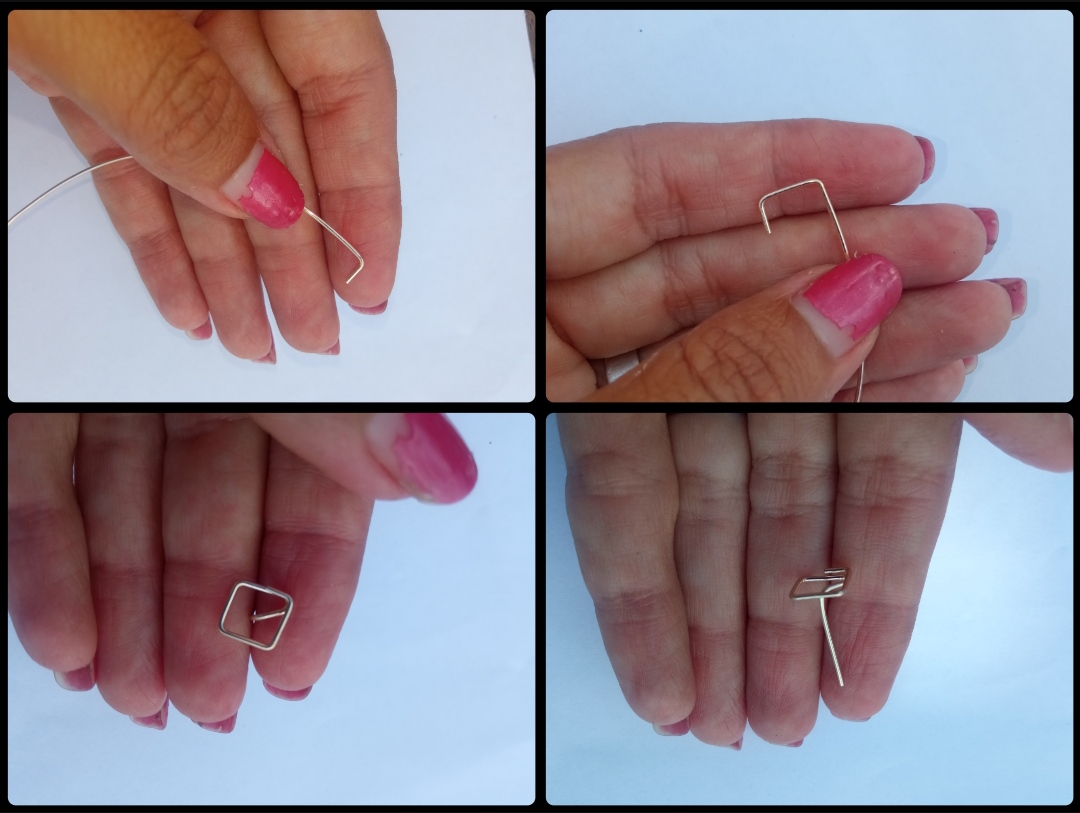
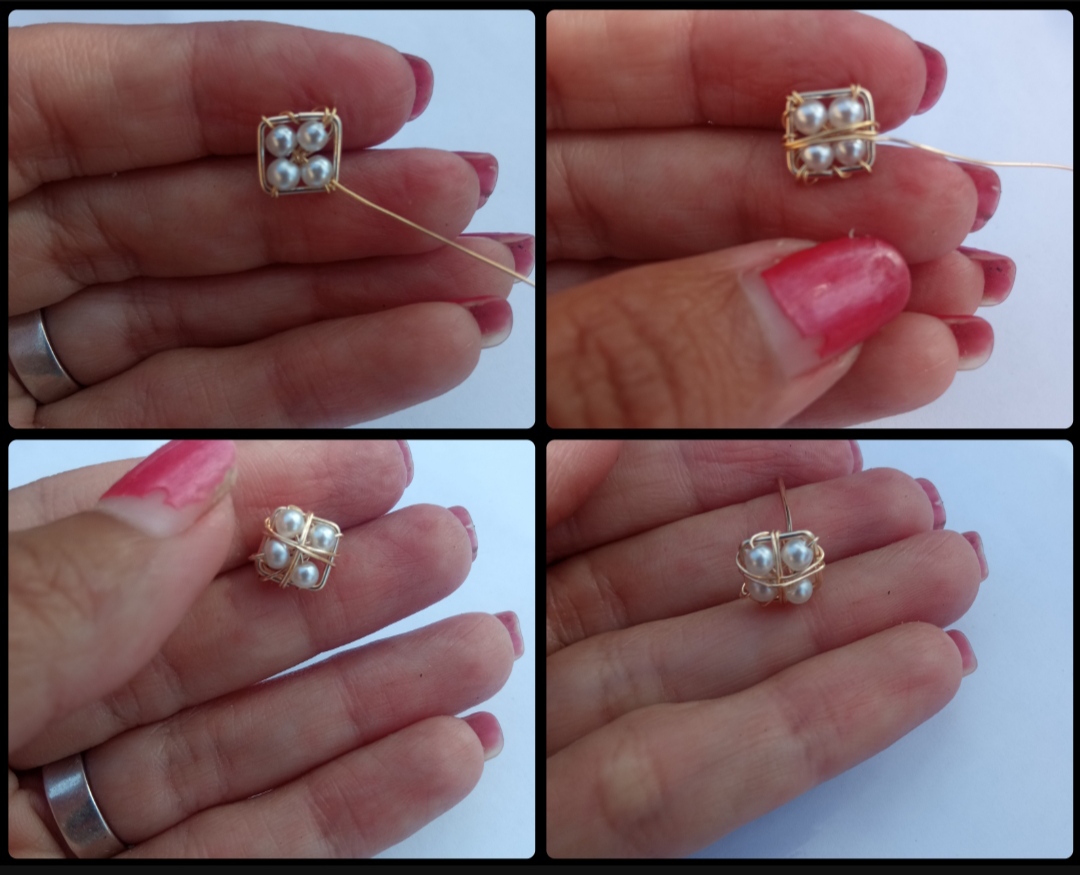
⭐ Paso 1: para iniciar la elaboración de este hermoso diseño lo primero que debemos hacer es tomar un pedazo de aproximadamente 8 cm de alambre de bisutería calibre 20 y con ayuda de la pinza doblaremos una pequeña punta y seguidamente comenzaremos a doblar en pequeñas piezas hasta dar forma de pequeño rombo como pueden observar en las siguientes imágenes. Al culminar la forma de rombo el exceso de alambre lo doblaremos hacia el centro de la pieza y luego hacia atrás dejando una pequeña punta que será el clavito de nuestro zarcillo.
⭐ Step 1: to start making this beautiful design, the first thing we must do is take a piece of approximately 8 cm of 20 gauge jewelry wire and with the help of the tweezers we will bend a small tip and then we will begin to bend it in small pieces to form a small rhombus shape as you can see in the following images.
When we complete the rhombus shape, we will bend the excess wire towards the center of the piece and then back, leaving a small tip that will be the nail of our tendril.
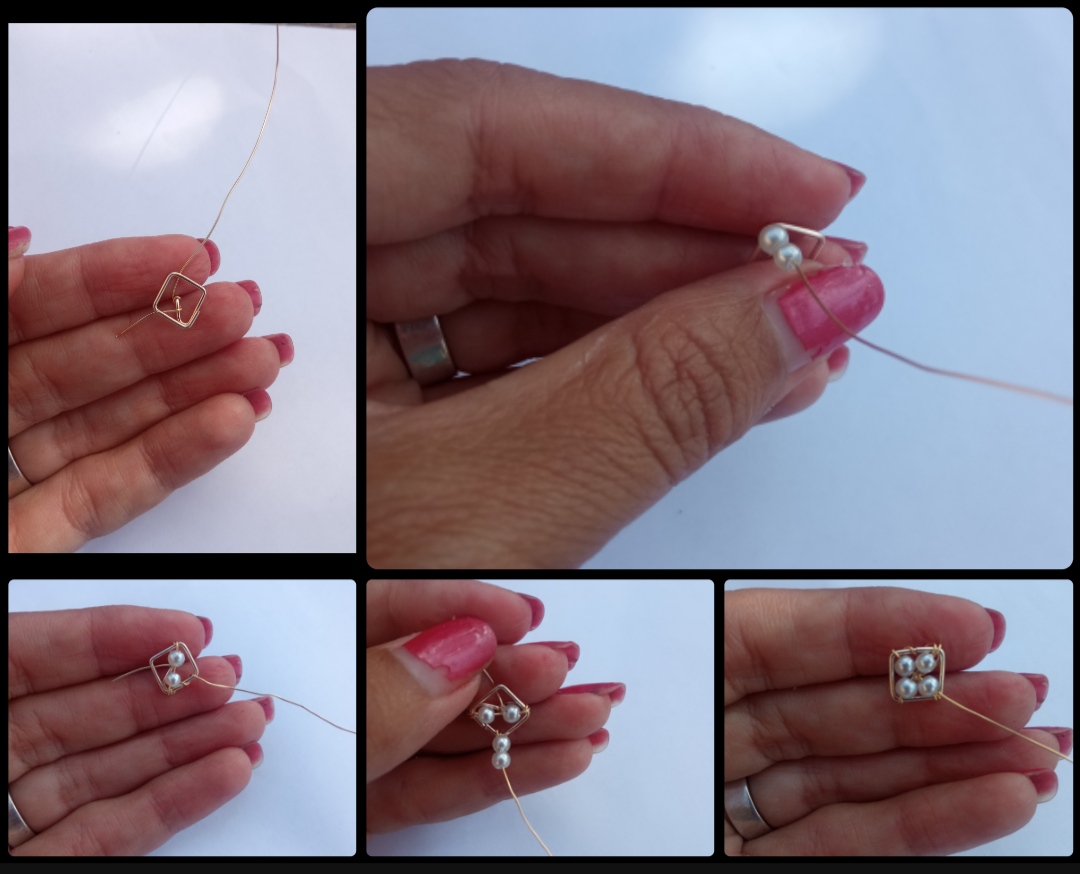
⭐ Paso 2: seguidamente tomaremos un pedazo de alambre de bisutería calibre 26 y lo enrollaremos en la base de nuestro zarcillo luego introduciremos dos pequeñas piedras perladas y la cruzaremos hacia la parte de abajo de nuestro rombo quedándonos las dos piedras en la parte central en forma lineal seguidamente enrollaremos un poco el alambre y lo llevaremos hacia uno de los lados del rombo e introduciremos dos piedras perladas más que cruzaremos hacia el otro extremo quedándonos en forma de cruz las piedras perladas como pueden observar. Y para culminar tomaremos el exceso de alambre y realizaremos un par de vueltas por encima de las piedras de un lado a otro como pueden observar en las siguientes fotografías.
⭐ Step 2: next we will take a piece of 26 gauge jewelry wire and we will wind it at the base of our tendril, then we will insert two small pearl stones and we will cross it towards the bottom of our rhombus, leaving the two stones at the bottom. center in a linear way, then we will roll the wire a little and take it towards one of the sides of the rhombus and insert two more pearl stones that we will cross towards the other end, leaving the pearl stones in the shape of a cross, as you can see.
And to finish we will take the excess wire and make a couple of turns over the stones from one side to the other as you can see in the following photographs.
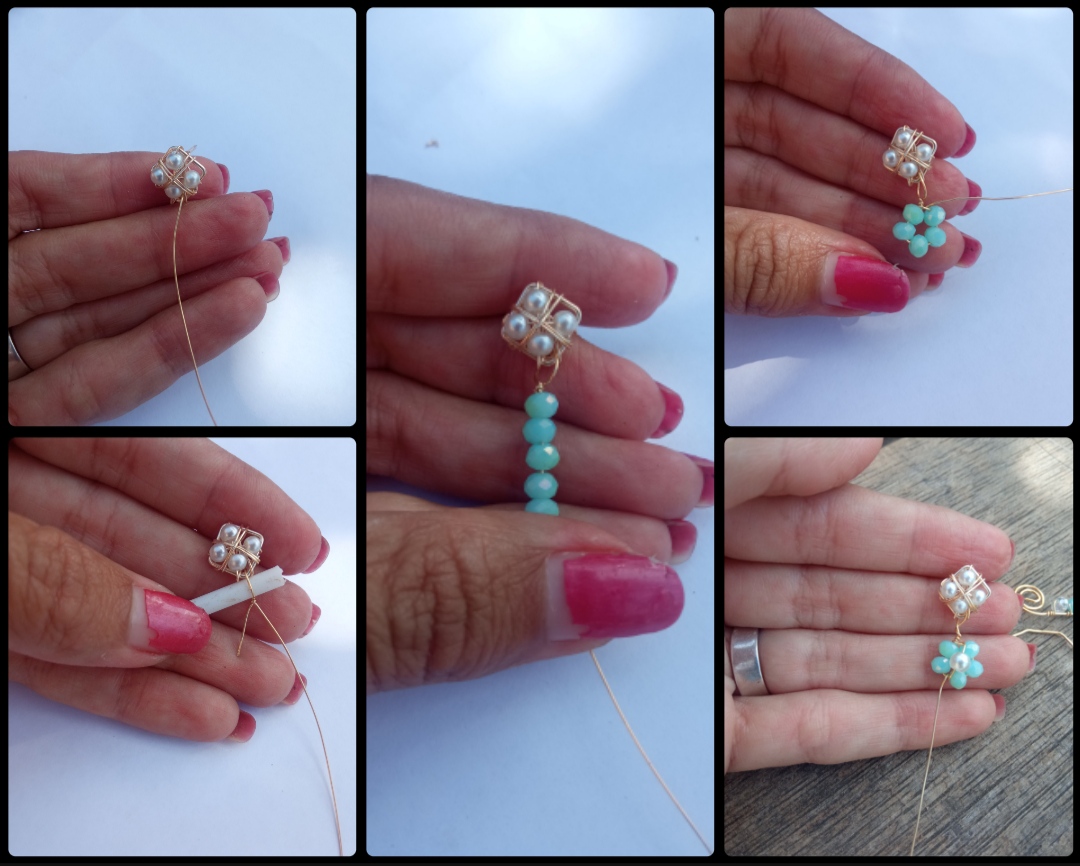
⭐ Paso 3: con los dos pasos anteriores ya habríamos elaborado unos hermosos zarcillos sencillos de clavos sin embargo yo quise colocarles un pequeño detalle más por lo que tomé otro pedazo de alambre de bisutería calibre 26 y lo introduce por la punta de abajo de nuestro rombo y con ayuda de un palillo realicé una pequeña forma circular seguidamente introduje cinco cristales y los coloqué en forma circular enrollando nuevamente el alambre encima de la primera pieza de cristal y para darle forma de pequeña Flor introduje una pequeña piedra perlada la cual coloqué en medio de los cristales como pueden observar a continuación. Y así coloqué una linda flor colgante de nuestro clavo lo cual me pareció un detalle sencillo pero muy hermoso. De esta manera culminamos la elaboración de nuestra primera pieza y debemos repetir el procedimiento para elaborar la segunda.
⭐ Step 3: with the previous two steps we would have already made some beautiful simple nail tendrils, however I wanted to add one more small detail to them, so I took another piece of 26 gauge jewelry wire and inserted it through the bottom tip of the nails. our rhombus and with the help of a toothpick I made a small circular shape, then I introduced five crystals and placed them in a circular shape, winding the wire again on top of the first piece of crystal and to give it the shape of a small Flower I introduced a small pearl stone which I placed in middle of the crystals as you can see below.
And so I placed a pretty flower hanging from our nail, which I thought was a simple but very beautiful detail. In this way we complete the creation of our first piece and we must repeat the procedure to make the second.
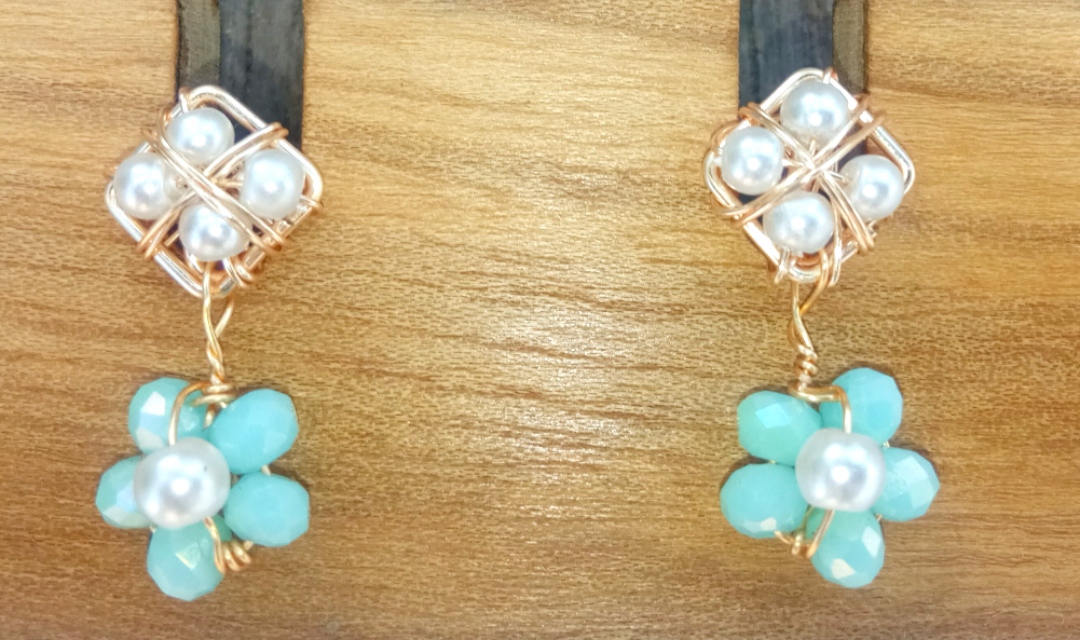

Todas las Fotos son de mi autoría y fueron tomadas con mi Celular Redmi 9.And so, my dear and appreciated friends, we will be able to make some very beautiful and simple tendrils, ideal to wear on any occasion. I wanted to make and decorate them with white pearly stones so that they can show off and combine with any outfit. As for the crystal flower, you can make it. in the color of your preference. And if you want to make it a little larger, you can add larger crystals.
I was totally delighted with this simple design and I hope you enjoyed it too. Now I must say goodbye, but not before thanking you for joining me in this new tutorial which I hope can be useful and beneficial to you, happy weekend everyone.
All Photos are my authorship and were taken with my Redmi 9 Cellphone
Now I got the idea how to make this kind of tendrils.Thanks to you my friend for sharing this blog.It is a big help for us.🥰
Thank you friend, I am glad to know that this Tutorial will be useful to you.
Trabajar con alambres es todo un arte, sobre todo por lograr un acabado limpio. Te quedaron hermosos esos zarcillos ☺️🫶🏼
Gracias amiga, me alegra mucho tu comentario.
Saludos.
Bonita tu creación amiga
Quiero más 💃
Que hermoso trabajo y súper fácil de hacer, yo también quiero unos así 🤩
Lucen preciosos!
Te quedaron muy bonitos Emma me gusta la combinación