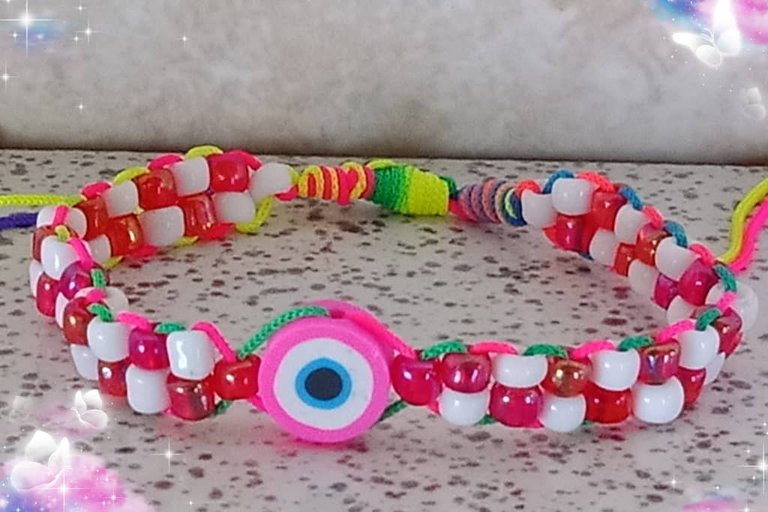
Saludos comunidad #hivediy, deseándoles feliz y bendecido inicio de semana a esta maravillosa comunidad de artesanos creativos. El día de hoy me siento feliz de compartir con ustedes mi nuevo proyecto creativo. Se trata de una hermosa, atractiva y muy llamativa pulserapor la gran variedad de colores que resaltan a ésta maravillosa joya.
Es muy sencilla de hacer y con materiales que regularmente tenemos en casa.
Que Dios les bendiga y espero les guste mi creación.
Greetings #hivediy community, wishing you a happy and blessed start of the week to this wonderful community of creative crafters. Today I am happy to share with you my new creative project. It is a beautiful, attractive and very striking bracelet because of the variety of colors that highlight this wonderful jewel.
It is very simple to make and with materials that we regularly have at home.
God bless you and I hope you like my creation.

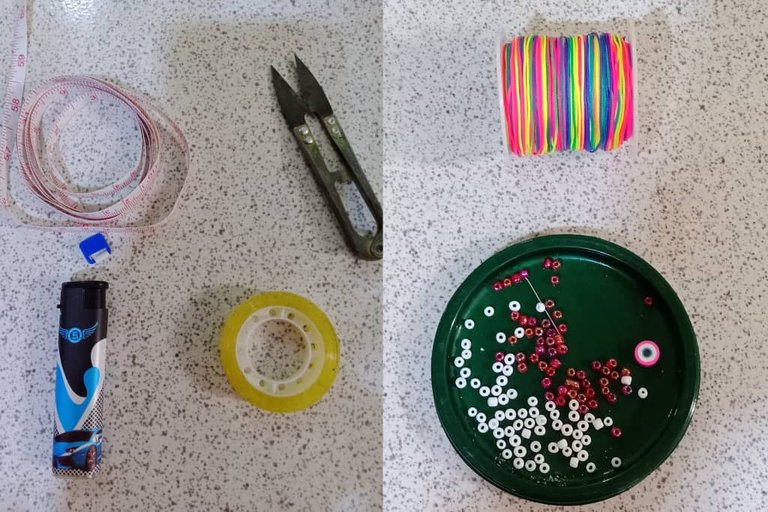
MATERIALES
Los materiales que utilizaremos para realizar esta hermosa pulsera con hilo chino multicolor son:
Hilo chino de un milímetro
Tijera
Yesquero
Cinta métrica
Cinta Adhesiva
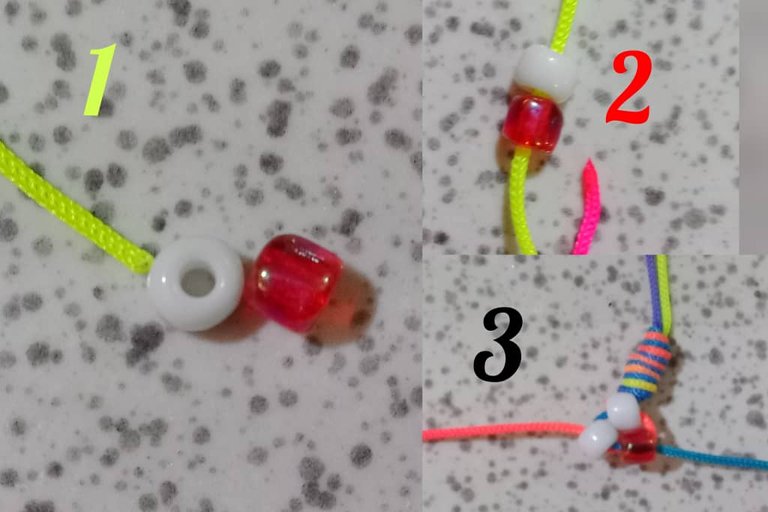
Chaquiras (mostacillas)
fomi
MATERIALS
The materials we will use to make this beautiful bracelet with multicolored Chinese thread are:
Chinese thread of one millimeter
Scissors
Tinder
Tape measure
Adhesive tape
Beads
fomi
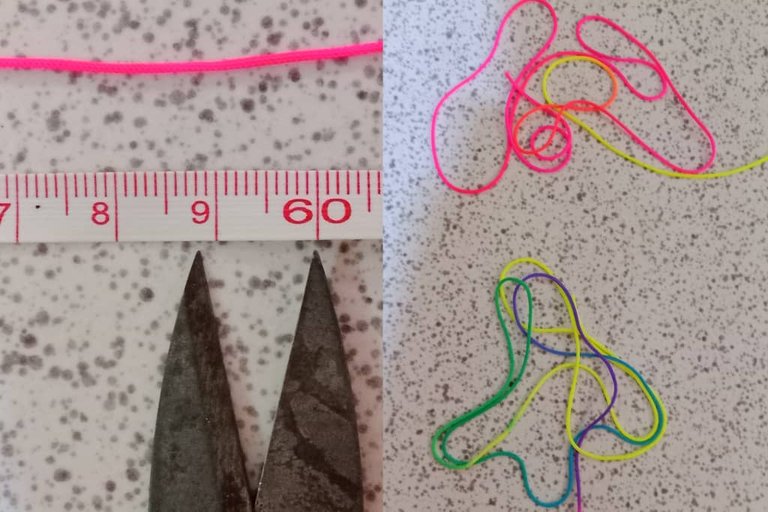
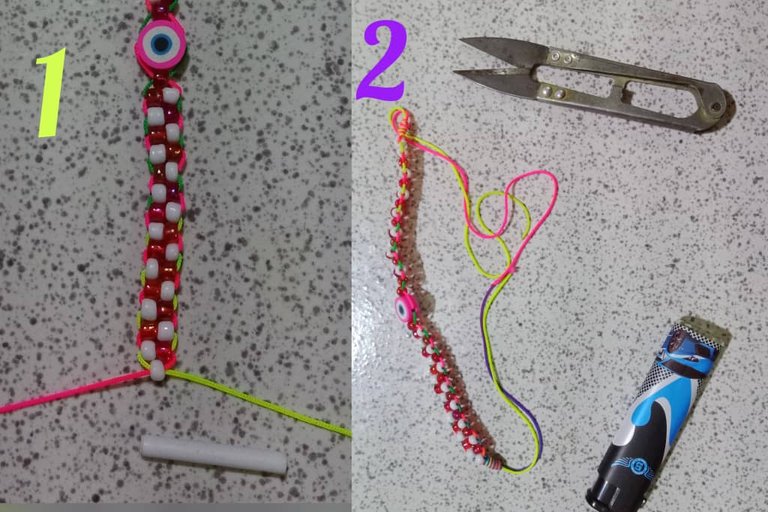
PREPARACIÓN
Para comenzar esta delicada pulsera multicolor vamos a cortar dos hebras de 60cm que usaremos para introducir las chaquiras y realizar el tejido
PREPARATION
To start this delicate multicolored bracelet we will cut two 60cm strands that we will use to introduce the beads and make the weaving.
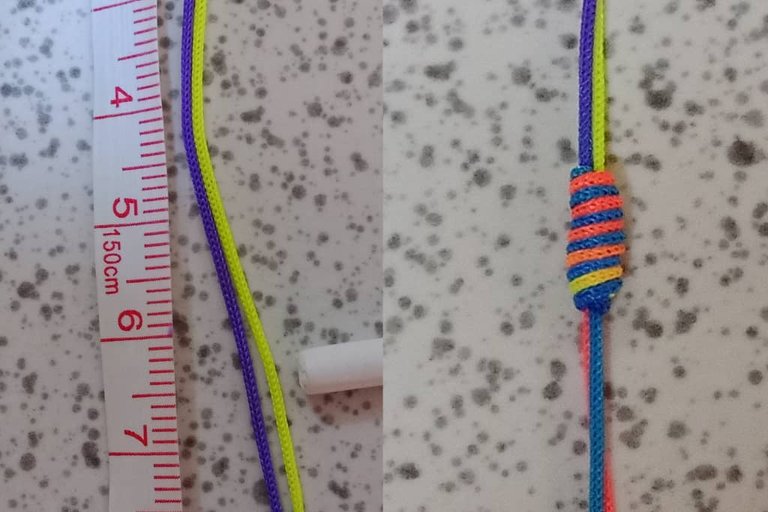
Luego comenzamos introduciendo una chaquira de color blanco por el hilo del lado izquierdo, después tomamos el hilo del lado derecho y lo introducimos por la misma chaquira pero por donde sale la punta del hilo izquierdo. Después agarramos ambas puntas vamos presionando hasta que la chaquira llevar la chaquira hasta el nudo franciscano
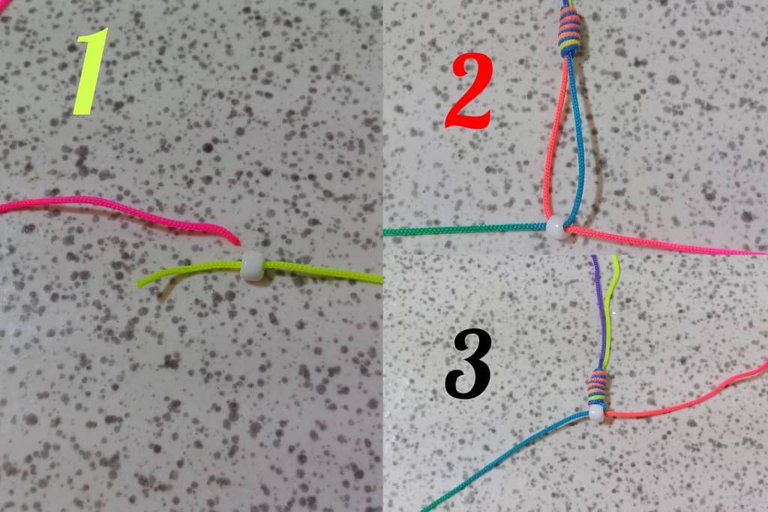
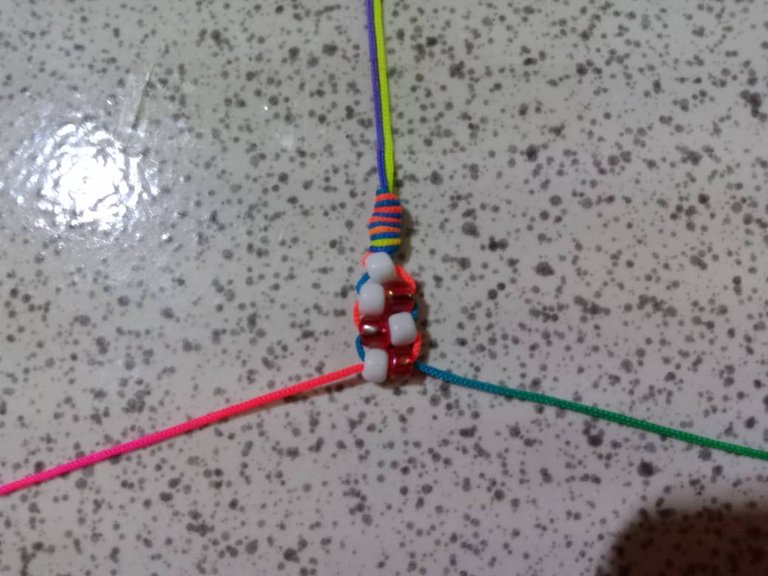
Después seguí realizando el mismo paso hasta llegar a los 6cm de este otro lado
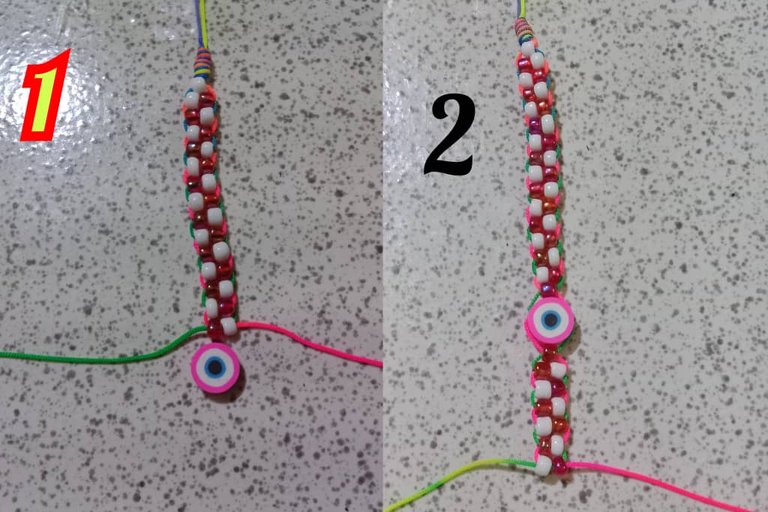
This is the result of our beautiful bracelet
Así quedó nuestra hermosa pulsera


Translated with https://www.deepl.com/translator
     Todas las imágenes son de mi autoría

      All the images are of my authorship
Wow this is such a beautiful bracelet you made, it's looks stunning and befitting.
Hello @vickoly thank you very much for supporting my content
Congratulations @evelin71! You have completed the following achievement on the Hive blockchain And have been rewarded with New badge(s)
Your next target is to reach 90 posts.
You can view your badges on your board and compare yourself to others in the Ranking
If you no longer want to receive notifications, reply to this comment with the word
STOPTo support your work, I also upvoted your post!
Está genial, muy colorida!
Gracias