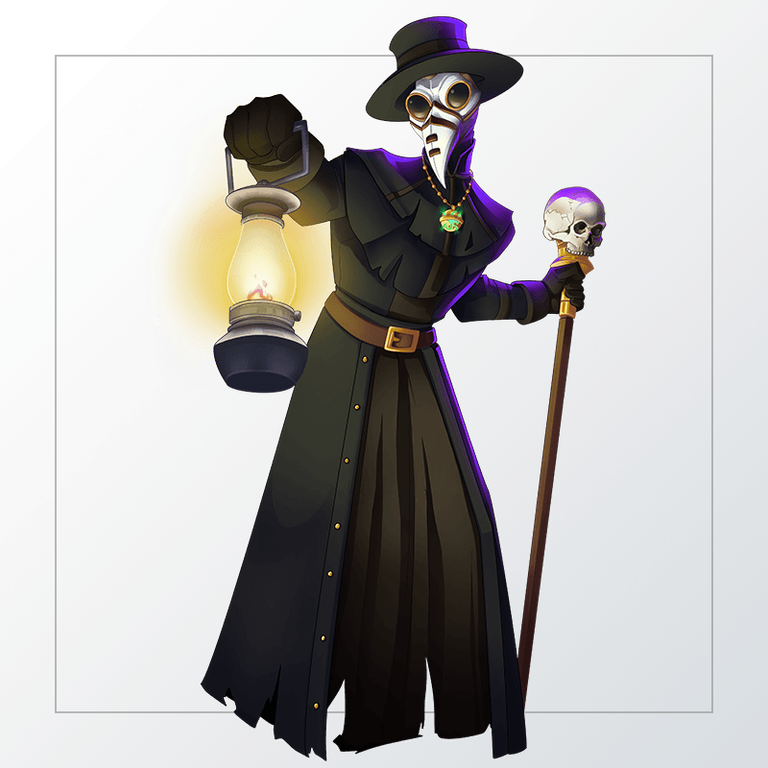
Hello friends, I hope you are well, welcome to my post. It's been a couple of months since I participated in a Splinterlands contest, so this is an opportunity to resume my activity in the contest. For week number 292 I have made a keychain, handmade from the letter Doctor BLIGHT who I have already had the opportunity to work on but in drawing. This keychain is part of a larger project, since my purpose is to make a realistic sculpture at the scale of the letter, but I still do not have the necessary materials to achieve that project, so now I only focused on the head which I have turned into a fun keychain. Here I briefly comment step by step on the entire process. Let's get started!
Hola amigos, espero que se encuentren muy bien, bienvenidos a mi post. Hace ya un par de meses que no participaba en un concurso de Splinterlands, así que esta es una oportunidad para retomar mi actividad en el concurso. Para la semana número 292 he realizado un llavero, hecho a mano de la carta Doctor BLIGHT quien ya he tenido la oportunidad de trabajarlo pero en dibujo. Este llavero forma parte de un proyecto más grande, pues mi propósito es hacer una escultura realista a tamaño escala de la carta, pero aun no tengo los materiales necesarios para alcanzar ese proyecto, por lo que ahora solo me concentré en la cabeza la cual he convertido en un divertido llavero. Aquí comento de forma breve paso a paso todo el proceso. Comencemos!

 |  |  |
|---|---|---|
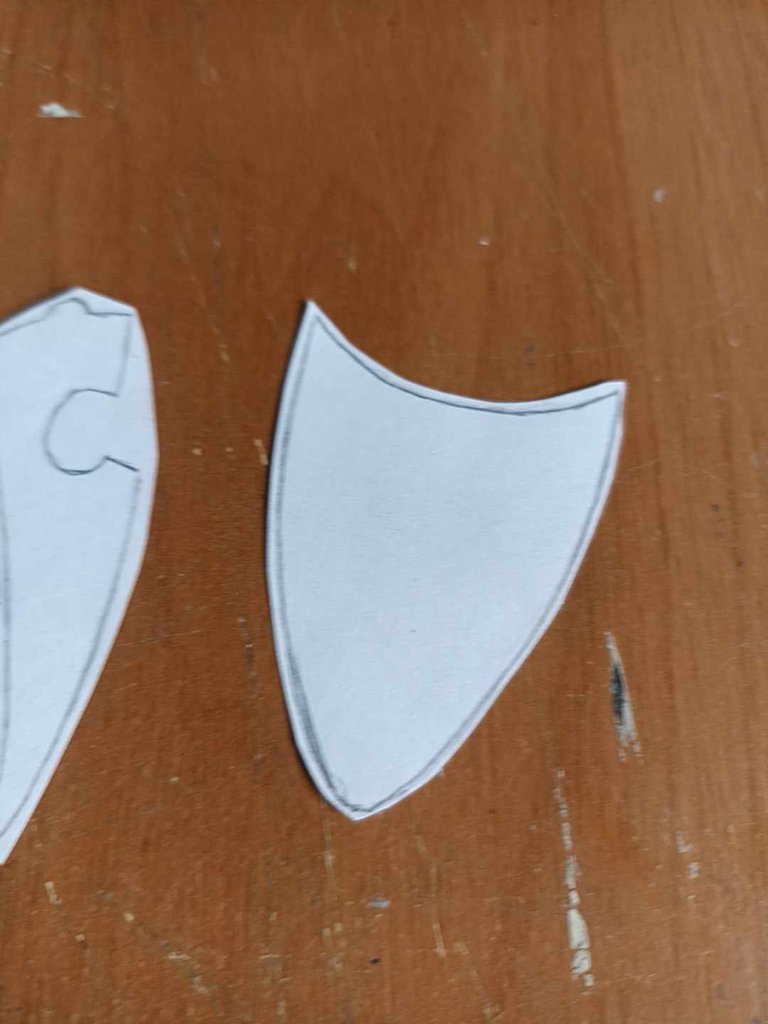 |  | 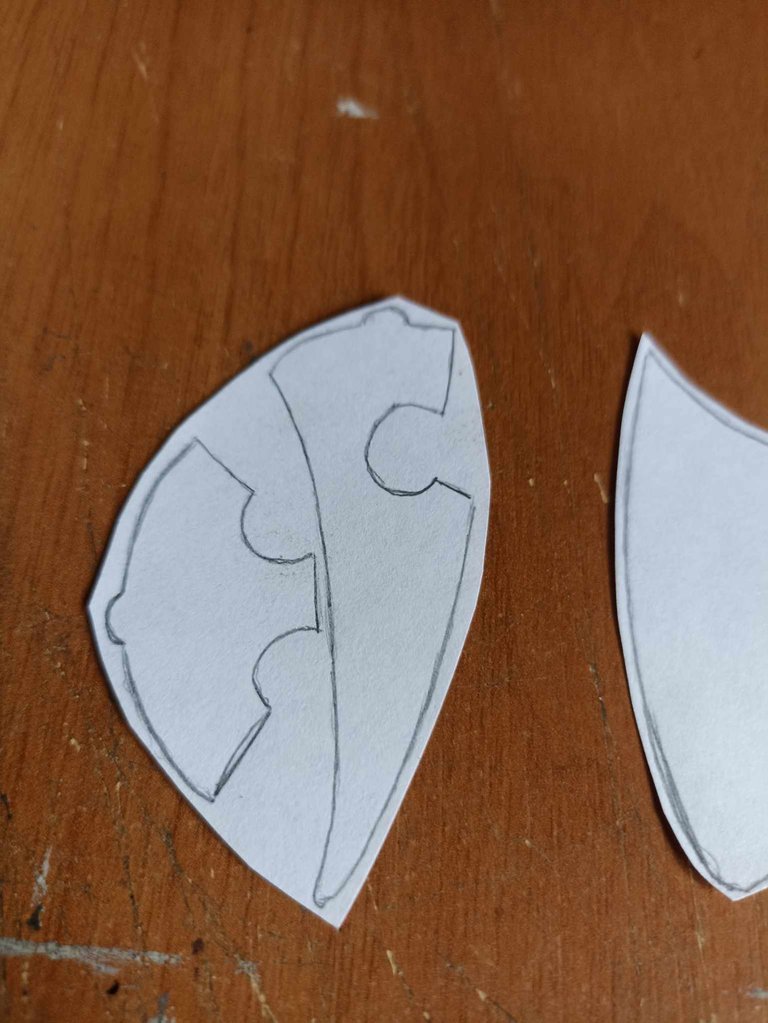 |
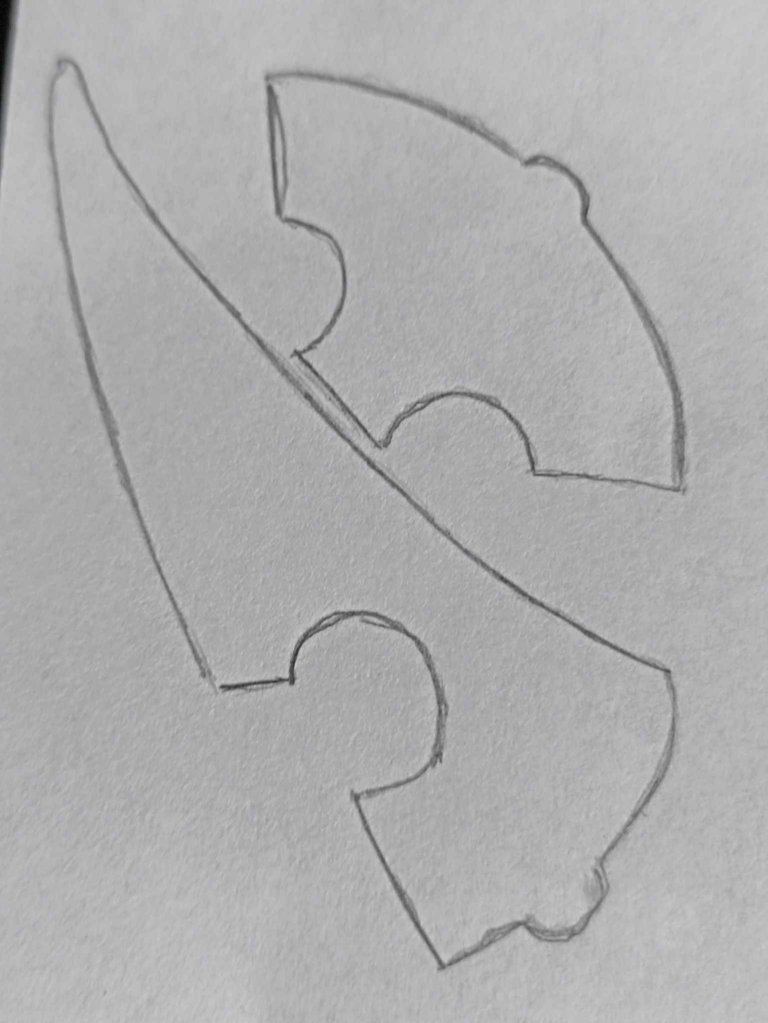
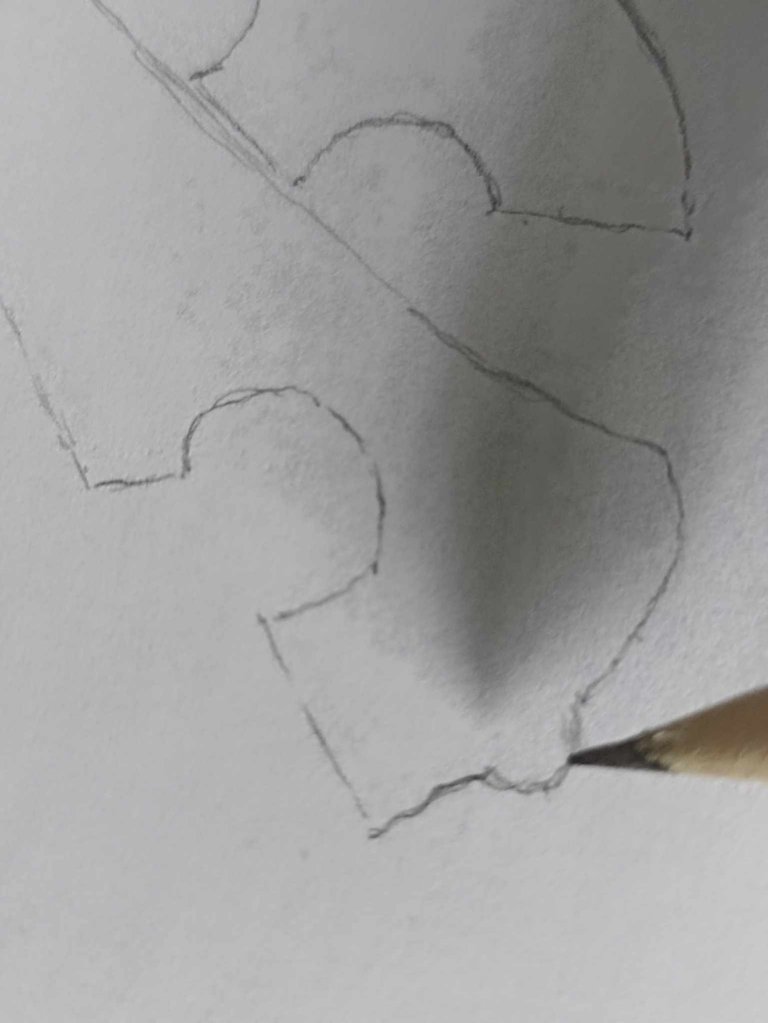
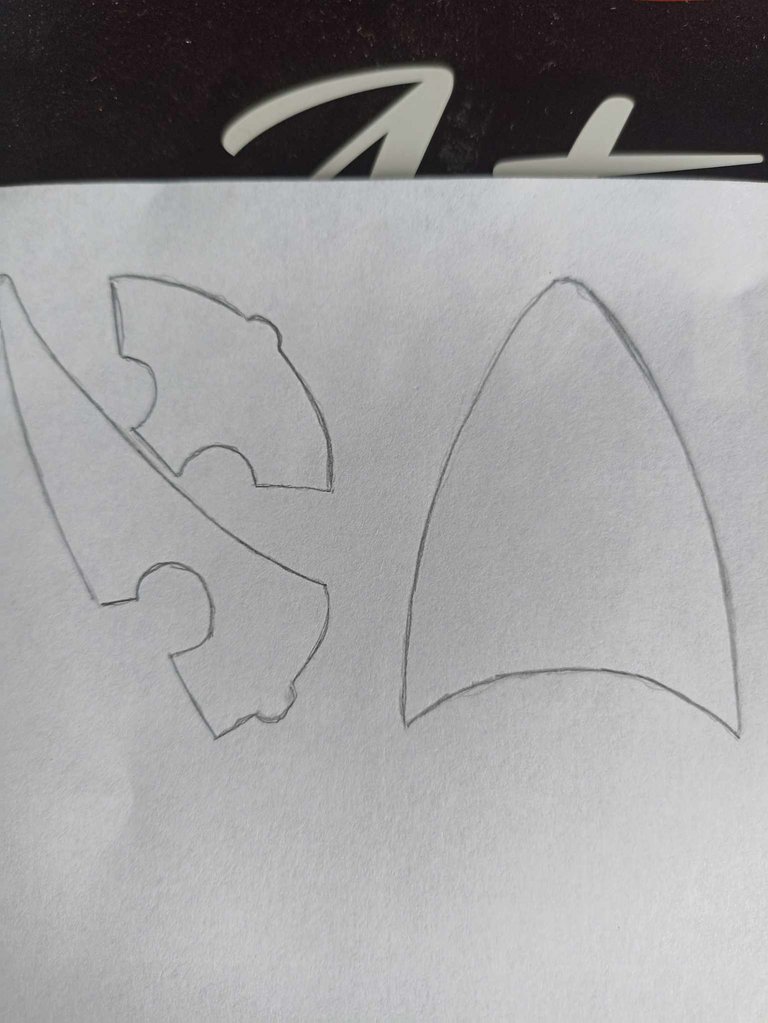
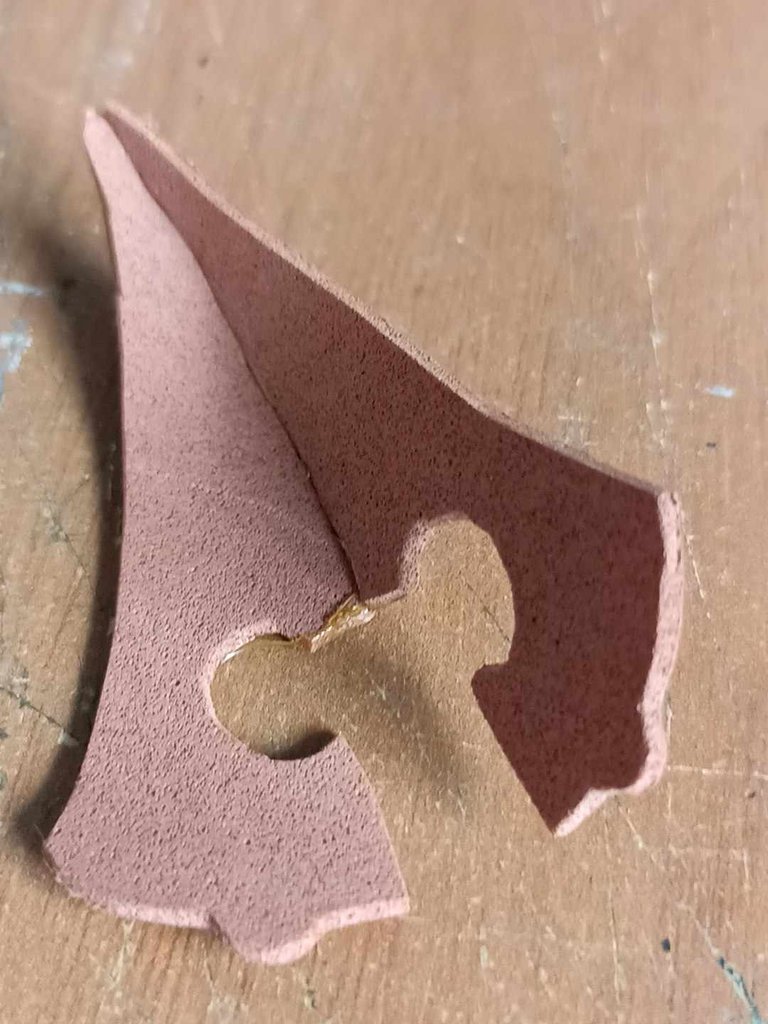
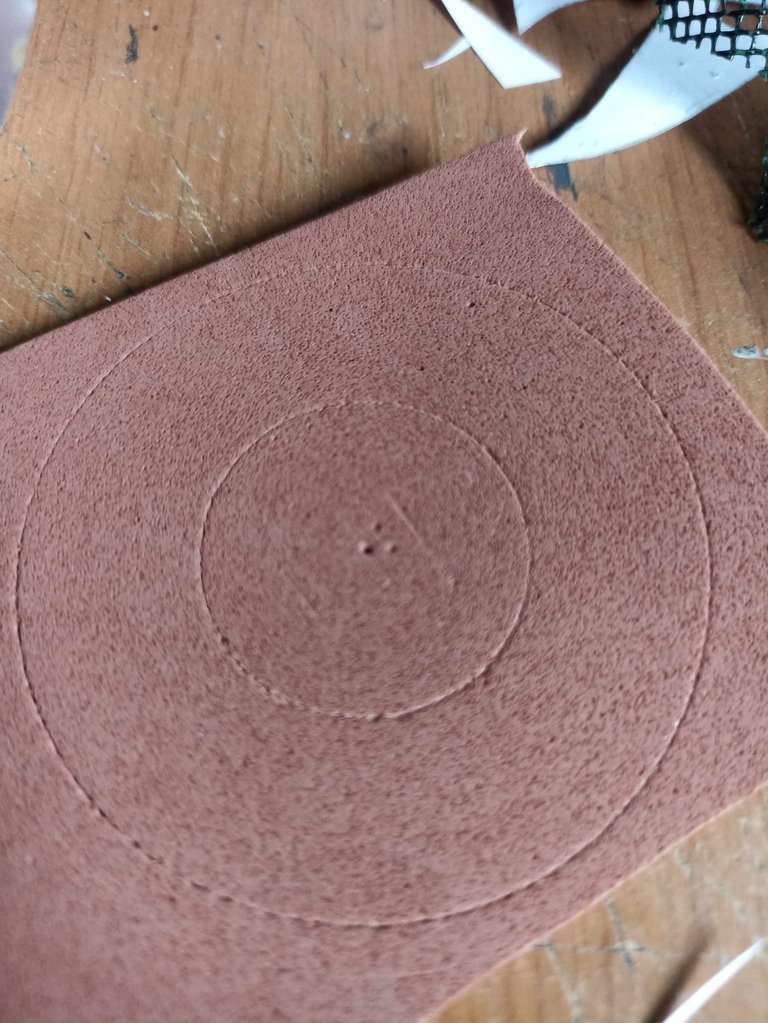
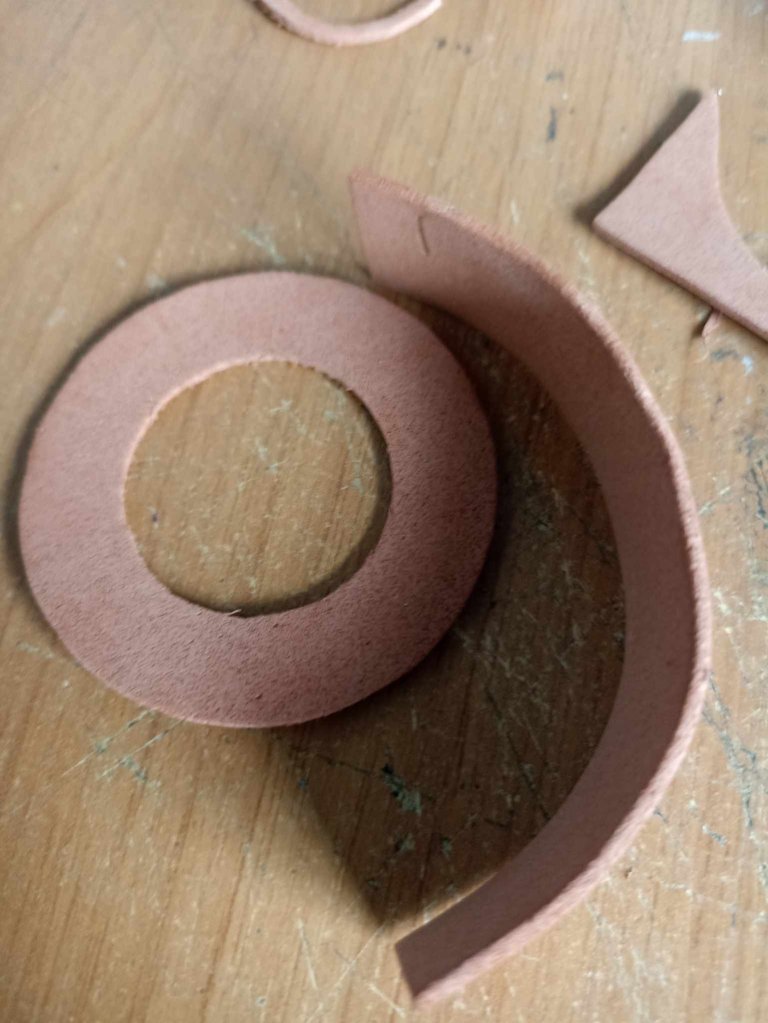
I made a template of the doctor's mask, in a reduced size, I used a 1:1 scale model that I then reduced to a more appropriate size. Then I cut it out with scissors, the goal is to use it as patterns since the material I will use to make the head will be foam rubber.
Hice una plantillas de la máscara del doctor, en un tamaño reducido, utilicé un modelo a escala 1:1 que luego yo reduje hacia un tamaño más acorde. Luego lo recorté con tijeras, el objetivo es usarlo como patrones ya que el material que usaré para hacer la cabeza será goma foami.
 |  |  |
|---|---|---|
 | 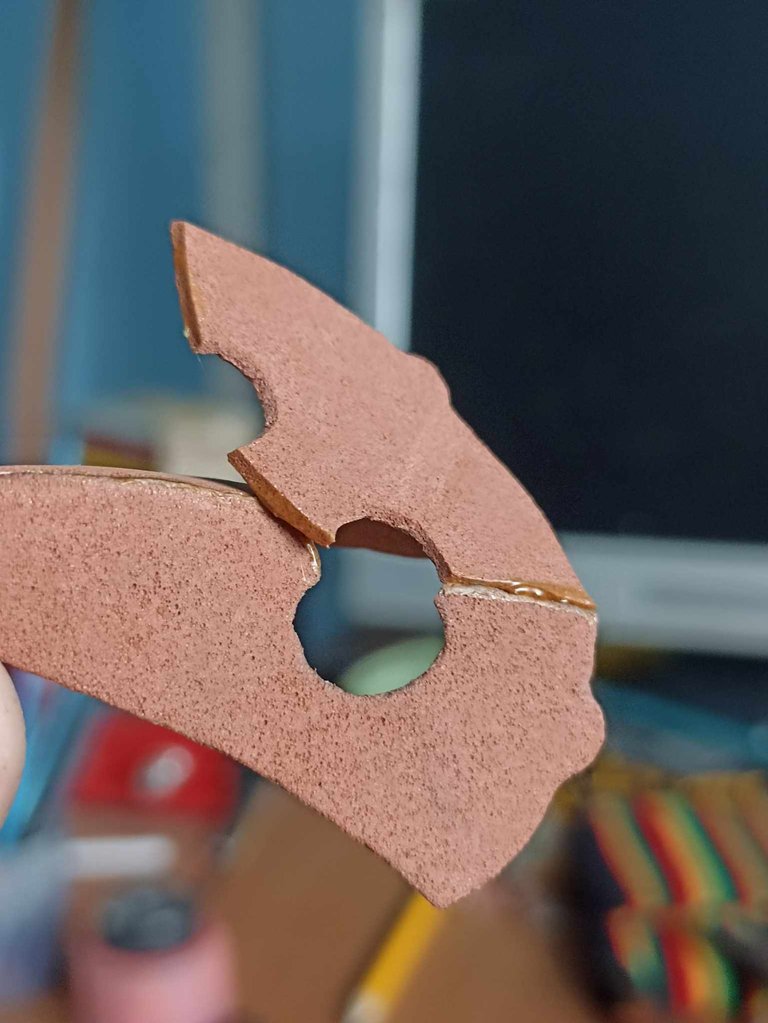 |  |
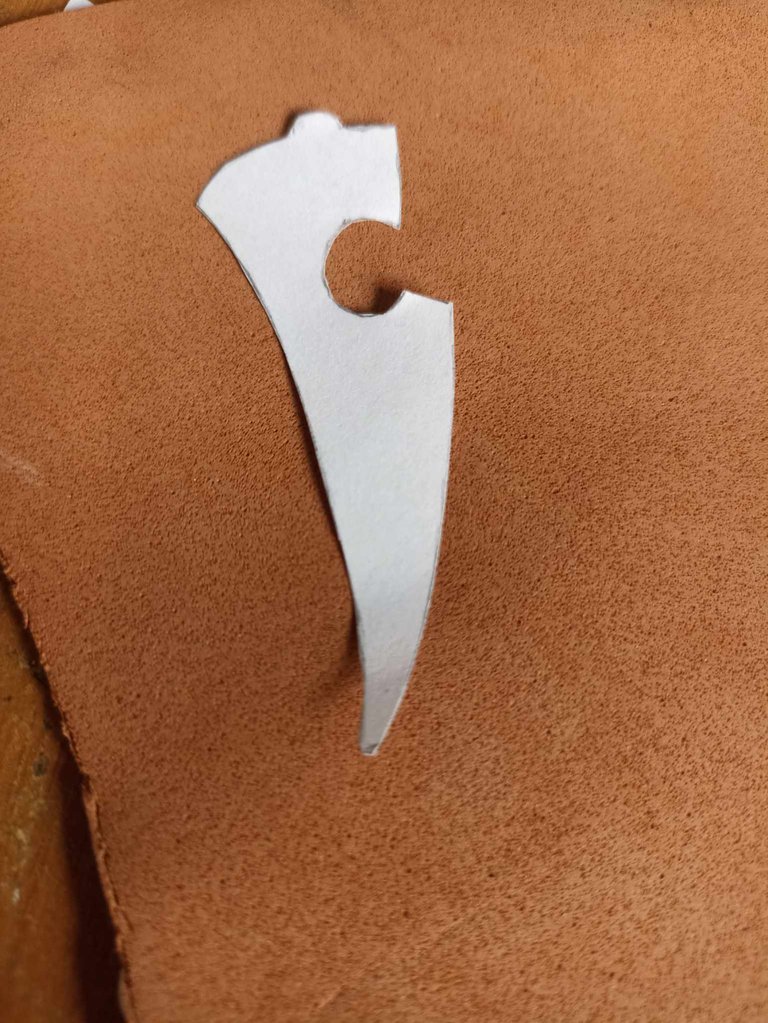
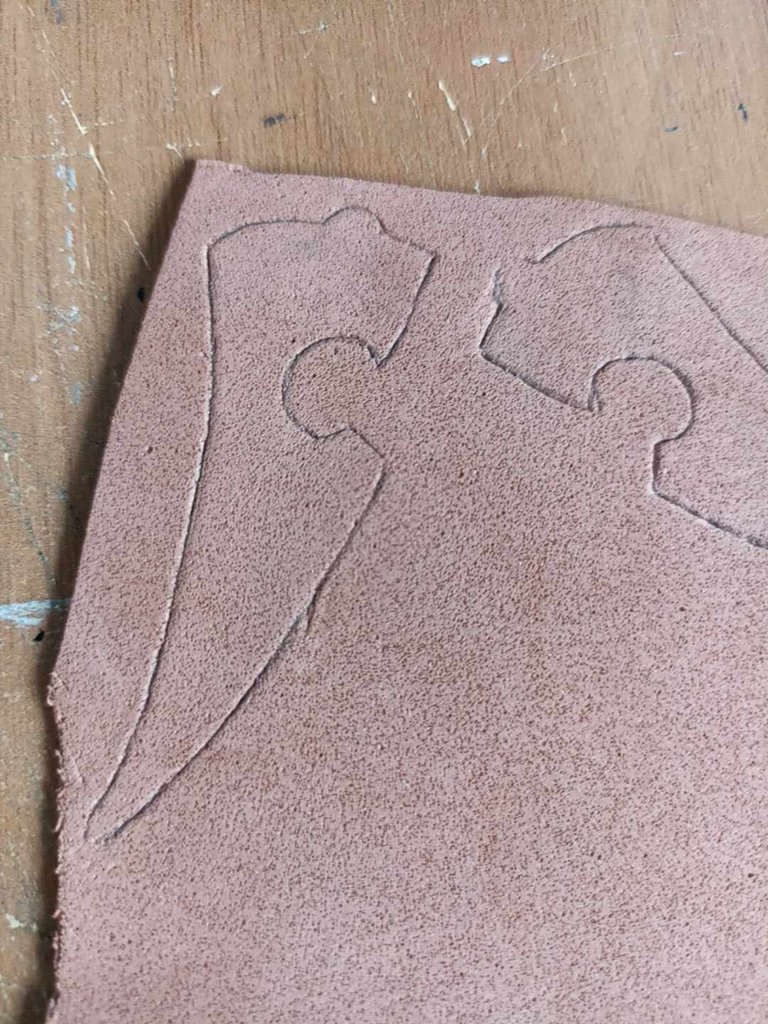
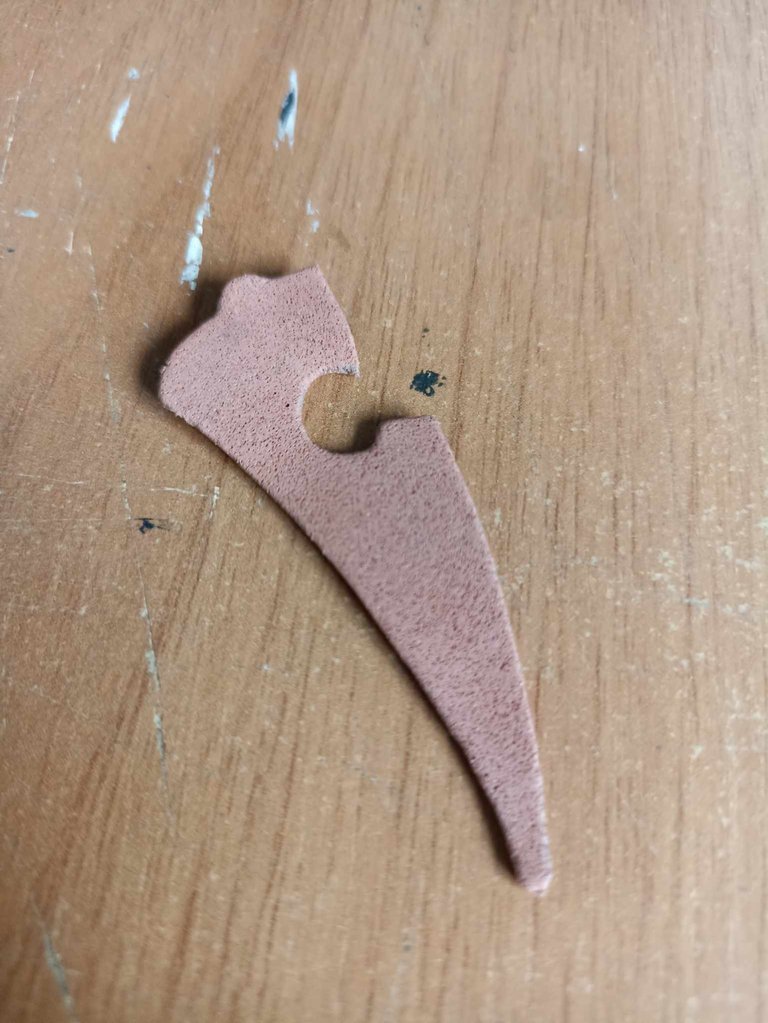
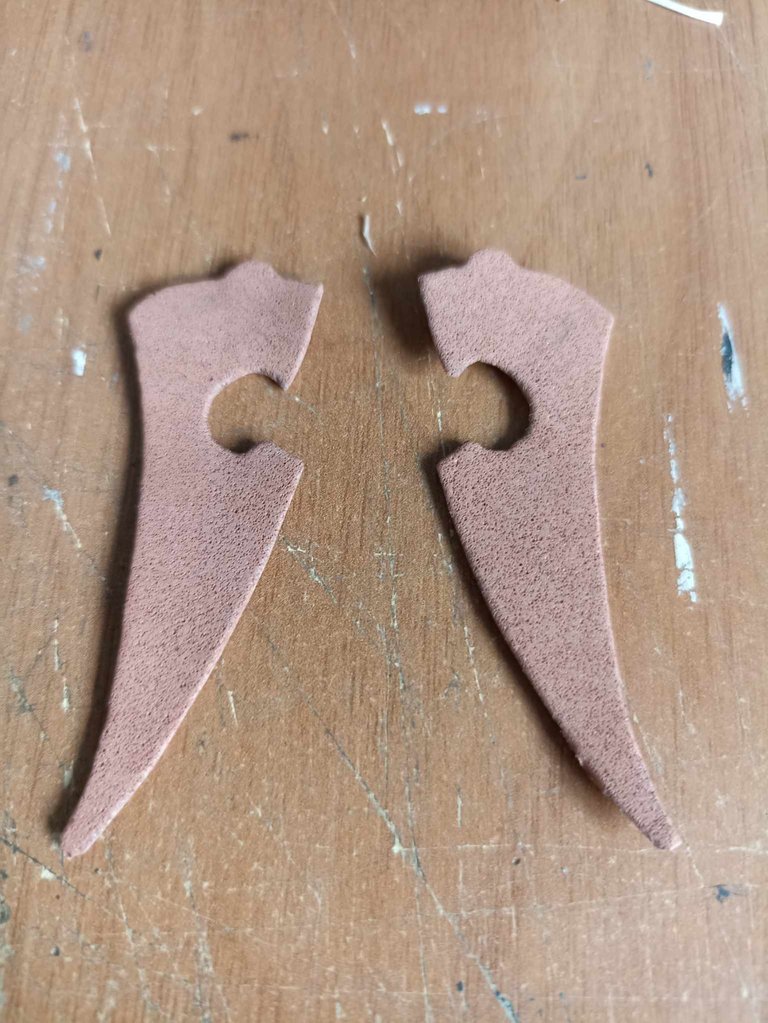
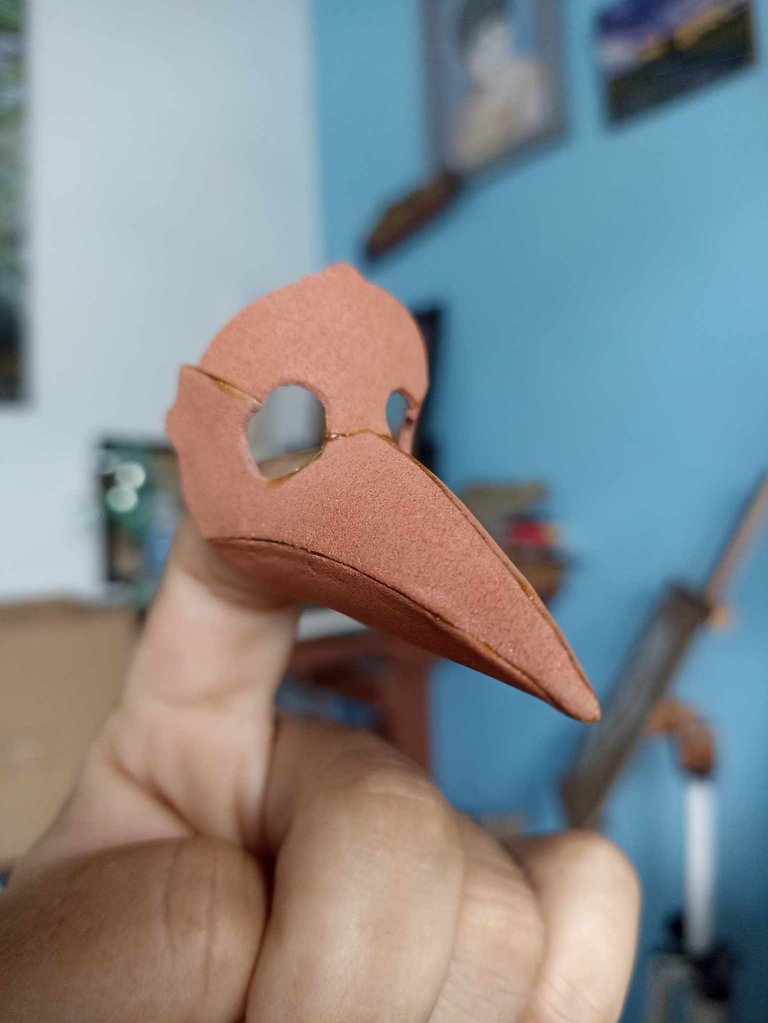
After having all the templates cut out, I used them as a pattern to take out the pieces of the mask, in this case 3 pieces, to make the beak and part of the eyes. First I joined the two curved parts to make the beak, using contact glue, then I placed the front part that joins the beak and so you can see the first part of the mask, only the bottom part is missing and it will be ready.
Luego de tener todas las plantillas recortadas, las usé como patrón para sacar las piezas e la máscara, en este caso 3 piezas, para hacer el pico y parte de los ojos. Primero uní las dos partes curvas para hacer el pico, utilizando pegamento de contacto, luego coloqué la parte frontal que se une con el pico y así se puede ver la primera parte de la máscara, solo falta la parte inferior y estará lista.
 |  |  |
|---|---|---|
 |  |  |
| - | - | - |
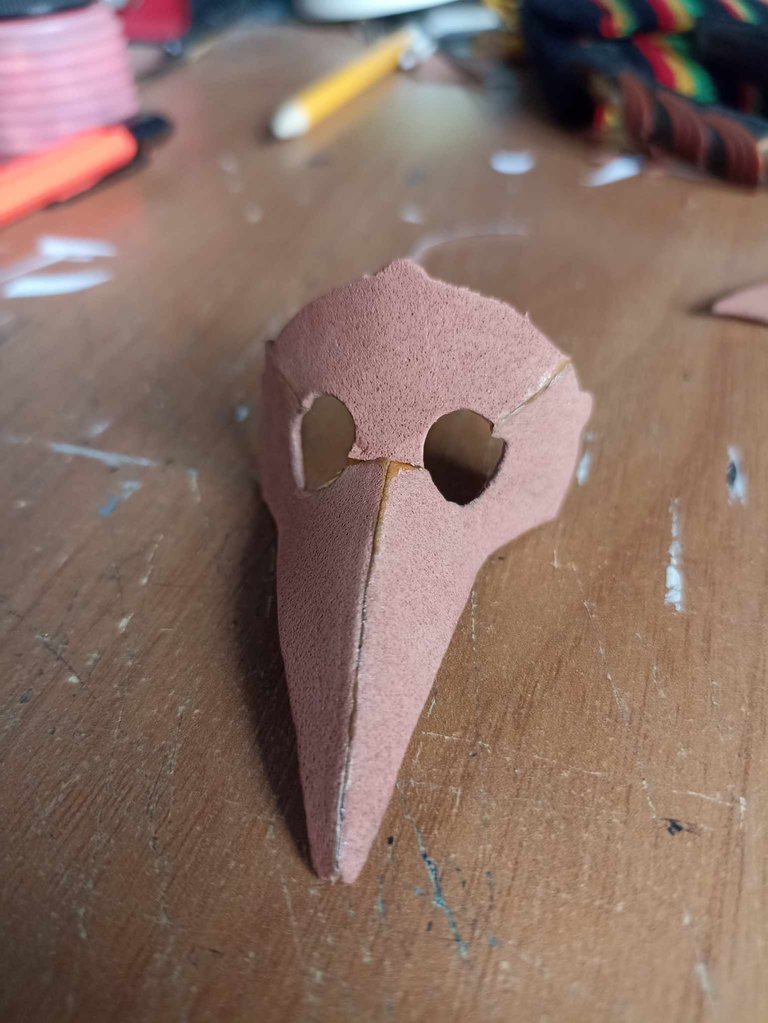
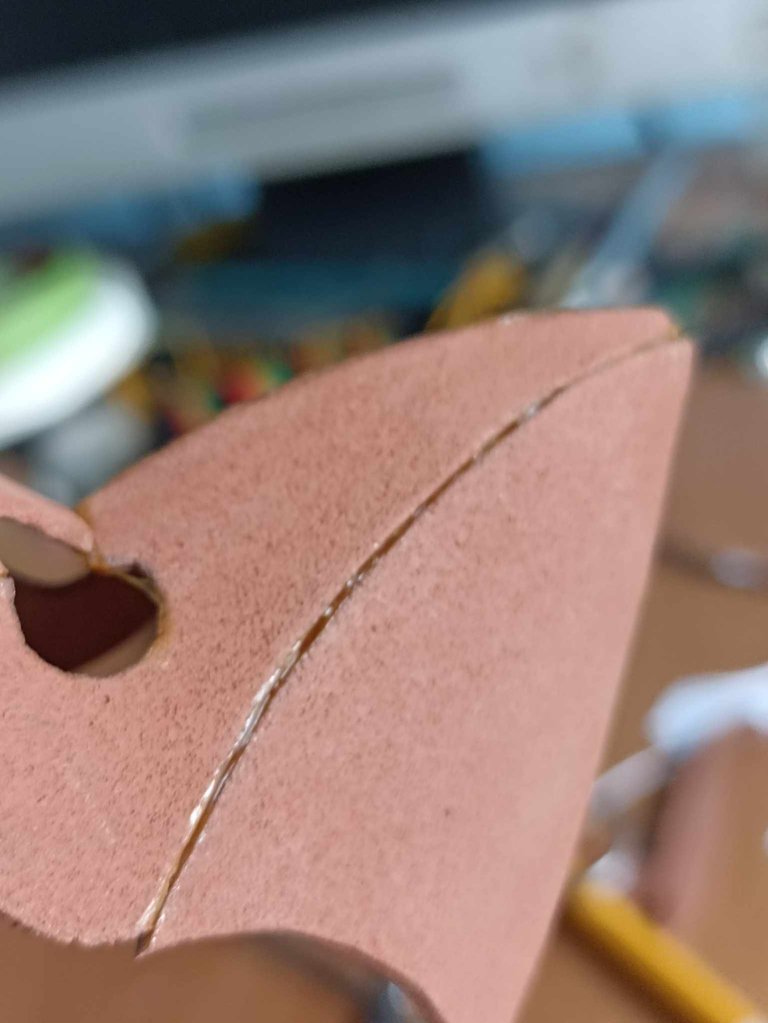
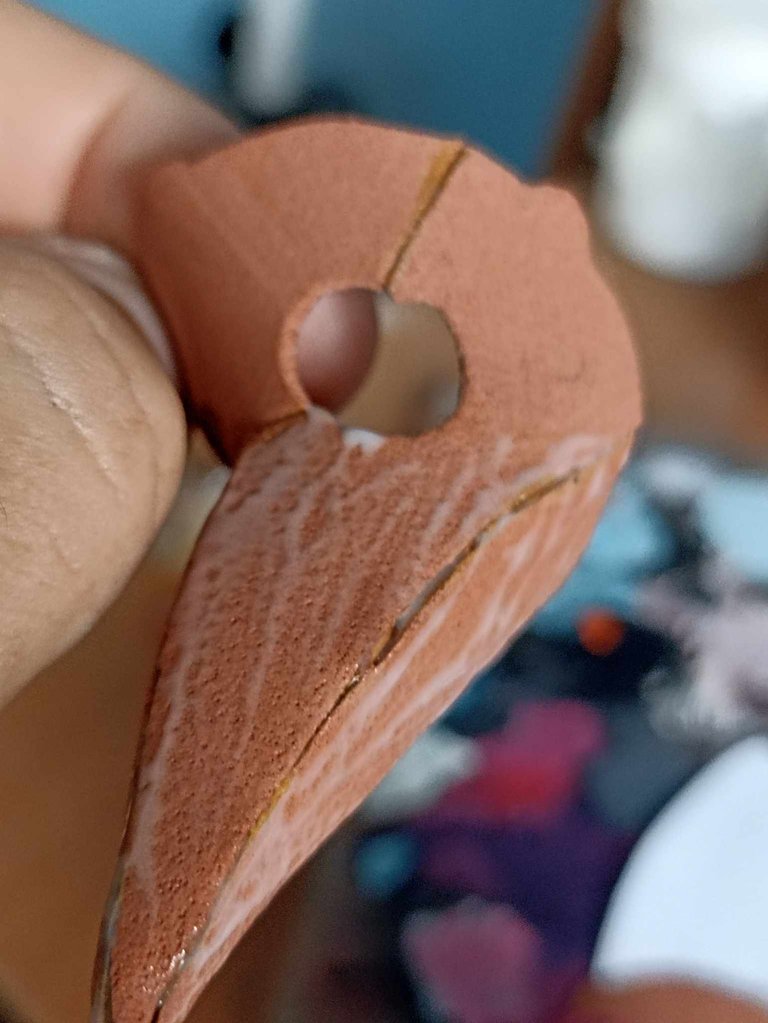
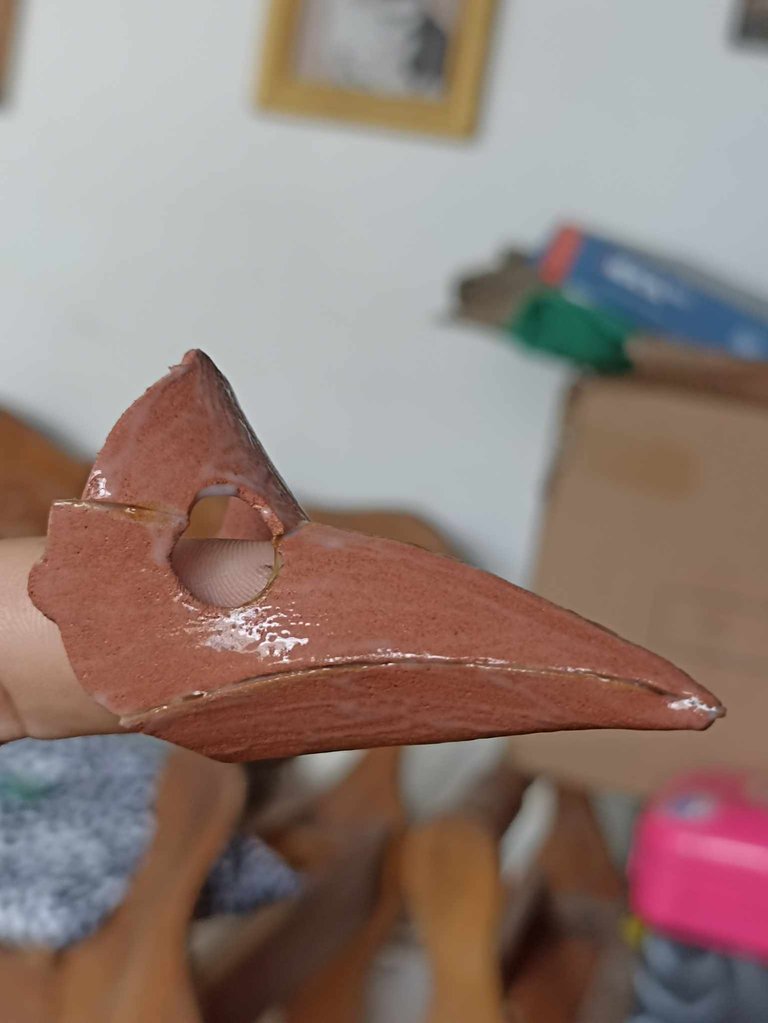
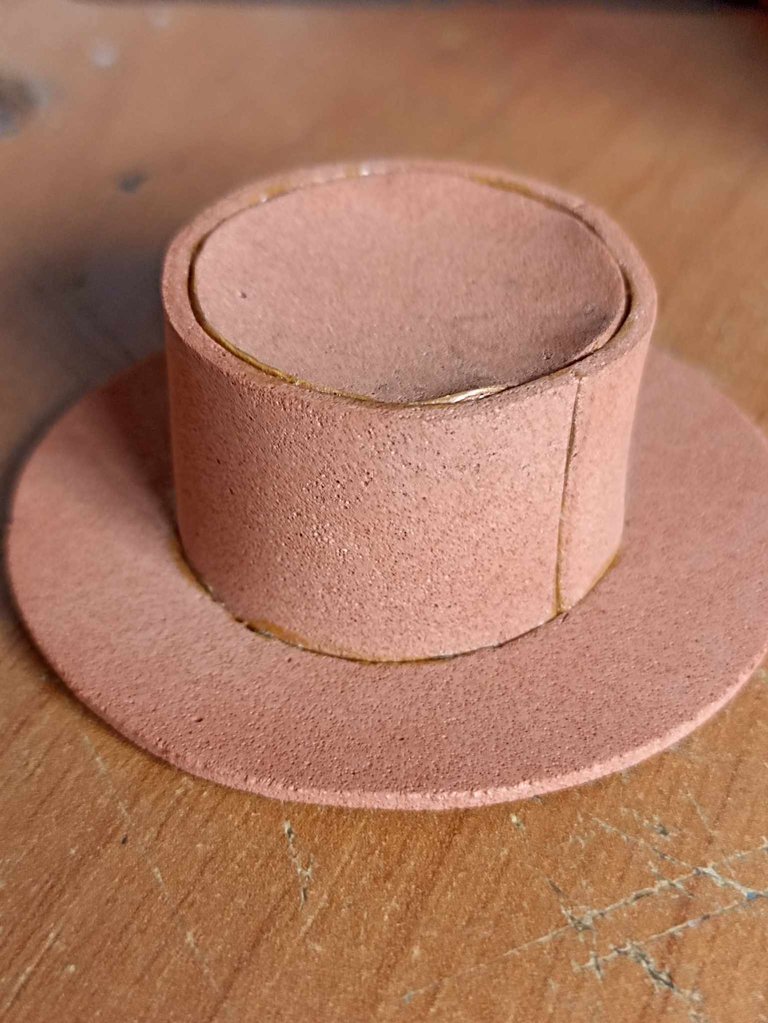
The next step is to place the bottom part and thus the first part of the mask will be ready. A trick that I use for the foam and to harden it is to bathe it in school glue and let it dry. After it has dried, apply two more coats until it dries. a very hard consistency that allows you to work in many ways.
El siguiente paso es colocar la parte inferior y así estará lista la primera parte de la máscara, un truco que uso para el foami y endurecerlo es bañarlo en pegamento escolar y dejar secar, luego que haya secado pasarle dos manos más hasta que seque, queda una consistencia muy dura que permite trabajar de muchas formas.
 |  |  |
|---|---|---|
 | 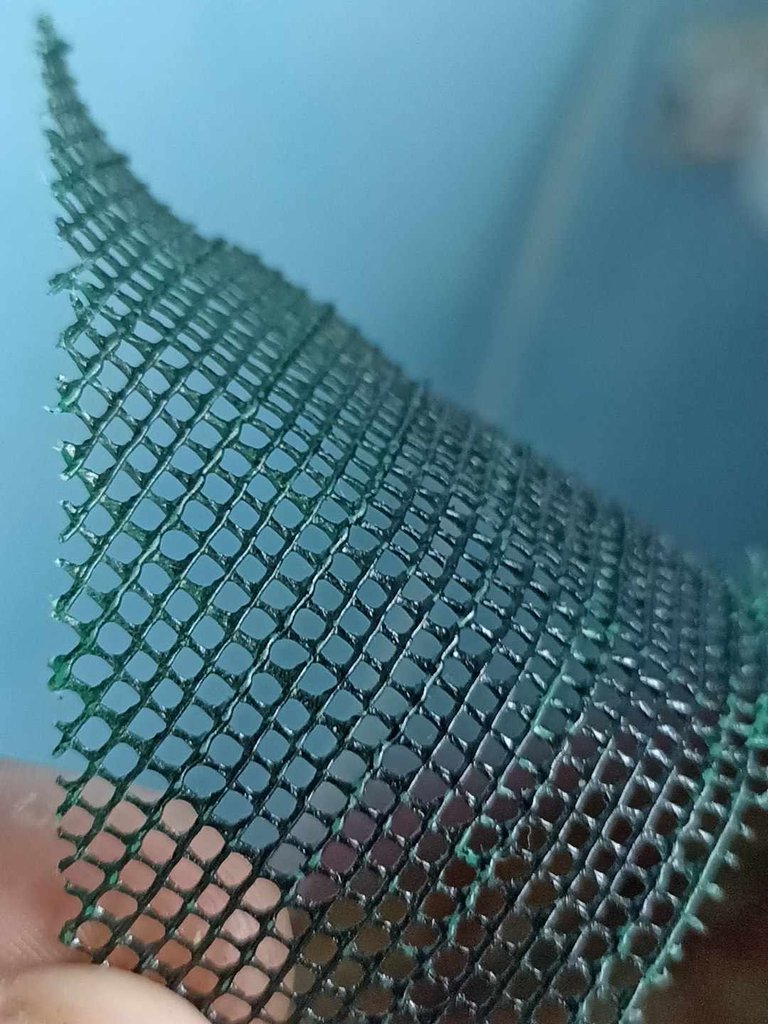 | 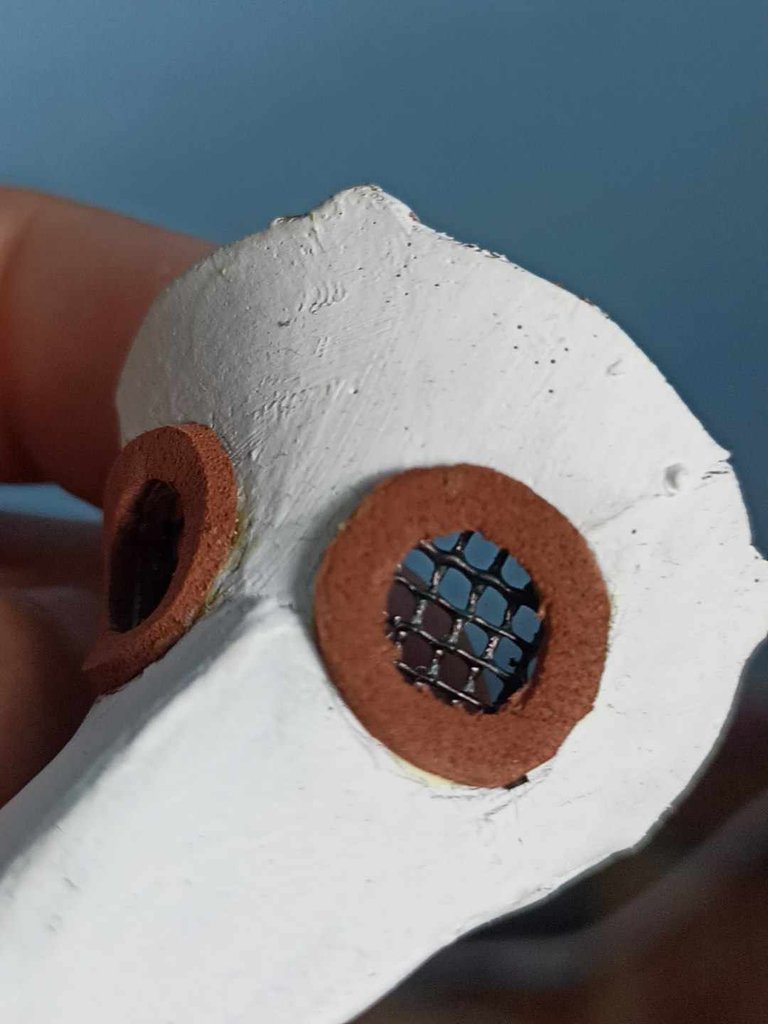 |
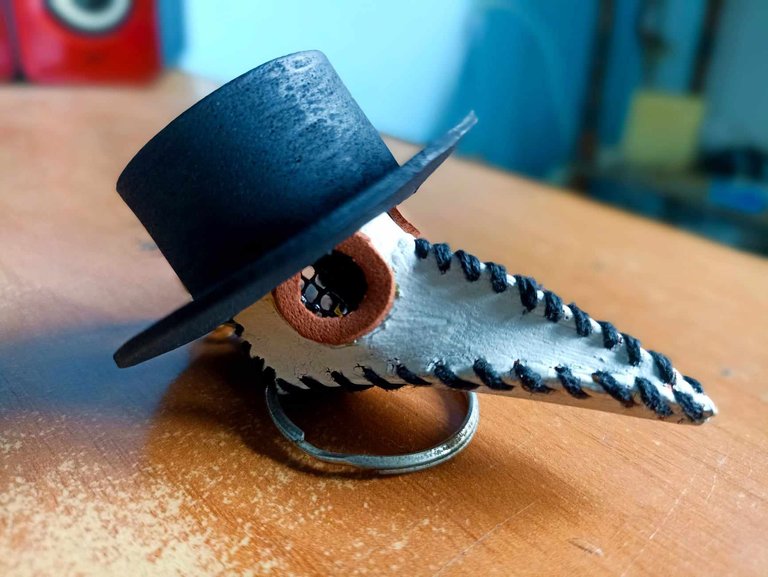
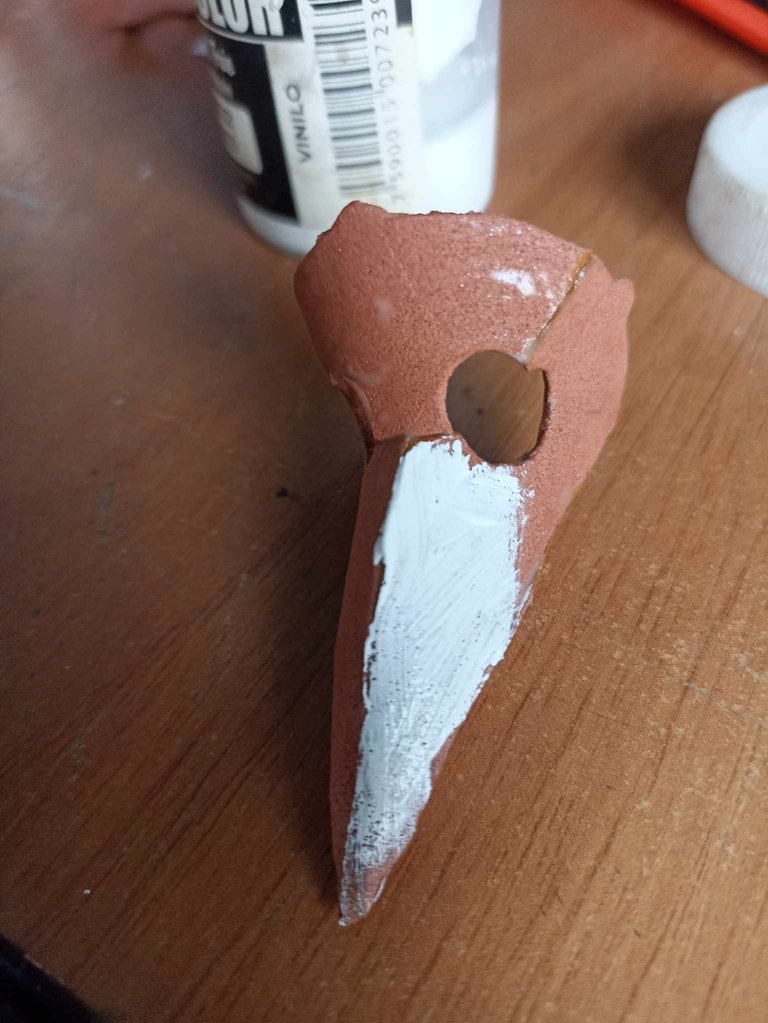
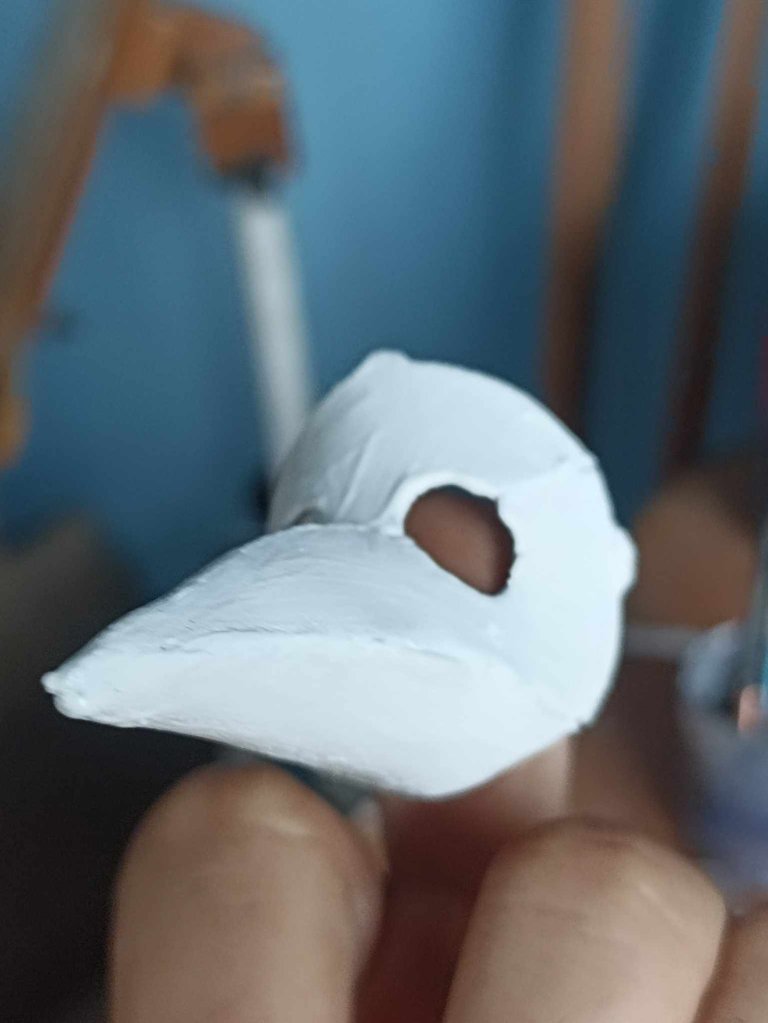
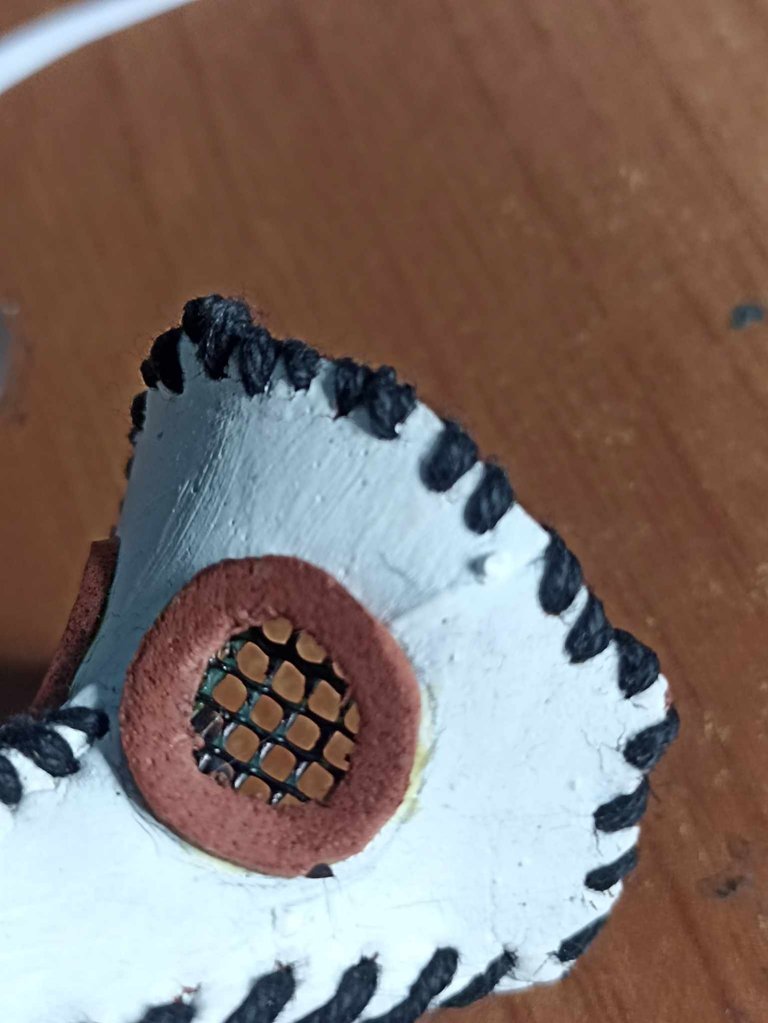
Next I started to paint it white, I used cold paint and a small brush. Then I made the accessories for the eyes, which consist of two foam wheels and on the inside I placed a plastic grid, I think this makes it look like a tactical operations mask.
Seguidamente comencé a pintarla de color blanco, utilicé pintura al frío y un pincel pequeño. Después hice los accesorios para los ojos que consiste en dos ruedas de foami y por el interior coloqué una rejilla de plástico, creo que esto lo hace lucir como una máscara de operaciones tácticas.
 |  |  |
|---|---|---|
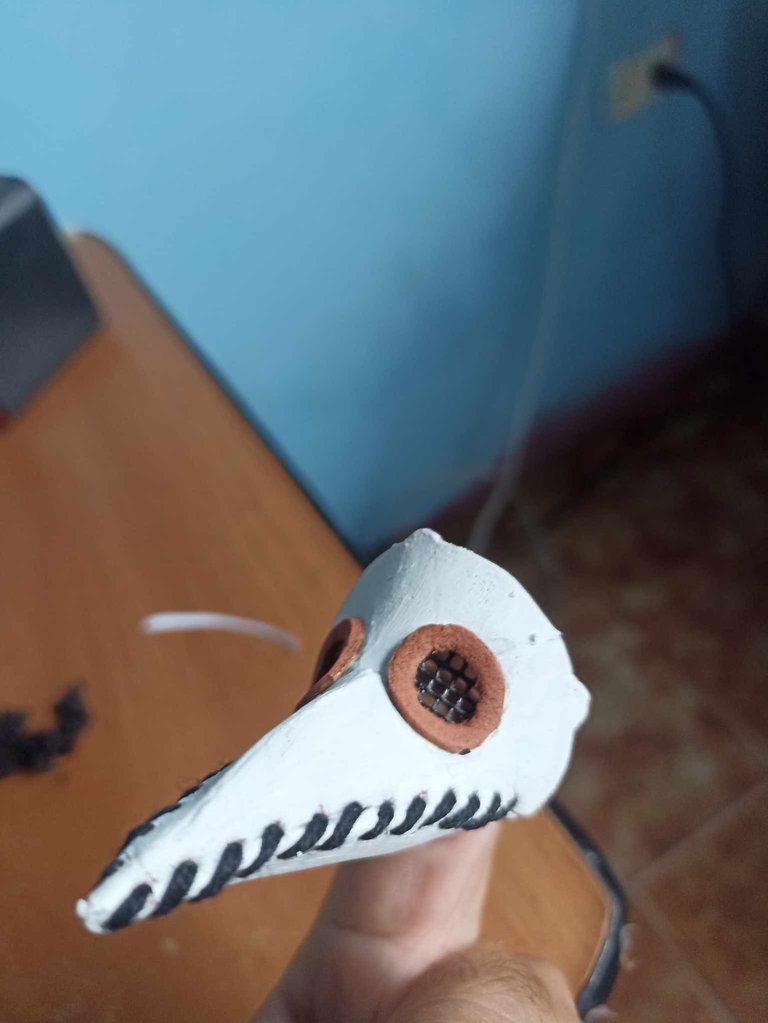 | 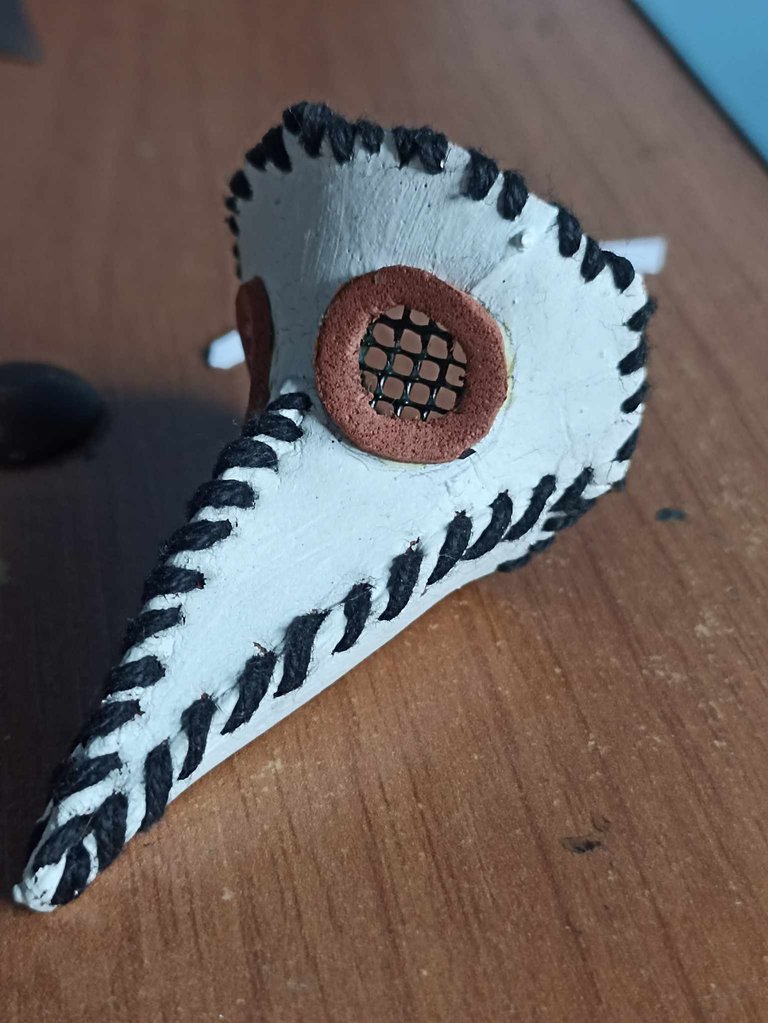 |  |
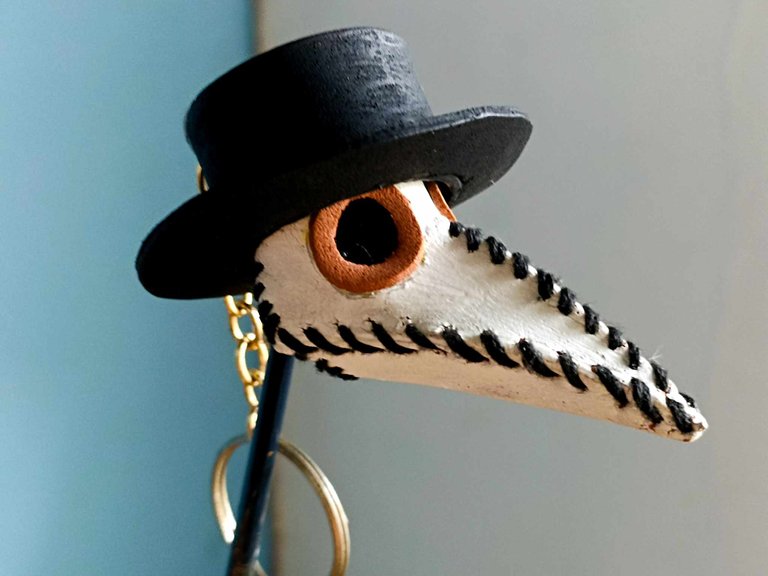
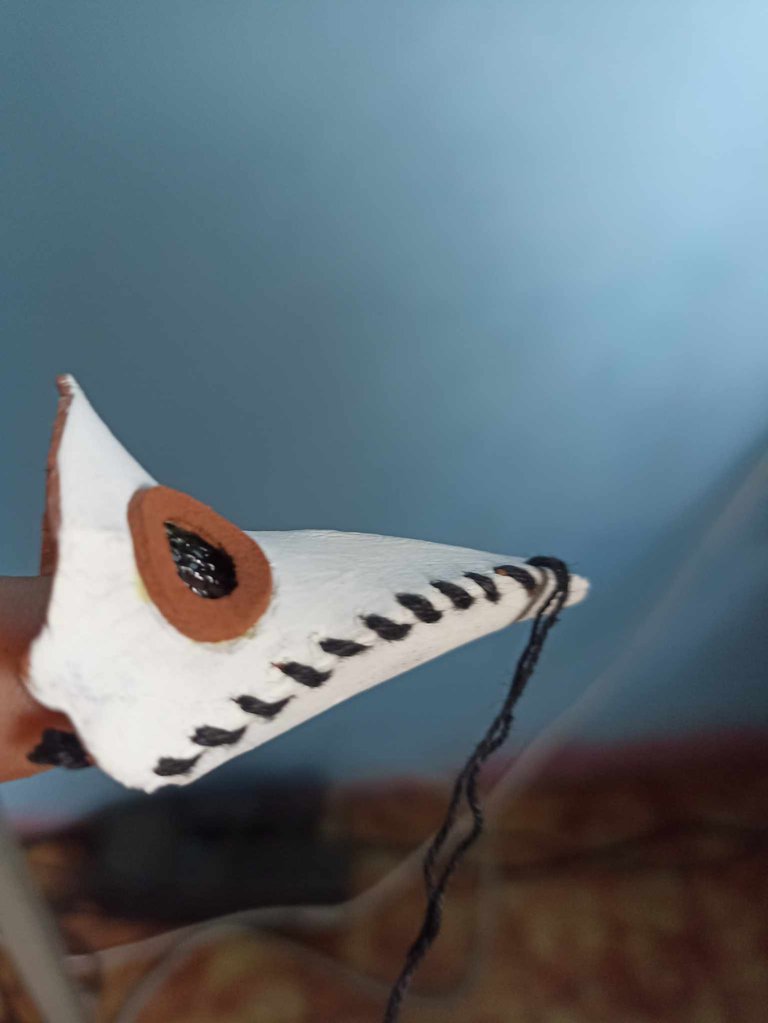
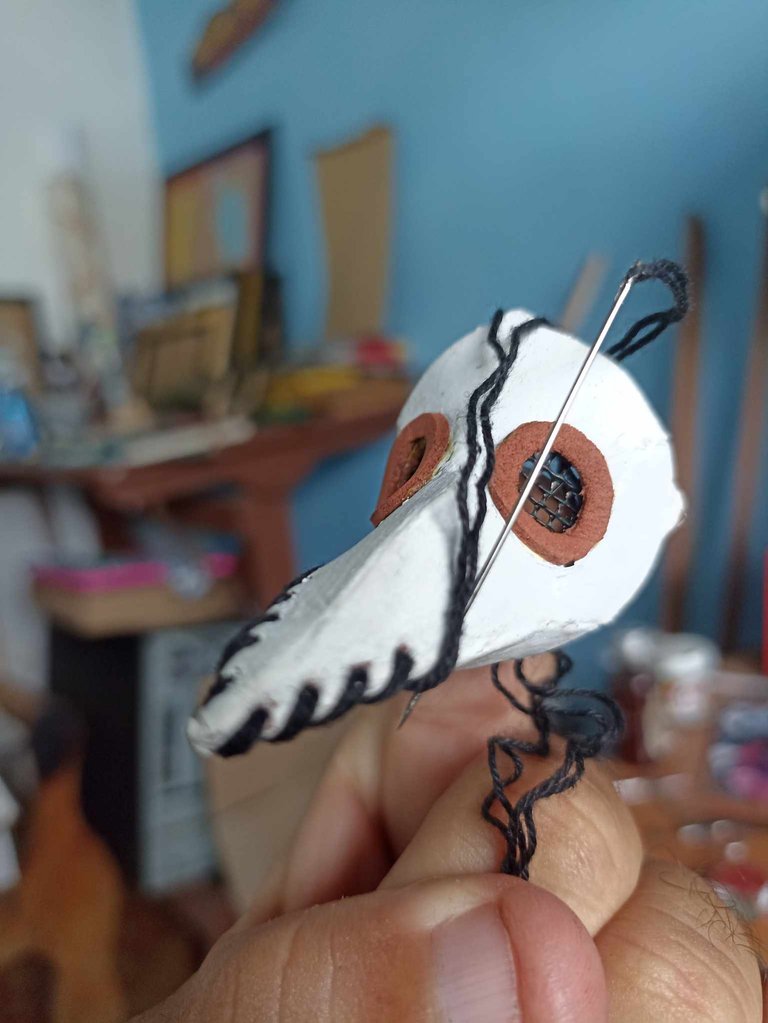
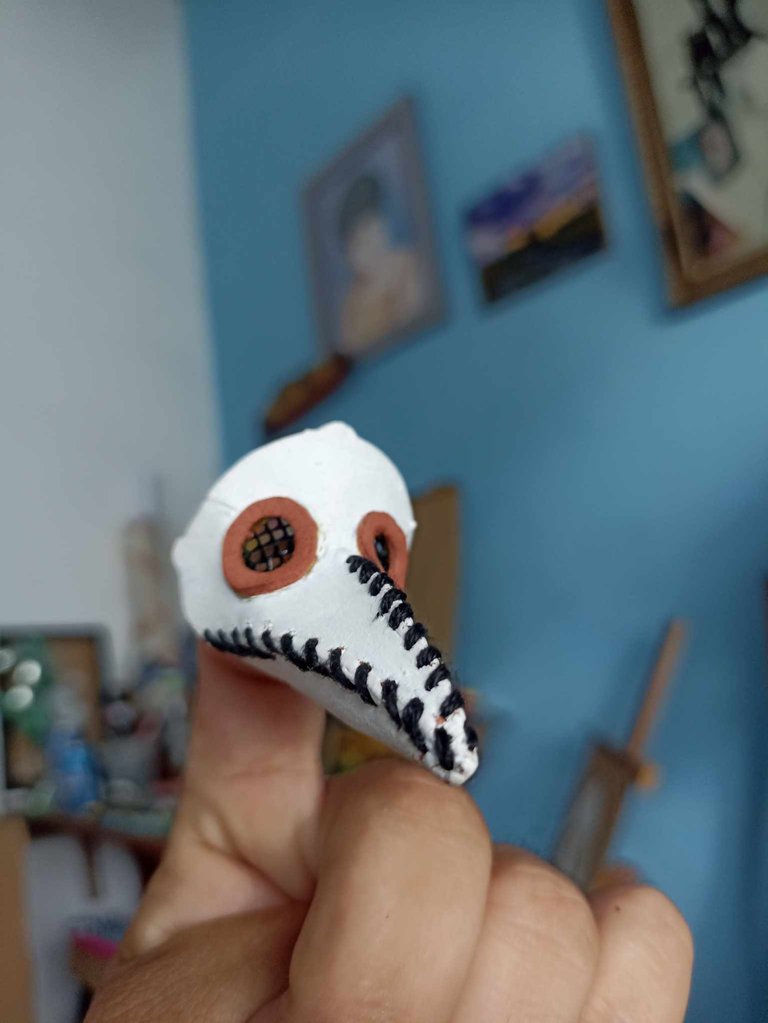
I thought it was great to sew all the edges, I think this gave it a better look, so I used black thread to make it stand out with the white color of the mask.
Se me hizo genial hacerle una costura por todos los bordes, creo que esto le daba un mejor aspecto, así que utilicé hilo de color negro para que resaltara con el color blanco de la máscara.
 |  |  |
|---|---|---|
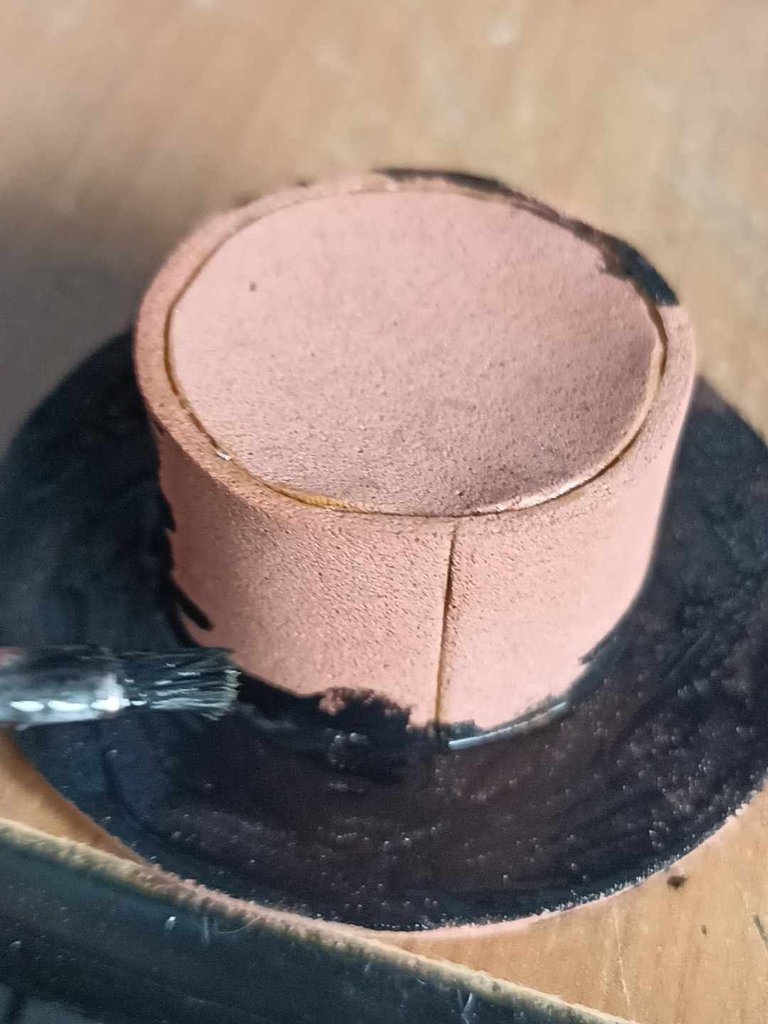 | 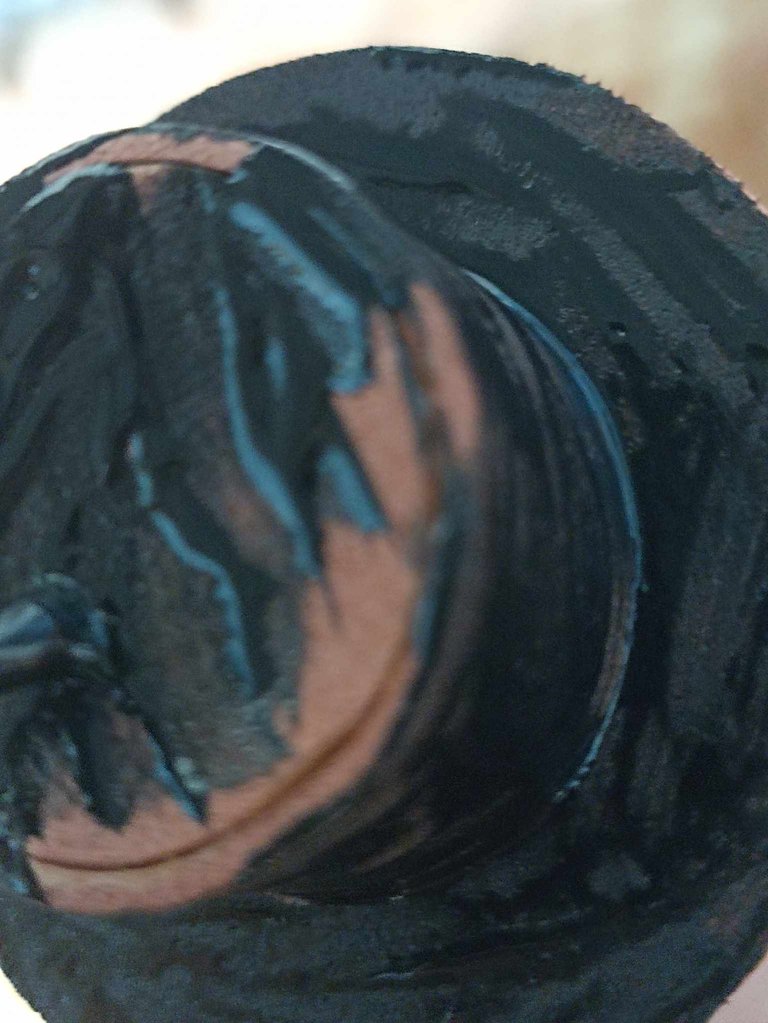 | 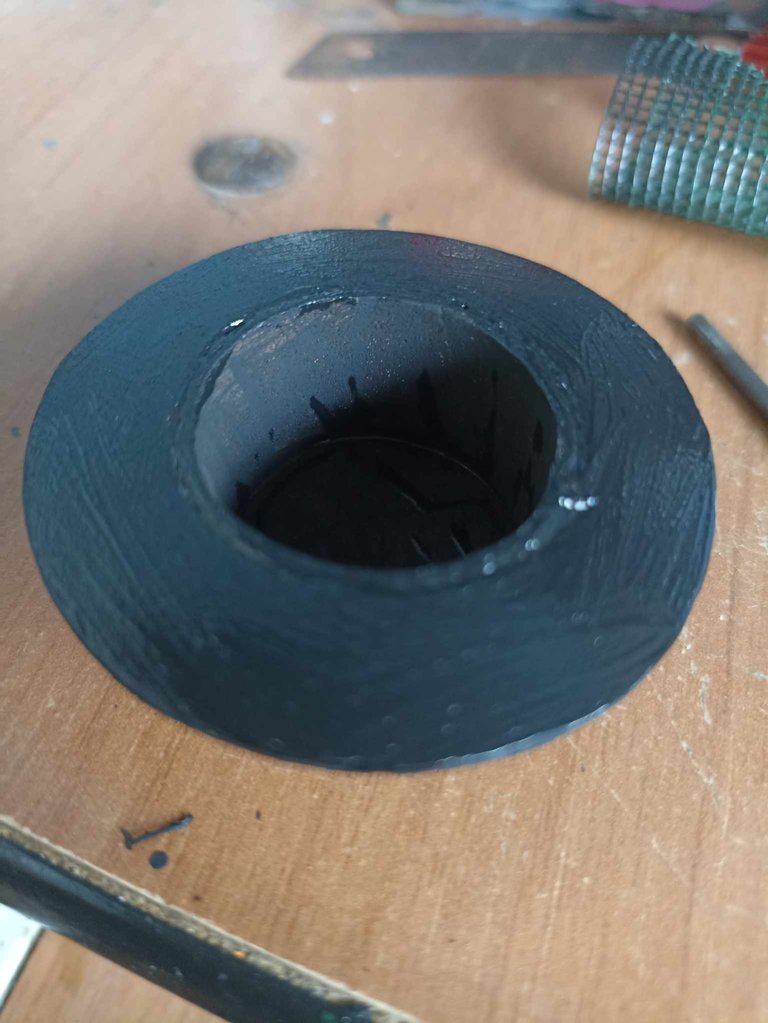 |
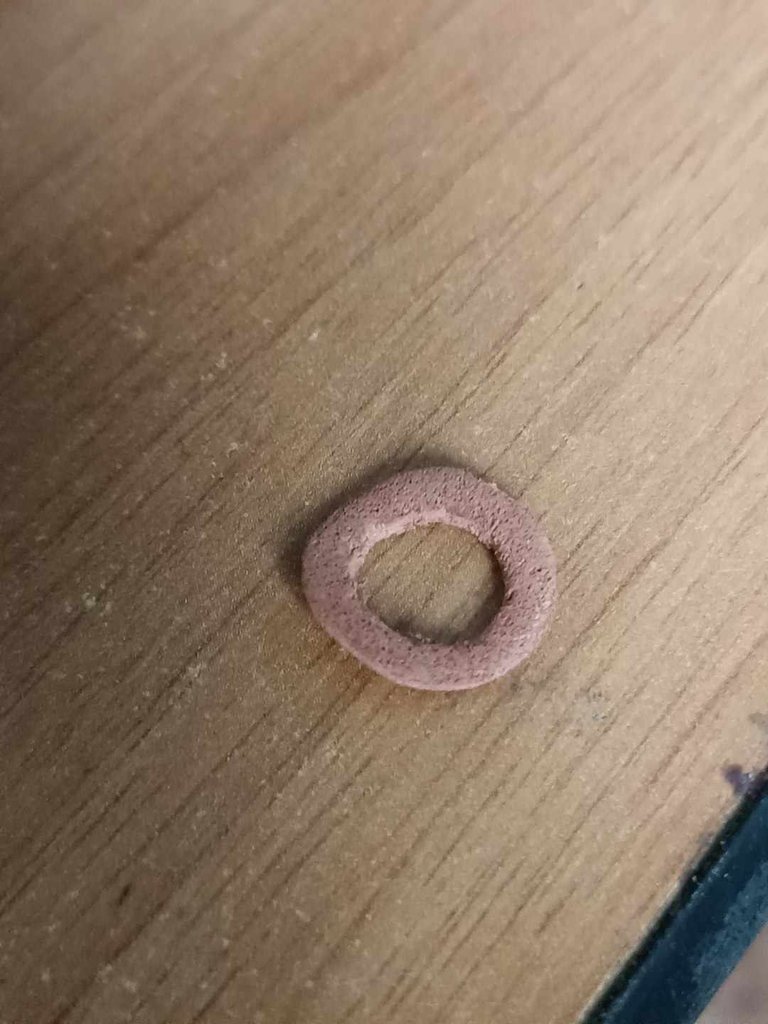
I could have just made the mask, but no! I also made the hat, I also made this using foam, and for this I made several circles, with patterns from a real hat but reduced to the same size as the mask so that they would be the same. After doing it, I painted it black and let it dry very well.
Pude haber hecho solo la máscara, pero no! También hice el sombrero, este también lo hice utilizando foami, y para ello hice varios círculos, con patrones de un sombrero real pero reducidos al mismo tamaño de la máscara para que quedaran iguales. Luego de hacerlo, lo pinté de color negro y deje secar muy bien.
 |  |  |
|---|---|---|
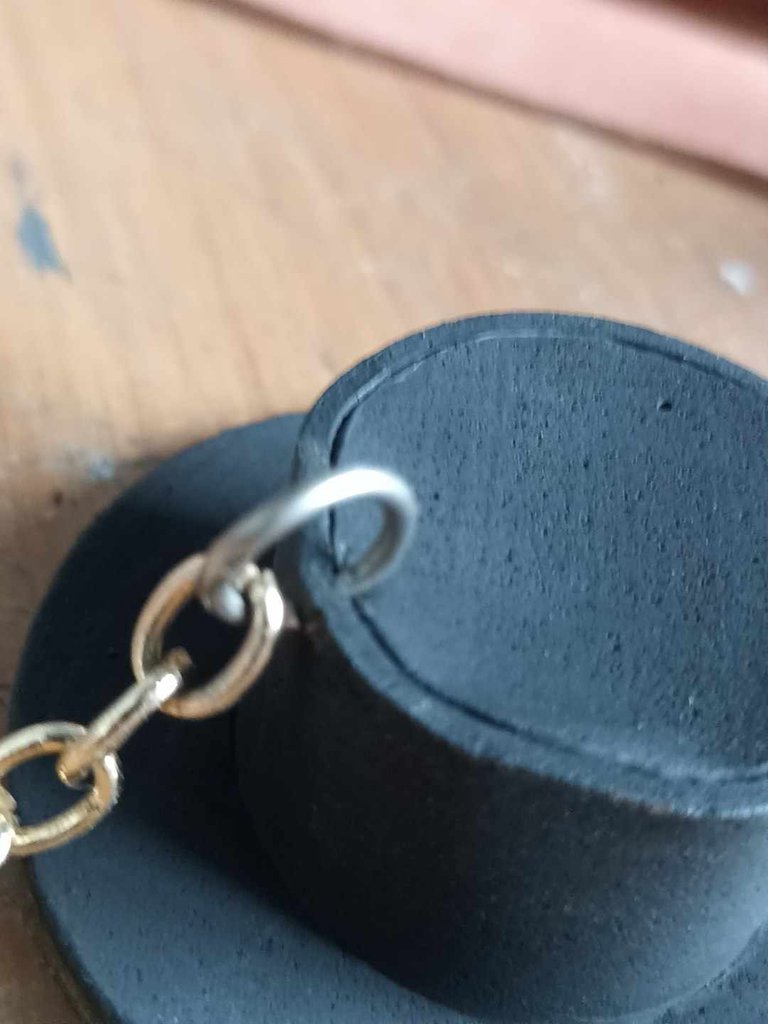 | 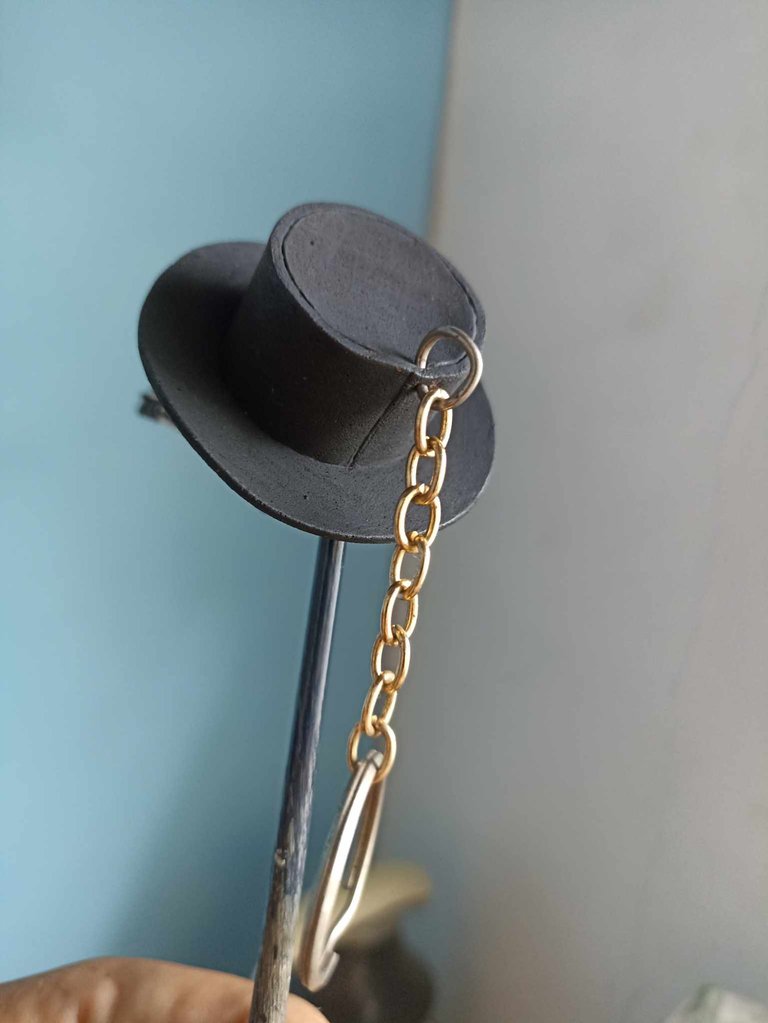 | 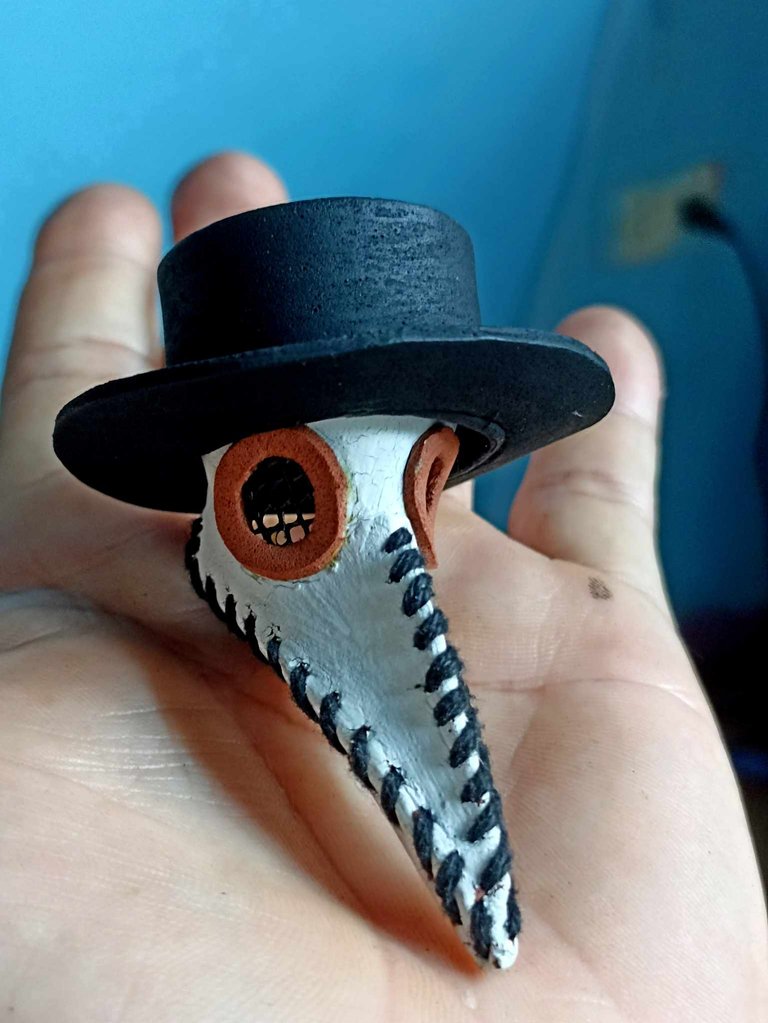 |
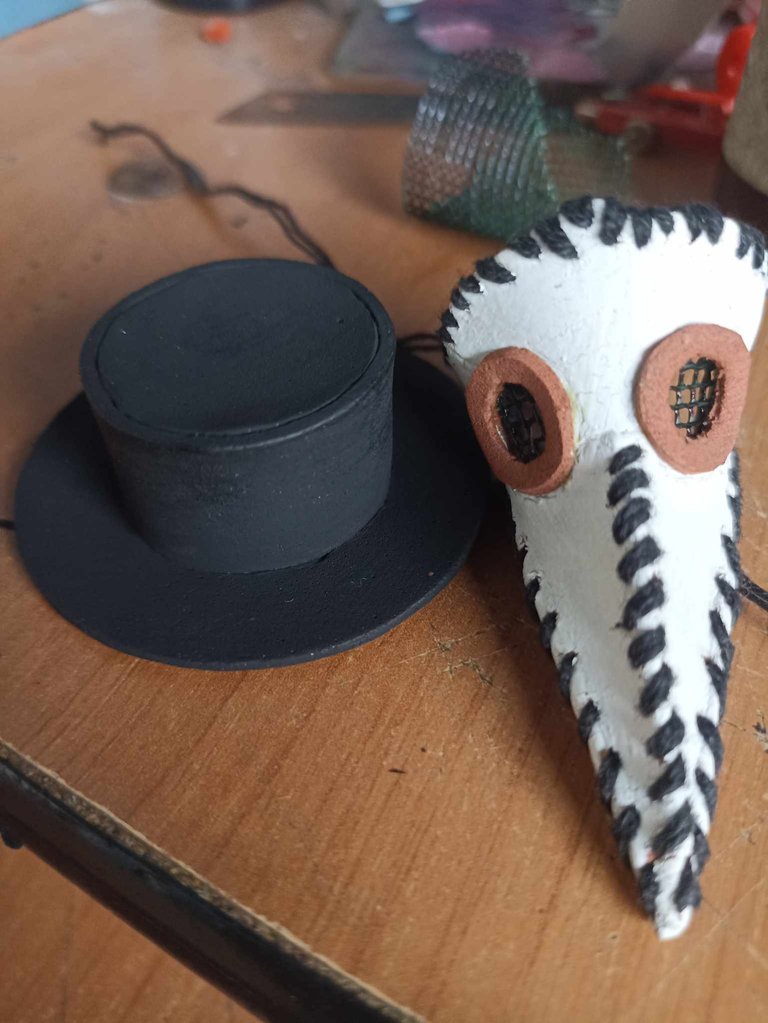
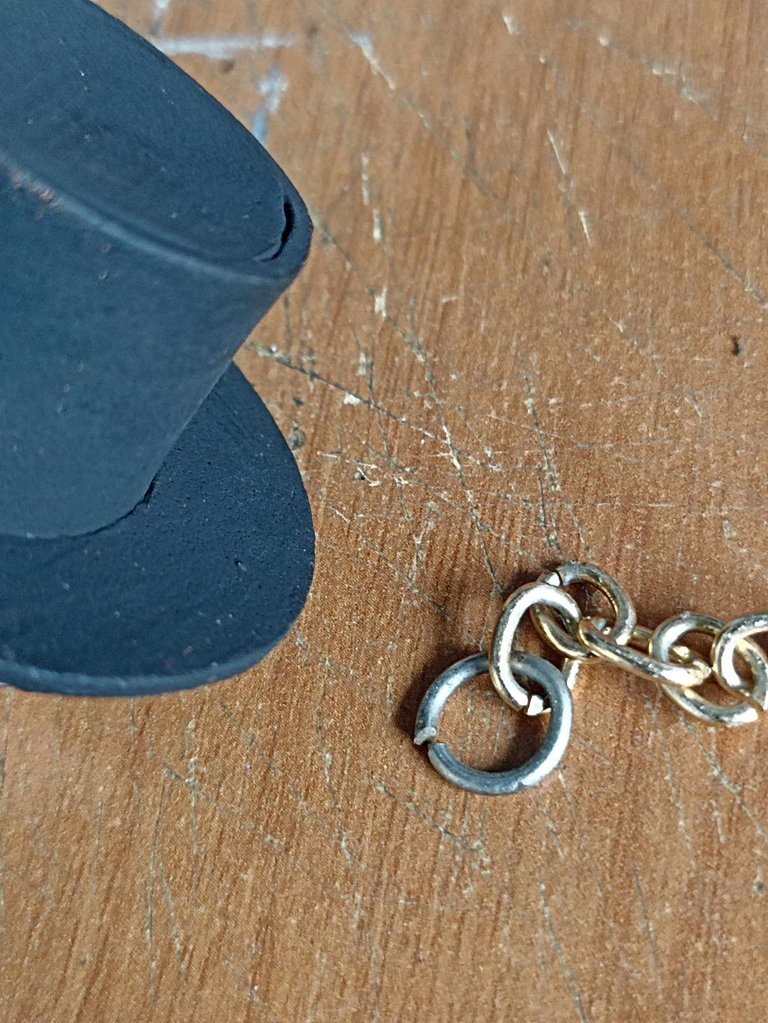
To finish my Doctor Blight keychain, I placed glue between the hat and the mask and finally added a chain that goes on the top of the hat, and that was it.
Para finalizar mi llavero de Doctor Blight, coloqué pegamento entre el sombrero y la máscara y por último agregué una cadena que va en la parte superior del sombrero, y así quedó finalizado.

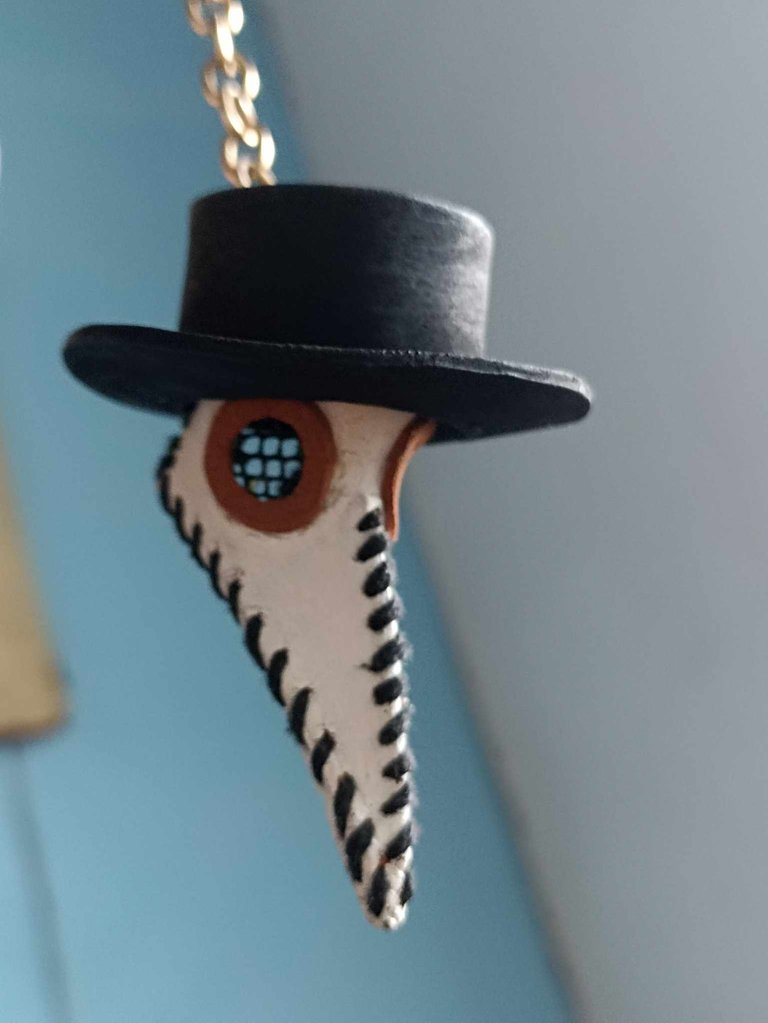
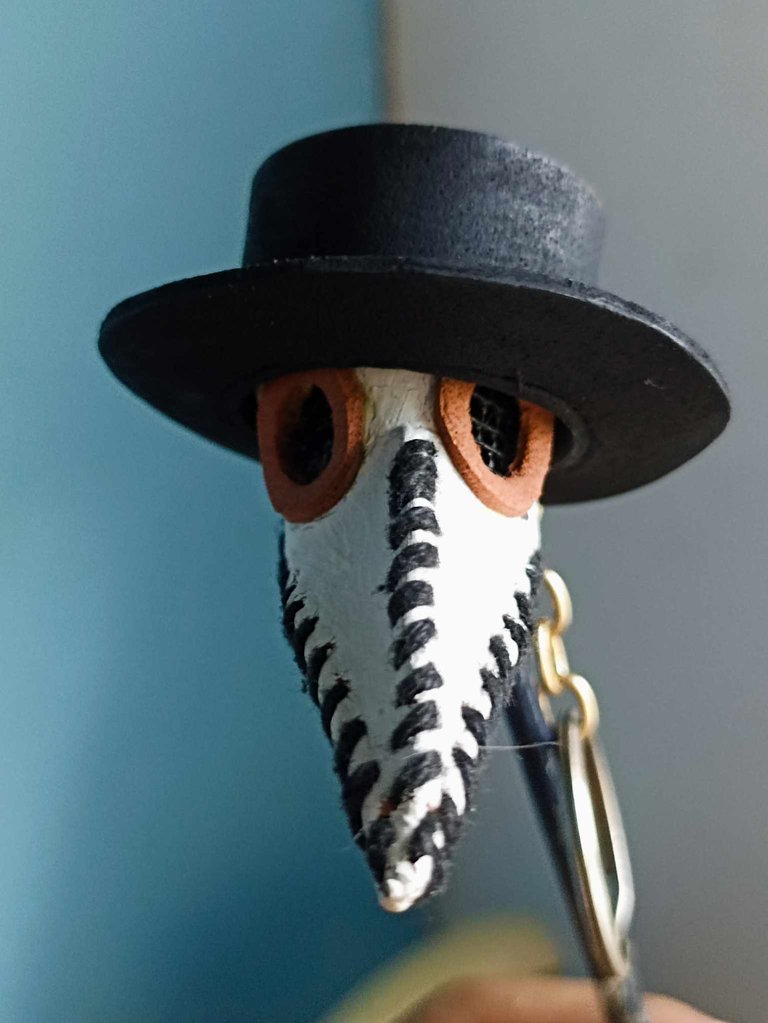
This is how my Doctor Blight keychain was finished. When I finished it I couldn't help but feel the desire to complete the entire sculpture, but as I mentioned before, the lack of material for now prevents me from doing so, but what do you say? Would you like me to make a sculpture of this Splinterlands card? I would make it Hot Toys style, if you don't know that brand of action figures I recommend you see it, that's the style I like to work with. For now I say goodbye, don't forget to comment what you thought, I say goodbye soon.
Así quedó finalizado mi llavero de Doctor Blight, al finalizarlo no pude evitar sentir el deseo de completar toda la escultura, pero como mencioné antes, la falta de material por ahora me lo impide, pero que dicen ustedes? les gustaría que haga una escultura de esta carta de Splinterlands? La haría estilo Hot Toys, sino conocen esa marca de figuras de acción recomiendo que la vean, ese es el estilo que me gusta trabajar. Por ahora me despido, no olviden comentar que les ha parecido, me despido hasta pronto.
Wowwww esto me encantoooo, lo ame, es más robada esa cartaaaaa jajajajaja...
Suerte en el concurso amigo.
!discovery 40
jajajaj la vas hacer? conchale, yo no he encontrado más latas así como antes, mi propósito era hacer una escultura de cuerpo completo.
This post was shared and voted inside the discord by the curators team of discovery-it
Join our Community and follow our Curation Trail
Discovery-it is also a Witness, vote for us here
Delegate to us for passive income. Check our 80% fee-back Program
Thanks for the support
Te felicito @fixie qué espectacular te quedo la máscara, tienes mucha habilidad para crear piezas tan pequeñas y perfectas. Muchos éxitos.
Muchas gracias querida @lauracraft soy un aficionado a las piezas pequeñas para coleccionarlas..
😃❤️ son geniales, eres un gran artista.
Thanks for the support!
Espléndido, como en la mayoría de tus trabajos, nos encanta ver tus magníficas obras de este estilo, muchas gracias por compartir con nosotros.
Tu comunidad artesana ahora es testigo

Me alegra mucho que les haya gustado y tambien agradecido por su apóyo!
Te felicito, como siempre haciendo bellezas.
Mucha suerte.
Saludos.
muchisimas gracias,, no hay que perder la costumbre de participar jeje