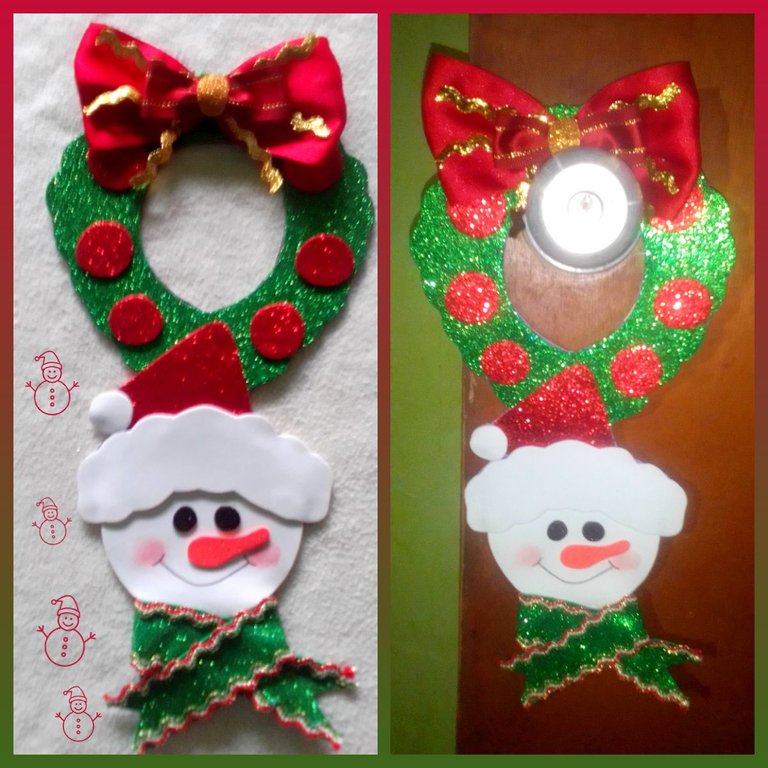
Happy Sunday, friends, a pleasure to greet you again, to start this day, I will begin by telling you that I thought about doing many new projects, but I didn't know how to decide on one in particular, until I chose it and at that moment my head hurt from thinking so much ha, ha, ha. This new creation is a Christmas door handle, in its preparation I worked with cardboard and eva rubber, which is already Christmas and using the frosted eva rubber gives much more shine to everything we do, in such a way that I achieved my goal and my new creation was really beautiful.
Feliz domingo, amigos, un gusto en saludarlo nuevamente, para iniciar este día, comenzaré por contarles qué pensé en hacer muchos proyectos nuevos, pero no sabía en decidirme por uno en especial, hasta que lo escogí y si en ese momento me dolió la cabeza de tanto pensar ja, ja, ja. Esta nueva creación, se trata de una manija para puerta, de navidad, en su elaboración trabajé con cartón y la goma eva, la cual estamos ya en navidad y usar la goma eva escarchada le da mucho más brillo a todo lo que hagamos, de tal manera que logre mi objetivo y fue realmente bella mi nueva creación.
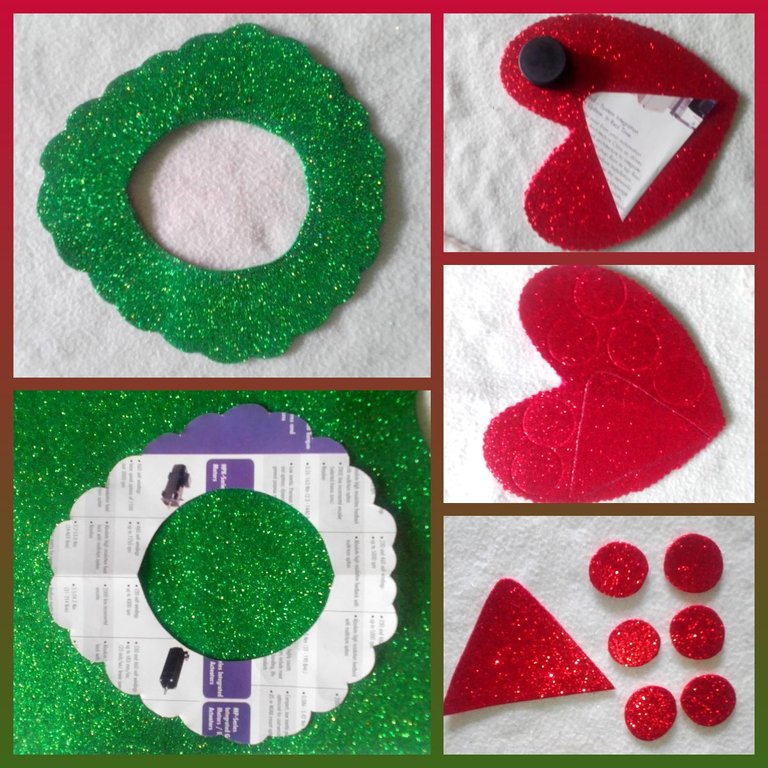
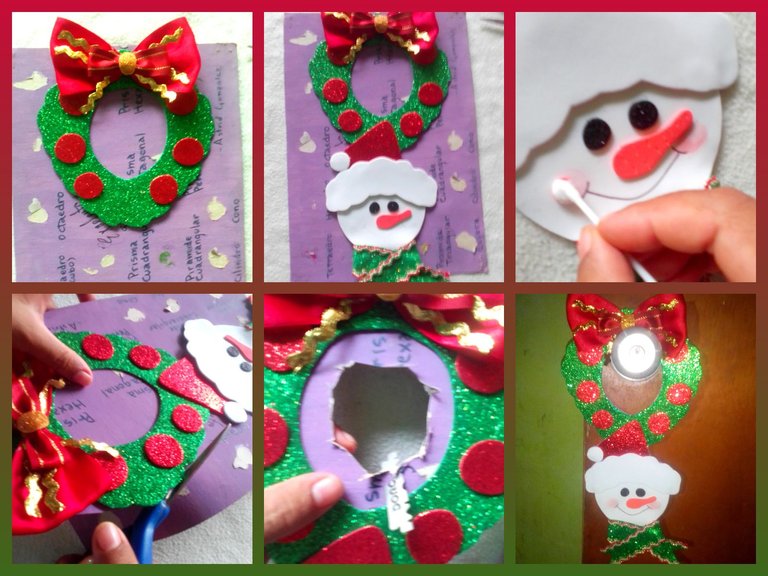
Step 1:
Use the frosty green EVA foam and a crown-type pattern to cut out one just like that. After the red, a hat pattern and with a cap mark on the 6 circles and cut out.
Paso 1:
Use la goma eva verde escarchado y un patrón tipo corona, para recortar uno así igual. Luego del rojo un patrón de gorro y con una tapa marque sobre los 6 círculos y recorte.
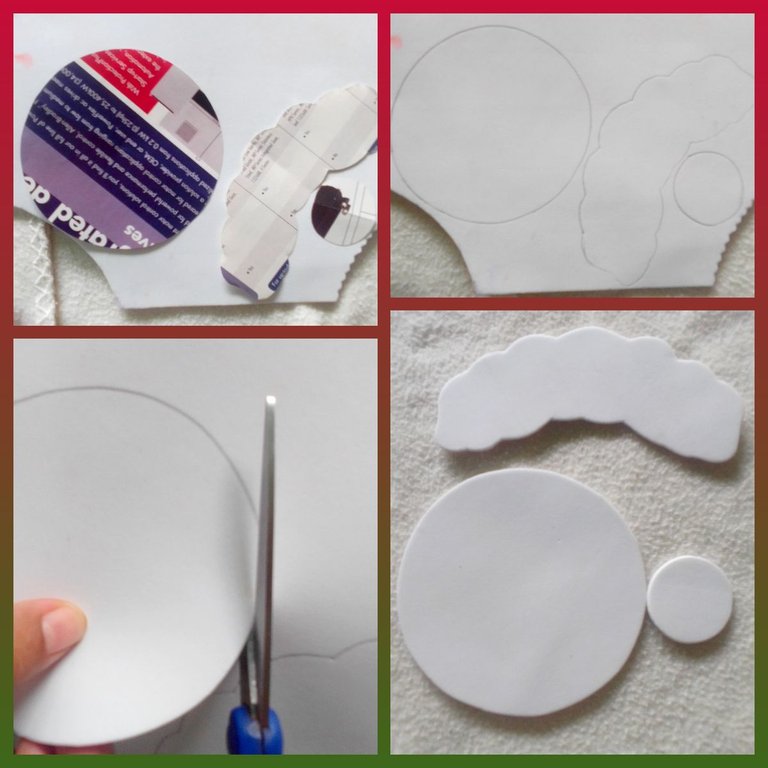
Step 2:
From the white EVA foam, mark the pattern of a medium circle, the edge of the hat and a small circle, cutting it out.
Paso 2:
De la goma eva blanco, marque el patrón de un círculo mediano, el faralao del gorro y un círculo pequeño, llevándolo a recortar.
Step 3:
I measured a strip 3 cm long x 28 cm wide and cut it out, then used a decorative tape to stick it along the entire edge, cutting at the ends of the v-type strip.
Paso 3:
Medí una tira de 3 cm de largo x 28 cm de ancho y recorte, luego utilice una cinta decorativa para pegarla por todo el orillo, cortando en las puntas de la tira tipo v.

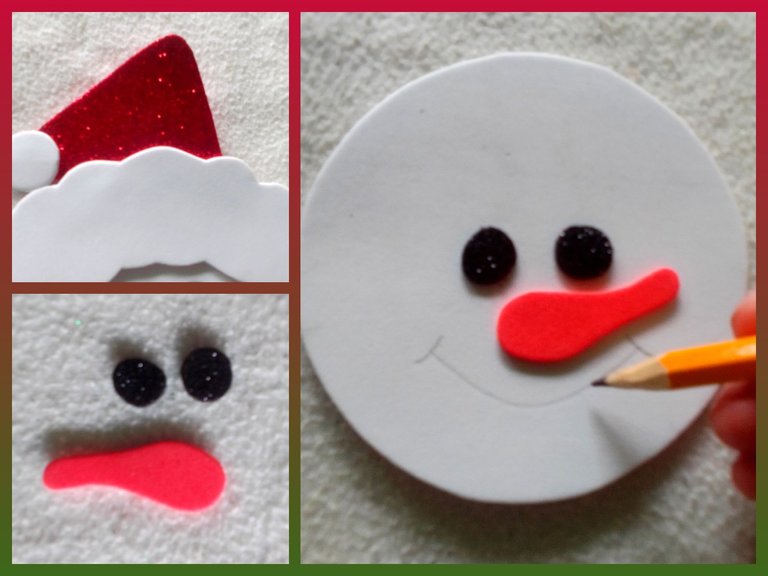
Step 4:
In this part I started putting together the snowman's face. I started by gluing the hat next to the faralao, I cut out the eyes and nose, I glued these and with the pencil I made his mouth.
Paso 4:
En esta parte comencé a armar la cara del muñeco de nieve. Empecé por pegar el gorro junto al faralao, corte los ojos y nariz, estos los pegue y con el lápiz hice su boca.
In this final part, I tried to use cardboard as a base, to give it firmness and hardness. I glued the crown to the cardboard, and on the top part I placed a bow that I had already prepared, then on the bottom part I glued the complete snowman along with his scarf. In this way I finished drawing his face, I used a black pencil for the mouth and for his cheeks I applied a little shadow, to finish I cut out the rest of the cardboard and in the center I put a sheet of paper, which I found a little difficult , cut with scissors, this is where I conclude my final result, I hope you can enjoy this excellent work and at the same time create it, thus decorating the door of your rooms or others.
Blessed day.
En esta parte final, emplee por utilizar un cartón como base, para así darle firmeza y dureza. La corona la pego al cartón, y en la parte superior coloque un lazo que tenía ya listo, luego en la parte inferior pegue el muñeco de nieve completo junto a su bufanda. De esta manera termine de dibujar su cara, use para la boca un lapicero negro y para sus mejillas aplique un poco de sombra, para finalizar recorte el restante del cartón y en el centro le pase una hojilla, la cual se me hacía un poco difícil, cortar con la tijera, es aquí donde concluyo mi resultado final, espero que puedan disfrutar de este excelente trabajo y que a la vez lo elaboren, así decoran la puerta de sus habitaciones u otras.
Bendecido día.
Collage making program: Fotojet Link
Translated from google translator Link
Photo editing program: PhotoFiltre 7
Las fotos fueron tomadas desde un Xiaomi Mi A2.
Programa para hacer el collage: Fotojet Enlace
Traducido del traductor de Google Enlace
Programa para editar fotos: PhotoFiltre 7
I say goodbye until another opportunity.
Thanks for your support.
Me despido hasta otra oportunidad.
Gracias por su apoyo.
Copyright @imargasa. All rights reserved.
Nice one
So beautiful
So adorable!
It looks fantastic. It can easily draw others' attention. Great job! Thank you for sharing this.
Muy creativo tu trabajo, me gusto ❄️🦌❄️
Qué linda te quedó esta manualidad, ideal para complementar los adornos navideños de la casa en esta venidera época decembrina.
Hermoso picaporte y con pocos materiales, la verdad es q la navidad nos pone muy creativos