Good morning, my friends from this wonderful community, I hope you had a great morning.
Sorry for the delay. But here I am again, I had practically a month without being able to share with you my activities, I was absent because as you know I am the mother of a beautiful princess, the children cover all that little space that we have, and what else do we have to dedicate all the time and Patience, even more so when they are so small.
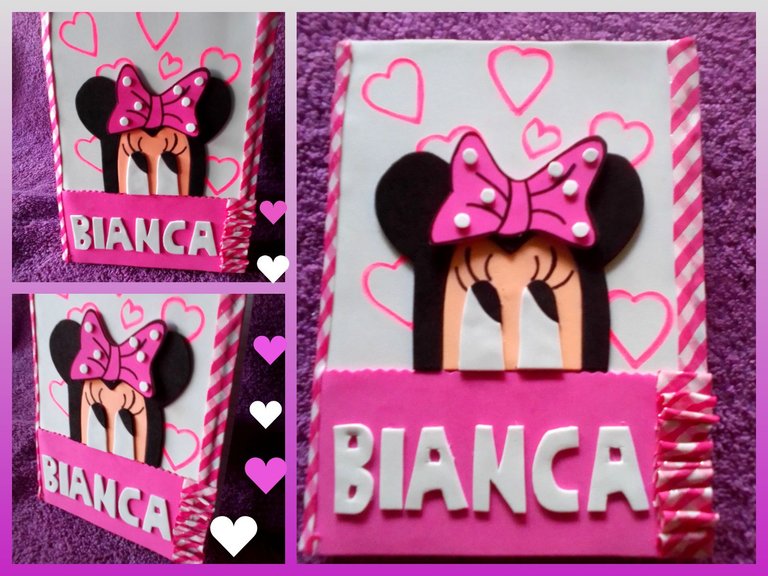
To start this beautiful day, I will present you a personalized mini agenda, which I created for my daughter, with the purpose of organizing all the activities that are presented and those scheduled.
Muy buenos días, mis amigos de esta maravillosa comunidad, espero que hayan tenido un excelente amanecer.
Disculpen la tardanza. Pero aquí estoy nuevamente, tuve prácticamente un mes sin poder compartir con ustedes de mis actividades, me ausenté porque como saben soy mamá de una bella princesa, los hijos abarcan todo ese poquito espacio que tenemos, y que más hay que dedicarle todo el tiempo y la paciencia, aún más cuando están así pequeños.
Para comenzar este bello día, les presentaré una agenda personalizada de mini, que elabore para mi hija, con la finalidad de organizar todas las actividades que se vayan presentando y las programadas.
Step 1:
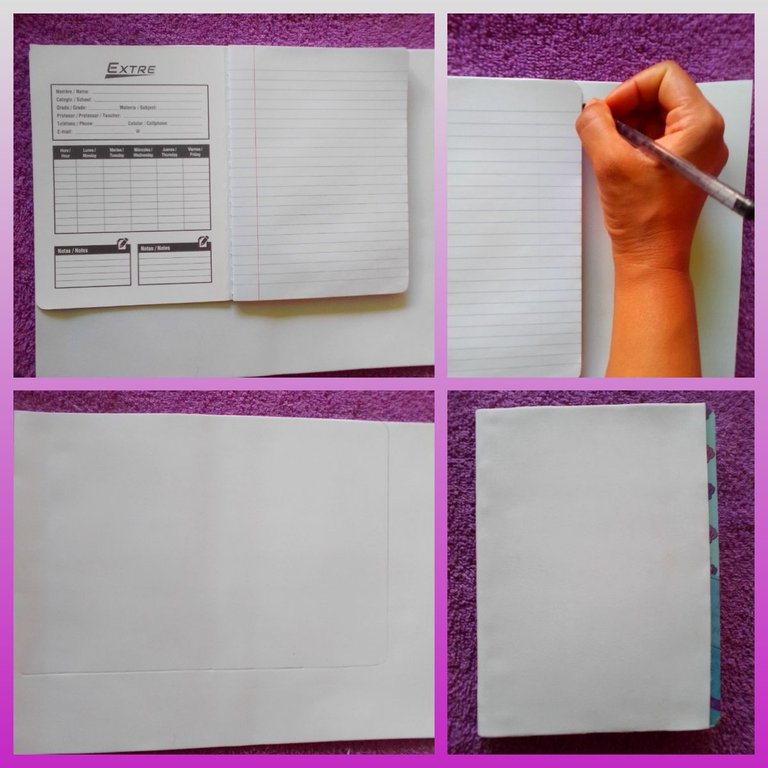
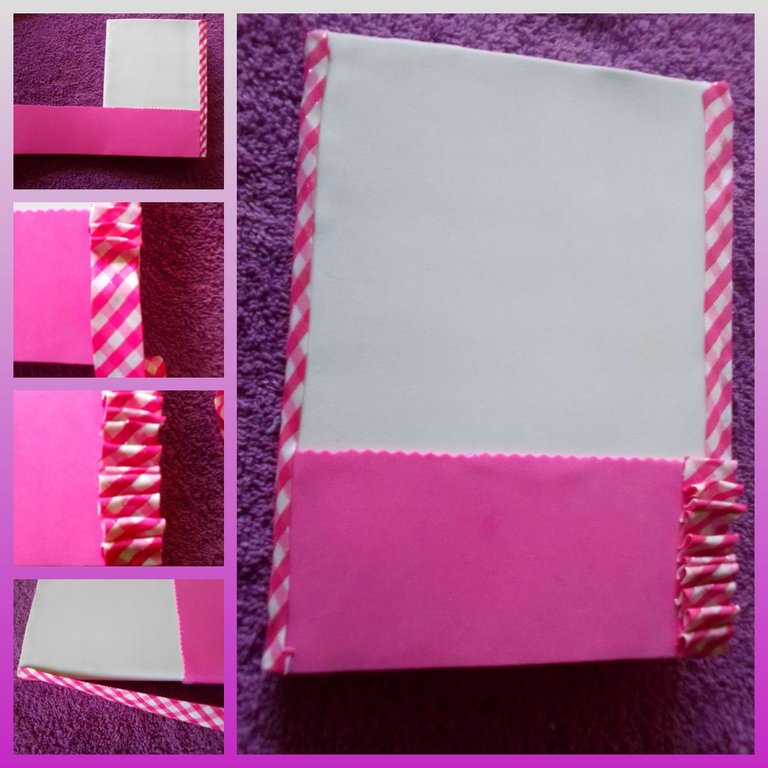
In this first step, I used a double letter white EVA foam, I proceeded all around the notebook, practically making a rectangle, in this way after cutting, I glued it to the notebook, leaving a space of 0.5 cm, on the side. from the cover.
Paso 1:
En este primer paso, utilice una goma eva blanco doble carta, procedí por todo el alrededor de la libreta, elaborando prácticamente un rectángulo, de esta manera luego de cortar, lo pegué a la libreta, dejando un espacio de 0.5 cm, por la parte de la portada.
Step 2:
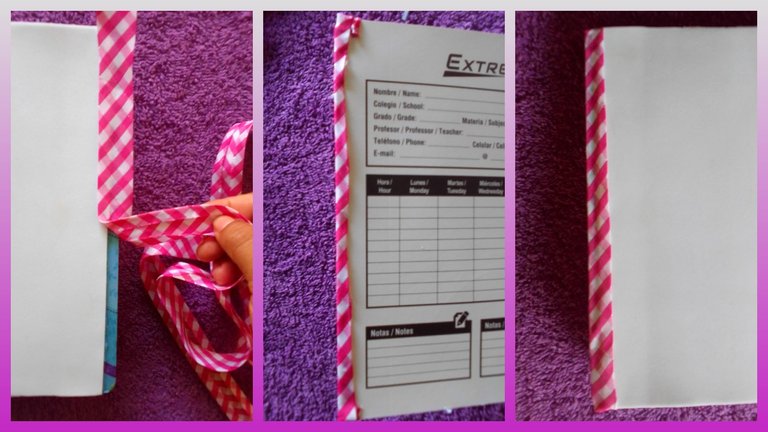
Use a fuchsia patterned ribbon to cover this space, then fold the ribbon on the inside to finish covering the edge.
Paso 2:
Utilice una cinta estampada fucsia, para cubrir este espacio, luego doble la cinta por el lado de adentro para terminar de cubrir el orillo.
Step 3:
I measured 7 cm long x 31 cm wide, to cut a rectangle, this way I used shape scissors.
Paso 3:
Medí 7 cm de largo x 31 cm de ancho, para cortar un rectángulo, de esta manera utilicé una tijera de forma.
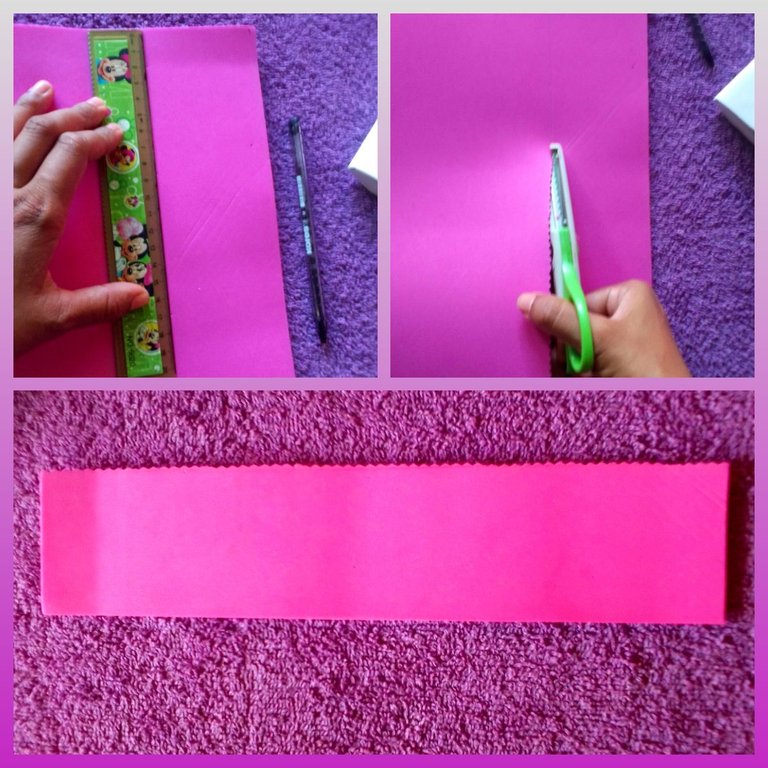
I glued the rectangle to the bottom of the cover, until it covered completely. With the rest of the tape, I made a funcido in the part where I placed the rectangle
El rectángulo lo pegué en la parte inferior de la portada, hasta cubrir completo. Con el restante de la cinta, hice un funcido en la parte donde coloque el rectángulo.
Step 4:
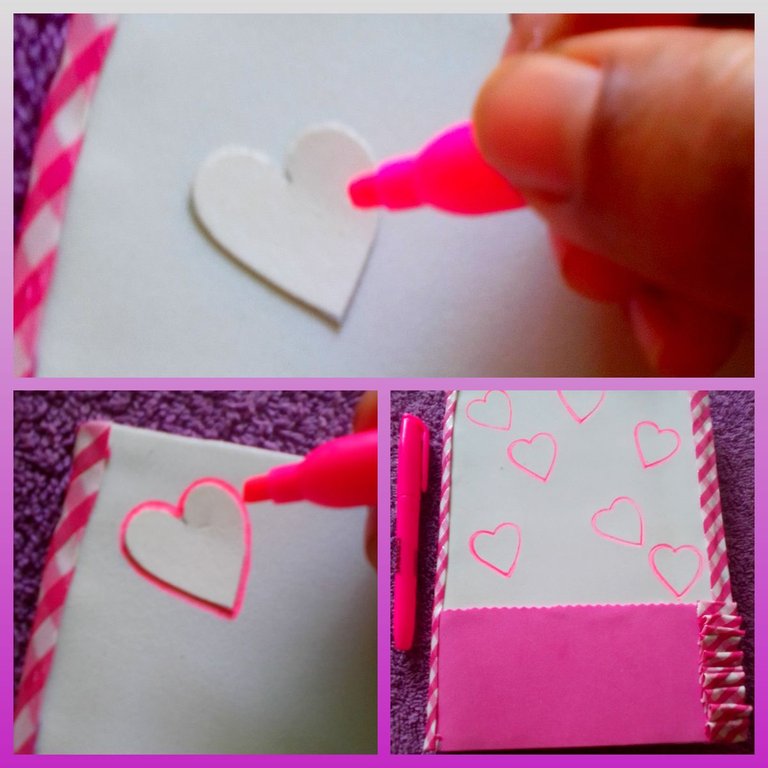
With a heart mold, I proceeded to make several hearts on the cover of the notebook, using a fuchsia highlighter.
Paso 4:
Con un molde de un corazón, procedí a elaborar varios corazones, en la portada de la libreta, utilizando un resaltador fucsia.
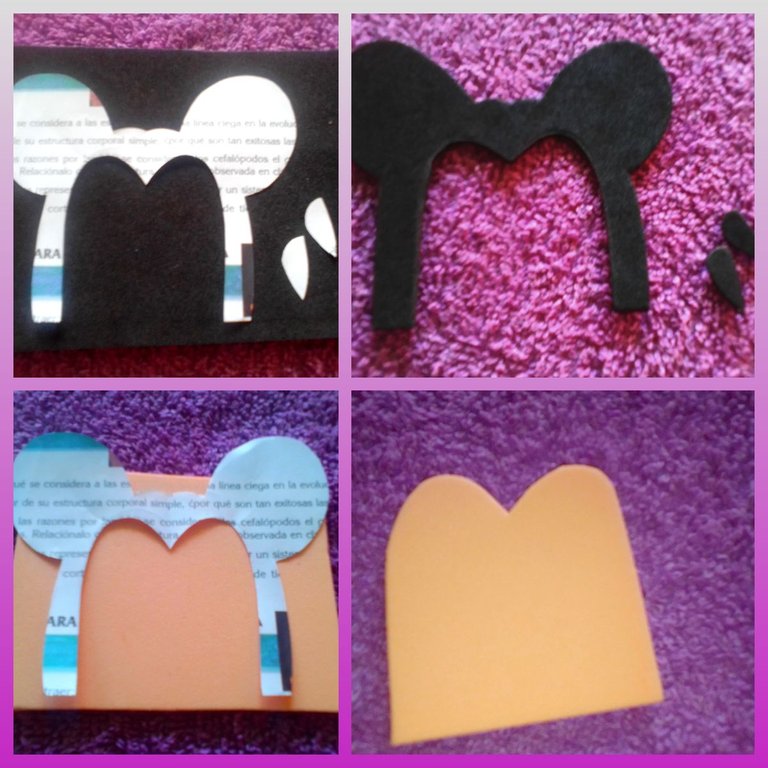
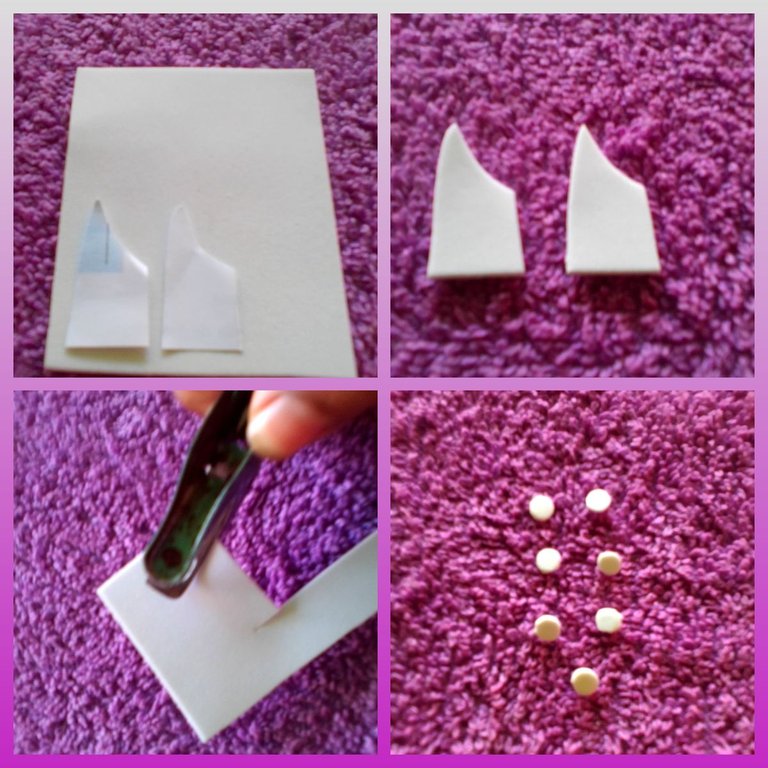
Use the black color to cut the ears, part of the eyes, then the skin color to make the face.
Utilice el color negro, para cortar las orejas, parte de los ojos, luego el color piel para hacer la cara
Step 5:
I made a rectangle the same width as the ruler, to make the name, so that with the ruler it helped me to make each of the letters, and they were formed of the same size.
Paso 5:
Realice un rectángulo del mismo ancho de la regla, para así hacer el nombre, de manera que con la regla iba ayudándome para hacer cada una de las letras, y fueran formadas del mismo tamaño.
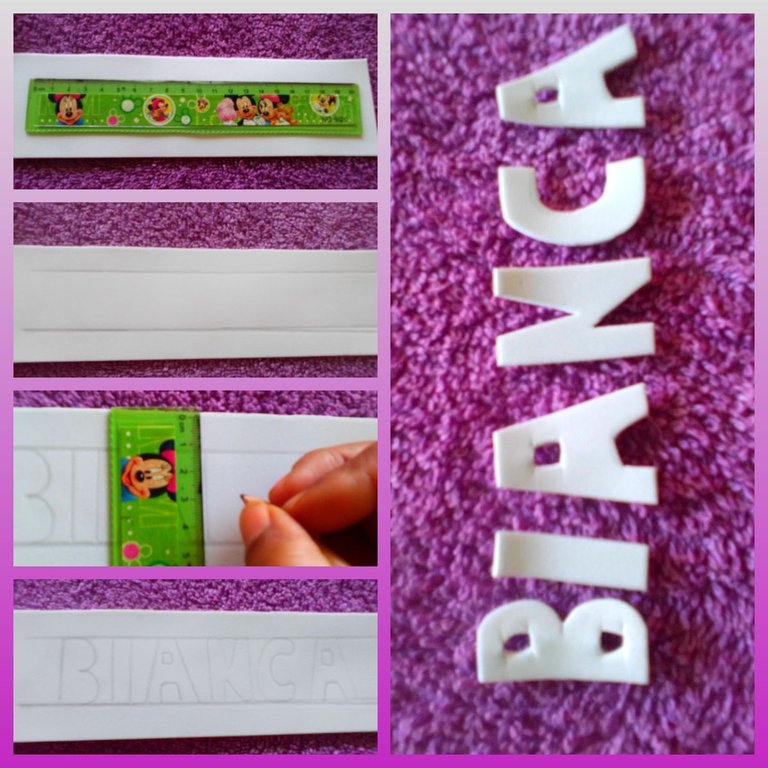
Next, use the same white color to make part of the eyes, and with it open a hole and take out 7 circles.
Seguidamente, utilice el mismo color blanco para hacer parte de los ojos, y con él abre hueco saque 7 círculos.
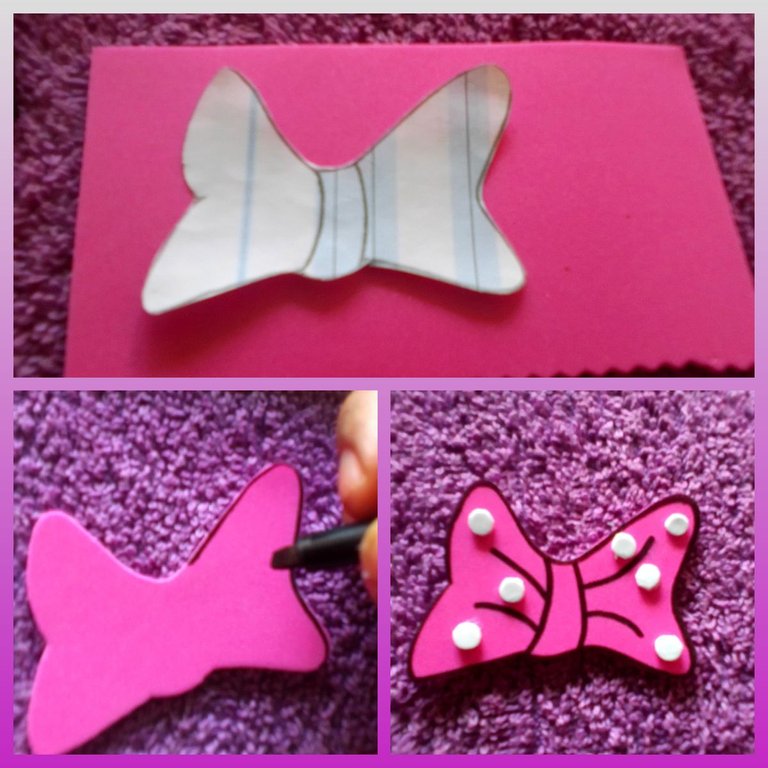
Step 6:
With a mold, make the bow, then use a black marker, go over the entire edge, making the final details, then fill it with the white circles.
Paso 6:
Con un molde elabore el lazo, luego use un marcador negro, pase por todo el orillo, haciéndole sus últimos detalles, seguidamente lo rellene con los círculos blancos.
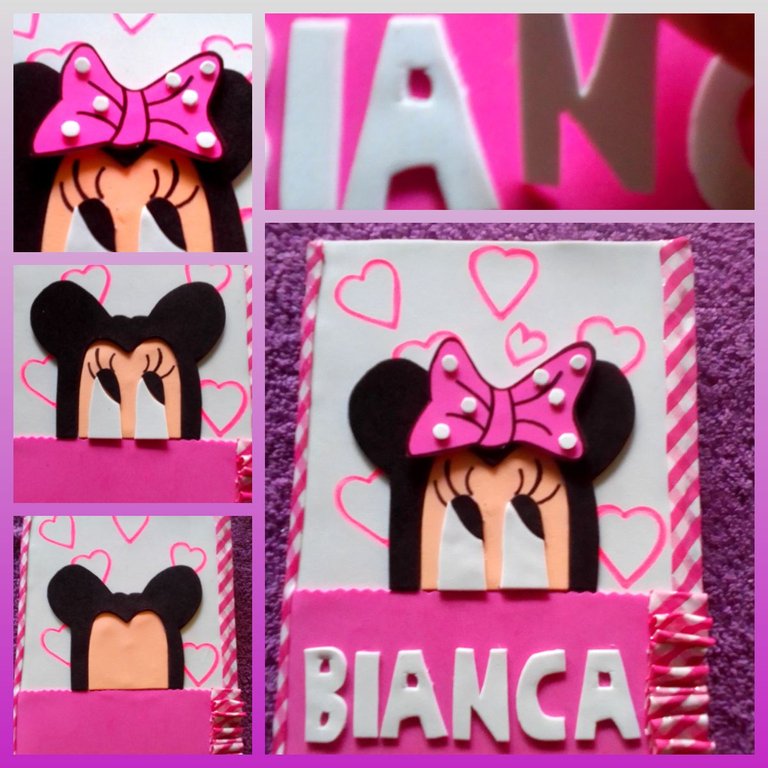
Step 7:
Almost finished the agenda, here I proceeded to decorate the cover, in this way. First I glued the face centered next to her ears, then I made her eyes, using the black marker to make her eyelashes, placed her bow, and finally I added each of the letters, until I finished with the full name.
Paso 7:
Casi terminada la agenda, aquí procedí a decorar la portada, de esta manera. Primero pegue centrada la cara junto a sus orejas, luego arme sus ojos, utilizando el marcador negro para hacer sus pestañas, coloque su lazo, y por último le fui anexando cada una de las letras, hasta culminar con el nombre completo.
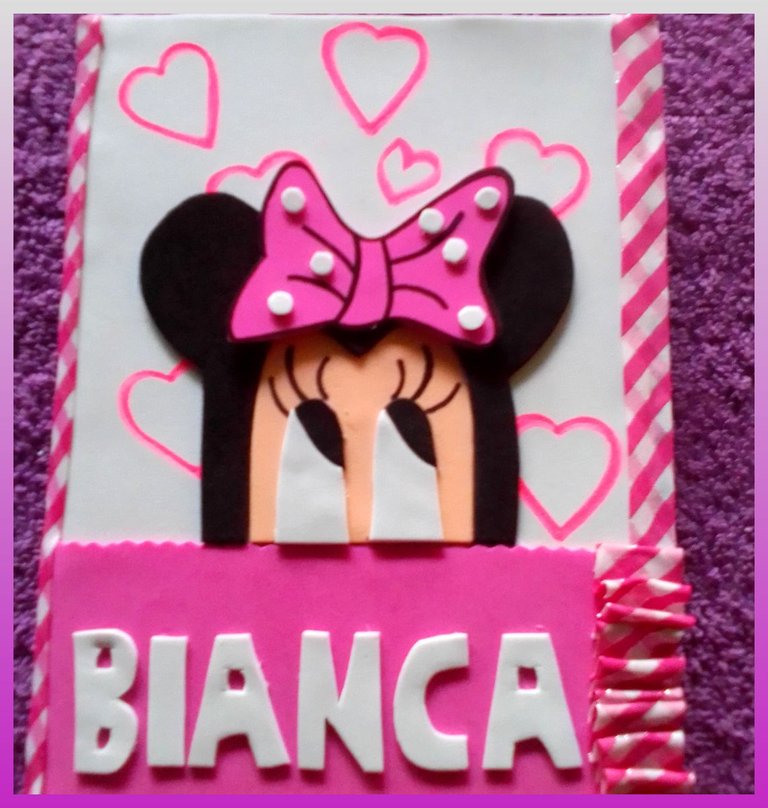
What a beautiful new project to create this agenda for my daughter, I congratulated myself because I know that it turned out beautiful, and the colors I used are very striking and perfect for this occasion. Here I say goodbye my friends, I hope you can take note of the steps I use to prepare it, which, when we do an activity like this, and more so for our children. Everything suits us very well.
Greetings and blessings.
Que bello nuevo proyecto en elaborar esta agenda para mi hija, me felicitó a mí misma porque sé que me quedo bella, y los colores que utilice son muy llamativos y perfectos, para esta ocasión. Aquí me despido mis amigos, espero que puedan tomar nota de los pasos que utilice para elaborarla, la cual, cuando hacemos alguna actividad como esta, y más para nuestros hijos. Todo nos queda muy bien.
Saludos y bendiciones.
Collage making program: Fotojet Link
Translated from google translator Link
Photo editing program: PhotoFiltre 7
Las fotos fueron tomadas desde un Xiaomi Mi A2.
Programa para hacer el collage: Fotojet Enlace
Traducido del traductor de Google Enlace
Programa para editar fotos: PhotoFiltre 7
I say goodbye until another opportunity.
Thanks for your support.
Me despido hasta otra oportunidad.
Gracias por su apoyo.
Copyright @imargasa. All rights reserved.
aha that looks so beautiful thanks for sharing, your daughter is so lucky to have a mother like you.
Que hermosa carpeta amiga tu hija debe estar .uy feliz de tener una madre tan creativa
Te quedó muy hermosa♥️
Me encantó tu creatividad la mirada de la temática muy acordé para este fin. Muy bien explicado se nota que le dedicaste un buen tiempo lleno de amor a tu hija te felicito. Gracias por compartir. 🥰
¡¡¡Buen trabajo!!! Gracias por publicar tu excelente contenido en Hive Diy, te quedo muy lindo tu manualidad, son muy útiles.
Tu comunidad artesana ahora es testigo
