¡¡Hola artesanos de Hive Diy.!! 👋
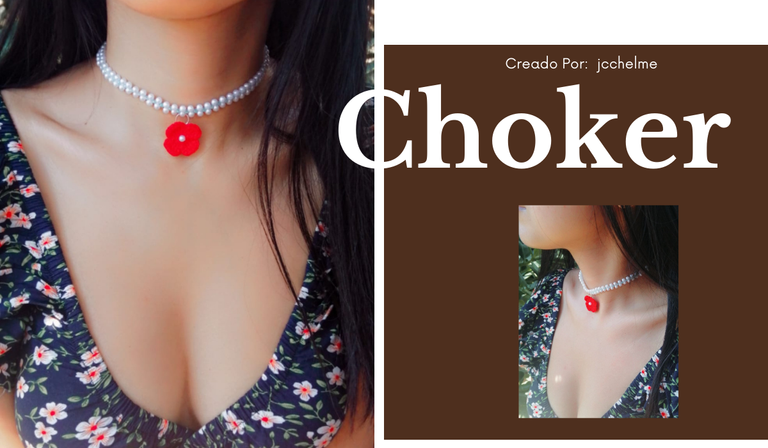
Hoy quiero hablarles sobre una pieza de joyería que personalmente encuentro muy atractiva y elegante: el choker. Si no están familiarizados con este término, les explicaré que un choker es esencialmente una gargantilla, un tipo de collar que se ajusta de manera ceñida alrededor del cuello. A lo largo de la historia, los chokers han sido símbolos de alta moda y estilo, y en los últimos años, han regresado con fuerza como un accesorio imprescindible en el mundo de la moda.
Personalmente, encuentro los chokers extremadamente sexys y femeninos. Hay algo en la forma en que abrazan el cuello que les da un aire de sofisticación y misterio. Inspirada por esta belleza, decidí crear mi propio choker utilizando perlas de fantasía y mostacillas, dos materiales que son accesibles pero que pueden resultar en una pieza sumamente elegante. Obviamente, utilicé perlas de fantasía, pues aunque tuviera la oportunidad de usar reales no lo haría. Me da demasiada tristeza cómo obtienen las perlas naturales.
El proceso para crear este choker es más sencillo de lo que podrías imaginar, pero requiere paciencia y atención al detalle. Comencé seleccionando las perlas y mostacillas que mejor se complementaran en términos de tamaño y color. La elección de los colores es crucial porque puedes jugar con contrastes o buscar una armonía suave y delicada.
Pues bien comencemos con este lindo choker. 😉
Hello Hive Diy crafters!! 👋
Today I want to talk to you about a piece of jewelry that I personally find very attractive and elegant: the choker. If you are not familiar with this term, let me explain that a choker is essentially a necklace that fits snugly around the neck. Throughout history, chokers have been symbols of high fashion and style, and in recent years, they have made a strong comeback as an essential accessory in the fashion world.
Personally, I find chokers extremely sexy and feminine. There is something about the way they hug the neck that gives them an air of sophistication and mystery. Inspired by this beauty, I decided to create my own choker using fantasy pearls and beads, two materials that are accessible but can result in an extremely elegant piece. Obviously, I used fantasy pearls, because even if I had the opportunity to use real ones, I wouldn't. It saddens me too much how natural pearls are obtained.
The process to create this choker is simpler than you might imagine, but it requires patience and attention to detail. I started by selecting pearls and beads that complemented each other in terms of size and color. Choosing the colors is crucial because you can play with contrasts or look for a soft and delicate harmony.
Well then, let's start with this beautiful choker. 😉
Materiales / Materials

|

|
- perlas de fantasía blancas
- mostacillas celestes
- 1 argolla de unión grande y 1 pequeña
- 1 alicate para bisutería
- Tijeras
- aguja
- 2 escarlachines
- Hilo elástico transparente
- 2 tapanudos
- hilo de bordar rojo
- crochet de 0.6 mm
- cadena
- White fantasy pearls
- Light blue beads
- 1 large and 1 small connecting ring
- 1 jewelry pliers
- Scissors
- Needle
- 2 lobster clasps
- Transparent elastic thread
- 2 crimp beads
- Red embroidery thread
- 0.6 mm crochet hook
- Chain
Elaboración / Elaboration

|

|
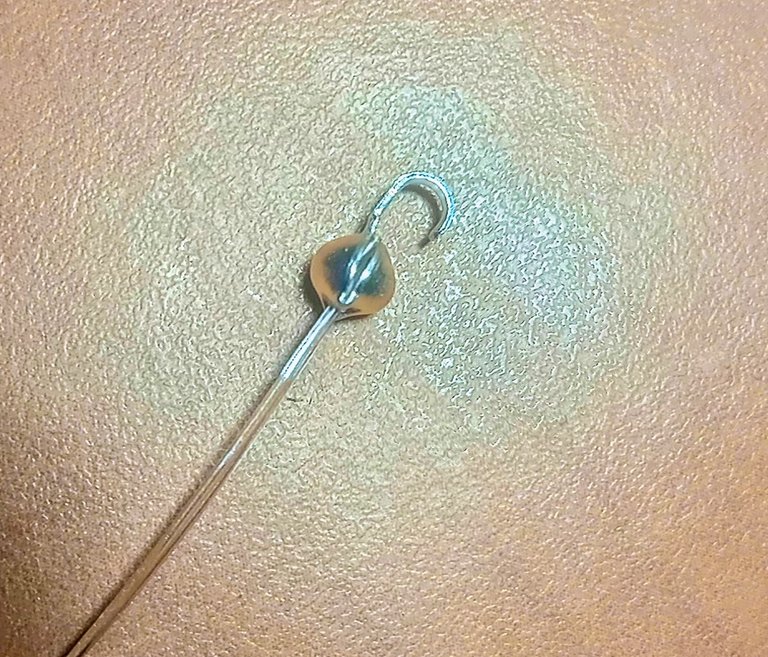
Tomé un metro y medio de hilo elástico y comencé uniendo ambos extremos, pasándolos a través de un escalachin, el cual aseguré firmemente con unas alicates. Este paso es crucial para colocar el tapanudos, garantizando así que las perlas se mantengan en su lugar al ser ensartadas y mejorando la pulcritud del trabajo. Este procedimiento no solo previene la pérdida de las perlas, sino que también añade un toque profesional a la pieza, haciendo que el choker terminado sea tanto elegante como duradero.
I took a meter and a half of elastic thread and began by joining both ends, threading them through a crimp bead, which I then firmly secured with pliers. This step is crucial for attaching the bead tip, ensuring that the pearls stay in place when threaded and enhancing the neatness of the work. This procedure not only prevents the loss of pearls but also adds a professional touch to the piece, making the finished choker both elegant and durable.


|

|

|

|
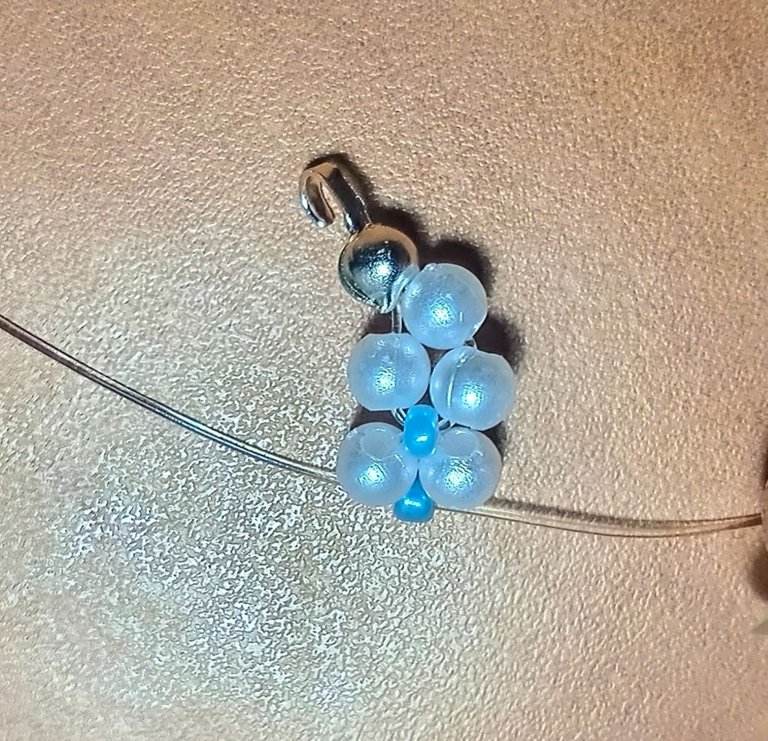
Después de preparar el hilo elástico, comencé a ensartar las perlas y mostacillas para dar forma al choker. Primero, pasé una perla por el extremo derecho del hilo y luego dos perlas por el extremo izquierdo.
Esta distribución asimétrica de las perlas fue el primer paso para crear un patrón atractivo. Seguidamente, introduje una mostacilla, la cual atravesé con ambos extremos del hilo, pero de manera intercalada. Este enhebrado cruzado de la mostacilla entre los dos hilos añade un detalle distinto al diseño. De esa manera no se verá todo blanco.
Tras añadir la mostacilla, continué el patrón insertando una nueva perla por ambos hilos.
Este proceso lo continúe hasta dar con el largo deseado.
After preparing the elastic thread, I began threading the pearls and seed beads to shape the choker. First, I passed one pearl through the right end of the thread and then two pearls through the left end.
This asymmetric distribution of the pearls was the first step in creating an attractive pattern. Next, I introduced a seed bead, which I threaded through both ends of the thread, but in an alternating manner. This crisscross threading of the seed bead between the two threads adds a distinctive detail to the design, ensuring it won't all look white.
After adding the seed bead, I continued the pattern by inserting a new pearl through both threads.
I continued this process until I achieved the desired length.

|

|

|

|
Finalmente coloque una argolla y la uni al mosquetón y en el otro extremo le puse una extensión de cadena.
Finally, I attached a jump ring and connected it to the lobster clasp, and on the other end, I added a chain extension.
|

|

|

|
Tenía la intención de añadir un dije con forma de flor al choker, pero me di cuenta de que no me quedaban. Entonces, se me ocurrió una idea creativa: hacer una flor de crochet para complementar el choker. Elaborar una flor en crochet no solo añadiría un toque único y hecho a mano a la pieza, sino que también me permitiría personalizar el color y el tamaño para que combinara perfectamente con el diseño. Bueno para ser sincera fue mi pequeña sobrina Amanda la que me dió la idea, @alejandralita tú hija es muy creativa. 🤗
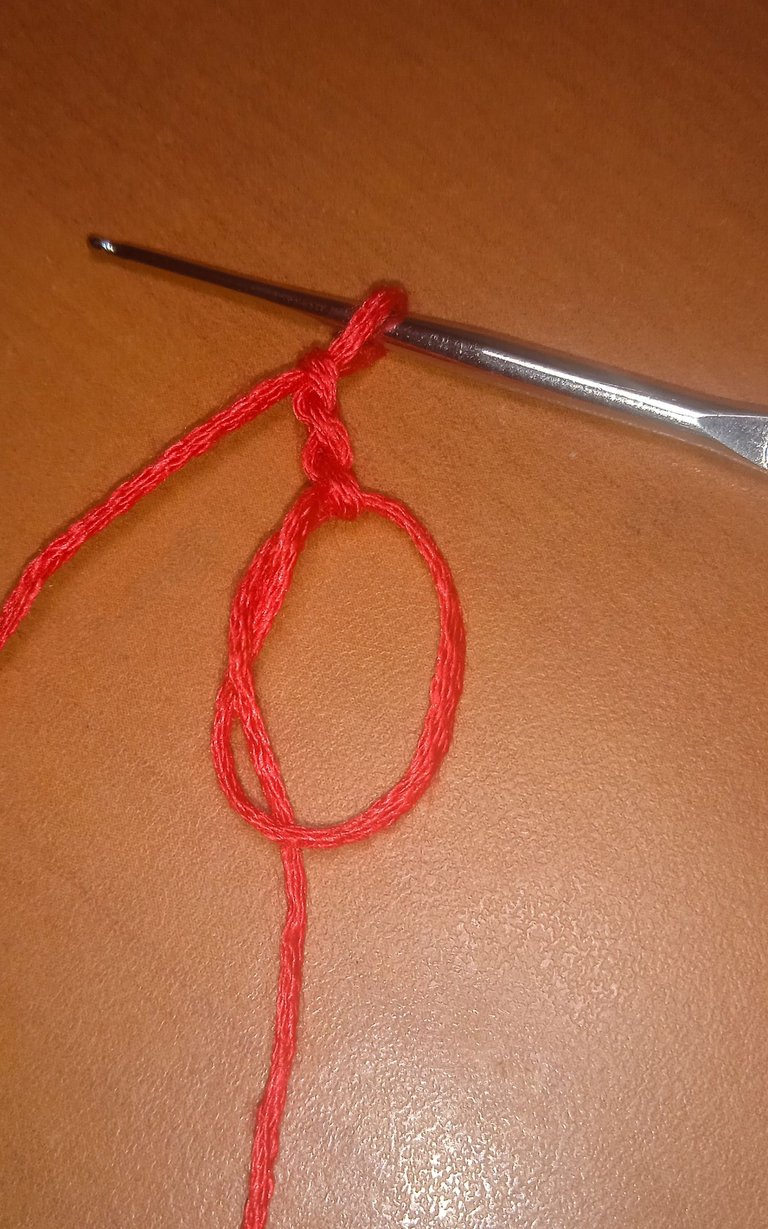
Hice un anillo mágico con 3 cadenas, para luego tejer 3 puntos altos dobles. Enseguida 3 cadenas y un punto bajo. Está secuencia la repetí hasta tener 4 petalos.
I intended to add a flower-shaped charm to the choker, but I realized I had run out. Then, a creative idea struck me: to make a crochet flower to complement the choker. Crafting a crochet flower would not only add a unique, handmade touch to the piece but would also allow me to customize the color and size to perfectly match the design. To be honest, it was my little niece Amanda who gave me the idea, @alejandralita your daughter is very creative. 🤗
I made a magic ring with 3 chains, then crocheted 3 double treble stitches. Next, I made 3 chains and a slip stitch. I repeated this sequence until I had 4 petals.

|

|
Para integrar la flor de crochet al choker, elegí una de las perlas como punto de unión. Cuidadosamente, coloqué una argolla grande alrededor de esta perla, creando un enlace seguro y estético entre ambos elementos. Esta argolla no solo funcionaba como un conector, sino que también añadía un detalle adicional al diseño general.
To integrate the crochet flower into the choker, I chose one of the pearls as the point of connection. Carefully, I placed a large jump ring around this pearl, creating a secure and aesthetic link between the two elements. This ring not only served as a connector but also added an additional detail to the overall design.

|

|
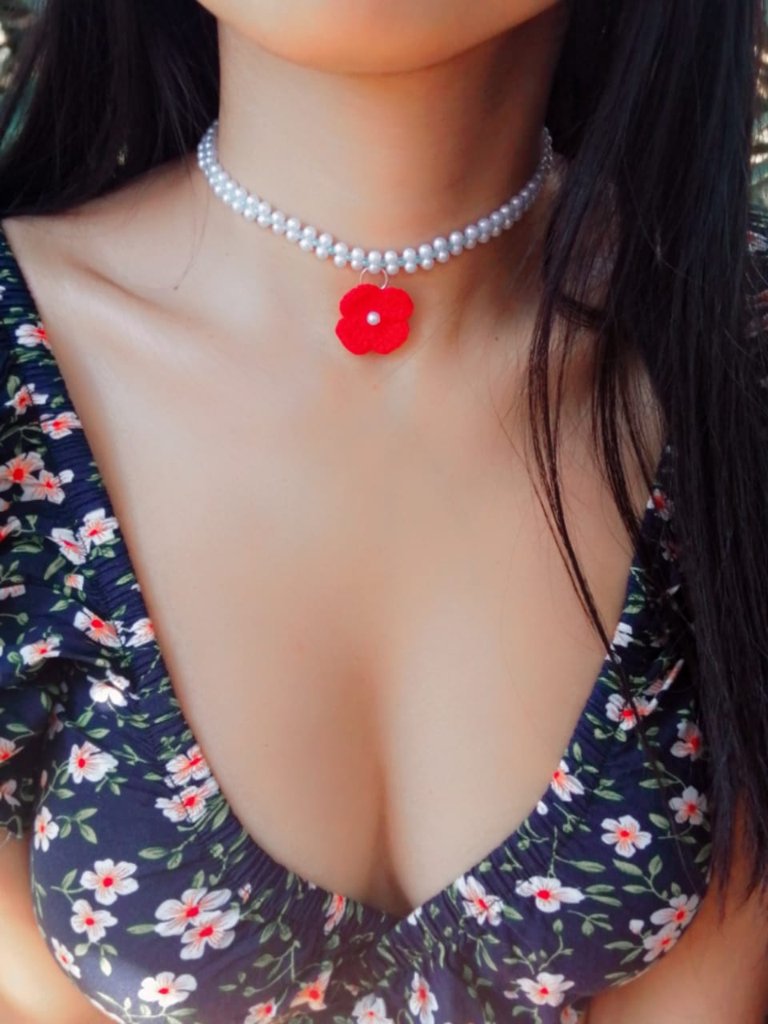
Pues aquí está el resultado, así a quedado mi lindo choker. A la flor al principio no le puse perla, pero luego le agregué una en medio.
Las imágenes fueron tomadas con luz natural y luz artificial, los colores se ven muy distintos en ambos escenarios.
Espero que ustedes de animen a hacer sus propios choker o gargantillas con esta idea. 🤗
Well, here's the result, this is how my lovely choker turned out. Initially, I didn't add a pearl to the flower, but then I added one in the middle.
The photos were taken in natural and artificial light, and the colors look very different in both settings.
I hope you are inspired to make your own chokers or necklaces with this idea. 🤗
Muchas gracias 😊
Un trabajo bien elaborado,te felicito de verdad muy creativo, saludos y bendiciones hijita.
Gracias 🤗
Congratulations @jcchelme! You have completed the following achievement on the Hive blockchain And have been rewarded with New badge(s)
Your next target is to reach 400 upvotes.
You can view your badges on your board and compare yourself to others in the Ranking
If you no longer want to receive notifications, reply to this comment with the word
STOPTo support your work, I also upvoted your post!
Check out our last posts:
WOW! It's impressive. The red color stands out from the white. Love its color combination and design. Well done!