Español
Hola mis estimados lectores, gusto en saludarles nuevamente… como les había mencionado anteriormente, he vuelto a @Hive después de varios meses de ausencia…
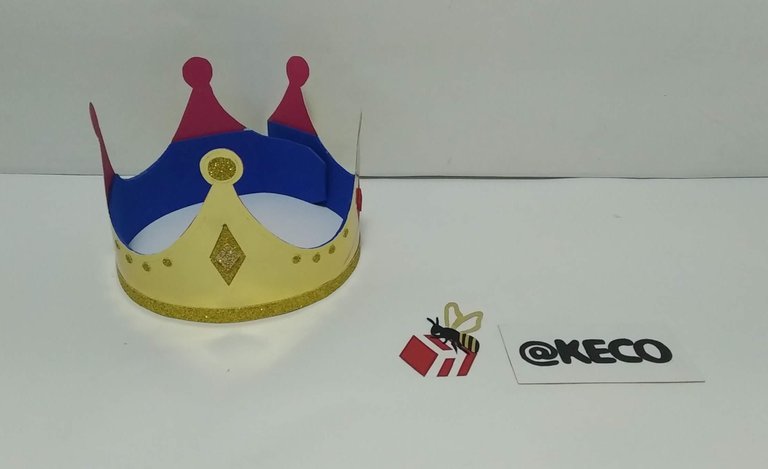
Hoy quiero mostrarles una creación para un acto cultural escolar; ¿Qué mamá o papá no se ha entusiasmado con algún acto escolar? El acto incluía a un rey y por supuesto todo rey tiene corona, así que el momento fue propicio para crear una sencilla pero hermosa corona que hiciera lucir hermoso al rey.
Es un trabajo sencillo y esperando disfruten del trabajo realizado les dejo los materiales utilizados, el proceso y las imágenes del trabajo.
- Cartulina Dorada tipo espejo.
- Foami plano grueso (Goma Eva)
- Cartulina dorada escarchada.
- Cartulina de colores: rojo, verde, rosado.
- Foami escarchado de color: rojo, verde, dorado (pedacitos).
- Cierre Mágico (velcro).
- Silicón frio.
- Silicón Caliente.
- Tijera.
- Lápiz.
- Tijera.
English
Hello my dear readers, nice to greet you again... as I had mentioned before, I'm back to @Hive after several months of absence...
Today I want to show you a creation for a school cultural event; what mom or dad hasn't been excited about a school event? The event included a king and of course every king has a crown, so the time was right to create a simple but beautiful crown to make the king look beautiful.
It is a simple job and I hope you enjoy the work done, here are the materials used, the process and the pictures of the work.
- Gold mirror cardboard.
- Thick flat Foami (Goma Eva)
- Gold frosted cardboard.
- Color cardboard: red, green, pink.
- Frosted colored Foami: red, green, gold (small pieces).
- Magic clasp (velcro).
- Cold silicone.
- Hot Silicone.
- Scissors.
- Pencil.
- Scissors.
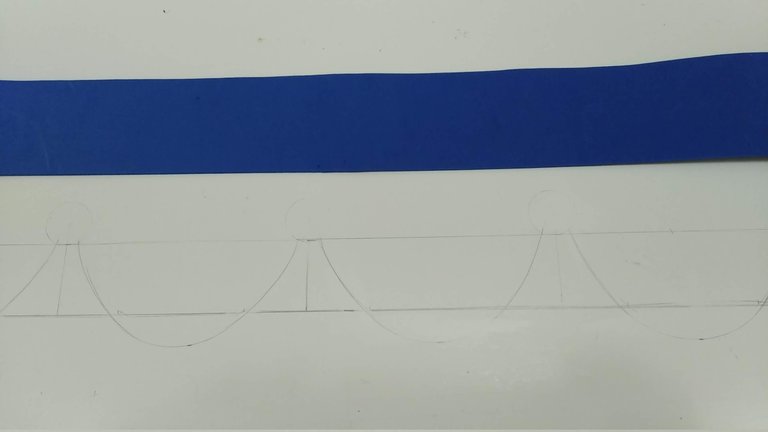
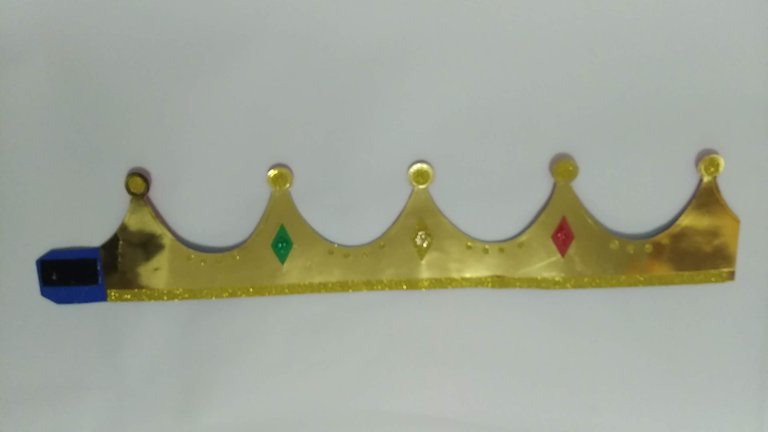
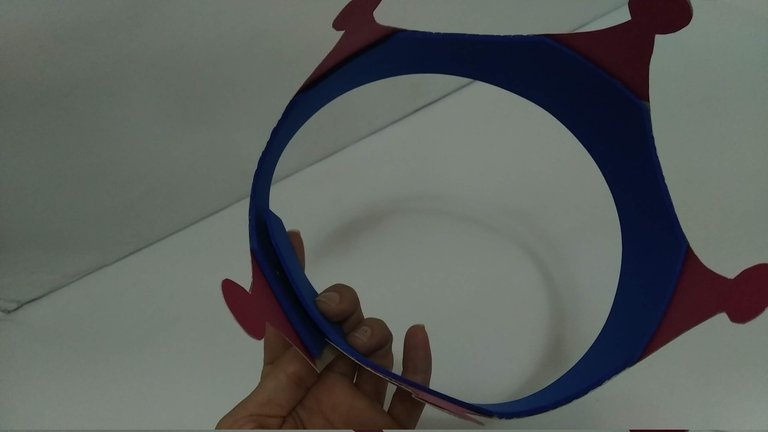
1.- Lo primero a tener en cuenta es el diámetro a crear. Para saber el tamaño, se mide con una cinta métrica la cabeza del niño y esa medida es la que se llevará en plano a la cartulina tipo espejo (por la parte blanca) y al foami plano azul (el ancho de la corona es a gusto personal, lo importante a destacar es que ambas piezas deben medir lo mismo en largo y ancho para que no sobresalgan una o la otra).
1.- The first thing to consider is the diameter to create. To know the size, the child's head is measured with a tape measure and that measurement is the one that will be taken flat to the mirror cardboard (on the white side) and the blue flat foami (the width of the crown is to personal taste, the important thing to note is that both pieces must measure the same in length and width so that they do not protrude one or the other).
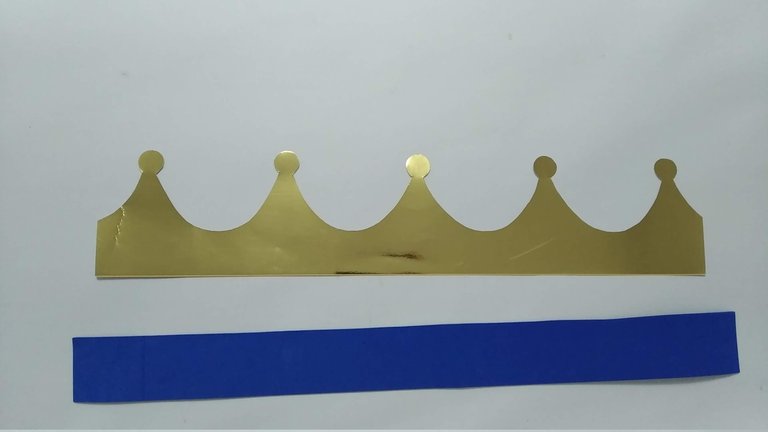
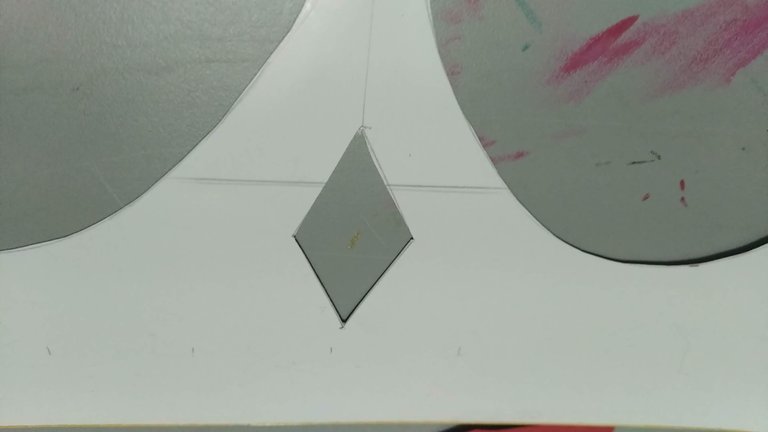
2.- Para darle alegría a la corona, se debe calar la cartulina dorada y en estos espacios pegar cartulina de colores (pegar por la parte posterior para pulcritud en el trabajo).
2.- To give joy to the wreath, the golden cardboard should be fretworked and colored cardboard should be glued in these spaces (glue on the back for neatness in the work).

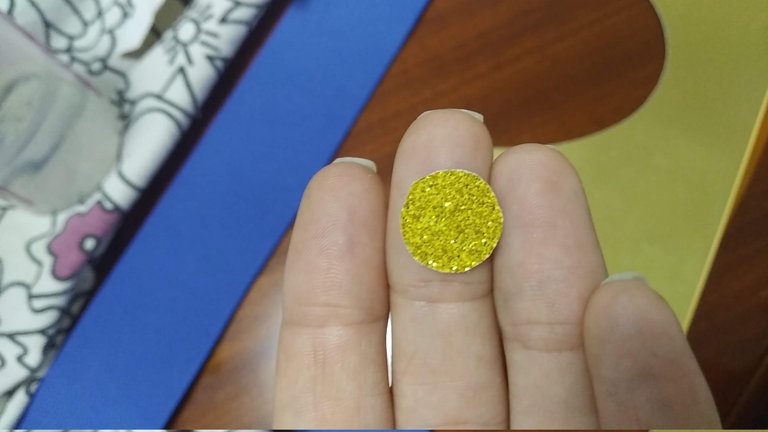
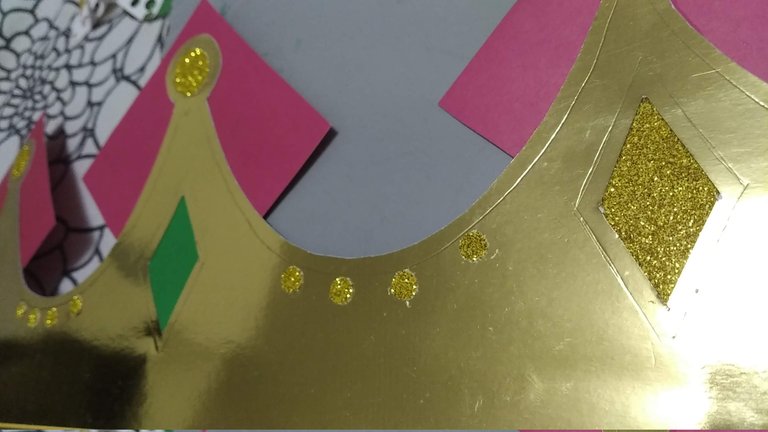
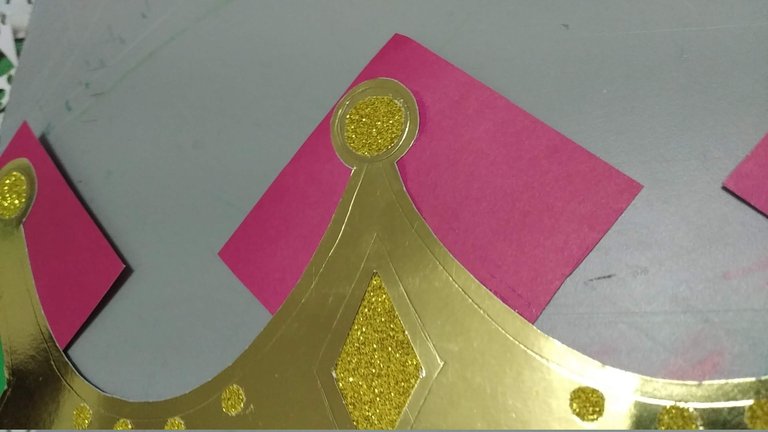
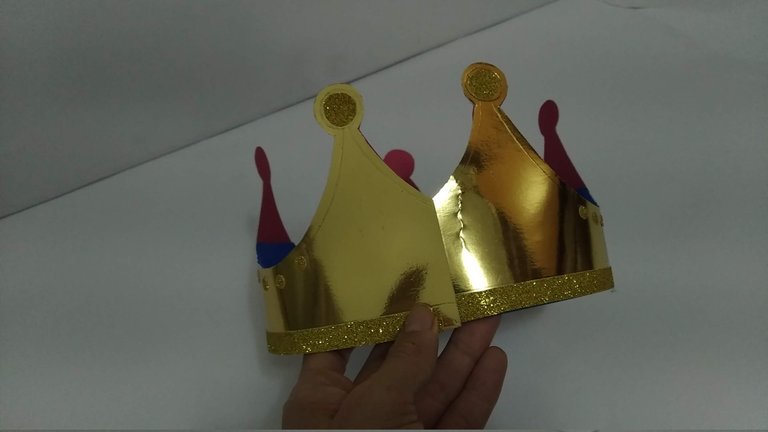
3.- Para el brillo especial de la corona, tomar la cartulina dorada escarchada y cortar pequeños trozos para pegar sobre la cartulina dorada; en este caso se cortaron círculos pequeños para la decoración. Adicionalmente, utilizando un lápiz o algún objeto punzante hacer pequeñas marcas a la cartulina dorada por todo sus bordes para ofrecer un efecto mas detallado como el de una corona real.
3.- For the special glitter on the wreath, take the frosted gold cardstock and cut small pieces to glue onto the gold cardstock; in this case small circles were cut out for decoration. Additionally, using a pencil or some sharp object make small marks on the gold cardboard all around the edges to give a more detailed effect like a real wreath.
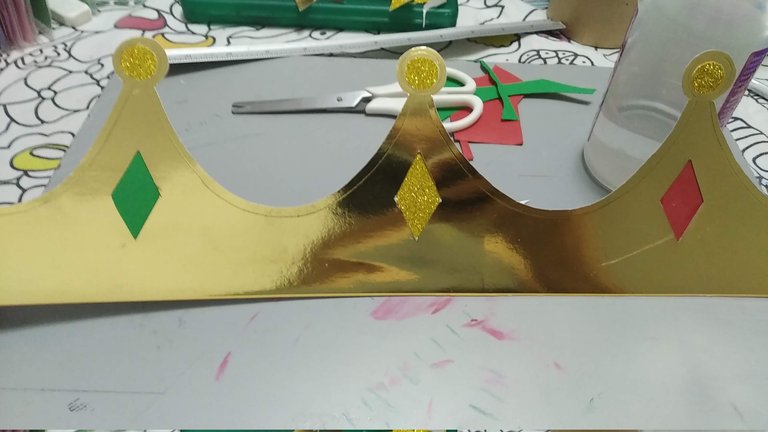
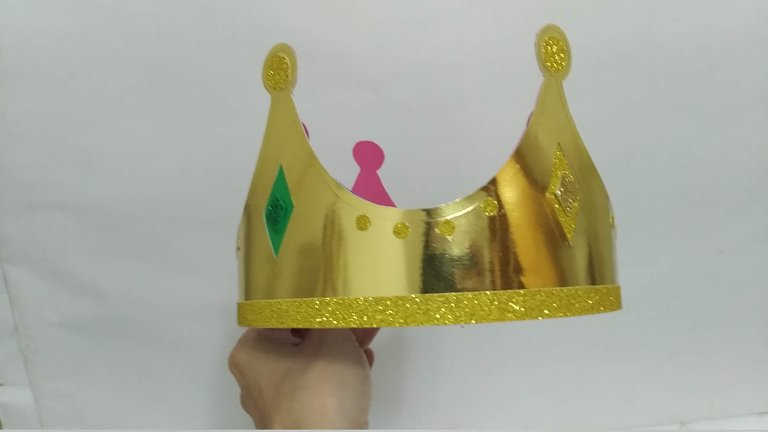
4.- En la parte superior de la corona, donde sobresalen las puntas redondas, pegar con silicón frío, la cartulina rosada (aunque puede ser cualquier otro color) y luego recortar por todo el borde del diseño dorado.
4.- On the top of the wreath, where the round ends protrude, glue with cold silicone, the pink cardboard (although it can be any other color) and then cut out all around the edge of the golden design.
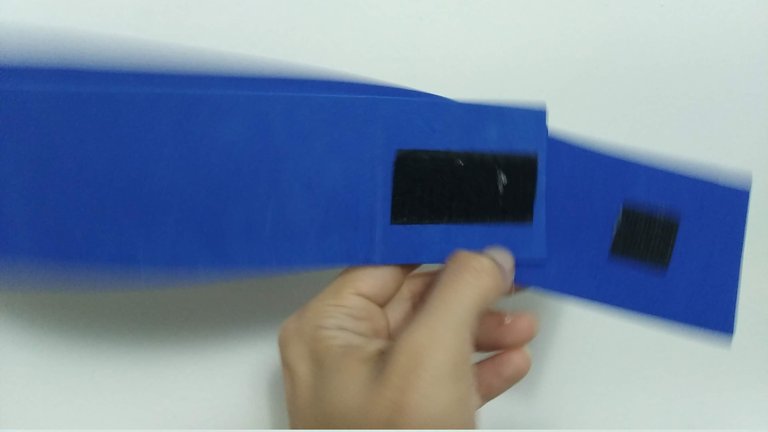
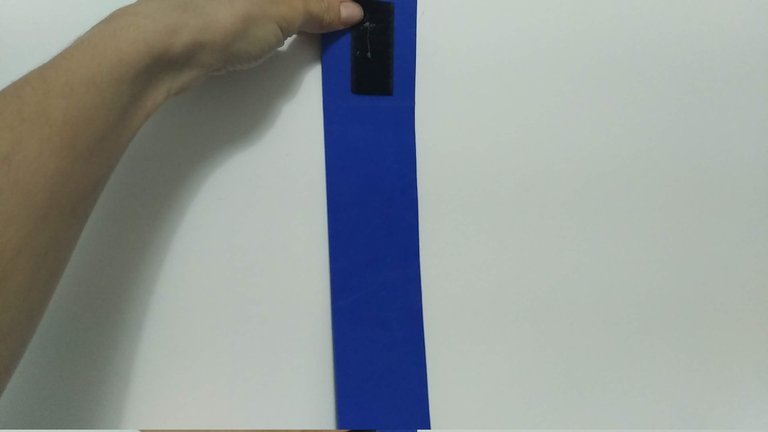
5.- Tomar la cinta rectangular de foami plano y pegarle con silicón caliente el velcro (cierre mágico) en los extremos de la misma. Y luego pegar sobre la cartulina dorada en la parte posterior (parte blanca), en caso que sea necesario recortar los borden que sobresalgan de la figura dorada.
5.- Take the rectangular ribbon of flat foami and glue the Velcro (magic clasp) on the ends of it with hot silicone. And then glue on the golden cardboard on the back (white part), if necessary cut out the embroidery that protrudes from the golden figure.
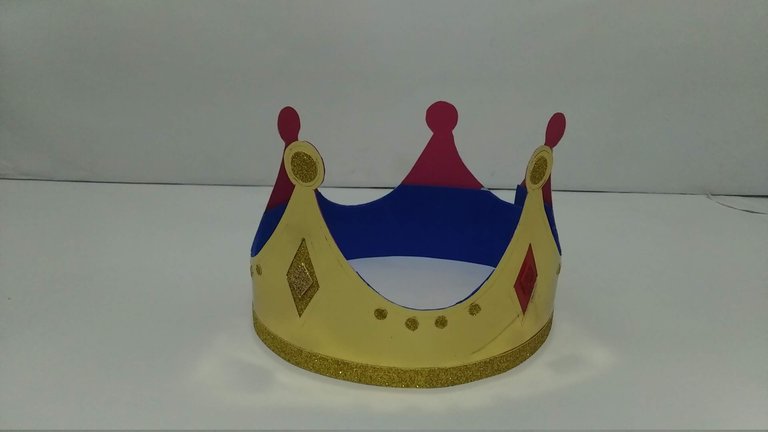
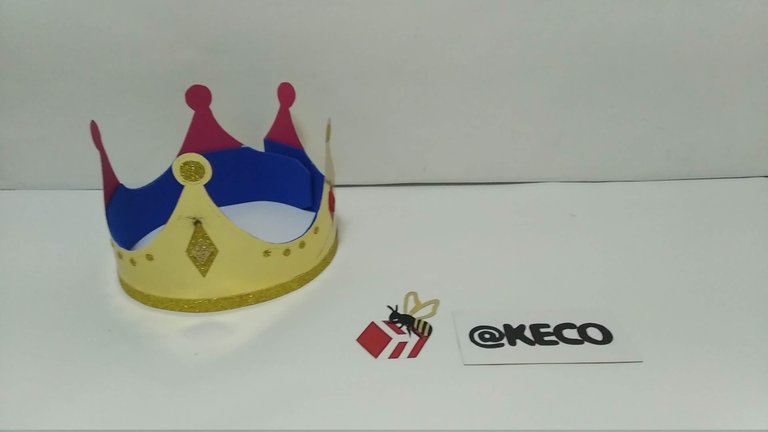
6.- Para terminar la decoración recortar una cinta de 1,5 cm de ancho y pegar a todo el borde inferior de la corona. Pegar con silicón frio, cuidando que no se derrame hacia la cartulina dorada tipo espejo. En los espacios con forma de rombo donde está la cartulina roja, verde y dorada, pegar pequeños trozos de foami escarchado para resaltar el brillo.
6.- To finish the decoration, cut a 1.5 cm wide ribbon and glue it around the bottom edge of the wreath. Glue with cold silicone, taking care that it does not spill over onto the gold mirror cardboard. In the diamond-shaped spaces where the red, green and gold cardboard is, glue small pieces of frosted foami to highlight the glitter.
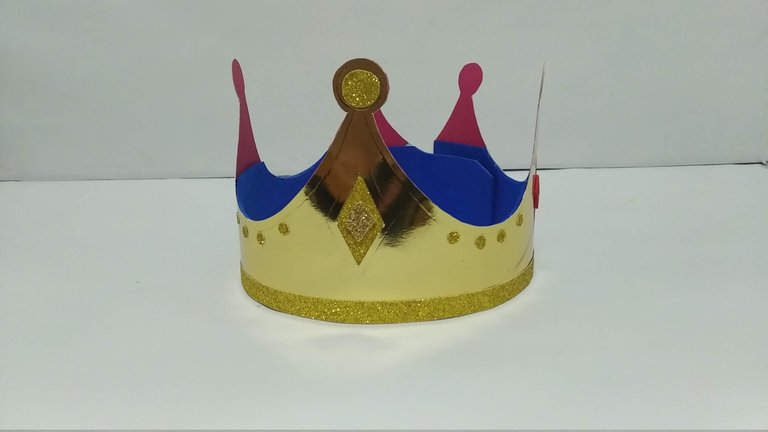
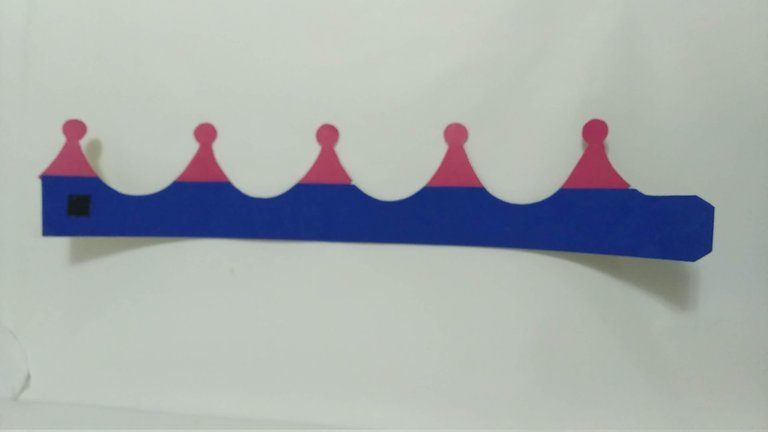
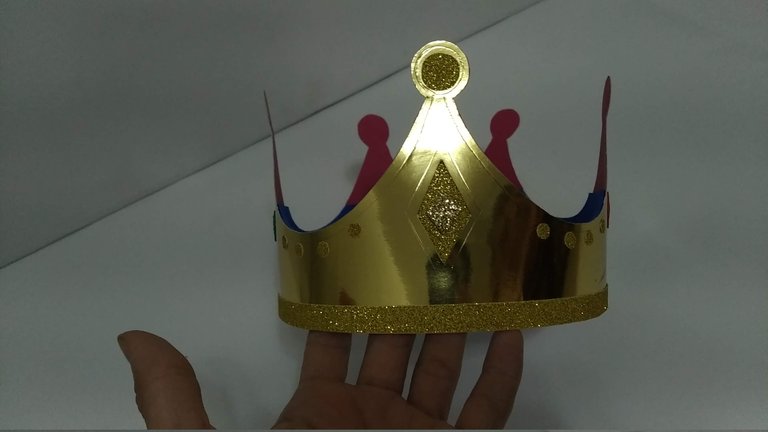
7.- Listo, corona lista. Y como ésta tiene velcro (cierre mágico) permite adaptarla y fijarla mejor a la cabeza del niño o niña, depende quien quiera usarla.
7.- Ready, crown ready. And as this one has Velcro (magic clasp) it allows to adapt it and fix it better to the head of the boy or girl, depending on who wants to use it.

Espero les haya gustado y sobre todo se entusiasmen a crear algo parecido para sorprender a familiares y amigos.
I hope you liked it and, above all, I hope you get excited to create something similar to surprise your family and friends.
SALUDOS / REGARDS
Todas las Fotos fueron tomadas con mi teléfono Redmi 7A.
Contenido original de @keco (fotos y texto) - Todos los derechos reservados Publicado en HIVE así como en mi instagram : http://instagram.com/carton_pintura_algo_mas
All Photos were taken with my Redmi 7A phone.
Original content from @keco (photos and text) - All rights reserved Posted on HIVE as well as on my instagram: http://instagram.com/carton_pintura_algo_mas
Gracias @mayvileros por estar presente apoyando, es un gesto valioso y me llena de amor, entusiasmo y ganas de seguir trabajando...
Saludos, bendiciones y éxitos.
Te quedó muy bella. Y es ajustable eso me encantó. Gracias por compartir.
🎆🎇🎉🎊🌧️💐✨🌾🌱🌹🌙🌿🍃🥀⚡🌺☘️🍀🌈🌷⭐🪴🌵🌸🌟💮🌴🌳💫☀️💮☔🌲🌳🌍🌌🌠☄️🏵️🐝🌻🌼🍄🐞🦋💙☕💜🍍🎆🎇🎉🎊
Gracias @chacald.dcymt por visitar y comentar. Hacerla ajustable resulta mejor porque el ajuste es sólido y evitamos se les caiga.
Saludos, bendiciones y éxitos.
@keco , que facilidad para crear en forma sencilla....felicitaciones