Español
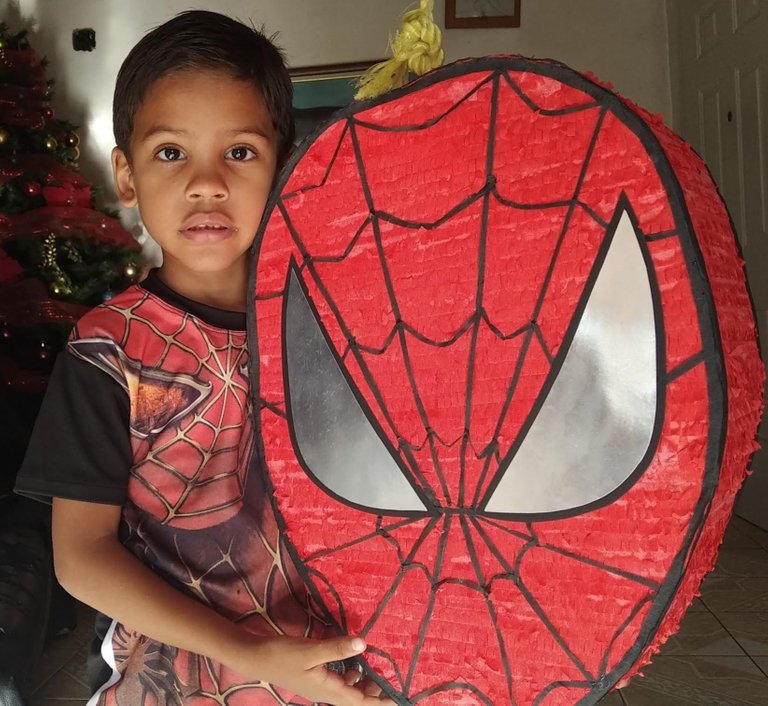
El regalo para mi sobrino, su personaje favorito relleno de muchas golosinas.
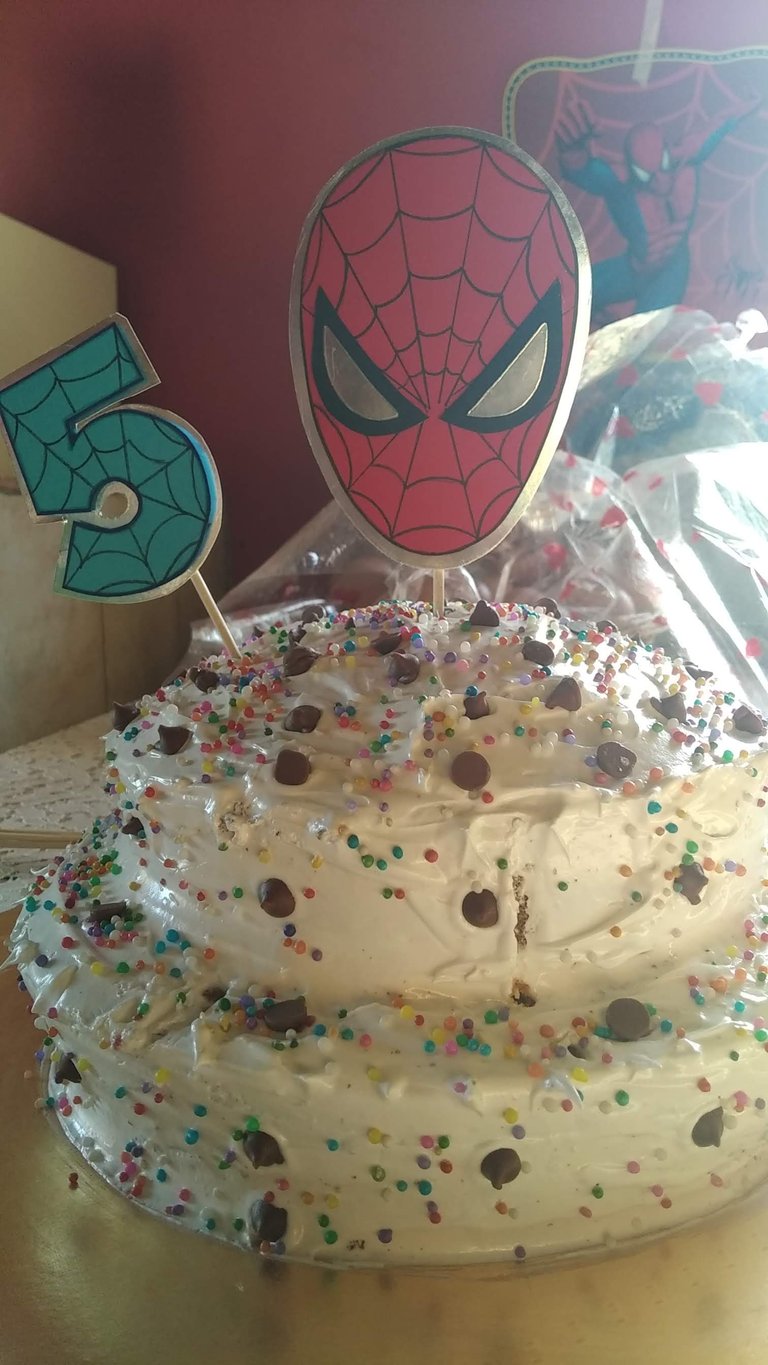
El trabajo que hoy les muestro, fue hecho con amor (elevado a la potencia) para mi sobrino Leandro, el a finales del año pasado, cumplió 5 años y aunque emocionalmente no teníamos ánimos de hacer celebración alguna por la muerte de su madre, algunos meses antes, él estaba tan emocionado de tener una fiesta de spiderman que como tía no pude negarme a hacerle una piñata de su personaje favorito y su abuela (mi madre) a hacerle el pastel de chocolate que tanto le gusta.
De más esta decirles que mientras hacia la piñata, conversaba con ella y le pedí muchas cosas, sobre todo fuerza para que mis sobrinos tengan un camino lleno de bendiciones sin ella. Fue un cumpleaños con asistencia reducida y tiempo corto, primero por el luto, segundo por el Covid-19, pero lo importante es que logramos hacer feliz a nuestro negrito amado y le ofrecimos una sorpresa que atesorará en sus recuerdos.
Fue una piñata pequeña, y fácil de hacer, y espero se animen a intentarla en casa. Sin más, y esperando disfruten del trabajo realizado les dejo los materiales utilizados, el proceso y las imágenes del trabajo.
- Cartón Ligero.
- Cartón grueso.
- Alambre.
- Silicón caliente.
- Cinta adhesiva de papel.
- Papel crepé rojo.
- Papel crepé negro.
- Cartulina plateada tipo espejo.
- Cartulina Negra.
- Engrudo casero.
- Tijera
- Un Clip mordaza.
English
The work I show you today, was made with love (elevated to the power) for my nephew Leandro, he turned 5 years old at the end of last year, and although emotionally we had no desire to do any celebration for the death of his mother, a few months before, he was so excited to have a Spiderman party that as an aunt I could not refuse to make him a piñata of his favorite character and his grandmother to make the chocolate cake that he likes so much.
Needless to say that while I was making the piñata, I talked to her and asked her for many things, especially strength for my nephews to have a path full of blessings without her. It was a birthday with reduced attendance and short time, first because of the mourning, second because of the Covid, but the important thing is that we managed to make our beloved negrito happy and we offered him a surprise that he will treasure in his memories.
It was a small piñata, and easy to make, and I hope you are encouraged to try it at home. Without further ado, and hoping you enjoy the work done, here are the materials used, the process and the pictures of the work.
- Light cardboard.
- Wire.
- Hot glue.
- Paper tape.
- Red crepe paper.
- Black crepe paper.
- Silver mirror cardboard.
- Black cardboard.
- Home-made paste.
- Scissors
- A gag clip.
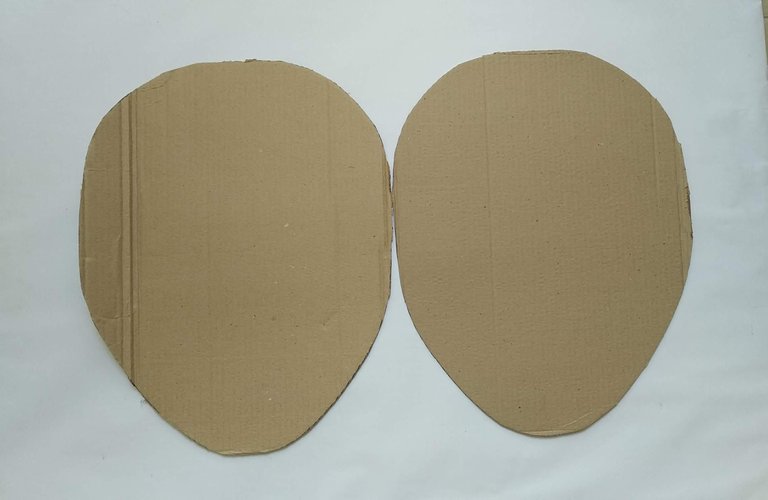
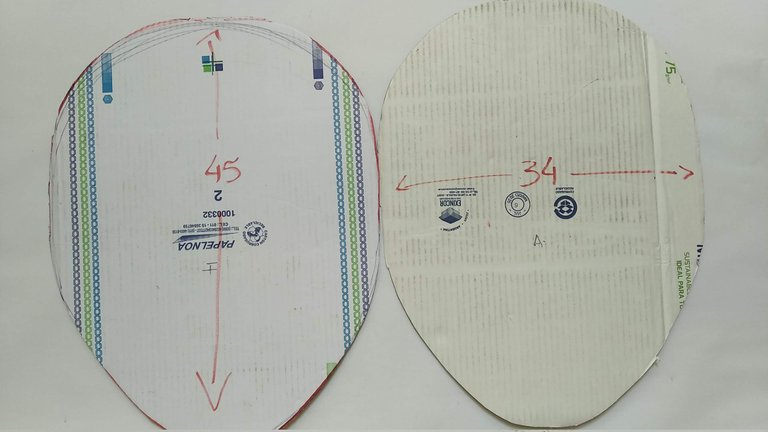
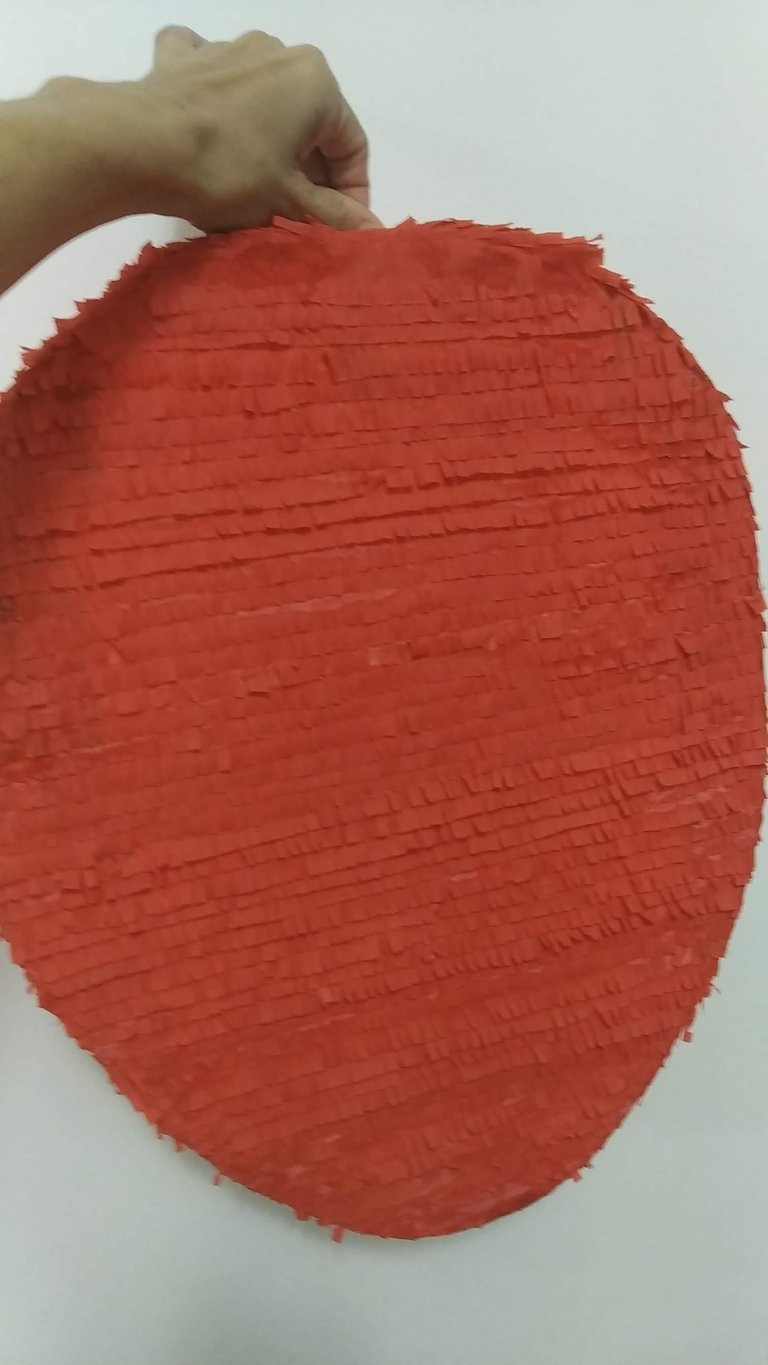
1.- Marcamos y cortamos en el cartón la forma deseada. Para éste trabajo se recortó en forma de huevo dos pedazos de cartón con las mismas dimensiones, de alto 45 centímetros y de ancho 34 centímetros.
1.- We marked and cut the desired shape on the cardboard. For this work we cut out two pieces of cardboard with the same dimensions, 45 centimeters high and 34 centimeters wide.
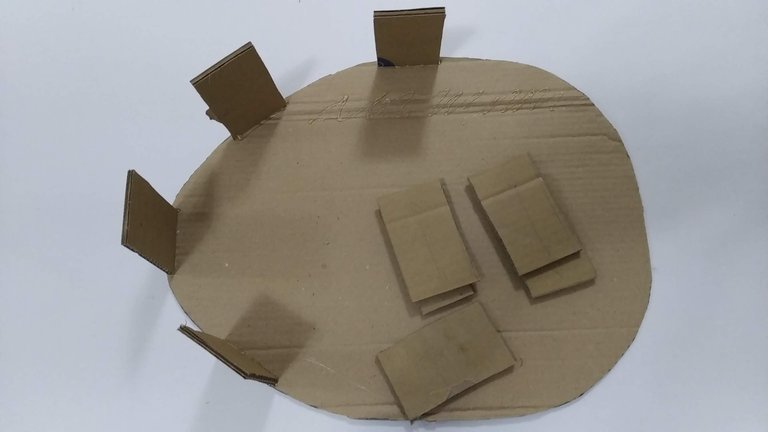
2.- La profundidad de la piñata dependerá a gusto personal, para esta piñata se hizo de 13 centímetros, por lo que se cortaron pequeños trozos de cartón grueso con esa altura.
2.- The depth of the piñata will depend on personal taste, for this piñata was made of 13 centimeters, so small pieces of thick cardboard were cut with that height.

3.- Los trozos de 13 centímetros de alto pegarlos con silicón caliente de alta resistencia alrededor de uno de los cortes del cartón, cuidando de dejar una separación simétrica entre ellos.
3.- TGlue the 13-centimeter-high pieces with high-strength hot silicone around one of the cardboard cuts, taking care to leave a symmetrical separation between them.
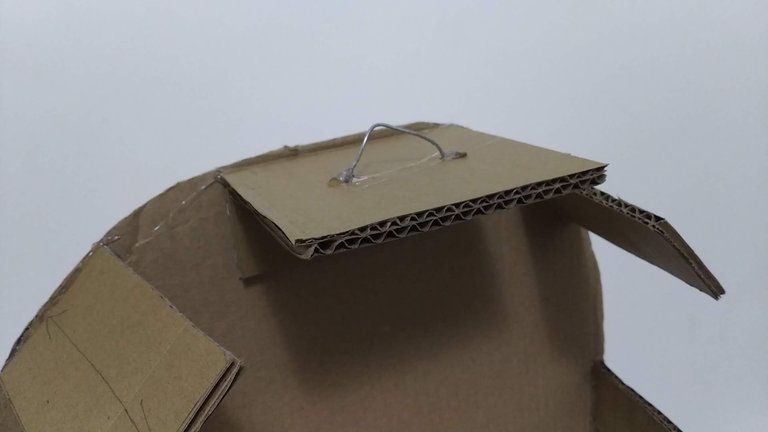
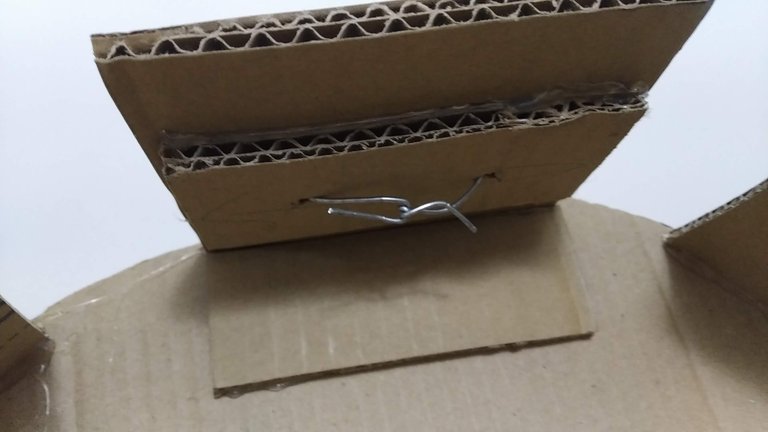
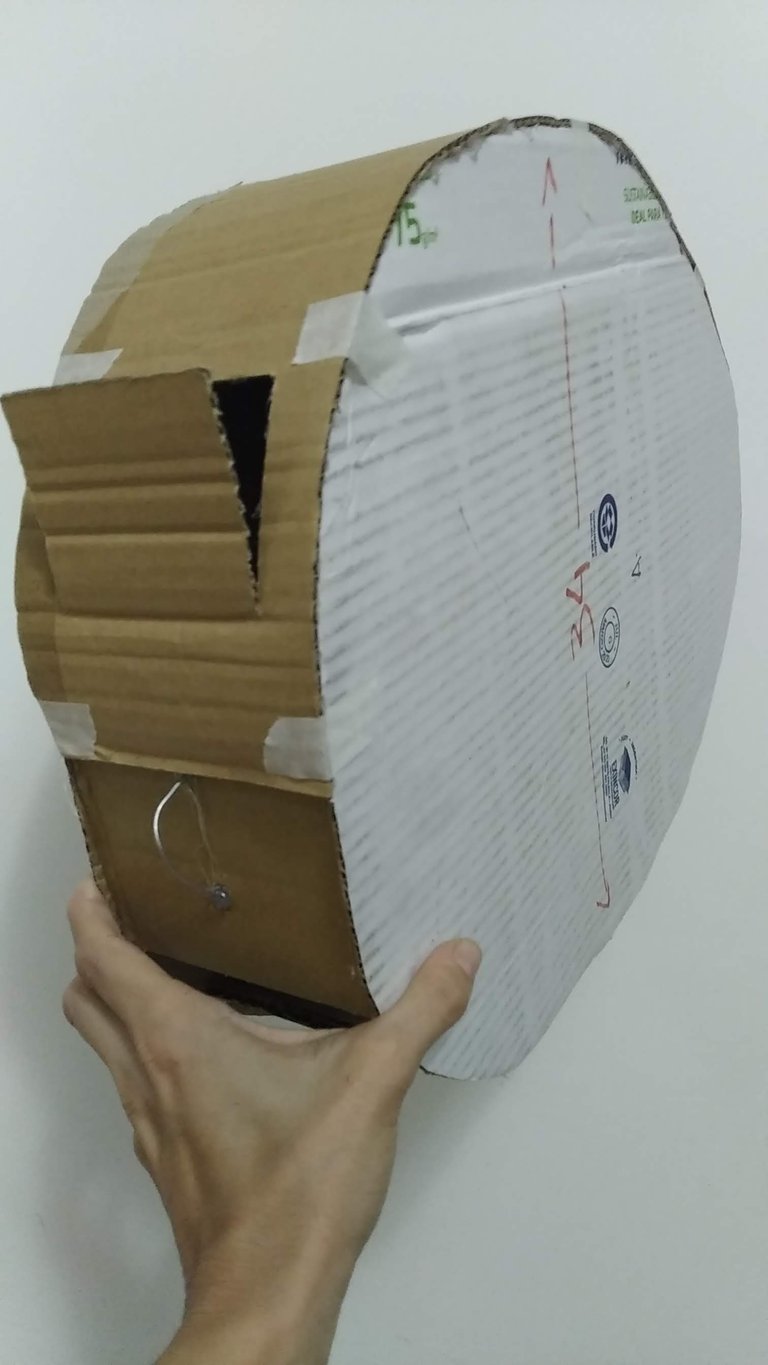
4.- Lo que será la parte superior de la piñata (donde va el alambre), se le debe pegar un trozo de cartón grueso resistente (13 cm) y reforzarlo con doble trozo de cartón, para lograr así, conseguir la fuerza necesaria que se necesita para soportar el peso de las golosinas. Este trozo de cartón reforzado debe incorporarle el alambre previo al ensamblado de la piñata, de lo contrario se pudiera soltar el amarre. Luego, pegar a la base de cartón en la parte superior..
4.- What will be the top of the piñata (where the wire goes), you must glue a piece of thick cardboard resistant (13 cm) and reinforce it with a double piece of cardboard, to achieve the necessary strength needed to support the weight of the candy. This piece of reinforced cardboard must be attached to the wire before assembling the piñata, otherwise the tie may come loose. Then glue to the cardboard base.
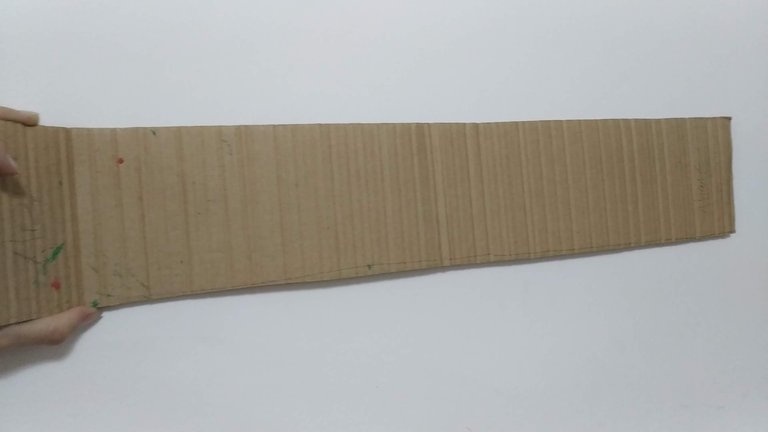
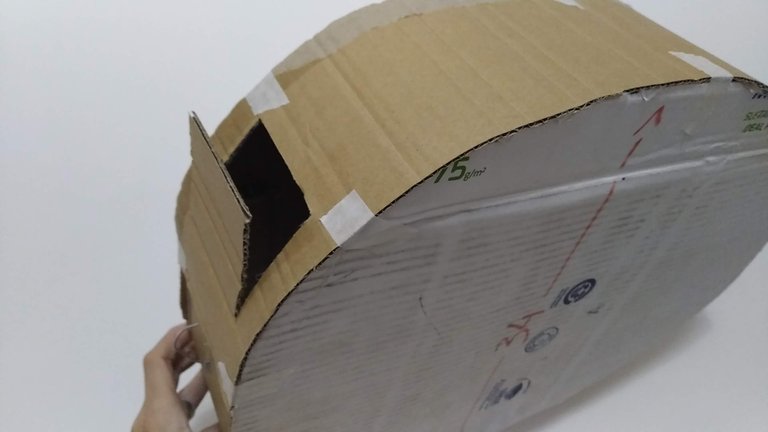
5.- Para cubrir la profundidad dada a la piñata (13 cm) se deberá tomar cartón liviano y cortarlo a ese ancho (13 cm); si el tamaño del cartón lo permite, puede cortarse un gran rectángulo que rodee toda la pieza, sino, puede pegarse en partes, lo importante es que mantenga la medida.
5.- To cover the depth given to the piñata (13 cm), light cardboard should be taken and cut to that width (13 cm); if the size of the cardboard allows it, a large rectangle can be cut around the whole piece, otherwise it can be glued in parts, the important thing is to keep the measure.
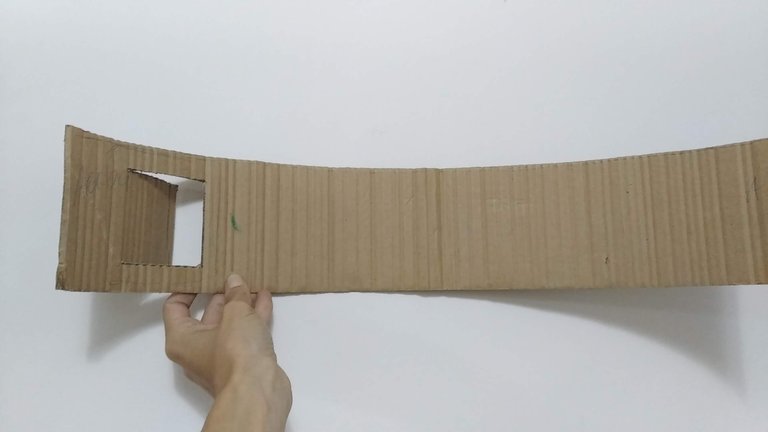
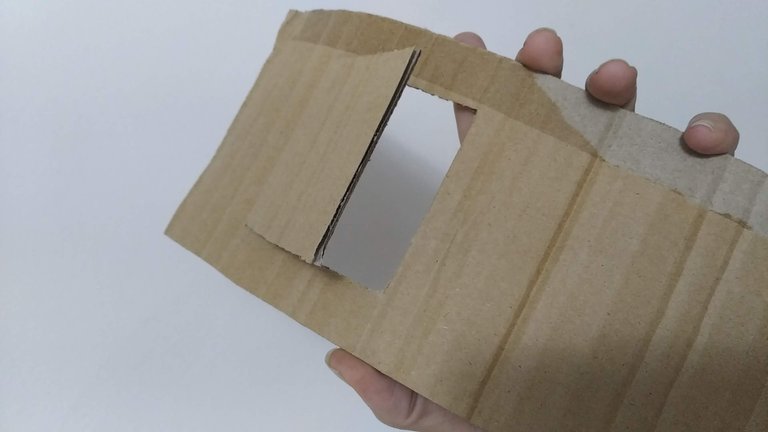
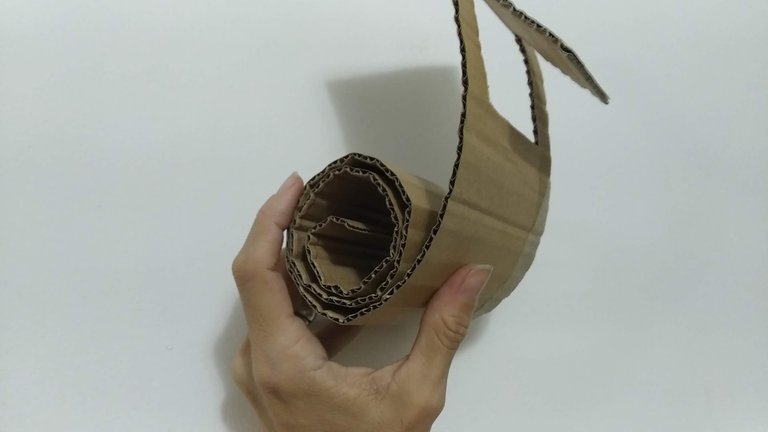
6.- En unos de los extremos de la pieza rectangular, hacer una abertura por donde luego se le incorporaran los juguetes y golosinas. El ancho dependerá de su gusto. Luego, enrollar la pieza para permitir luego se amolde mejor a la pieza a crear.
6.- At one end of the rectangular piece, make an opening where the toys and treats will be placed. The width will depend on your taste. Then, roll the piece to allow it to mold better to the piece to be created.
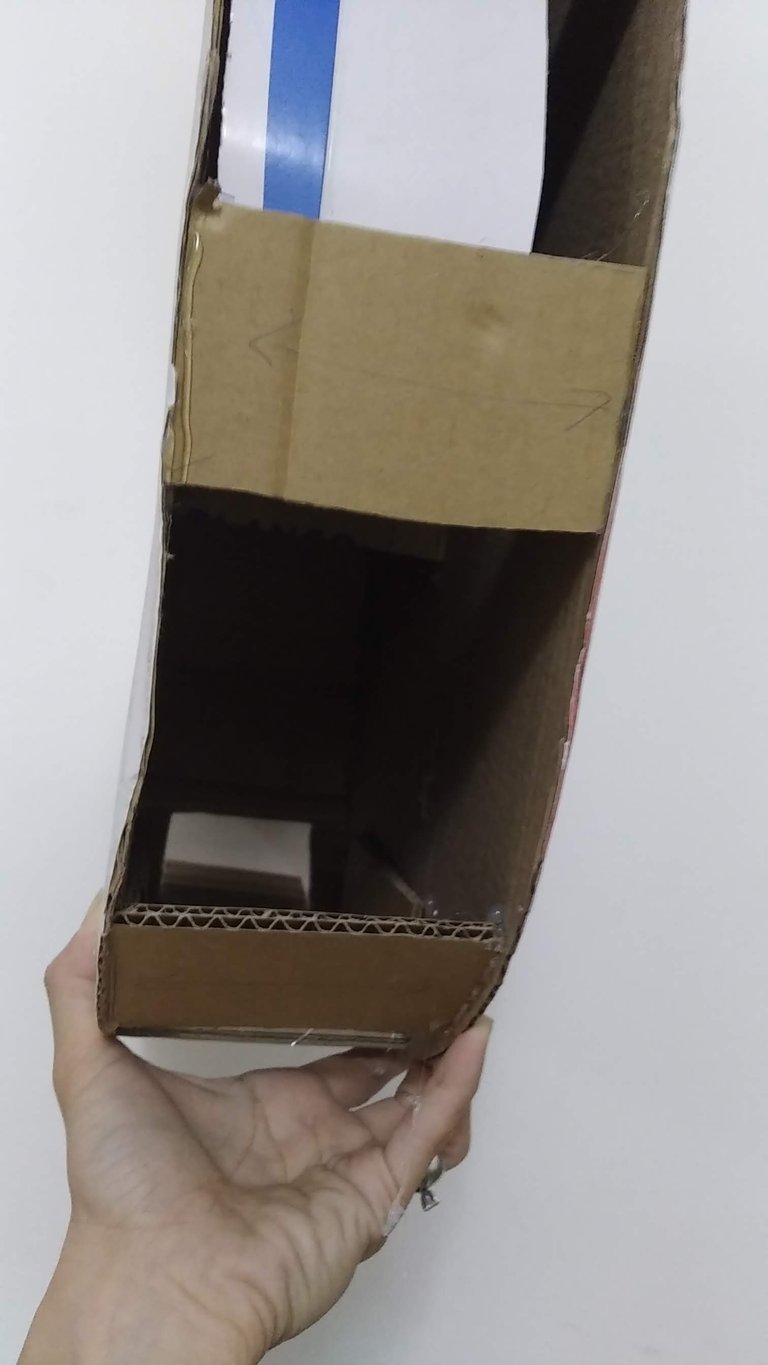
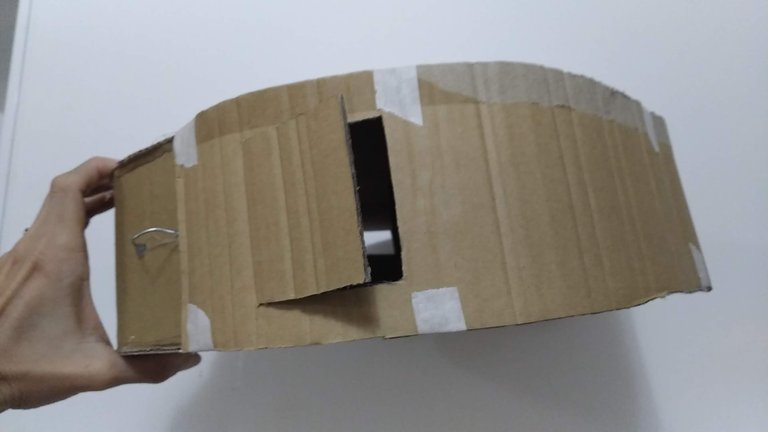
7.- Pegar con silicón caliente el rectángulo en los bordes de ambas caras de la piñata. Se debe cuidar que la abertura dejada para introducir las golosinas y juguetes quede hacia la parte superior. Para reforzar el pegado, colocar trozos de cinta adhesiva de papel entre las caras y la profundidad.
7.- Hot glue the rectangle to the edges of both sides of the piñata. Make sure that the opening left to insert the candies and toys is towards the top. To reinforce the gluing, place pieces of paper tape between the sides and the depth.
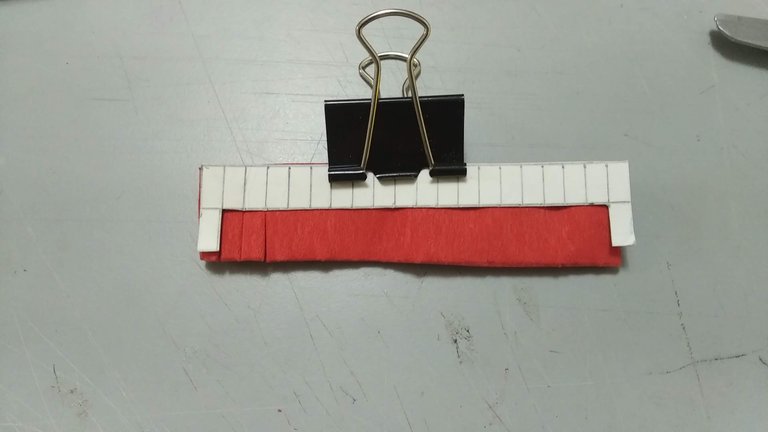
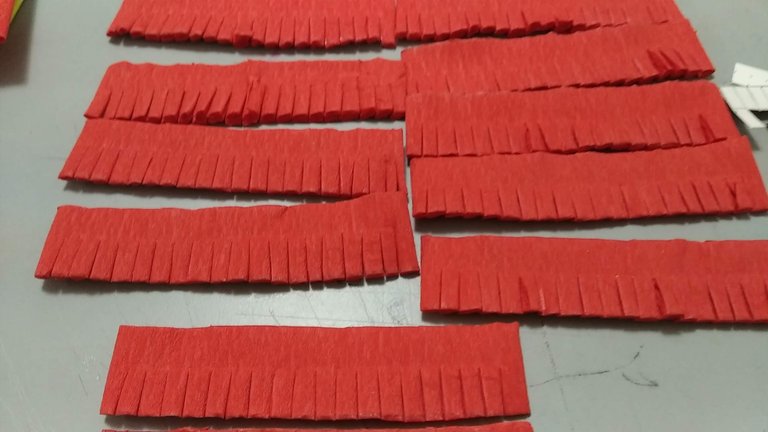
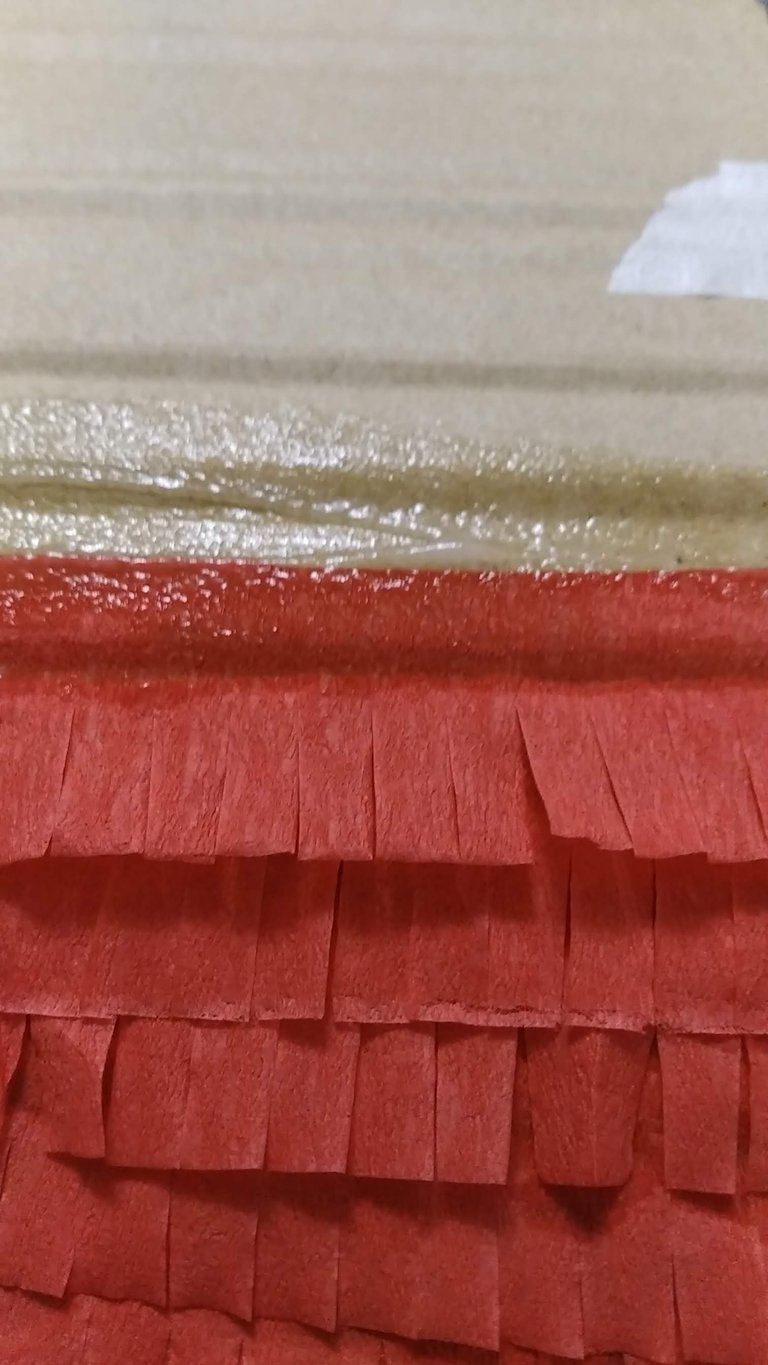
8.- A decorar…. Para esto, se deberá cortar el papel crepé rojo en flecos, para garantizar todos me quedaran iguales, utilicé una pequeña guía realizada en cartón, que consiste en hacer las marcas para el corte del papel en igual forma y tamaño.
8.- To decorate.... To do this, the red crepe paper must be cut into bangs. To ensure that they all look the same, I used a small guide made of cardboard, which consists of making the marks for cutting the paper in the same shape and size.
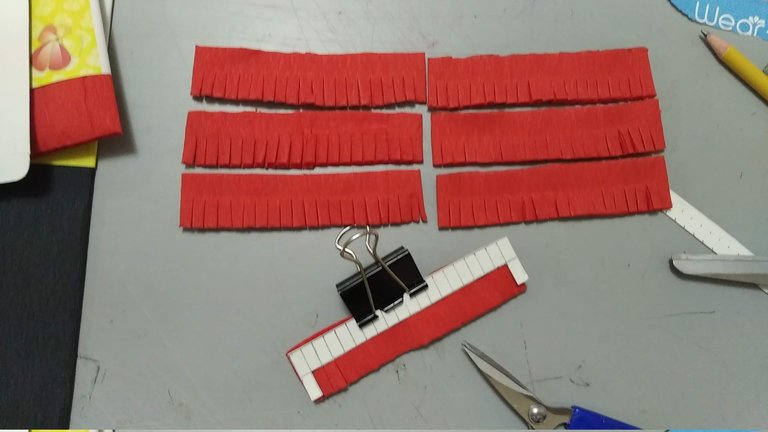
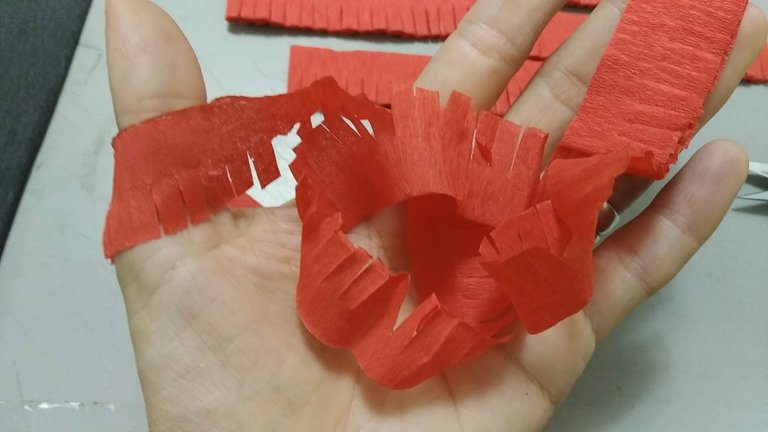
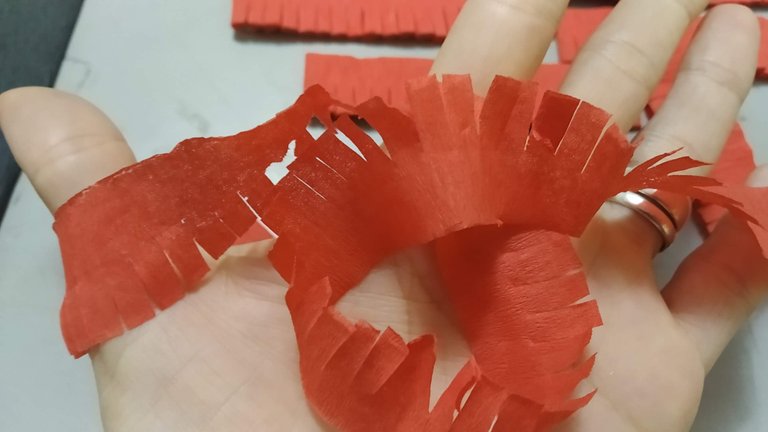
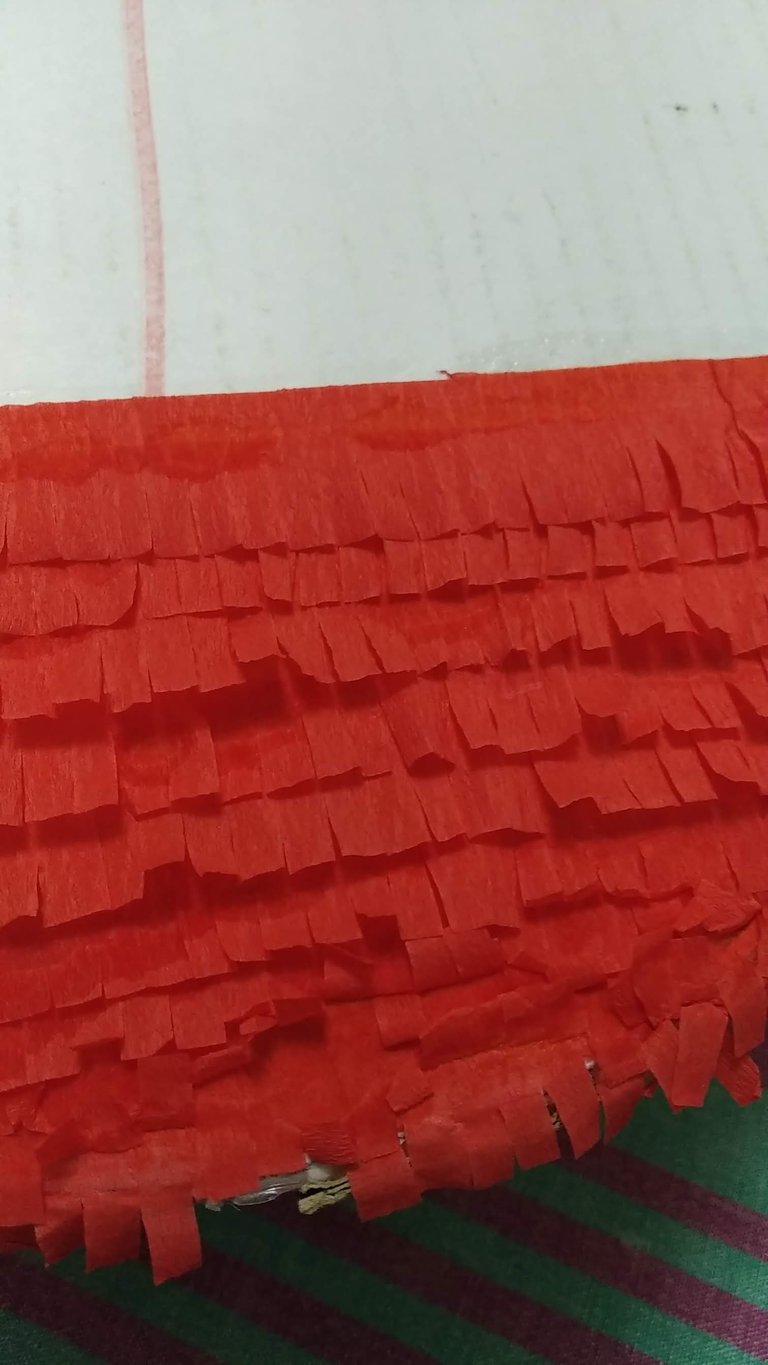
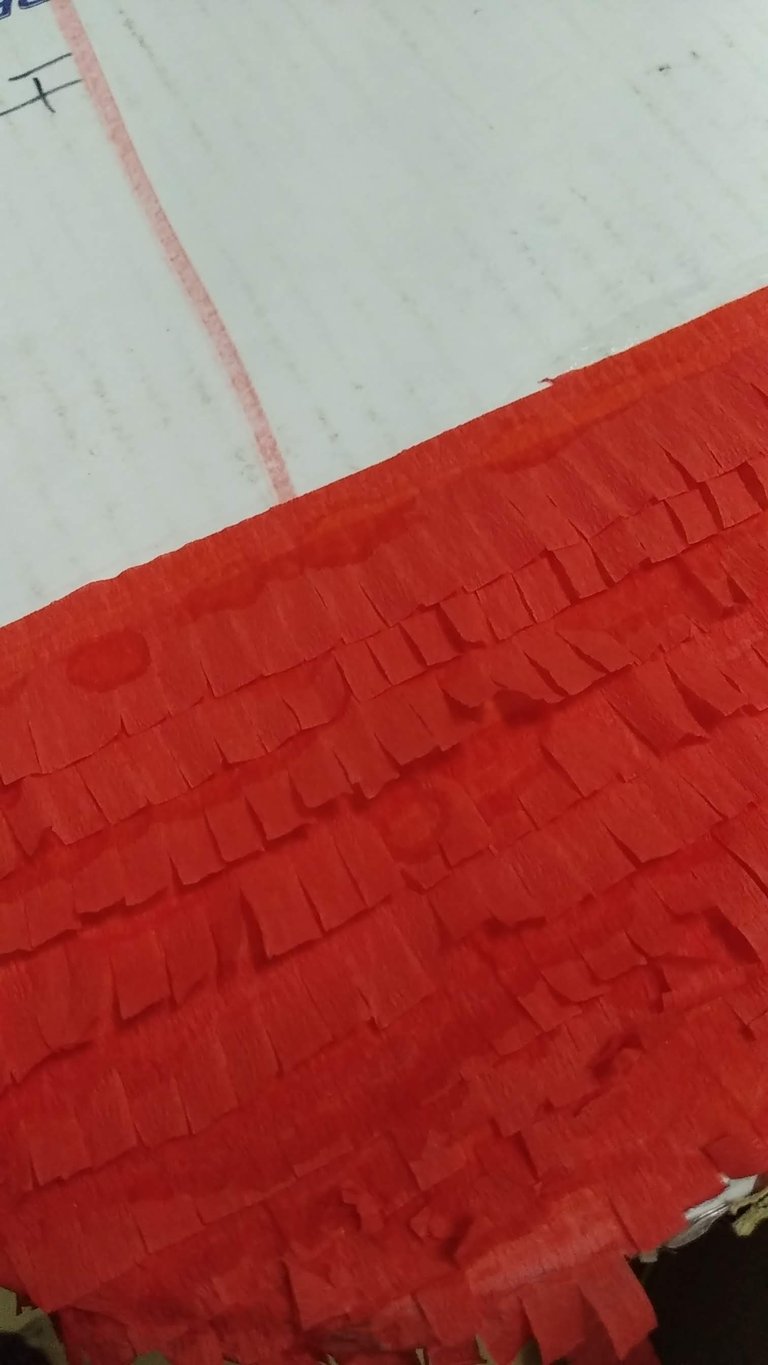
9.- Estirar el papel cortado en flecos y comenzar a pegar con el engrudo casero a la base, pegar de abajo hacia arriba, cuidando de dejar entre tira y tira la misma distancia.
9.- Stretch the paper cut into bangs and start gluing with the homemade paste to the base, gluing from bottom to top, taking care to leave the same distance between each strip.
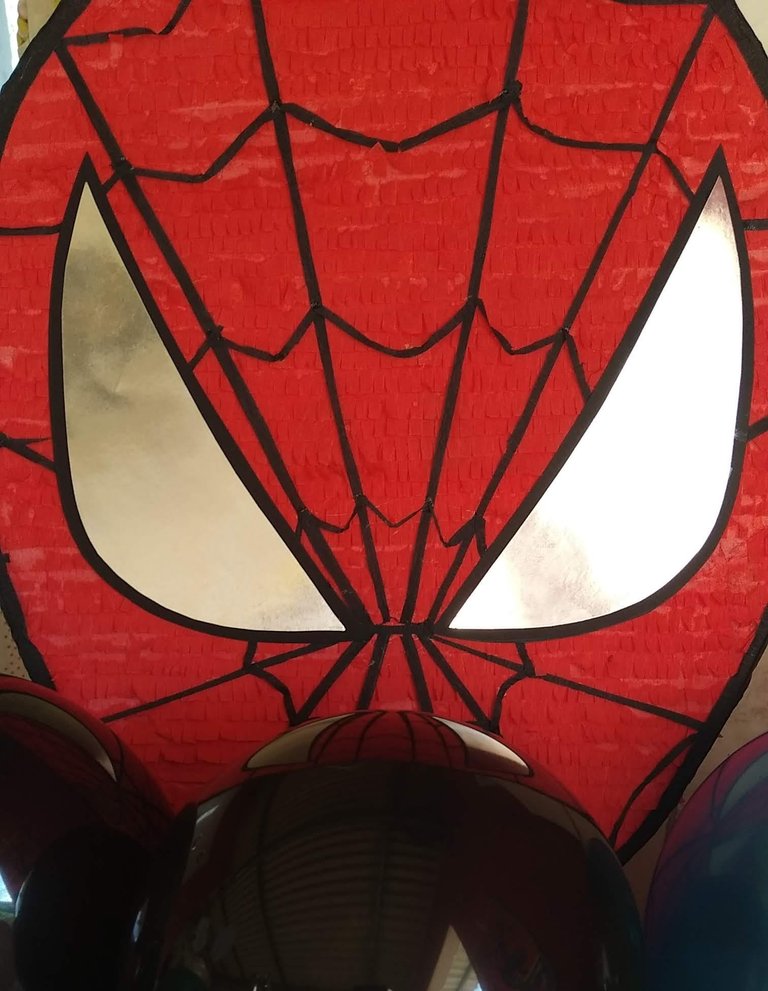
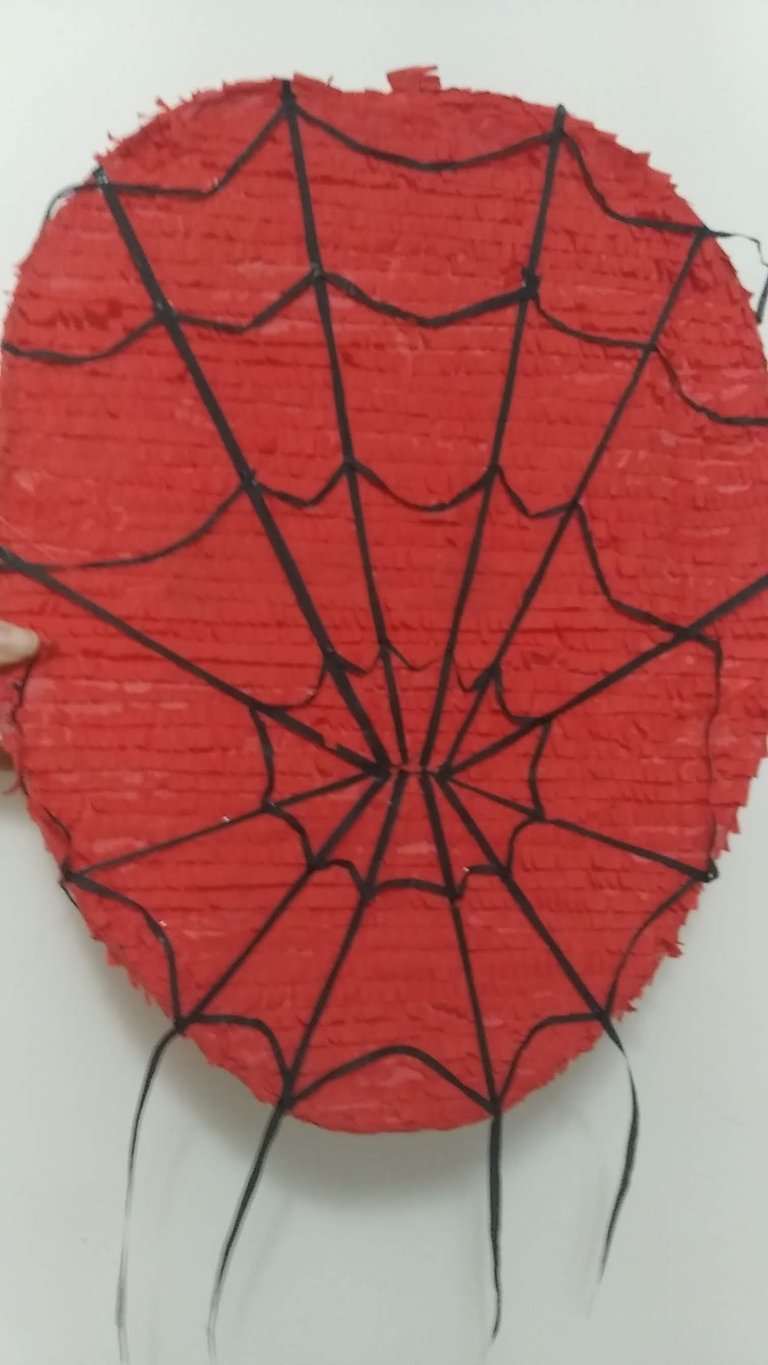
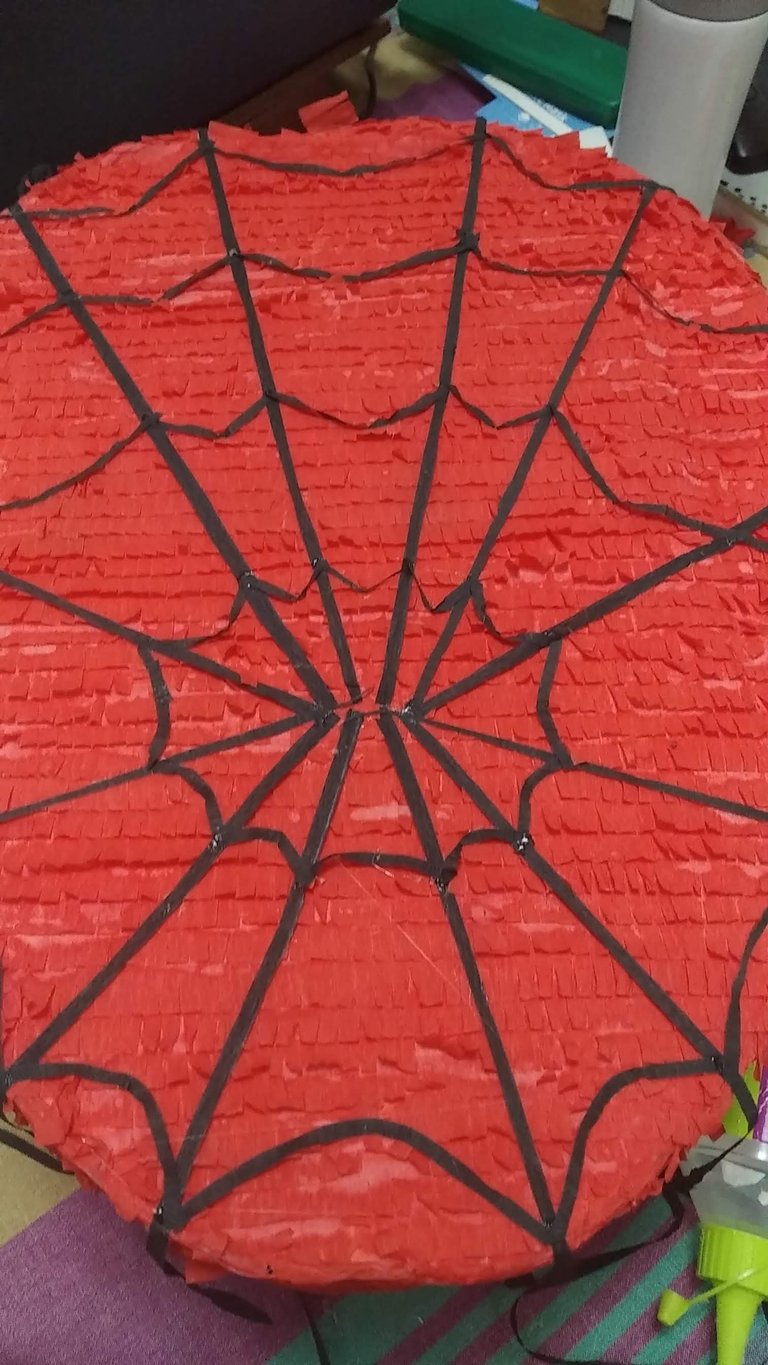
10.- Para hacer las marcas de telaraña en la piñata, cortar pequeñas tiras de papel crepé negro y pegar cuidando de dejar simetría entre las partes. A este diseño yo solo le hice el efecto al centro del rostro, pero ustedes pueden hacerlo por todos sus lados. Luego al borde de la parte frontal y trasera, pegar un trozo de papel negro (mas grueso) que haga el efecto de marco.
10.-To make the spider web marks on the piñata, cut small strips of black crepe paper and glue, taking care to leave symmetry between the parts. In this design I only did the effect in the center of the face, but you can do it on all sides. Then at the edge of the front and back, glue a piece of black paper (thicker) to make the effect of a frame.
11.- Listo, a disfrutar de lo creado en casa.
11.-Ready, enjoy what you have created at home.
Espero les haya gustado y sobre todo se entusiasmen a crear algo parecido para sorprender a familiares y amigos.
I hope you liked it and, above all, I hope you get excited to create something similar to surprise your family and friends.
SALUDOS / REGARDS
Todas las Fotos fueron tomadas con mi teléfono Redmi 7A.
Contenido original de @keco (fotos y texto) - Todos los derechos reservados Publicado en HIVE así como en mi instagram : http://instagram.com/carton_pintura_algo_mas
All Photos were taken with my Redmi 7A phone.
Original content from @keco (photos and text) - All rights reserved Posted on HIVE as well as on my instagram: http://instagram.com/carton_pintura_algo_mas
Bueno, una manualidad hecha con variados materiales, pero con el mas importante que es el amor. Me enterneció lo que escribiste al comienzo, sin duda habrán sido momentos difíciles que Leandro podrá sobrellevar con la ayuda de familiares que lo quieren tanto como tu. Es un hermoso detalle y te felicito por haberlo hecho.
Buenoa deseos, felicidad y amor para su familia. Un abrazo.
Gracias @gaboamc2393 este sin duda fue un trabajo movido por el amor, fueron momentos difíciles que aun estamos procesando, pero de la mano de Dios el dolor se transforma y seguimos caminando, ayudando a crear en los recuerdos de mi sobrino gratos momentos.
Saludos, bendiciones y éxitos.
Yay! 🤗
Your content has been boosted with Ecency Points, by @gaboamc2393.
Use Ecency daily to boost your growth on platform!
Support Ecency
Vote for new Proposal
Delegate HP and earn more
Gracias @ecency y @gaboamc2393 por este valioso apoyo.
Hola amiga!
Que bueno que cobraste ánimos para hacer y dar un poco de felicidad a tu tierno sobrino.
Me conmovió mucho el que haya perdido a su madre la verdad que es muy triste estando tan pequeño, la fortuna es que cuanta con una tía y una abuela que le dan mucho amor y lo llenaran de detalles que haga de su vida mas llevadera!
Un abrazo amiga y lamento la perdida!
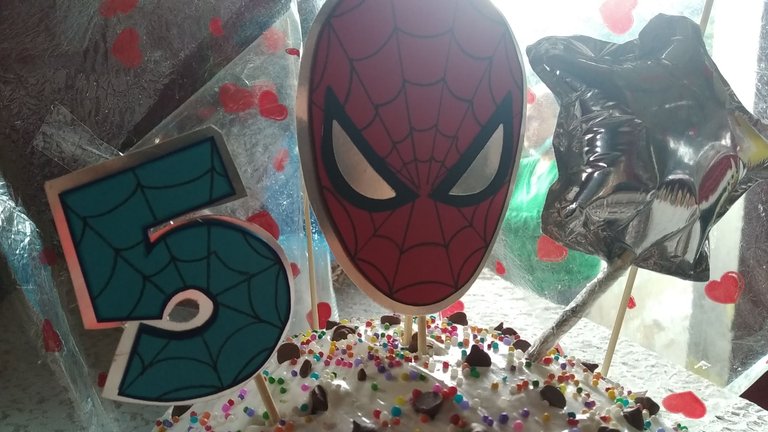
La piñata y los toppers te quedaron muy bonitos de seguro Leandro estuvo feliz en su reunión de cumple!
Hola @hetyg gracias por tomar espacio en tu valioso tiempo para comentar mi post. Hacer esta piñata requirió de ánimo, amor y fuerzas, pero necesitábamos darle a mi negrito un alegría, él la merecía mas que nadie en este mundo. Perder a su madre tan joven como consecuencia de la diabetes es difícil para el y para todos pero nos mantenemos acá para llenarlo de lindos recuerdos...
Un fuerte abrazo.
Saludos, bendiciones y éxitos.
Me encantó. 👋🤗